Duration: 45 minutes
Steps: 62 Steps
Ready to bring your iPhone 16e’s rear camera back to its glory days? This guide will walk you through swapping out the back camera assembly—perfect if your photos are looking blurry, grainy, or your camera’s focus is acting up. You’ll need fresh back glass adhesive to finish the job. Once you’ve installed a genuine Apple rear camera, don’t forget to calibrate it using Repair Assistant. A few images might showcase a different model, but don’t sweat it—the steps are the same.
Step 1

Let your phone’s battery dip below 25%—keeping it too charged could cause some safety issues with lithium-ion batteries. Better safe than sorry!
– First things first, let’s disconnect any cables hanging off your phone. We don’t want any accidental trips, right?
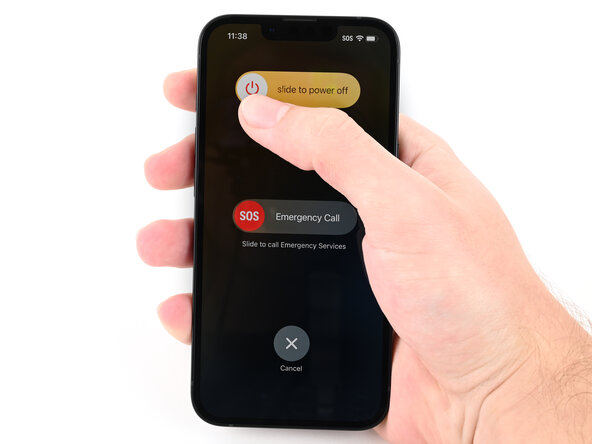
– Now, give that power button a nice long press along with either volume button, then slide to power off your phone. You’ve got this!
Step 2
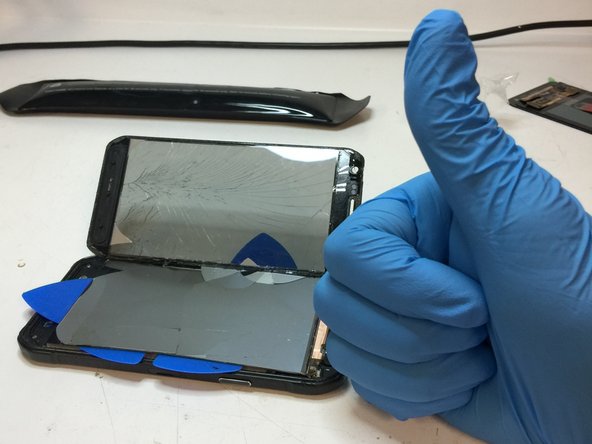
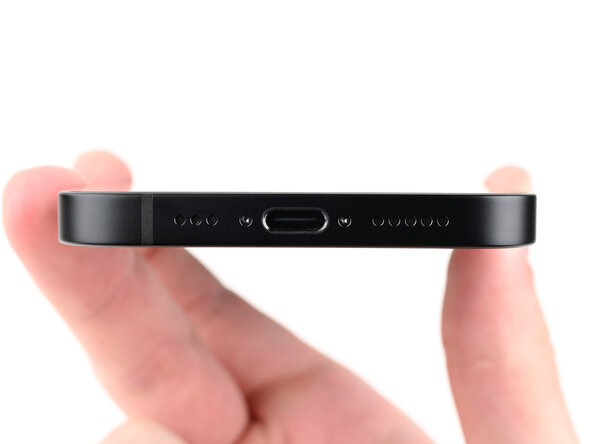
Ensure there’s a nice, flat spot near the bottom edge that’s just the right size for your suction cup to grab onto.
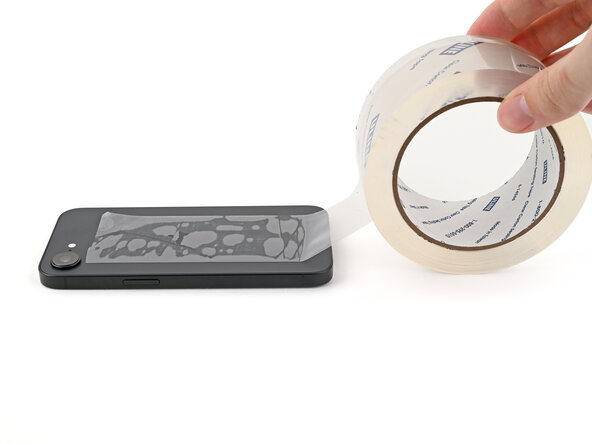
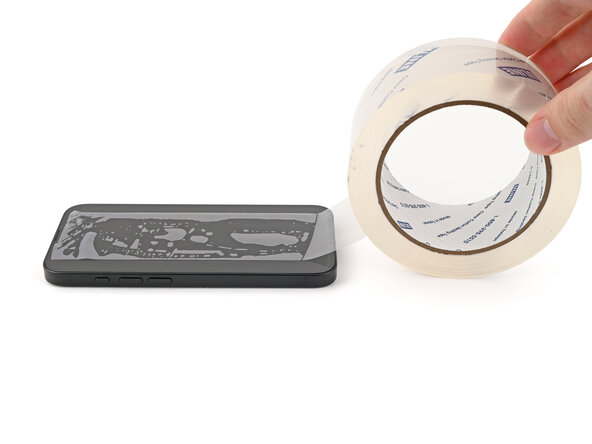
– If your screen or back glass is pretty shattered, lay some overlapping strips of packing tape over the glass. This helps protect your fingers and makes the disassembly a bit smoother. When you’re ready to move forward, if you need a hand, you can always schedule a repair.
Tools Used

Step 3
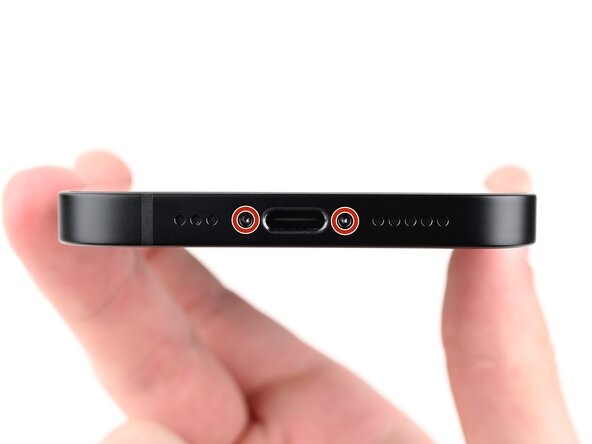
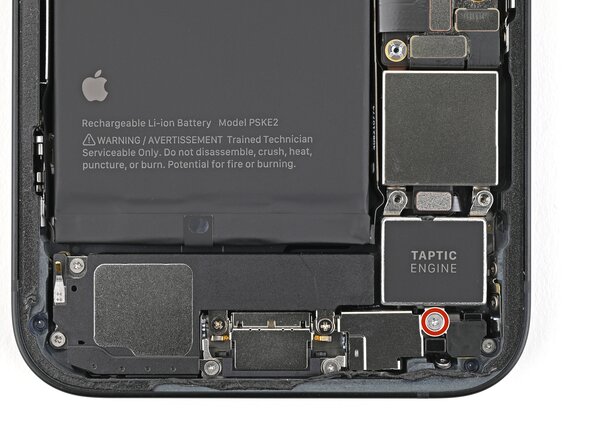
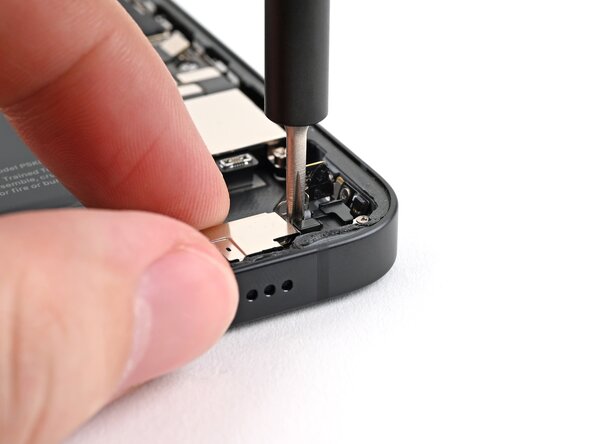
– Grab your trusty P2 pentalobe screwdriver and carefully unscrew the two 7.8 mm screws on either side of the charging port. Nice and steady – you’re doing great!
Step 4


Pushing your opening pick in too deep can cause damage—let’s avoid that! Mark your pick to keep things safe and sound.
Feel free to mark the other corners of your pick with different depths for extra control.
Or, get creative and tape a coin about 3 mm from the tip of your pick to act as a handy depth guide.
– Take a moment to measure out 3 mm from the tip and give that opening pick a little love tap with a permanent marker to mark your spot!
Step 5
Watch out! Don’t let that phone get too toasty—its battery can be a bit of a drama queen when it comes to heat. Keep it cool and avoid any heat-related mishaps!
Or, grab a hair dryer or heat gun and warm up the bottom edge of the back glass until it feels noticeably hot—think toasty, not scorching.
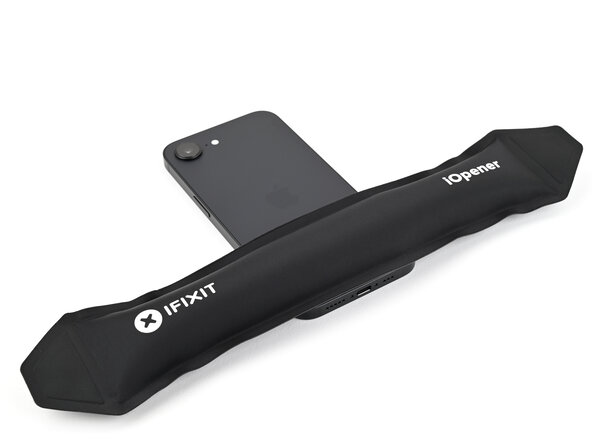
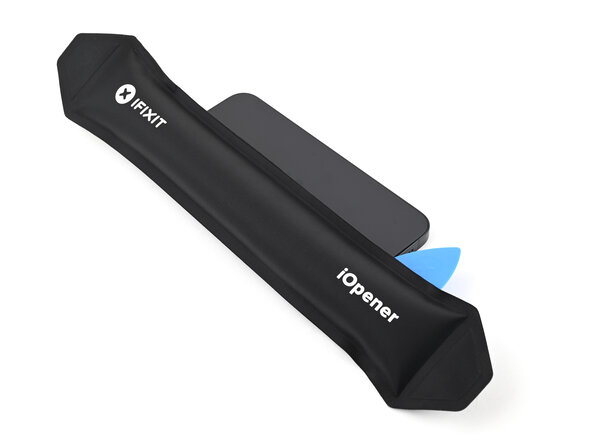
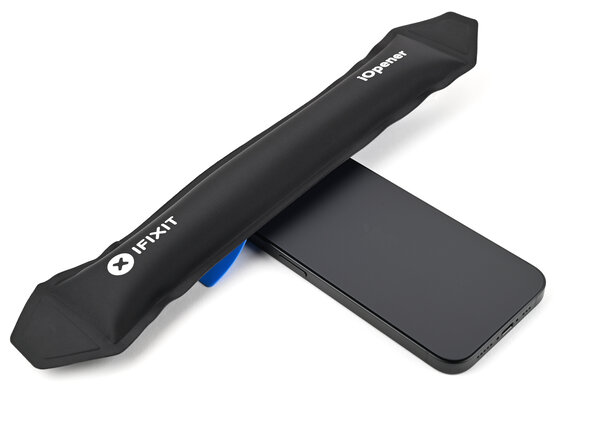
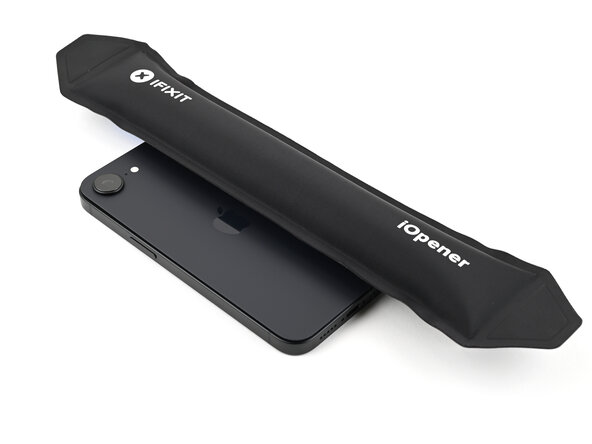
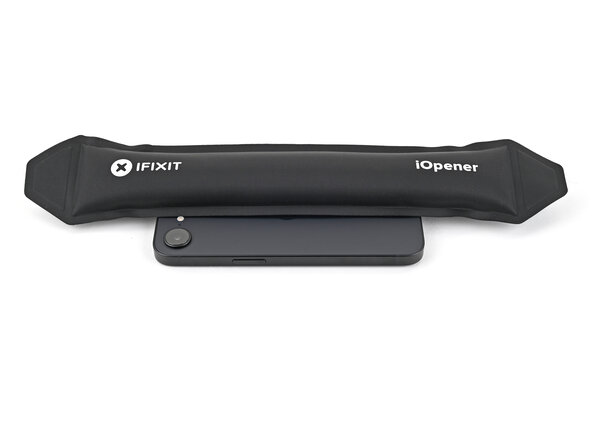
– Place a warm iOpener on the bottom edge of the back glass and let it work its magic for 90 seconds.
Tools Used


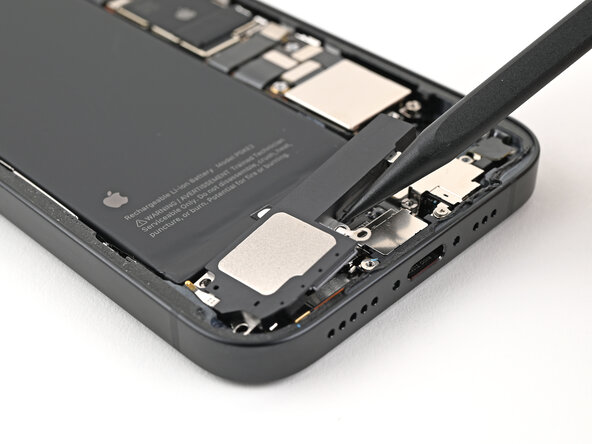
Step 6
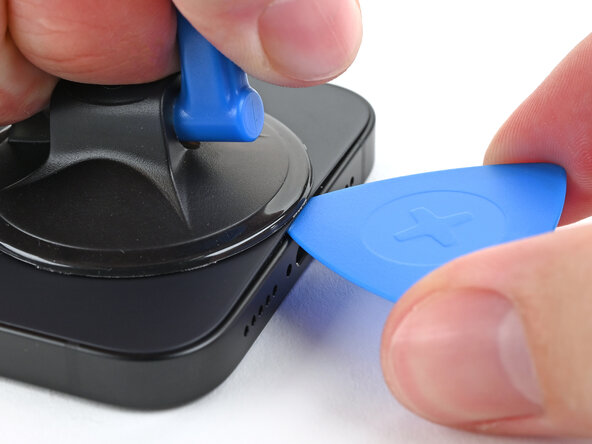
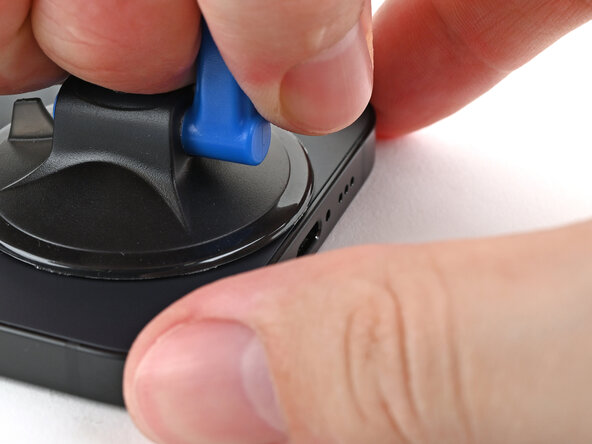
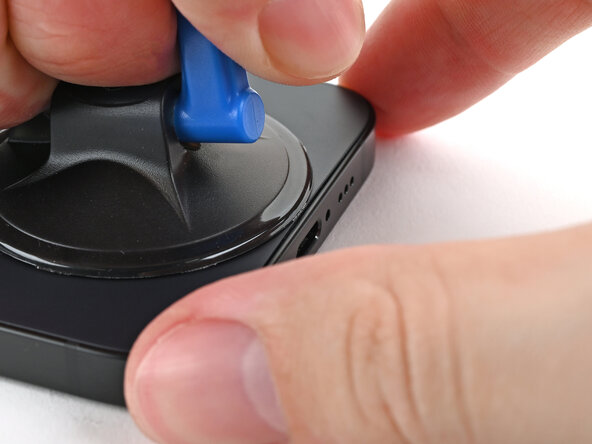
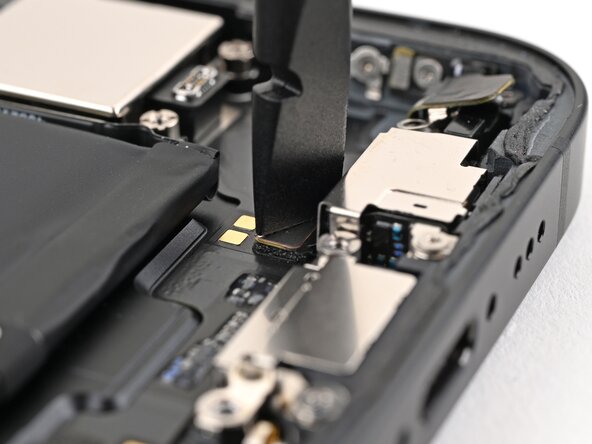
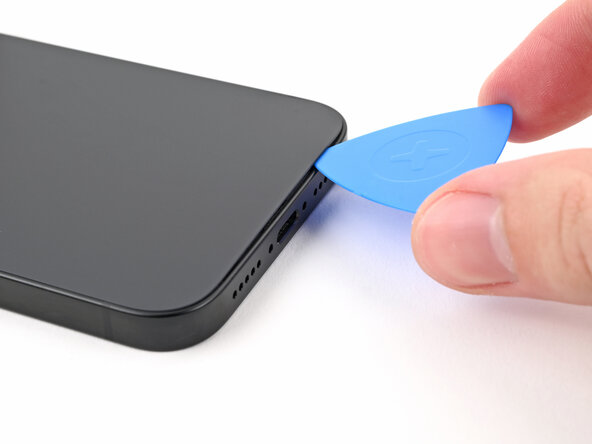
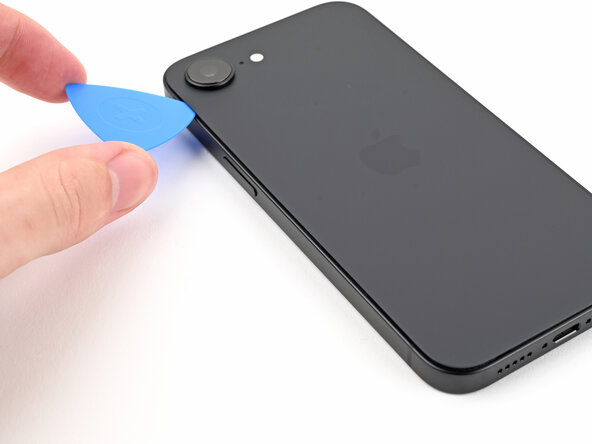
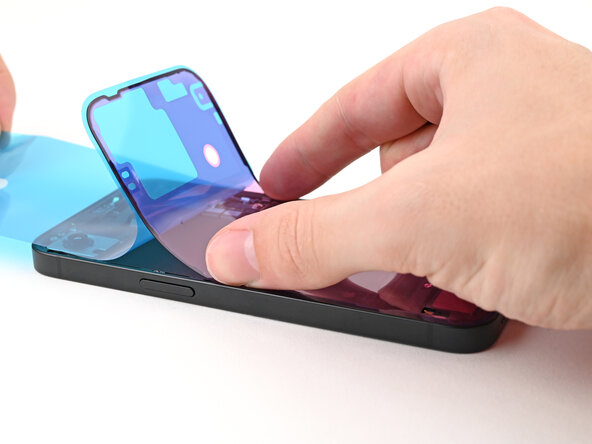
– Place the suction handle carefully on the lower edge of the back glass.
– Gently pull on the handle with consistent force to create a little space between the back glass and the frame.
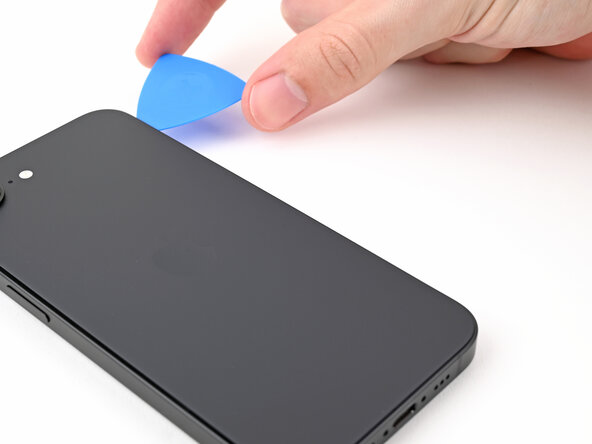
– Slide the tip of your opening pick into that gap and get ready to move on!
Tools Used

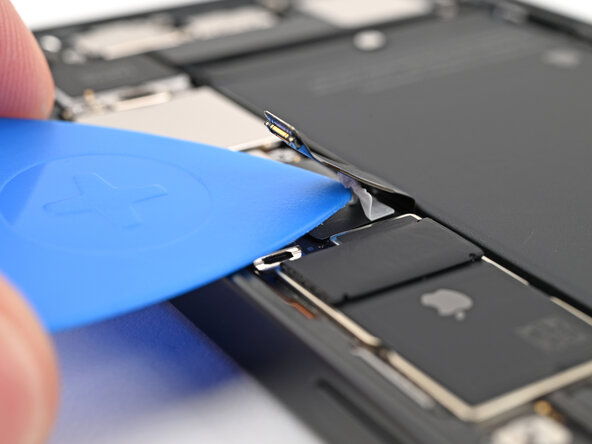
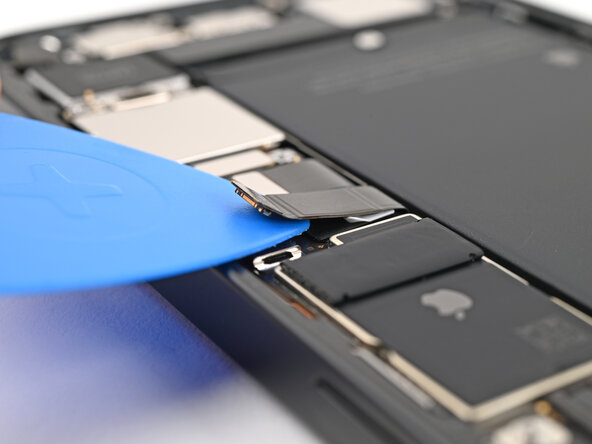
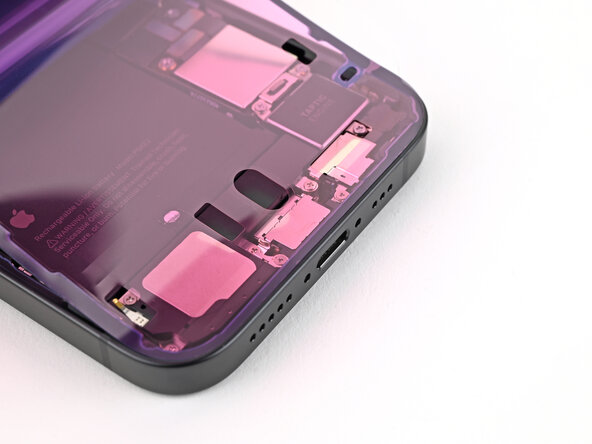
Step 7
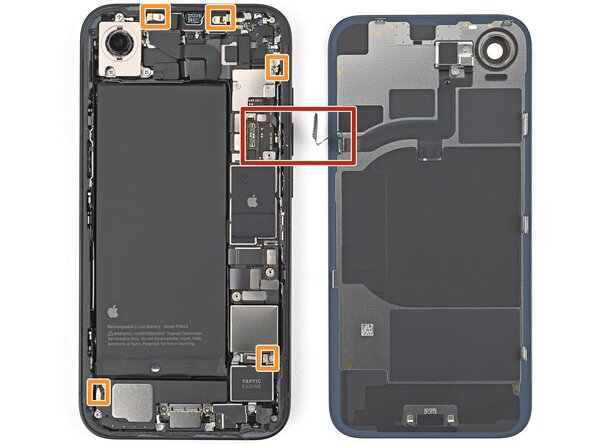
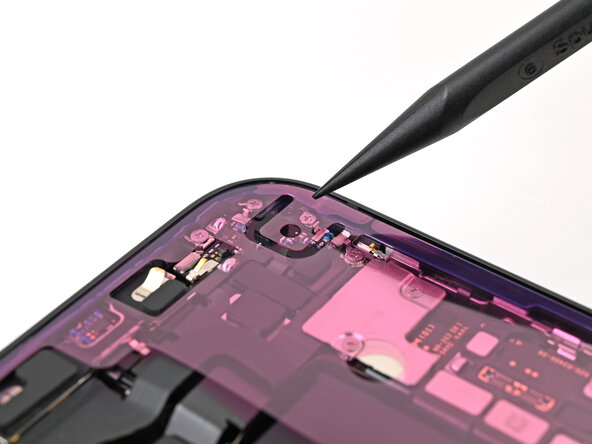
When you’re working your way around the back glass, keep your pick to a shallow 3 mm—any deeper and you might hit something important lurking just below.
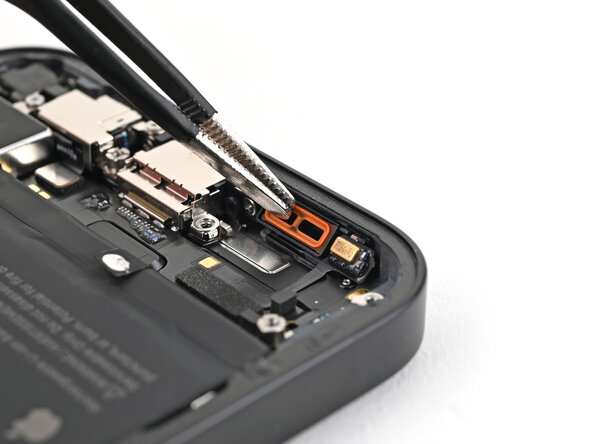
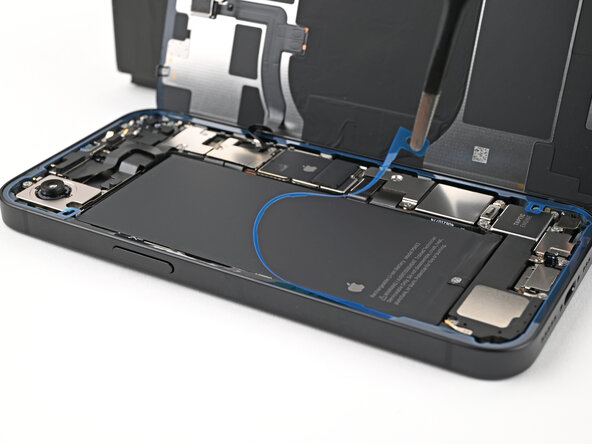
– Carefully locate the fragile cable that links the back glass to your phone, right next to the volume up button. Treat it like the delicate treasure it is!
– Keep an eye out for the array of spring contacts that line the edge of your phone. They’re just hanging out, waiting to be noticed!
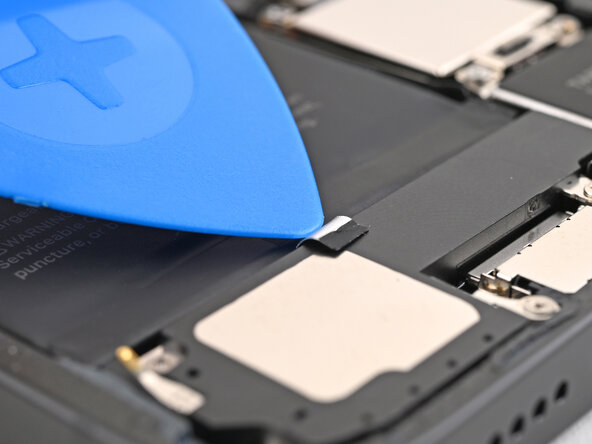
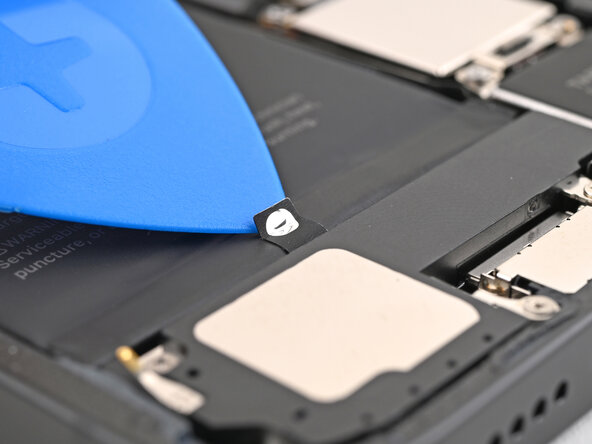
Step 8
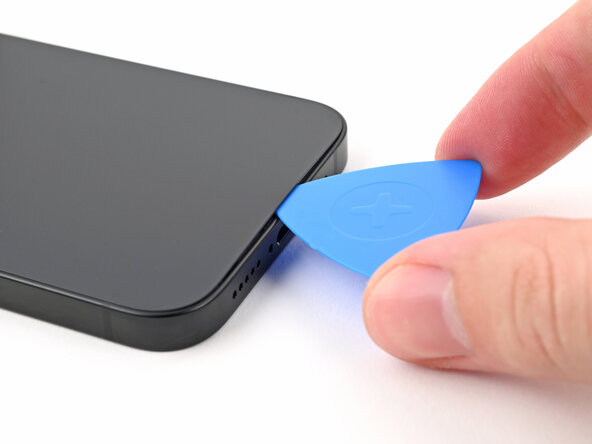
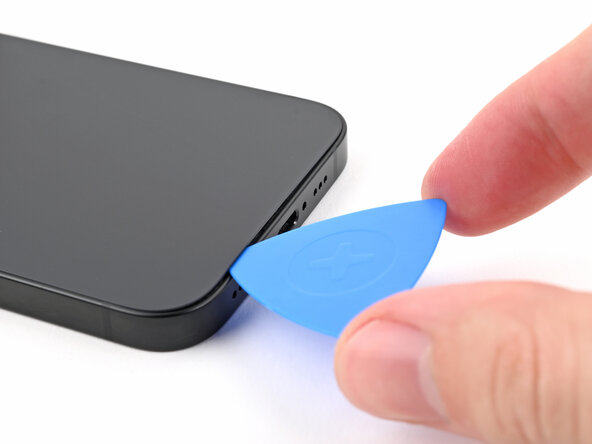
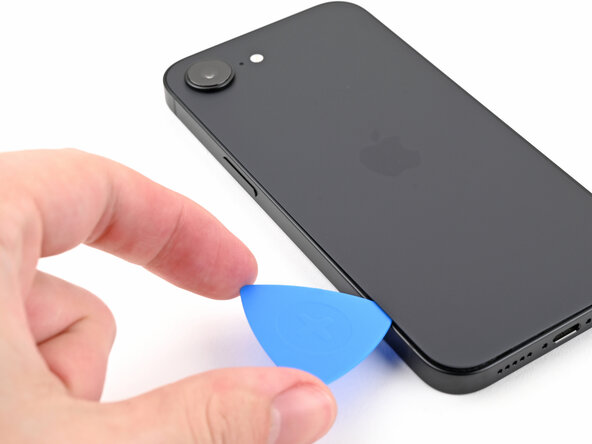
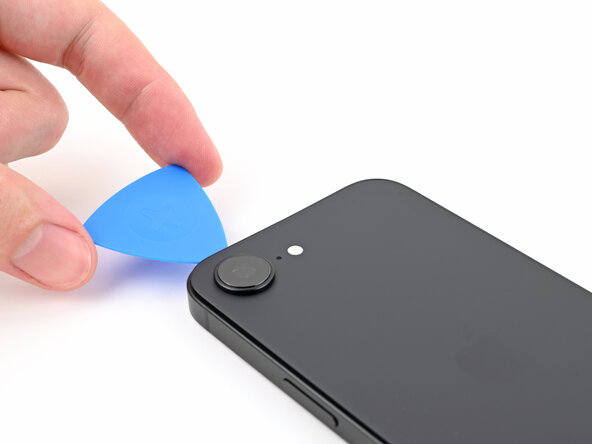
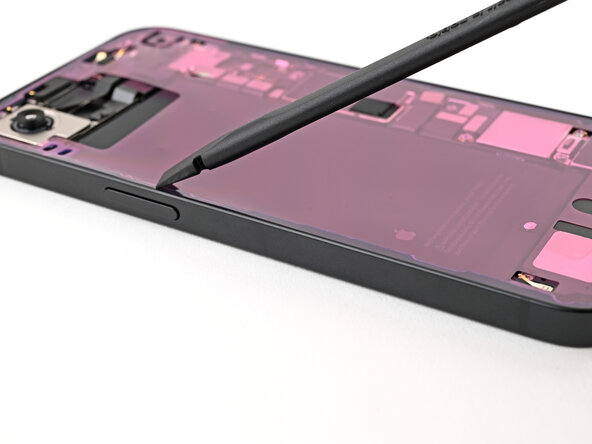
– Slide the opening pick gently along the bottom of the back glass to gently break the adhesive seal.
– Keep the opening pick near the bottom left corner as you work, staying close to where the magic happens.
Step 9
Warm things up a bit! Grab a hair dryer or heat gun and gently blow heat onto the back glass until it feels comfortably warm to the touch. This helps loosen things up for the next step. Need a hand with anything else? Remember, you can always schedule a repair if it gets tricky.
– Heat up your trusty iOpener and give that left edge of the back glass a warm hug for a solid 90 seconds.
Tools Used
Step 10
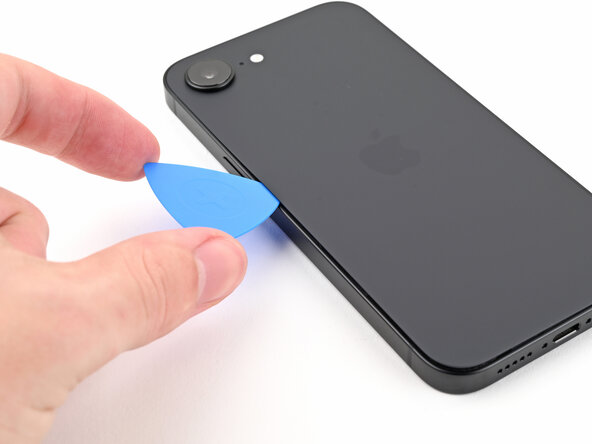
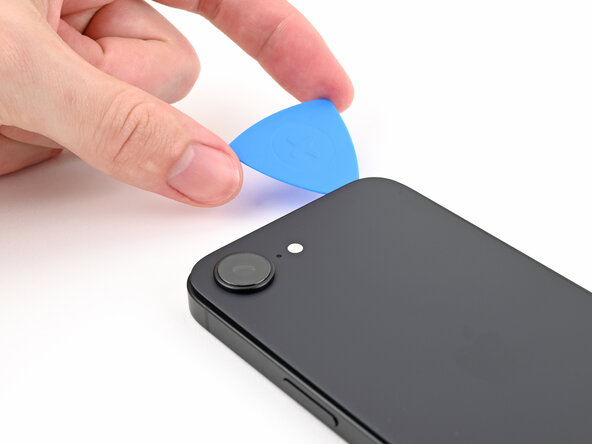
As you move along, you’ll hear and feel those metal clips giving way. Keep going, you’re almost there!
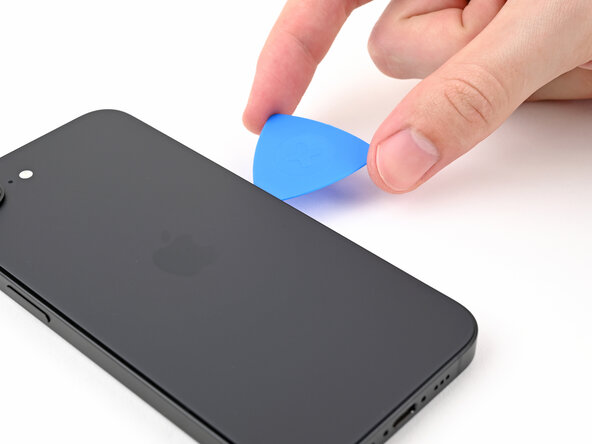
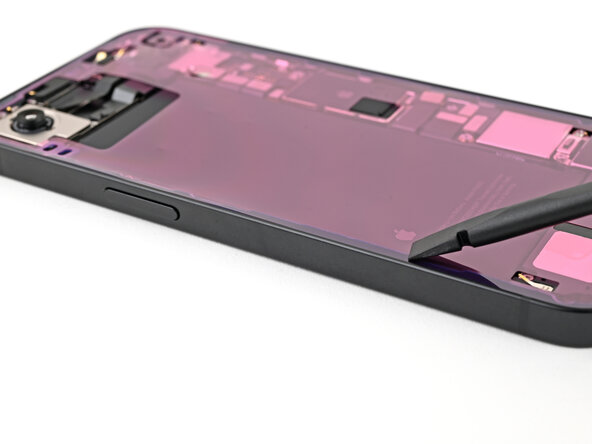
– Gently spin the opening pick around the bottom left corner and glide it up along the left edge to loosen the adhesive and free those stubborn metal clips.
– Keep the opening pick hanging out near the top left corner, ready for the next move.
Step 11
Grab your hair dryer or heat gun and warm up the back glass until it feels nice and toasty to the touch.
– Heat up the top edge of the back glass with an iOpener for about 90 seconds—think of it as giving your phone a warm spa treatment before the big repair.
Tools Used
Step 12
As you glide along, you’ll hear and feel those metal clips popping free like confetti at a celebration!
– Start by gently rotating the opening pick around the top left corner, then slide it along the top edge. This will separate the adhesive and let you pop those metal clips free. Easy does it!
– Leave the opening pick in the top right corner for now, just letting it chill there while you move on to the next step.
Step 13
Grab your hair dryer or heat gun and warm up the back glass until it feels nice and toasty to the touch.
– Warm up the right edge of the back glass with a heated iOpener for about 90 seconds. Keep the heat steady to loosen things up.
Tools Used
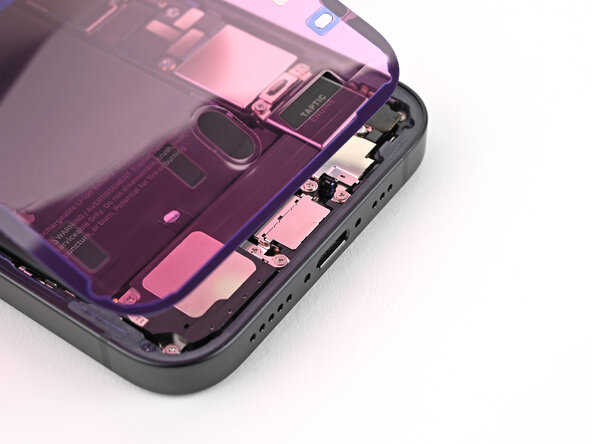
Step 14

Keep your pick no deeper than 3 mm to steer clear of that sneaky hidden cable!
As you pass it, you should hear and feel the metal clip release.
– Gently swing the opening pick around the top right corner, then glide it along the right edge to loosen and lift away the remaining adhesive and metal clip. Take your time and keep it steady—you’re almost there! If you need help, you can always schedule a repair.
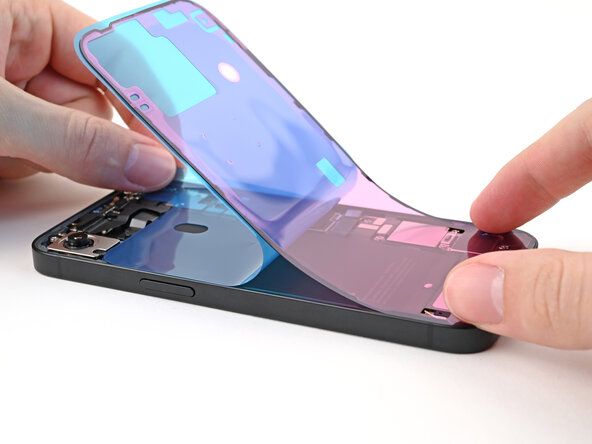
Step 15
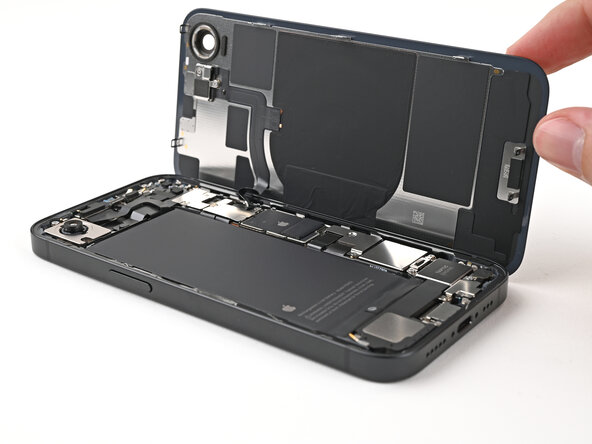
Your back glass adhesive should now be totally free! If it’s still hanging on, just take your trusty opening pick and gently slide it around the edges to loosen any stubborn spots. You’ve got this!
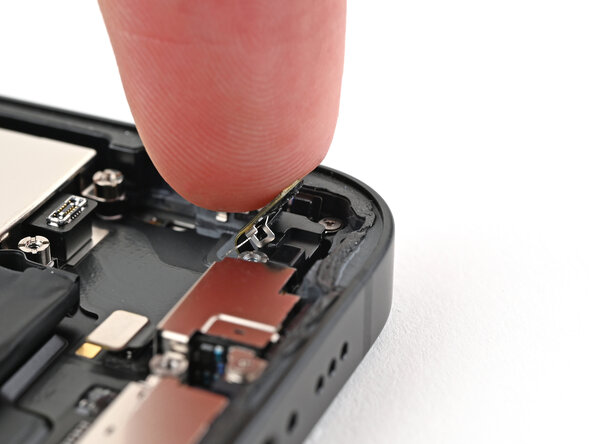
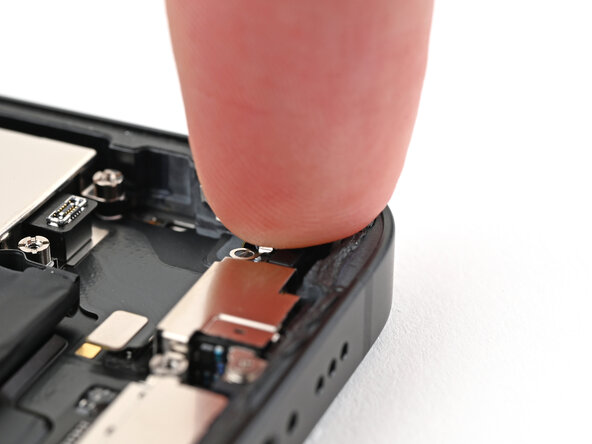
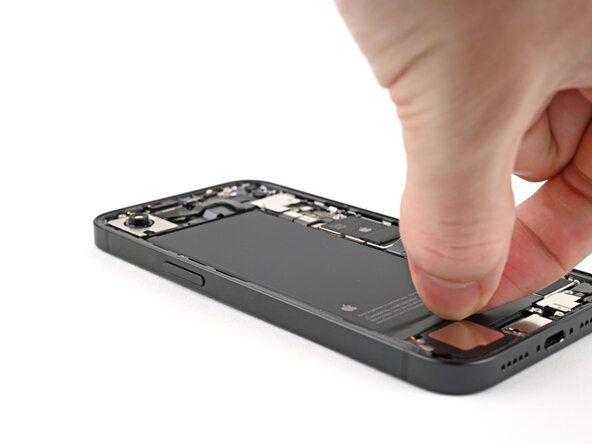
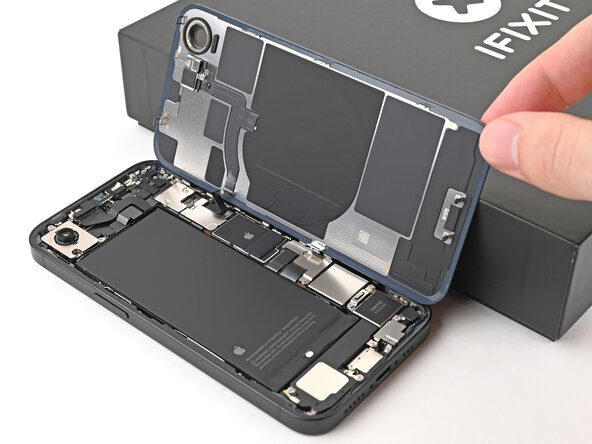
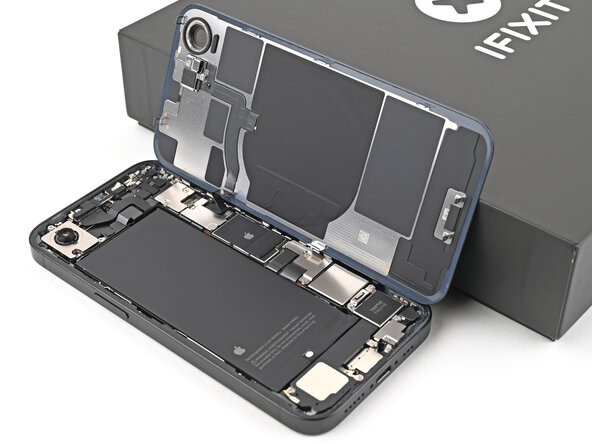
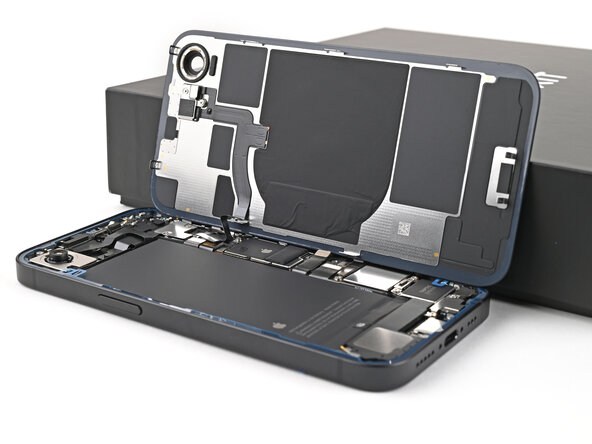
– Gently swing open the back glass on the right side of the phone and prop it up on a clean, sturdy surface to keep things steady.
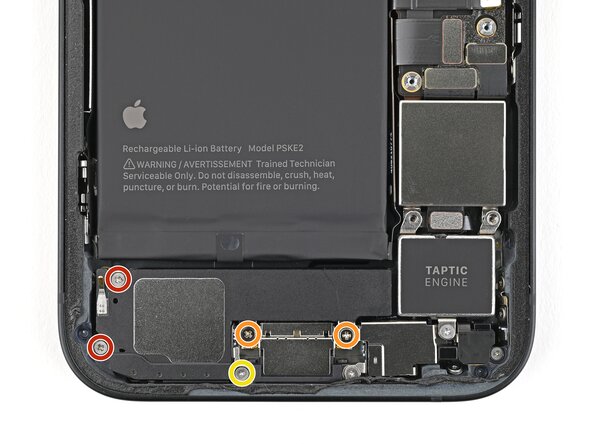
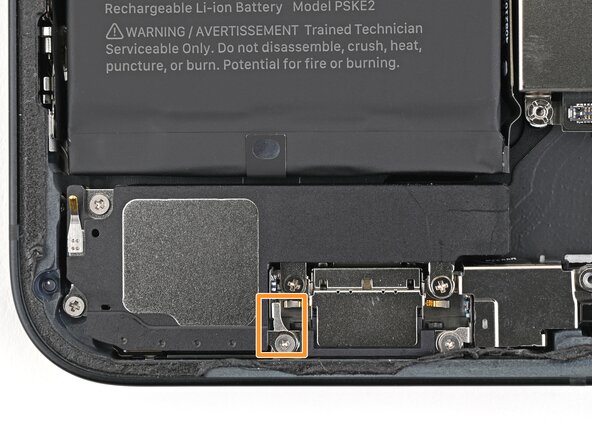
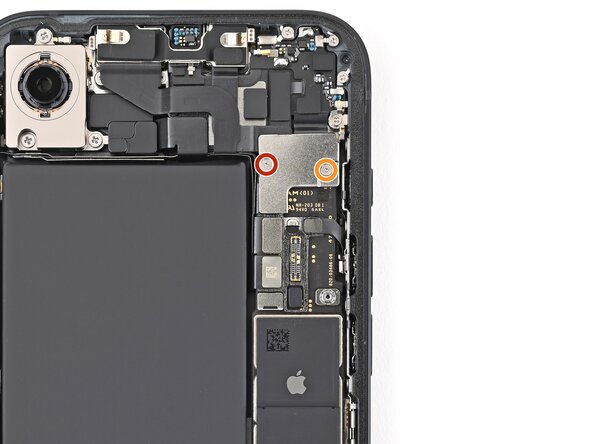
Step 16
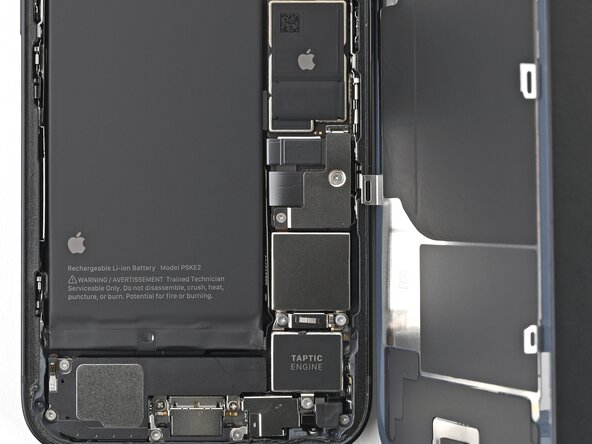
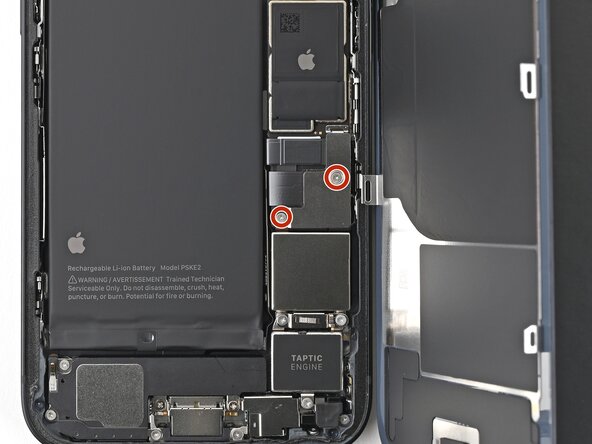
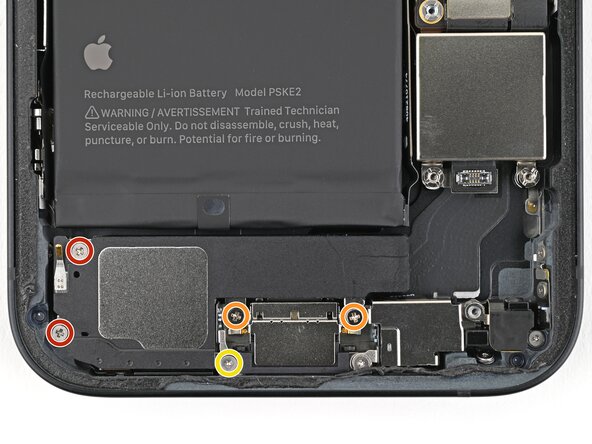
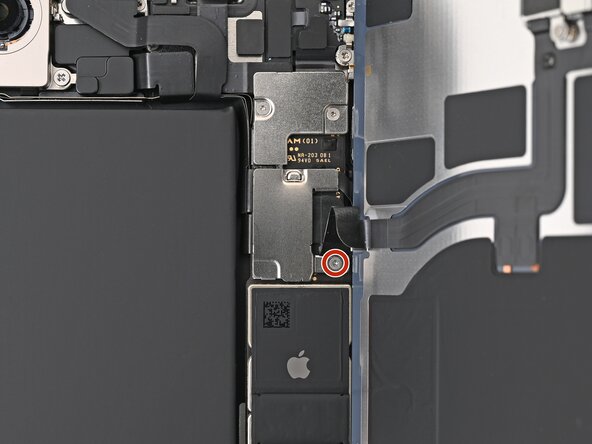
– Grab your trusty tri-point Y000 screwdriver and carefully remove the two 1.3mm screws that are keeping that lower connector cover in place. Piece of cake, right?
Tools Used

Step 17
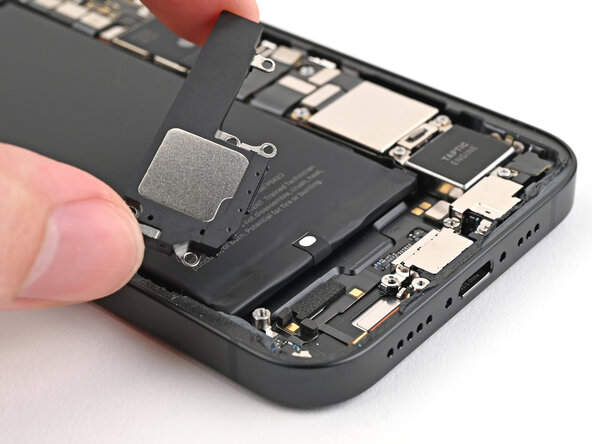
– Grab some tweezers or just use your fingers to lift the bottom connector cover. Slide it upward toward the top of the phone to unclip it from its metal latch. Once it’s free, you can remove the cover completely. If you hit any snags, remember you can always schedule a repair for extra help.
Tools Used

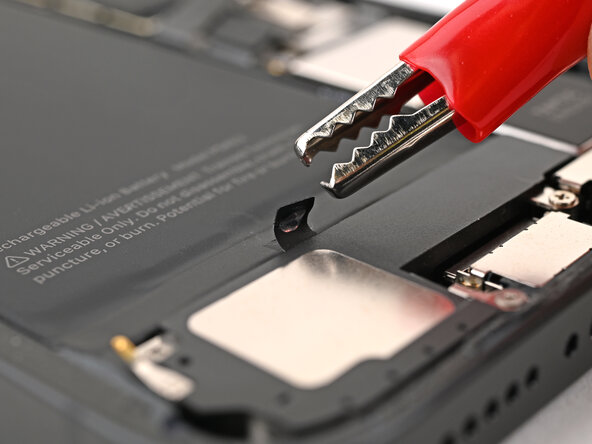
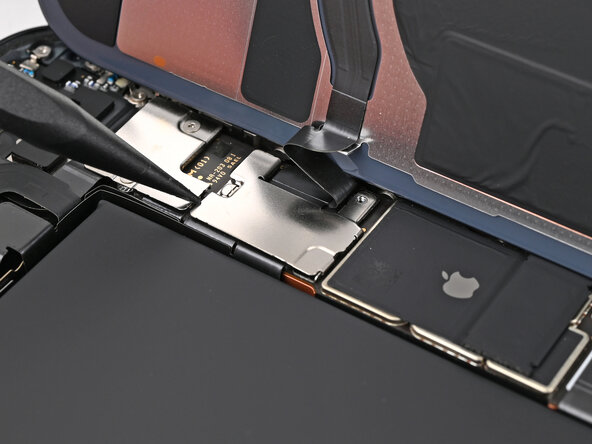
Step 18
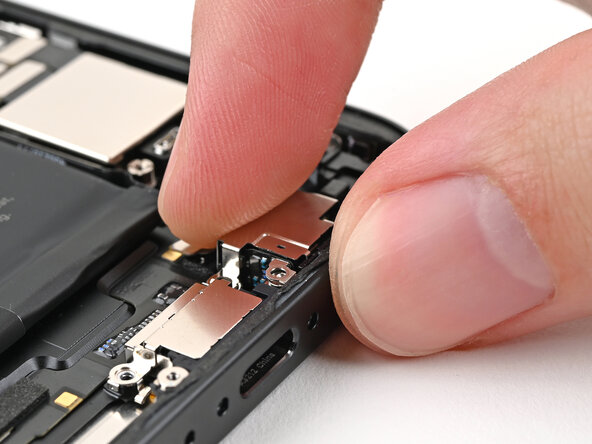
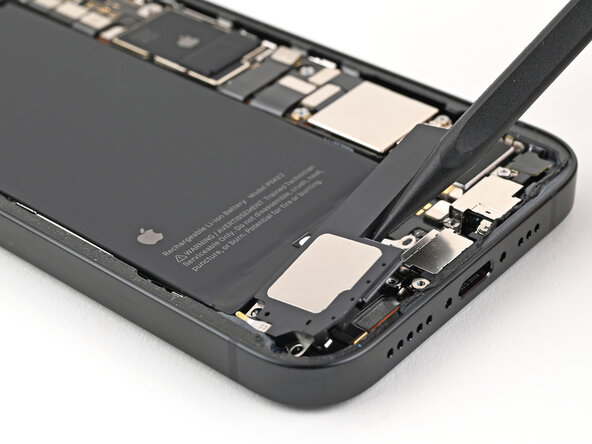
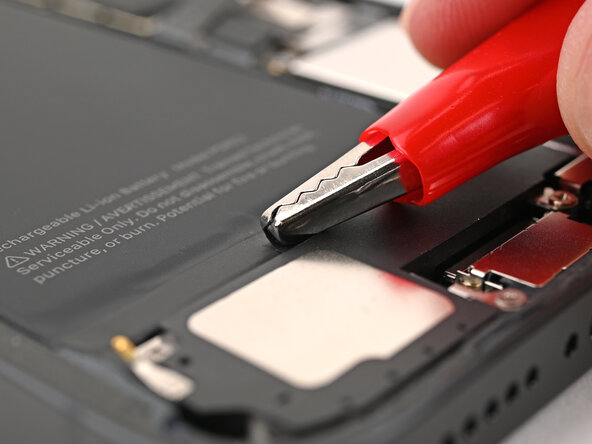
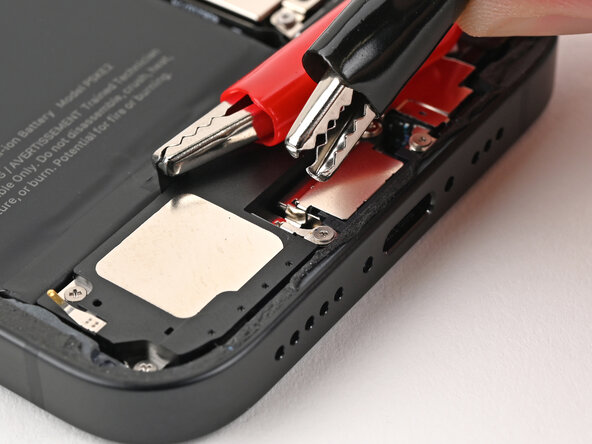
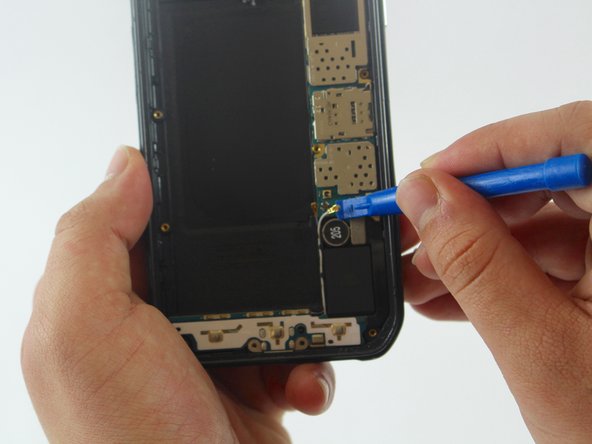
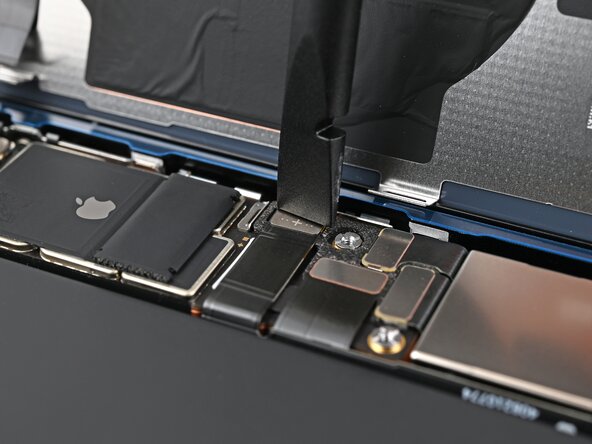
– Grab your trusty spudger and gently nudge up that battery press connector to disconnect it. You’ve got this!
Tools Used

Step 19
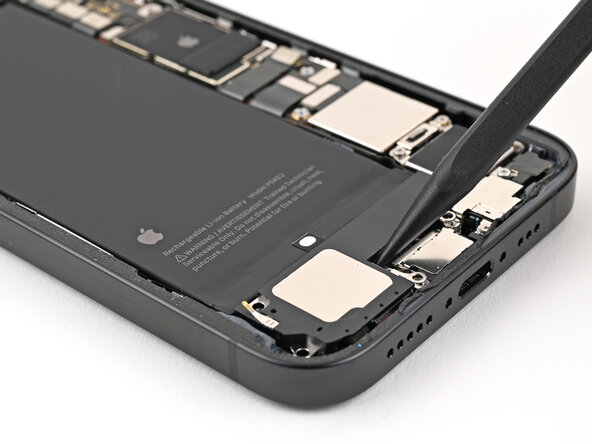
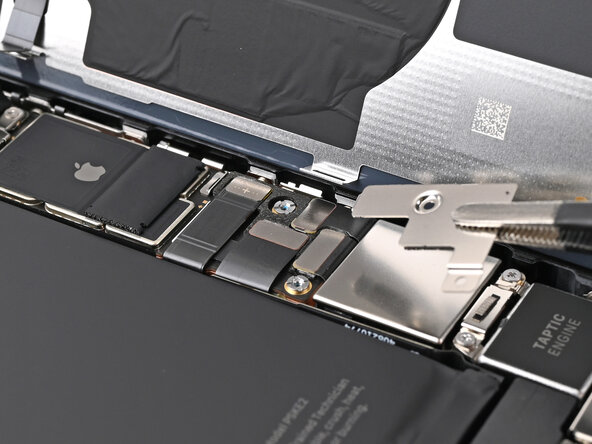
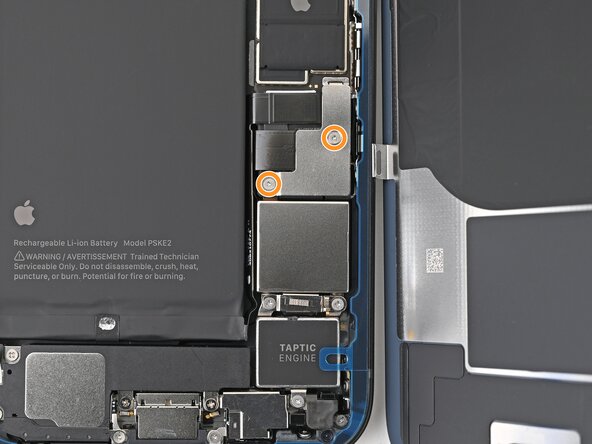
– Grab your trusty tri-point Y000 screwdriver and remove that 1.0 mm-long screw holding down the middle connector cover. You’ve got this!
Tools Used
Step 20
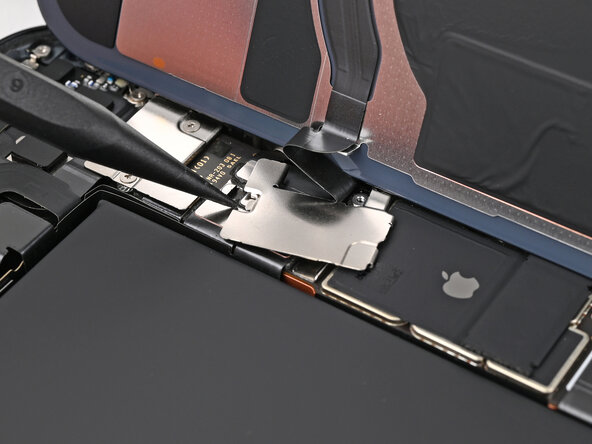
The middle connector cover slides snugly into two metal clips — one on the top and one on the bottom. Just line it up and give it a gentle push to lock it in place. Need a hand? You can always schedule a repair.
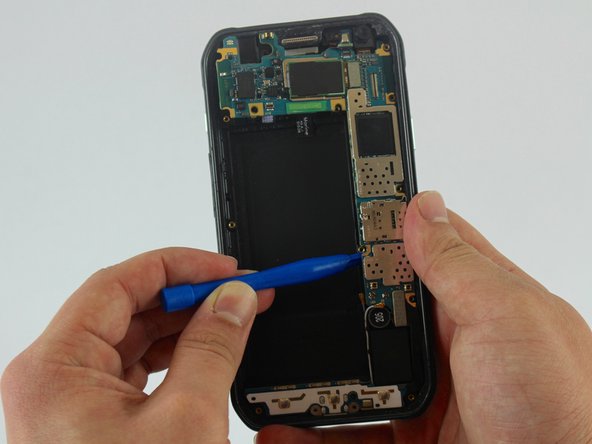
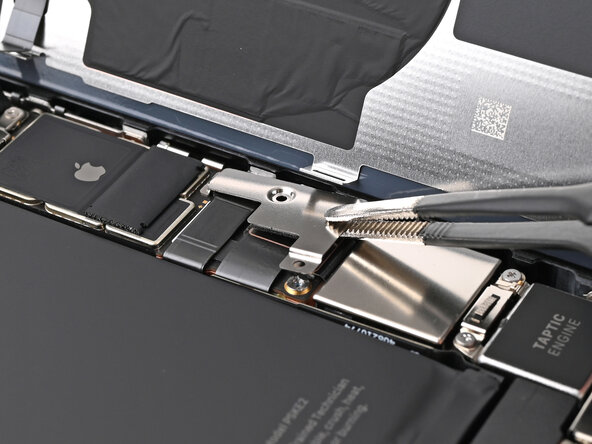
– Take the pointy end of your spudger and gently nudge the middle connector cover down toward the bottom of your phone to pop those clips loose.
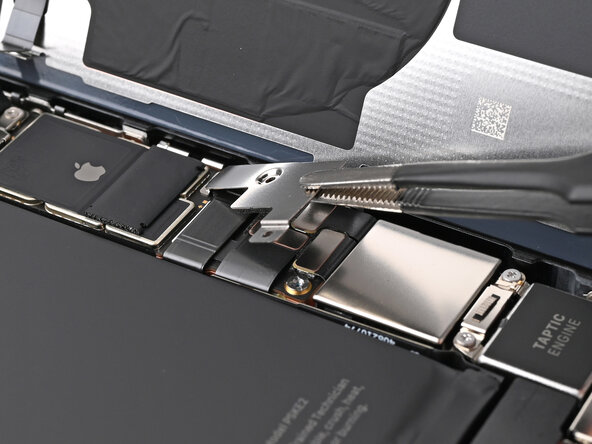
– Now, use your trusty tweezers or fingers to carefully lift the cover away and set it aside.
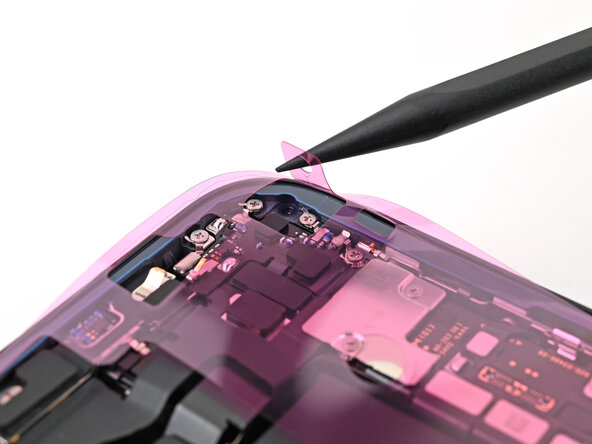
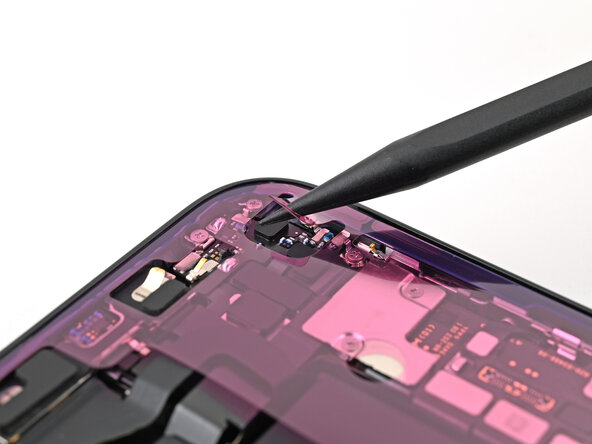
Step 21
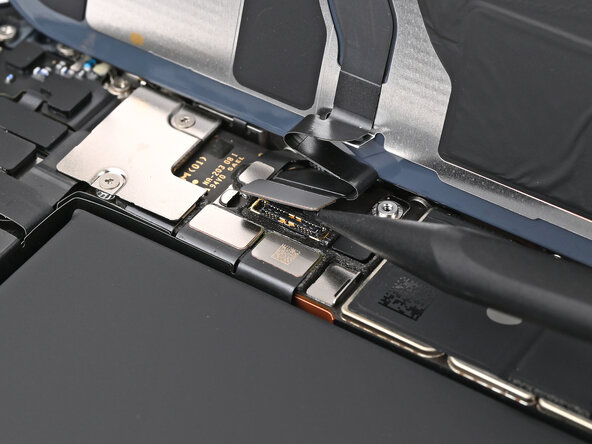
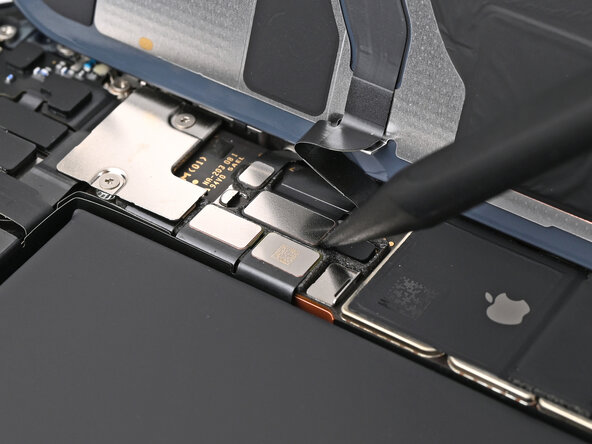
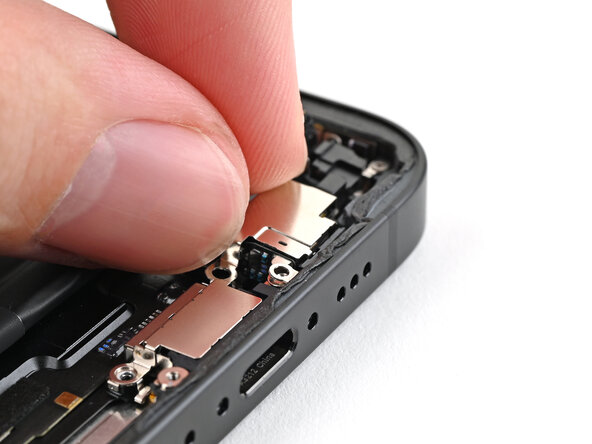
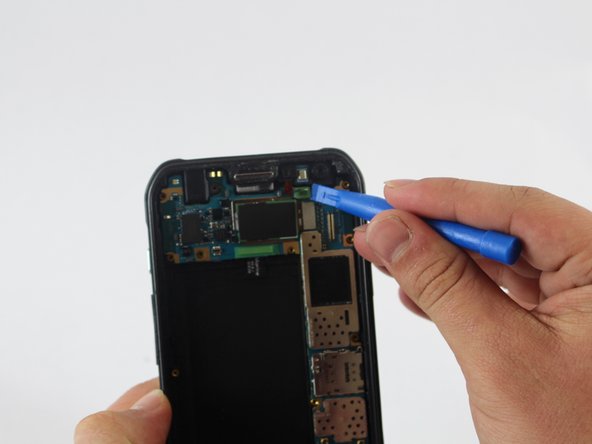
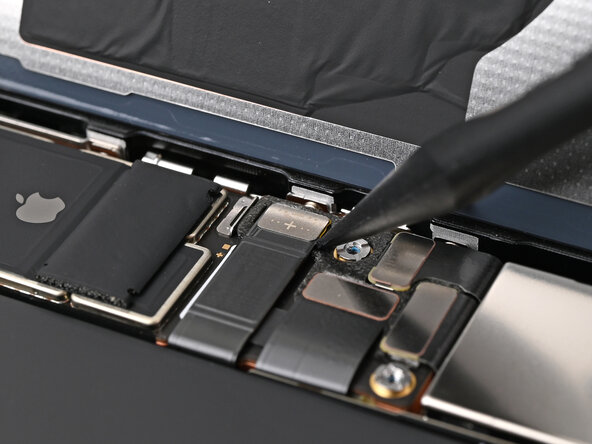
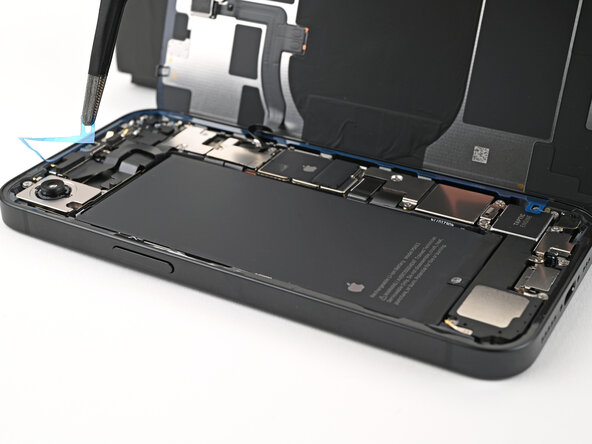
– Gently use the tip of a spudger to lift and unplug the wireless charging coil press connector. Keep it cool and steady!
Tools Used
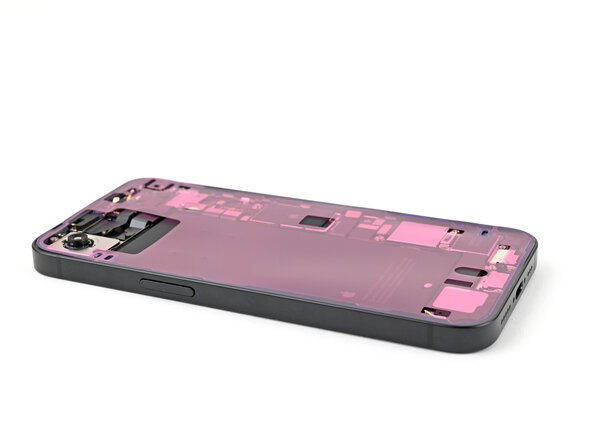
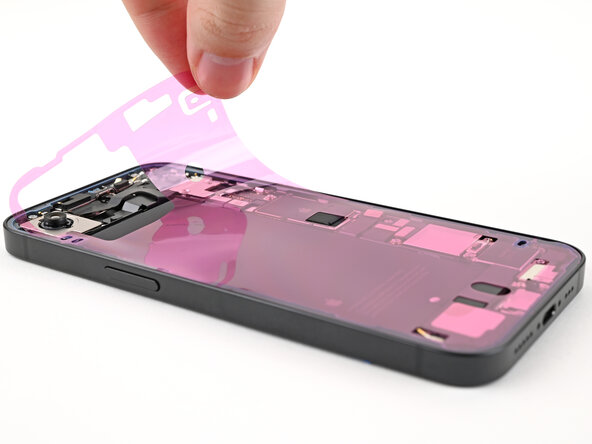
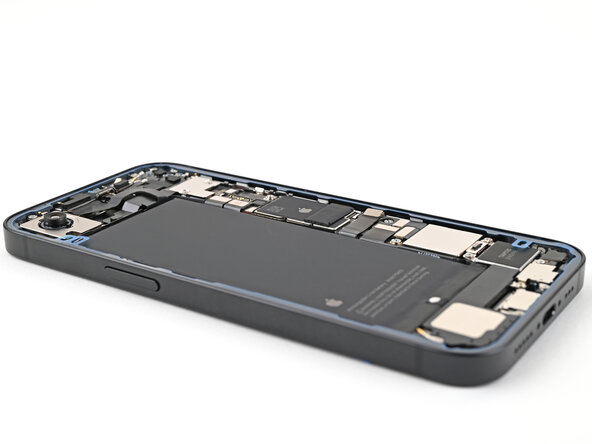
Step 22

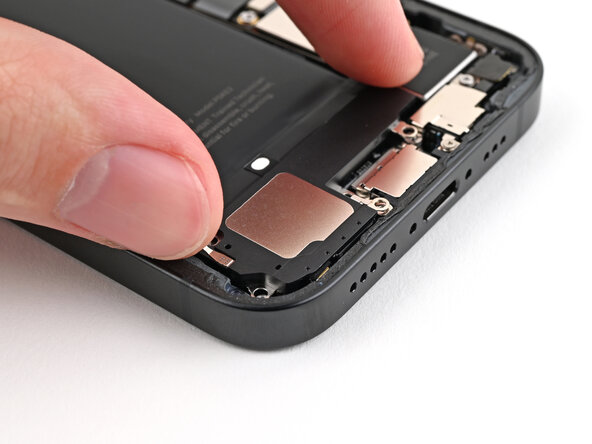
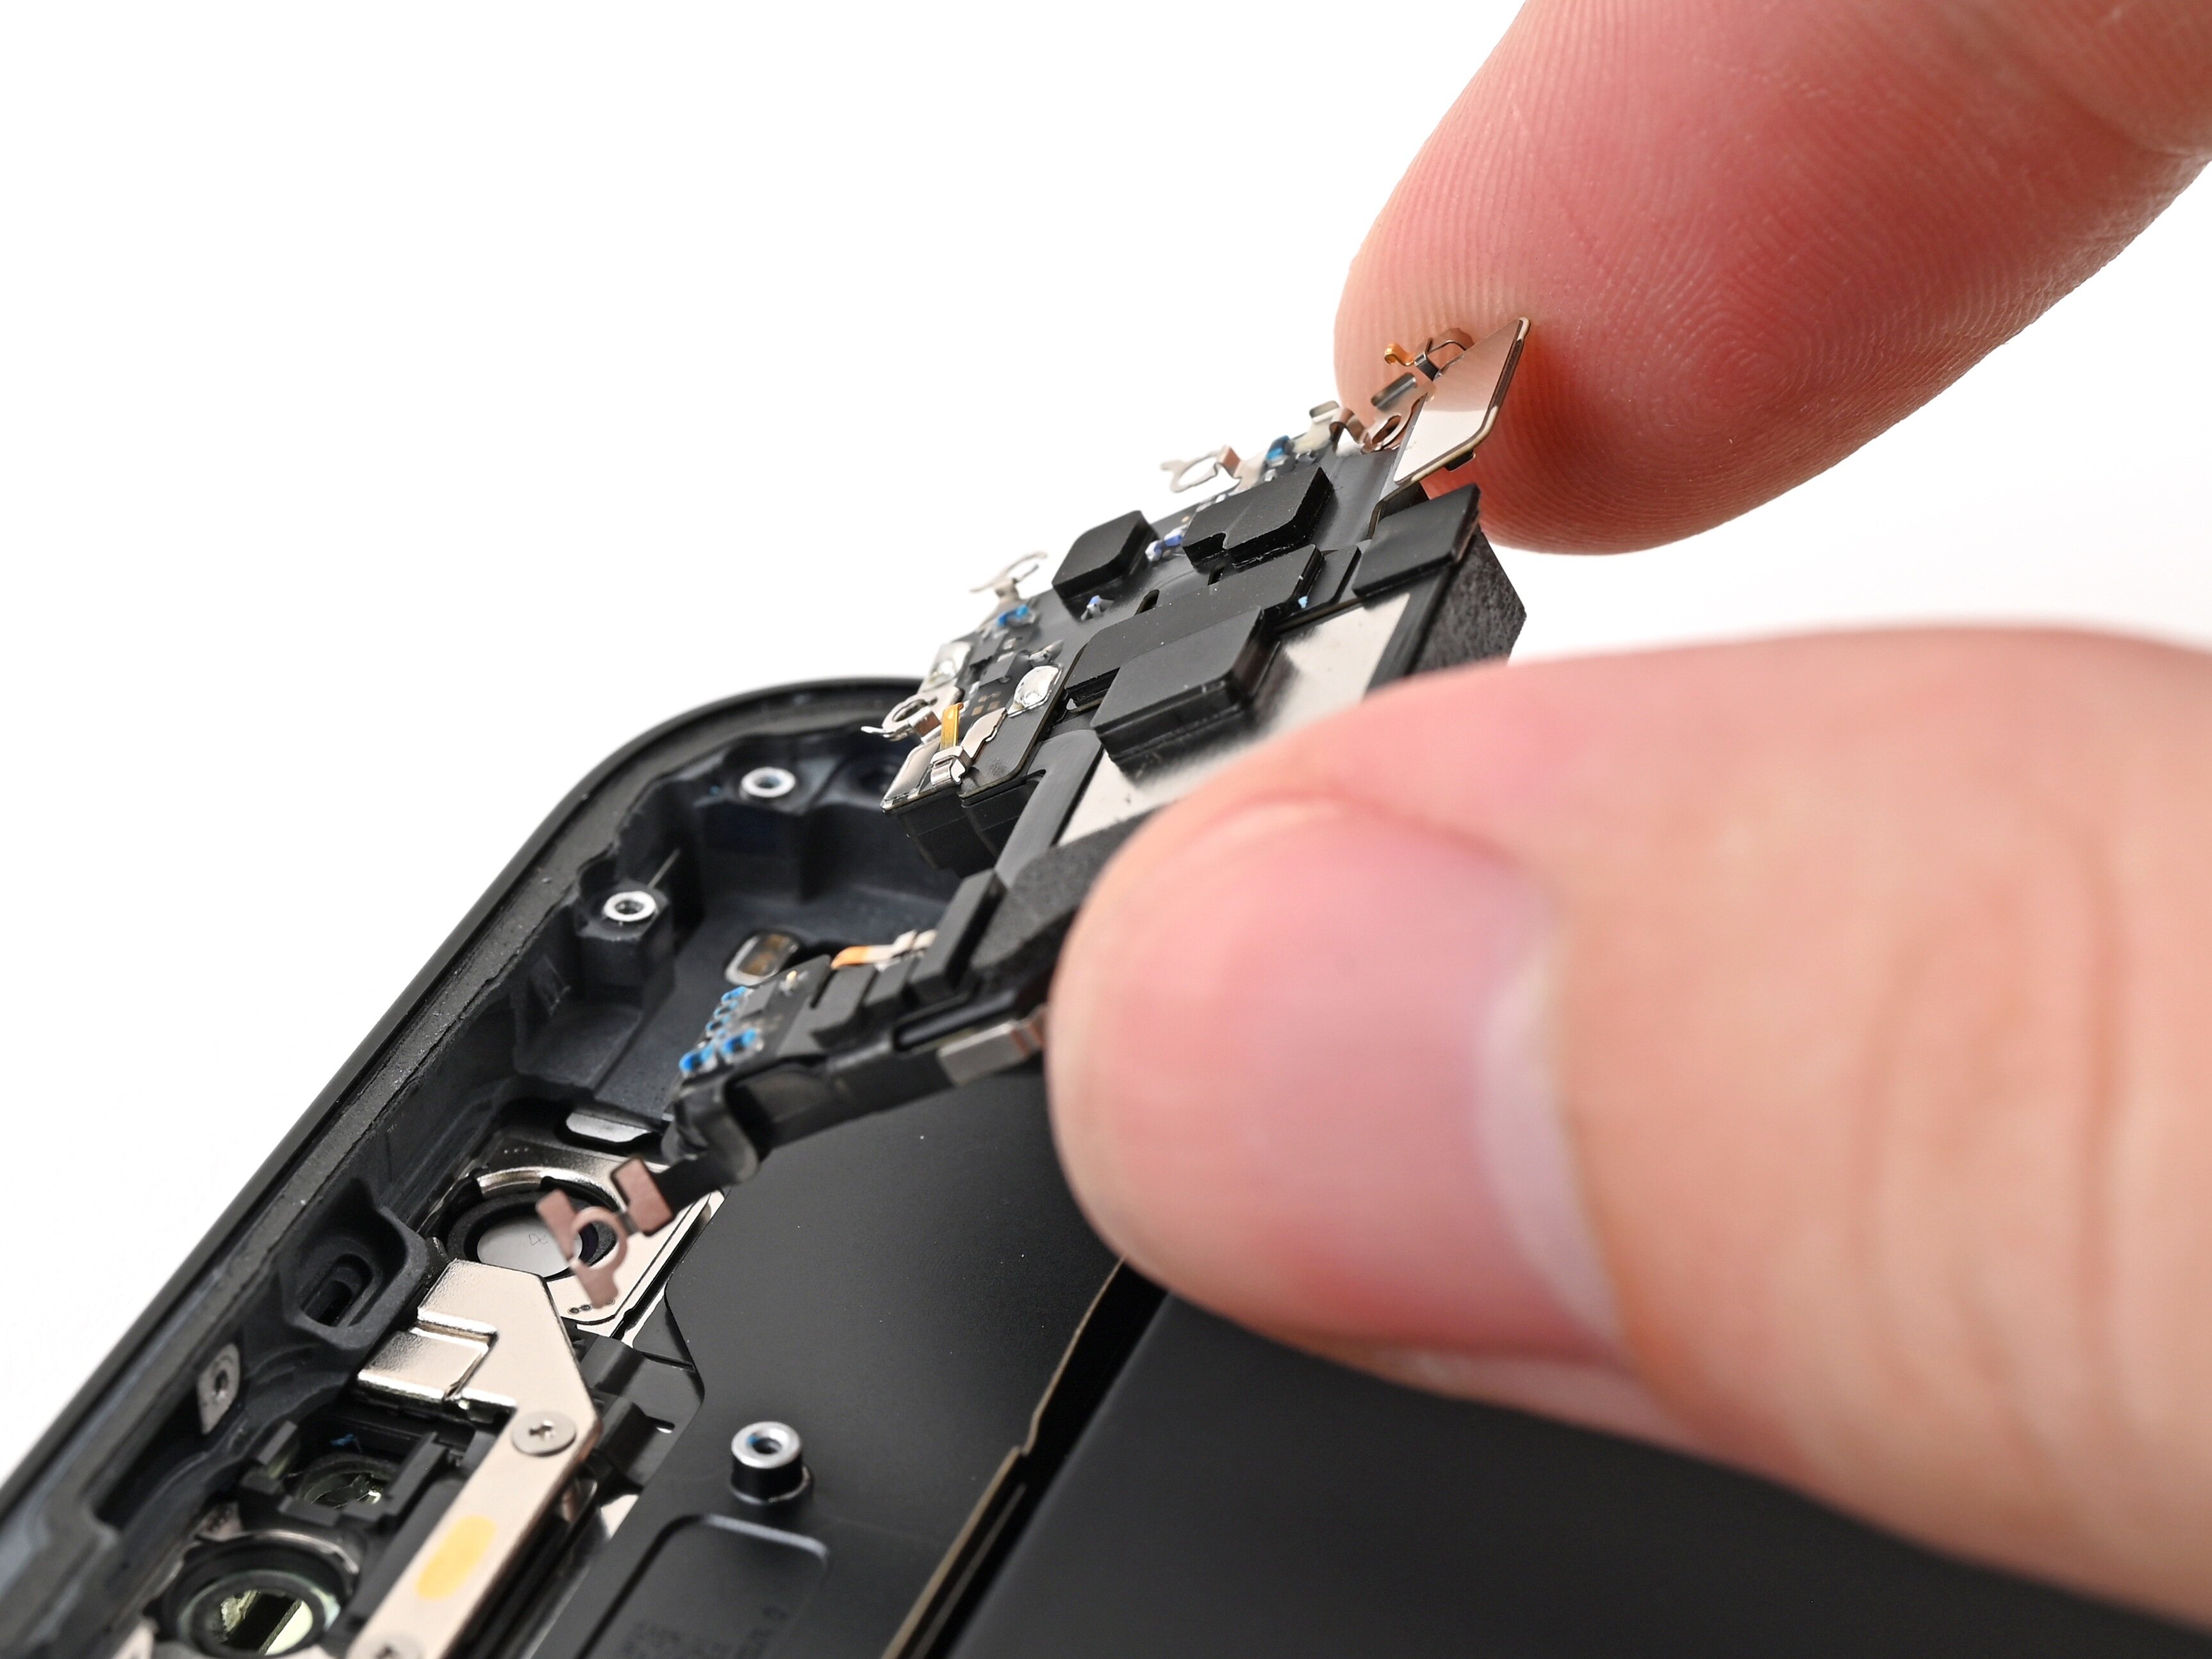
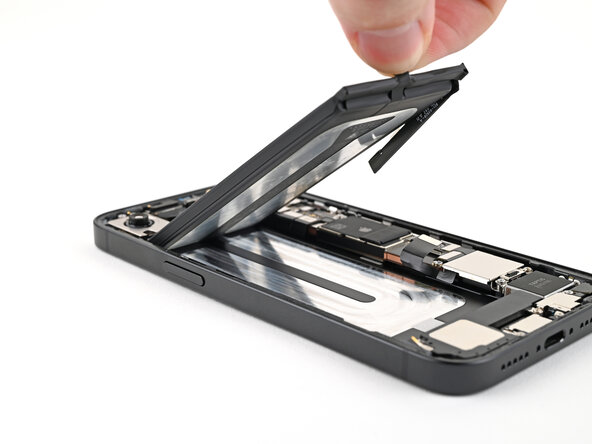
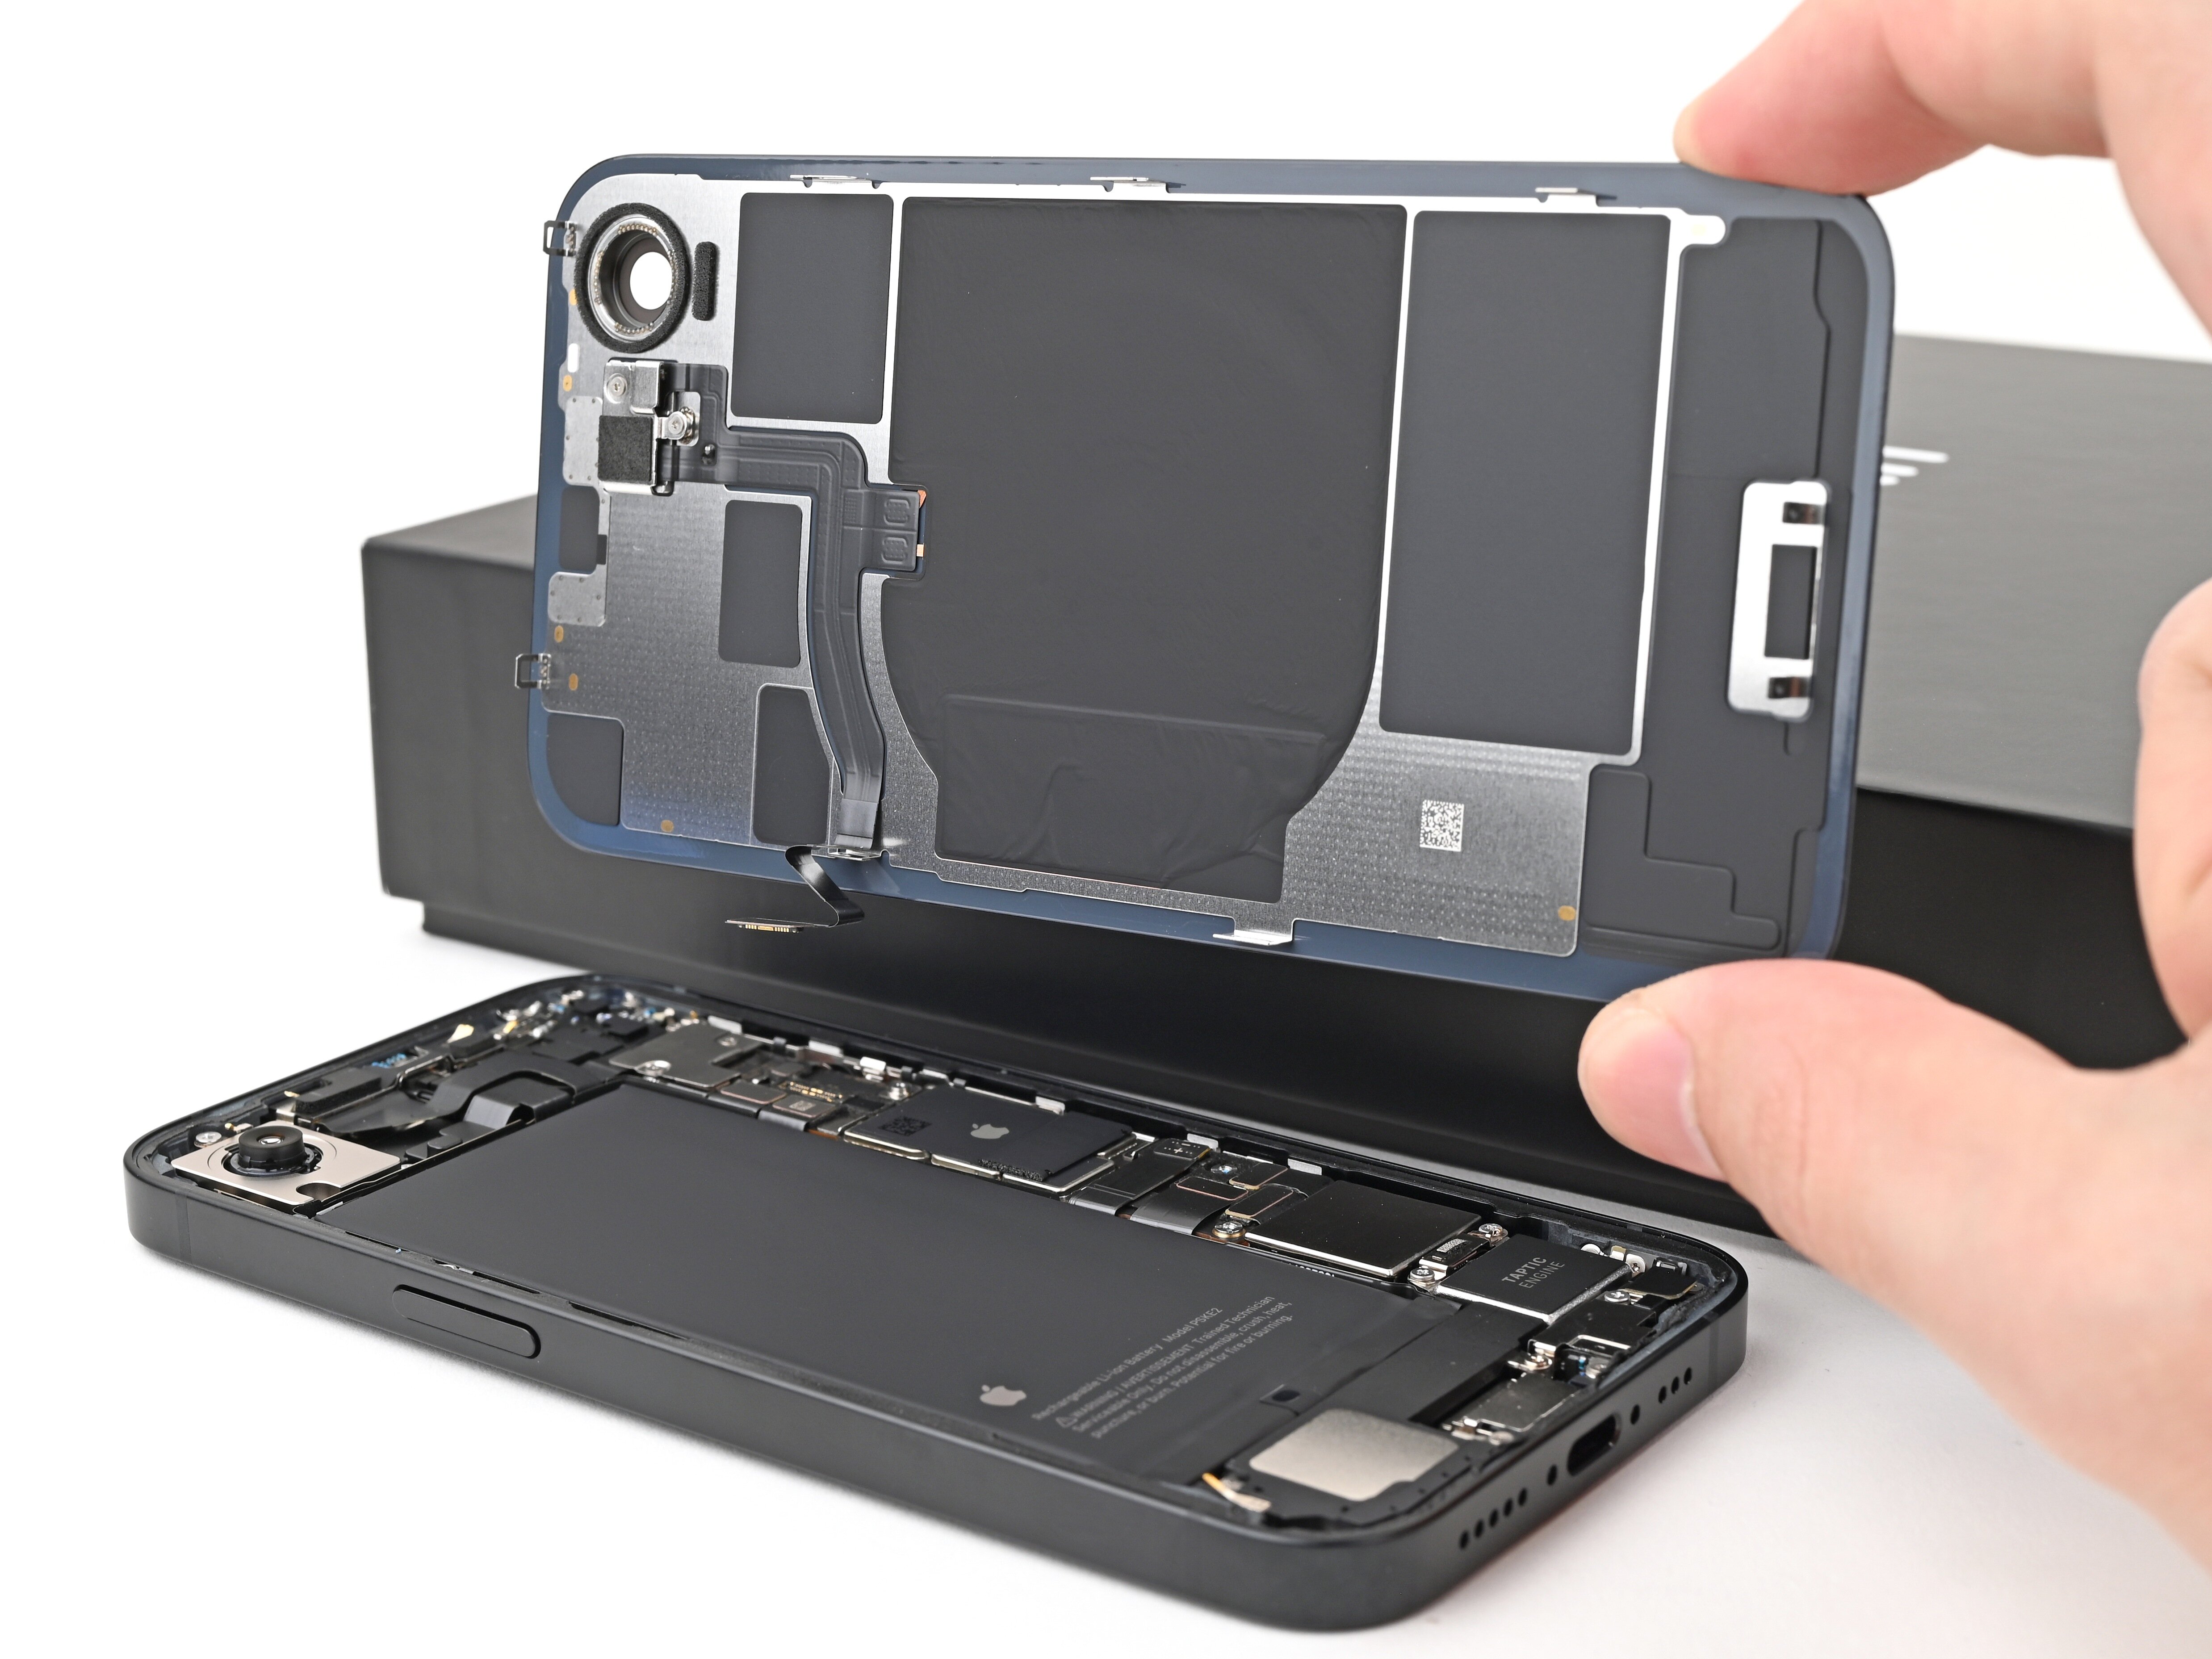
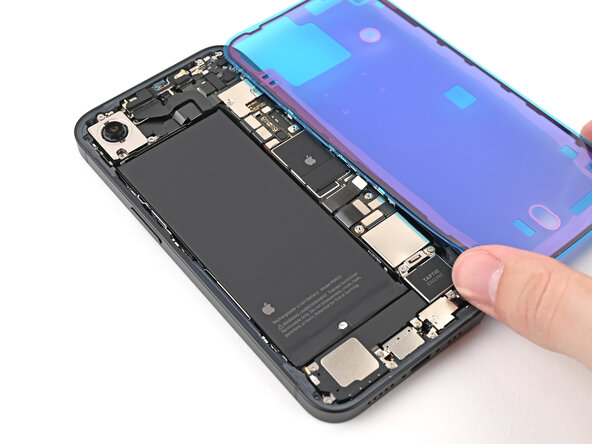
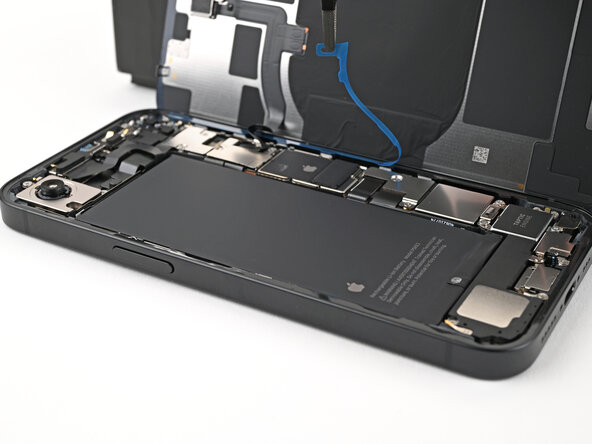
– Time to give that back glass a little nudge! Gently lift it off the frame and set it aside. You’re one step closer to a smooth repair!
Step 23

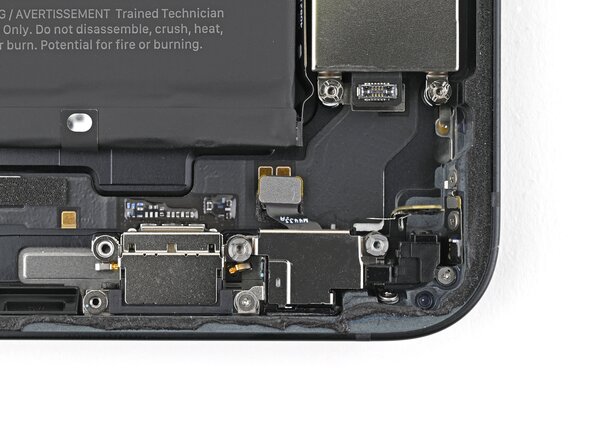
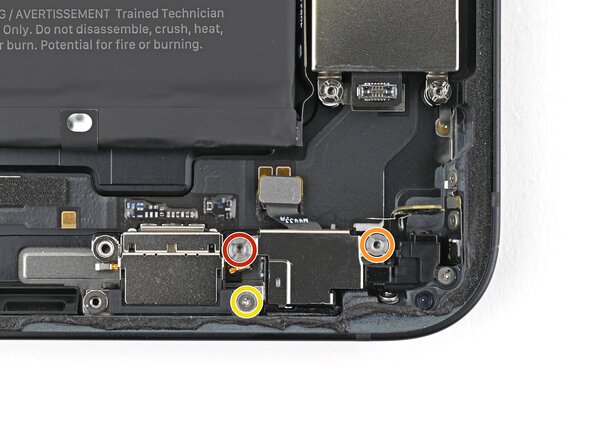
– Grab your tri-point Y000 screwdriver and take out the two screws holding down the top connector cover:
– One screw that’s 1.0 mm long
– One screw that’s 1.3 mm long
Tools Used
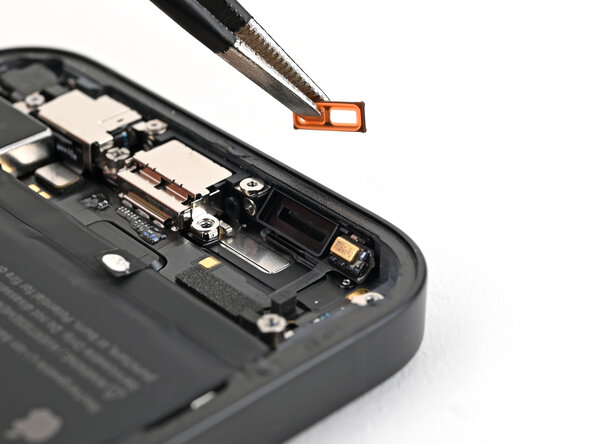
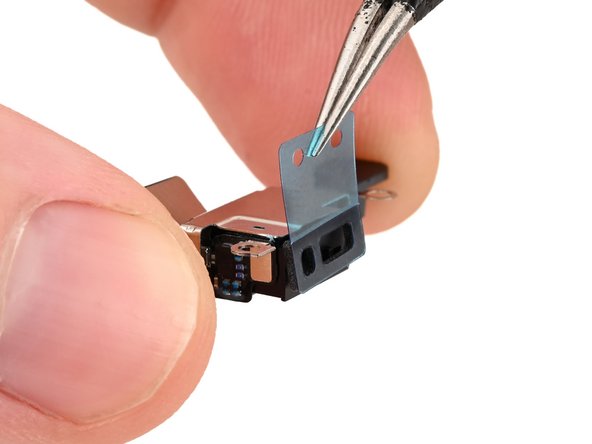
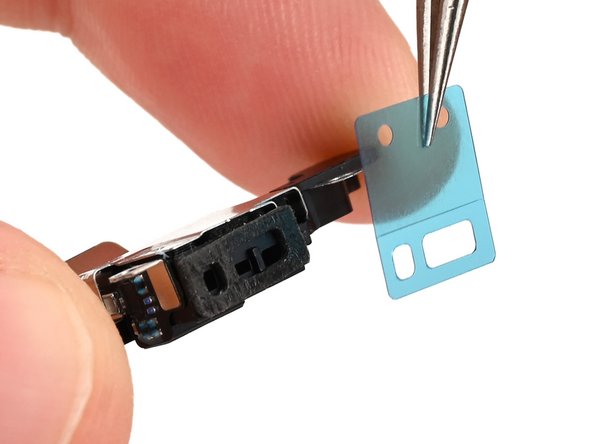
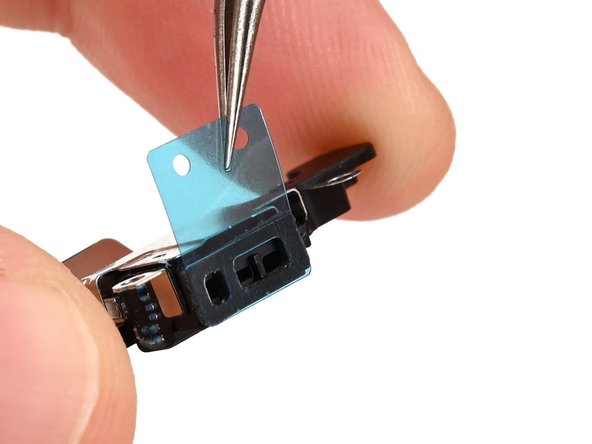
Step 24

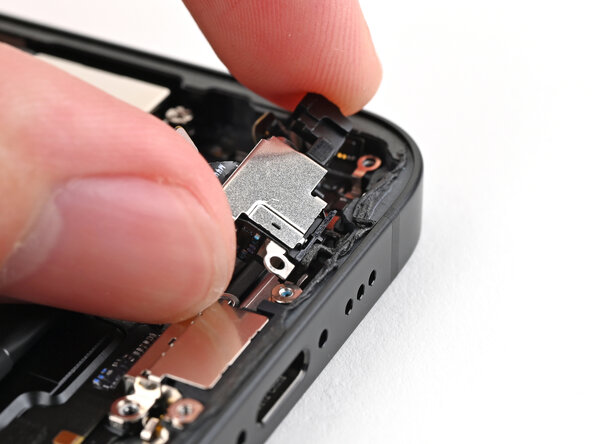
– Gently grab the front camera bracket with tweezers or your fingers and lift it out like a pro.
Tools Used
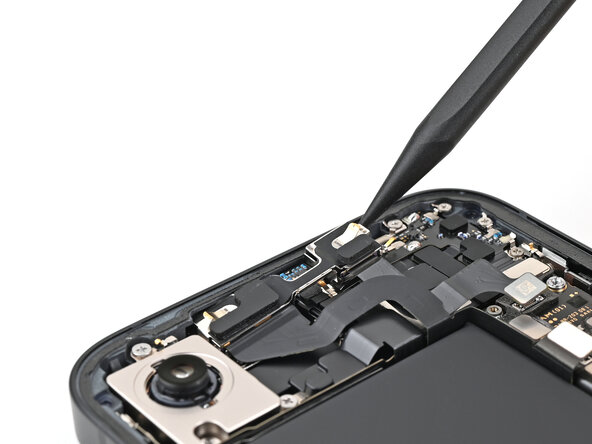
Step 25

– Grab your trusty spudger and gently pop up those two front camera connectors. Nice and easy—disconnect them like a pro!
Tools Used
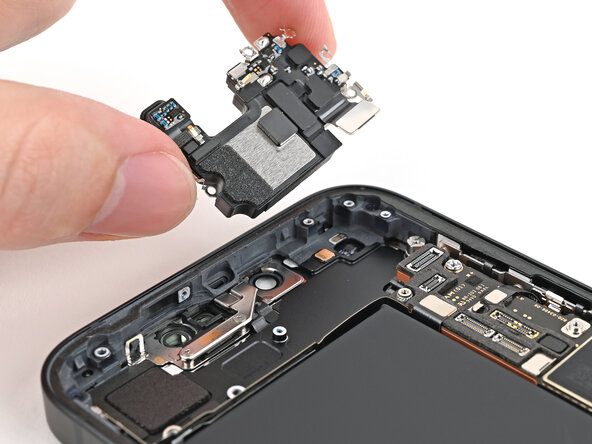
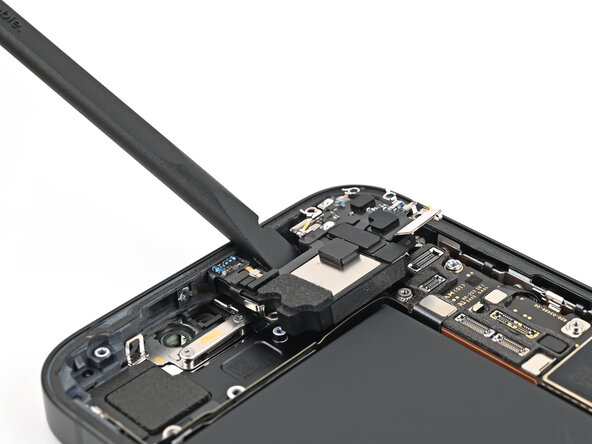
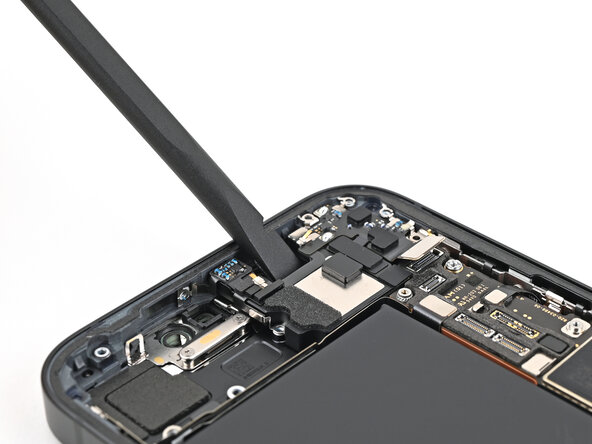
Step 26
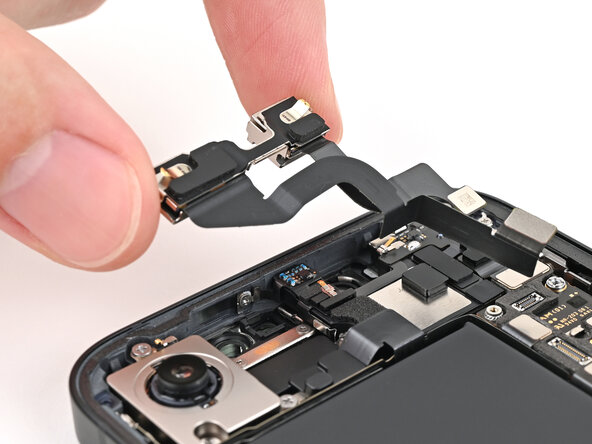
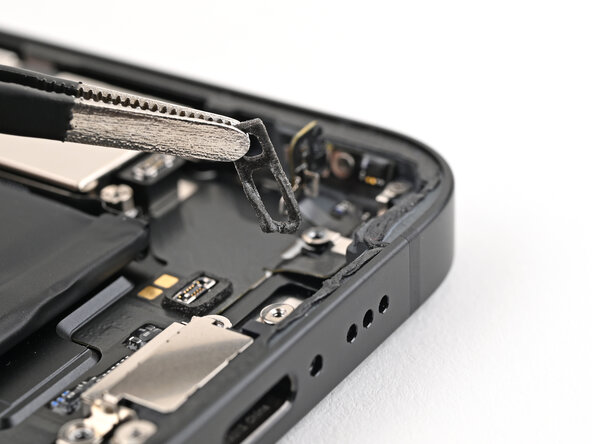
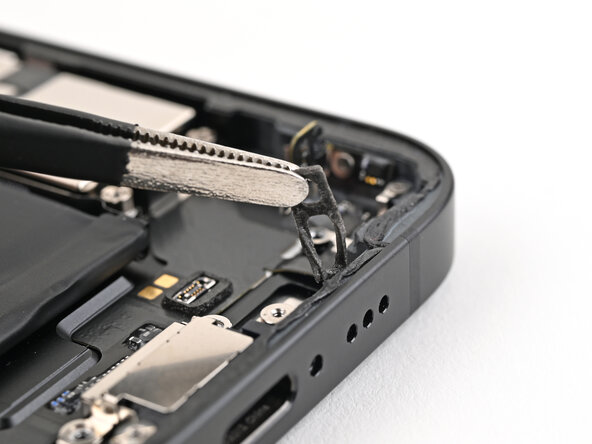
– Gently slide the tip of a spudger between the front camera assembly and the frame.
– Carefully lift the front camera assembly, wiggling it just enough so you can grab it with your fingers.
– Now, remove the front camera assembly with a little finesse.
Tools Used
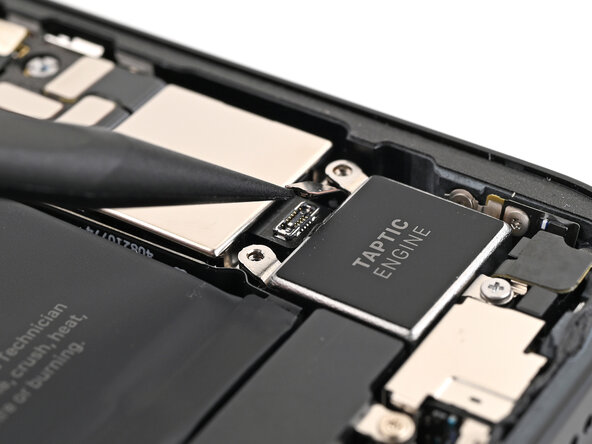
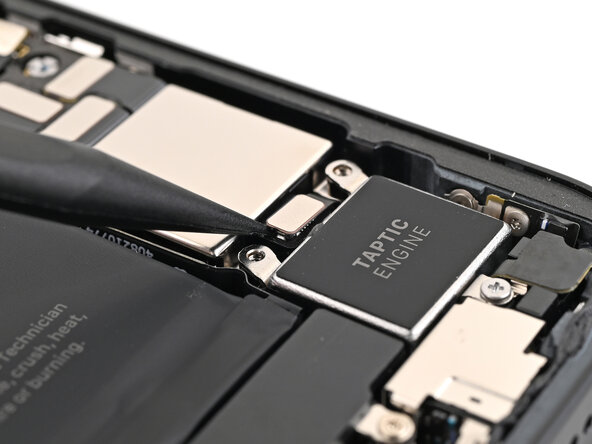
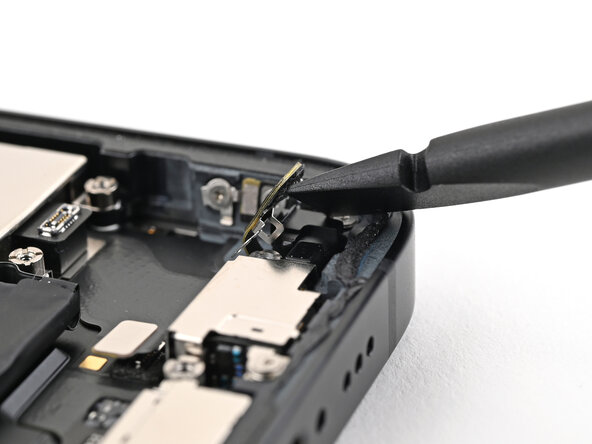
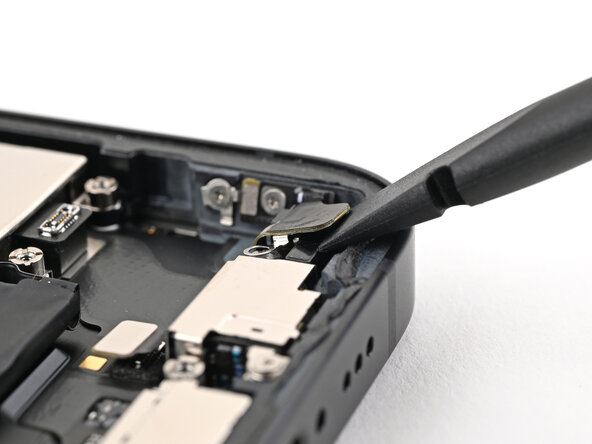
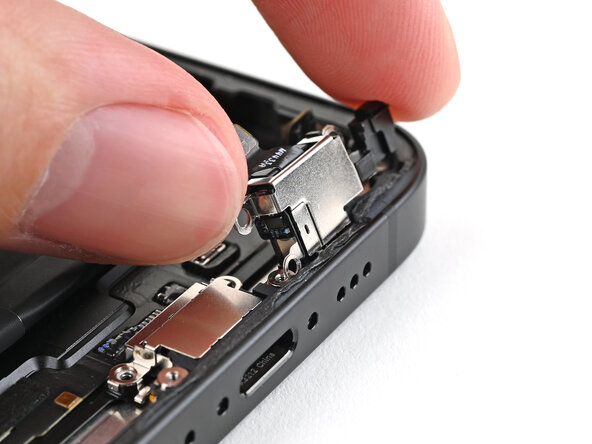
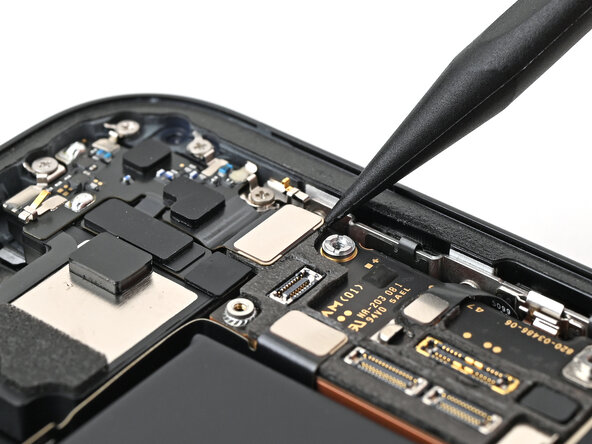
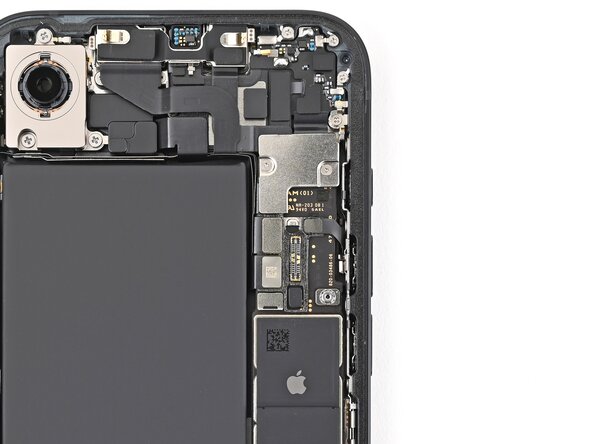
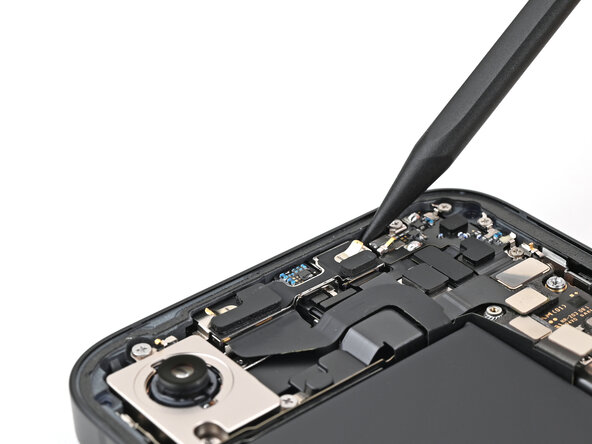
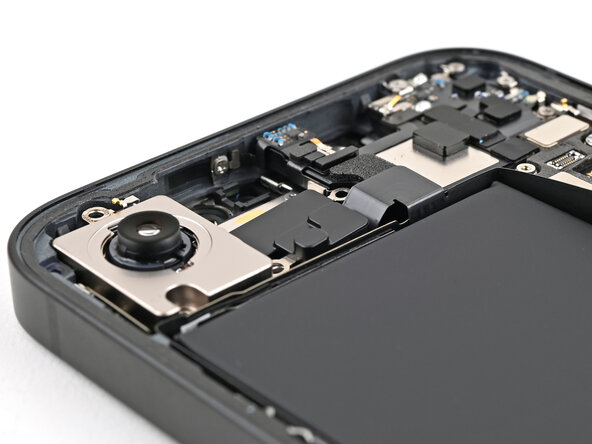
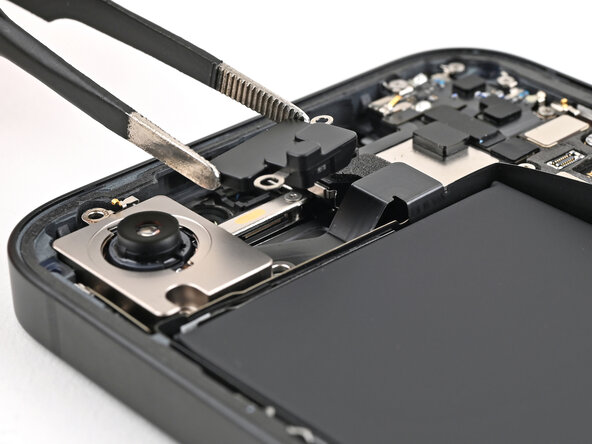
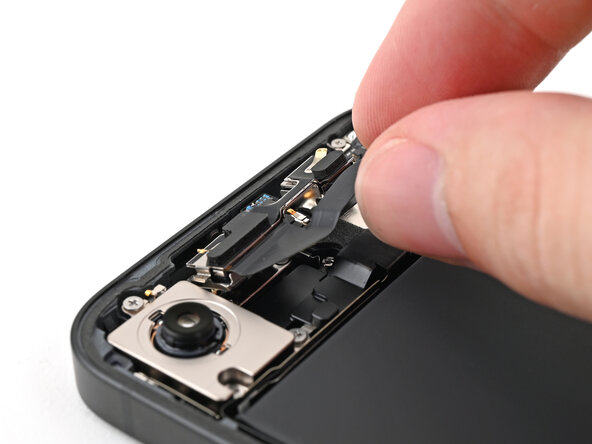
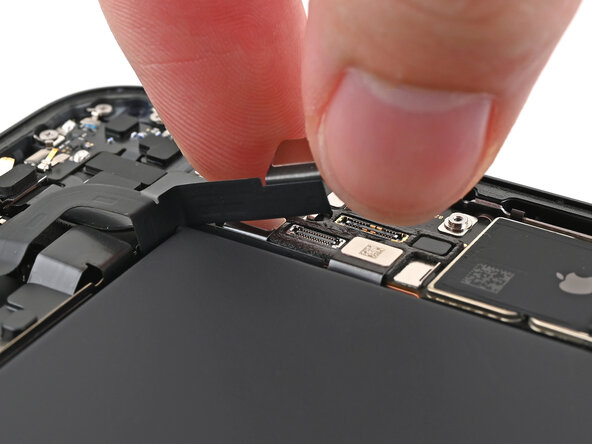
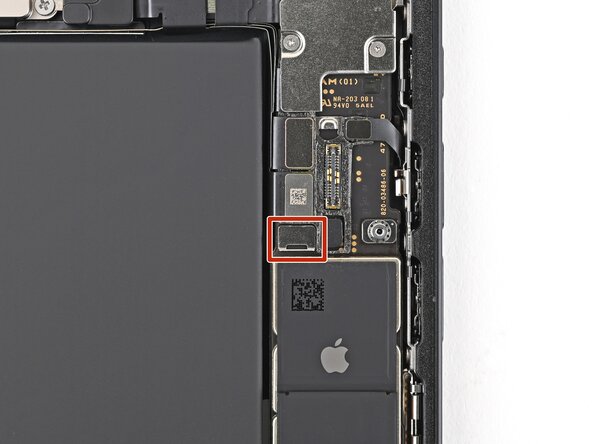
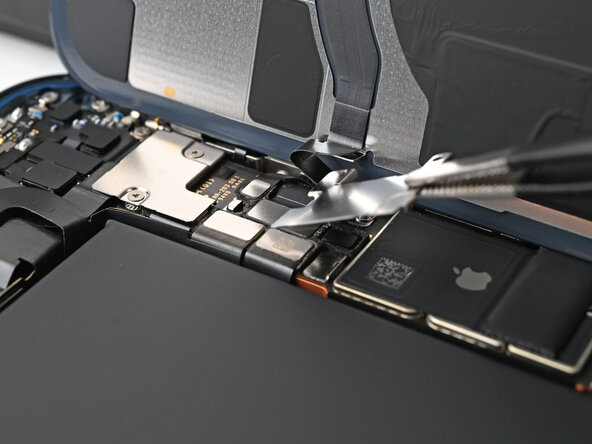
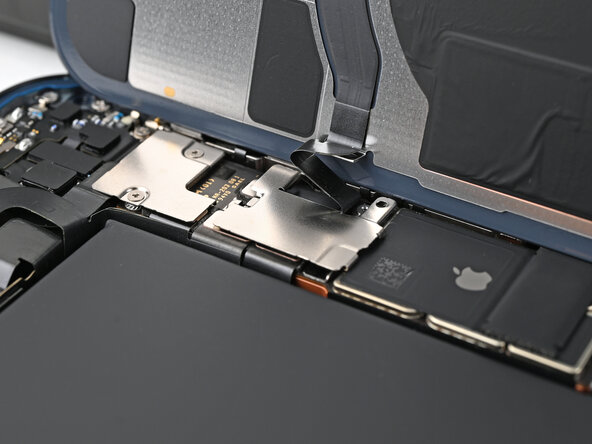
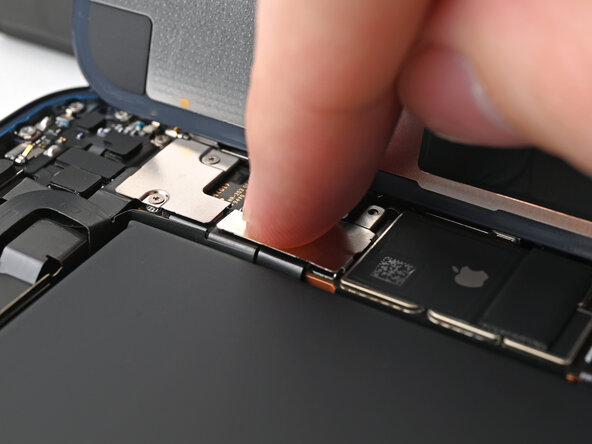
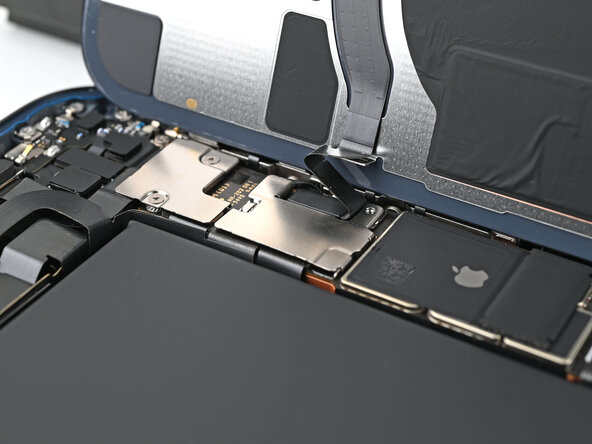
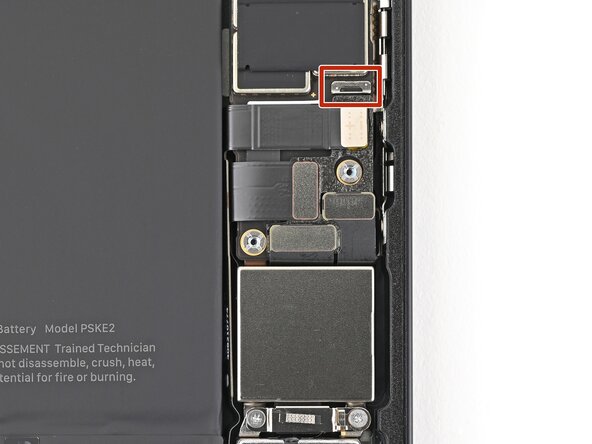
Step 27
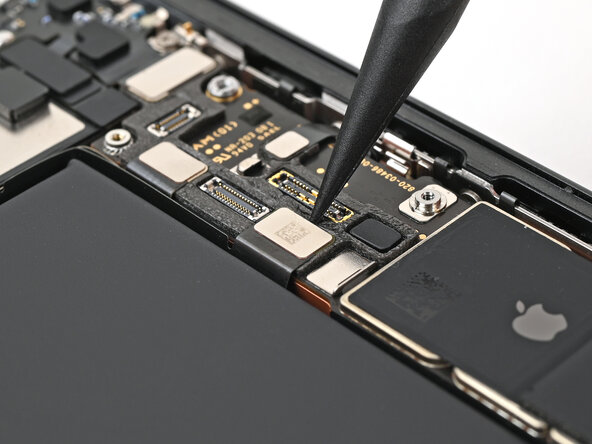
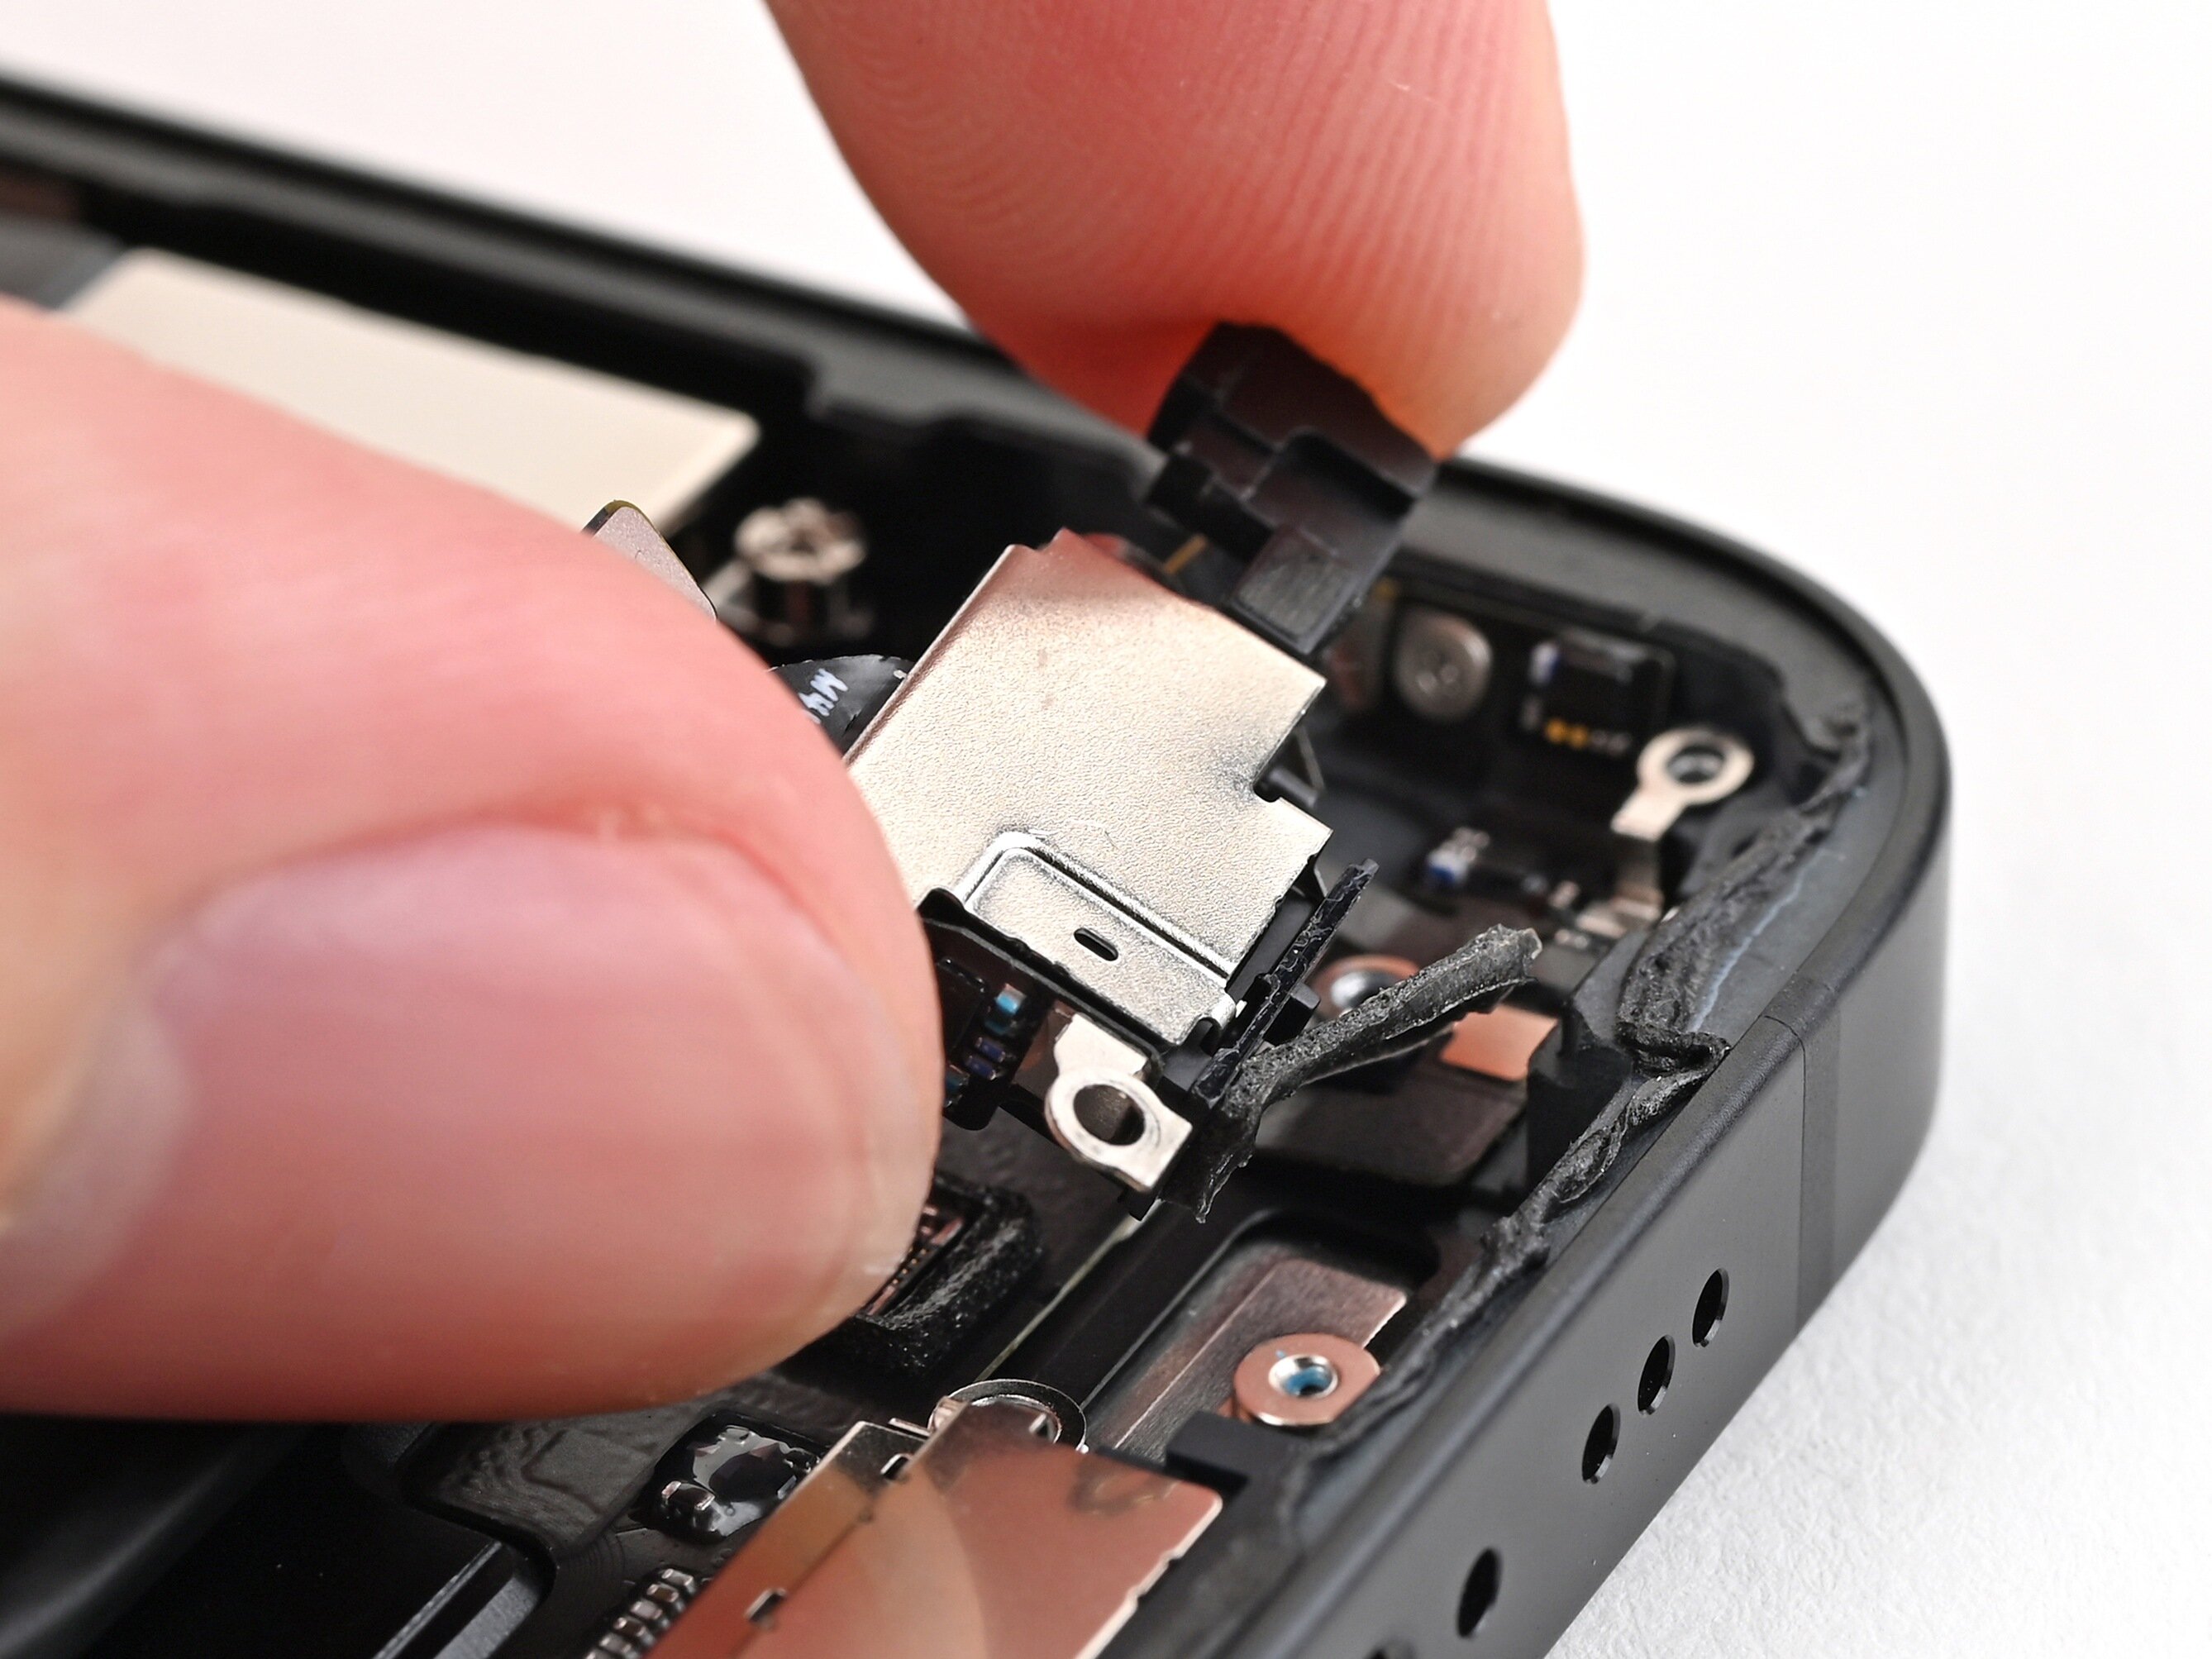
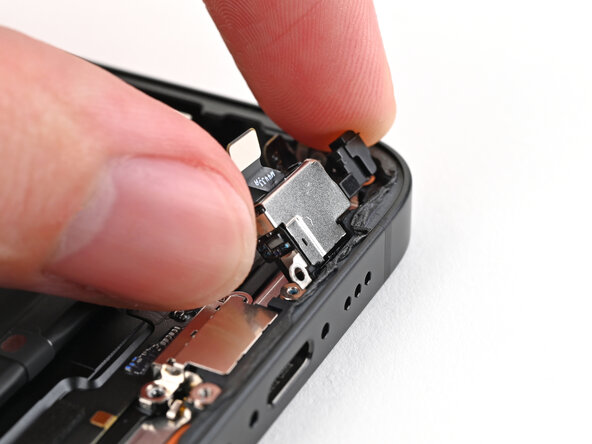
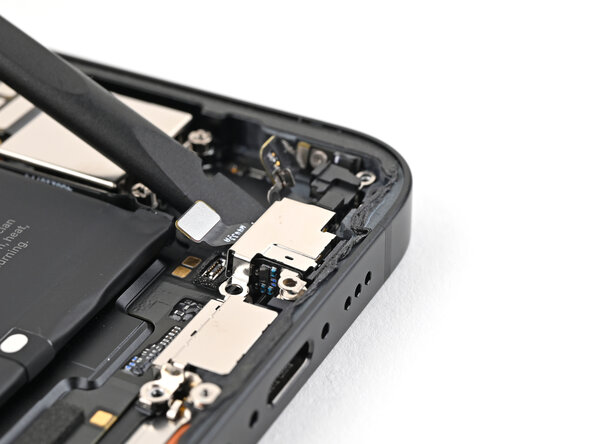
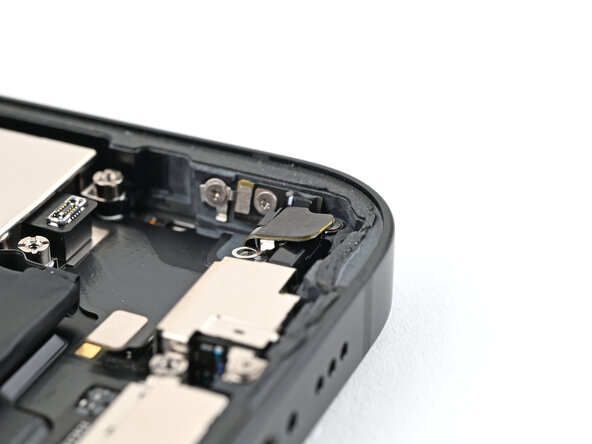
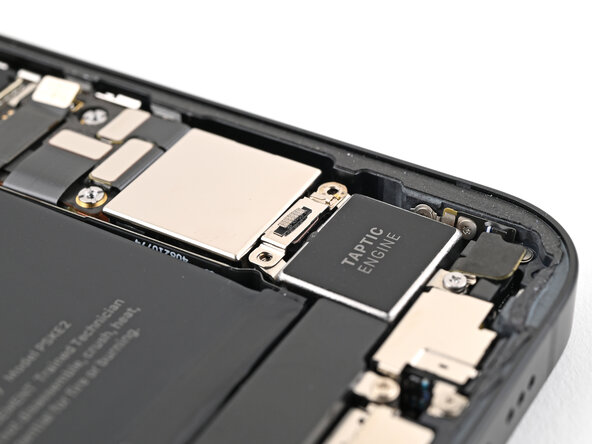
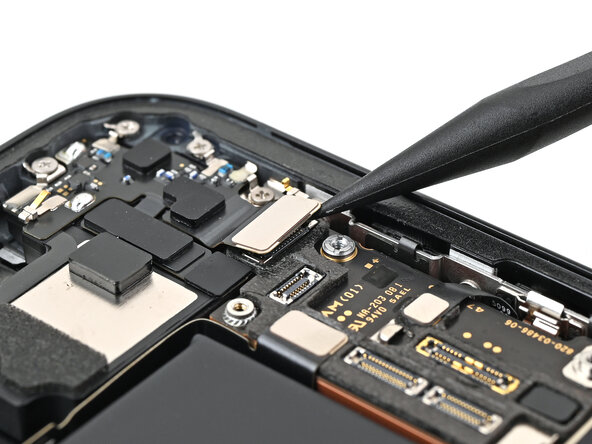
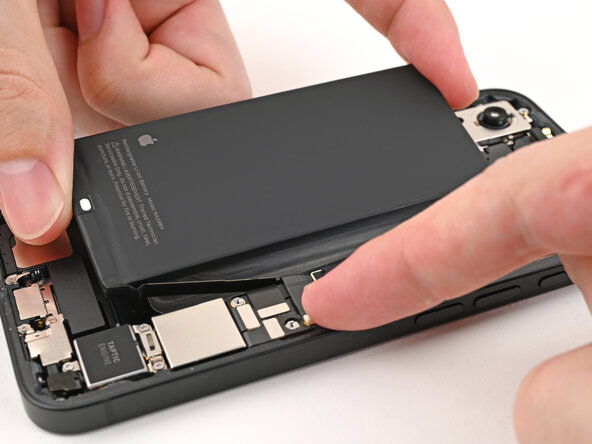
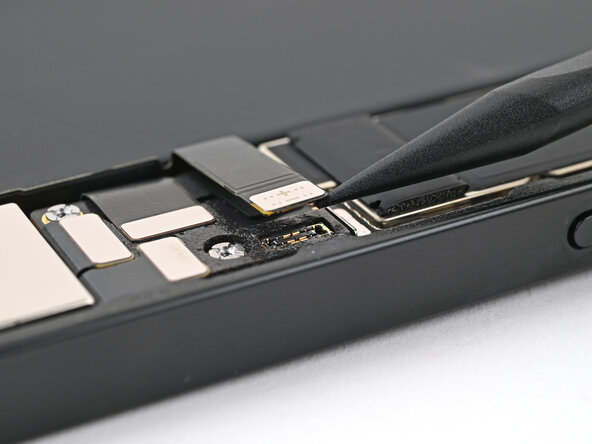
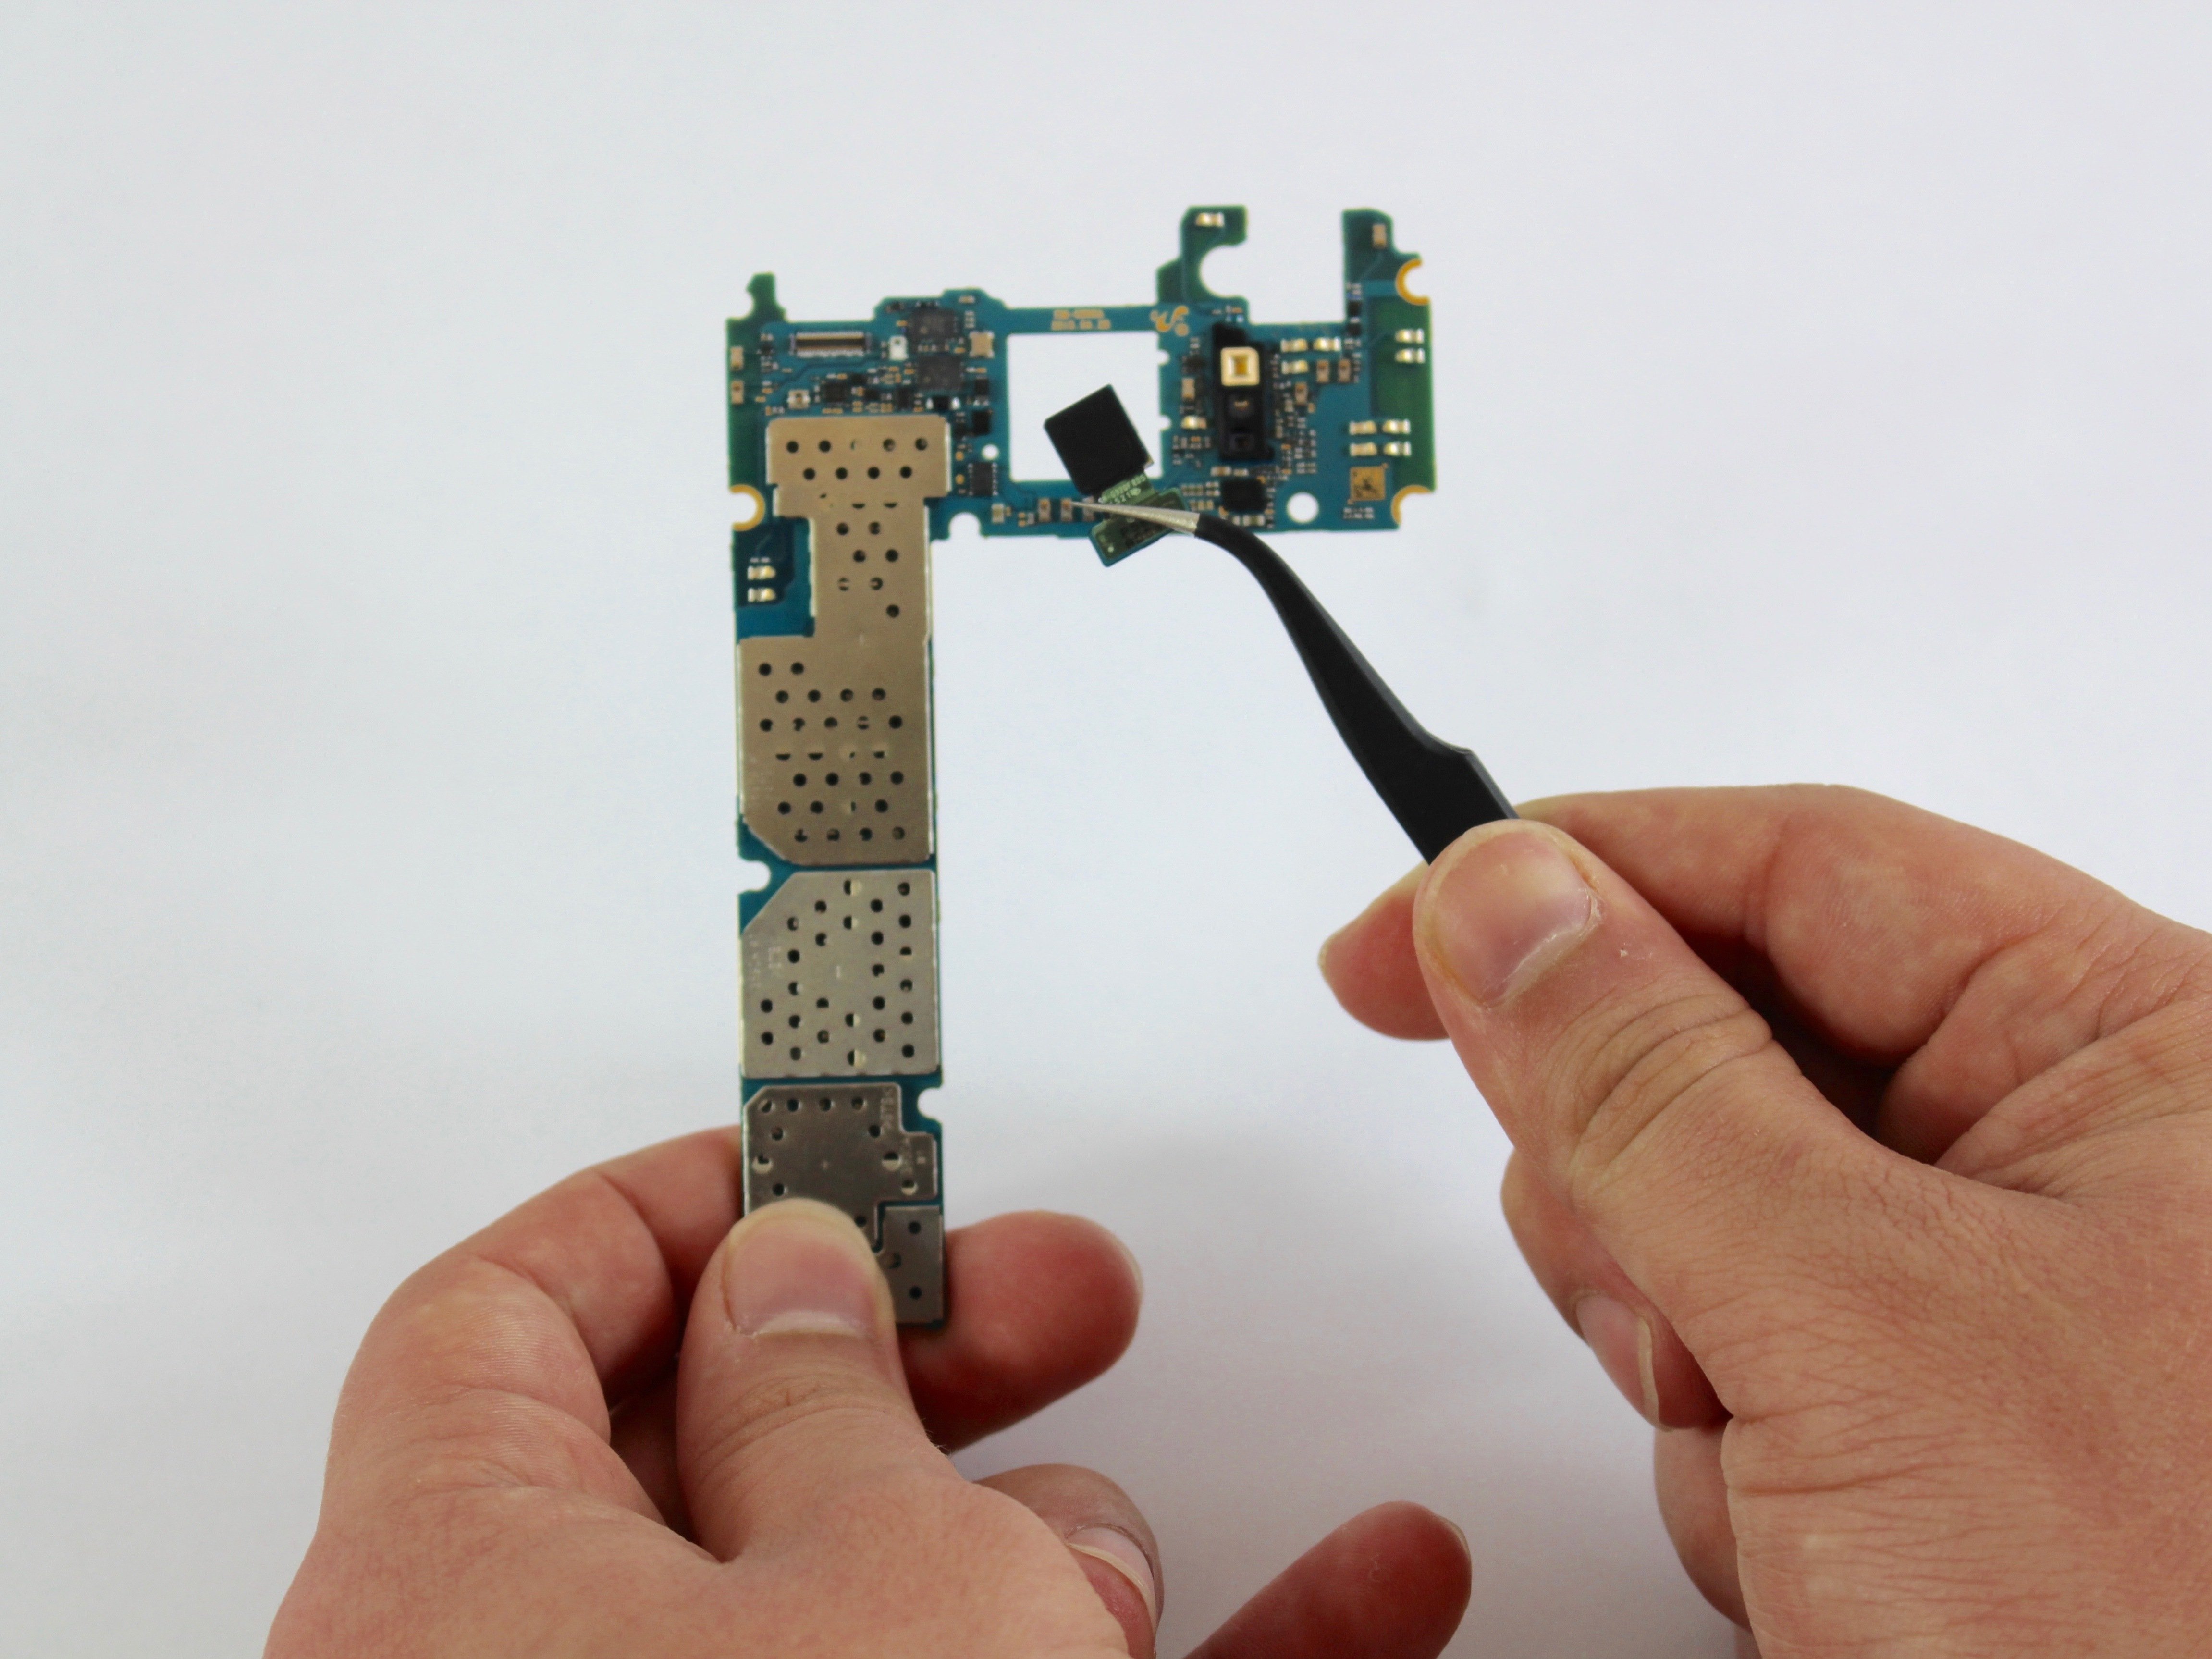
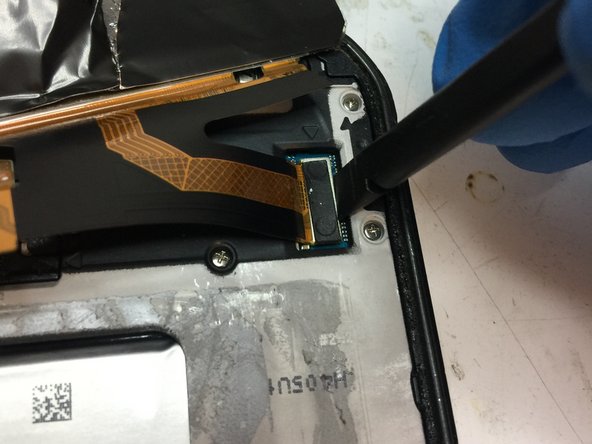
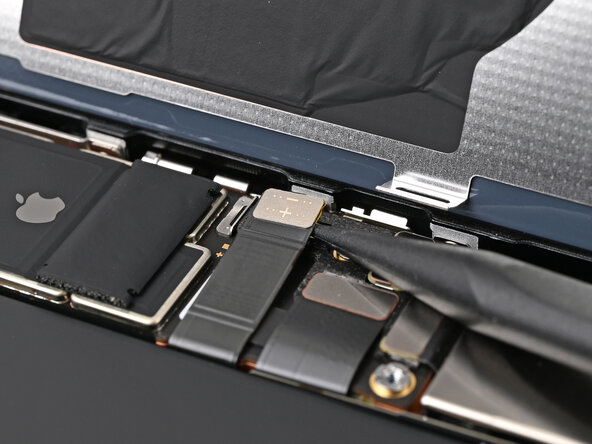
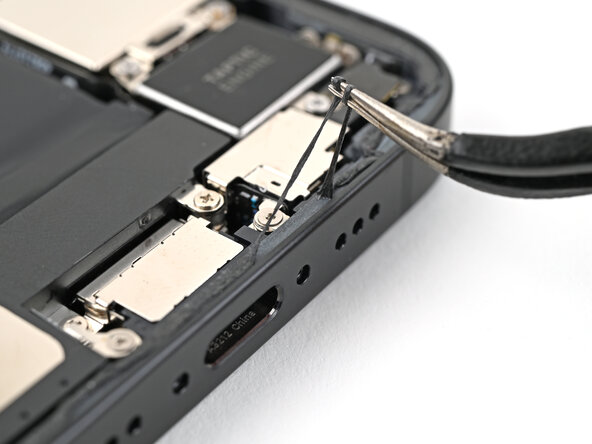
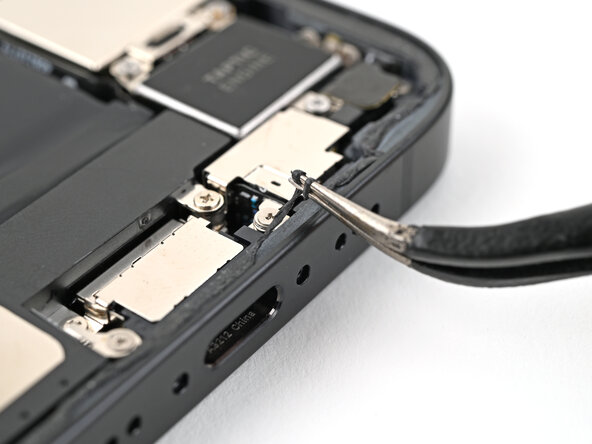
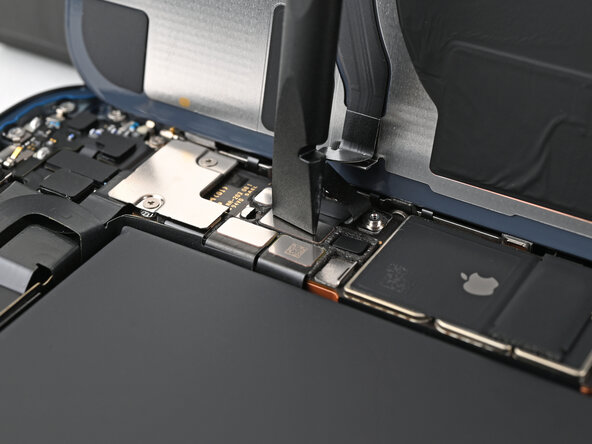
– Gently wedge the tip of your trusty spudger under the rear camera assembly connector and give it a little nudge to disconnect it. You’ve got this!
Tools Used
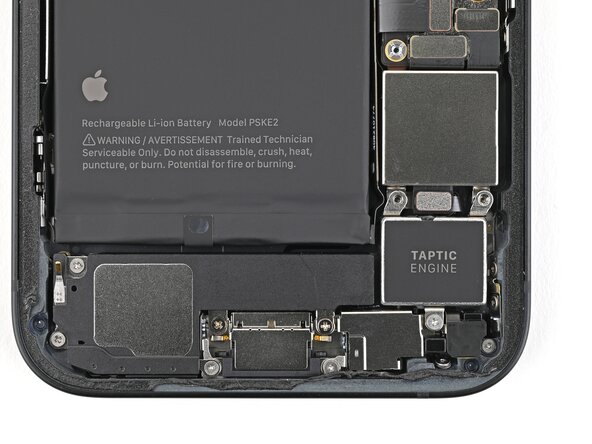
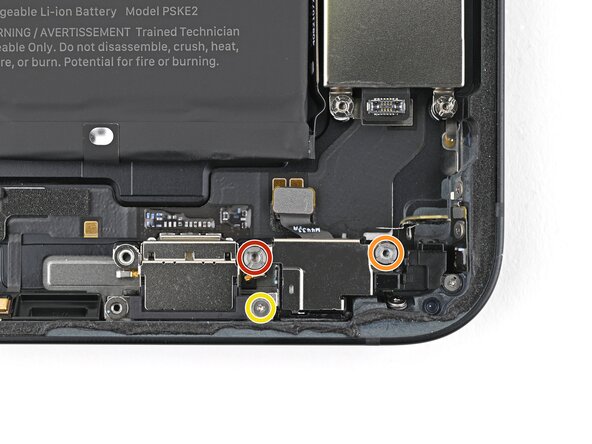
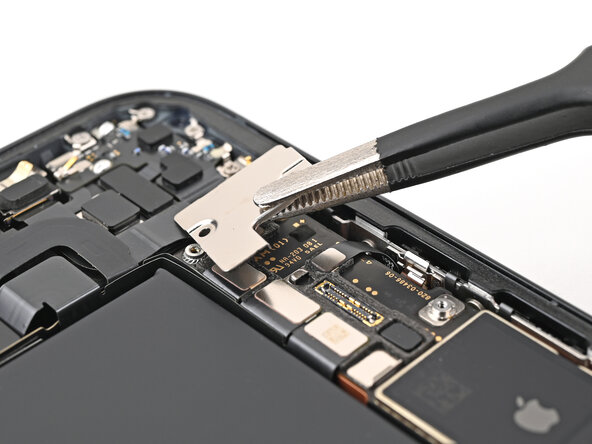
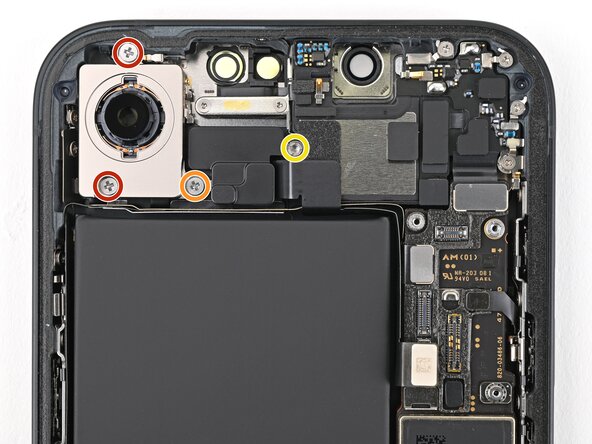
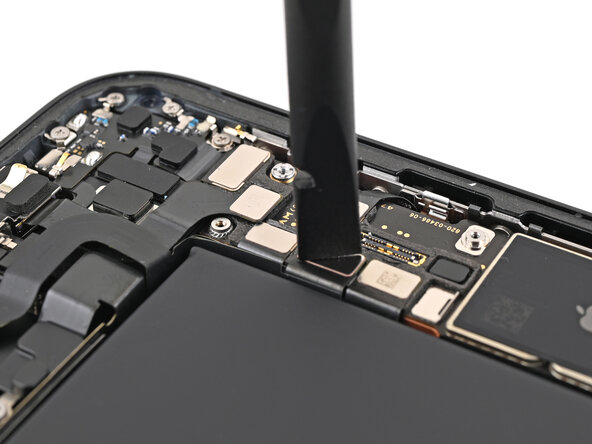
Step 28


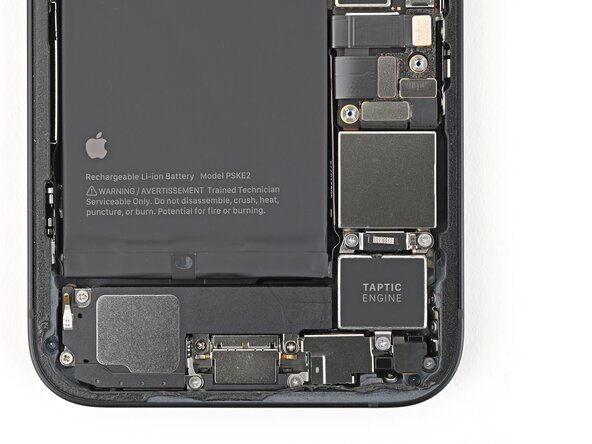
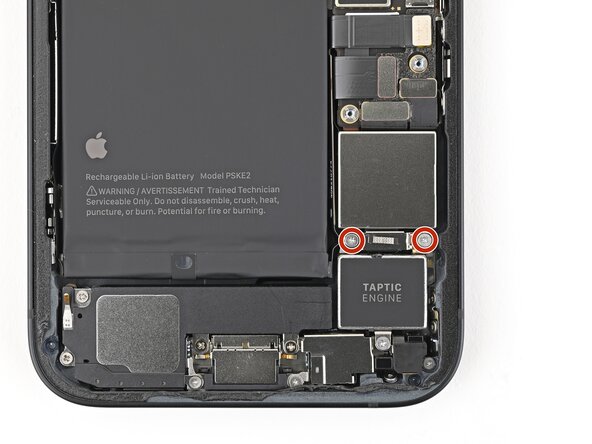
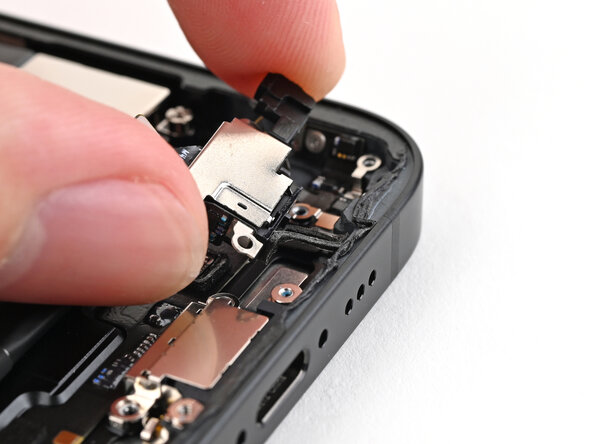
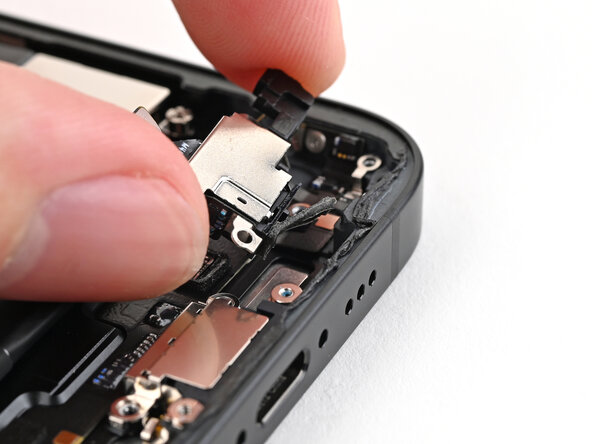
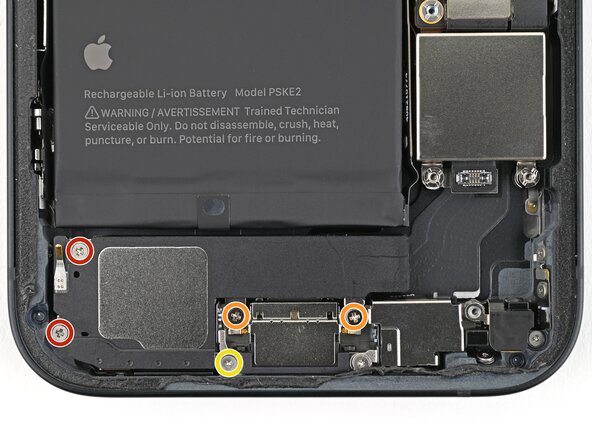
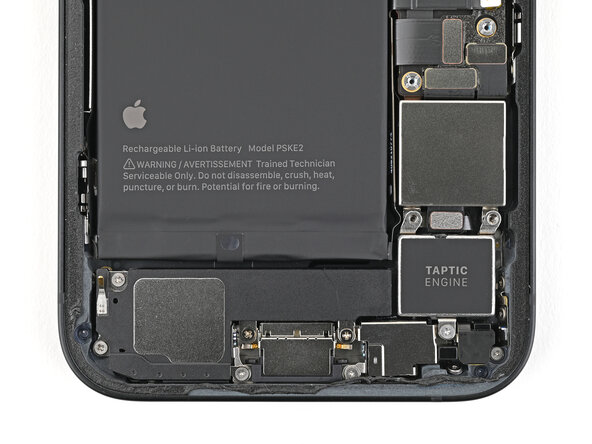
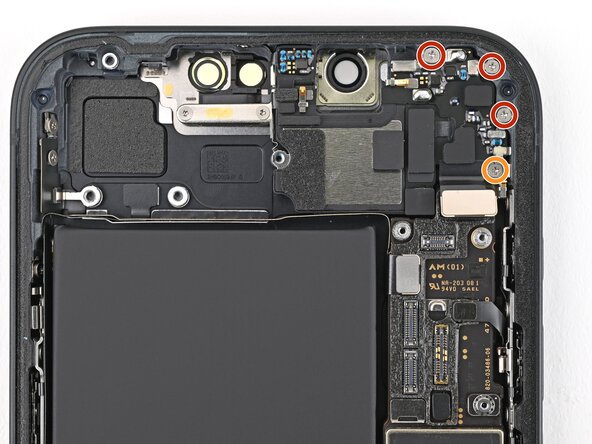
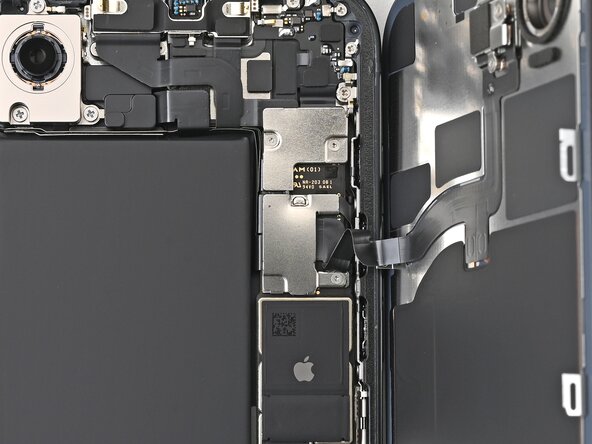
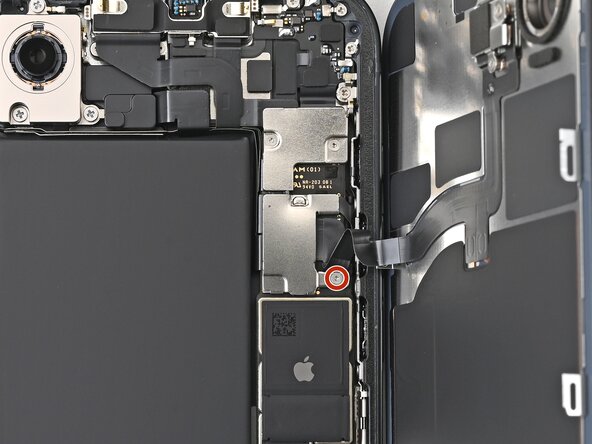
– Grab a Phillips screwdriver and unscrew the three screws holding the rear camera assembly in place.
– Use a standoff screwdriver to carefully remove the 2.4mm screw that’s keeping the camera spacer snug.
– Next up, take out two 2.3mm screws.
– Finally, finish off with one 2.5mm screw to wrap it all up.
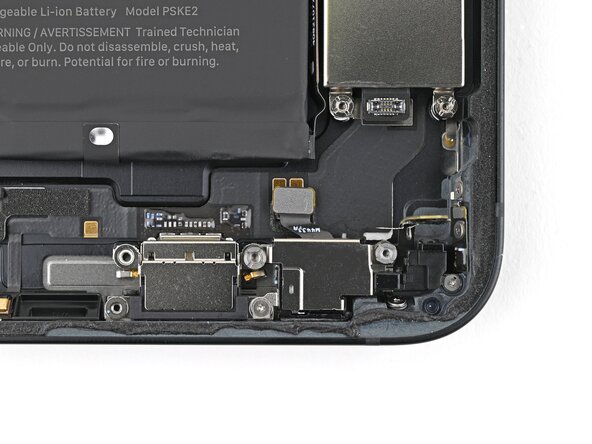
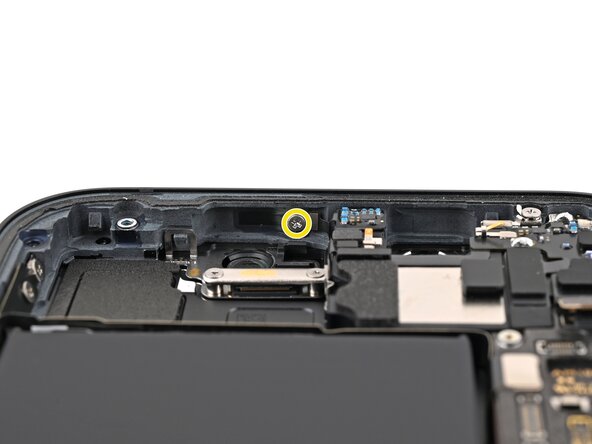
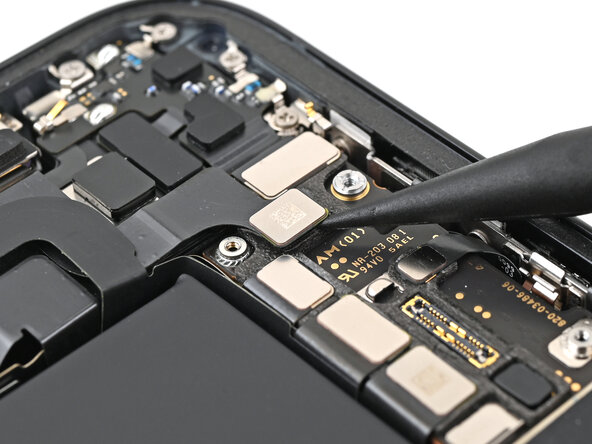
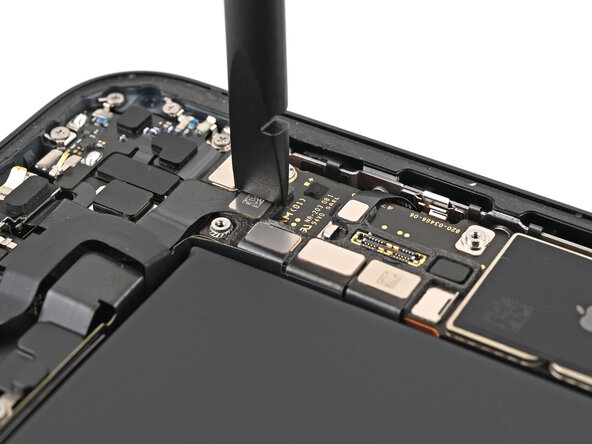
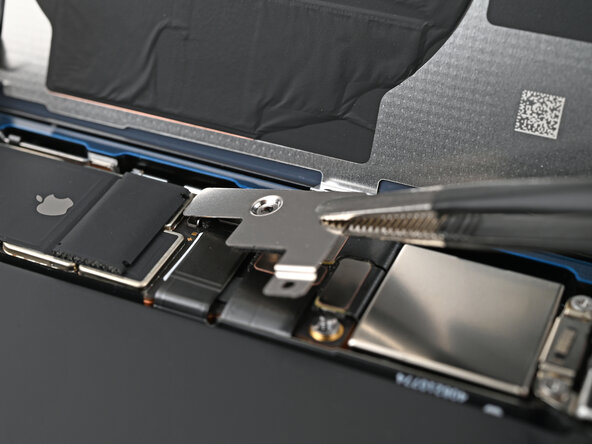
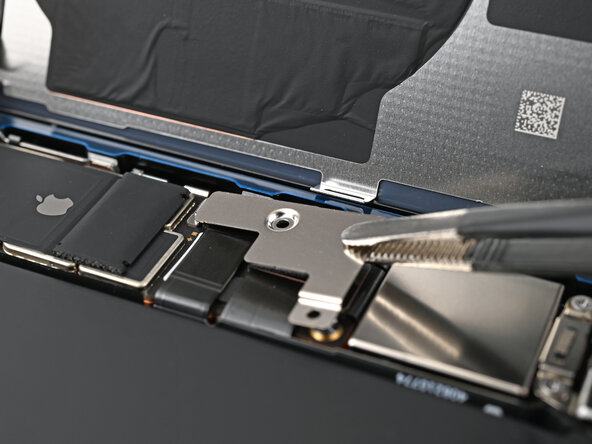
Step 29

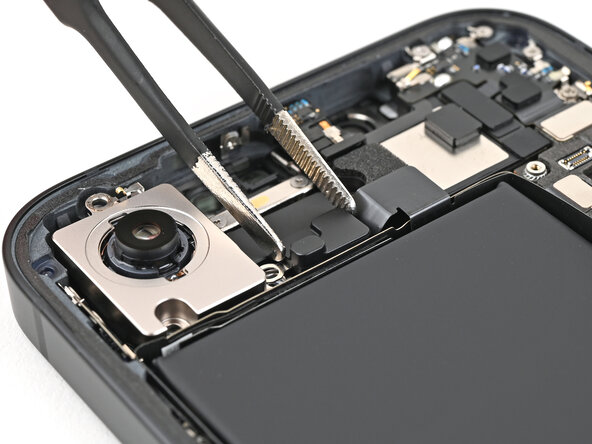
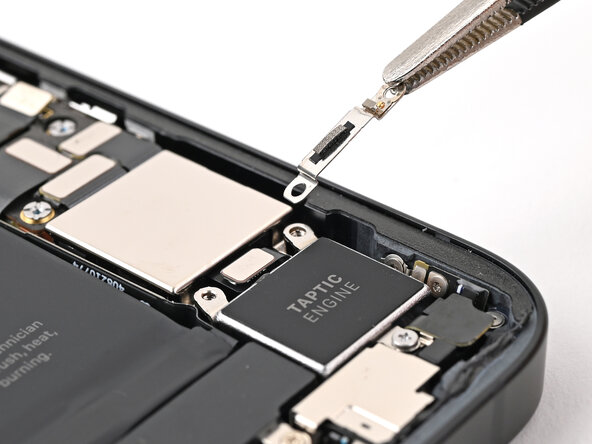
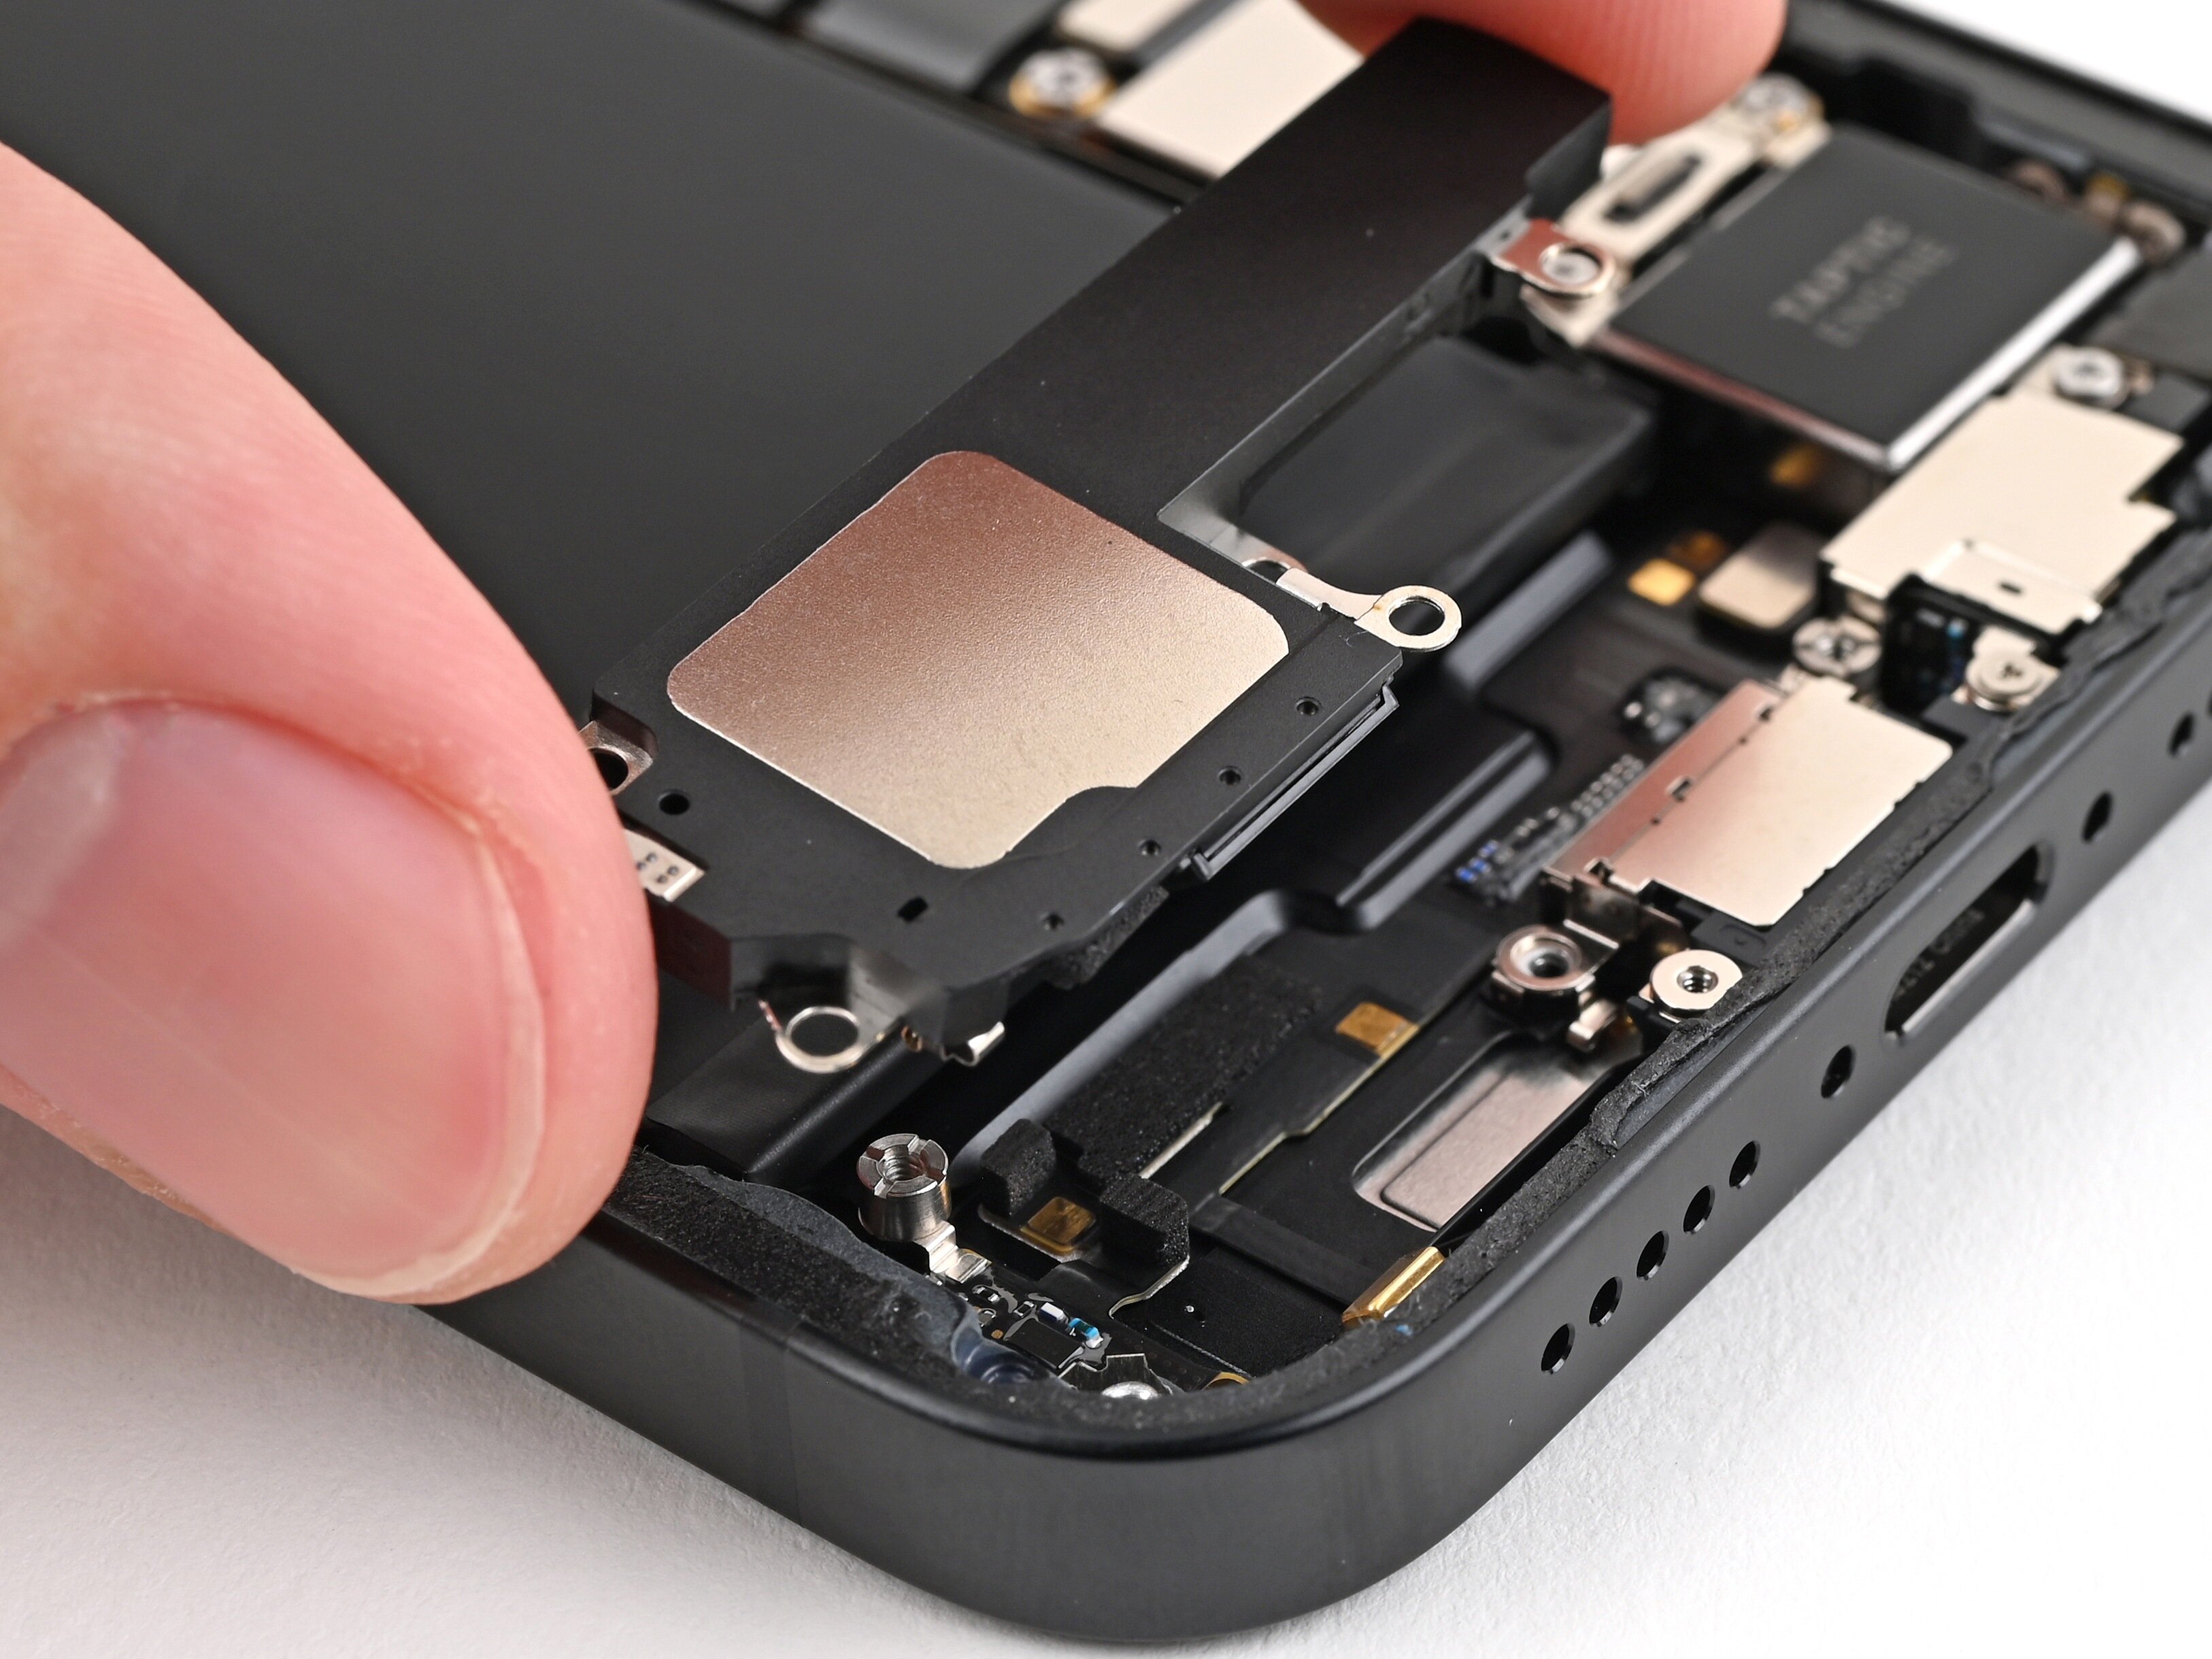
– Grab your tweezers (or just use your fingers) and lift out the camera spacer like a pro. No sweat!
Tools Used
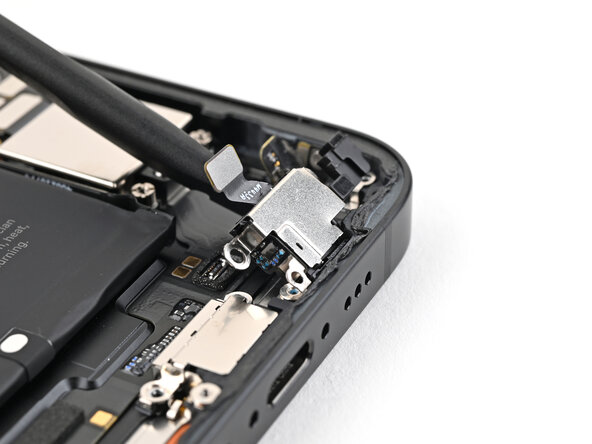
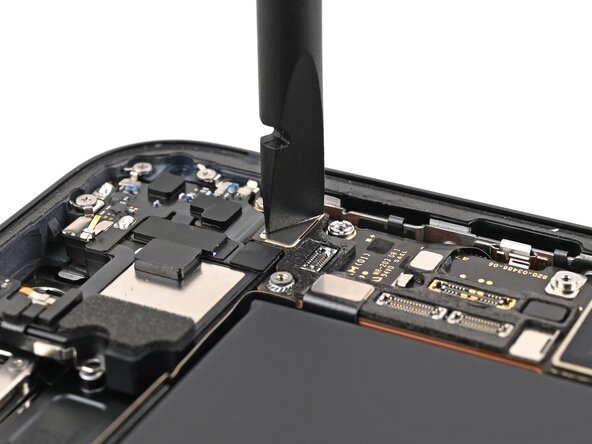
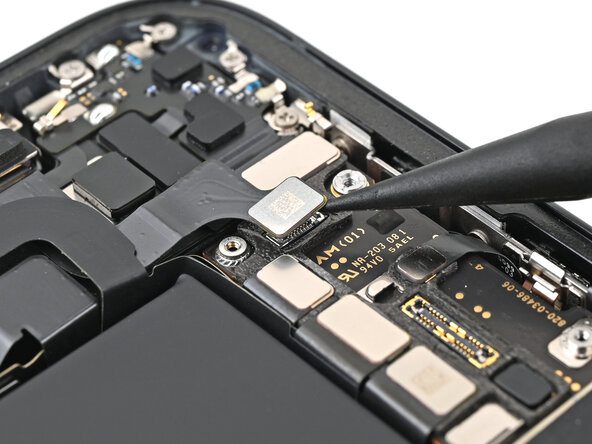
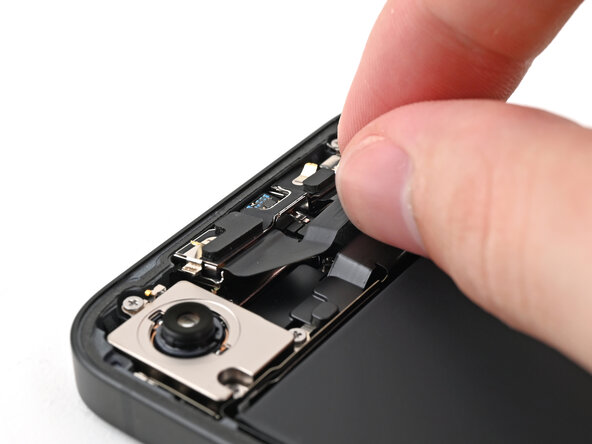
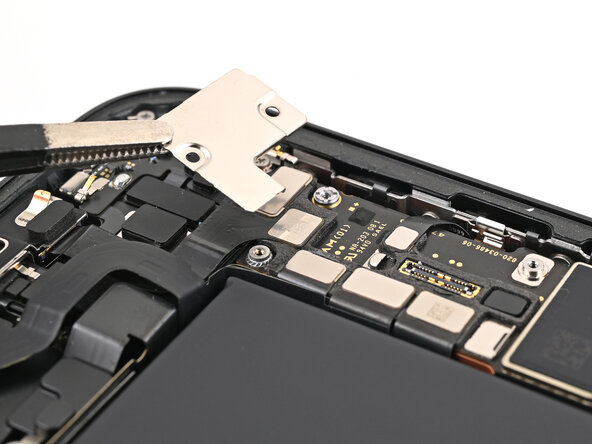
Step 30
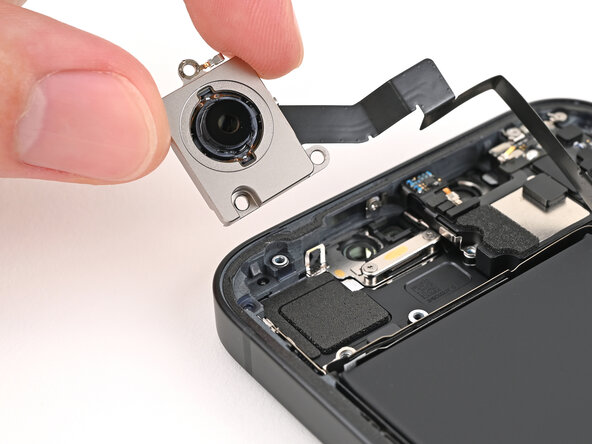
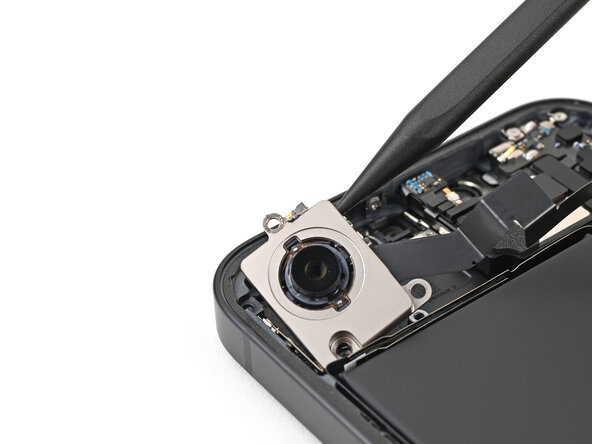
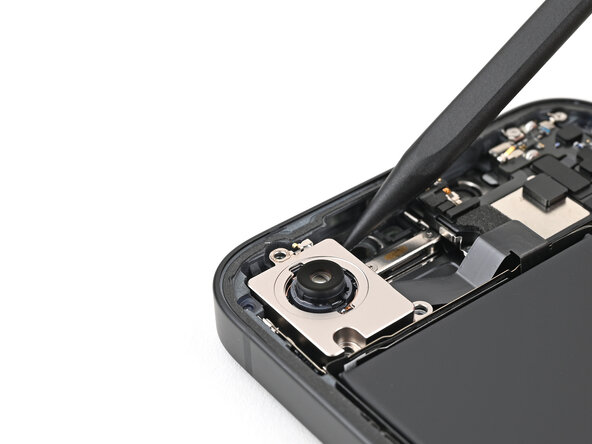
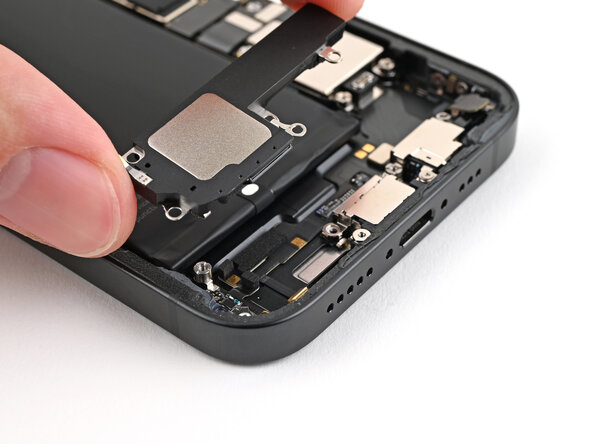
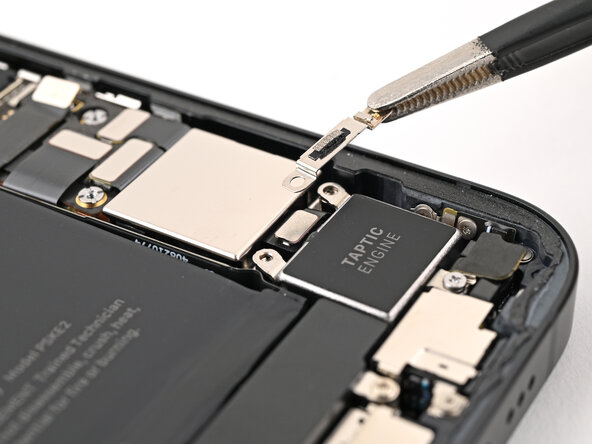
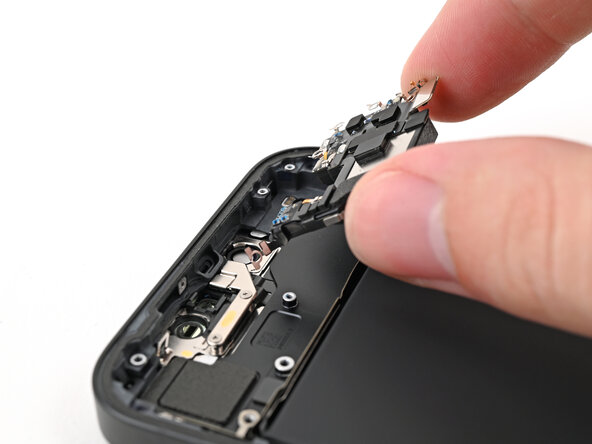
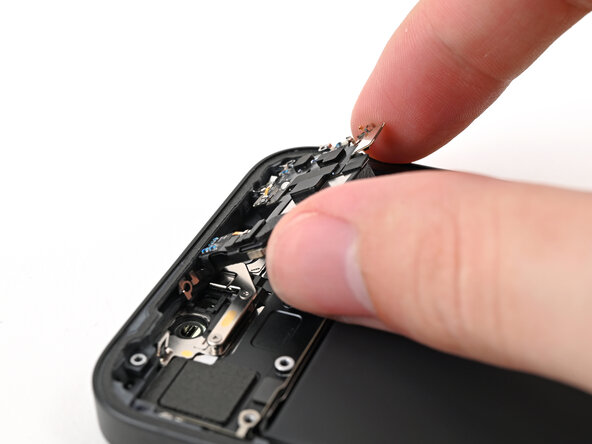
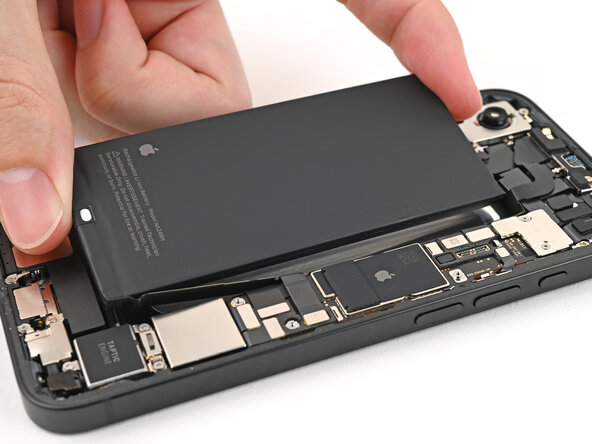
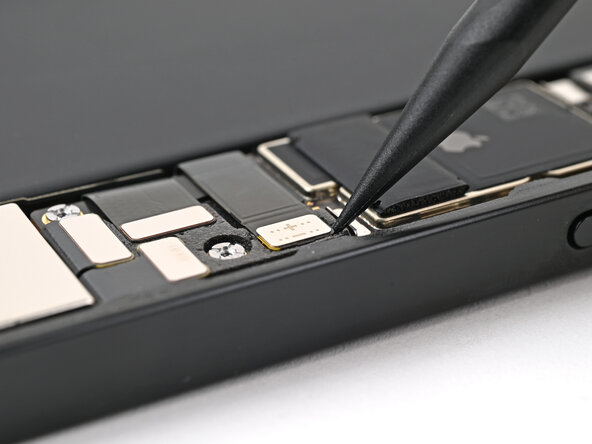
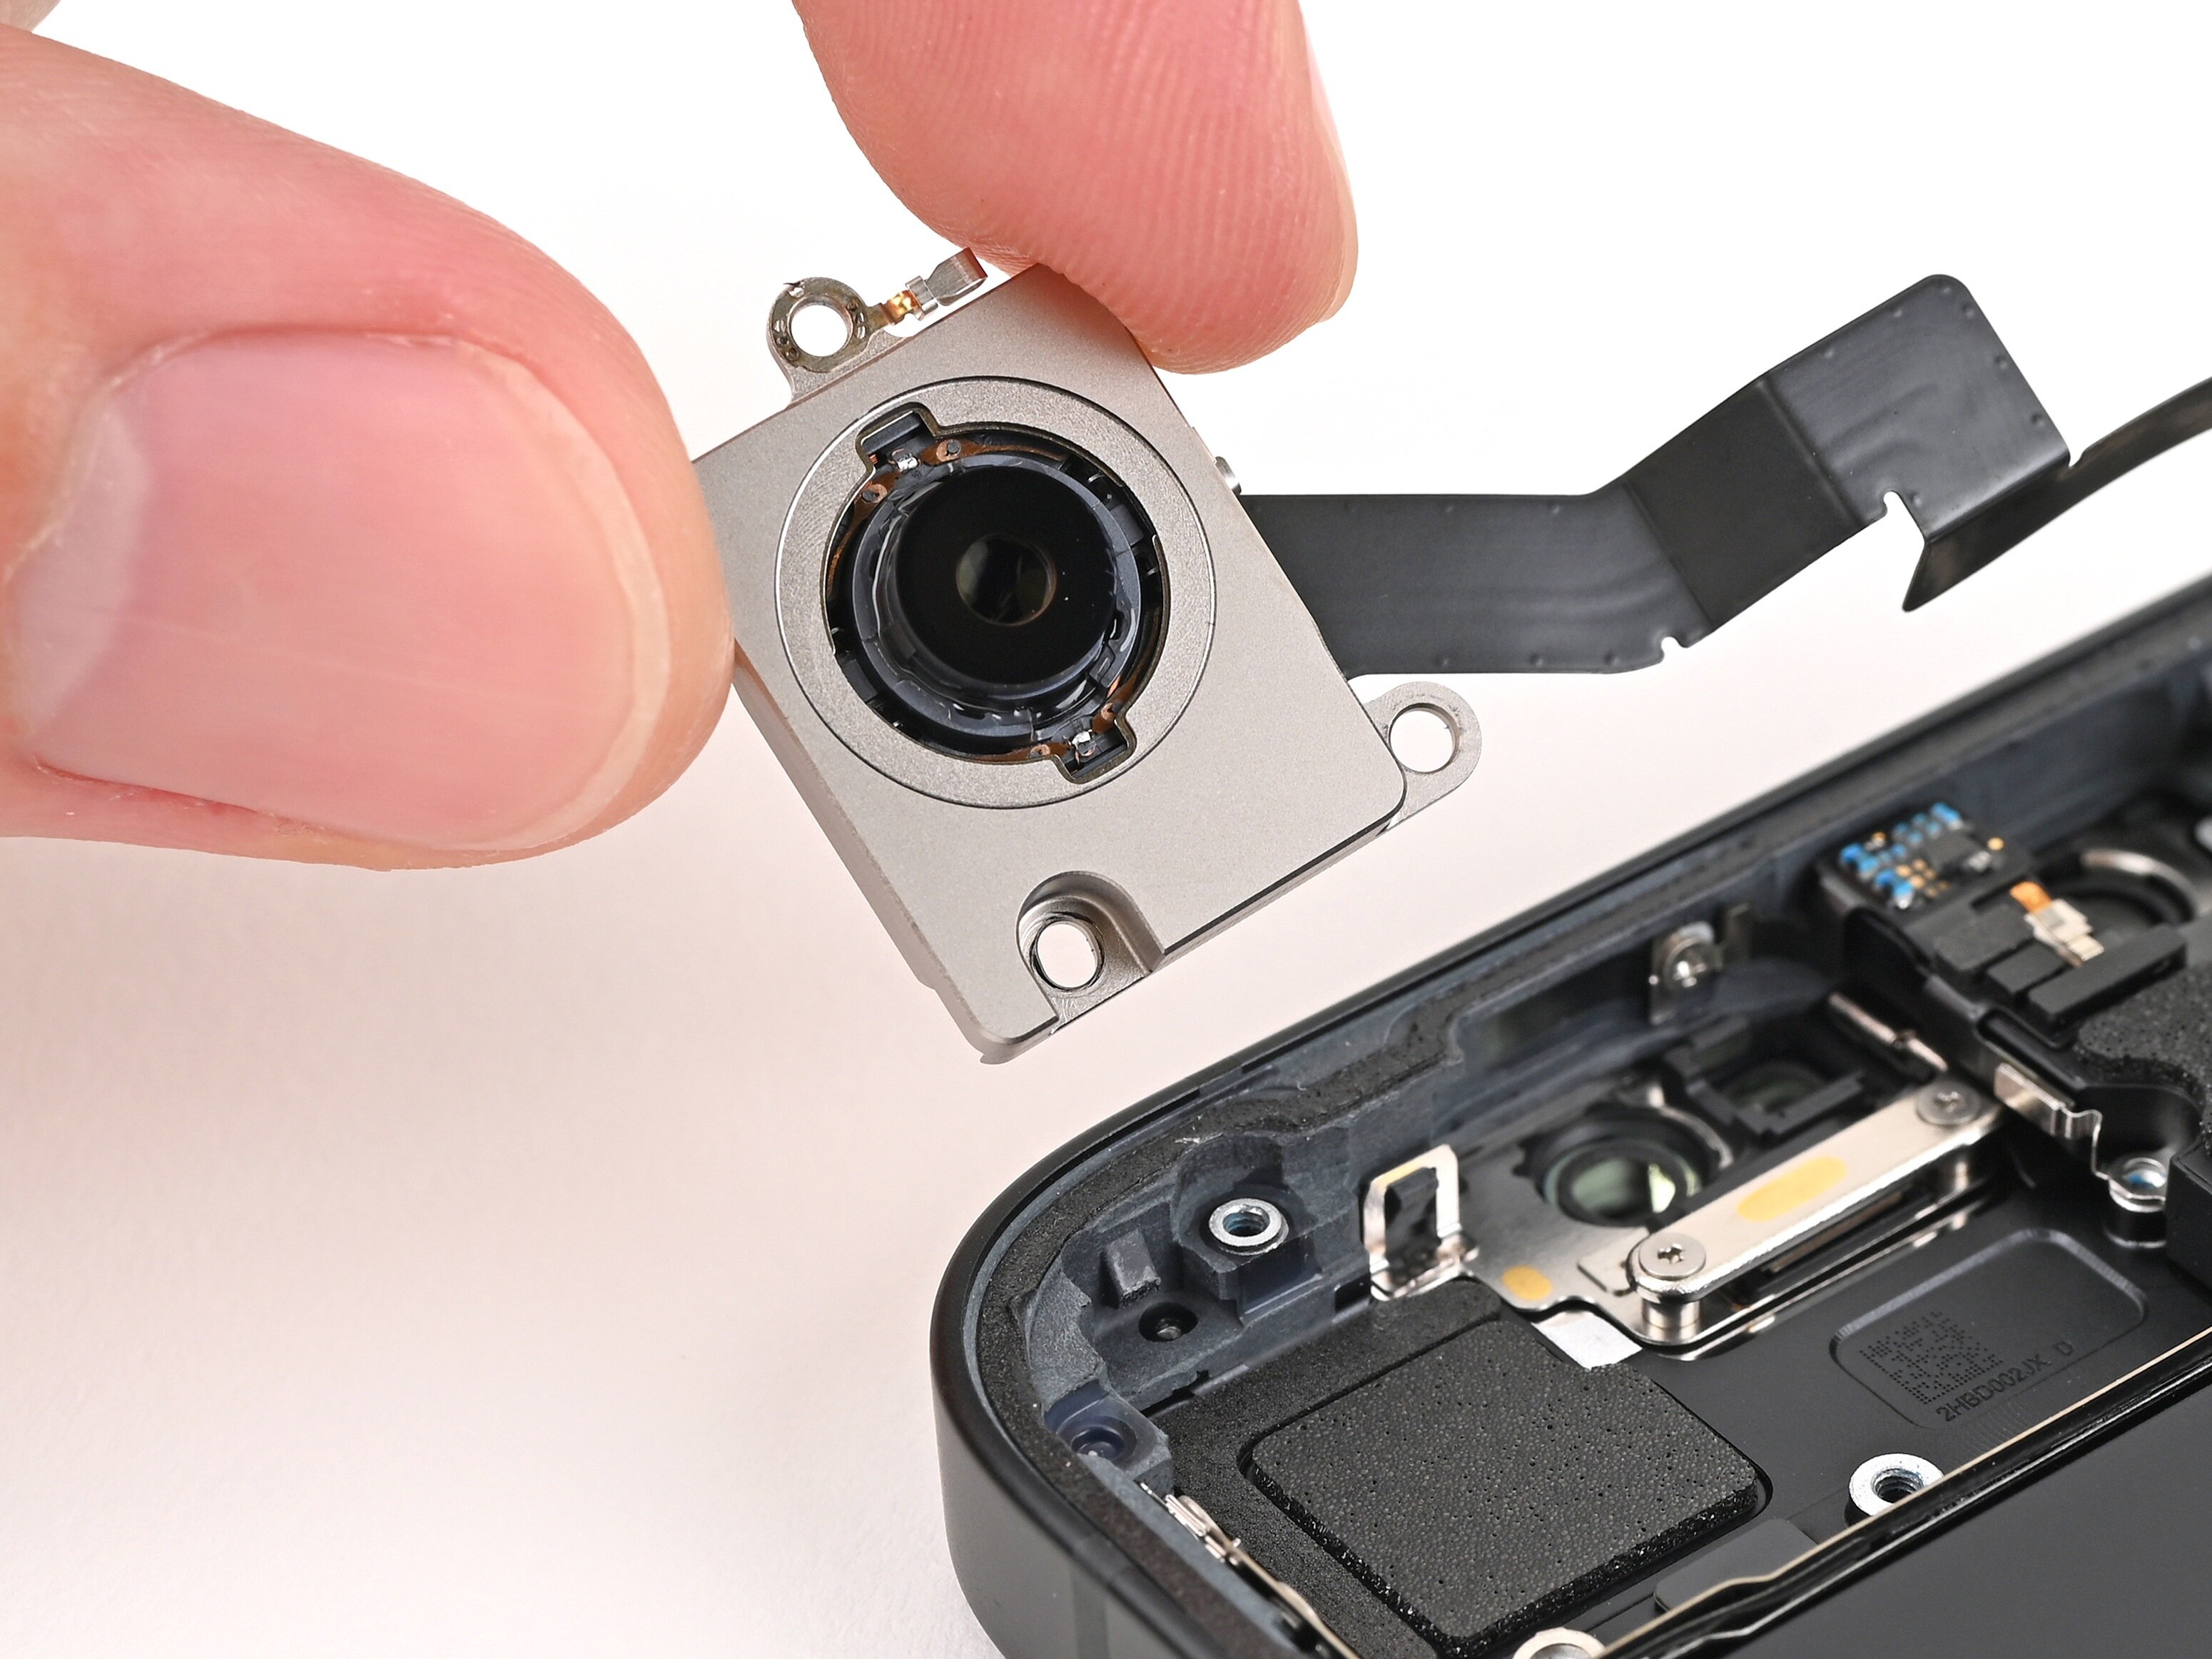
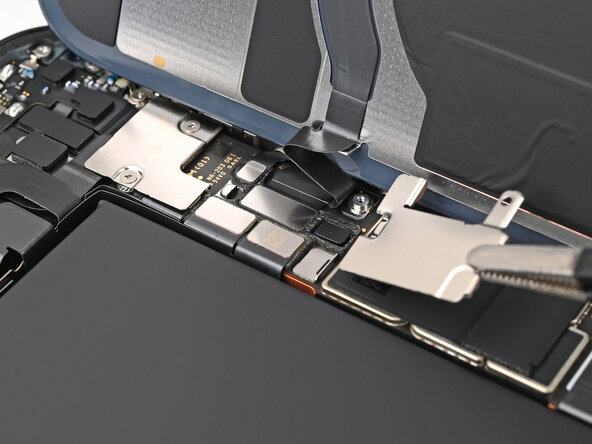
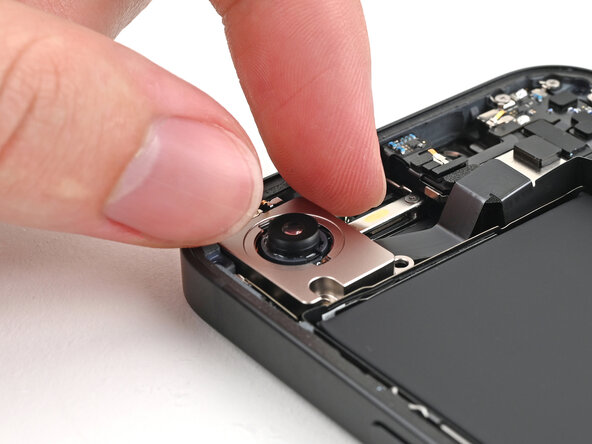
– Gently pop the rear camera assembly up using the tip of your spudger—just enough so you can grab it like a pro.
– Lift out the rear camera assembly and set it aside. Nice work!
Tools Used
Step 31
– Awesome job on getting your device all disassembled! Now, let’s dive into the fun part—putting it all back together. Follow these steps, and you’ll have your gadget up and running in no time!
Step 32

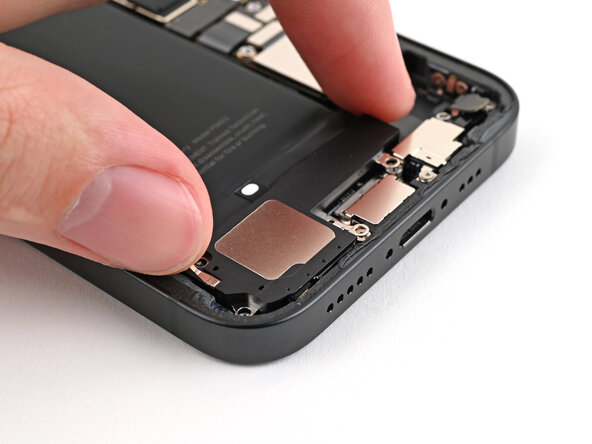
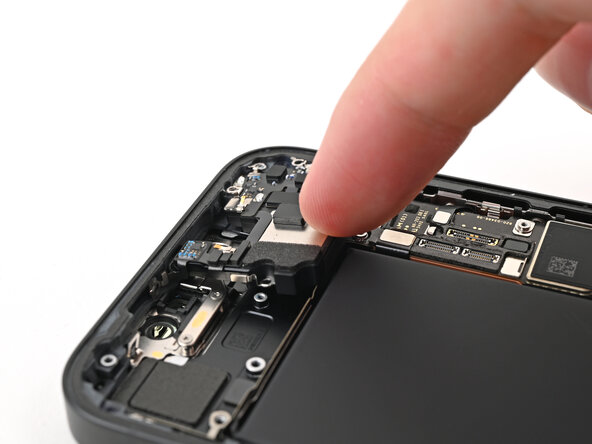
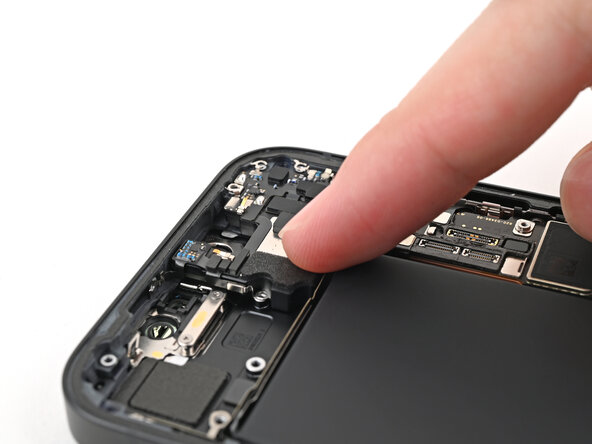
– Gently drop the rear camera assembly into its spot in the frame—like it’s coming home after a long day.
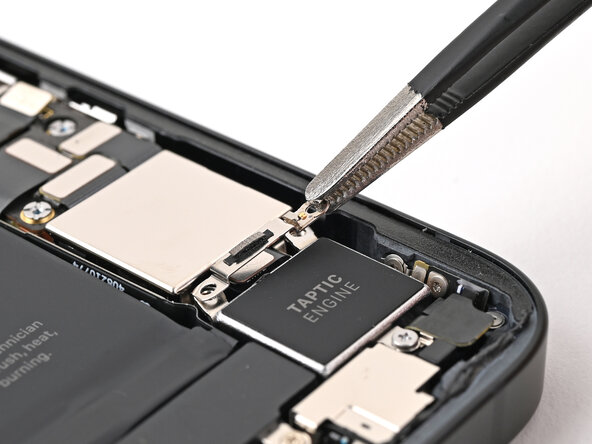
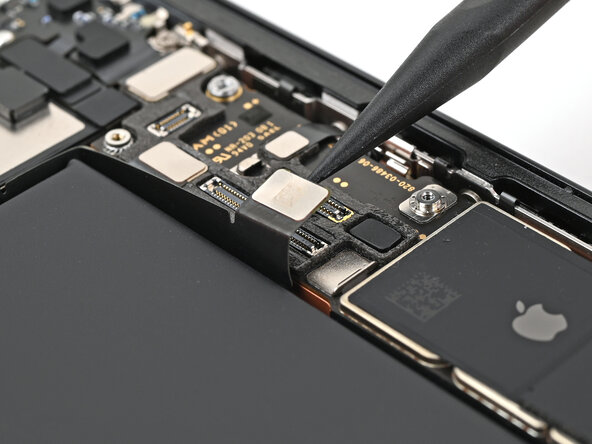
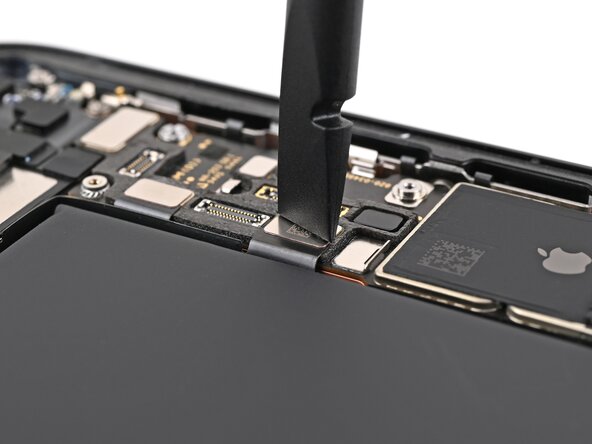
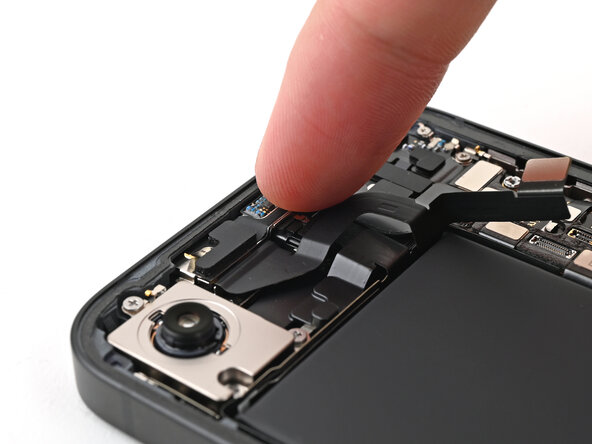
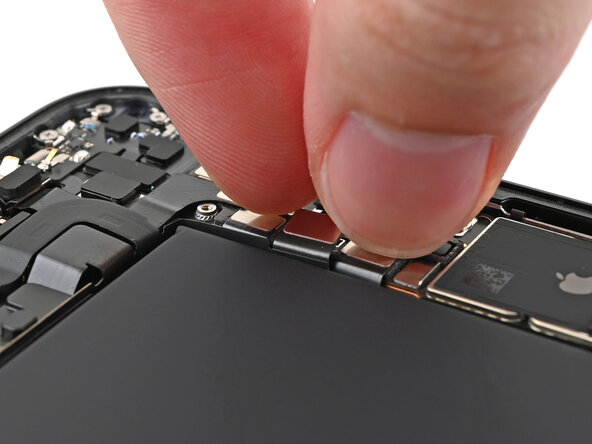
Step 33
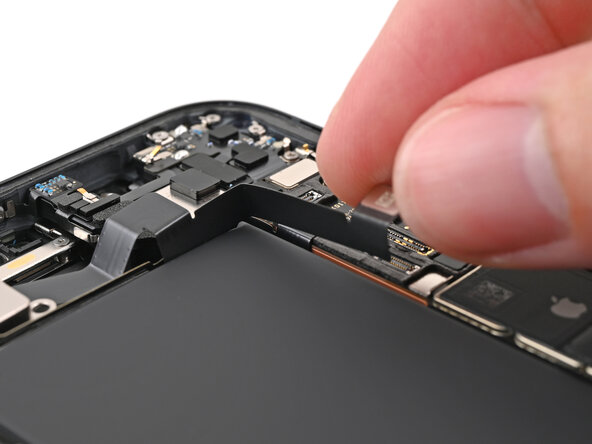

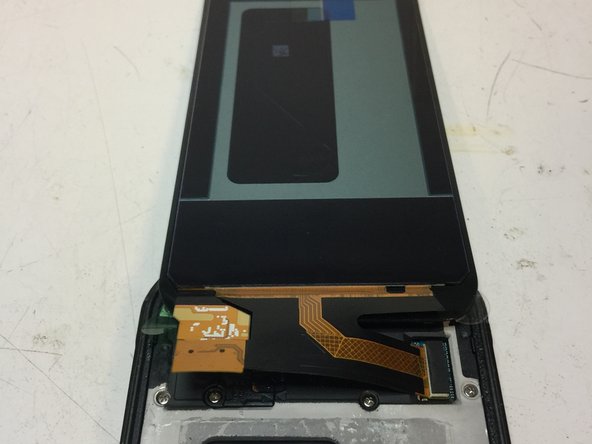
– Gently slide the rear camera assembly cable back into its spot next to the battery—like tucking in a little tech burrito.
Step 34
– Gently slide the camera spacer into its cozy spot in the frame. It’s a perfect fit—just like a puzzle piece!
Step 35

– Grab your trusty Phillips screwdriver and secure the rear camera assembly with three screws—easy does it!
– Switch to a standoff screwdriver to pop in the 2.4 mm-long screw for the camera spacer. Precision time!
– Tighten up two 2.3 mm-long screws. One more for good measure!
– Finish off with one 2.5 mm-long screw. Camera assembly: locked and loaded.
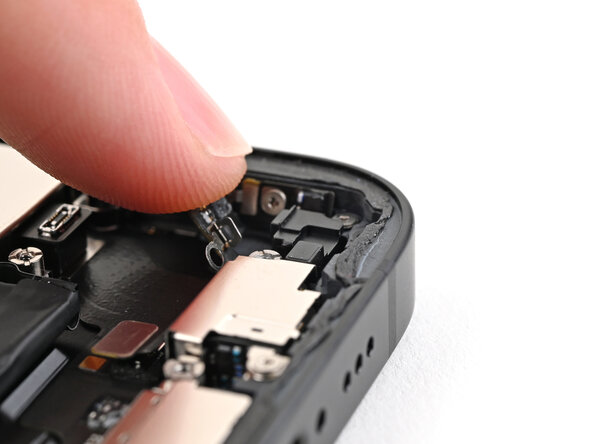
Step 36
– Grab a spudger or just use your fingers and gently connect the rear camera assembly press connector. Easy does it—just a little press to reconnect that connection.
Tools Used
Step 37
– Gently slide the front camera assembly into its spot in the frame, making sure it fits snugly.
– Give the assembly a light press to make sure it’s seated flat and secure.
Step 38
– Gently slide the rear camera assembly cable back into its slot, nestling it along the battery like a cozy little pathway. If you run into any snags, remember you can always schedule a repair to get expert help.
Step 39
– Grab your spudger or just your trusty fingers and gently press those front camera assembly connectors back together. You’ve got this!
Tools Used
Step 40

– Pop that front top connector cover right on the logic board, making sure it sits snugly over those three press connectors.
Step 41

– Grab your trusty tri-point Y000 screwdriver and get ready to secure that top connector cover like a pro:
– First up, you’ll need one 1.0 mm-long screw.
– And don’t forget a 1.3 mm-long screw to complete the job!
Tools Used
Step 42
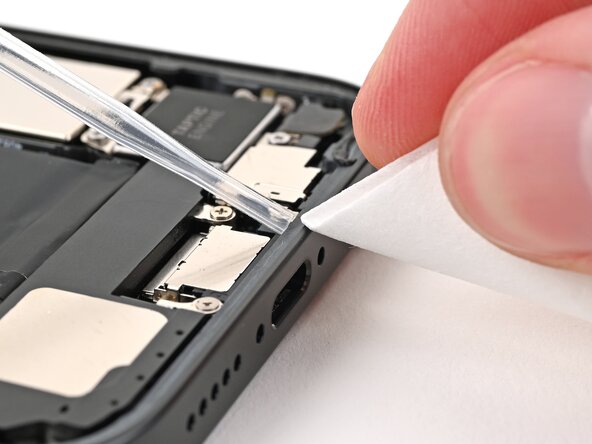
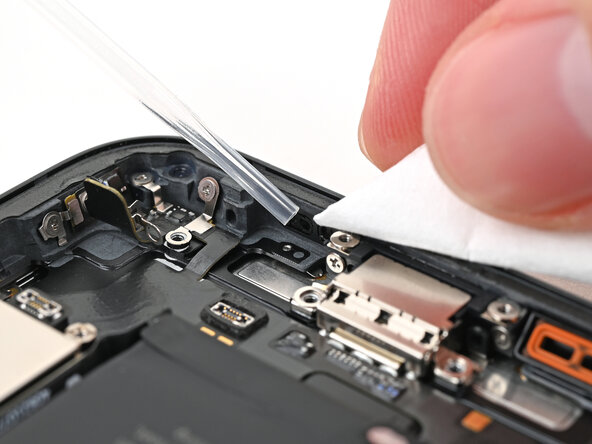
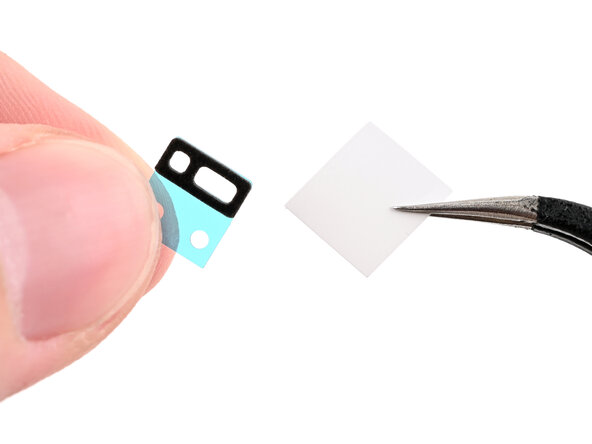
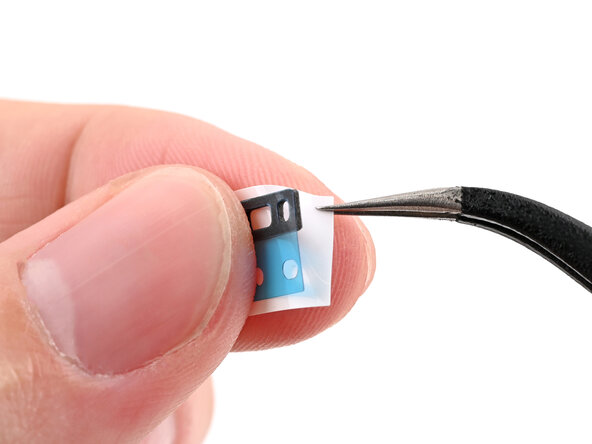
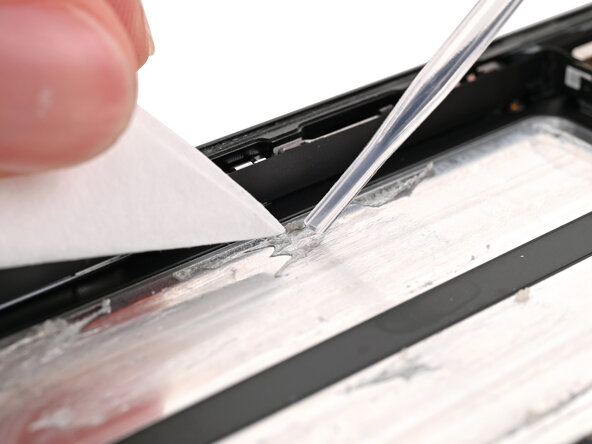
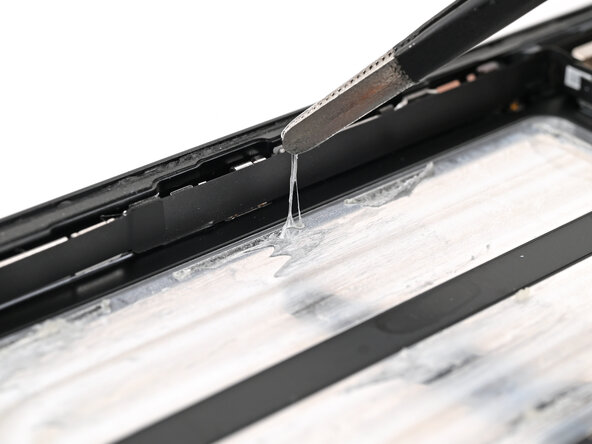
You might want to gather up that adhesive with the tip of a spudger before you give it a gentle pinch with your tweezers.
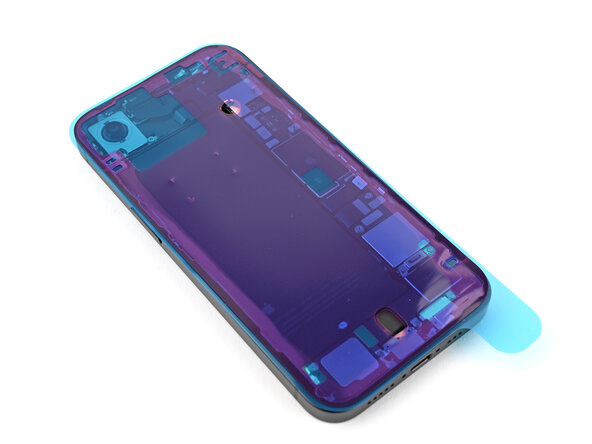
– Grab your tweezers and carefully peel away the adhesive hugging the frame’s edge.
– Take a coffee filter or a lint-free cloth, dab it in some high-strength isopropyl alcohol (over 90%), and wipe away any sticky leftovers.
Step 43
Your liner’s color and the pull tab spots might look a bit different on your adhesive, so don’t be thrown off. Just follow the steps and keep going—salvation repair is here to get it done smoothly.
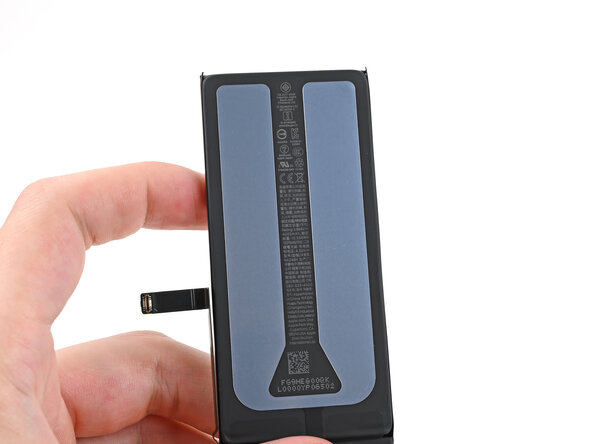
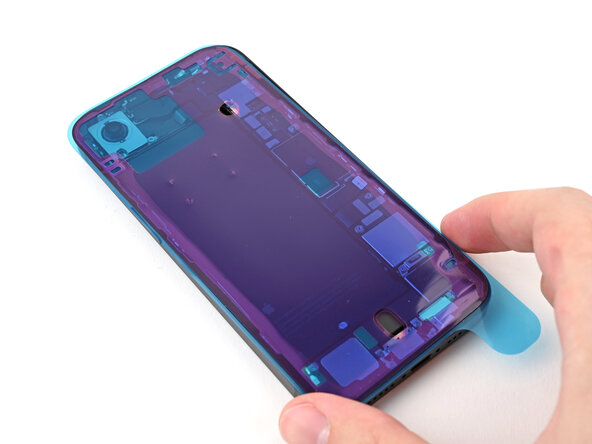
– Place your replacement adhesive onto the frame, making sure the bigger blue liner is underneath and the pull tab is tucked neatly in the bottom-right corner.
– Use handy landmarks like the camera hole and edge notches to line up the adhesive perfectly with the frame.
Step 44
Once the adhesive is set, it’s a one-shot deal—no going back! If it’s not lined up right, you’ll need to remove it and start fresh with new adhesive.
– Grab the pull tab and start peeling the back liner off the adhesive from the bottom—but don’t go wild and rip it all off just yet.
– Swing that blue liner aside for a sec and line up the adhesive with the bottom edge of your iPhone.
– Nestle the bottom edge of the adhesive into its spot in the frame, making sure those spring contacts on your iPhone are cozy in their cutouts in the liner.
Step 45
When you line up the bottom edge of the adhesive just right, the sides and top will slide right into place like magic! If things get a little wonky, no worries—just peel it off and start fresh with a new adhesive.
Got a little adhesive misalignment and no backup on hand? No biggie! You can pop your iPhone back together and use it as usual, but just remember that its water resistance will take a vacation until you get some new adhesive in there.
– Keep peeling the back liner off that adhesive like a pro, all while giving it a gentle press to secure it snugly along the edges of your iPhone’s frame.
Step 46
– Use the flat end of a spudger to press the adhesive into place around the perimeter of the frame.
Tools Used
Step 47
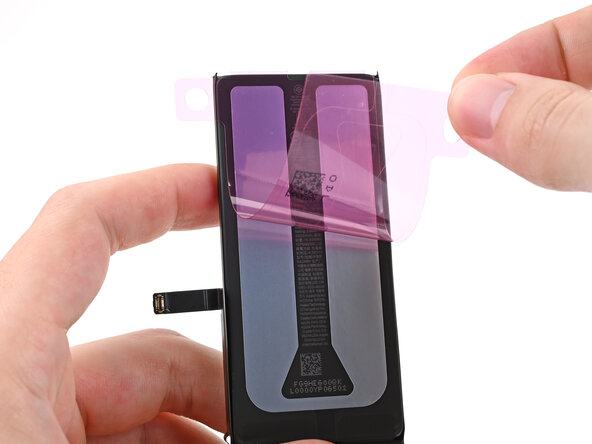
– Gently use the end of your spudger to lift the pull tab located in the top right corner of the pink adhesive liner until you can comfortably grab it with your fingers.
Tools Used
Step 48
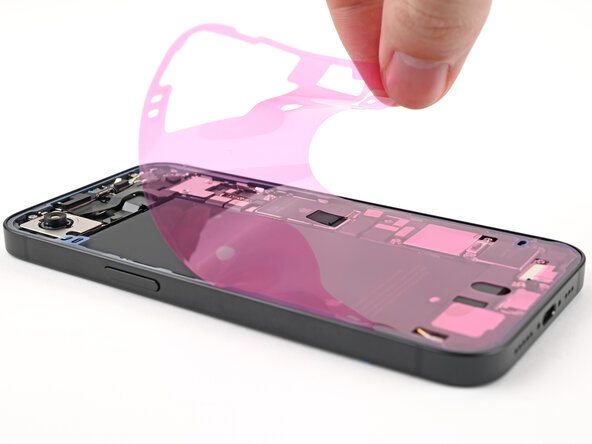
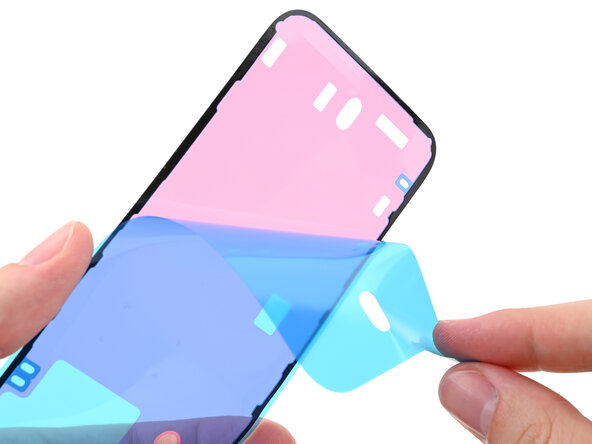
– Peel back the pink liner from the frame using the pull tab to expose the blue liners underneath
Step 49
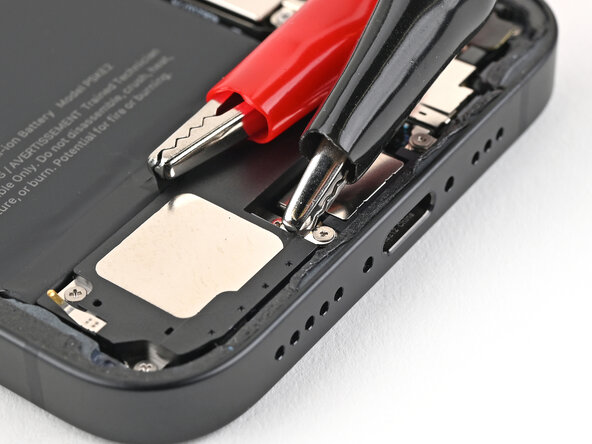
– Gently lift the back glass on the right side of your iPhone, using a sturdy box or similar item to give it a little boost.
– Grab your trusty spudger or your finger and snugly connect the charging coil press connector, followed by the battery press connector.
Tools Used
Step 50
– Place the middle connector cover over the wireless charging coil press connector, making sure it slightly overlaps the slot on the logic board where the bottom clip fits.
Step 51

– Gently press the cover down onto the logic board with your finger. Then, while keeping that pressure, slide the cover upward so the metal clips slide into their designated slots on the logic board. Need a hand? You can always schedule a repair.
Step 52
– Grab your tweezers and gently set the top part of the lower connector cover into its spot on the logic board.
– Carefully position the lower connector cover over the press connector like a pro.
Tools Used
Step 53
– Grab your tri-point Y000 screwdriver and tighten up that 1.0 mm screw to secure the middle connector cover. It’s a small screw, but it does a big job!
– Now, use that same tri-point Y000 screwdriver to snug down the two 1.3 mm screws for the lower connector cover. Easy peasy, right?
Tools Used
Step 54
Gently hold the back glass above the frame, making sure it doesn’t stick to the adhesive, and carefully peel off the liner along the right edge. Patience is key—take your time to avoid any cracks or damage. If you need a hand with tricky parts, you can always schedule a repair.
– Grab your tweezers and pinch those pull tabs on the three blue liners. Peel ’em off to reveal the sticky side underneath.
Tools Used
Step 55
– Position the back glass just above your phone and get it in line with the frame. You’ve got this!
Step 56

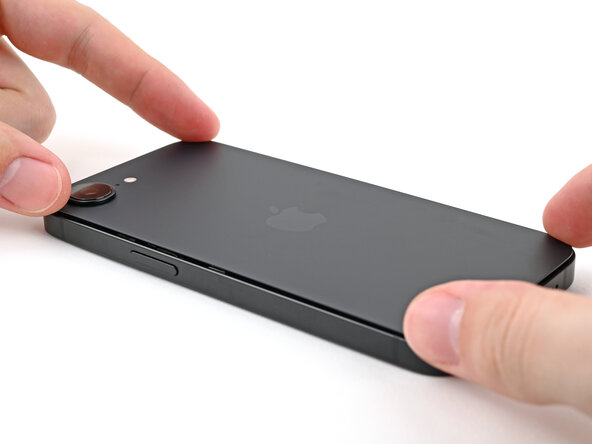
– Place the back glass gently onto the frame, then press down until you hear the clips click into place.
– Run your fingers around the edges of the back glass to make sure all the clips are securely locked in.
Step 57

– To help the adhesive set, gently heat the edges of the back glass with an iOpener, hair dryer, or heat gun until it’s warm and touchable. Then, press firmly around the edges of the back glass. If you have screen vise clamps, use them to boost the bonding strength of your new adhesive. No clamps? No worries—keep reading for other ways to secure the back glass. If you need a hand, you can always schedule a repair.
Tools Used
Step 58
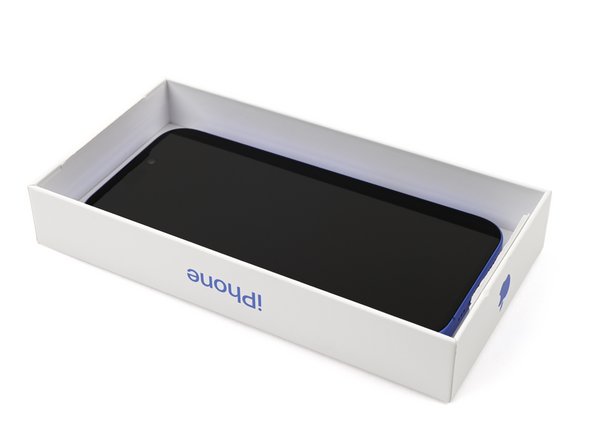

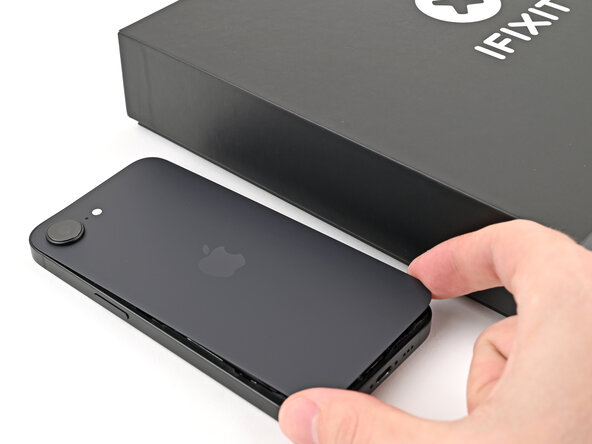
– Got the box your iPhone came in? Awesome! Grab the lid and set it down on a flat surface.
– Now, carefully place your iPhone with the screen facing up right in the center of the lid, making sure the camera bump fits neatly into its little spot.
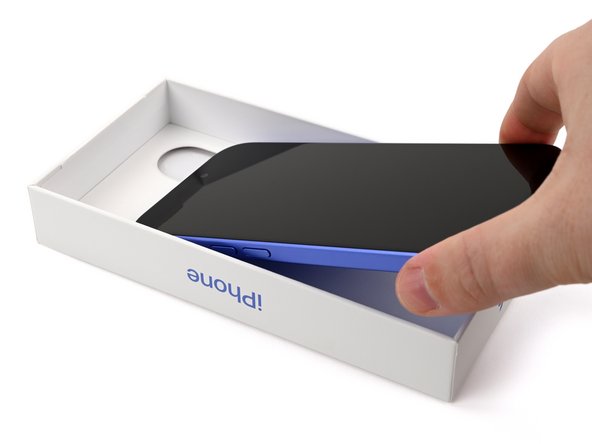
– Find something roughly the size of your iPhone but taller than the sides of the box. Stack it gently on top of your iPhone, then add a few more heavy items on top to help the process.
– Let those items chill for at least thirty minutes. If you’re using lighter objects, you might want to leave them stacked for longer, maybe overnight for the best results.
To get a nice, even compression on your iPhone and help the back glass stick better to the frame, remember to consider the camera bump. If you don’t have the original box, no worries—just skip this step and use an alternative method. Need a hand? You can always schedule a repair for expert assistance.
Step 59
No box? No problem! Just follow the next three steps to make sure your iPhone’s back glass gets compressed evenly.
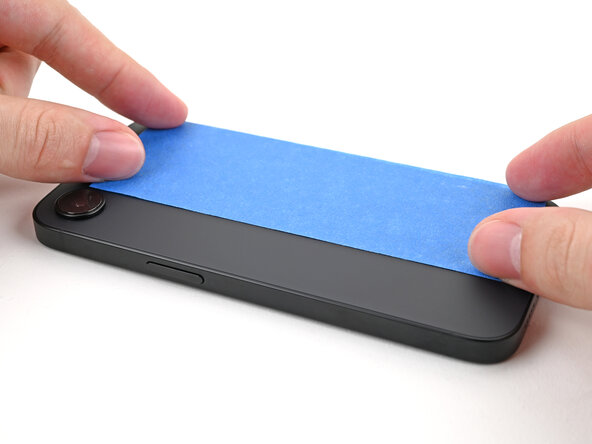
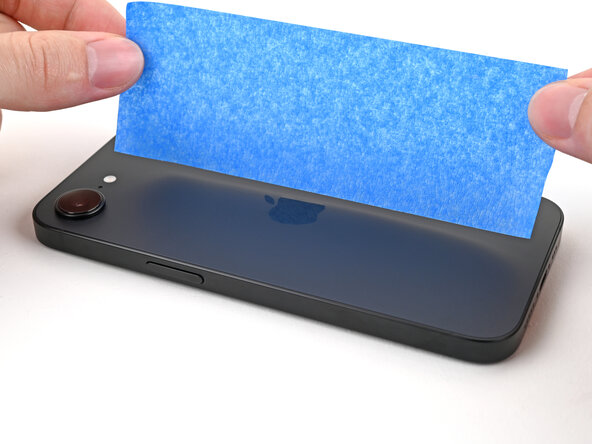
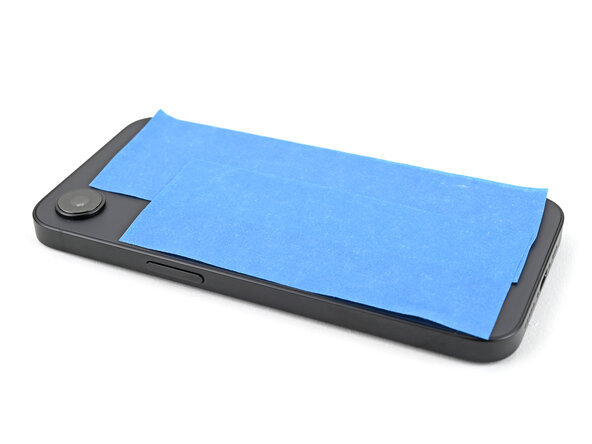
– Gently lay your iPhone face down on a soft, flat surface—let’s keep that screen safe and sound!
– Give the back glass a little TLC by applying tape to protect its finish. A small step for a big win!
Step 60
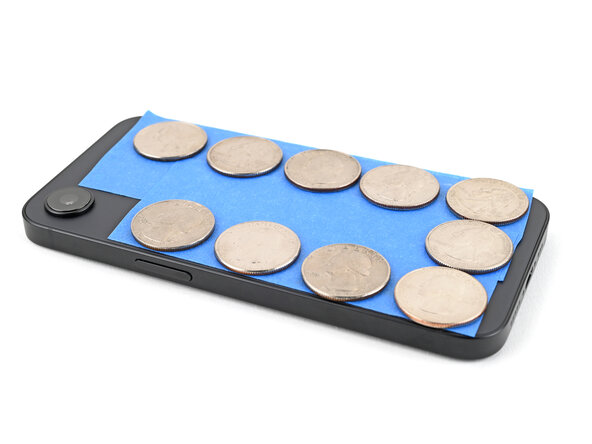
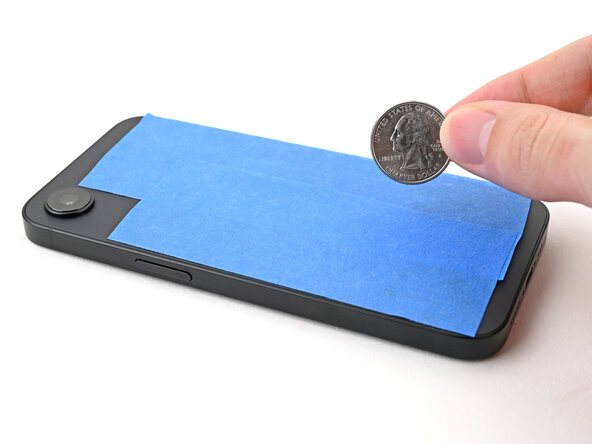
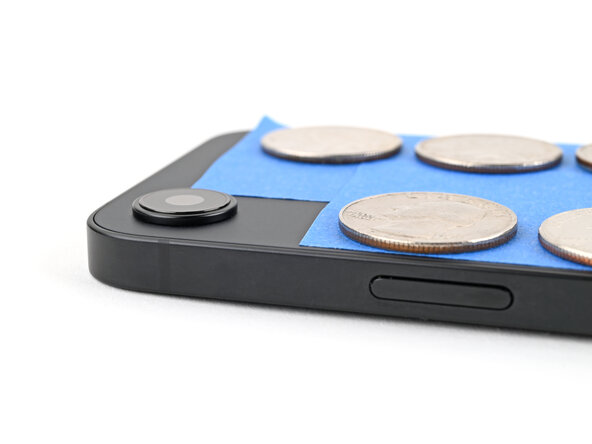
Depending on how thick the coins are, you might need to stack a few layers to get the right thickness. Keep at it—sometimes a little extra padding is just what’s needed.
– Lay down a layer of coins or similar thick objects along the edges of the back glass. Spread them out evenly and ensure they’re at least as tall as the camera bump to keep everything level.
Step 61

Coins might leave marks on the surface below, so best to avoid using anything precious.
– Grab a stack of your favorite hefty books or some solid objects and pile them on top of your iPhone.
– Let that weight do its thing for at least thirty minutes. If you’ve chosen lighter items, feel free to let them hang out a bit longer. For the best results, consider leaving them stacked overnight!
Step 62


– Once you’ve finished your repair, be sure to calibrate your genuine replacement rear camera assembly using Apple’s Repair Assistant. Just head to Settings → General → About → Parts & Service History, tap Restart & Finish Repair, and follow the prompts on screen.
– Don’t forget to recycle your e-waste responsibly by taking it to an R2 or e-Stewards certified recycler.
– If things didn’t go exactly as planned, no worries! Try some basic troubleshooting or reach out to our iPhone 16e Answers Community for a hand.
–
Success!