Duration: 45 minutes
Steps: 28 Steps
Safety first! Let your battery chill at 25% or less before you dive in—keeps things shock-free and your phone extra thankful.
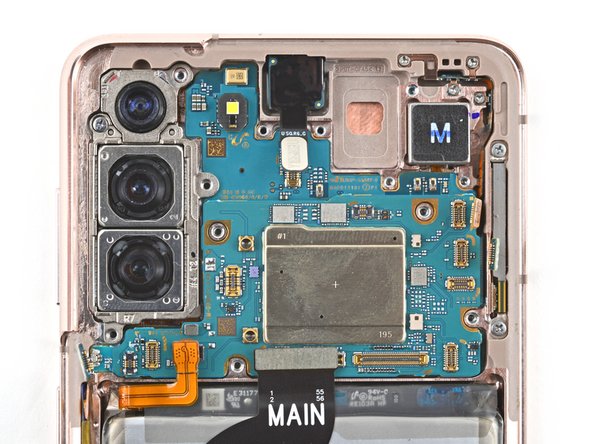
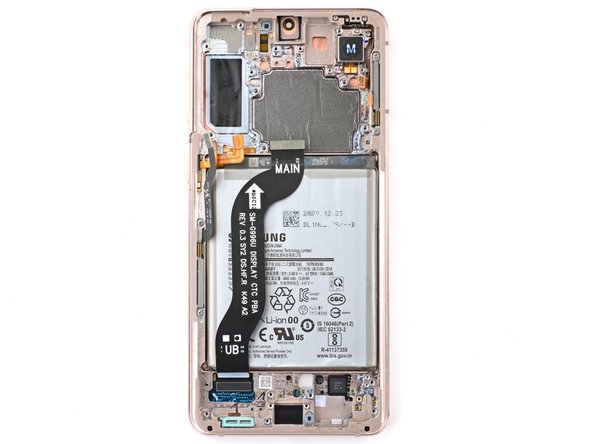
Ready to swap out that secondary interconnect cable in your Samsung Galaxy S21? Before diving in, make sure to discharge your battery below 25%—it’s a smart move to keep things safe and cool. If your battery’s looking a bit swollen, handle with extra care. Follow these steps to carefully disconnect and replace the cable, and if at any point you need a hand, you can always schedule a repair to get professional help.
Step 1

Make sure your phone is completely powered off before you dive in—your future self will thank you!
You can use a hair dryer, heat gun, or hot plate for this step—just keep it chill and don’t fry your phone. The screen, battery, and plastic cover are all pretty sensitive to heat, so don’t go full volcano mode.
– Warm up your iOpener and set it on the lower edge of the back cover for a couple of minutes. Let that heat work its magic!
Tools Used

Step 2


Keep the pick shallow—no deeper than 5 mm. Going further might poke something you don’t want poked!
Depending on how old your phone is, this might be a bit tricky. If you’re running into some trouble, just crank up the heat a little more on the edge and give it another go!
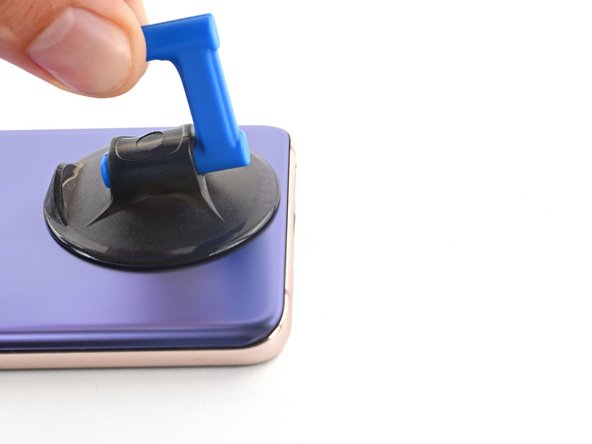
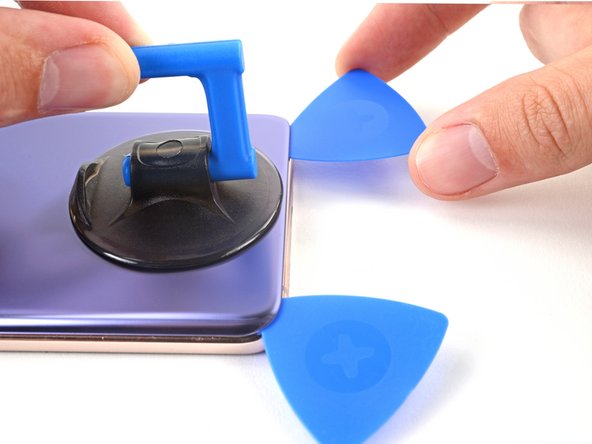
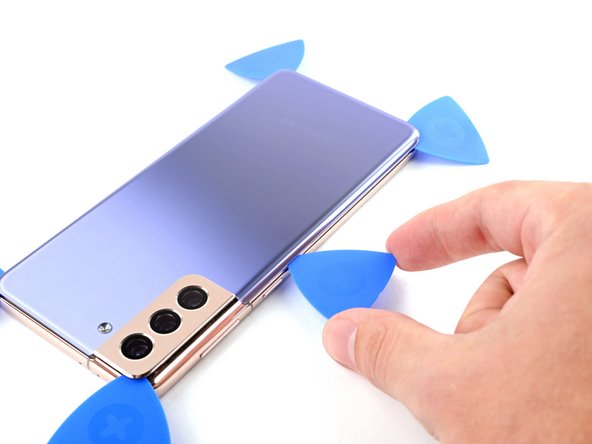
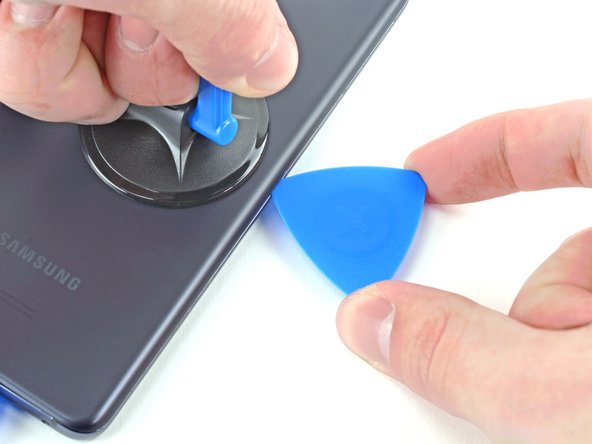
– Stick a suction cup near the bottom edge of your phone’s back—right in the center is your sweet spot.
– Give that suction cup a confident pull upwards to open up a small gap between the back cover and the frame.
– Slide an opening pick into the gap you just made. You’re officially in!
Step 3


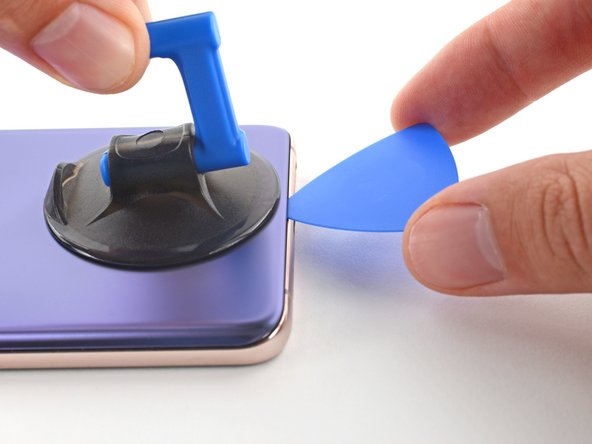
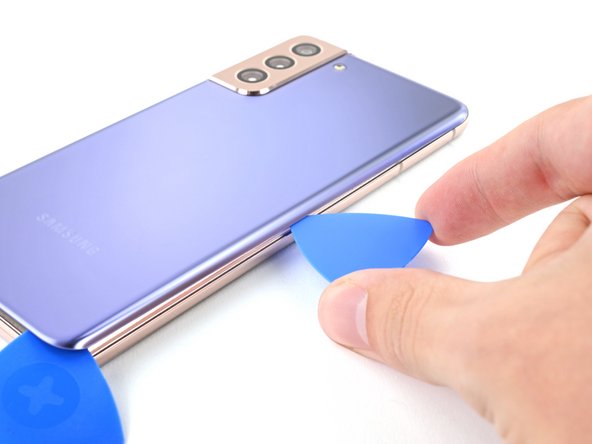
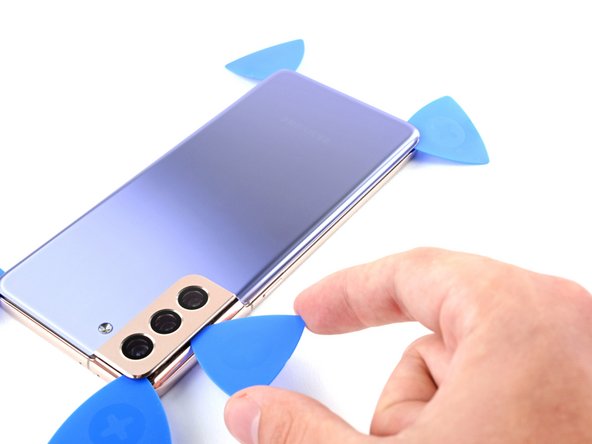
– Gently slide your pick back and forth along the bottom edge to cut through the adhesive. Keep the pick in place afterward to stop the adhesive from sealing back up.
Step 4

– Warm up that iOpener and give the left edge of the back cover a cozy two-minute hug!
Tools Used
Step 5


Don’t go deeper than 5 mm with the pick, or you might poke something vital inside. Keep it shallow and safe!
– Place a suction cup on the back of the phone, as close to the middle of the left edge as you can manage.
– Gently pull up on the suction cup, applying firm and steady pressure until you create a small gap between the back cover and the frame.
– Slide an opening pick into that gap to get things moving.
Step 6


Be careful not to cut past where the camera shell meets the back cover—otherwise, you might end up cracking the plastic. Keep it tidy and stay within the lines to keep everything looking sharp.
– Glide an opening pick down the left edge until you hit the bottom left corner—you’re slicing through that sticky adhesive.
– Keep the pick parked right there so the adhesive doesn’t sneak back together.
Step 7

– Give the back cover’s right edge a warm hug with a heated iOpener for about two minutes.
Tools Used
Step 8


Keep your pick shallow—just 3 mm tops—so you don’t end up poking the secondary interconnect cable hiding out along the right edge.
– Place the suction cup on the back of your phone, aiming for the center of the right edge. Make sure it’s nice and snug.
– Give the suction cup a firm, steady pull to gently separate the back cover from the frame, creating a small gap.
– Slide an opening pick into the gap and you’re on your way!
Step 9


– Gently slide the opening pick along the right edge of the back cover, moving it back and forth to slice through the adhesive.
– Leave the pick in place to keep the adhesive from sticking back together. You’ve got this!
Step 10


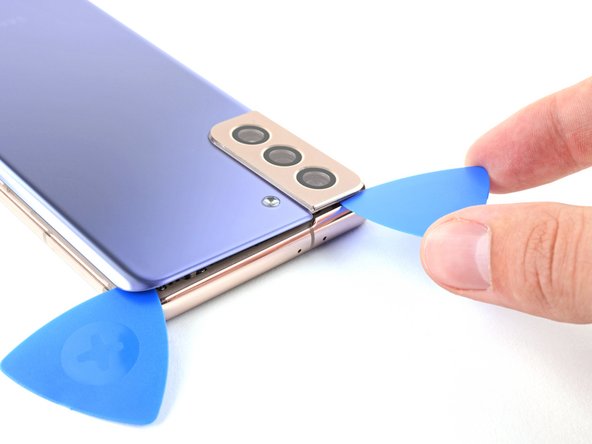
– Start by gently rotating the right-edge opening pick around the top-right corner of the phone. Take your time—patience is key to a smooth lift.
Insert the pick gently, up to 5 mm max—going further might risk damaging those delicate internal parts. Take it slow and steady, and if you need a hand, you can always schedule a repair.
This technique works on all the corners, but just a heads-up, avoid the top-left one where the rear-facing camera hangs out.
Step 11


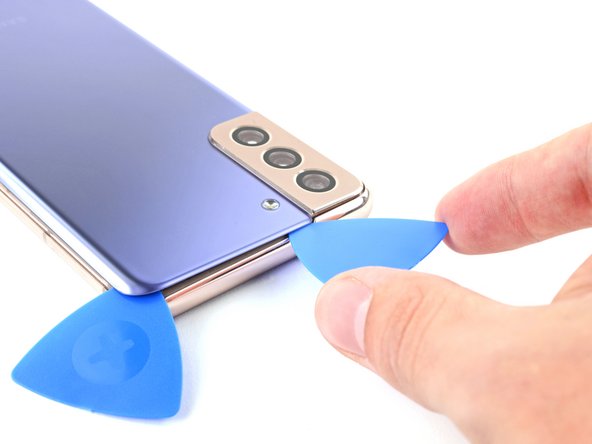
– Slide your top pick as close as you can to the camera shell—don’t be shy, get in there!
– Now, do the same with the pick on the left edge. You’re practically a phone ninja at this point.
Step 12

– Warm up your iOpener, then let it chill on the camera shell for about two minutes.
Tools Used
Step 13


Gently insert the pick no more than 5 mm to keep that camera safe and scratch-free. Easy does it—no need to force it.
If this trick doesn’t do the job, just roll on to the next step for a different approach. If it works, you can skip ahead and keep cruising!
– Turn the back cover counterclockwise to loosen it up and create a small gap between the camera shell and the frame.
– Gently slide an opening pick into that gap to help lift it away.
Step 14


Take it easy with this trick—going too hard might give your plastic back cover a nasty crack.
– Gently slide the two picks toward the camera shell, slipping them under the corners of the back cover next to the camera. Then, wiggle the picks back and forth along the gap between the back cover and the camera shell until you gently pry them apart and create a space between the camera shell and the frame. If you need a hand, you can always schedule a repair.
Step 15


The frame and camera shell are basically glued together like best friends, so don’t be shy—warm things up a few times to loosen that sticky bond.
– Gently slide an opening pick between the camera shell and the frame to carefully cut through the adhesive. Take your time, and if you need a hand, you can always schedule a repair.
Step 16


Heads up! There’s a plate around the flash on the back cover, and your pick might snag on it—just wiggle gently if you feel stuck.
– Sneak your pick past the camera’s right side—there’s a sneaky strip of adhesive waiting to be sliced.
– Tilt the pick down like you’re giving the internals a gentle high-five to keep everything safe and sound.
Step 17


The plate’s resistance might remind you of sticky tape. Tilt the pick downward to keep it from slipping into the plate—that way, you stay in control and make the job easier.
– Aim the tip of your opening pick right at your phone’s flash—like you’re a phone surgeon.
– Slide the pick in gently, keeping clear of the flash’s metal plate. No sudden moves!
– Cut through the sticky adhesive just to the right of the camera. Take your time; you’ve got this!
Step 18


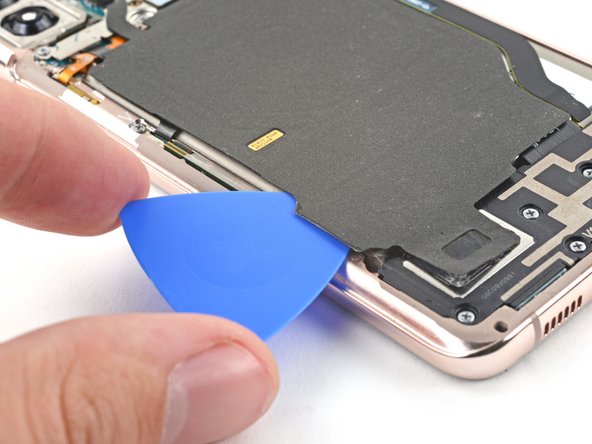
– Pop off the back cover. Be gentle, but firm! It’s like peeling off the last layer of a burrito—just the right touch.
– Time for reassembly: Take a quick moment to power up your device and give everything a test run. Make sure all functions are on point before you seal it back up. But remember, once you’re done testing, power it down completely before you proceed.
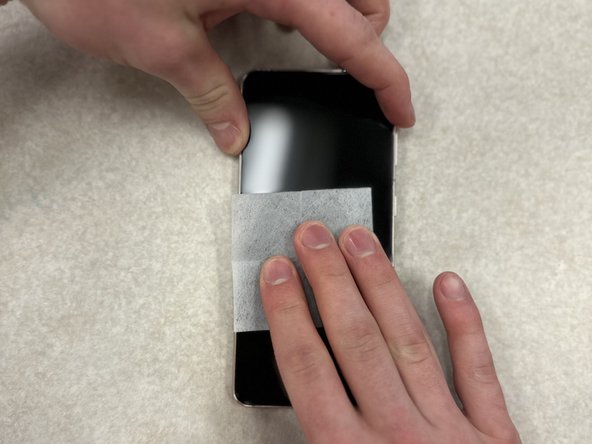
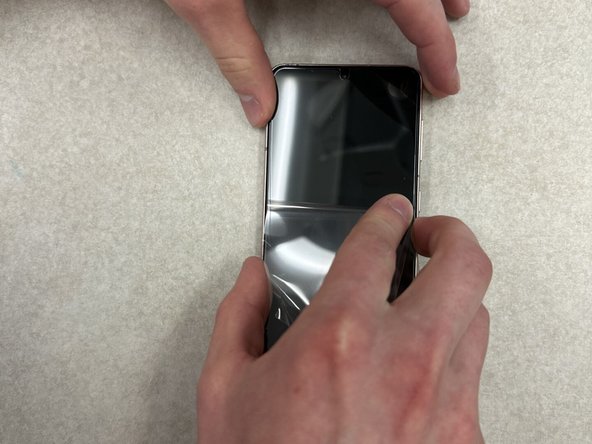
– Got some leftover adhesive? No worries! Grab your tweezers or fingers, and carefully remove any chunks. Then, wipe away any sticky residue with some high-concentration (over 90%) isopropyl alcohol. Smooth and clean!
– Using Samsung’s custom-cut adhesives? You’re in luck! Check out the guide linked here for a perfect fit.
– Opting for double-sided tape? No problem. Follow this guide for all the steps you need to get it done right.
If the back cover is still sticking tight to the frame, gently slide your opening pick around the edges of the phone until it pops free all the way around. Keep it steady, and take your time—patience makes the repair smoother. Need a hand? You can always schedule a repair with Salvation Repair.
Tools Used

Step 19

Keep each screw in its own spot—mixing them up is like playing phone repair roulette, and nobody wants that.
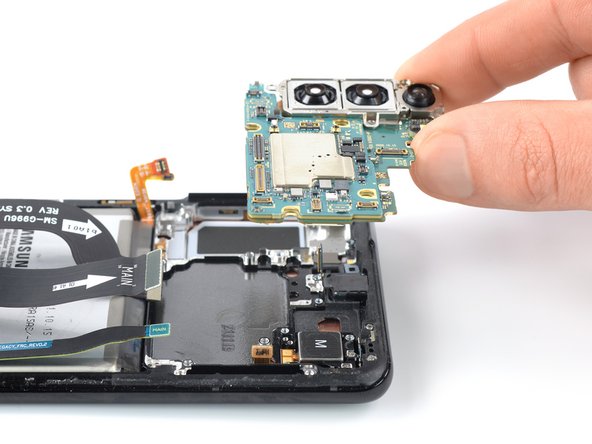
– Grab your trusty Phillips screwdriver and unscrew the five 4mm-long screws holding the motherboard bracket in place. Keep those screws safe—they’re your key to unlocking the next step!
Step 20


Hold off on totally removing the bracket—it’s still hanging on to the wireless charging coil.
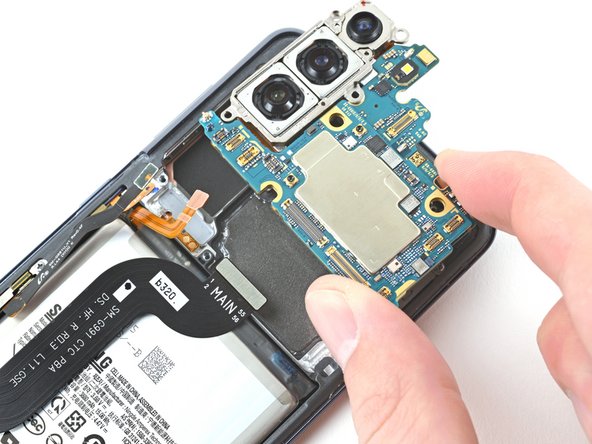
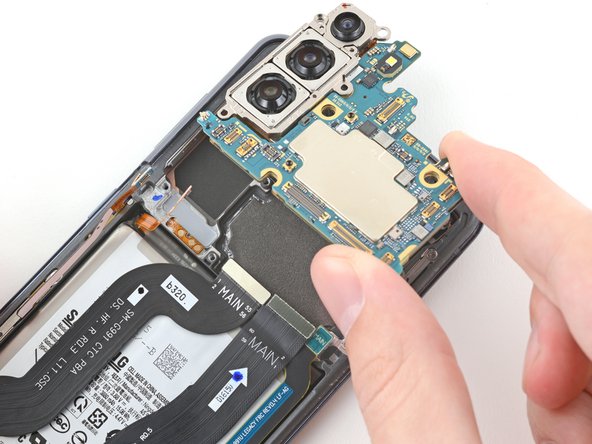
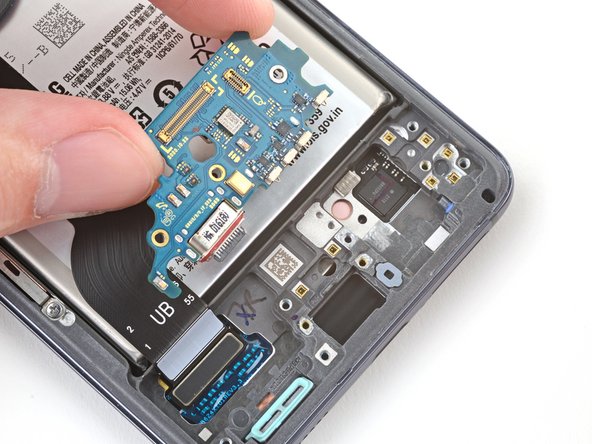
– Grab a pair of tweezers and gently lift the motherboard bracket off the frame. It’s a delicate move, so take your time!
Tools Used
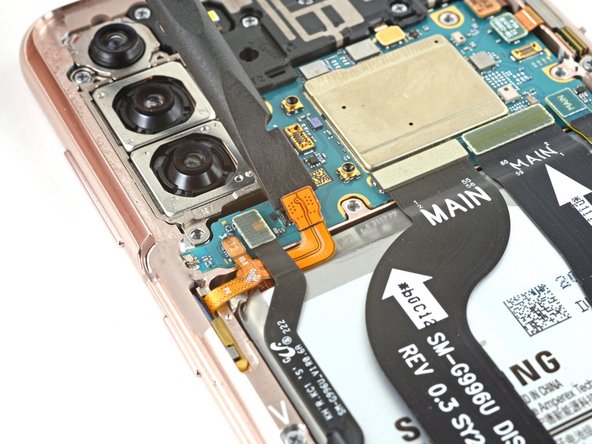
Step 21


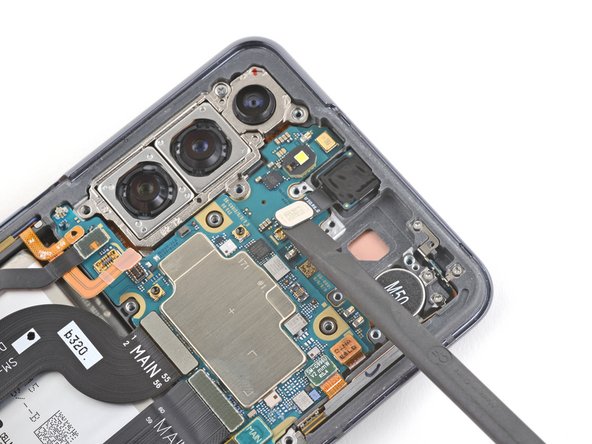
Gently work your way under just the edge of the connector—don’t let your tool wander, or it might scuff up the socket and the nearby parts.
– Grab your tweezers or fingers and gently move the motherboard bracket out of the way. Then, use a spudger to carefully lift the battery press connector up.
– To snap connectors back into place, align one side and press down until it clicks. Then do the same for the other side. Avoid pressing in the middle. If it gets misaligned, the pins could bend, leading to permanent damage.

Step 22


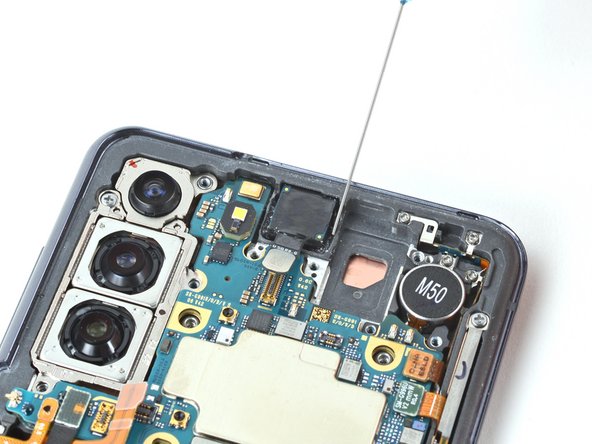
– While keeping the motherboard bracket safely out of the way, use a spudger to gently pry up and disconnect the wireless charging coil’s press connector.
Tools Used
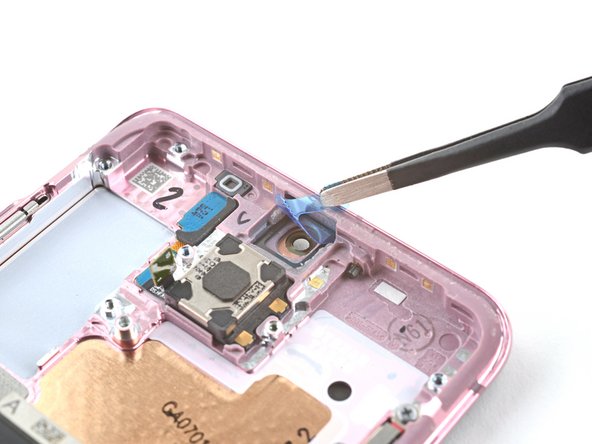
Step 23


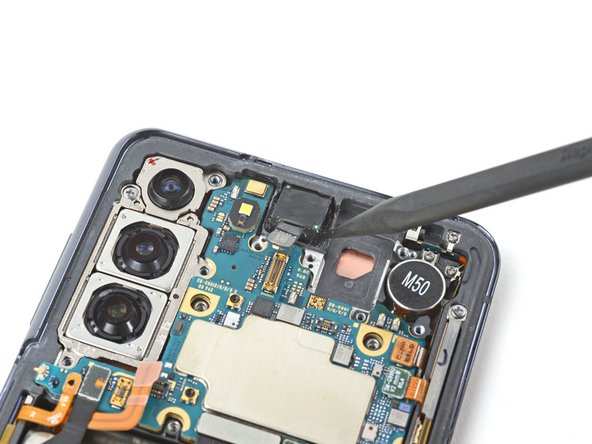
The wireless charging coil is held in place with some gentle adhesive, so it’ll come off without too much fuss.
– Gently peel the wireless charging coil away from your phone using your fingers—think of it as removing a sticker, but with a little extra care.
– When you’re putting everything back together, start by tightening those motherboard bracket screws first. This helps line up the charging coil just right. Then, press the rest of the coil down so it sticks where it should.
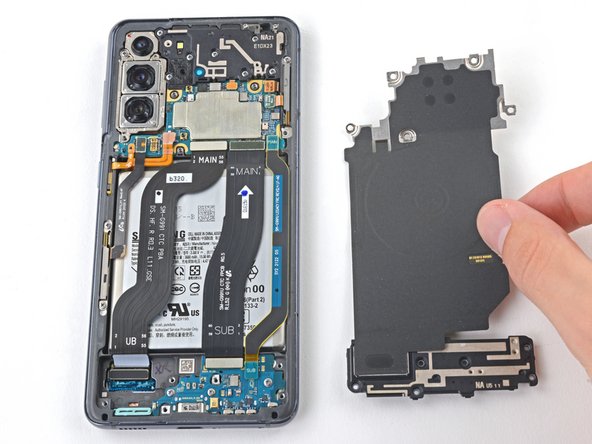
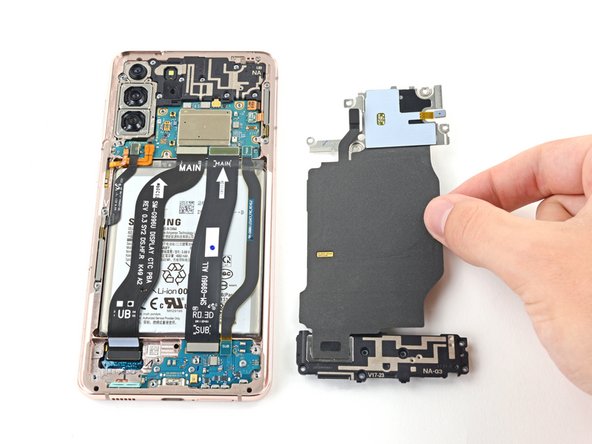
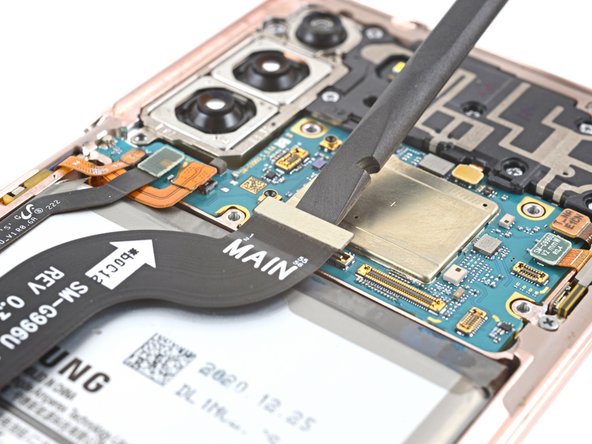
Step 24

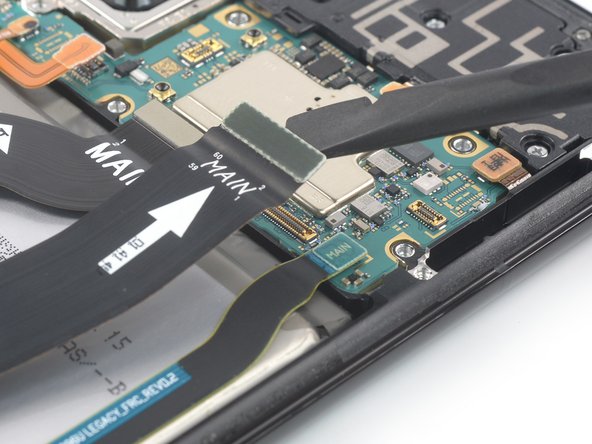
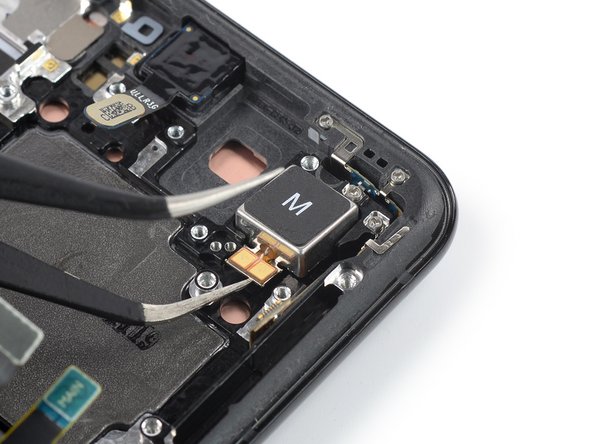
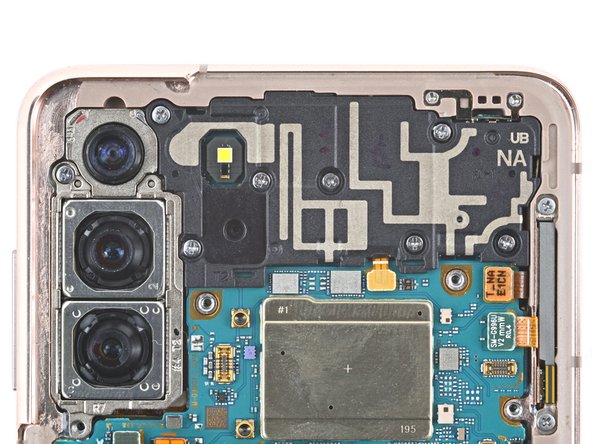
– Grab your trusty Phillips driver, give it a little pep talk, and spin out those six 4 mm screws that are keeping the loudspeaker snuggled up to the frame. They’ll come out smoother than your favorite playlist.
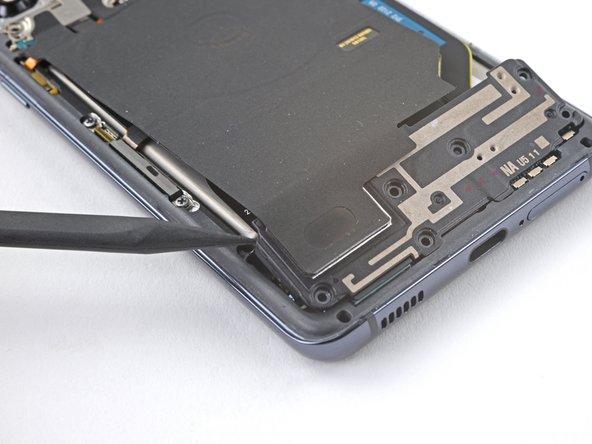
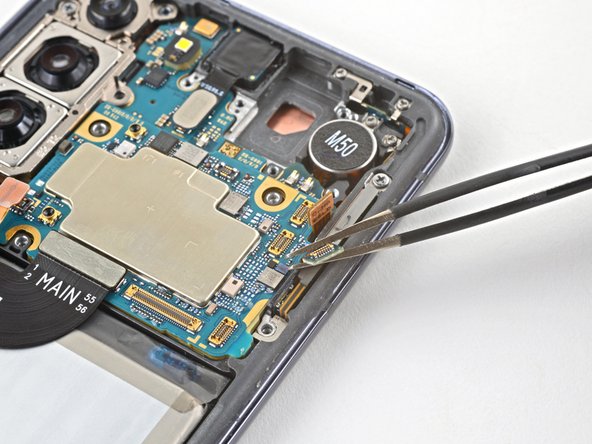
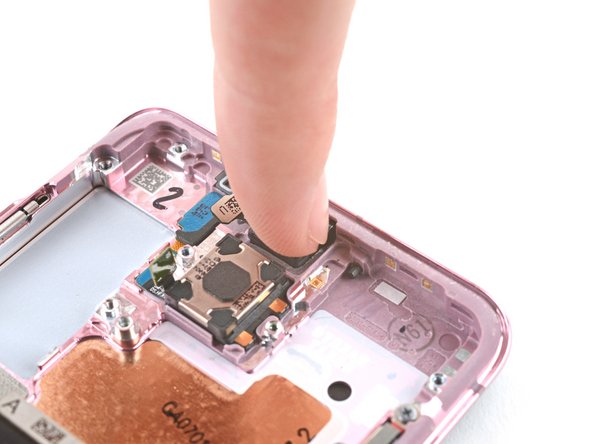
Step 25


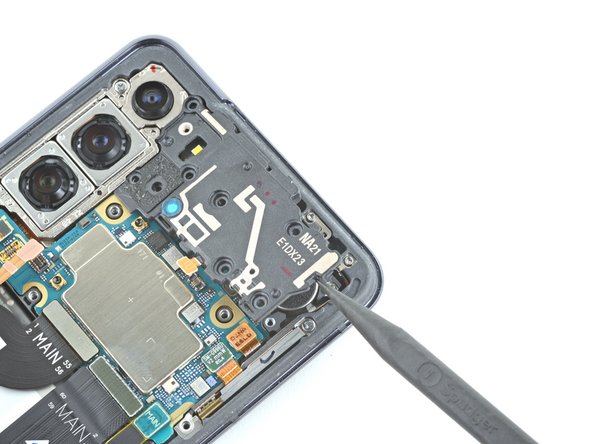
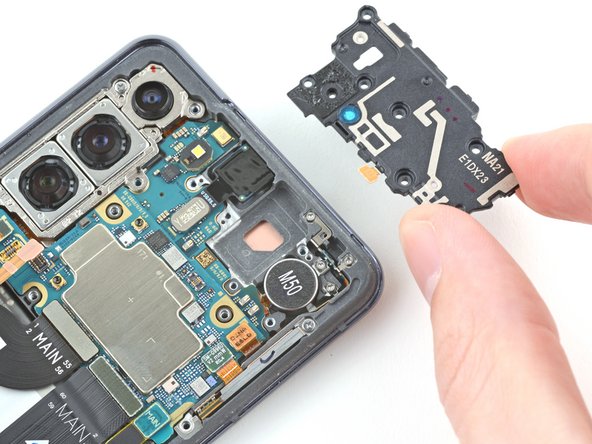
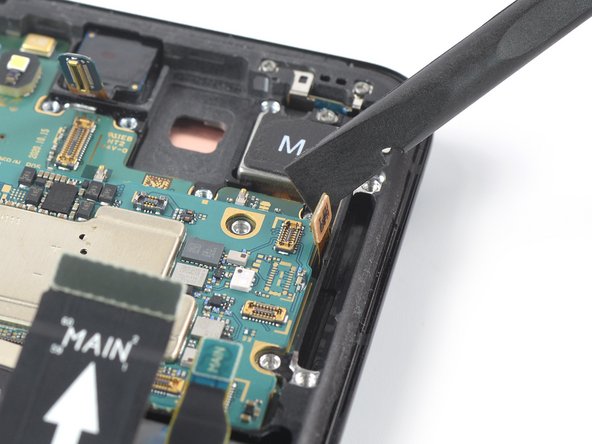
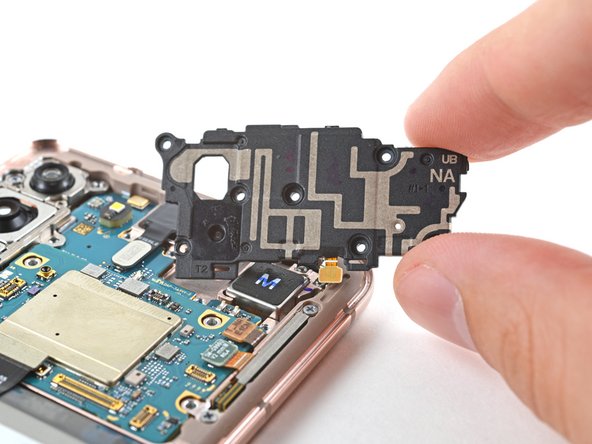
– Gently insert a spudger into the notch at the top-left corner of the loudspeaker and carefully pry upward to pop it free from its clips. Once loosened, lift out the loudspeaker to continue with your repair. If you need extra hands, you can always schedule a repair.
Tools Used
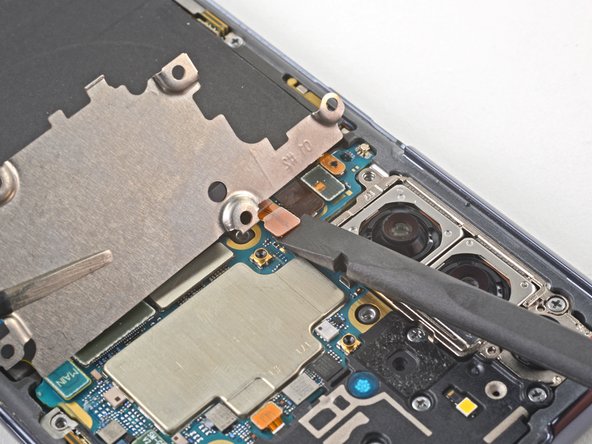
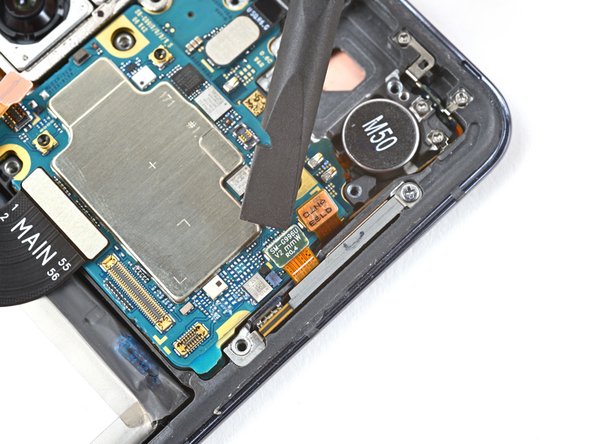
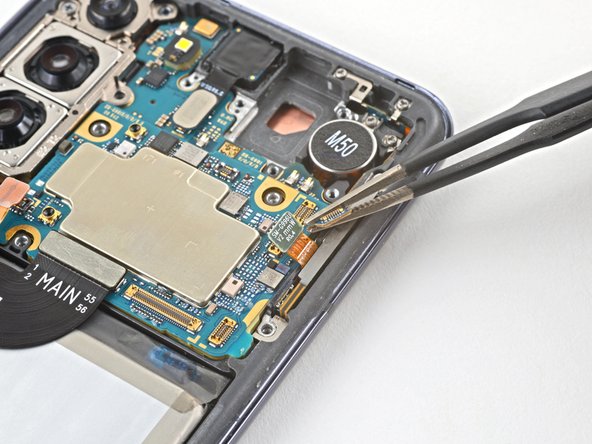
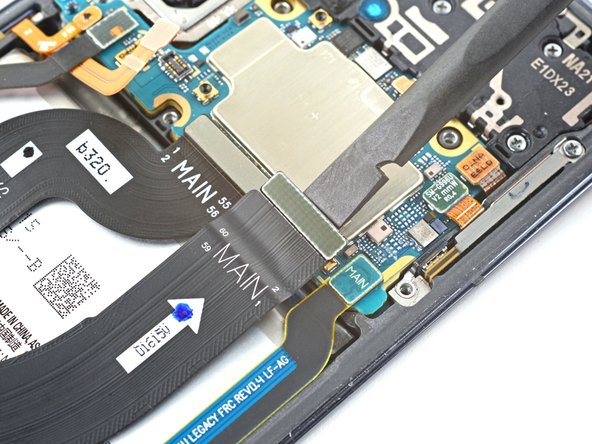
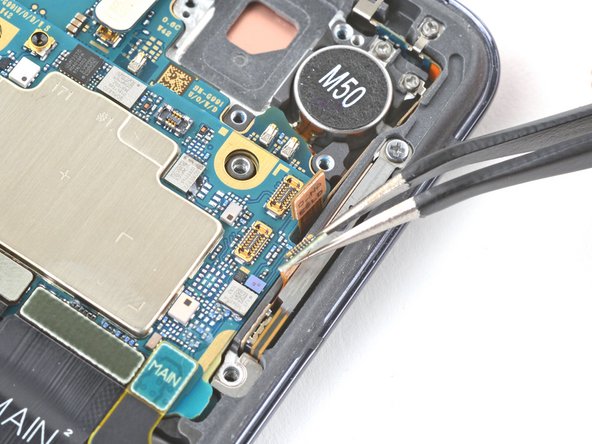
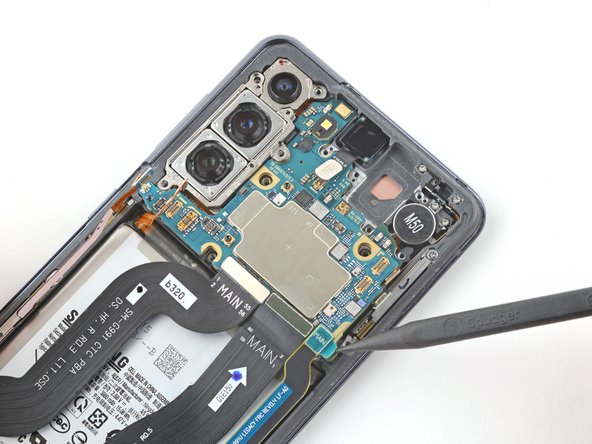
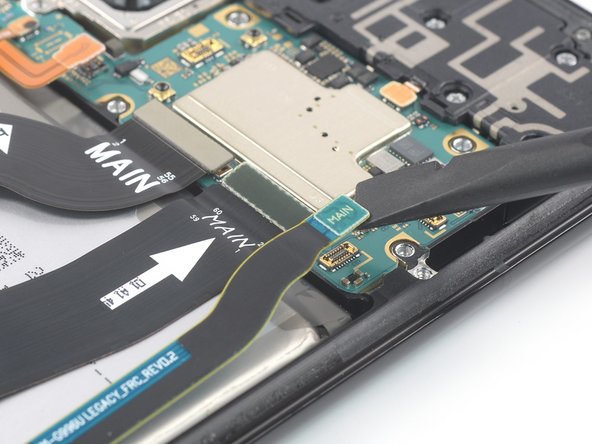
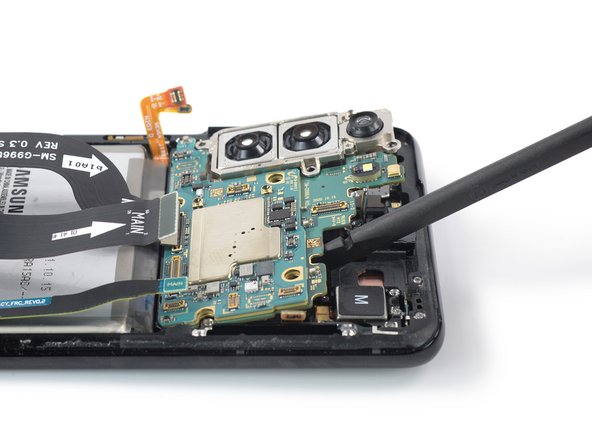
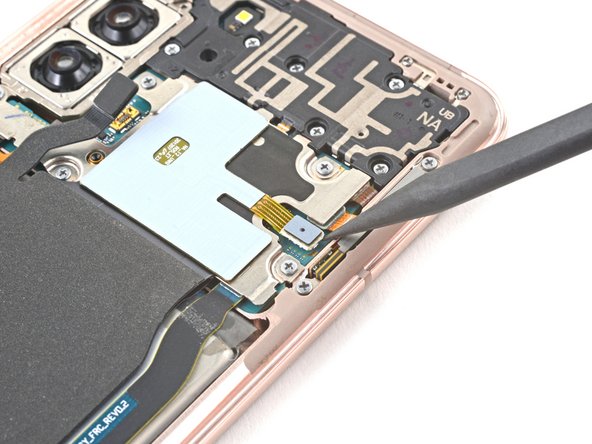
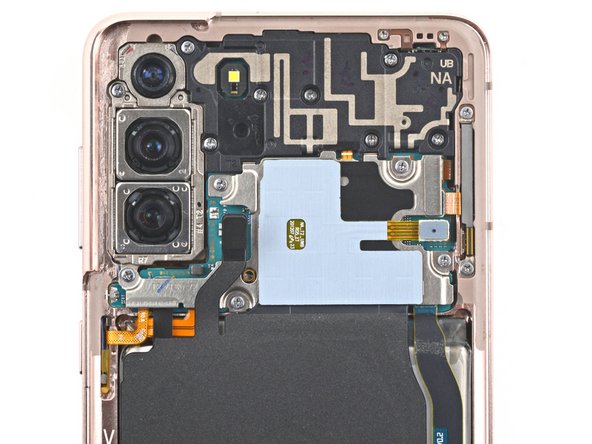
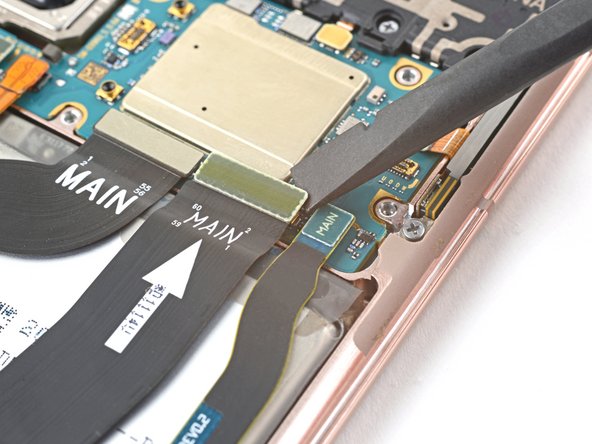
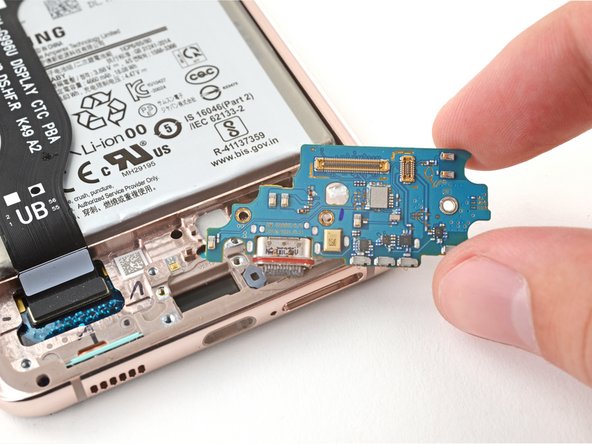
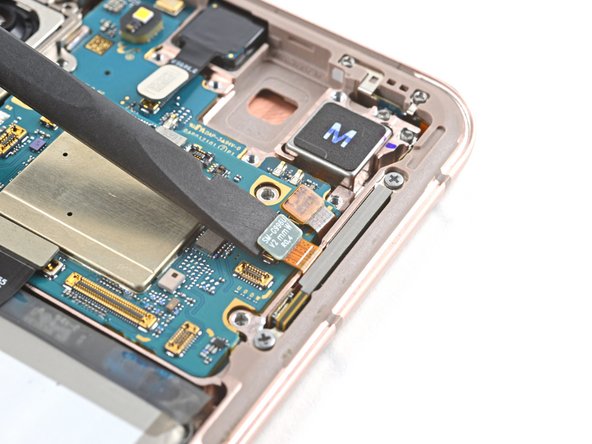
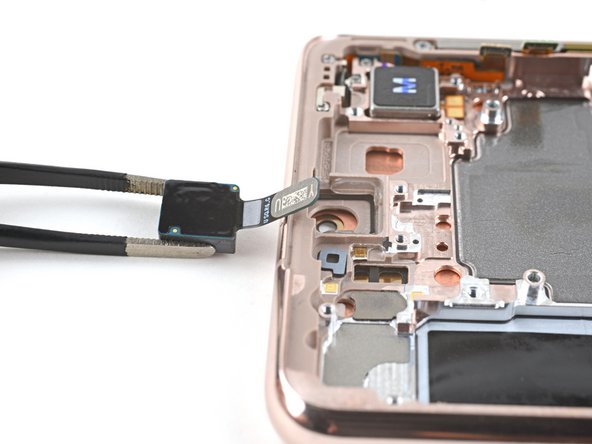
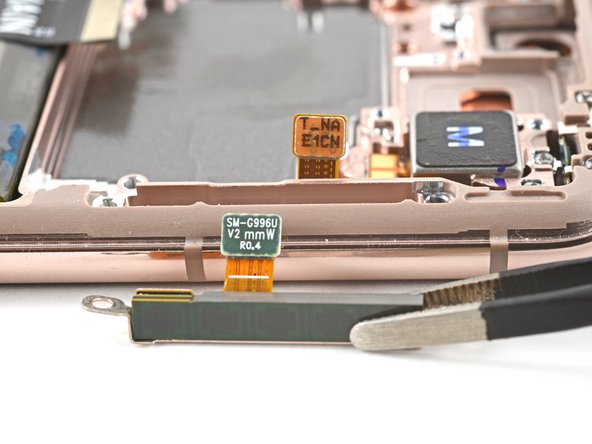
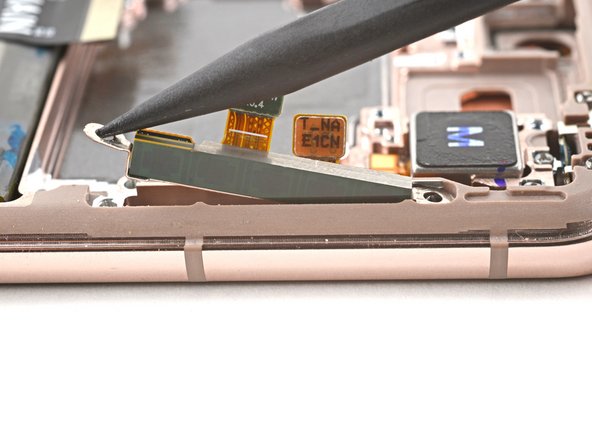
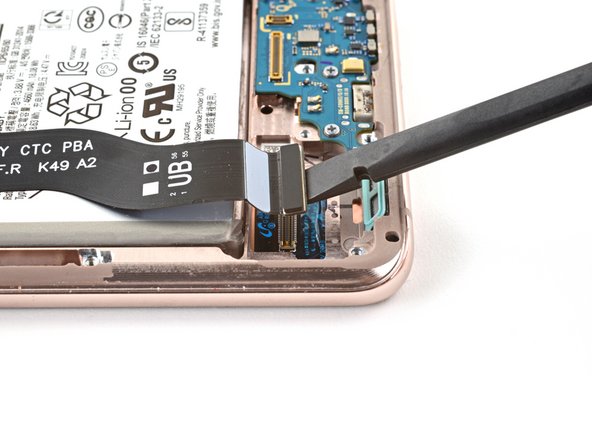
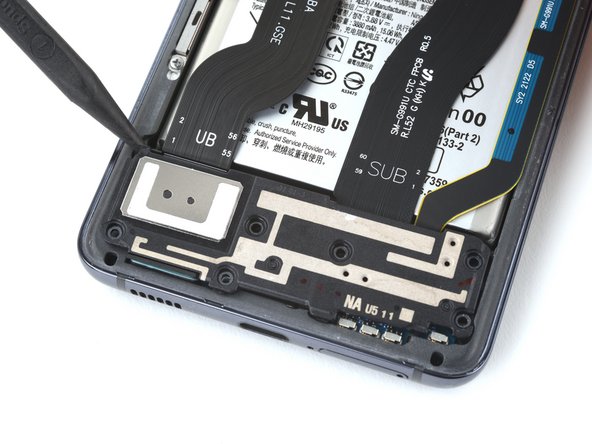
Step 26


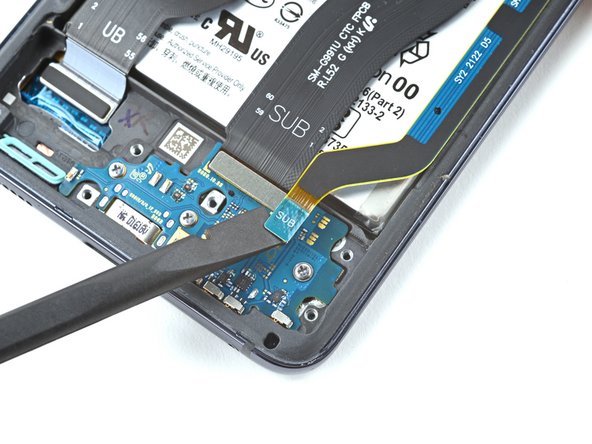
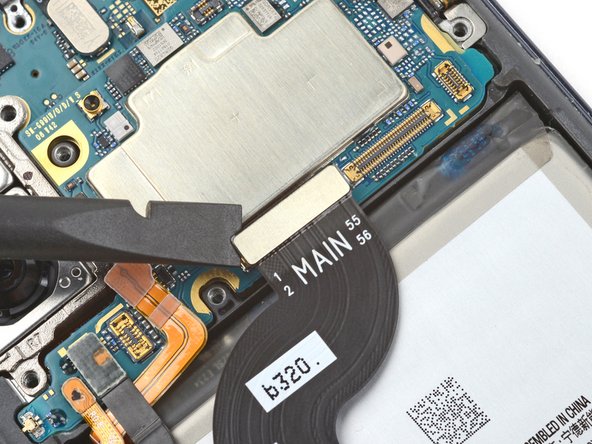
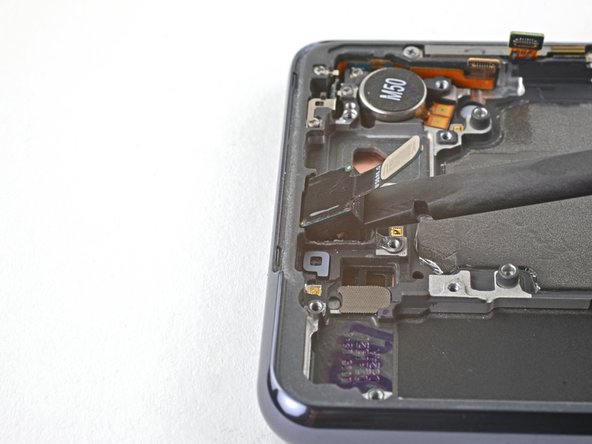
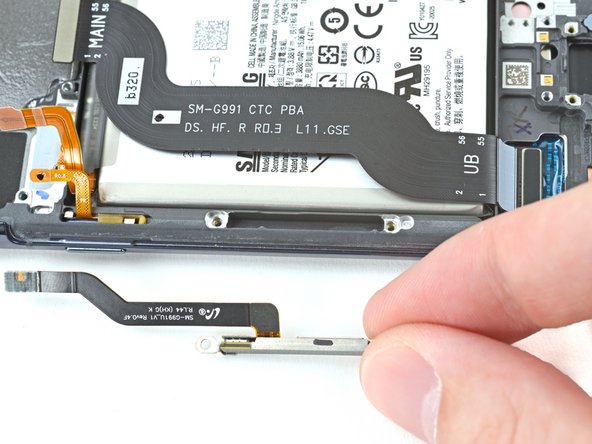
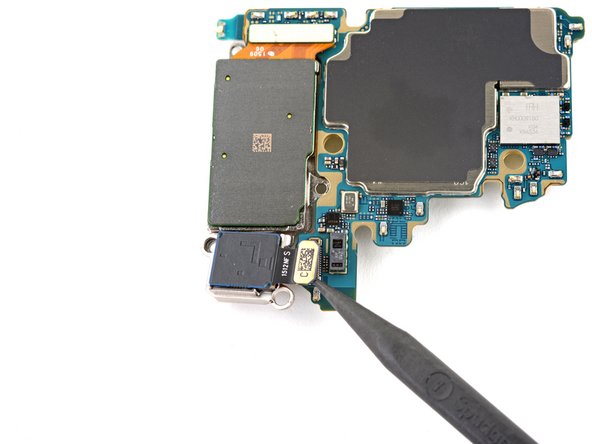
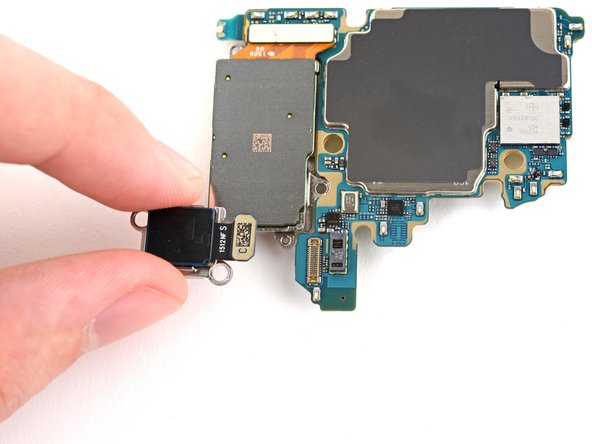
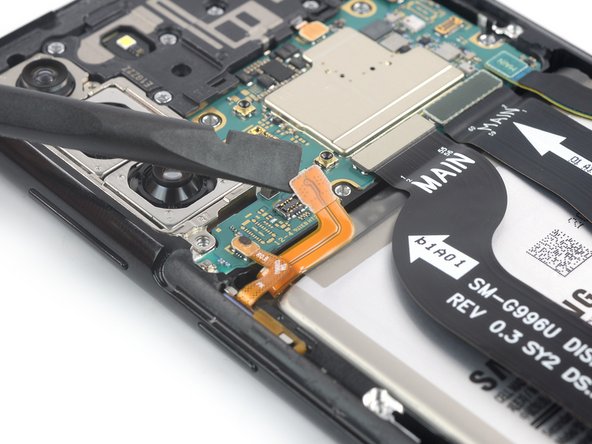
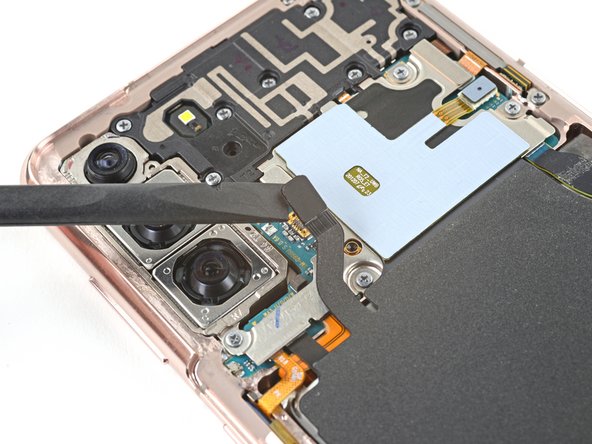
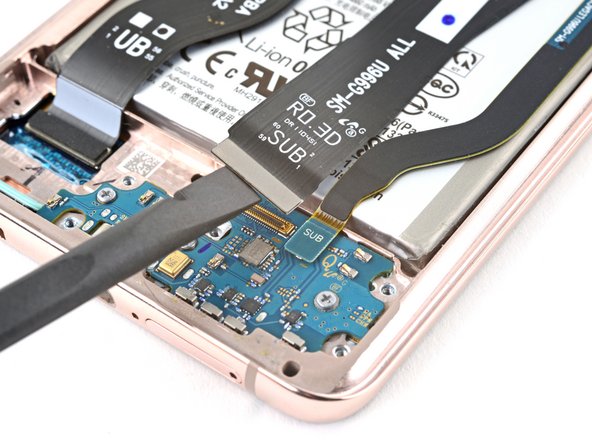
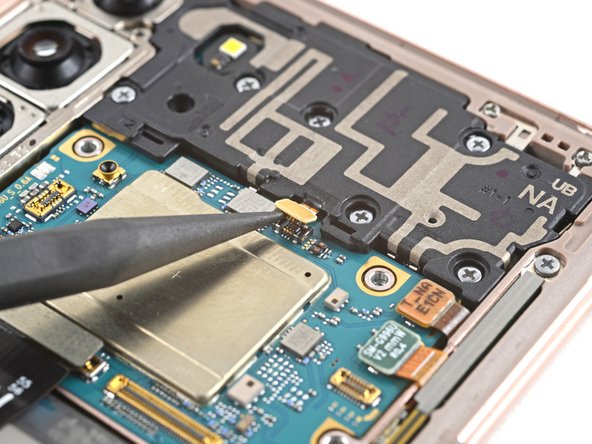
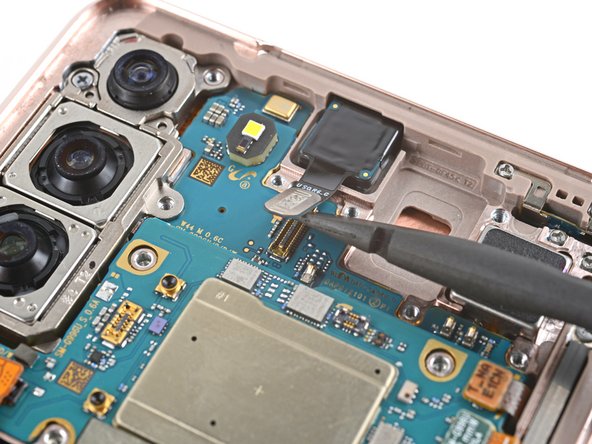
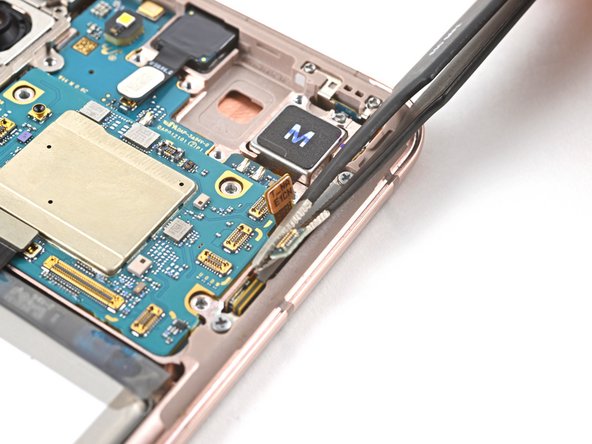
– Grab the flat end of your spudger and gently pop up the press connector at the bottom of the secondary interconnect cable. Easy does it—no need to wrestle with it!
Tools Used
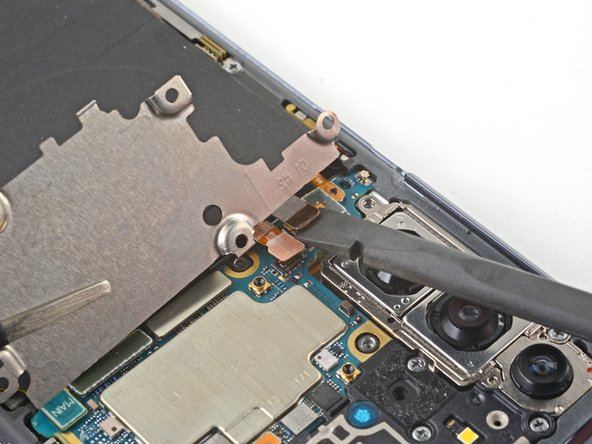
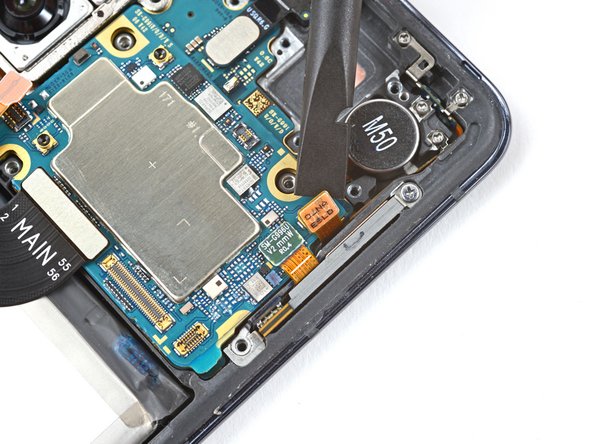
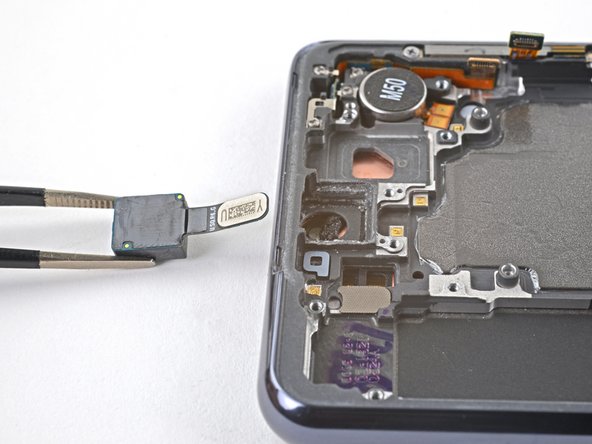
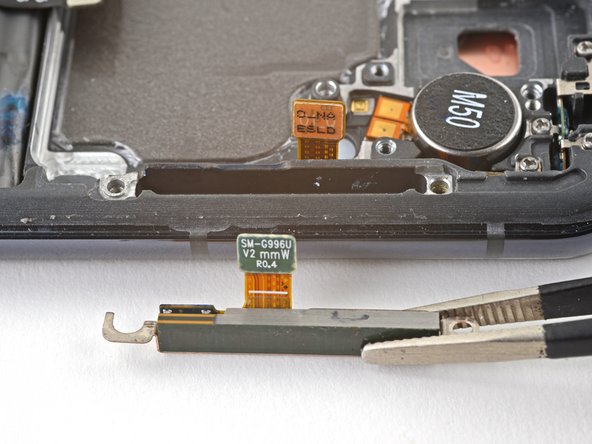
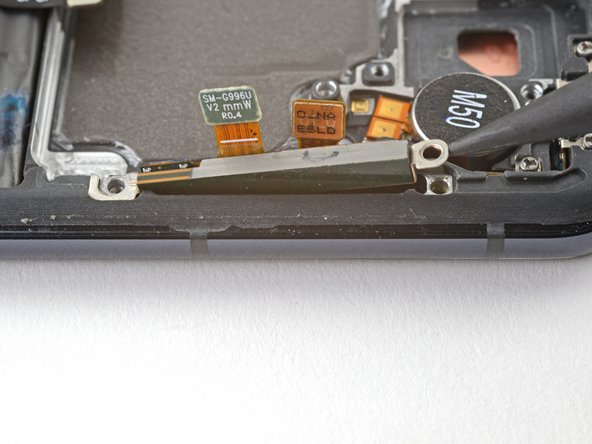
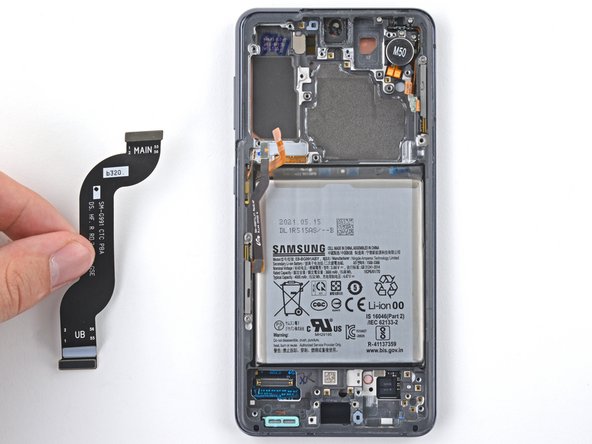
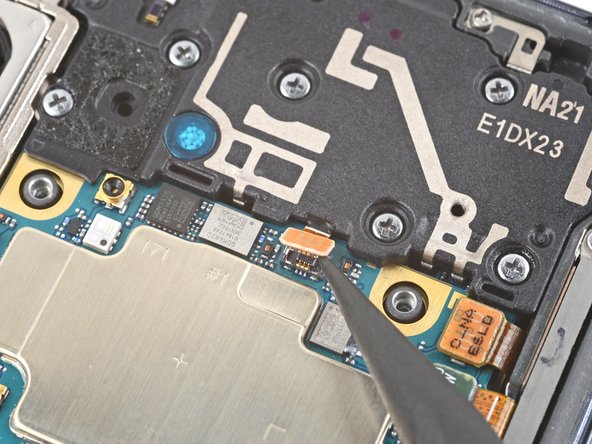
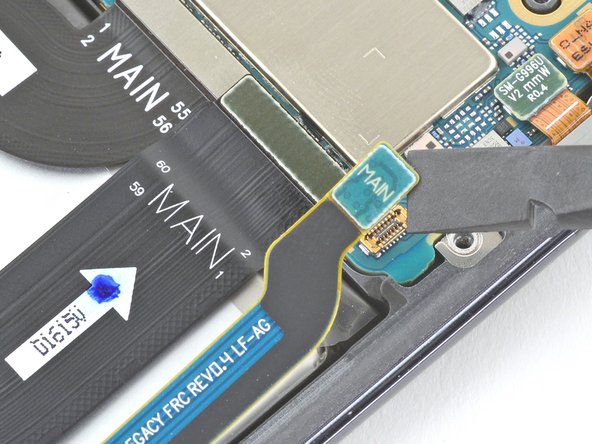
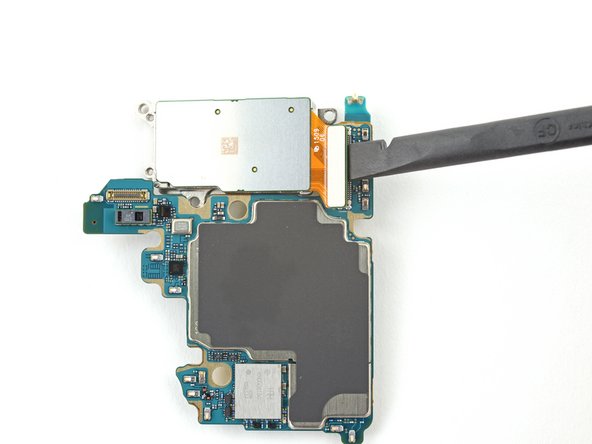
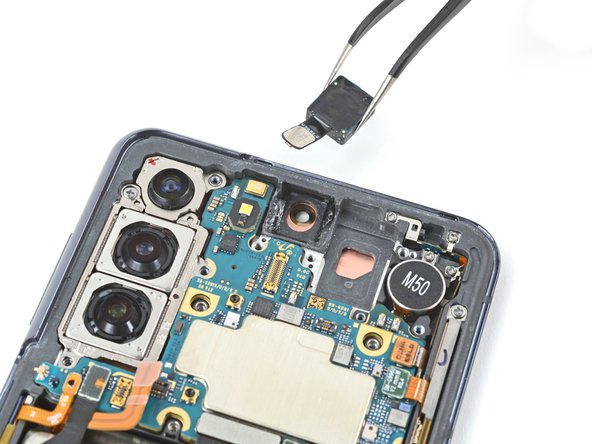
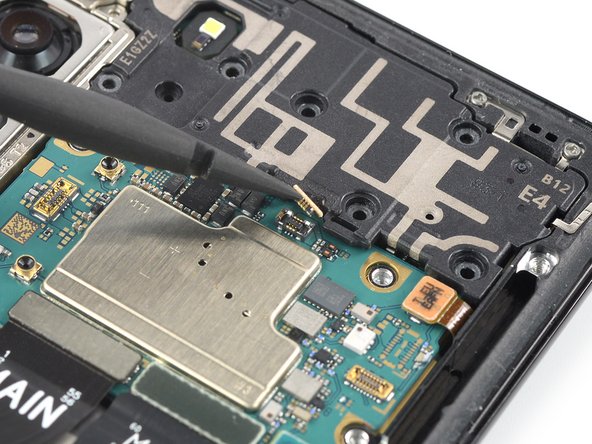
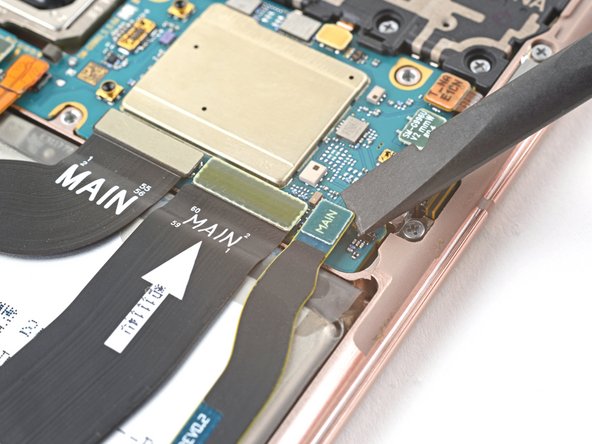
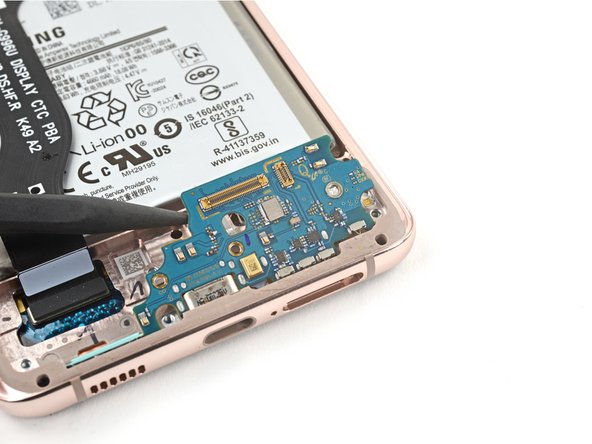
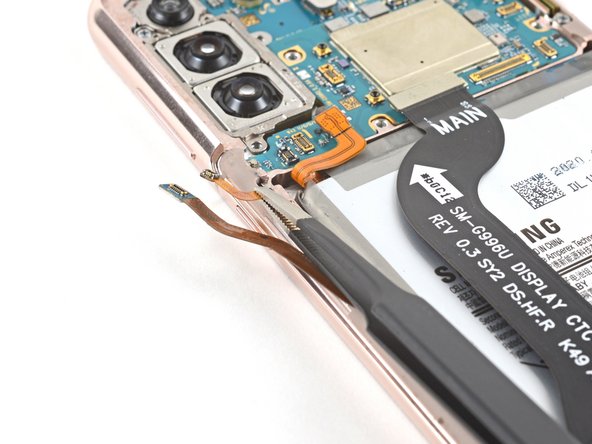
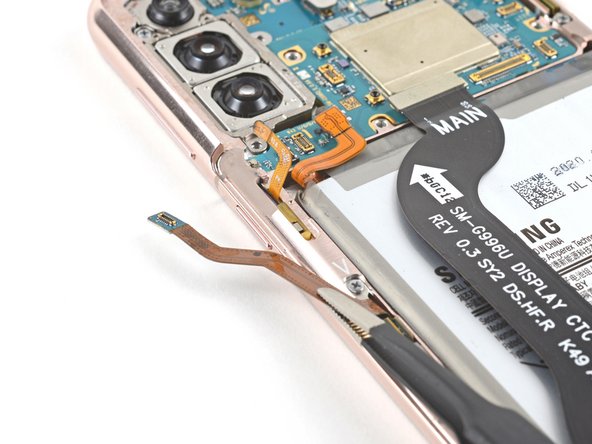
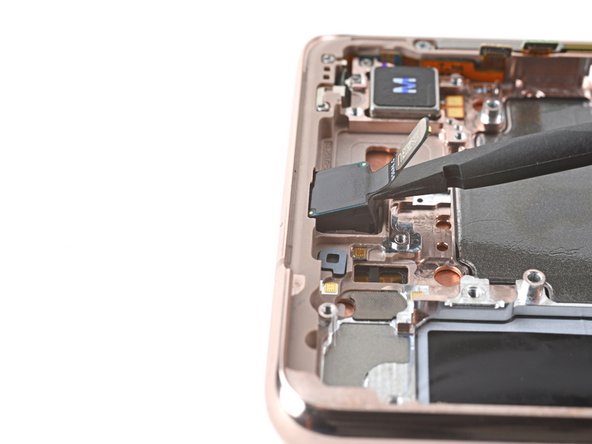
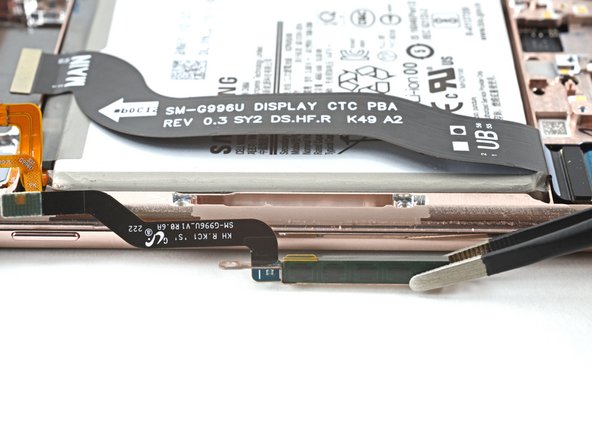
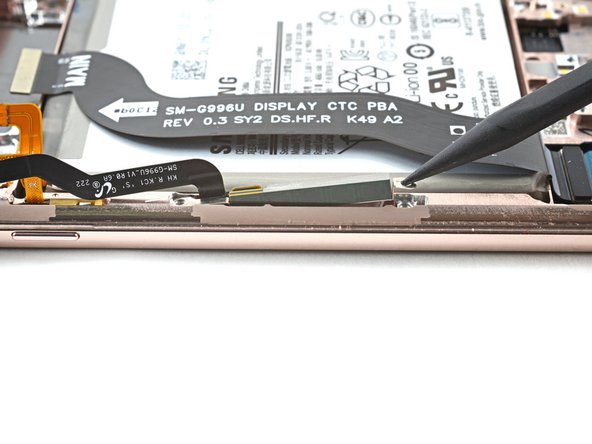
Step 27


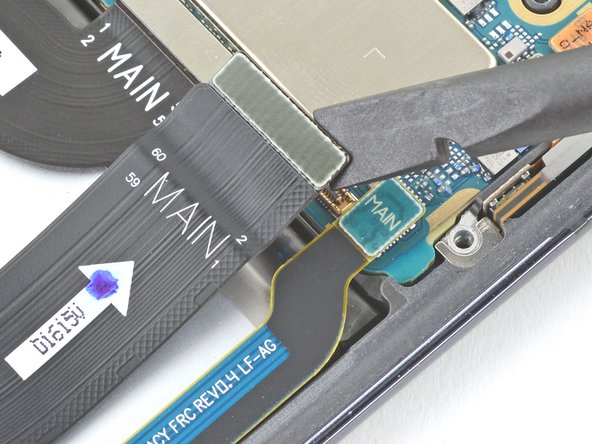
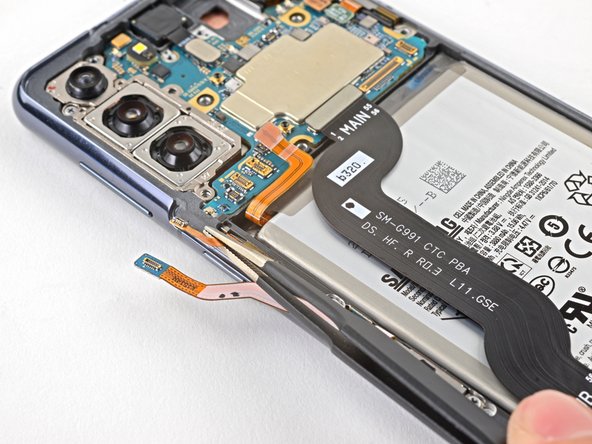
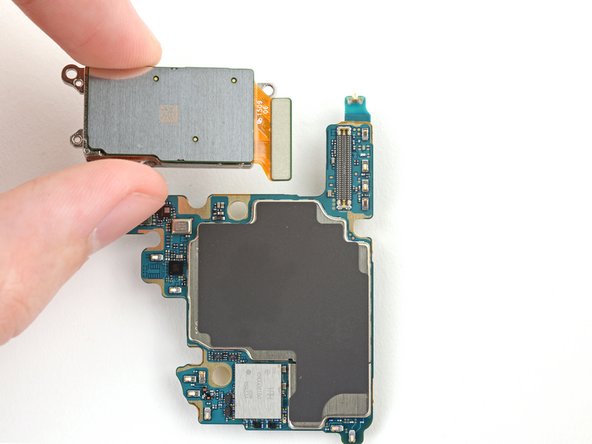
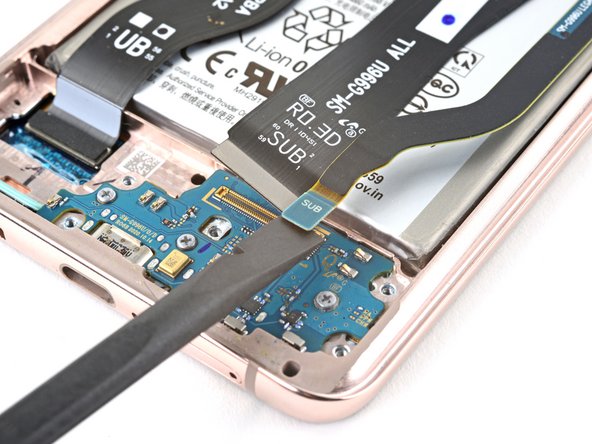
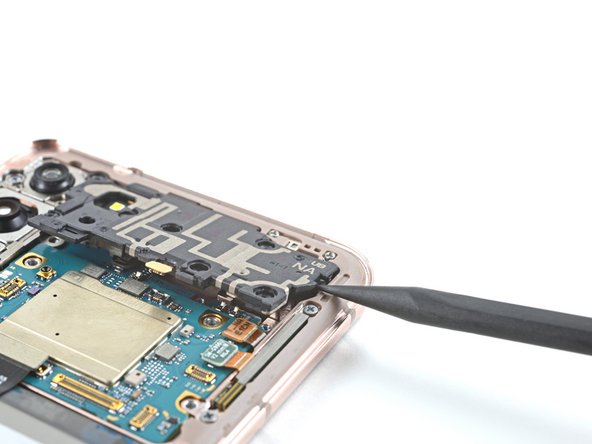
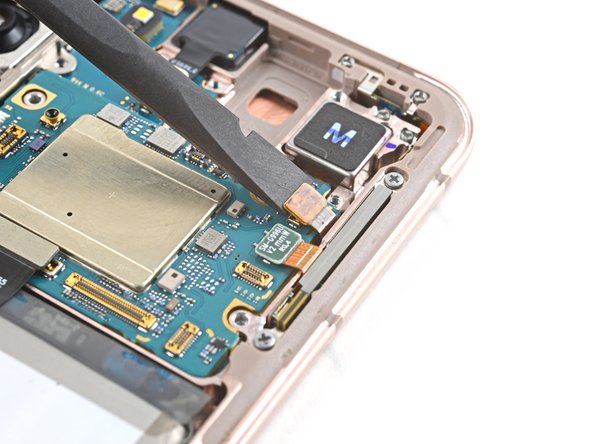
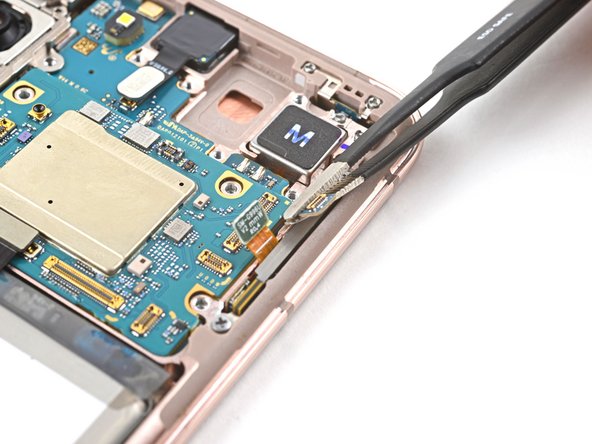
– Gently use the flat end of a spudger to lift and disconnect the top press connector of the secondary interconnect cable. You’ve got this!
Tools Used
Step 28

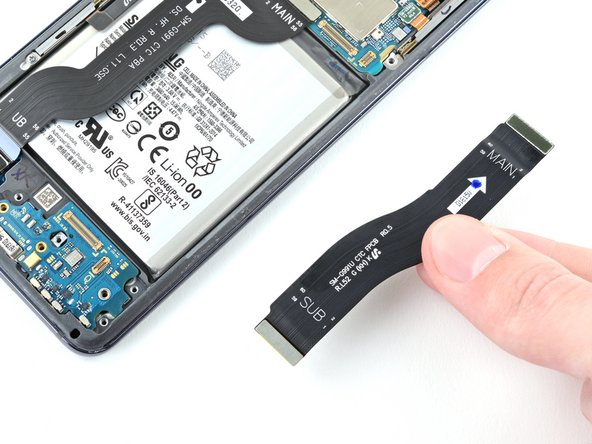
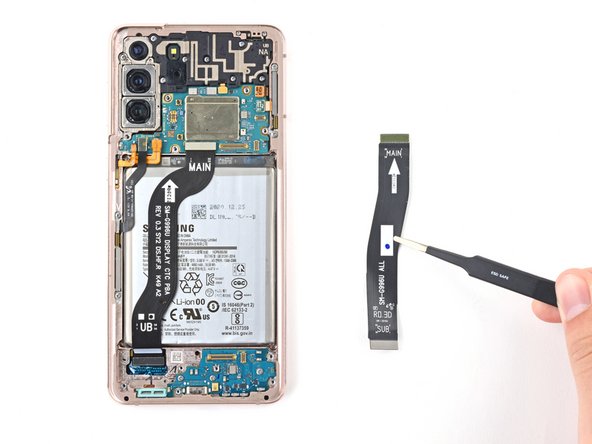
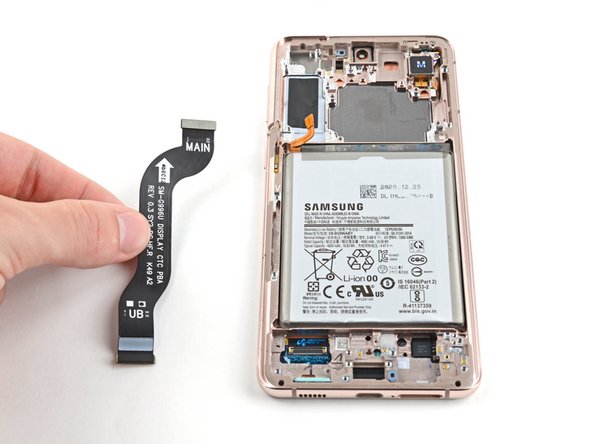
– Before you wrap things up, check your new part against the old one—don’t forget to peel off any sticky backs or swap over any bits that didn’t come with your replacement.
– Ready to put it all back together? Just retrace your steps in reverse.
– Once you’re done, take a moment to run through a quick test to make sure everything’s working as it should.
– Got leftover parts or old electronics? Give them a second life and recycle at an R2 or e-Stewards certified spot.
– Stuck somewhere or just feeling puzzled? Drop by our Answers community for tips and troubleshooting.
– If the DIY road gets too bumpy, you can always schedule a repair with Salvation Repair. You’ve got this!
Tools Used
Success!