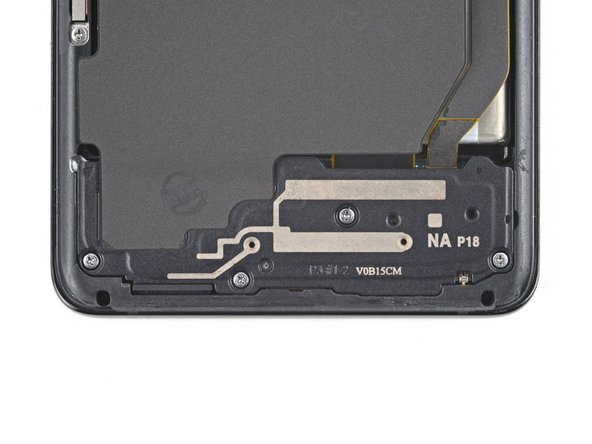
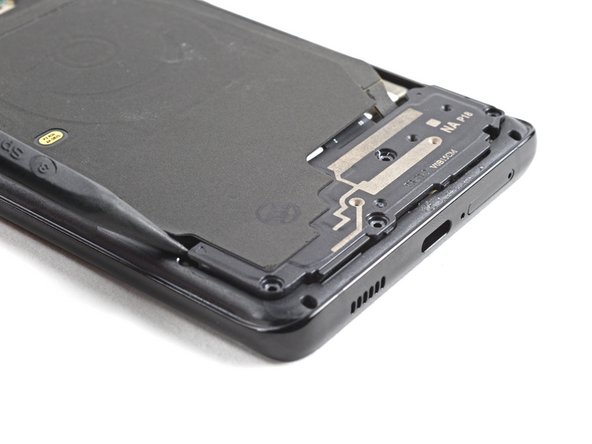
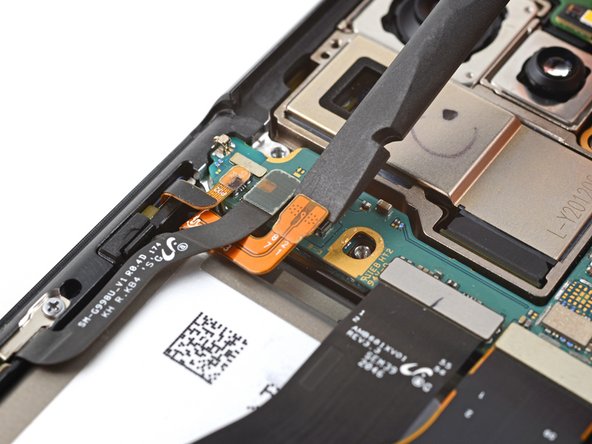
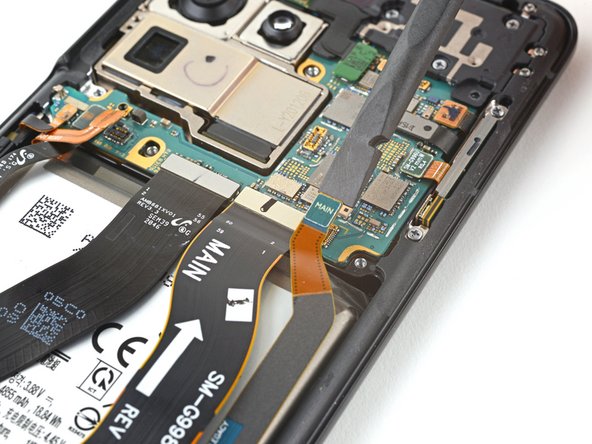
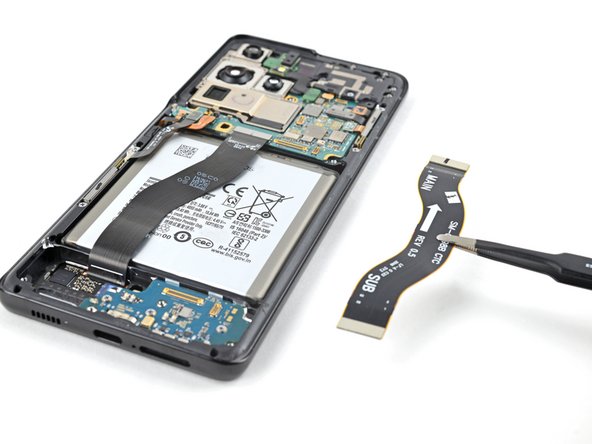
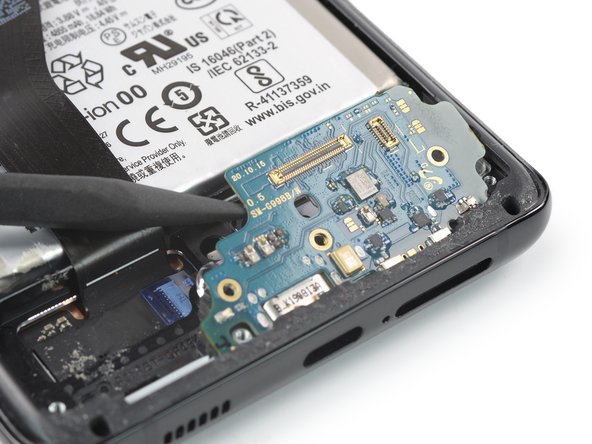
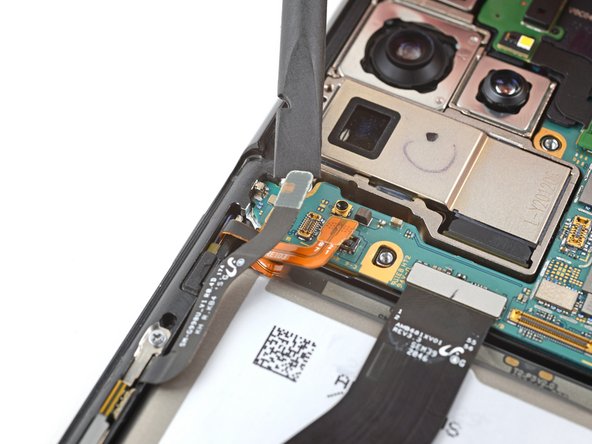
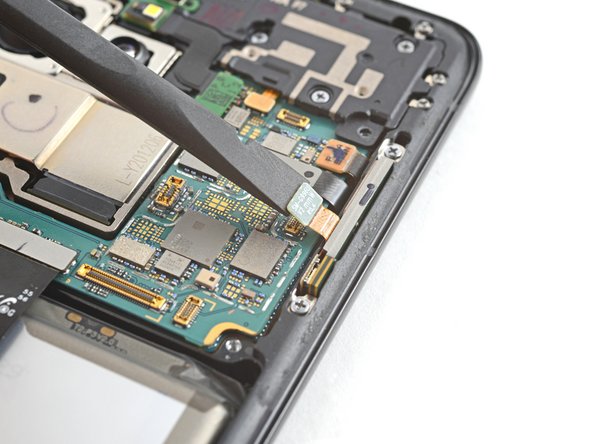
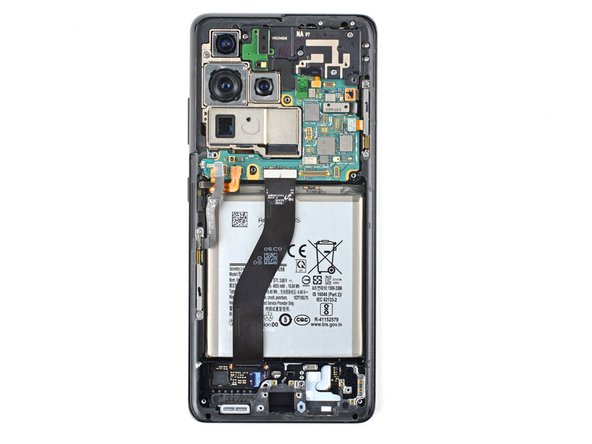
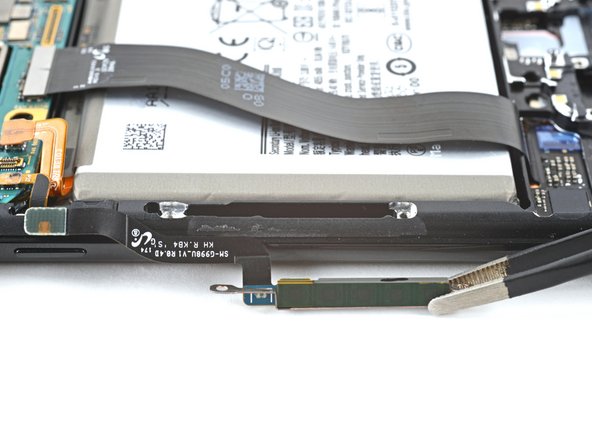
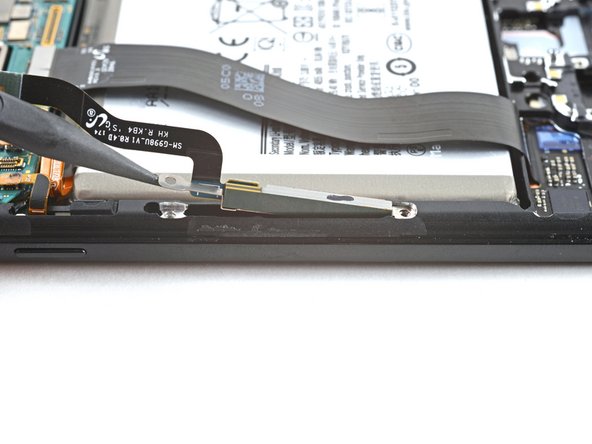
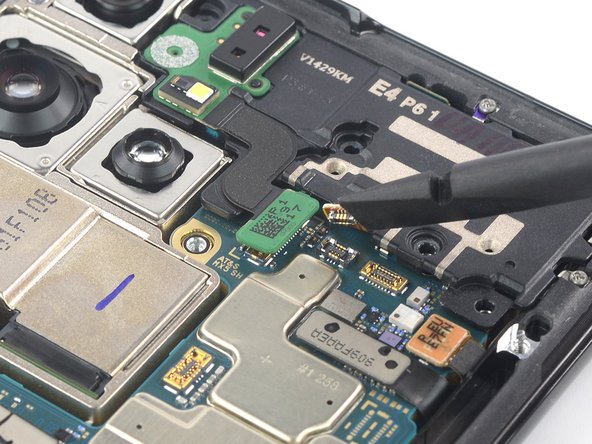
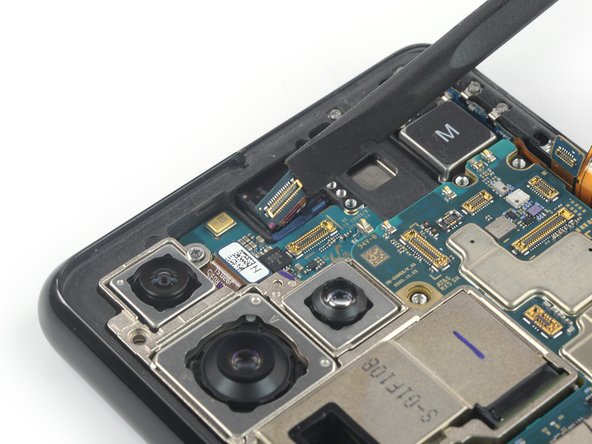
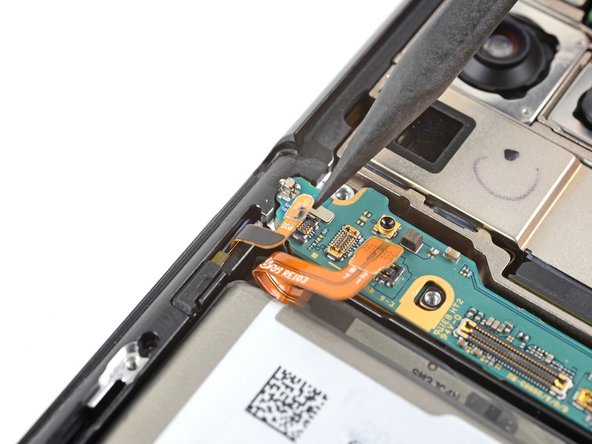
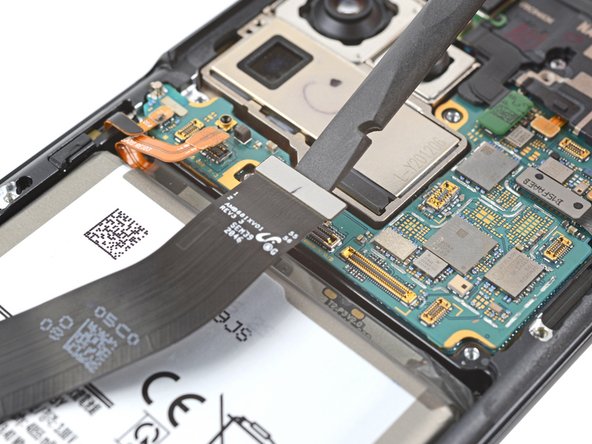
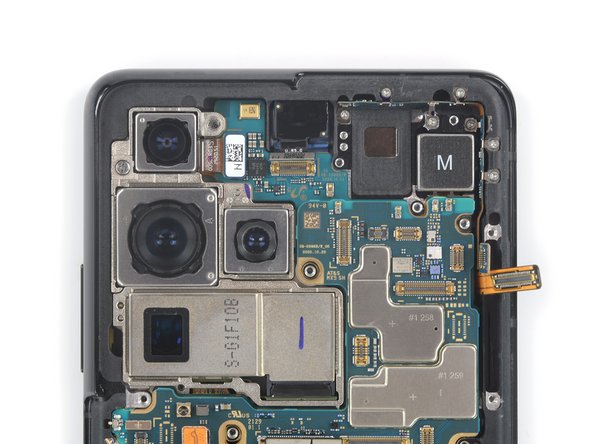
Samsung Galaxy S21 Plus Screen Replacement

Duration: 45 minutes
Steps: 27 Steps

Got a cracked or broken screen on your Samsung Galaxy S21 Plus? No worries, we’ve got you covered. This guide will walk you through replacing your screen on the SM-G996B/DS model (the international version). Other models might have an extra antenna cable along the edge of the midframe, so keep that in mind. If your frame’s been bent out of shape, you’ll need to replace it to ensure the new screen fits snugly and avoids any pressure damage. Also, if your battery is swollen, take extra precautions. Before you dive in, make sure to discharge the battery below 25%. This simple step helps reduce the risk of any thermal events if the battery gets damaged by accident during the repair. Quick note: This guide is all about swapping out the screen, while keeping the original frame and motherboard in place. But, some replacement screens come pre-installed in a new frame (aka chassis), and that involves a whole different process. So, double-check your parts before starting! If you don’t replace the adhesive seals when putting everything back together, your device will still work, but it will lose its water resistance. To avoid any leaks, make sure you’ve got new adhesive for both the rear glass and the screen before starting the repair. If you need help, you can always schedule a repair.

Step 1

– Grab your iOpener, heat it up, and let it chill on the back cover for a good three minutes. That adhesive won’t know what hit it.

Tools Used
  1. iOpenerSamsung Galaxy S21 Plus Screen Replacement
  2. Heat GunSamsung Galaxy S21 Plus Screen Replacement

Step 2

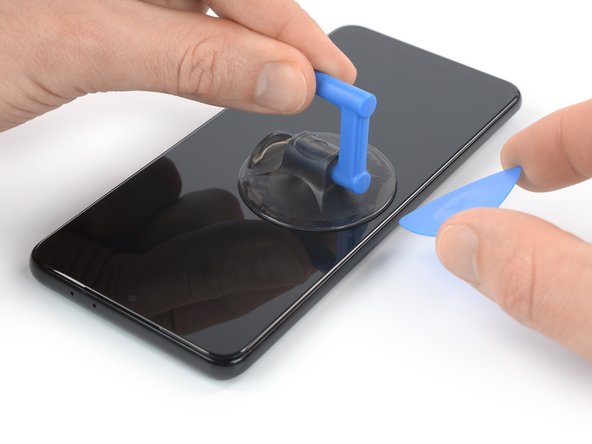
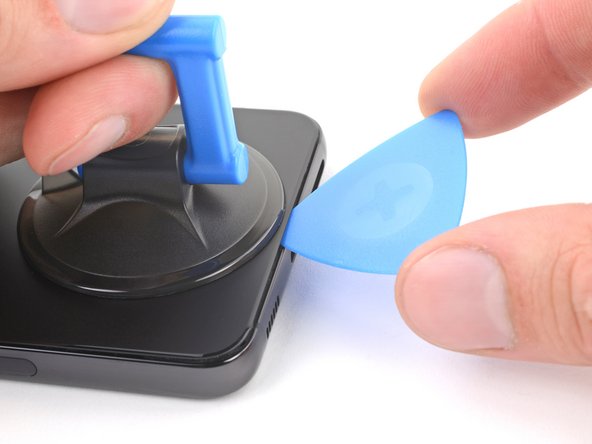
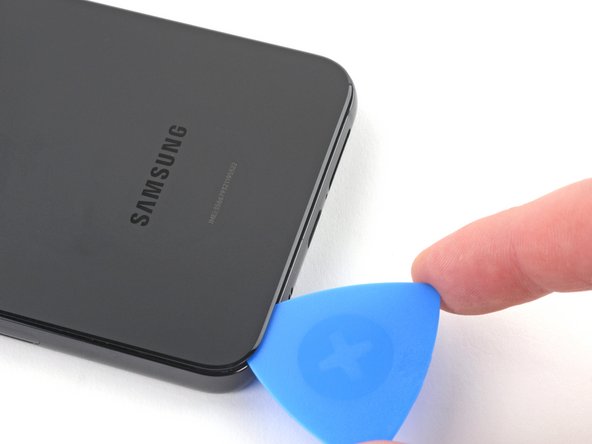
– Stick a suction handle right near the bottom edge of the back cover—get as close as you can without starting a game of Twister.

– Gently pull up with the suction handle until you spot a little gap between the cover and the frame. No need for Hulk strength here.

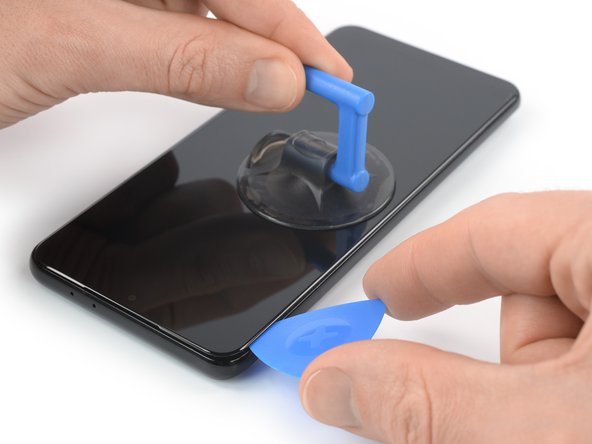
– Slip an opening pick into that gap like you’re sliding into DMs—smooth and easy does it.

– Glide the pick over to the bottom left corner and slice through the adhesive, ninja-style.

– Keep the pick chilling in place so the sticky stuff doesn’t try to make a comeback.

Tools Used
  1. iOpenerSamsung Galaxy S21 Plus Screen Replacement
  2. Suction HandleSamsung Galaxy S21 Plus Screen Replacement

Step 3

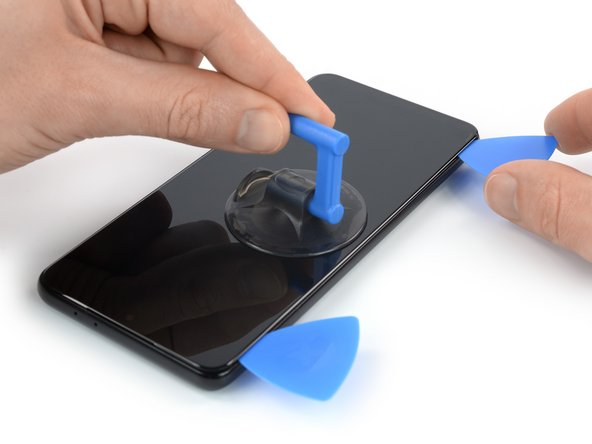
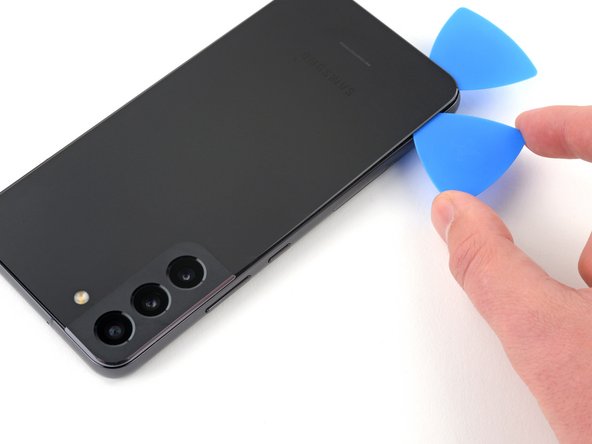
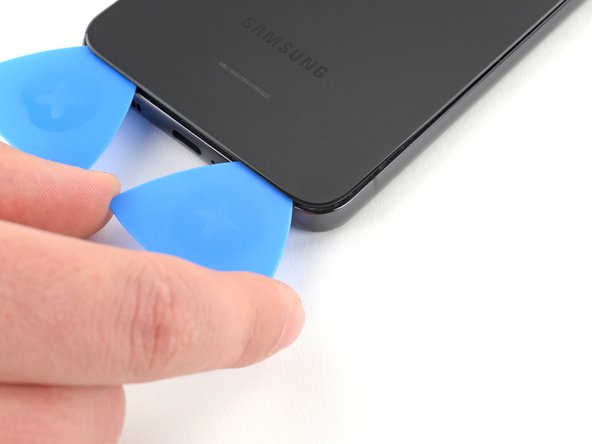
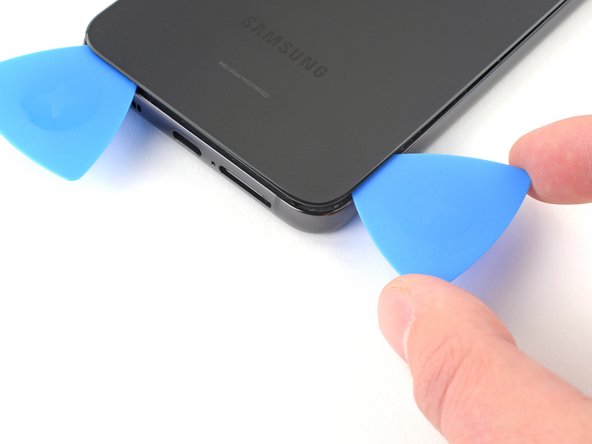
– Pop in a second opening pick at the bottom edge of your device to get things moving.

– Carefully slide that pick toward the bottom right corner to cut through the adhesive.

– Keep those opening picks in place—it’s like giving the adhesive a little timeout so it doesn’t stick back together.

Step 4

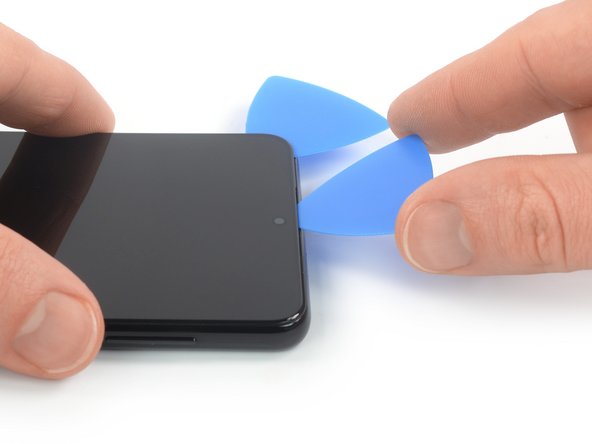
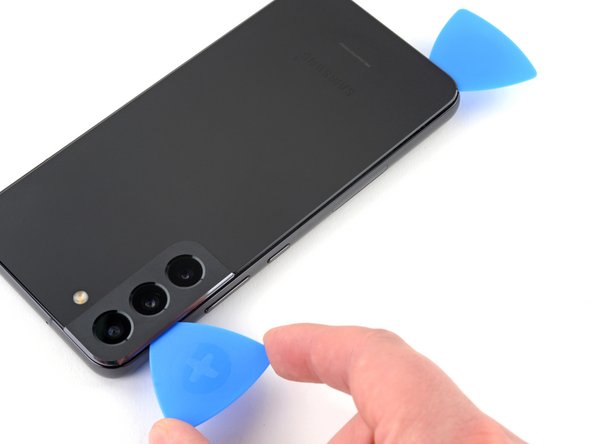
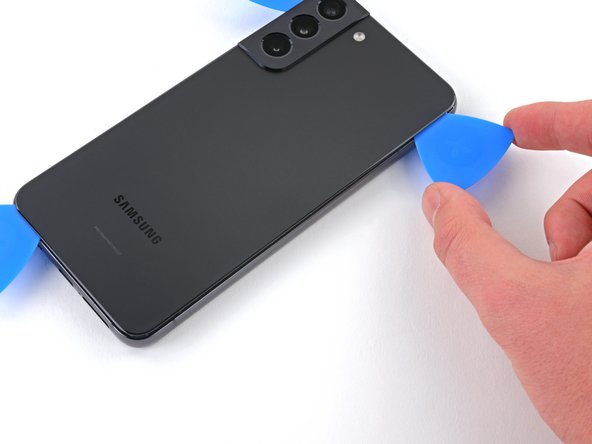
– Pop in a third opening pick at the bottom right corner of your phone—like you’re dealing cards at a poker table.

– Glide that pick up the right edge to break up the sticky adhesive situation.

– Leave the pick chilling in the top right corner so the adhesive doesn’t make an unexpected comeback.

Tools Used
  1. iOpenerSamsung Galaxy S21 Plus Screen Replacement

Step 5

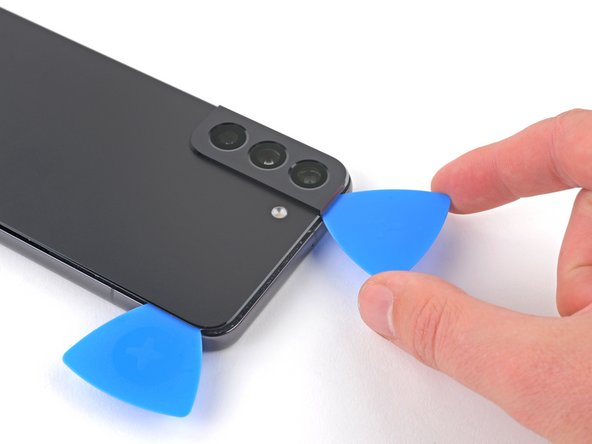
– Pop in a fourth opening pick right under the top right corner of your device, like you’re giving it a friendly nudge.

– Glide that opening pick along the top edge to gently slice through the adhesive—think of it as dancing your way around the glue.

– Keep the opening pick in the top left corner to prevent the adhesive from sealing back up—it’s like giving your repair a little insurance policy.

Step 6

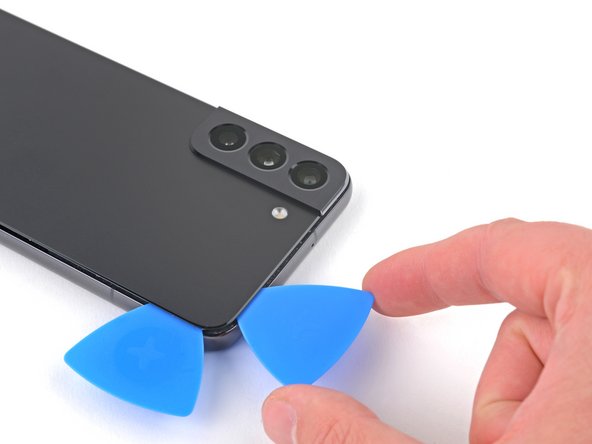
– Grab your fifth opening pick and sneak it under the bottom left edge.

– Glide the pick up the left side of the back cover to finish slicing through that stubborn adhesive.

Step 7

– Pop off the back cover.

– On your way back to reassembly:

– Now’s a great time to power up your phone and make sure it’s behaving—test all the buttons and features before you lock things down. Just remember to shut it down completely before you dive back in.

– Get rid of any leftover adhesive chunks—tweezers or your fingers work great. Give the area a swipe with some high-strength (over 90%) isopropyl alcohol to clear away any sticky residue.

– Rolling with Samsung custom-cut adhesives? Check out this guide.

– Using double-sided tape instead? This guide’s got your back.

Step 8

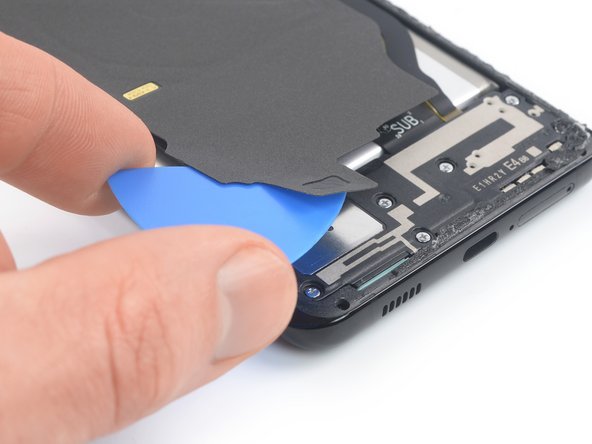
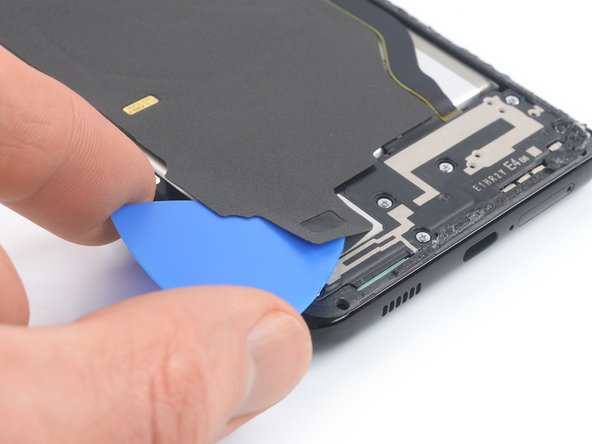
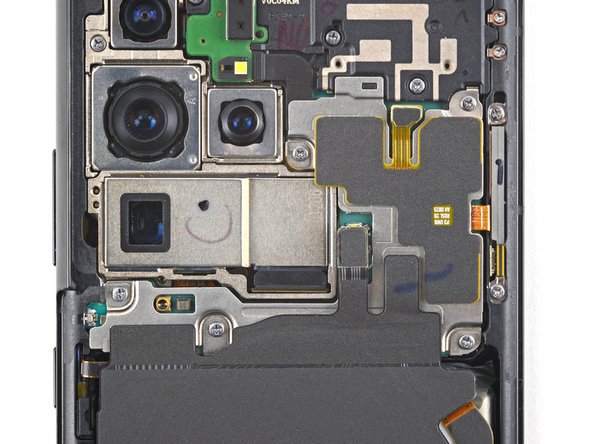
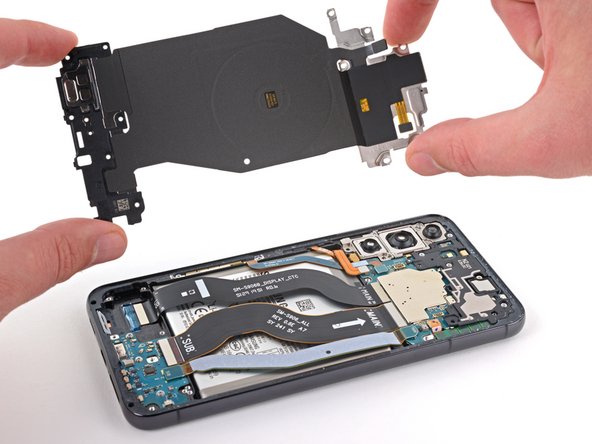
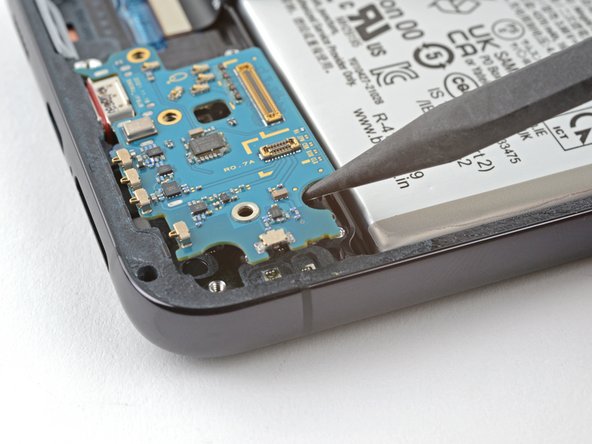
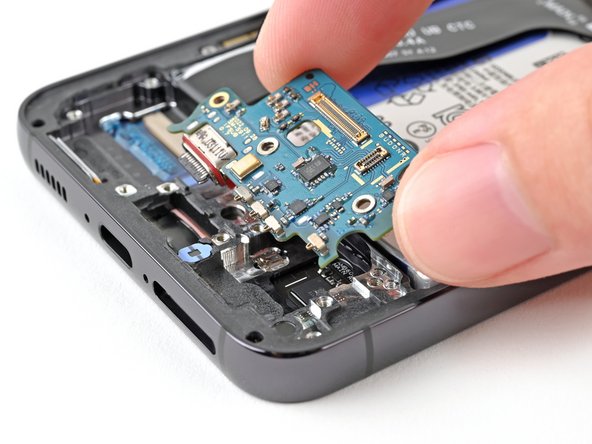
– Slide an opening pick gently under the left bottom corner of the NFC antenna and charging coil assembly. You’re doing great!

– Now, carefully glide that pick along the bottom left edge of the assembly to detach it from the battery. Keep it steady and you’re on the right track!

Step 9

– Gently wedge an opening pick right underneath the bottom edge of the NFC antenna and charging coil assembly. Then, carefully guide the pick along the bottom of the assembly to loosen it from the loudspeaker. Need a hand? You can always schedule a repair.

Step 10

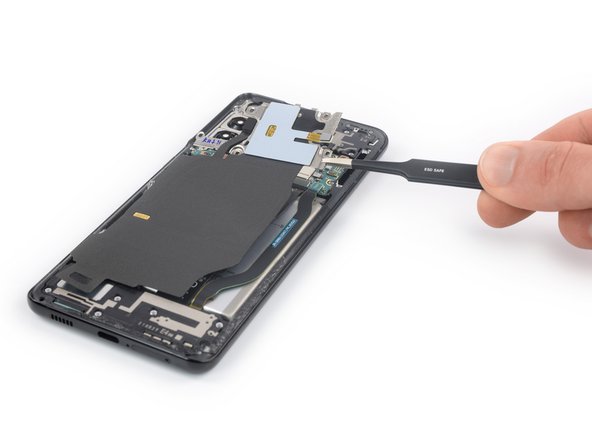
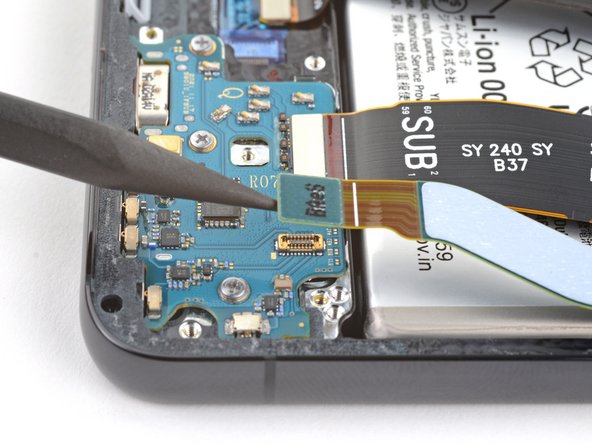
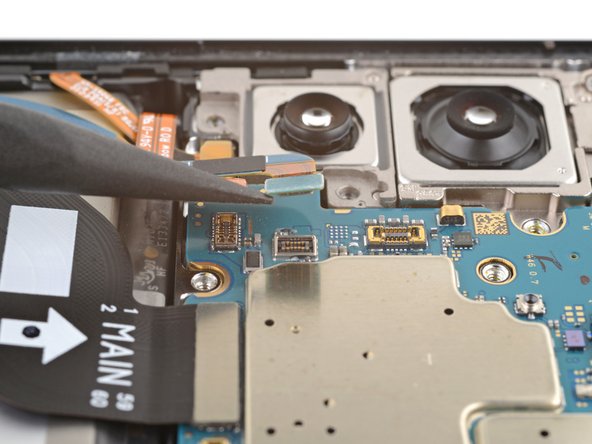
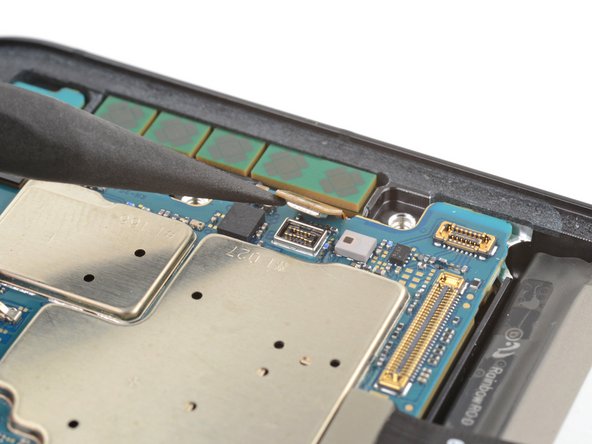
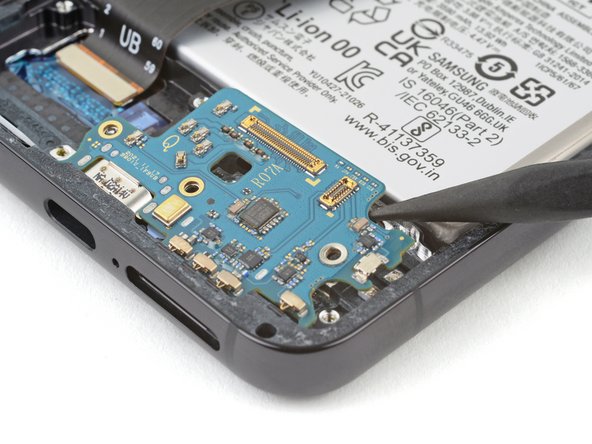
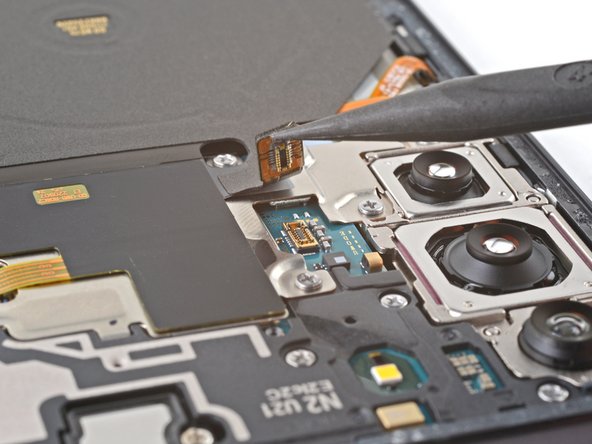
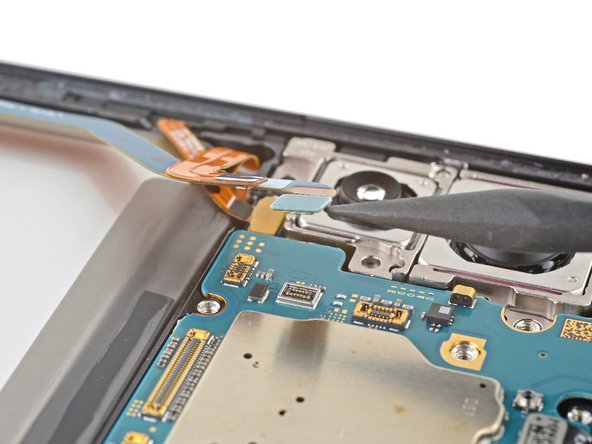
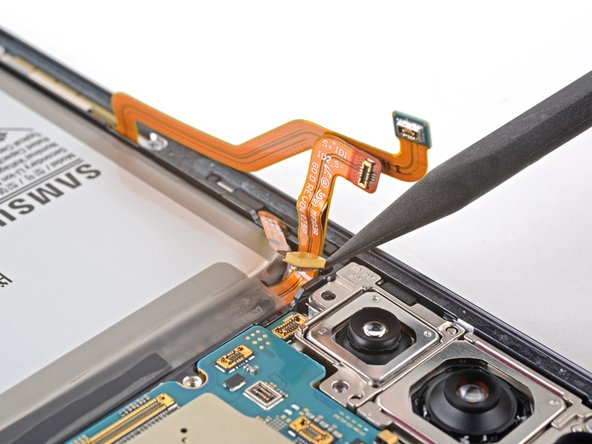
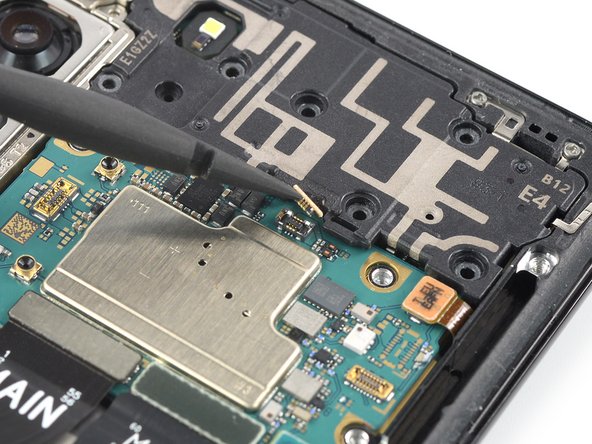
– Grab your spudger and gently pop the charging coil connector straight up from its socket. Easy does it—no need to wrestle with it!

Tools Used
  1. SpudgerSamsung Galaxy S21 Plus Screen Replacement

Step 11

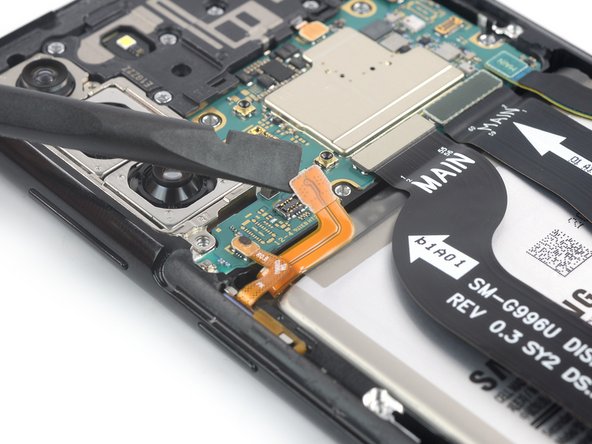
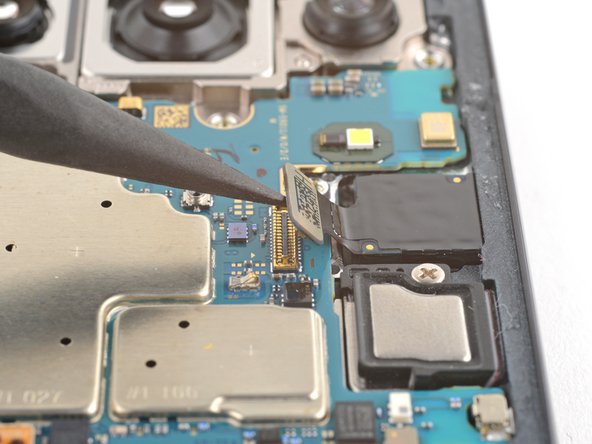
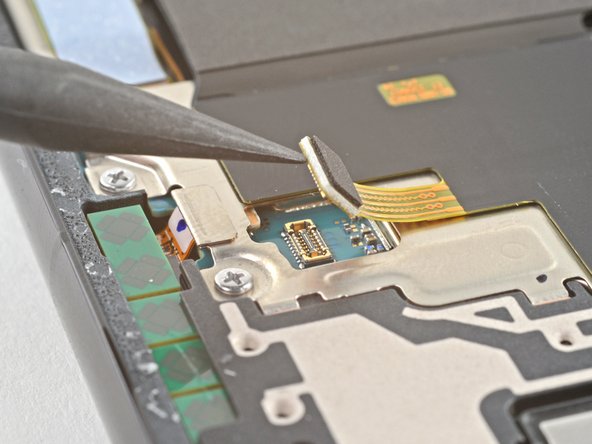
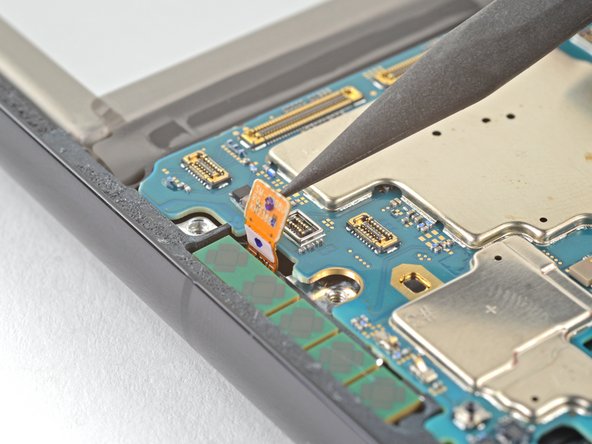
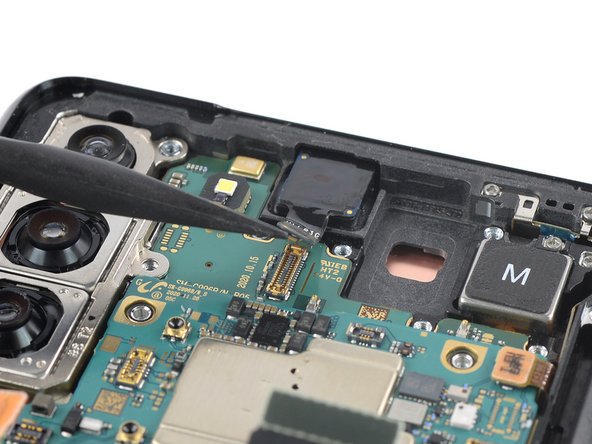
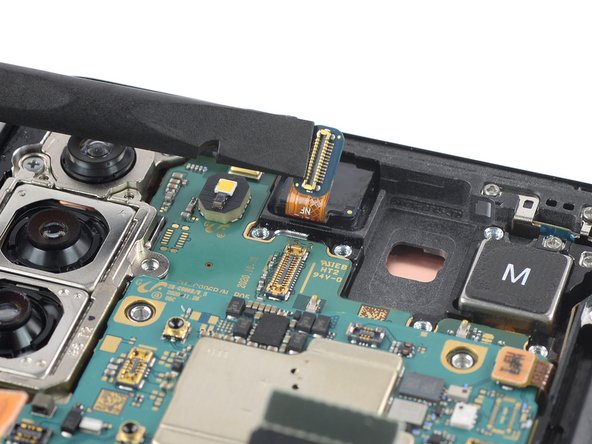
– Grab a spudger and gently lift the NFC antenna connector straight up from its socket. Easy does it—no force needed.

Tools Used
  1. SpudgerSamsung Galaxy S21 Plus Screen Replacement

Step 12

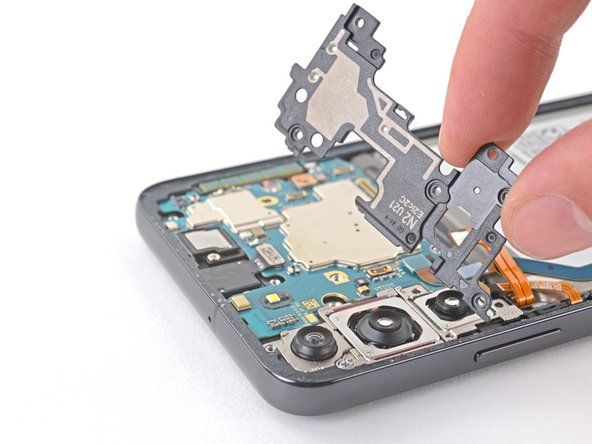
– Grab a Phillips screwdriver and unscrew the five 3.9 mm screws holding down the NFC antenna and charging coil assembly. Keep those screws safe—you’ll need them later. If you hit a snag or need extra hands, you can always schedule a repair with Salvation Repair.

Step 13

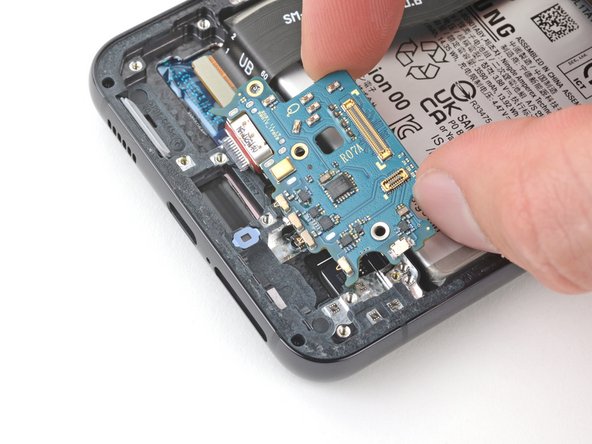
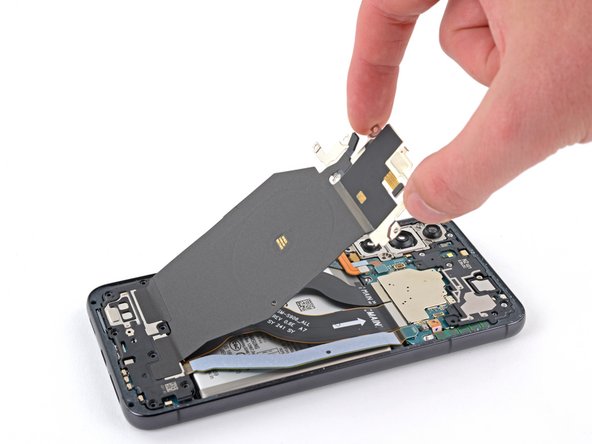
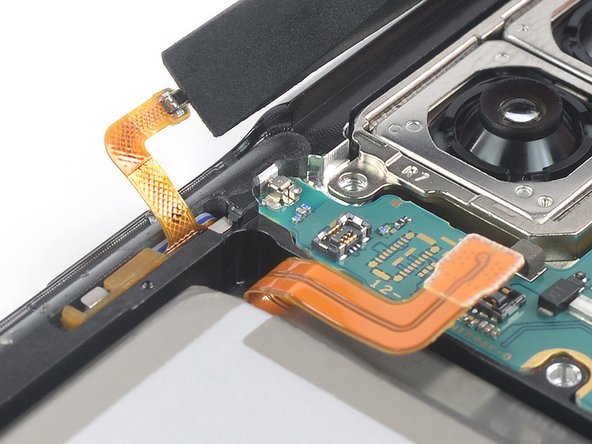
– Grab a trusty pair of tweezers or simply use your fingers, and gently pluck out the NFC antenna and charging coil assembly. You’ve got this!

Step 14

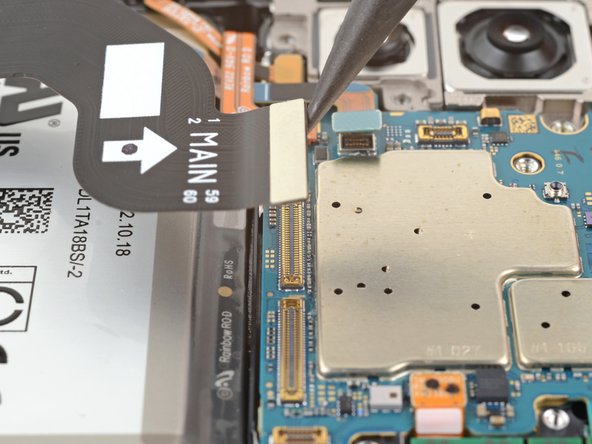
– Grab a spudger and gently pry up the battery connector from its socket. Just pop it up, no force needed!

Tools Used
  1. SpudgerSamsung Galaxy S21 Plus Screen Replacement

Step 15

– Grab a Phillips screwdriver and unscrew those six 3.9 mm-long screws holding the loudspeaker assembly in place. Keep them safe—you’ll need them later. If you run into any trouble, remember you can always schedule a repair with Salvation Repair.

Step 16

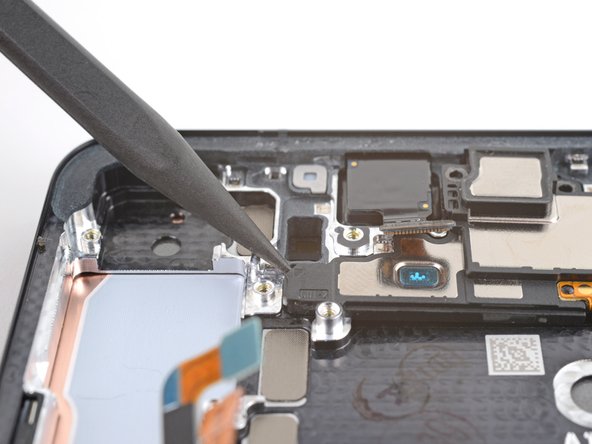
– Slide your opening pick into the gap at the top edge of the loudspeaker assembly. Then, gently pry up the assembly by tilting it downward—easy does it! If you need a hand along the way, you can always schedule a repair.

Step 17

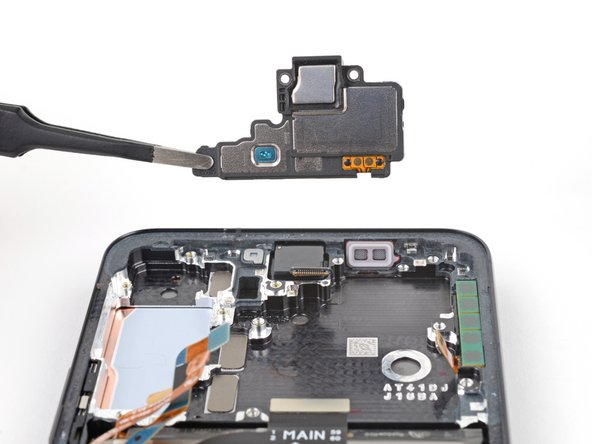
– Remove the loudspeaker assembly. When you’re ready to put everything back together, don’t forget to apply fresh adhesive where needed—just give those areas a good cleaning with isopropyl alcohol (>90%) first. It’s all about keeping things snug and secure for a smooth finish.

Step 18

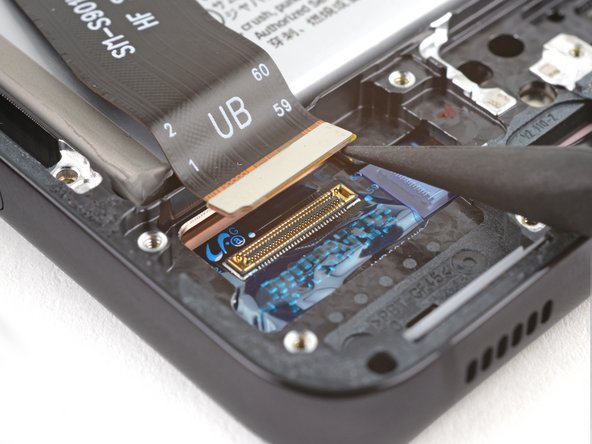
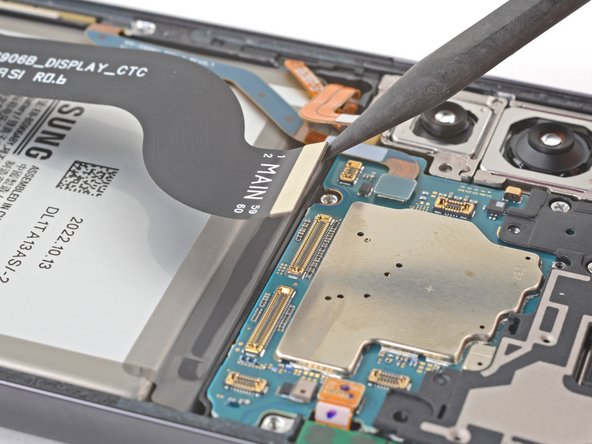
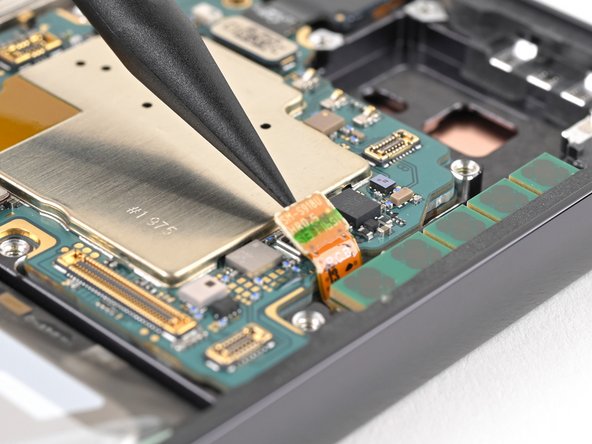
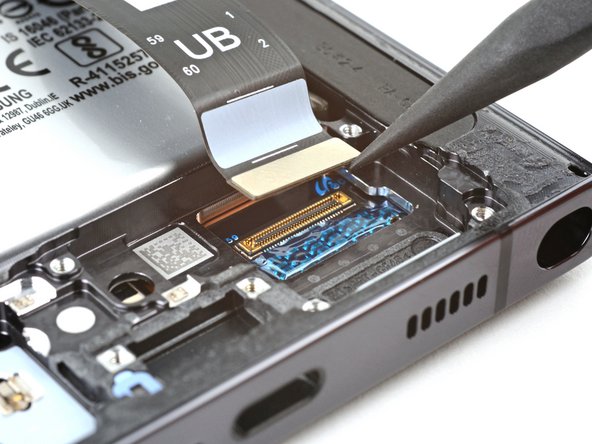
– Slide the spudger under the display flex cable’s upper connector and give it a gentle upward nudge—think of it as popping the top off your favorite fizzy drink. Connector free, display happy.

Tools Used
  1. SpudgerSamsung Galaxy S21 Plus Screen Replacement

Step 19

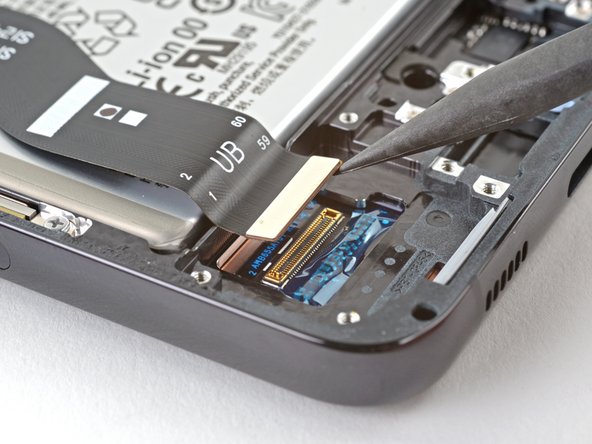
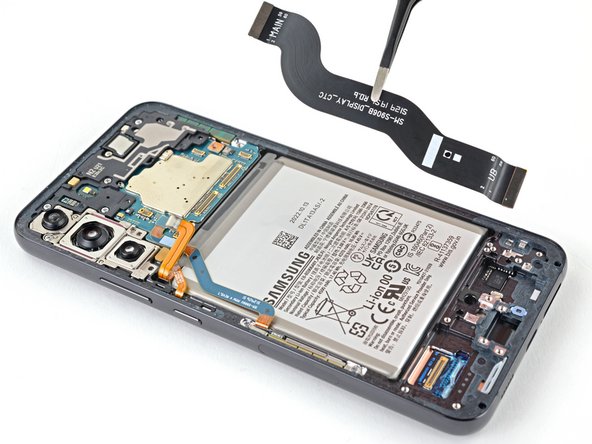
– Grab your trusty spudger and pop that display flex cable connector straight up from its socket—like opening a stubborn pickle jar, but way less messy.

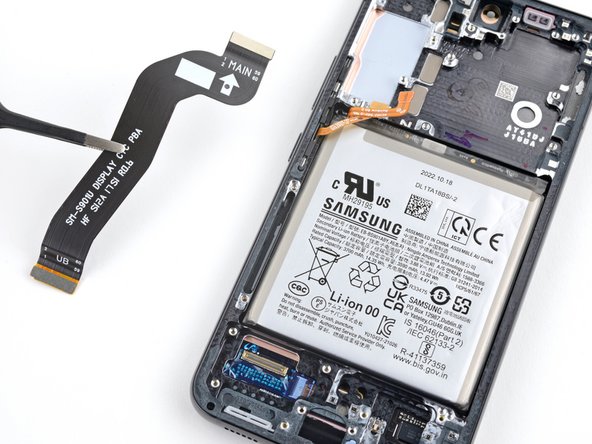
– With your fingers or a pair of tweezers, gently lift out the display flex cable. Go slow, like you’re picking out the last french fry from the bag—no rush, you got this!

Tools Used
  1. SpudgerSamsung Galaxy S21 Plus Screen Replacement

Step 20

– Place a heated iOpener on the screen to soften up that stubborn adhesive. Keep it in place for at least 5 minutes to let the heat do its magic. If you need help along the way, you can always schedule a repair.

Tools Used
  1. iOpenerSamsung Galaxy S21 Plus Screen Replacement
  2. Heat GunSamsung Galaxy S21 Plus Screen Replacement

Step 21

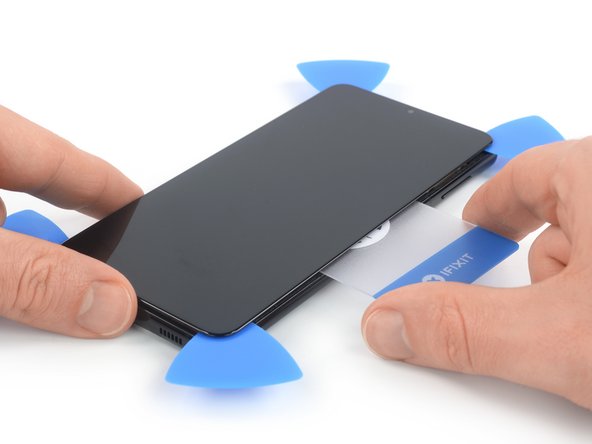
– Once the screen feels warm to the touch, grab a suction handle and place it as close to the left edge as you can. Just a little tap on the edge will do.

– Gently pull up on the suction handle to create a small gap between the screen and the frame. It’s like opening a door, but much more satisfying!

– Now, slide an opening pick into the gap. Think of it as a tiny tool to break free the screen from its grip.

– Move the pick towards the top left corner of the screen and slice through the adhesive, as smooth as a hot knife through butter.

– Leave the pick in place to prevent the adhesive from sealing back up on you. Patience is key here!

Tools Used
  1. Suction HandleSamsung Galaxy S21 Plus Screen Replacement

Step 22

– Grab a second opening pick and slide it into the top left corner of the screen, then gently glide it down to the bottom left to cut through the adhesive. Keep that pick in place to prevent the adhesive from sealing back up. If you need a hand, you can always schedule a repair.

Step 23

– Pop in a third opening pick up at the top left corner—like you’re playing high-stakes phone Tetris.

– Guide the pick along the top edge to slice through that stubborn adhesive. Glide like you mean it.

– Let the pick chill where it is, so the adhesive doesn’t sneak back together. You’re in charge now.

Step 24

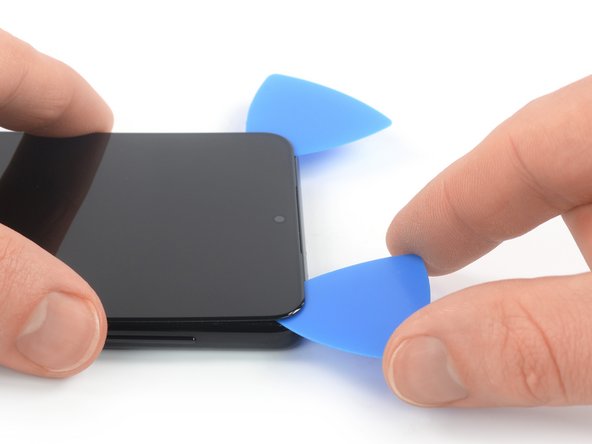
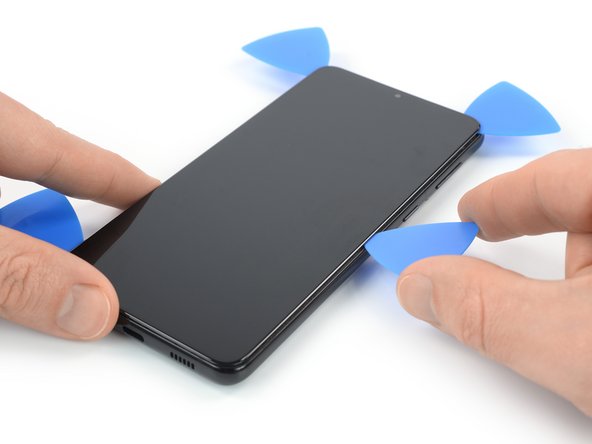
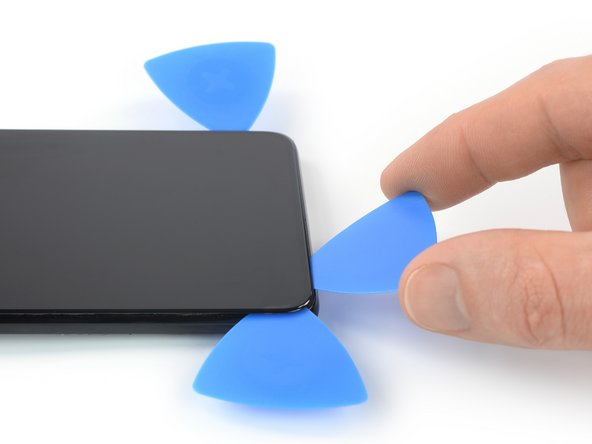
– Slip a fourth opening pick under the top right corner of the screen. You’ve got this!

– Gently glide the opening pick down the right edge of the screen to cut through that sticky adhesive. Nice and easy!

– Keep that opening pick in place to stop the adhesive from sealing up again. You’re making progress!

Tools Used
  1. iOpenerSamsung Galaxy S21 Plus Screen Replacement
  2. Heat GunSamsung Galaxy S21 Plus Screen Replacement

Step 25

– Pop in a fifth opening pick at the bottom right corner of the screen, just like adding the cherry on top of your sundae!

– Gently glide that opening pick along the bottom edge to cut through the remaining adhesive, like you’re spreading butter on warm toast!

Step 26

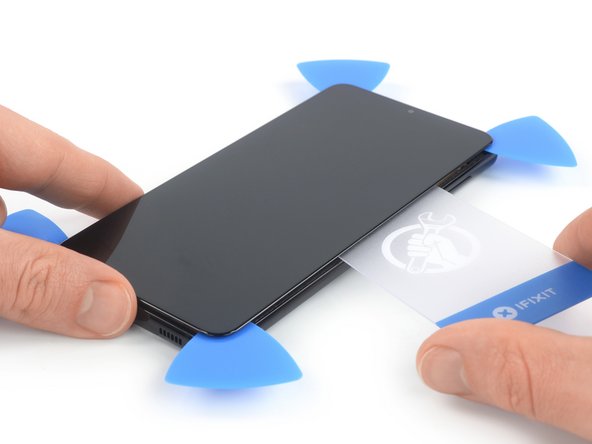
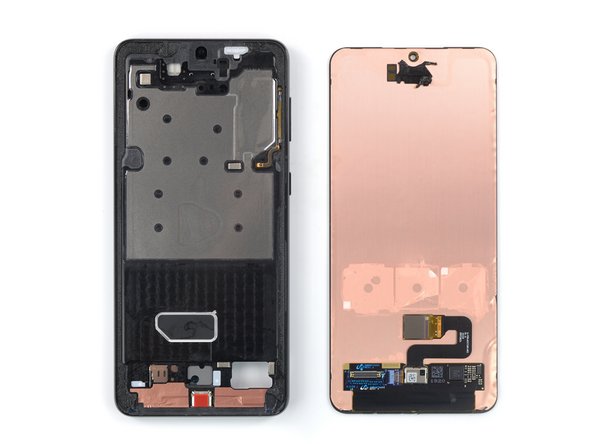
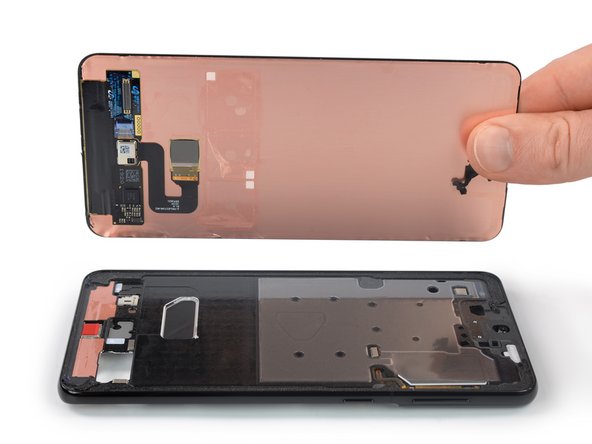
– Grab a trusty plastic card and slide it into the crack between the midframe and the screen along one of the phone’s long sides.

– Gently wiggle and slice with the card to loosen up that sticky adhesive holding the display down.

Step 27

– Fire up your device and give your repair a quick test drive before locking things back in place.

– Putting it all back together? Just reverse these steps—like rewinding your favorite song.

– Once you’re done, check out our guide to make sure your fix is working as it should.

– For a solid screen install, use custom-cut double-sided tape on the back—think of it as a security blanket for your display.

– Take your old parts to an R2 or e-Stewards recycler and let them handle the electronic leftovers.

– If things went sideways, run through some basic troubleshooting or tap into our Answers community. Need backup? You can always schedule a repair.

Success!

Samsung Galaxy S21 Ultra Screen and Battery Assembly Replacement

Duration: 45 minutes
Steps: 42 Steps

Ready to swap out the screen and battery assembly on your Samsung Galaxy S21 Ultra? This guide walks you through replacing the entire assembly — that’s the screen, battery, and frame all bundled together. Double-check you’ve got the right part before diving in. If your battery’s puffed up, take extra care—safety first. Before you start pulling things apart, fully discharge the battery to lower the risk of any thermal surprises if it gets nicked. Keep in mind, how well you reseal everything impacts water resistance, but your device will lose its IP rating after the repair.

Step 1

– Pop the SIM-eject tool (or a carefully unfolded paperclip with street cred) into the tiny hole on the phone’s top edge.

– Give it a gentle push—like ringing a doorbell—until the tray slides out to say hello.

– Lift the tray out and set it aside; you’re one step closer to gadget glory.

Step 2

– Grab an iOpener and gently place it on the back cover. Hold it there for at least three minutes to help loosen up that stubborn adhesive underneath. When in doubt, take a breather and try again — patience is part of the process. If you need a hand, you can always schedule a repair.

Tools Used
  1. iOpenerSamsung Galaxy S21 Ultra Screen and Battery Assembly Replacement
  2. Heat GunSamsung Galaxy S21 Ultra Screen and Battery Assembly Replacement

Step 3

– Stick a suction handle near the bottom edge of the back cover—get it as close to the edge as possible for maximum grip.

– Give the suction handle a gentle pull to open up a tiny gap between the back cover and the frame. You’re looking for just enough space to sneak in your next tool.

– Slide an opening pick into the gap you created. Don’t be shy—just ease it in.

– Glide the pick over to the bottom left corner and slice through that sticky adhesive holding things together.

– Leave the pick hanging out in the gap to keep the adhesive from getting any ideas about sticking itself back together.

Tools Used
  1. iOpenerSamsung Galaxy S21 Ultra Screen and Battery Assembly Replacement
  2. Suction HandleSamsung Galaxy S21 Ultra Screen and Battery Assembly Replacement

Step 4

– Pop in a second opening pick along the bottom edge of your phone.

– Slide it over to the bottom right corner to slice through the sticky stuff.

– Let those picks chill in place so the adhesive doesn’t sneak back together.

Step 5

– Pop in a third opening pick at the bottom right corner of your phone.

– Gently glide that pick along the right edge to break the adhesive’s grip.

– Keep the opening pick in the top right corner to stop the adhesive from sealing back up.

Tools Used
  1. iOpenerSamsung Galaxy S21 Ultra Screen and Battery Assembly Replacement

Step 6

– Pop in a fourth opening pick right beneath the top right corner of your phone.

– Gently glide that opening pick along the top edge to slice through the adhesive like a pro.

– Keep that opening pick snug in the top left corner to stop the adhesive from sealing up again.

Step 7

– Slip in a fifth opening pick just beneath the top left corner to get things started.

– Glide your opening pick along the left edge of the back cover, gently slicing through the remaining adhesive as you go.

Step 8

– Pop off that back cover like you mean it.

– When you’re putting things back together:

– This is the perfect moment to fire up your phone and check that everything’s working before you seal it shut again. Just make sure to fully power it down before moving forward.

– Grab your tweezers (or fingers) and pick away any leftover adhesive bits. If the sticky stuff is holding out, a little heat can help loosen things up.

– Got custom-cut adhesive? Head over to our guide for the details.

– Rolling with double-sided tape? We’ve got a guide for that, too.

Step 9

– Gently slide an opening pick under the left bottom edge of the NFC antenna and charging coil assembly. Carefully work the pick along the bottom left side to separate the assembly from the battery, keeping things smooth and steady. If you need a hand, you can always schedule a repair.

Step 10

– Grab your trusty spudger and gently pry the charging coil connector straight up from its socket. You’ve got this!

Tools Used
  1. SpudgerSamsung Galaxy S21 Ultra Screen and Battery Assembly Replacement

Step 11

– Grab a spudger and gently pry the NFC antenna connector straight up from its socket. Easy does it—just a little lift, and you’re good to go. If you need a hand, you can always schedule a repair.

Tools Used
  1. SpudgerSamsung Galaxy S21 Ultra Screen and Battery Assembly Replacement

Step 12

– Grab your Phillips screwdriver and take out the five screws (they’re 3.9 mm long) holding the NFC antenna and charging coil assembly in place. Let’s get that hardware moving!

Step 13

– Grab your Phillips screwdriver and unscrew the four 3.9 mm-long screws holding the loudspeaker assembly in place.

Step 14

– Slide the tip of a spudger into the gap between the frame and the upper-left notch of the loudspeaker. Gently pry upward with the spudger to pop the loudspeaker free from its plastic clips. If you need a hand, you can always schedule a repair.

Tools Used
  1. SpudgerSamsung Galaxy S21 Ultra Screen and Battery Assembly Replacement

Step 15

– Grab some tweezers or your trusty fingers and gently lift out the NFC antenna, charging coil, and loudspeaker assembly. You’ve got this!

– Once you’ve done that, set the assembly aside. It’ll be back in action during reassembly, so keep it safe!

Step 16

– Grab your spudger like it owes you rent and gently pop the battery’s press connector loose. Easy does it—no drama, just a clean disconnect.

Tools Used
  1. SpudgerSamsung Galaxy S21 Ultra Screen and Battery Assembly Replacement

Step 17

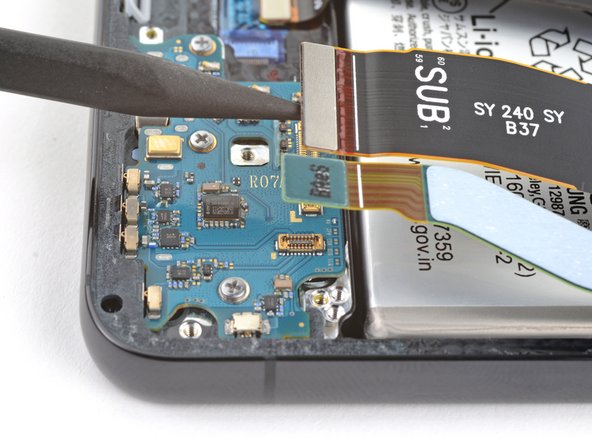
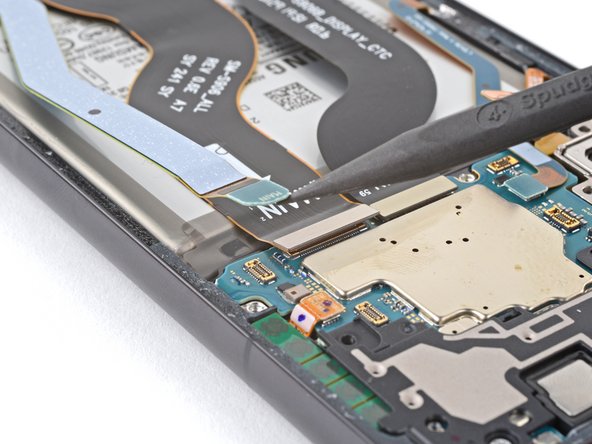
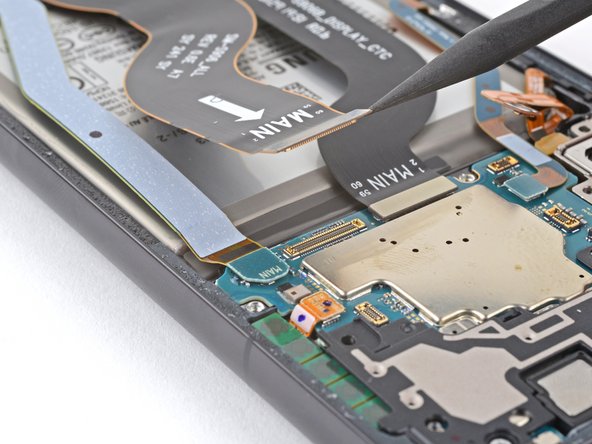
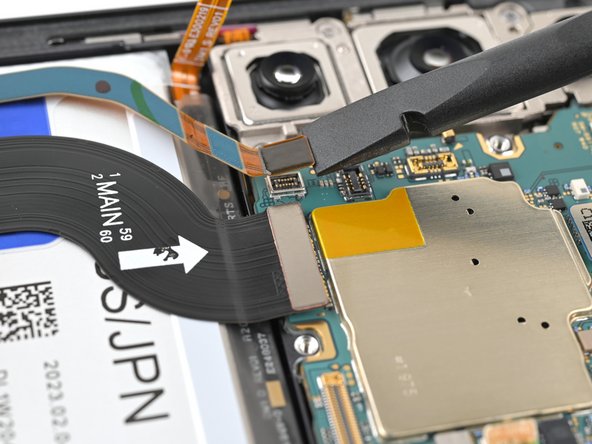
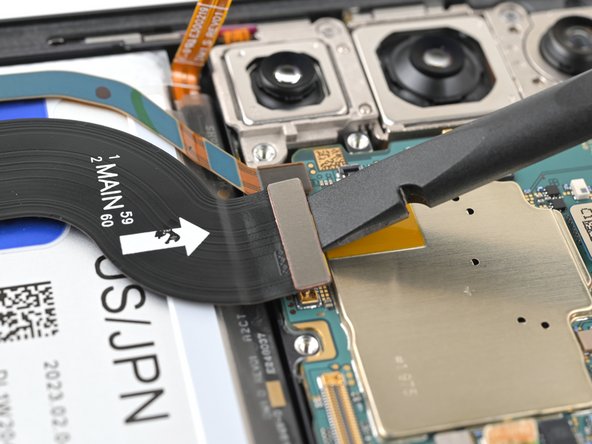
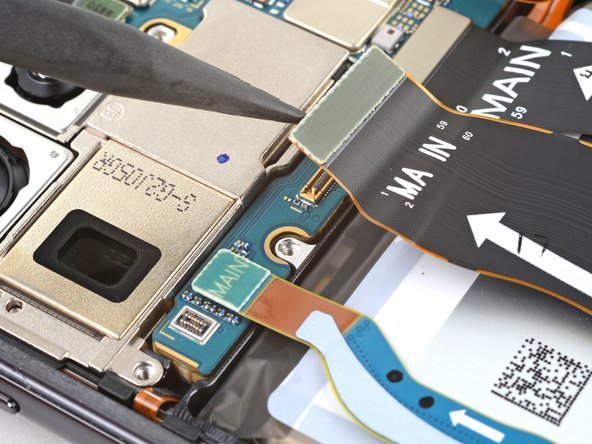
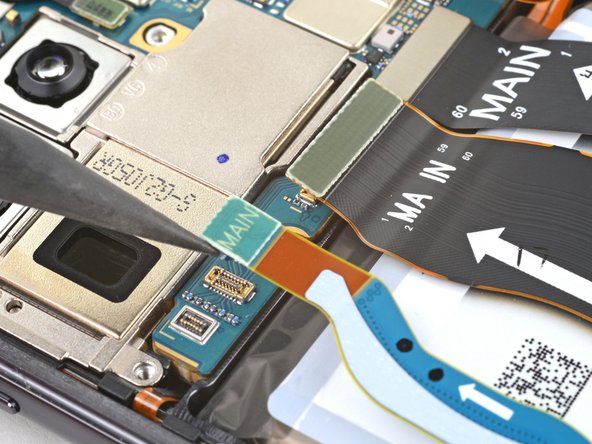
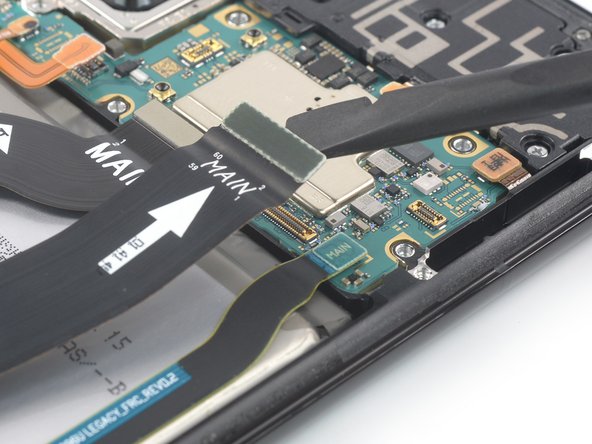
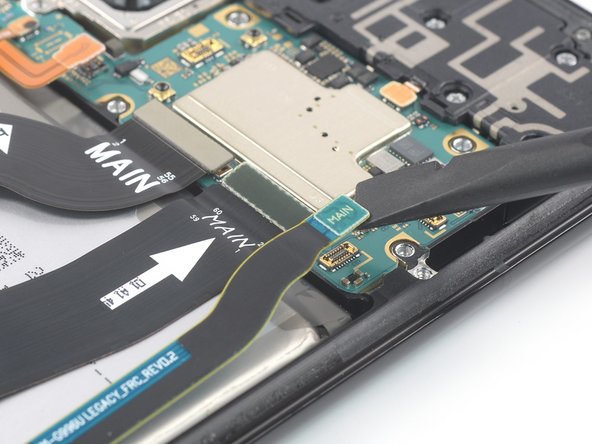
– Grab a spudger and gently pry up the connectors that link the main and secondary interconnect cables on the motherboard. Carefully disconnect them to keep everything in good shape. If you need a hand with this, you can always schedule a repair.

Tools Used
  1. SpudgerSamsung Galaxy S21 Ultra Screen and Battery Assembly Replacement

Step 18

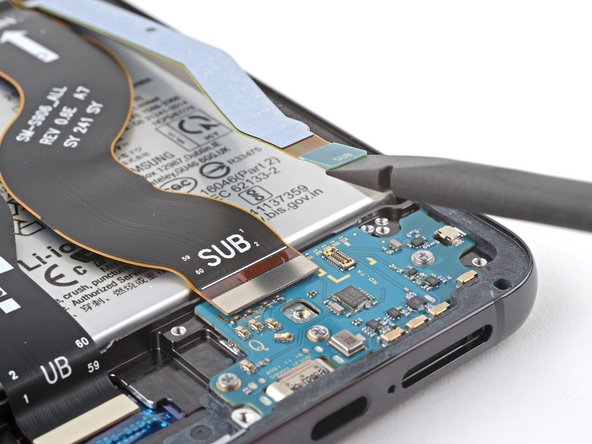
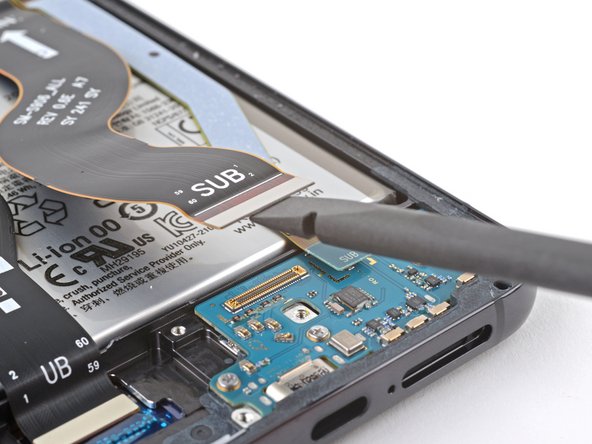
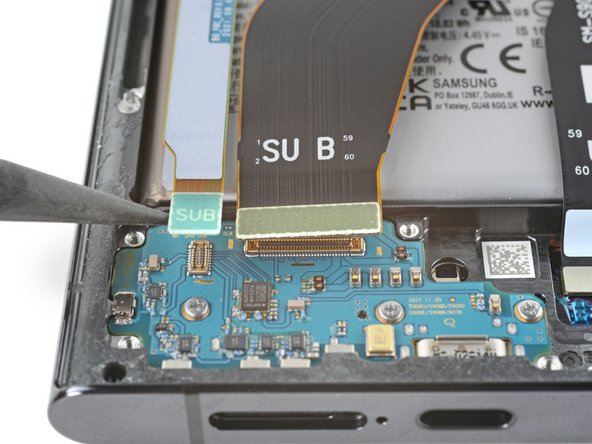
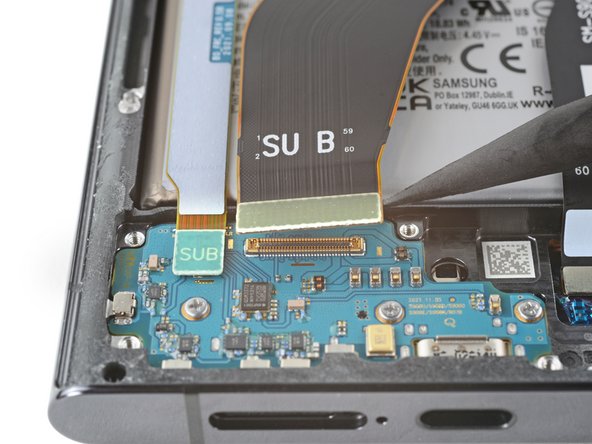
– Grab your trusty spudger and gently pop the bottom connector of the secondary interconnect cable straight up from the daughterboard socket.

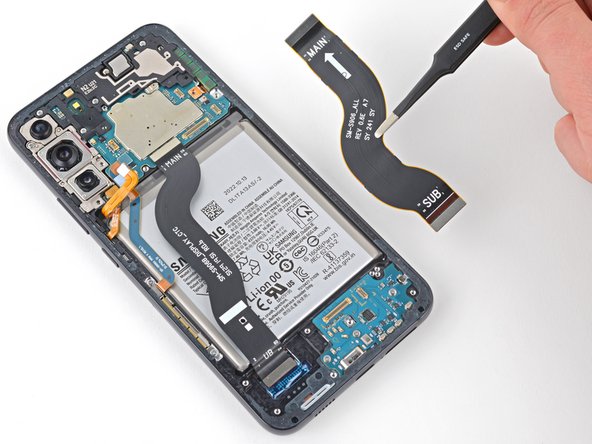
– Use your fingers or tweezers to carefully lift the secondary interconnect cable out.

– Set that cable aside—you’ll be putting it back in when you reassemble.

Tools Used
  1. SpudgerSamsung Galaxy S21 Ultra Screen and Battery Assembly Replacement

Step 19

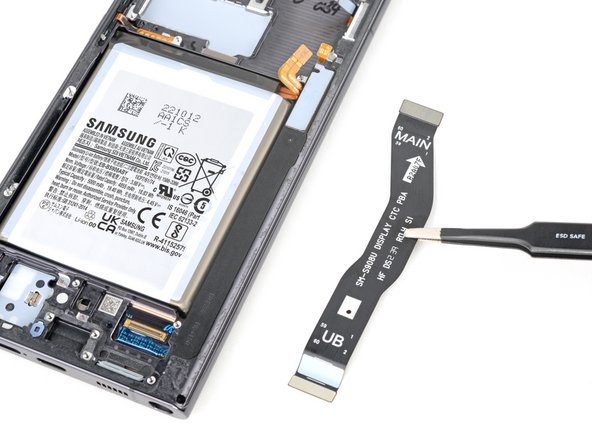
– Grab your trusty spudger and pop the primary interconnect cable off the daughterboard—just lift that bottom connector straight up.

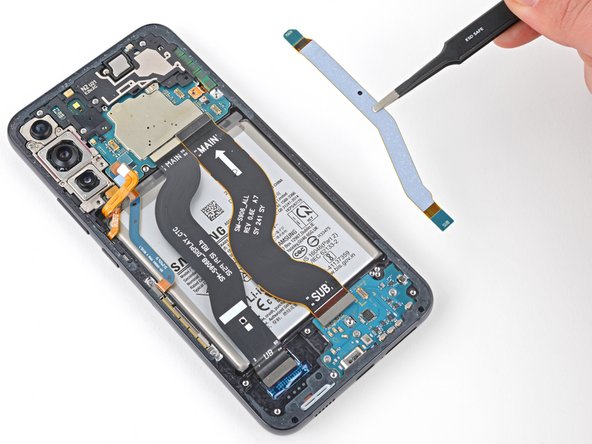
– With fingers or tweezers, gently pull out the primary interconnect cable. No need for a Hulk grip here.

– Keep the cable somewhere safe, because you’ll need it when it’s time to put everything back together.

Tools Used
  1. SpudgerSamsung Galaxy S21 Ultra Screen and Battery Assembly Replacement

Step 20

– Grab a Phillips screwdriver and loosen the three 3.4 mm screws holding down the charging board. Easy as that—just a few turns and you’re on your way. If you need help, you can always schedule a repair.

Step 21

– Slide the pointed end of your spudger carefully under the left edge of the charging board, right next to the main flex cable connector. Then, gently pry up the charging board with your spudger, giving it a little lift to loosen it from its place.

Tools Used
  1. SpudgerSamsung Galaxy S21 Ultra Screen and Battery Assembly Replacement

Step 22

– Grab some blunt tweezers or use your fingers to gently lift out the charging board. Start by lifting the top edge, then carefully slide the USB-C connector out of its slot. Take your time—patience is key! If you need a hand, you can always schedule a repair.

Step 23

– Grab your trusty spudger and gently work it under the left 5G mmWave antenna’s press connector to pop it loose. You’re doing great!

Tools Used
  1. SpudgerSamsung Galaxy S21 Ultra Screen and Battery Assembly Replacement

Step 24

– Grab a spudger and gently pry up the right 5G mmWave antenna’s press connector to disconnect it. Keep it careful and steady—no rush needed. If you need a hand, you can always schedule a repair.

Tools Used
  1. SpudgerSamsung Galaxy S21 Ultra Screen and Battery Assembly Replacement

Step 25

– Grab a Phillips screwdriver and gently unscrew the four 3.4 mm-long screws holding the 5G mmWave antennas in place. Keep track of those screws—they’re tiny but important! If you need a hand, you can always schedule a repair.

Step 26

– Grab a spudger and gently pry up the bottom screw tab of the right 5G mmWave antenna bracket—think of it as giving it a little lift to get started.

– Using tweezers or your fingers, carefully lift out the right 5G mmWave antenna—no rush, it’s all about a gentle touch.

– Set the antenna aside for now—you’ll be reusing it when it’s time to put everything back together.

Tools Used
  1. SpudgerSamsung Galaxy S21 Ultra Screen and Battery Assembly Replacement

Step 27

– Grab your trusty spudger and gently pop up the bottom screw tab of the left 5G mmWave antenna bracket.

– Use tweezers—or just your fingers—to pluck out the left 5G mmWave antenna.

– Put that antenna somewhere safe! You’ll need it again when you put everything back together.

Tools Used
  1. SpudgerSamsung Galaxy S21 Ultra Screen and Battery Assembly Replacement

Step 28

– Grab your Phillips screwdriver and unscrew the four 3.9 mm-long screws that are holding the earpiece speaker and laser AF module assembly in place.

Step 29

– Grab your trusty spudger and gently pop up the connectors for the laser AF module and the earpiece speaker flex cables—just pry them straight up and out, easy does it!

Tools Used
  1. SpudgerSamsung Galaxy S21 Ultra Screen and Battery Assembly Replacement

Step 30

– Use a pair of blunt nose tweezers to gently grab the bottom right corner of the earpiece speaker and laser AF module assembly, then carefully lift it straight up. Once free, remove the assembly from the device. Keep it handy—you’ll be reusing it during reassembly. If you need help, you can always schedule a repair.

Step 31

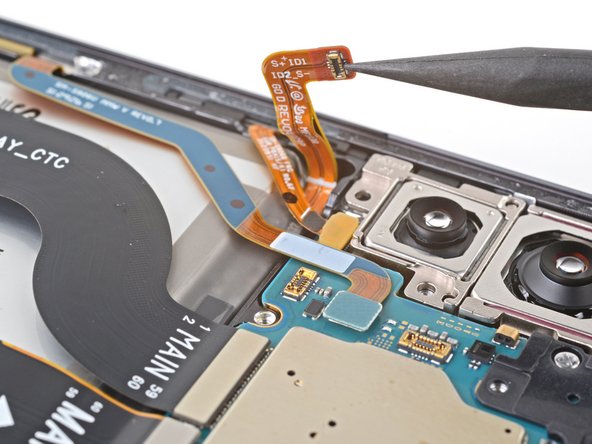
– Grab your trusty spudger and gently pop the connectors for the in-display fingerprint and antenna flex cables straight up from their sockets—think of it as giving them a little encouragement to head out.

– Once they’re loose, nudge both connectors to the side to clear the way for the motherboard. Smooth moves!

Tools Used
  1. SpudgerSamsung Galaxy S21 Ultra Screen and Battery Assembly Replacement

Step 32

– Gently pop the front-facing camera cable connector straight up with your spudger—like opening a stubborn jar, but way less messy.

Tools Used
  1. SpudgerSamsung Galaxy S21 Ultra Screen and Battery Assembly Replacement

Step 33

– Grab your trusty spudger and lift the power button flex cable connector straight up—think of it as giving the motherboard a little breathing room.

– Gently nudge the connector to the side so your motherboard can break free and do its thing.

Tools Used
  1. SpudgerSamsung Galaxy S21 Ultra Screen and Battery Assembly Replacement

Step 34

– Grab your trusty spudger and gently pop up the display cable’s press connector. Easy does it—no need to rush!

Tools Used
  1. SpudgerSamsung Galaxy S21 Ultra Screen and Battery Assembly Replacement

Step 35

– Grab some tweezers or just use your fingers to gently bend the display cable away from the device. Easy does it—you’re making room for the next step.

Step 36

– Grab your trusty Phillips screwdriver and twist out that tiny 3.9 mm screw holding the camera module—easy does it!

Step 37

– Grab your trusty spudger and slide it under the top edge of the motherboard right next to the vibration motor. We’re getting into the nitty-gritty!

– Give that spudger a little twist to gently lift and loosen the motherboard. You’ve got this!

Tools Used
  1. SpudgerSamsung Galaxy S21 Ultra Screen and Battery Assembly Replacement

Step 38

– Gently lift out the motherboard like you’re handling a delicate slice of cake—no sudden moves!

Step 39

– Place a heated iOpener on the front camera for about 90 seconds to get things nice and toasty.

Tools Used
  1. iOpenerSamsung Galaxy S21 Ultra Screen and Battery Assembly Replacement

Step 40

– Slip a spudger into the little gap next to the front camera—like you’re picking the lock on a treasure chest.

– Gently pop the front camera up with the spudger. It should come loose from the frame, no sweat.

– Grab the camera with tweezers or your fingers and lift it out. Easy does it!

– Put the camera somewhere safe—you’ll want to use it again when you put things back together.

Tools Used
  1. SpudgerSamsung Galaxy S21 Ultra Screen and Battery Assembly Replacement

Step 41

– Now you’ve got just the screen and battery assembly hanging out together.

– Grab your new replacement part and size it up against the original—sometimes you’ll need to move a few leftover bits over or peel off sticky protectors before popping it in.

Step 42

– To put your device back together, just work through the steps in reverse.

– When it’s time to say goodbye to your old parts, drop them off at an R2 or e-Stewards certified recycler.

– If things didn’t go quite as planned, try a little troubleshooting or connect with our Answers community for some extra tips. And if you’d rather leave it to the pros, you can always schedule a repair.

Success!
To put your device back together, just retrace the steps you took—like rewinding your favorite mixtape.
Don’t toss old tech in the trash—drop it off at an R2 or e-Stewards certified recycler so it can live its best second life.
If things didn’t go as smoothly as you hoped, give some basic troubleshooting a shot, or swing by our Answers community for advice. If you’re still stuck, you can always schedule a repair and let us handle it.

Samsung Galaxy S22 Screen and Battery Assembly Replacement

Duration: 45 minutes
Steps: 55 Steps

Ready to swap out the screen and battery assembly in your Samsung Galaxy S22? This step-by-step guide is all about the combo unit — that’s the screen, battery, and frame all in one piece. Double-check you’ve got the right part before diving in. Keep in mind, sealing up your device to keep water resistance intact depends on how well you reapply the adhesive, so don’t expect an IP rating to magically stay. If you need a hand, you can always schedule a repair.

Step 1

– Grab your trusty SIM eject tool, a bit, or even a straightened paper clip, and slide it into the SIM card tray hole located on the bottom edge of your phone.

– Give that SIM eject tool a little push into the tray hole to pop out the SIM card tray like a pro.

– Carefully take out the SIM card tray and set it aside.

Step 2

– Warm up your iOpener and give it a cozy spot on the bottom edge of the back cover for a solid two minutes. Let’s get that adhesive nice and toasty!

Tools Used
  1. iOpenerSamsung Galaxy S22 Screen and Battery Assembly Replacement
  2. Heat GunSamsung Galaxy S22 Screen and Battery Assembly Replacement

Step 3

– While waiting for the adhesive to loosen up, keep in mind: there’s a sticky grip holding the back cover around the edges of the frame.

Step 4

– Stick a suction cup near the bottom edge of the back cover, getting as close to the bottom as you can. No need to be shy—just make sure it’s firmly attached.

– Pull gently but firmly on the suction cup to create a small gap between the cover and the frame—think of it as giving the device a friendly nudge to start the separation.

– Carefully slide an opening pick into that gap to keep it open and continue the disassembly. Stay patient, and if you need a hand, you can always schedule a repair.

Tools Used
  1. iOpenerSamsung Galaxy S22 Screen and Battery Assembly Replacement
  2. Suction HandleSamsung Galaxy S22 Screen and Battery Assembly Replacement

Step 5

– Glide the pick along the bottom edge, making sure to break up that sticky adhesive as you go.

– Keep the pick chilling in the bottom left corner—this keeps the glue from trying to make a comeback.

Step 6

– Warm up the left edge of the back cover with a heated iOpener for about two minutes. The goal is to loosen things up and make the next steps smoother.

Tools Used
  1. iOpenerSamsung Galaxy S22 Screen and Battery Assembly Replacement

Step 7

– Time to get this repair started! Insert a second opening pick at the bottom left corner, and let’s get that adhesive loosened up.

– Now, slide the pick down to the bottom of the camera bezel to slice through the left adhesive – you’re making great progress!

– Leave the pick in place to keep that adhesive from resealing, and get ready for the next step in this repair journey.

Step 8

– Warm up your iOpener and give it a cozy spot on the right edge of the back cover for a solid two minutes. Let’s get that adhesive nice and toasty!

Tools Used
  1. iOpenerSamsung Galaxy S22 Screen and Battery Assembly Replacement

Step 9

– Grab a third pick and gently insert it into the bottom right corner to start loosening things up.

– Carefully slide that pick up toward the top right corner, slicing through the adhesive along the way.

– Leave the pick in the top right corner to keep the adhesive from sticking back together. If you need help, you can always schedule a repair.

Step 10

– Warm up an iOpener until it’s nice and pliable, then gently press it against the top edge of the back cover for about two minutes. This will help soften the adhesive for easier removal. If you need a hand, you can always schedule a repair.

Tools Used
  1. iOpenerSamsung Galaxy S22 Screen and Battery Assembly Replacement

Step 11

– Pop an opening pick into the gap at the top right edge—like you’re slicing into a perfectly wrapped present.

– Glide the pick along the top edge and curve it around the top left corner to gently break up the last bit of sticky adhesive.

Step 12

– Pop off the back cover and set it aside.

– While putting things back together:

– Now’s a solid moment to fire up your phone and make sure everything’s working before you seal the deal. Power it down fully again before moving on—no surprises wanted.

– If there’s leftover adhesive hanging around, grab some tweezers or use your fingers to clear it out. Stubborn bits? Hit them with some heat for easier removal.

– Ready for fresh adhesive? Follow this guide to lay it down right.

Step 13

– Gently use the sharp end of a spudger to carefully detach the wireless charging coil from the motherboard.

Tools Used
  1. SpudgerSamsung Galaxy S22 Screen and Battery Assembly Replacement

Step 14

– Grab your trusty Phillips screwdriver and get ready to tackle those six 3.5 mm-long screws holding down the wireless charging coil. It’s time to show those screws who’s boss!

Step 15

– Grab your Phillips screwdriver and gently remove the seven 3.5 mm screws holding the loudspeaker in place. Keep those screws safe—you’ll want them when reassembling. When in doubt, if you need a hand, you can always schedule a repair for extra help.

Step 16

– Slide the pointy end of your spudger between the top left corner of the loudspeaker and the frame—like you’re sneaking into a VIP section.

– Gently pop the loudspeaker up to unclip it from the frame. It might give a little resistance, but you’ve got this.

– When putting things back together, press all along the edge of the loudspeaker to snap those clips back in place. Nice and snug.

Tools Used
  1. SpudgerSamsung Galaxy S22 Screen and Battery Assembly Replacement

Step 17

– Slide that wireless charging coil and speaker out of the frame like you’re pulling the last slice of pizza—smooth and satisfying.

Step 18

– Take the pointy end of your spudger and gently pop up the battery press connector—like giving your device a little high-five for progress!

Tools Used
  1. SpudgerSamsung Galaxy S22 Screen and Battery Assembly Replacement

Step 19

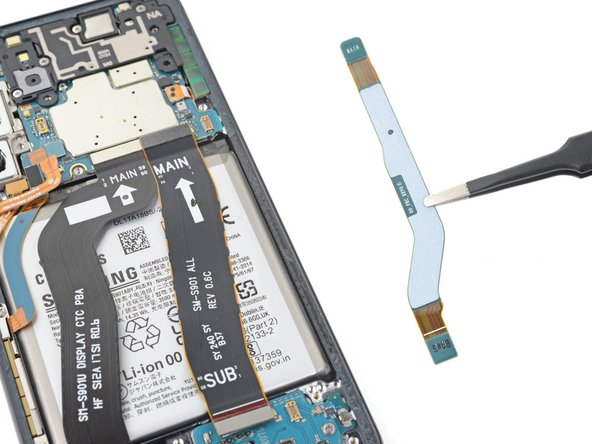
– Grab your trusty spudger and use its pointed end to carefully lift up and disconnect both interconnect cables from the motherboard. You’ve got this!

Tools Used
  1. SpudgerSamsung Galaxy S22 Screen and Battery Assembly Replacement

Step 20

– Grab the pointed end of your spudger and gently pry up to disconnect both interconnect cables from the charging board. Take your time and be gentle—these connectors are delicate. If you need a hand, you can always schedule a repair.

Tools Used
  1. SpudgerSamsung Galaxy S22 Screen and Battery Assembly Replacement

Step 21

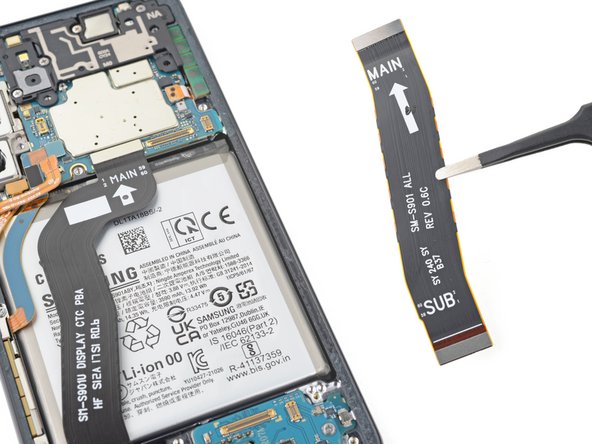
– Carefully disconnect the two interconnect cables from the frame. When putting everything back together, make sure the ‘main’ ends are pointing toward the top of the phone and the ‘sub’ ends are facing downward. Need a hand? You can always schedule a repair if things get tricky.

Step 22

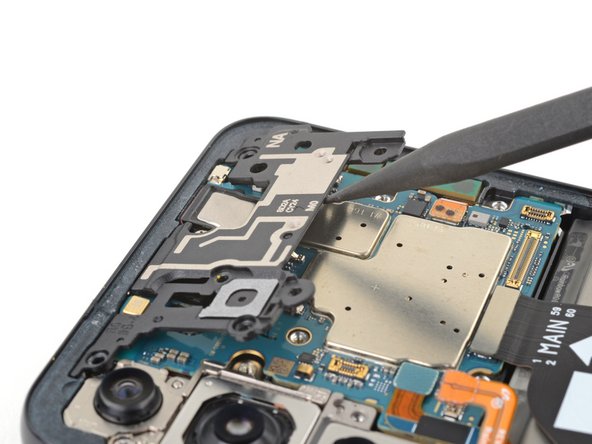
– Grab your trusty Phillips screwdriver and take out the four 3.5 mm screws holding down the motherboard cover.

Step 23

– Slide the sharp end of your spudger right between the bottom of the motherboard cover and the motherboard. It’s like a little dance move!

– Gently lift the cover to pop it free from the frame. You’ve got this!

Tools Used
  1. SpudgerSamsung Galaxy S22 Screen and Battery Assembly Replacement

Step 24

– Carefully lift and take out the motherboard cover to get the party started.

Step 25

– Gently use the pointed end of your spudger to lift and disconnect the left 5G mmWave antenna press connector. You’re doing great!

Tools Used
  1. SpudgerSamsung Galaxy S22 Screen and Battery Assembly Replacement

Step 26

– Grab the pointy end of your spudger and gently pop up that front-facing camera connector. Easy does it—no need to rush!

Tools Used
  1. SpudgerSamsung Galaxy S22 Screen and Battery Assembly Replacement

Step 27

– Take the pointy end of your spudger and gently pop up the screen press connector—like opening a secret latch.

Tools Used
  1. SpudgerSamsung Galaxy S22 Screen and Battery Assembly Replacement

Step 28

– Grab that pointed end of your spudger and gently pry up the right 5G mmWave antenna press connector to disconnect it. Easy does it—you’re just teasing it loose like a pro. If you need a hand, remember you can always schedule a repair with Salvation Repair.

Tools Used
  1. SpudgerSamsung Galaxy S22 Screen and Battery Assembly Replacement

Step 29

– Grab your trusty spudger and use its pointed end to gently pop up and disconnect the power and volume button’s press connector. You’re doing great!

– When you’re putting everything back together, just keep in mind that this cable wants to hang out under the battery cable. It’s all about giving them the right space!

Tools Used
  1. SpudgerSamsung Galaxy S22 Screen and Battery Assembly Replacement

Step 30

– Grab your Phillips screwdriver and take out the 3.5 mm screw holding the motherboard in place. Easy does it—keep that screw safe for reassembly!

Step 31

– Slide the pointed end of your spudger into the gap at the bottom right corner between the motherboard and the frame.

– Gently pry the motherboard upward until you can grip it with your fingers and lift it out.

Tools Used
  1. SpudgerSamsung Galaxy S22 Screen and Battery Assembly Replacement

Step 32

– Pinch the right edge of the motherboard and gently lift—think of it as rescuing it from the frame.

– When you’re putting everything back, make sure the cables are lounging on top of the motherboard so it slides home like a champ.

Step 33

– Grab your Phillips screwdriver and take out those three 3.5mm screws holding the charging board in place. Simple as that!

Step 34

– Slip the pointy end of your spudger between the top right corner of the charging board and the frame—give it a little wiggle.

– Gently pop the charging board up until you can grab it with your fingers. Almost there!

Tools Used
  1. SpudgerSamsung Galaxy S22 Screen and Battery Assembly Replacement

Step 35

– Grab the charging board by its corners and gently slide it out of its cozy spot in the frame.

– Time to say goodbye to the charging board! Carefully remove it.

– When putting everything back together, angle the charging board downwards a bit to help the USB-C port find its place in the recess like it’s going home.

Step 36

– Grab your Phillips screwdriver and take out the two screws (they’re 2.9 mm long) holding the earpiece speaker in place. Easy does it!

Step 37

– Slip the pointed end of your spudger gently under the left edge of the earpiece speaker. Then, carefully pry upward to unclip the earpiece speaker from the frame. If you need help along the way, you can always schedule a repair.

Tools Used
  1. SpudgerSamsung Galaxy S22 Screen and Battery Assembly Replacement

Step 38

– Snag that earpiece speaker and pop it out with ease!

Step 39

– Grab your Phillips screwdriver and unscrew the pair of 3.5 mm-long screws holding down the lower 5G mmWave antenna. Easy does it—just a couple of turns, and you’re good to go. If you need a hand, you can always schedule a repair.

Step 40

– Slide the pointy end of your spudger between the bottom screw mount of the antenna bracket and the frame—like you’re picking a lock, but less dramatic.

– Give the bracket a gentle lift until it’s loose enough to grab with some blunt tweezers or your fingers. No need for superhero strength.

– Take out the lower 5G mmWave antenna. Easy does it!

Tools Used
  1. SpudgerSamsung Galaxy S22 Screen and Battery Assembly Replacement

Step 41

– Swap out the old bracket for a fresh one before popping in the lower 5G mmWave antenna—unless you’re flying solo without a new bracket, then just skip this part.

– Gently pluck the antenna and connector out of the old bracket. No need to wrestle with it.

– Peel off the L-shaped adhesive liner from your shiny new bracket. It’s like unwrapping a tiny present.

– Nestle the antenna into the bracket’s recess, making sure the connector sneaks under the longer screw mount.

– Strip away the thin adhesive liner from the outside of the bracket, and then slide it into the frame like a pro.

Step 42

– Slide the sharp end of your spudger into the little gap between the upper 5G mmWave antenna and the frame. You’ve got this!

– Gently pry the antenna out of its snug spot until you can easily grab it with your fingers or some blunt nose tweezers. Keep it steady!

– Carefully take out the upper 5G mmWave antenna. You’re doing great!

Tools Used
  1. iOpenerSamsung Galaxy S22 Screen and Battery Assembly Replacement
  2. SpudgerSamsung Galaxy S22 Screen and Battery Assembly Replacement

Step 43

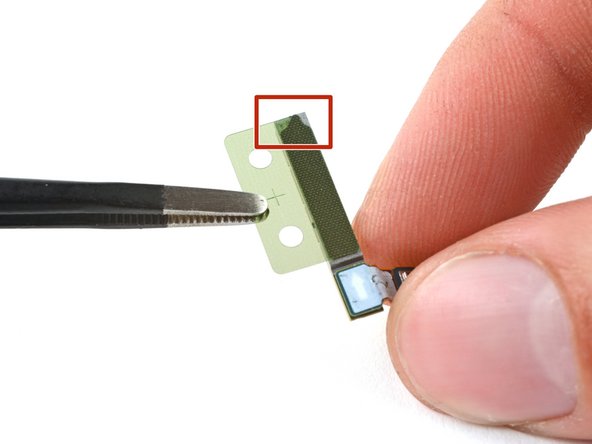
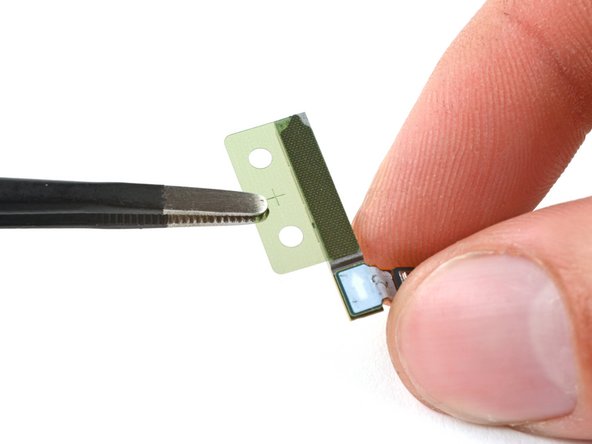
– Stick some fresh adhesive on that upper 5G mmWave antenna before you pop it back in. If you’re out of new adhesive, just reuse the old stuff or grab some custom-cut tape—no biggie.

– Peel off the old adhesive from the antenna using blunt nose tweezers or, hey, your fingers work just fine too.

– Take off the clear liner from your new adhesive—think of it like unwrapping candy, but for your device.

– Slap the new adhesive onto the bottom of the antenna, making sure the round end is furthest from the connector. Precision points if you get it lined up just right.

– Peel off the green liner before you slide the antenna back into the frame. And there you go, antenna ready for action!

Step 44

– Warm up your iOpener and let it chill on the top of the screen for about two minutes.

Tools Used
  1. iOpenerSamsung Galaxy S22 Screen and Battery Assembly Replacement
  2. Heat GunSamsung Galaxy S22 Screen and Battery Assembly Replacement

Step 45

– Grab the pointed end of your spudger and gently pop the front-facing camera out of its spot—like you’re giving it a little nudge to come out and play.

Step 46

– Grab your trusty blunt nose tweezers and gently pluck out the front-facing camera from its snug little spot. Easy does it—you’re just teasing it out of the recess.

Step 47

– Alright, let’s get your new frame ready for that front-facing camera! First up, peel off the black adhesive liner from the camera recess. It’s like taking a sticker off, but way more exciting!

– Next, grab that foam liner from the new frame and give it a good peel. It’s out with the old and in with the new! You’re doing great!

Step 48

– Get ready to install that front-facing camera! First, swap out the old adhesive in the frame for a fresh one.

– Peel off the clear liner from the camera adhesive—think of it like opening a secret level.

– Pop the adhesive into the camera’s little nook, making sure the pull tab is chillin’ on the right side.

– Grab that blue adhesive liner and pull it away with the tab. Satisfaction guaranteed.

– Now, nestle the front-facing camera into its spot in the frame, and give it a gentle press so it sticks like it means it.

Step 49

– Grab your spudger and gently pop up the display cable connector—just give it a little lift, and you’re good to go!

Tools Used
  1. SpudgerSamsung Galaxy S22 Screen and Battery Assembly Replacement

Step 50

– Gently unplug the display cable from its cozy spot on the frame.

Step 51

– Gently slide the corner of your spudger into the tab on the power and volume button bracket. It’s like giving the tab a little nudge!

– Now, give the spudger a twist upwards to carefully pry the bracket out of its snug spot in the frame. Take it slow and steady.

– When putting things back together, press each button to make sure they snap into place with that satisfying ‘click’ sound. They should feel just like they did before you started.

Tools Used
  1. SpudgerSamsung Galaxy S22 Screen and Battery Assembly Replacement

Step 52

– Grab the power and volume button bracket using blunt nose tweezers or your fingers, then gently lift it out. Next, peel away the button pad with your fingers. When putting things back together, slide the button pad in first, then position the bracket against the back of the pad—together, they’ll fit snugly. Need a hand? You can always schedule a repair.

Step 53

– Slide one arm of your trusty blunt nose tweezers into the cozy little recess of the power button.

– Give a gentle nudge to the power button’s peg to disconnect it just enough so you can snag it with your fingers.

– Now, seize that power button and lift it out like a pro!

Step 54

– Gently insert one arm of your blunt-tipped tweezers into the groove of the volume button.

– Press on both of the volume button’s pegs simultaneously to loosen them from the frame, making it easier to grab the buttons with your fingers.

– Carefully use your fingers to lift out and remove the volume buttons.

Step 55

– Time to put everything back together! Just follow these steps in reverse, and you’ll be good as new.

– Now that you’re done, don’t forget to responsibly recycle your e-waste with an R2 or e-Stewards certified recycler.

– If things didn’t quite go as planned, don’t worry! You can always schedule a repair or check out our troubleshooting community for some extra help.

Success!

Samsung Galaxy S22 Plus Screen and Battery Assembly Replacement

Duration: 45 minutes
Steps: 50 Steps

Ready to swap out the screen and battery on your Samsung Galaxy S22+? You’ll be working with the full screen, battery, and frame assembly—all bundled together for a smooth repair. Double-check you’ve got the right part before diving in. Heads up: keeping your phone water-resistant depends on how well you stick everything back together, but the official IP rating won’t stick around after the repair.

Step 1

– Take your SIM eject tool, tiny screwdriver bit, or a trusty paper clip—straighten that bad boy out—and aim for the little hole next to the SIM tray on the bottom edge of your phone.

– Gently press the tool into the hole until the SIM card tray pops out. It’s like a secret handshake for your phone.

– Pull the SIM card tray out and set it aside. Easy does it!

Step 2

– Grab your iOpener and stick it on the bottom edge of the back cover for about three minutes. This will help loosen the adhesive hiding underneath, making the next steps much smoother.

Tools Used
  1. Heat GunSamsung Galaxy S22 Plus Screen and Battery Assembly Replacement
  2. iOpenerSamsung Galaxy S22 Plus Screen and Battery Assembly Replacement

Step 3

– Stick a suction handle on the bottom edge of the back cover—get it as close to the edge as you can for maximum grip.

– Give that suction handle a gentle lift to open up a tiny gap between the back cover and the frame.

– Slide an opening pick into that gap. Go slow, you got this!

Tools Used
  1. iOpenerSamsung Galaxy S22 Plus Screen and Battery Assembly Replacement
  2. Suction HandleSamsung Galaxy S22 Plus Screen and Battery Assembly Replacement

Step 4

– Take off the suction handle—like you’re removing a VIP pass.

– Glide the opening pick along the bottom edge to slice through the sticky adhesive. It’s like butter, but for gadgets.

– Park the pick near the bottom left corner to keep the sticky stuff from sneaking back together.

Tools Used
  1. iOpenerSamsung Galaxy S22 Plus Screen and Battery Assembly Replacement
  2. Suction HandleSamsung Galaxy S22 Plus Screen and Battery Assembly Replacement

Step 5

– Place your warmed-up iOpener along the left edge of the phone for about 3 minutes to loosen things up.

– If your iOpener starts cooling off, give it a 30-second trip to the microwave to keep the heat going.

Tools Used
  1. iOpenerSamsung Galaxy S22 Plus Screen and Battery Assembly Replacement

Step 6

– Pop in a second opening pick where you’ve made a little gap at the bottom left corner.

– Gently glide that pick along the left edge to cut through the adhesive like a pro.

– Keep the opening pick snugly in place near the top left corner to stop that pesky adhesive from sealing back up.

Step 7

– Warm up your trusty iOpener and give the right edge of your phone a cozy 3-minute hug to loosen that stubborn adhesive.

– If your iOpener starts to cool down, just pop it back in the heat for another 30 seconds to keep the warmth flowing.

Tools Used
  1. iOpenerSamsung Galaxy S22 Plus Screen and Battery Assembly Replacement

Step 8

– Now it’s time to bring in the reinforcements – insert a third opening pick into the gap you created along the bottom edge to help pry the back cover open.

– Gently slide the opening pick around the bottom right corner of the back cover to cut through the adhesive, being careful not to apply too much pressure.

Step 9

– Gently slide your opening pick along the right edge of the back cover to cut through the adhesive. Keep the pick inserted near the top right corner to prevent the adhesive from sticking back together. If you need a hand, you can always schedule a repair.

Step 10

– Give your iOpener a spa day on the top edge of your phone for about 3 minutes to loosen up that stubborn adhesive.

– If your iOpener cools off, pop it back in for another 30 seconds to keep things nice and toasty.

Tools Used
  1. iOpenerSamsung Galaxy S22 Plus Screen and Battery Assembly Replacement

Step 11

– Gently glide the opening pick from the top left corner across the top edge to break the last of that pesky adhesive free. Keep it smooth and steady—you’ve got this!

Step 12

– Pop that back cover off like you’re opening a fresh deck of cards.

– When you’re piecing everything back together:

– Perfect time to hit the power button and make sure your phone is still singing in tune. When it checks out, shut it down all the way before you keep going.

– Pick off any stubborn glue blobs with tweezers or your fingertips. A little heat from your trusty hair dryer will soften them if they’re feeling clingy.

– If you scored custom-cut adhesives, let this guide show you the way.

– If you’re rolling with double-sided tape, here’s the roadmap for that too.

Step 13

– Grab your spudger’s pointed end and gently pry up the charging coil’s press connector from the motherboard. Take your time—think of it as giving your device a little friendly nudge. If you need a hand, you can always schedule a repair.

Tools Used
  1. SpudgerSamsung Galaxy S22 Plus Screen and Battery Assembly Replacement

Step 14

– Grab your trusty spudger and gently pop up the NFC antenna cable from the motherboard—just a little lift will do the trick!

Tools Used
  1. SpudgerSamsung Galaxy S22 Plus Screen and Battery Assembly Replacement

Step 15

– Grab your Phillips screwdriver and unscrew those six 3.5 mm screws holding the charging coil in place. Easy peasy!

Step 16

– Grab your Phillips screwdriver and take out the seven 3.5 mm screws holding the loudspeaker in place.

Step 17

– Slide your spudger between the left side of the loudspeaker and the frame—think of it as just making a little room.

– Lift gently to pop the clips loose and set the loudspeaker free.

– When putting it back together, press the loudspeaker into place until you hear those clips snap in—music to your ears!

Tools Used
  1. SpudgerSamsung Galaxy S22 Plus Screen and Battery Assembly Replacement

Step 18

– Carefully detach the charging coil and NFC antenna assembly with a gentle touch.

Step 19

– Grab your spudger and gently pry up the battery’s press connector to disconnect it. Easy does it—patience is key here. If you need a hand, you can always schedule a repair.

Tools Used
  1. SpudgerSamsung Galaxy S22 Plus Screen and Battery Assembly Replacement

Step 20

– Grab your spudger and gently pry up the primary interconnect cable from the motherboard, then carefully disconnect it. Next, do the same for the secondary interconnect cable—lift it free with your spudger. If you need help at any point, you can always schedule a repair.

Tools Used
  1. SpudgerSamsung Galaxy S22 Plus Screen and Battery Assembly Replacement

Step 21

– Slide your spudger under the primary interconnect cable and give it a gentle pop off the charging board—easy does it.

– Now coax the secondary interconnect cable up with the spudger and disconnect it from the charging board—almost done!

Tools Used
  1. SpudgerSamsung Galaxy S22 Plus Screen and Battery Assembly Replacement

Step 22

– Get ready to show those interconnect cables who’s boss! Gently grab your tweezers or your trusty fingers and pop those cables out with ease.

– As you put everything back together, double-check that each cable marked MAIN is snugly connected to the motherboard, while the ones labeled SUB are happily linked to the charging board. You’ve got this!

Step 23

– Grab your Phillips screwdriver and loosen those three 3.4 mm screws holding the charging board in place. Keep it steady and don’t forget—you can always schedule a repair if you run into trouble.

Step 24

– Slide the pointy end of your spudger between the top right edge of the charging board and the frame—think of it like sneaking into a secret club.

– Gently pry the board upwards just enough so you can grab it with your fingers. No need to wrestle it, just a little lift is all it takes.

Tools Used
  1. SpudgerSamsung Galaxy S22 Plus Screen and Battery Assembly Replacement

Step 25

– Gently pull the charging board toward the top of the phone at about a 30-degree tilt and lift it out. During reinstallation, make sure that the red gasket around the charging port sits snugly against the phone’s edge—this helps keep out dust and water. If you need a hand, you can always schedule a repair.

Step 26

– Grab your trusty spudger and gently pop the display cable off the motherboard—it’s like opening a secret door, but for electronics.

Tools Used
  1. SpudgerSamsung Galaxy S22 Plus Screen and Battery Assembly Replacement

Step 27

– Grab your spudger and gently pry up the display cable from its press connector, which is tucked below the battery. Take your time—patience makes perfect. If you need a hand along the way, you can always schedule a repair.

Tools Used
  1. SpudgerSamsung Galaxy S22 Plus Screen and Battery Assembly Replacement

Step 28

– Carefully disconnect the display cable from its connector.

– Gently set the cable aside—you’ll reuse it when putting everything back together.

Step 29

– Grab your Phillips screwdriver and take out the four 3.5 mm screws holding down the motherboard cover. Easy does it!

Step 30

– Slide the sharp end of your spudger right between the motherboard cover and the motherboard.

– With a little finesse, lift the motherboard cover off the motherboard.

– Voilà! The motherboard cover is now free!

Tools Used
  1. SpudgerSamsung Galaxy S22 Plus Screen and Battery Assembly Replacement

Step 31

– Grab your trusty spudger and gently pop the left mmWave antenna off the motherboard. No ninja moves required.

– When putting things back together, make sure the mmWave antenna cable takes the scenic route underneath the battery cable.

Tools Used
  1. SpudgerSamsung Galaxy S22 Plus Screen and Battery Assembly Replacement

Step 32

– Grab your trusty spudger and gently lift up to disconnect the right mmWave antenna from the motherboard. Take it easy and make sure you’re not applying too much pressure. You’ve got this!

Tools Used
  1. SpudgerSamsung Galaxy S22 Plus Screen and Battery Assembly Replacement

Step 33

– Scoot the battery and mmWave antenna cables aside to uncover the connector for the volume and power buttons hiding underneath.

– Grab your spudger (pointy end, please) and pop off the volume and power button connectors.

Tools Used
  1. SpudgerSamsung Galaxy S22 Plus Screen and Battery Assembly Replacement

Step 34

– Grab your spudger and use the pointy side to gently pop the front camera connector off the motherboard. Easy does it!

Tools Used
  1. SpudgerSamsung Galaxy S22 Plus Screen and Battery Assembly Replacement

Step 35

– Grab your Phillips screwdriver and unscrew the 3.5 mm screw that’s holding the camera module and motherboard to the frame.

Step 36

– Slide the pointy end of your spudger underneath the top left corner of the motherboard.

– Carefully lift the motherboard out of the phone, then gently grab it with your fingers for control.

Tools Used
  1. SpudgerSamsung Galaxy S22 Plus Screen and Battery Assembly Replacement

Step 37

– Carefully lift out the motherboard and set it aside like the VIP it is.

– When putting everything back together, double-check that none of those sneaky cables are hiding under the motherboard.

Step 38

– Grab your iOpener and let it chill on the front camera for a solid three minutes.

– Set the iOpener on your desk and rest the top edge of the screen on it to give the camera a nice heat boost from below.

Tools Used
  1. Heat GunSamsung Galaxy S22 Plus Screen and Battery Assembly Replacement
  2. iOpenerSamsung Galaxy S22 Plus Screen and Battery Assembly Replacement

Step 39

– Gently lift the front camera from its frame using the pointed end of your spudger—think of it as a tiny pry party. If it’s feeling stubborn, a pair of tweezers or your fingertips can help lift it out smoothly. Need a hand? Remember, you can always schedule a repair with Salvation Repair.

Tools Used
  1. SpudgerSamsung Galaxy S22 Plus Screen and Battery Assembly Replacement

Step 40

– Get your new frame ready for the front-facing camera during reassembly: peel away the black adhesive liner from the camera recess to free it up. Then, peel off the foam liner from the new frame to keep everything tidy and in place. If you need a hand, you can always schedule a repair.

Step 41

– Ready to give your front-facing camera a comfy new home? Start by swapping out the old adhesive in the frame.

– Peel off the clear liner from your camera adhesive—think of it as revealing a fresh sticker.

– Stick the adhesive into the camera’s nook, making sure the pull tab is chilling on the right side.

– Grab the pull tab and whisk away the blue adhesive liner like a magician.

– Nestle the front-facing camera into its spot and press down gently to lock it in place. High five, you’re almost done!

Step 42

– Grab your Phillips screwdriver and gently unscrew the pair of 3.5 mm screws holding down the left 5G mmWave antenna. Keep them safe—you’ll need them to reassemble later. If you hit any snags, remember you can always schedule a repair with Salvation Repair for a hand.

Step 43

– Grab your trusty spudger and gently nudge up the lower screw tab on the left 5G mmWave antenna bracket until it’s within tweezers range.

– With tweezers at the ready, pluck out the left 5G mmWave antenna.

– Put the antenna somewhere safe—you’ll need it when putting things back together.

Tools Used
  1. SpudgerSamsung Galaxy S22 Plus Screen and Battery Assembly Replacement

Step 44

– Ready to swap out the lower 5G mmWave antenna? Pop in a new bracket if you’ve got one—otherwise, no worries, just keep going.

– Gently separate the antenna and connector from the old bracket. It’s like a mini spa day for your phone parts.

– Peel off the L-shaped adhesive liner from your shiny new bracket. Satisfying, right?

– Nestle the antenna right into the bracket’s recess, making sure the connector sneaks under the longer screw mount.

– Before locking it all down in the frame, peel off the thin adhesive liner hanging out on the bracket’s outside. You’re almost done!

Step 45

– Grab your spudger and gently work its pointy end under the right 5G mmWave antenna to lift it up and break the adhesive seal.

– Once it’s loose, use your tweezers or fingers to carefully pull the antenna away. You’re almost there!

Tools Used
  1. iOpenerSamsung Galaxy S22 Plus Screen and Battery Assembly Replacement
  2. SpudgerSamsung Galaxy S22 Plus Screen and Battery Assembly Replacement

Step 46

– Slide the corner of your spudger into the tab on the side button bracket—like you’re picking the lock to a tiny treasure chest.

– Give the spudger a gentle twist upward to pop and loosen the bracket out of its spot in the frame. It should come free without much fuss.

– When you’re putting things back together, be sure to press each button and listen for that classic ‘click.’ If it sounds and feels just like before, you nailed it.

Tools Used
  1. SpudgerSamsung Galaxy S22 Plus Screen and Battery Assembly Replacement

Step 47

– Grab that side button bracket with some blunt nose tweezers or your trusty fingers and give it a gentle tug to remove it.

– Next up, use your fingers to snag the button pad and pull it out.

– When it’s time to put everything back together, start with the button pad. Once that’s in place, slide the bracket snugly against the back of the button pad. Together, they’ll look just right!

Step 48

– Slip one arm of your blunt nose tweezers into the little nook where the side button hangs out.

– Give the power button’s peg a gentle push through the frame until it’s poking out enough for you to grab.

– Snag the button with your fingers and pull it out—nice and easy!

Step 49

– Gently slide the tip of your blunt nose tweezers into the groove next to the side button.

– Press the two pegs of the volume buttons through the frame until you can get a grip on the buttons with your fingers.

– Grab the volume buttons with your fingers and lift them out.

Step 50

– To wrap things up, just reverse these steps to put everything back together.

– Got some e-waste? Make sure it’s recycled responsibly at an R2 or e-Stewards certified facility.

– If things didn’t go as planned, don’t sweat it! A little troubleshooting might do the trick, or feel free to ask for some advice over at our Answers community.

Success!
Time to put everything back together—just reverse the steps and you’re golden.
Done with your old device? Send it off to an R2 or e-Stewards recycler and give it a second life.
If things didn’t go quite as planned, try some troubleshooting or tap into our Answers community. And hey, you can always schedule a repair if you want a pro to take a look!

Samsung Galaxy S22 Ultra USB-C Port and Charging Board Replacement

Duration: 45 minutes
Steps: 30 Steps

Get ready to breathe new life into your Samsung Galaxy S22 Ultra by replacing the USB-C port and charging board. Before you dive in, make sure to fully discharge the battery to minimize the risk of any unexpected thermal events. If your battery is looking a little swollen, take the necessary precautions to keep things safe. Keep in mind that while you’ll be able to get your device up and running again, the repair might affect its water resistance – but with a little care when reapplying the adhesive, you can get it pretty close to its original state. Your device will no longer have its IP rating, but it’ll be functioning like new.

Step 1

– Grab a SIM eject tool, a bit, or even a straightened paperclip, and gently insert it into the tiny hole on the bottom edge of your phone where the SIM tray hides. Give it a little push—don’t force it—and the tray will pop out. Carefully pull out the SIM card tray, and you’re all set for the next step. If you need a hand, you can always schedule a repair.

Step 2

– Warm up an iOpener and place it on the right edge of the back cover for about two minutes. This gentle heat helps loosen the adhesive so you can lift it off more easily.

Tools Used
  1. iOpenerSamsung Galaxy S22 Ultra USB-C Port and Charging Board Replacement
  2. Heat GunSamsung Galaxy S22 Ultra USB-C Port and Charging Board Replacement

Step 3

– While the adhesive takes its sweet time to get soft, here are a couple of things to keep in mind:

– The back cover is held tight with some sticky stuff all around the edge of the frame.

Step 4

– Stick the suction handle on the back cover, aiming for the center of the right edge—right in the sweet spot.

– Give the handle a steady, strong pull to pop open a gap between the cover and the frame. Slow and steady wins here!

– Slide an opening pick into that gap like a pro.

Tools Used
  1. iOpenerSamsung Galaxy S22 Ultra USB-C Port and Charging Board Replacement
  2. Suction HandleSamsung Galaxy S22 Ultra USB-C Port and Charging Board Replacement

Step 5

– Slide that little pick like you’re buttering toast along the right edge—keep it nice and smooth to slice the sticky stuff.

– Park the pick near the bottom right corner so the adhesive doesn’t try to sneak back together while you’re busy elsewhere.

Step 6

– Warm up the bottom edge of the back cover with a heated iOpener for about two minutes—think of it as giving your device a little spa treatment before the real work begins.

Tools Used
  1. iOpenerSamsung Galaxy S22 Ultra USB-C Port and Charging Board Replacement

Step 7

– Place a second opening pick near the bottom right corner. Tilt the pick upward to match the curved edge and gently rotate it around that corner, easing it apart.

Step 8

– Gently slide your opening pick into the bottom left corner to cut through the adhesive. Keep the pick in that corner to stop the adhesive from sealing back up. If you need a hand, you can always schedule a repair.

Step 9

– Warm up the left edge of the back cover with a heated iOpener for about two minutes—think of it as giving your device a little spa treatment before we get hands-on.

Tools Used
  1. iOpenerSamsung Galaxy S22 Ultra USB-C Port and Charging Board Replacement

Step 10

– Slip a third opening pick into the bottom left corner—like you’re sliding a bookmark into a good novel.

– Tilt the pick so it hugs that smooth edge, then swing it around the corner like you’re tracing a cool curve.

Step 11

– Gently slide your opening pick along the left edge to cut through the adhesive, stopping right when you reach the power button. Keep the pick in place on the left side to prevent the adhesive from sealing back up.

Step 12

– Warm up your iOpener and let it hang out on the top edge of the back cover for about two minutes.

Tools Used
  1. iOpenerSamsung Galaxy S22 Ultra USB-C Port and Charging Board Replacement

Step 13

– Slide an opening pick into the gap up at the top-right corner—think of it as sneaking a VIP pass past the velvet rope.

– Tilt the pick upward to hug that curved edge, then sweep it around the corner like you’re drawing a smile on a selfie.

Step 14

– Gently slide the pick into the top left corner to cut through that sticky adhesive like a pro.

– Keep the pick in place to stop the adhesive from sealing back up. You’ve got this!

Step 15

– Slip an opening pick into the little gap at the top left edge—like you’re sneaking into a secret club.

– Tilt the pick upward so it hugs the curve, and smoothly spin it around that top left corner.

Step 16

– Gently slide the pry tool toward the bottom camera to cut through the remaining adhesive, stopping just before you reach the power button.

Step 17

– First things first, let’s get that back cover off! Grab it and give it a gentle pull.

– Now, as you put everything back together:

– Here’s a pro tip: power on your phone and check that everything’s working like a charm before you seal it up. Just remember to turn it off completely before diving back in!

– If you find any stubborn adhesive bits, don’t sweat it! Use tweezers or your fingers to remove them. A little heat can help if you’re having a tough time getting them off.

– Using custom-cut adhesives? Be sure to follow this guide.

– If double-sided tape is your jam, check out this guide.

Step 18

– Start by gently wedging an opening pick right between the right edge of the wireless charging coil and the battery. Then, glide the pick along the right side to carefully loosen and separate the adhesive holding everything in place.

Step 19

– Gently use the pointy end of your trusty spudger to pop off that NFC antenna press connector from the motherboard – it’s like giving it a little hug goodbye!

– Now, go ahead and show some love to the wireless charging coil press connector too; a little pry and you’ll have it free in no time!

Tools Used
  1. SpudgerSamsung Galaxy S22 Ultra USB-C Port and Charging Board Replacement

Step 20

– Grab your Phillips screwdriver and back out the five 3.5 mm screws holding down the NFC antenna and charging coil. Easy does it—no need to rush.

Step 21

– Grab your Phillips screwdriver and loosen those six 3.5 mm screws holding the loudspeaker in place. Once they’re out, you’re all set to move forward. If you need a hand at any point, you can always schedule a repair.

Step 22

– Slide the pointy end of your spudger into the upper right corner between the loudspeaker and the frame—like you’re sneaking a cookie from the jar.

– Gently pop up the loudspeaker to release it from its cozy frame spot.

– When it’s time to put things back together, press around the loudspeaker’s edge to snap it snugly into place.

Tools Used
  1. SpudgerSamsung Galaxy S22 Ultra USB-C Port and Charging Board Replacement

Step 23

– Lift out the NFC antenna, wireless-charging coil, and loudspeaker—think of it as popping the last three toppings off a pizza slice. They’ll come away together, no drama.

Step 24

– Gently use the pointed end of your spudger to lift and detach the battery press connector. You’re doing great!

Tools Used
  1. SpudgerSamsung Galaxy S22 Ultra USB-C Port and Charging Board Replacement

Step 25

– Grab your spudger and gently use the pointed end to lift and disconnect the main interconnect cable from the motherboard. Easy does it!

– Do the same for the secondary interconnect cable. A little extra care here, and you’ll be golden!

Tools Used
  1. SpudgerSamsung Galaxy S22 Ultra USB-C Port and Charging Board Replacement

Step 26

– Grab your trusty spudger and gently pop up the press connector for the primary interconnect cable from the charging board. Easy does it!

– Now, do the same for the secondary interconnect cable—just a quick lift and you’re good to go.

Tools Used
  1. SpudgerSamsung Galaxy S22 Ultra USB-C Port and Charging Board Replacement

Step 27

– Unplug those interconnect cables from the frame and set them aside. You’ve got this!

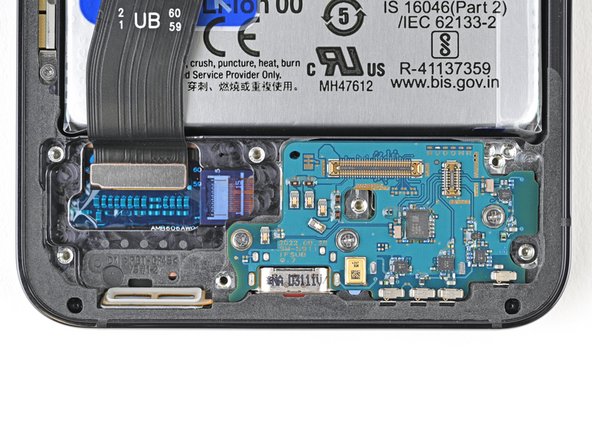
Step 28

– Grab your Phillips screwdriver and take out the three 3.5 mm screws holding down the charging board. Easy does it—don’t lose those little guys!

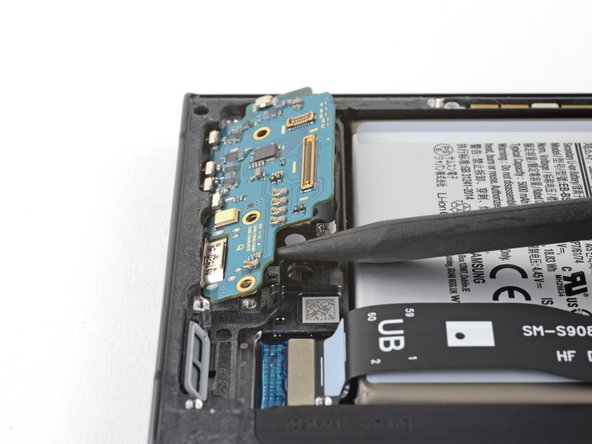
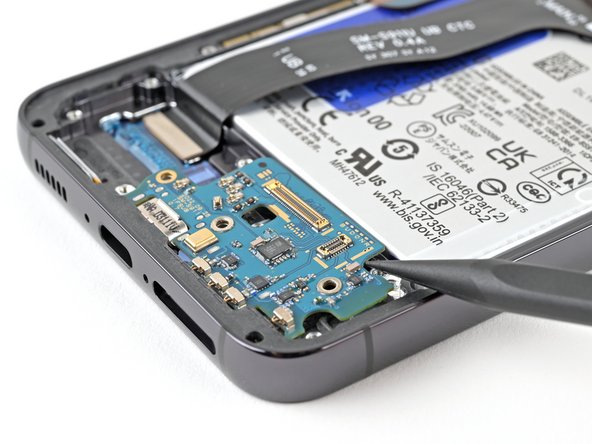
Step 29

– Take the pointy end of your spudger and slide it under the charging board—go for the side opposite the USB-C port.

– Gently lift the charging board out of its spot until you can grab it with your fingers. Easy does it!

Tools Used
  1. SpudgerSamsung Galaxy S22 Ultra USB-C Port and Charging Board Replacement

Step 30

– Now that you’ve made it through the repair, reassemble your device by reversing these steps – easy peasy!

– Don’t forget to responsibly recycle your e-waste at an R2 or e-Stewards certified recycler.

– If things didn’t quite go as planned, no worries! You can always schedule a repair or check out our Answers community for some troubleshooting help.

Success!
Ready to put everything back together? Just walk through these steps backwards.
Old parts lying around? Drop them off at an R2 or e-Stewards certified recycler.
Ran into trouble? Our Answers community has your back for troubleshooting tips. If you’re stuck, you can always schedule a repair.

Samsung Galaxy S23 Screen and Battery Assembly Replacement

Duration: 45 minutes
Steps: 43 Steps

Get ready to dive into replacing the screen and battery assembly on your Samsung Galaxy S23! This guide is all about the screen and battery assembly, which means you’ve got the screen, battery, and frame snugly packed together in one unit. Make sure you’ve got the right part in hand before kicking off the repair adventure. If it’s just the screen you’re swapping out, we’ve got a guide for that too! Before you start taking your device apart, it’s super important to completely discharge the battery. This little step helps keep things safe by lowering the chances of a thermal mishap if the battery gets a little too cozy with your tools. If you notice that your battery is swollen, be sure to take the right precautions. Remember: while reapplying the back cover adhesive is key to retaining that water resistance, your device might lose its IP (Ingress Protection) rating after the repair. So, let’s get started!

Step 1

– First things first, let’s disconnect any cables from your phone. Give it some space!

– Now, press and hold the side button along with the volume down button, then tap ‘Power off’ to gracefully shut down your phone.

Step 2

– Warm up an iOpener and place it on the right edge of the back cover for two minutes to loosen that stubborn adhesive.

Step 3

– Grab a suction handle and stick it to the back cover, aiming for the center of the right edge.

– Give the suction handle a solid, steady pull—think gym day—to pop open a gap between the cover and the frame.

– Slide an opening pick into that new gap. Smooth moves!

Tools Used
  1. iOpenerSamsung Galaxy S23 Screen and Battery Assembly Replacement
  2. Suction HandleSamsung Galaxy S23 Screen and Battery Assembly Replacement

Step 4

– Gently glide the pick along the right edge, back and forth, to break that adhesive seal. You’re doing great!

– Keep the pick snugly in place near the bottom right corner to stop that pesky adhesive from sticking back together.

Step 5

– Warm up the bottom edge of the back cover with a heated iOpener for about two minutes—think of it as a cozy blanket for your device before you get to work.

Tools Used
  1. iOpenerSamsung Galaxy S23 Screen and Battery Assembly Replacement

Step 6

– Slide a second pick into the bottom right corner—like a pro.

– Spin it around that corner to loosen up the sticky stuff holding things together.

Step 7

– Gently slide your opening pick into the bottom left corner to loosen the adhesive’s grip.

– Keep that pick in place at the bottom left to stop the adhesive from sealing back up.

Step 8

– Warm up the left edge of the back cover by gently applying a heated iOpener for about two minutes. Keep it steady and let the heat do its thing. If you need a hand, you can always schedule a repair.

Tools Used
  1. iOpenerSamsung Galaxy S23 Screen and Battery Assembly Replacement

Step 9

– Gently swing the opening pick around the bottom left corner to loosen the adhesive. Keep the mood light and steady—you’re making progress one step at a time. If you need a hand, you can always schedule a repair.

Step 10

– Pop in a third opening pick down at the bottom left corner—like adding another player to your team.

– Glide your pick up toward the top left corner to loosen that sticky adhesive. Smooth moves only!

– Let your pick chill in the top left corner so the adhesive doesn’t try any sneaky resealing.

Step 11

– Warm up your iOpener and let it chill on the top edge of the back cover for a solid two minutes.

Tools Used
  1. iOpenerSamsung Galaxy S23 Screen and Battery Assembly Replacement

Step 12

– Pop in a fourth pick at the top left corner to get started.

– Give it a gentle twist around that corner to loosen up the adhesive and make separation smoother.

Step 13

– Gently slide your opening pick into the top right corner to loosen the adhesive grip. Keep the pick there to stop the adhesive from sticking back together. If you need a hand, you can always schedule a repair.

Step 14

– Set your opening pick right by the flash cutout—like it’s got VIP access.

– Slide the pick under the top edge of the back cover; you’ll feel it catch on the sticky stuff holding it down.

– Keep gliding the pick down toward the bottom until the adhesive finally lets go and the back cover is free.

Step 15

– Pop off the back cover and set it aside.

– When you’re putting things back together:

– Get rid of any leftover adhesive bits—tweezers or your fingers work great. If it’s being stubborn, a little heat and some isopropyl alcohol (at least 90%) will do the trick.

– For custom-cut adhesives, check out the guide.

– Using double-sided tape? Follow that guide.

Step 16

– Grab your trusty spudger and gently pop up the wireless charging coil connector from the motherboard. Easy does it—no need to wrestle with it.

– When reconnecting these press connectors, line them up with care, and press down on one side till you hear a click, then do the same on the other side. Skip pressing the center. If it’s off-center, those tiny pins can bend and that’s a headache nobody wants.

Tools Used
  1. SpudgerSamsung Galaxy S23 Screen and Battery Assembly Replacement

Step 17

– Grab your Phillips screwdriver and unscrew those thirteen 3.5 mm screws holding down the wireless charging coil and the loudspeaker. First, remove the six screws securing the wireless charging coil, then tackle the seven screws keeping the loudspeaker in place. Need a hand? You can always schedule a repair.

Step 18

– Start by gently inserting the point of your spudger into the notch at the top left corner of the loudspeaker.

– Once it’s in there, pry it up carefully to release the loudspeaker from the frame. You’ve got this!

Tools Used
  1. SpudgerSamsung Galaxy S23 Screen and Battery Assembly Replacement

Step 19

– Gently lift the loudspeaker out of the frame—easy does it, no need to wrestle!

– Take out the wireless charging coil and the loudspeaker from the frame. These two are ready for a break.

– When you’re putting it all back together, give the loudspeaker a solid press around the edges so it snaps right into place like it was meant to be.

Step 20

– Grab your spudger and gently pop up the battery press connector—like opening a tiny treasure chest, but less dramatic.

Tools Used
  1. SpudgerSamsung Galaxy S23 Screen and Battery Assembly Replacement

Step 21

– Gently use the spudger tip to lift up and disconnect the earpiece speaker press connector. Nice and easy, just take your time.

Tools Used
  1. SpudgerSamsung Galaxy S23 Screen and Battery Assembly Replacement

Step 22

– Grab your trusty Phillips screwdriver and unscrew those five 3.5 mm-long screws holding the earpiece speaker in place. You’re doing great!

Step 23

– Slide the flat end of your spudger right between the bottom edge of the earpiece speaker and the shiny shield on the motherboard. You’ve got this!

– Give that spudger a little twist to pop the earpiece speaker free from the frame and lift it out like a pro.

– When it’s time to put everything back together, remember to tuck the top end of the earpiece speaker into the frame first before pressing down to snap it back in. Easy peasy!

Tools Used
  1. SpudgerSamsung Galaxy S23 Screen and Battery Assembly Replacement

Step 24

– Grab your trusty spudger and gently pop up the primary and secondary interconnect cable connectors from the daughterboard. Smooth moves—just take it slow and watch those tiny connectors!

Tools Used
  1. SpudgerSamsung Galaxy S23 Screen and Battery Assembly Replacement

Step 25

– Do the same thing for both the main and backup interconnect cable connectors on the motherboard—unclip, unplug, and keep those cables out of the way like a pro.

Step 26

– Disconnect both interconnect cables with care.

Step 27

– Grab your Phillips screwdriver and unscrew the three 3.5 mm-long screws holding down the daughterboard. Easy does it!

Step 28

– Use the tip of a spudger to gently lift the top right corner of the daughterboard and unclip it from the frame. Carefully remove the daughterboard. When putting everything back together, reinsert the USB-C port into its slot at an angle before pressing the daughterboard flat onto the frame. If you need assistance, you can always schedule a repair.

Tools Used
  1. SpudgerSamsung Galaxy S23 Screen and Battery Assembly Replacement

Step 29

– Slide the tip of your trusty spudger between the left side of the antenna press connector and the shiny shield on the motherboard.

– Gently pry it up and disconnect that antenna press connector like a pro!

Tools Used
  1. SpudgerSamsung Galaxy S23 Screen and Battery Assembly Replacement

Step 30

– Grab your spudger and gently pop the display and 5G mmWave cable connectors off the motherboard. Just a little wiggle and lift—they’ll come right up!

Tools Used
  1. SpudgerSamsung Galaxy S23 Screen and Battery Assembly Replacement

Step 31

– Grab your spudger and gently lift to disconnect the front camera press connector. You’ve got this!

Tools Used
  1. SpudgerSamsung Galaxy S23 Screen and Battery Assembly Replacement

Step 32

– Grab a Phillips screwdriver and carefully remove the two 3.5mm screws holding the motherboard in place. It’s a simple step, just a little twist and you’re on your way.

Step 33

– Slide the flat end of your spudger between the top edge of the motherboard and the frame, right by the earpiece speaker cutout.

– Give the spudger a gentle twist to pop the motherboard up so you can grab it easily.

– Lift out the motherboard and set it aside.

– When putting things back together, make sure all the cables aren’t hiding under the motherboard before you drop it back into place.

Tools Used
  1. SpudgerSamsung Galaxy S23 Screen and Battery Assembly Replacement

Step 34

– Slip your spudger into the notch at the bottom edge, right where the top 5G mmWave antenna meets the frame—like sneaking into a secret club.

– Gently pry up and lift the antenna to break the adhesive’s grip. It might feel stubborn, but you’ve got this!

Tools Used
  1. SpudgerSamsung Galaxy S23 Screen and Battery Assembly Replacement

Step 35

– Gently wiggle the top 5G mmWave antenna out of the frame with your fingers, peeling off any stubborn adhesive as you go.

– When putting things back together, check if the conductive tape under the antenna needs to catch a ride to your new part.

Step 36

– Warm up the front camera with a hair dryer or heat gun for about 90 seconds. Make sure it’s nice and toasty, but don’t overdo it! Just enough to loosen things up.

Tools Used
  1. Hair DryerSamsung Galaxy S23 Screen and Battery Assembly Replacement
  2. Heat GunSamsung Galaxy S23 Screen and Battery Assembly Replacement

Step 37

– Gently pop the front camera out of its little nook in the frame using the flat side of your spudger. Easy does it!

Step 38

– Grab your trusty spudger and gently pop the front camera up from its spot—just enough so you can get a good grip with your fingers.

– Lift out the front camera and set it aside like the VIP it is.

Tools Used
  1. SpudgerSamsung Galaxy S23 Screen and Battery Assembly Replacement

Step 39

– Gently pop up the display cable connector from the back of the screen using the flat end of your spudger—like you’re opening a stubborn pickle jar, but smaller.

– Slide that display cable out of the way. Nicely done!

Tools Used
  1. SpudgerSamsung Galaxy S23 Screen and Battery Assembly Replacement

Step 40

– Grab your trusty Phillips screwdriver and carefully remove the two 2.5mm screws holding the 5G mmWave antenna in place.

Step 41

– Slip one arm of your trusty angled tweezers into a screw hole on the bottom 5G mmWave antenna bracket. Yes, really!

– Gently lever the bracket upward with your tweezers, just enough to grab it with your fingers and pull it out of its snug little spot. Smooth moves!

Step 42

– Gently pop the bottom 5G mmWave antenna out of its spot to break the adhesive bond. No need for wrestling moves—just a little finesse.

– Now, whisk away the 5G mmWave antenna and give yourself a nod for a smooth extraction!

Step 43

– Ready to put things back together? Just retrace your steps and your device should be good to go.

– Don’t toss those old parts—drop them off with an R2 or e-Stewards certified recycler.

– Ran into a hiccup? Try some basic troubleshooting, or swing by our Samsung Galaxy S23 Answers Community for some tips.

– And hey, if you get stuck, you can always schedule a repair and let us handle the heavy lifting.

Success!
Time to put your device back together—just follow these steps in reverse. You’ve got this!
When it’s time to say goodbye to old parts, drop them off with an R2 or e-Stewards certified recycler so they don’t end up haunting a landfill.
If your repair took an unexpected turn, try some basic troubleshooting or check out the Samsung Galaxy S23 Answers Community for tips.
And hey, if you’re still stuck, don’t sweat it—just schedule a repair and Salvation Repair will help you out!

Samsung Galaxy S22 Ultra Screen and Battery Assembly Replacement

Duration: 45 minutes
Steps: 59 Steps

Ready to give your Samsung Galaxy S22 Ultra a fresh start with a new screen and battery assembly? This step-by-step guide walks you through replacing the whole package—the screen, battery, and frame, all in one. Double-check that you’ve got the correct assembly before diving in. Quick heads up: the upper 5G mmWave antenna isn’t interchangeable between US (908U) and international (908B/E) frames, so match up your model! After you finish, your phone’s water resistance depends on how well you stick things back together, but the official IP rating will be history. Take your time, follow along, and you’ve got this! If things get tricky, you can always schedule a repair.

Step 1

– Let’s get started by inserting a SIM eject tool, or even a straightened paper clip, into the tiny hole on the bottom edge of your phone – it’s time to set that SIM card free!

– Gently push the SIM eject tool into the hole until the SIM card tray pops out – you’re making great progress!

– Now, simply remove the SIM card tray and you’ll be one step closer to getting your phone up and running again.

Step 2

– Give that button at the bottom of the stylus a gentle press.

– Slide the stylus out like a pro!

Step 3

– Warm up your iOpener and set it on the right edge of the back cover for a couple of minutes.

Tools Used
  1. iOpenerSamsung Galaxy S22 Ultra Screen and Battery Assembly Replacement
  2. Heat GunSamsung Galaxy S22 Ultra Screen and Battery Assembly Replacement

Step 4

– While the adhesive is getting nice and toasty, here’s a heads-up:

– Sticky stuff holds the back cover all the way around the edge of the frame.

Step 5

– Stick the suction handle on the back cover, aiming for the center along the right edge—like you’re giving it a high-five.

– Pull up on that handle with a steady, confident grip to open up a gap between the cover and the frame. You’ve got this!

– Slide an opening pick into the gap. Take it slow; steady hands win the race.

Tools Used
  1. iOpenerSamsung Galaxy S22 Ultra Screen and Battery Assembly Replacement
  2. Suction HandleSamsung Galaxy S22 Ultra Screen and Battery Assembly Replacement

Step 6

– Gently slide the pick along the right edge, working back and forth to cut through the adhesive. Keep the pick inserted near the bottom of the right edge to help prevent the adhesive from sealing back up. If you need help at any point, you can always schedule a repair.

Step 7

– Warm up your iOpener and place it on the bottom edge of the back cover for two minutes. Give it a little time to work its magic!

Tools Used
  1. iOpenerSamsung Galaxy S22 Ultra Screen and Battery Assembly Replacement

Step 8

– Time to get this repair started! Insert a second opening pick at the bottom right corner, making sure it’s snug and secure.

– Now, gently angle the pick upward to match the curved edge, and rotate it around the bottom right corner – you’re making great progress!

Step 9

– Slide your opening pick down to the bottom left corner to cut through that sticky adhesive. Nice and easy does it!

– Keep the pick chilling in the bottom left corner so the adhesive doesn’t sneak back together while you work.

Step 10

– Warm up your iOpener and give the left edge of the back cover a cozy two-minute hug!

Tools Used
  1. iOpenerSamsung Galaxy S22 Ultra Screen and Battery Assembly Replacement

Step 11

– Slip a third opening pick into the bottom left corner—like you’re sneaking in a secret handshake.

– Tilt the pick up to follow the curve, then spin it around the bottom corner like you’re tracing a funky dance move.

Step 12

– Gently slide your opening pick along the left edge, slicing through the adhesive. Keep going until you reach the power button. Then, leave that pick in place on the edge to stop the adhesive from sealing back up. If you need help, you can always schedule a repair.

Step 13

– Warm up your iOpener and let it chill on the top edge of the back cover for a solid two minutes.

Tools Used
  1. iOpenerSamsung Galaxy S22 Ultra Screen and Battery Assembly Replacement

Step 14

– Slide an opening pick into the gap at the top right edge—like sneaking a slice of cake before dinner.

– Tilt the pick upward to follow the curve, then gently spin it around the top right corner. Smooth moves!

Step 15

– Use the pick to gently slide into the top left corner to loosen the adhesive. Keep the pick in place afterward to prevent the adhesive from sticking back together. If you need help, you can always schedule a repair.

Step 16

– Slip an opening pick into the gap at the top left corner—like sliding into the DMs, but for your device.

– Tilt the pick up to follow that smooth, curved edge and give it a gentle spin around the top left corner.

Step 17

– Glide that pick down toward the bottom camera, slicing through the last bits of sticky stuff. Pause before you hit the power button—no need to get wild at the finish line!

Step 18

– Pop off that back cover and set it aside.

– When you’re putting things back together:

– Now’s a good moment to fire up your phone and make sure everything works before you seal it up. Once you’ve checked, shut it down completely before moving on.

– Clear away any leftover adhesive chunks with tweezers or your fingers. If the sticky stuff is stubborn, a little heat helps loosen it up.

– Using custom-cut adhesives? Check out Salvation Repair’s guide for the details.

– Double-sided tape your thing? Salvation Repair has a guide for that too.

Step 19

– Gently slide an opening pick between the right edge of the wireless charging coil and the battery. You’ve got this!

– Carefully glide the pick along the right edge to break that sticky adhesive apart. You’re on a roll!

Step 20

– Time to get started! Use the pointed end of a spudger to carefully pry and disconnect the NFC antenna press connector from the motherboard. Take your time and work gently.

– Next up, repeat the same process for the wireless charging coil press connector. You got this!

Tools Used
  1. SpudgerSamsung Galaxy S22 Ultra Screen and Battery Assembly Replacement

Step 21

– Grab your Phillips screwdriver and take out the five 3.5 mm screws holding down the NFC antenna and charging coil.

Step 22

– Grab your trusty Phillips screwdriver and take out the six 3.5 mm screws holding the loudspeaker in place. Let’s make those screws history!

Step 23

– Let’s get started by carefully inserting the pointed end of your trusty spudger between the upper right corner of the loudspeaker and the frame – it’s time to set that speaker free!

– Gently pry up to unclip the loudspeaker from the frame. Take your time and be patient, it’s a delicate process.

– When you’re putting everything back together, make sure to press around the perimeter of the loudspeaker to secure it to the frame. You’re doing great!

Tools Used
  1. SpudgerSamsung Galaxy S22 Ultra Screen and Battery Assembly Replacement

Step 24

– Carefully take out the NFC, wireless charging coil, and loudspeaker from the frame. You’ve got this!

Step 25

– Grab your spudger, aim for the battery press connector, and pop it loose with the pointed end. Battery’s taking a break now.

Tools Used
  1. SpudgerSamsung Galaxy S22 Ultra Screen and Battery Assembly Replacement

Step 26

– Grab the pointy end of your spudger and gently pop up the lower 5G mmWave antenna connector—just a little nudge is all it takes!

Tools Used
  1. SpudgerSamsung Galaxy S22 Ultra Screen and Battery Assembly Replacement

Step 27

– Let’s get started! Use your trusty Phillips screwdriver to remove the two 3.5mm-long screws that are holding the antenna bracket in place. This is a breeze, and you’re already making progress!

Step 28

– Gently wedge your spudger between the bottom screw mount of the antenna bracket and the frame, giving it a little persuasion.

– Carefully pry up on the bracket until you can grab it easily with blunt nose tweezers or your fingers—no need to be forceful.

– Lift out the lower 5G mmWave antenna to free it from its spot.

Tools Used
  1. SpudgerSamsung Galaxy S22 Ultra Screen and Battery Assembly Replacement

Step 29

– If you’ve got a fresh bracket ready for the lower 5G mmWave antenna, swap it in now. No worries if you don’t—just cruise right past this step.

– Pop the antenna and its connector off the old bracket. It’s like giving them a quick ticket out.

– Peel off the L-shaped adhesive liner from your shiny new bracket. Satisfying, right?

– Nestle the antenna into the bracket’s snug little nook, making sure the connector slips under the longer screw mount.

– Now, peel away that skinny adhesive liner on the bracket’s outside edge before popping it back into the frame.

Step 30

– Gently take the pointed end of your spudger and carefully wiggle it under the upper 5G mmWave antenna press connector to disconnect it. You’ve got this!

Tools Used
  1. SpudgerSamsung Galaxy S22 Ultra Screen and Battery Assembly Replacement

Step 31

– Slide the spudger’s pointy end into the crack between the lower edge of the 5G mmWave antenna and the board like you’re opening a tiny, stubborn envelope.

– Gently pop the antenna up until you can pinch it with your fingers or snag it with blunt tweezers—no hero moves needed.

– Lift the top 5G mmWave antenna out and set it aside; you’ve just freed the little guy.

Tools Used
  1. iOpenerSamsung Galaxy S22 Ultra Screen and Battery Assembly Replacement
  2. SpudgerSamsung Galaxy S22 Ultra Screen and Battery Assembly Replacement

Step 32

– Stick on some fresh adhesive to the upper 5G mmWave antenna before popping it back in. No new adhesive? No worries—reuse the old one or get creative with custom-cut strips.

– Peel off the old adhesive from the antenna using blunt nose tweezers or just your fingers. No need to be fancy.

– Take off the clear liner from your new adhesive—let’s get sticky.

– Place the new adhesive on the bottom of the antenna. Make sure the round end is pointing away from the connector like it’s got somewhere to be.

– Before you settle the antenna back in the frame, remove the green liner from the adhesive. Now you’re ready to finish up.

Step 33

– Grab the pointed end of your spudger and gently pry up the main interconnect cable from the motherboard to disconnect it. Then, do the same for the secondary interconnect, which is located to the left of the primary cable. Keep at it, and if you need some extra help, you can always schedule a repair.

Tools Used
  1. SpudgerSamsung Galaxy S22 Ultra Screen and Battery Assembly Replacement

Step 34

– With the pointed end of your spudger, gently pop up and disconnect the main interconnect cable from the charging board. It’s like unplugging tiny Lego pieces—just a little wiggle and lift.

– Do the same trick for the secondary interconnect cable. One more gentle lift and you’re good to go!

Tools Used
  1. SpudgerSamsung Galaxy S22 Ultra Screen and Battery Assembly Replacement

Step 35

– Gently unplug and lift out those interconnect cables from the frame—like you’re giving them a little vacation.

Step 36

– Grab your Phillips screwdriver and take out the three screws (they’re each 3.5 mm long) that hold the charging board in place.

Step 37

– Let’s get this repair started! Insert the pointed end of your trusty spudger under the charging board, right across from the USB-C port.

– Gently pry the charging board up from its cozy little recess until you can get a good grip on it with your fingers.

Tools Used
  1. SpudgerSamsung Galaxy S22 Ultra Screen and Battery Assembly Replacement

Step 38

– Grab the charging board by its corners and gently slide it out of its slot in the frame—think of it as a little game of slide and seek.

– Pull out the charging board carefully—no need to rush, it’s just hanging out waiting to be freed.

– When putting things back together, angle the charging board downward as you slide it in; this helps guide the USB-C port into its cozy little recess. If you need help, you can always schedule a repair.

Step 39

– Grab your spudger and use its pointed end to gently pop up and disconnect the press connector for the laser autofocus module. Easy does it!

Tools Used
  1. SpudgerSamsung Galaxy S22 Ultra Screen and Battery Assembly Replacement

Step 40

– Grab your Phillips screwdriver and take out the three screws (they’re 3.5 mm long) holding down the motherboard cover. Easy does it!

Step 41

– Slide the sharp end of your spudger into the bottom right corner of the motherboard cover, right where it meets the frame.

– Gently pry up on the cover to pop it free from the frame.

– Carefully take out the motherboard cover along with the laser AF module.

– When putting everything back together, give the cover a good press down to lock those clips into place on the frame.

Tools Used
  1. SpudgerSamsung Galaxy S22 Ultra Screen and Battery Assembly Replacement

Step 42

– Grab the pointy end of your spudger and gently pop up the front-facing camera connector—like giving it a little wave hello before it takes a break.

Tools Used
  1. SpudgerSamsung Galaxy S22 Ultra Screen and Battery Assembly Replacement

Step 43

– Grab your spudger and gently pop up the fingerprint reader connector—like opening a tiny treasure chest.

Tools Used
  1. SpudgerSamsung Galaxy S22 Ultra Screen and Battery Assembly Replacement

Step 44

– Grab your trusty spudger and use its pointed end to gently lift and disconnect the screen press connector. You’ve got this!

Tools Used
  1. SpudgerSamsung Galaxy S22 Ultra Screen and Battery Assembly Replacement

Step 45

– Grab the pointed end of your spudger and gently pry up to disconnect the stylus’s press connector. Easy does it—just a little lift and wiggle to free it up.

Tools Used
  1. SpudgerSamsung Galaxy S22 Ultra Screen and Battery Assembly Replacement

Step 46

– Grab your trusty Phillips screwdriver and take out that 3.5 mm-long screw that’s holding the motherboard in place. You’re doing great!

Step 47

– Gently slide the pointed end of your spudger into the gap between the top left of the motherboard and the frame.

– Once you’re in there, give it a little nudge and lift the motherboard until you can grab it with your fingers.

Tools Used
  1. SpudgerSamsung Galaxy S22 Ultra Screen and Battery Assembly Replacement

Step 48

– Pick up the motherboard by its left edge and gently lift it out of the frame.

– When it’s time to put everything back together, make sure the cables are resting above the motherboard as you slide it back in.

Step 49

– Grab your Phillips screwdriver and gently unscrew the two 3.2 mm screws holding in the earpiece speaker and vibration motor. Easy does it—you’re almost there! If you need help, you can always schedule a repair.

Step 50

– Slide the flat end of your spudger carefully beneath the bottom edge of the earpiece speaker and vibration motor. Gently pry up the earpiece speaker and vibration motor from their recess and lift them out. If you need a hand, you can always schedule a repair.

Tools Used
  1. SpudgerSamsung Galaxy S22 Ultra Screen and Battery Assembly Replacement

Step 51

– Warm up an iOpener and gently press it onto the top of the screen for about two minutes. This helps loosen things up for the next step. If you need a hand along the way, just schedule a repair.

Tools Used
  1. iOpenerSamsung Galaxy S22 Ultra Screen and Battery Assembly Replacement
  2. Heat GunSamsung Galaxy S22 Ultra Screen and Battery Assembly Replacement

Step 52

– Grab your trusty spudger and gently use the pointed end to lift the front-facing camera out of its cozy spot. Take it slow, no need to rush—this little step will go smoothly.

Step 53

– Grab your trusty blunt nose tweezers and gently lift the front-facing camera out of its spot. Easy does it!

Step 54

– Time to prep your new frame for the front-facing camera magic:

– Lift off that black adhesive liner from the camera spot—don’t be shy!

– Peel away the foam liner from the fresh frame. Give it a little wiggle if it’s stubborn.

Step 55

– Get ready to stick it! Before popping in that front-facing camera, lay down some fresh adhesives on both the frame and the camera itself:

– Peel off the two big clear rectangular liners from the adhesive sheet and slap those adhesives onto the sides of the camera area.

– Next, take the liner off the main adhesive piece and set it right in the middle of the camera recess, making sure the pull tab points toward the bottom of the frame.

– Clear off any leftover sticky bits from the camera module—no gunk allowed.

– Finally, peel the liner from the skinny adhesive strip and stick it right along the top edge of the camera.

Step 56

– Pop in the front-facing camera:

– Peel off those four blue adhesive liners from the camera and the frame. (Yes, all of them. Trust us.)

– Slide the front-facing camera into its cozy spot in the frame and give it a gentle press to make sure it sticks.

Step 57

– Grab your spudger by the pointed end and gently pry up to disconnect the display cable’s press connector. Keep it careful but confident—you’re making progress! If you need a hand, remember you can always schedule a repair.

Tools Used
  1. SpudgerSamsung Galaxy S22 Ultra Screen and Battery Assembly Replacement

Step 58

– Let’s get started by carefully grabbing and removing the display cable from the frame.

Step 59

– Ready to put it all back together? Just follow the steps in reverse and your device should be back in action.

– Got old parts or electronics hanging around? Drop them off at an R2 or e-Stewards certified recycler and give them a new lease on life.

– Hit a snag? Swing by our Answers community for some repair wisdom, or if things get really tricky, you can always schedule a repair.

Success!
Now, to put your device back together, simply reverse the steps you’ve already tackled—easy peasy!
Got e-waste piling up? Don’t just toss it—take it to an R2 or e-Stewards certified recycler and do the planet a solid.
Things didn’t go according to plan? No worries! Head over to our Answers community for troubleshooting tips, or if you’re really stuck, you can always schedule a repair.

Samsung Galaxy S22 Ultra Screen and Battery Assembly Replacement

Duration: 45 minutes
Steps: 59 Steps

Ready to give your Samsung Galaxy S22 Ultra a fresh start with a new screen and battery assembly? This step-by-step guide walks you through replacing the whole package—the screen, battery, and frame, all in one. Double-check that you’ve got the correct assembly before diving in. Quick heads up: the upper 5G mmWave antenna isn’t interchangeable between US (908U) and international (908B/E) frames, so match up your model! After you finish, your phone’s water resistance depends on how well you stick things back together, but the official IP rating will be history. Take your time, follow along, and you’ve got this! If things get tricky, you can always schedule a repair.

Step 1

– Let’s get started by inserting a SIM eject tool, or even a straightened paper clip, into the tiny hole on the bottom edge of your phone – it’s time to set that SIM card free!

– Gently push the SIM eject tool into the hole until the SIM card tray pops out – you’re making great progress!

– Now, simply remove the SIM card tray and you’ll be one step closer to getting your phone up and running again.

Step 2

– Give that button at the bottom of the stylus a gentle press.

– Slide the stylus out like a pro!

Step 3

– Warm up your iOpener and set it on the right edge of the back cover for a couple of minutes.

Tools Used
  1. iOpenerSamsung Galaxy S22 Ultra Screen and Battery Assembly Replacement
  2. Heat GunSamsung Galaxy S22 Ultra Screen and Battery Assembly Replacement

Step 4

– While the adhesive is getting nice and toasty, here’s a heads-up:

– Sticky stuff holds the back cover all the way around the edge of the frame.

Step 5

– Stick the suction handle on the back cover, aiming for the center along the right edge—like you’re giving it a high-five.

– Pull up on that handle with a steady, confident grip to open up a gap between the cover and the frame. You’ve got this!

– Slide an opening pick into the gap. Take it slow; steady hands win the race.

Tools Used
  1. iOpenerSamsung Galaxy S22 Ultra Screen and Battery Assembly Replacement
  2. Suction HandleSamsung Galaxy S22 Ultra Screen and Battery Assembly Replacement

Step 6

– Gently slide the pick along the right edge, working back and forth to cut through the adhesive. Keep the pick inserted near the bottom of the right edge to help prevent the adhesive from sealing back up. If you need help at any point, you can always schedule a repair.

Step 7

– Warm up your iOpener and place it on the bottom edge of the back cover for two minutes. Give it a little time to work its magic!

Tools Used
  1. iOpenerSamsung Galaxy S22 Ultra Screen and Battery Assembly Replacement

Step 8

– Time to get this repair started! Insert a second opening pick at the bottom right corner, making sure it’s snug and secure.

– Now, gently angle the pick upward to match the curved edge, and rotate it around the bottom right corner – you’re making great progress!

Step 9

– Slide your opening pick down to the bottom left corner to cut through that sticky adhesive. Nice and easy does it!

– Keep the pick chilling in the bottom left corner so the adhesive doesn’t sneak back together while you work.

Step 10

– Warm up your iOpener and give the left edge of the back cover a cozy two-minute hug!

Tools Used
  1. iOpenerSamsung Galaxy S22 Ultra Screen and Battery Assembly Replacement

Step 11

– Slip a third opening pick into the bottom left corner—like you’re sneaking in a secret handshake.

– Tilt the pick up to follow the curve, then spin it around the bottom corner like you’re tracing a funky dance move.

Step 12

– Gently slide your opening pick along the left edge, slicing through the adhesive. Keep going until you reach the power button. Then, leave that pick in place on the edge to stop the adhesive from sealing back up. If you need help, you can always schedule a repair.

Step 13

– Warm up your iOpener and let it chill on the top edge of the back cover for a solid two minutes.

Tools Used
  1. iOpenerSamsung Galaxy S22 Ultra Screen and Battery Assembly Replacement

Step 14

– Slide an opening pick into the gap at the top right edge—like sneaking a slice of cake before dinner.

– Tilt the pick upward to follow the curve, then gently spin it around the top right corner. Smooth moves!

Step 15

– Use the pick to gently slide into the top left corner to loosen the adhesive. Keep the pick in place afterward to prevent the adhesive from sticking back together. If you need help, you can always schedule a repair.

Step 16

– Slip an opening pick into the gap at the top left corner—like sliding into the DMs, but for your device.

– Tilt the pick up to follow that smooth, curved edge and give it a gentle spin around the top left corner.

Step 17

– Glide that pick down toward the bottom camera, slicing through the last bits of sticky stuff. Pause before you hit the power button—no need to get wild at the finish line!

Step 18

– Pop off that back cover and set it aside.

– When you’re putting things back together:

– Now’s a good moment to fire up your phone and make sure everything works before you seal it up. Once you’ve checked, shut it down completely before moving on.

– Clear away any leftover adhesive chunks with tweezers or your fingers. If the sticky stuff is stubborn, a little heat helps loosen it up.

– Using custom-cut adhesives? Check out Salvation Repair’s guide for the details.

– Double-sided tape your thing? Salvation Repair has a guide for that too.

Step 19

– Gently slide an opening pick between the right edge of the wireless charging coil and the battery. You’ve got this!

– Carefully glide the pick along the right edge to break that sticky adhesive apart. You’re on a roll!

Step 20

– Time to get started! Use the pointed end of a spudger to carefully pry and disconnect the NFC antenna press connector from the motherboard. Take your time and work gently.

– Next up, repeat the same process for the wireless charging coil press connector. You got this!

Tools Used
  1. SpudgerSamsung Galaxy S22 Ultra Screen and Battery Assembly Replacement

Step 21

– Grab your Phillips screwdriver and take out the five 3.5 mm screws holding down the NFC antenna and charging coil.

Step 22

– Grab your trusty Phillips screwdriver and take out the six 3.5 mm screws holding the loudspeaker in place. Let’s make those screws history!

Step 23

– Let’s get started by carefully inserting the pointed end of your trusty spudger between the upper right corner of the loudspeaker and the frame – it’s time to set that speaker free!

– Gently pry up to unclip the loudspeaker from the frame. Take your time and be patient, it’s a delicate process.

– When you’re putting everything back together, make sure to press around the perimeter of the loudspeaker to secure it to the frame. You’re doing great!

Tools Used
  1. SpudgerSamsung Galaxy S22 Ultra Screen and Battery Assembly Replacement

Step 24

– Carefully take out the NFC, wireless charging coil, and loudspeaker from the frame. You’ve got this!

Step 25

– Grab your spudger, aim for the battery press connector, and pop it loose with the pointed end. Battery’s taking a break now.

Tools Used
  1. SpudgerSamsung Galaxy S22 Ultra Screen and Battery Assembly Replacement

Step 26

– Grab the pointy end of your spudger and gently pop up the lower 5G mmWave antenna connector—just a little nudge is all it takes!

Tools Used
  1. SpudgerSamsung Galaxy S22 Ultra Screen and Battery Assembly Replacement

Step 27

– Let’s get started! Use your trusty Phillips screwdriver to remove the two 3.5mm-long screws that are holding the antenna bracket in place. This is a breeze, and you’re already making progress!

Step 28

– Gently wedge your spudger between the bottom screw mount of the antenna bracket and the frame, giving it a little persuasion.

– Carefully pry up on the bracket until you can grab it easily with blunt nose tweezers or your fingers—no need to be forceful.

– Lift out the lower 5G mmWave antenna to free it from its spot.

Tools Used
  1. SpudgerSamsung Galaxy S22 Ultra Screen and Battery Assembly Replacement

Step 29

– If you’ve got a fresh bracket ready for the lower 5G mmWave antenna, swap it in now. No worries if you don’t—just cruise right past this step.

– Pop the antenna and its connector off the old bracket. It’s like giving them a quick ticket out.

– Peel off the L-shaped adhesive liner from your shiny new bracket. Satisfying, right?

– Nestle the antenna into the bracket’s snug little nook, making sure the connector slips under the longer screw mount.

– Now, peel away that skinny adhesive liner on the bracket’s outside edge before popping it back into the frame.

Step 30

– Gently take the pointed end of your spudger and carefully wiggle it under the upper 5G mmWave antenna press connector to disconnect it. You’ve got this!

Tools Used
  1. SpudgerSamsung Galaxy S22 Ultra Screen and Battery Assembly Replacement

Step 31

– Slide the spudger’s pointy end into the crack between the lower edge of the 5G mmWave antenna and the board like you’re opening a tiny, stubborn envelope.

– Gently pop the antenna up until you can pinch it with your fingers or snag it with blunt tweezers—no hero moves needed.

– Lift the top 5G mmWave antenna out and set it aside; you’ve just freed the little guy.

Tools Used
  1. iOpenerSamsung Galaxy S22 Ultra Screen and Battery Assembly Replacement
  2. SpudgerSamsung Galaxy S22 Ultra Screen and Battery Assembly Replacement

Step 32

– Stick on some fresh adhesive to the upper 5G mmWave antenna before popping it back in. No new adhesive? No worries—reuse the old one or get creative with custom-cut strips.

– Peel off the old adhesive from the antenna using blunt nose tweezers or just your fingers. No need to be fancy.

– Take off the clear liner from your new adhesive—let’s get sticky.

– Place the new adhesive on the bottom of the antenna. Make sure the round end is pointing away from the connector like it’s got somewhere to be.

– Before you settle the antenna back in the frame, remove the green liner from the adhesive. Now you’re ready to finish up.

Step 33

– Grab the pointed end of your spudger and gently pry up the main interconnect cable from the motherboard to disconnect it. Then, do the same for the secondary interconnect, which is located to the left of the primary cable. Keep at it, and if you need some extra help, you can always schedule a repair.

Tools Used
  1. SpudgerSamsung Galaxy S22 Ultra Screen and Battery Assembly Replacement

Step 34

– With the pointed end of your spudger, gently pop up and disconnect the main interconnect cable from the charging board. It’s like unplugging tiny Lego pieces—just a little wiggle and lift.

– Do the same trick for the secondary interconnect cable. One more gentle lift and you’re good to go!

Tools Used
  1. SpudgerSamsung Galaxy S22 Ultra Screen and Battery Assembly Replacement

Step 35

– Gently unplug and lift out those interconnect cables from the frame—like you’re giving them a little vacation.

Step 36

– Grab your Phillips screwdriver and take out the three screws (they’re each 3.5 mm long) that hold the charging board in place.

Step 37

– Let’s get this repair started! Insert the pointed end of your trusty spudger under the charging board, right across from the USB-C port.

– Gently pry the charging board up from its cozy little recess until you can get a good grip on it with your fingers.

Tools Used
  1. SpudgerSamsung Galaxy S22 Ultra Screen and Battery Assembly Replacement

Step 38

– Grab the charging board by its corners and gently slide it out of its slot in the frame—think of it as a little game of slide and seek.

– Pull out the charging board carefully—no need to rush, it’s just hanging out waiting to be freed.

– When putting things back together, angle the charging board downward as you slide it in; this helps guide the USB-C port into its cozy little recess. If you need help, you can always schedule a repair.

Step 39

– Grab your spudger and use its pointed end to gently pop up and disconnect the press connector for the laser autofocus module. Easy does it!

Tools Used
  1. SpudgerSamsung Galaxy S22 Ultra Screen and Battery Assembly Replacement

Step 40

– Grab your Phillips screwdriver and take out the three screws (they’re 3.5 mm long) holding down the motherboard cover. Easy does it!

Step 41

– Slide the sharp end of your spudger into the bottom right corner of the motherboard cover, right where it meets the frame.

– Gently pry up on the cover to pop it free from the frame.

– Carefully take out the motherboard cover along with the laser AF module.

– When putting everything back together, give the cover a good press down to lock those clips into place on the frame.

Tools Used
  1. SpudgerSamsung Galaxy S22 Ultra Screen and Battery Assembly Replacement

Step 42

– Grab the pointy end of your spudger and gently pop up the front-facing camera connector—like giving it a little wave hello before it takes a break.

Tools Used
  1. SpudgerSamsung Galaxy S22 Ultra Screen and Battery Assembly Replacement

Step 43

– Grab your spudger and gently pop up the fingerprint reader connector—like opening a tiny treasure chest.

Tools Used
  1. SpudgerSamsung Galaxy S22 Ultra Screen and Battery Assembly Replacement

Step 44

– Grab your trusty spudger and use its pointed end to gently lift and disconnect the screen press connector. You’ve got this!

Tools Used
  1. SpudgerSamsung Galaxy S22 Ultra Screen and Battery Assembly Replacement

Step 45

– Grab the pointed end of your spudger and gently pry up to disconnect the stylus’s press connector. Easy does it—just a little lift and wiggle to free it up.

Tools Used
  1. SpudgerSamsung Galaxy S22 Ultra Screen and Battery Assembly Replacement

Step 46

– Grab your trusty Phillips screwdriver and take out that 3.5 mm-long screw that’s holding the motherboard in place. You’re doing great!

Step 47

– Gently slide the pointed end of your spudger into the gap between the top left of the motherboard and the frame.

– Once you’re in there, give it a little nudge and lift the motherboard until you can grab it with your fingers.

Tools Used
  1. SpudgerSamsung Galaxy S22 Ultra Screen and Battery Assembly Replacement

Step 48

– Pick up the motherboard by its left edge and gently lift it out of the frame.

– When it’s time to put everything back together, make sure the cables are resting above the motherboard as you slide it back in.

Step 49

– Grab your Phillips screwdriver and gently unscrew the two 3.2 mm screws holding in the earpiece speaker and vibration motor. Easy does it—you’re almost there! If you need help, you can always schedule a repair.

Step 50

– Slide the flat end of your spudger carefully beneath the bottom edge of the earpiece speaker and vibration motor. Gently pry up the earpiece speaker and vibration motor from their recess and lift them out. If you need a hand, you can always schedule a repair.

Tools Used
  1. SpudgerSamsung Galaxy S22 Ultra Screen and Battery Assembly Replacement

Step 51

– Warm up an iOpener and gently press it onto the top of the screen for about two minutes. This helps loosen things up for the next step. If you need a hand along the way, just schedule a repair.

Tools Used
  1. iOpenerSamsung Galaxy S22 Ultra Screen and Battery Assembly Replacement
  2. Heat GunSamsung Galaxy S22 Ultra Screen and Battery Assembly Replacement

Step 52

– Grab your trusty spudger and gently use the pointed end to lift the front-facing camera out of its cozy spot. Take it slow, no need to rush—this little step will go smoothly.

Step 53

– Grab your trusty blunt nose tweezers and gently lift the front-facing camera out of its spot. Easy does it!

Step 54

– Time to prep your new frame for the front-facing camera magic:

– Lift off that black adhesive liner from the camera spot—don’t be shy!

– Peel away the foam liner from the fresh frame. Give it a little wiggle if it’s stubborn.

Step 55

– Get ready to stick it! Before popping in that front-facing camera, lay down some fresh adhesives on both the frame and the camera itself:

– Peel off the two big clear rectangular liners from the adhesive sheet and slap those adhesives onto the sides of the camera area.

– Next, take the liner off the main adhesive piece and set it right in the middle of the camera recess, making sure the pull tab points toward the bottom of the frame.

– Clear off any leftover sticky bits from the camera module—no gunk allowed.

– Finally, peel the liner from the skinny adhesive strip and stick it right along the top edge of the camera.

Step 56

– Pop in the front-facing camera:

– Peel off those four blue adhesive liners from the camera and the frame. (Yes, all of them. Trust us.)

– Slide the front-facing camera into its cozy spot in the frame and give it a gentle press to make sure it sticks.

Step 57

– Grab your spudger by the pointed end and gently pry up to disconnect the display cable’s press connector. Keep it careful but confident—you’re making progress! If you need a hand, remember you can always schedule a repair.

Tools Used
  1. SpudgerSamsung Galaxy S22 Ultra Screen and Battery Assembly Replacement

Step 58

– Let’s get started by carefully grabbing and removing the display cable from the frame.

Step 59

– Ready to put it all back together? Just follow the steps in reverse and your device should be back in action.

– Got old parts or electronics hanging around? Drop them off at an R2 or e-Stewards certified recycler and give them a new lease on life.

– Hit a snag? Swing by our Answers community for some repair wisdom, or if things get really tricky, you can always schedule a repair.

Success!
Now, to put your device back together, simply reverse the steps you’ve already tackled—easy peasy!
Got e-waste piling up? Don’t just toss it—take it to an R2 or e-Stewards certified recycler and do the planet a solid.
Things didn’t go according to plan? No worries! Head over to our Answers community for troubleshooting tips, or if you’re really stuck, you can always schedule a repair.

Samsung Galaxy S21 Plus Rear Camera Replacement

Duration: 45 minutes
Steps: 28 Steps

Ready to swap out the rear camera on your Samsung Galaxy S21 Plus? This guide walks you through it on the SM-G996B/DS (international) model. If you’re working on a different version, you might spot an extra antenna cable near the midframe edge—watch for that surprise guest. Skipping new adhesive seals during reassembly means your phone will still work just fine, but it could lose its water resistance superpowers. Grab some fresh adhesive to stick everything back together when you’re done.

Step 1

– Grab your trusty iOpener and give it a warm hug against the back cover for a solid three minutes. This will help loosen up that stubborn adhesive hiding underneath, making your repair journey a breeze!

Tools Used
  1. iOpenerSamsung Galaxy S21 Plus Rear Camera Replacement
  2. Heat GunSamsung Galaxy S21 Plus Rear Camera Replacement

Step 2

– Grab a suction handle and stick it to the bottom edge of the back cover, right up against the edge for the best grip.

– Gently pull on the suction handle to lift the back cover just enough to create a tiny gap between it and the frame.

– Slide an opening pick into that little gap you just made.

– Carefully glide the opening pick down to the bottom left corner to cut through the adhesive.

– Keep that opening pick in place to stop the adhesive from sealing back up.

Tools Used
  1. iOpenerSamsung Galaxy S21 Plus Rear Camera Replacement
  2. Suction HandleSamsung Galaxy S21 Plus Rear Camera Replacement

Step 3

– Slip in a second opening pick at the bottom edge of your phone.

– Gently slide the pick towards the bottom-right corner to break through the adhesive.

– Keep the picks in place to stop the adhesive from sealing up again.

Step 4

– Pop a third opening pick into the bottom right corner of your phone.

– Gently slide the pick along the right edge, cutting through that sticky adhesive like a pro.

– Leave the pick in the top right corner so the adhesive doesn’t decide to reseal itself. You’ve got this!

Tools Used
  1. iOpenerSamsung Galaxy S21 Plus Rear Camera Replacement

Step 5

– Pop a fourth opening pick under the top right corner—think of it as giving your phone a little lift.

– Glide that pick along the top edge to gently slice through the sticky adhesive. Smooth moves only.

– Let the pick chill in the top left corner to keep the adhesive from trying any sneaky resealing tricks.

Step 6

– Time to get this repair started! Insert a fifth opening pick underneath the bottom left corner, and gently pry it open.

– Now, slide the opening pick along the left edge of the back cover to slice through the remaining adhesive. Take your time and work carefully to avoid any damage.

Step 7

– Time to pop off the back cover! Carefully lift it off, and you’re in business.

– Now, as you’re putting everything back together:

– Here’s a great opportunity to power on your phone and make sure all the functions are working smoothly before you seal everything up. Just remember to power it down again before continuing, we don’t want any surprises later!

– Use tweezers or your fingers to gently remove any leftover adhesive chunks. Got some sticky residue? No problem—grab some high-concentration (over 90%) isopropyl alcohol and wipe it clean.

– If you’re using Samsung’s custom-cut adhesives, we’ve got a handy guide for that.

– Working with double-sided tape? Follow this guide for a smooth setup.

Step 8

– Let’s get this repair started! Begin by carefully inserting an opening pick under the left bottom end of the NFC antenna and charging coil assembly.

– Now, gently slide the opening pick along the bottom left edge of the assembly to loosen it from the battery. Take your time and be patient – we’ve got this!

Step 9

– Hook a plastic opening tool or pick beneath the bottom edge of the NFC antenna and charging coil assembly. Gently work it along the bottom to separate it from the loudspeaker. Take your time—patience makes perfect! If you need a hand, you can always schedule a repair.

Step 10

– Grab your trusty spudger and gently lift the charging coil connector straight up from its socket—it pops out with a little nudge!

Tools Used
  1. SpudgerSamsung Galaxy S21 Plus Rear Camera Replacement

Step 11

– Grab your spudger and gently pop the NFC antenna connector straight up from its socket—like opening a stubborn soda can!

Tools Used
  1. SpudgerSamsung Galaxy S21 Plus Rear Camera Replacement

Step 12

– Grab your Phillips screwdriver and zip out those five 3.9 mm screws holding down the NFC antenna and charging coil. Let’s get this assembly loose!

Step 13

– Grab some tweezers or use your fingers to gently lift out the NFC antenna and charging coil assembly. Take your time—careful hands make for a smooth removal. If you need help, you can always schedule a repair.

Step 14

– Let’s get started! Use a spudger to carefully disconnect the battery cable by gently prying the connector straight up from its socket. Remember to take your time and be patient, we’ve got this!

Tools Used
  1. SpudgerSamsung Galaxy S21 Plus Rear Camera Replacement

Step 15

– Grab your trusty spudger and gently pry the display flex cable’s upper connector straight up from its socket. You’ve got this!

Tools Used
  1. SpudgerSamsung Galaxy S21 Plus Rear Camera Replacement

Step 16

– Grab a spudger and gently pry up the main and interconnect flex cables from the motherboard. Just lift their top connectors straight up from their sockets—easy does it.

Tools Used
  1. SpudgerSamsung Galaxy S21 Plus Rear Camera Replacement

Step 17

– Grab your trusty Phillips screwdriver and get ready to tackle those seven 3.9 mm-long screws holding the earpiece speaker assembly in place. You’ve got this!

Step 18

– Grab your trusty spudger and give that earpiece speaker cable connector a gentle pop straight up out of its socket—like you’re lifting a tiny lid on a treasure chest.

Tools Used
  1. SpudgerSamsung Galaxy S21 Plus Rear Camera Replacement

Step 19

– Slip your spudger under the bottom left corner of the earpiece speaker assembly—like you’re sneaking a fry from the bottom of the bag.

– Gently lift the earpiece speaker assembly with your spudger. Give it a little nudge, no need to wrestle.

Tools Used
  1. SpudgerSamsung Galaxy S21 Plus Rear Camera Replacement

Step 20

– Time to get up close and personal with those tiny components! Use a pair of tweezers or your fingers to carefully remove the earpiece speaker assembly – it’s like a little puzzle piece waiting to be freed.

– Reassembly time! Apply new adhesive where it’s necessary, and don’t forget to clean the relevant areas with isopropyl alcohol (>90%) – a clean slate is a happy slate. If you’re feeling stuck, remember that a little patience and practice go a long way.

Step 21

– Grab your spudger and gently lift the front-facing camera cable connector straight up from its socket. No need to rush – just ease it off carefully.

Tools Used
  1. SpudgerSamsung Galaxy S21 Plus Rear Camera Replacement

Step 22

– Grab your trusty spudger and gently pop the power button flex cable straight up out of its socket. No need to rush – give it a little wiggle if it’s feeling stubborn.

– Swing that flex cable aside with a smooth bend, keeping it safely out of harm’s way while you work on getting the motherboard out.

Tools Used
  1. SpudgerSamsung Galaxy S21 Plus Rear Camera Replacement

Step 23

– Grab your spudger and gently pry the power antenna flex cable connector straight up out of its socket—think of it as lifting a tiny lid without forcing it.

– Carefully bend the flex cable to one side with your spudger, making sure not to put any unnecessary stress on it when you’re removing the motherboard. Stay gentle, stay confident!

Tools Used
  1. SpudgerSamsung Galaxy S21 Plus Rear Camera Replacement

Step 24

– Slide a spudger gently under the top edge of the motherboard assembly, right next to the vibration motor.

– Use your spudger to carefully lift and pry up the motherboard assembly—think of it as giving it a friendly nudge to loosen things up.

Tools Used
  1. SpudgerSamsung Galaxy S21 Plus Rear Camera Replacement

Step 25

– Gently lift out the motherboard assembly along with the rear cameras. Keep it steady and avoid forcing anything—if it feels stuck, take a moment to double-check for hidden screws or clips. Need a hand? You can always schedule a repair with Salvation Repair.

Step 26

– Grab your trusty spudger and gently pop the ultra wide camera flex cable connector straight up—like you’re unplugging a tiny dance partner.

– Next, use the spudger to lift the wide and tele camera assembly connector right out of its socket. Keep it smooth and steady—no wrestling required!

Tools Used
  1. SpudgerSamsung Galaxy S21 Plus Rear Camera Replacement

Step 27

– Gently wiggle the camera assembly loose from the motherboard using tweezers or your fingers—slow and steady wins the race here.

Step 28

– Almost done! If possible, power on your device to make sure everything is working smoothly before sealing it up.

– Take a quick glance at your new replacement part and the original one – you might need to swap some components or remove adhesive backing before installing the new part.

– To put everything back together, just follow these steps in reverse. Easy peasy!

– Once you’ve finished the repair, test it out to make sure all is well. If you need help, check out our troubleshooting tips or schedule a repair with Salvation Repair.

– Don’t forget to responsibly recycle your e-waste with an R2 or e-Stewards certified recycler.

– If things didn’t quite go as planned, don’t worry! Try some basic troubleshooting or ask our community for help. You got this!

Success!
Fire up your device and give your repair a test run before sealing things up with fresh adhesive.
Line up your new part with the original—make sure you transfer any leftover bits or peel off protective backings before popping it in.
To put everything back together, just work your way through these steps in reverse.
Once you’re done, check out the guide to make sure your repair is working smoothly.
Got leftover parts or broken bits? Drop your e-waste off at an R2 or e-Stewards certified recycler.
If things didn’t go according to plan, try some basic troubleshooting—or swing by our Answers community for advice. If you need a hand, you can always schedule a repair.

Samsung Galaxy S21 Plus NFC Antenna & Charging Coil Assembly Replacement

Duration: 45 minutes
Steps: 13 Steps

Ready to give your Galaxy S21 Plus a little TLC? Follow these steps to swap out a busted NFC antenna and charging coil assembly. This guide is for the SM-G996B/DS (international) model, but heads up—some versions have an extra antenna cable hugging the midframe. If you skip new adhesive seals when putting things back together, your device will run just fine, but it’ll probably wave goodbye to its water resistance. Grab some replacement adhesive to keep everything snug during reassembly. Take it one step at a time, and if things get wild, you can always schedule a repair.

Step 1

– Grab an iOpener and gently place it on the back cover. Let it sit there for at least three minutes to help loosen up that stubborn adhesive underneath. If you need a hand, you can always schedule a repair.

Tools Used
  1. iOpenerSamsung Galaxy S21 Plus NFC Antenna & Charging Coil Assembly Replacement
  2. Heat GunSamsung Galaxy S21 Plus NFC Antenna & Charging Coil Assembly Replacement

Step 2

– Stick a suction handle on the lower edge of the back cover—get it as close to the edge as you can.

– Give the suction handle a gentle lift to crack open a tiny gap between the cover and the frame.

– Slide an opening pick right into that gap like a pro.

– Work the pick over to the bottom left corner to slice through all that sticky adhesive.

– Leave the pick chilling there so the adhesive doesn’t get any ideas about sticking back together.

Tools Used
  1. iOpenerSamsung Galaxy S21 Plus NFC Antenna & Charging Coil Assembly Replacement
  2. Suction HandleSamsung Galaxy S21 Plus NFC Antenna & Charging Coil Assembly Replacement

Step 3

– Start by slipping a second opening pick in at the bottom edge of your phone.

– Gently slide that pick toward the bottom right corner to cut through the adhesive.

– Keep those opening picks in place to stop the adhesive from sealing back up.

Step 4

– Time to bring in the reinforcements – insert a third opening pick at the bottom right corner of your phone to help loosen things up.

– Now, gently slide the opening pick along the right edge of your phone to slice through the adhesive. Take your time, you got this!

– Leave the opening pick in the top right corner to keep the adhesive from resealing. You’re making great progress!

Tools Used
  1. iOpenerSamsung Galaxy S21 Plus NFC Antenna & Charging Coil Assembly Replacement

Step 5

– Pop a fourth opening pick under the top right corner of your phone—like you’re dealing a card at a poker table.

– Glide the pick across the top edge to slice through the sticky adhesive—smooth moves only.

– Keep that pick chilling in the top left corner so the adhesive doesn’t sneakily stick itself back together.

Step 6

– Sneak a fifth pick under the bottom left corner — like a secret agent, but for your phone.

– Glide that pick up the left edge to break up the last bits of sticky stuff holding the back cover in place.

Step 7

– Start by carefully removing the back cover of your device. During reassembly, it’s a good idea to power on your phone and test all functions before sealing it up—no point putting everything back together only to find something’s not working! Make sure to power down completely before proceeding. Use tweezers or your fingers to gently remove any leftover adhesive chunks. For stubborn residue, wipe it away with high-concentration (over 90%) isopropyl alcohol. If you’re using Samsung’s custom-cut adhesives, follow the specific guide for those. Alternatively, if double-sided tape was your choice, refer to its guide. Need a hand? You can always schedule a repair with Salvation Repair.

Step 8

– Slip an opening pick under the left bottom corner of the NFC antenna and charging coil assembly like you’re sliding into home base.

– Gently glide your pick along the lower left edge to loosen the assembly from the battery—easy does it!

Step 9

– Let’s get this repair started! Begin by slipping an opening pick under the bottom edge of the NFC antenna and charging coil assembly.

– Now, gently slide the opening pick along the bottom of the assembly to loosen it from the loudspeaker. Take your time and be patient – we’ve got this!

Step 10

– Grab your trusty spudger and gently pop the charging coil connector straight up from its socket—like opening a stubborn pickle jar, but way less messy.

Tools Used
  1. SpudgerSamsung Galaxy S21 Plus NFC Antenna & Charging Coil Assembly Replacement

Step 11

– Grab your trusty spudger and gently pry the NFC antenna connector straight up from its socket. You’ve got this!

Tools Used
  1. SpudgerSamsung Galaxy S21 Plus NFC Antenna & Charging Coil Assembly Replacement

Step 12

– Grab your Phillips screwdriver and take out the five 3.9 mm screws holding down the NFC antenna and charging coil. Easy does it!

Step 13

– Fire up your device and take your repair for a test drive before sealing things up with fresh adhesive.

– Line up your new part with the old one—swap over any leftover bits or peel off backing tape as needed.

– Ready to reassemble? Just follow these steps backwards and you’re golden.

– Once you’re done, check out this guide to make sure everything’s working as it should.

– When it’s time to say goodbye to old parts, drop them off at an R2 or e-Stewards certified recycler.

– If things didn’t go quite as planned, try some basic troubleshooting or hit up our Answers community for a hand.

– Need backup? You can always schedule a repair.

Success!
Before sealing everything up, why not power on your device and give your repair a test run? It’s like a mini celebration of your hard work!
Make sure to compare your shiny new replacement part with the original—sometimes, you might need to switch over some leftover bits or peel off those pesky adhesive backings before diving into the installation.
To put your device back together, just retrace your steps like a pro!
Once you’ve wrapped up the repair, don’t forget to check out this guide to test your handiwork.
Got any e-waste lying around? Help the planet by taking it to an R2 or e-Stewards certified recycler.
If things didn’t go as smoothly as you’d hoped, don’t sweat it! Try a little troubleshooting magic or reach out to our awesome Answers community for some friendly tips.

🍪
Have a cookie! This site uses cookies to enhance your experience. Opt-Out Options.