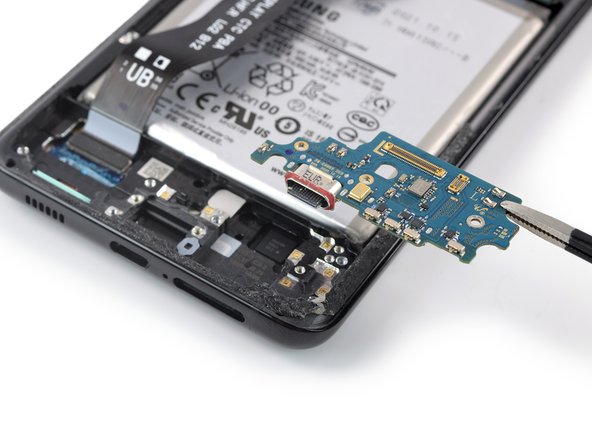
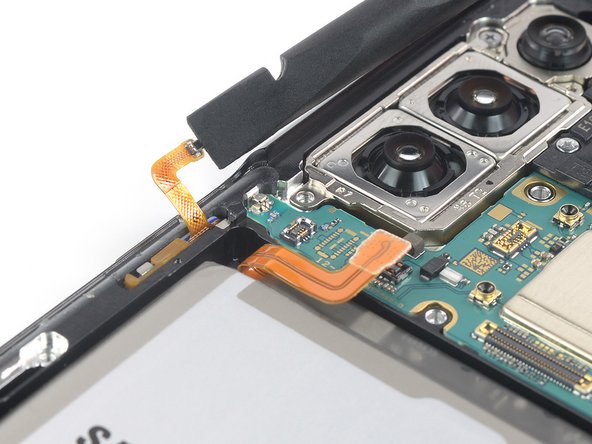
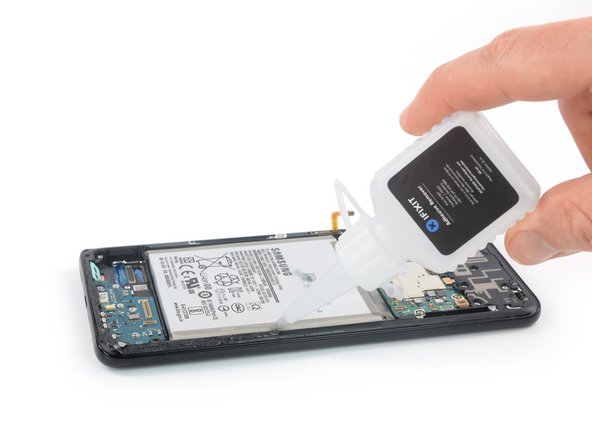
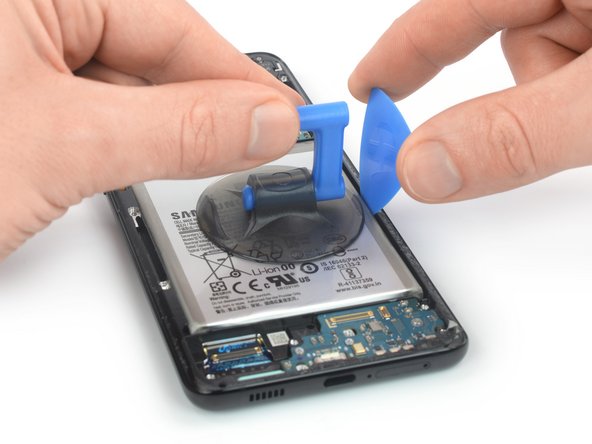
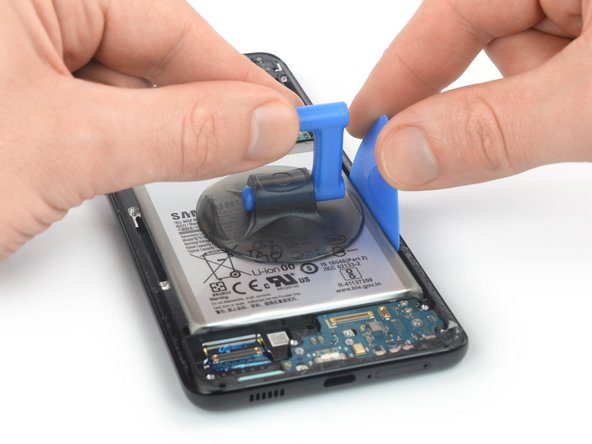
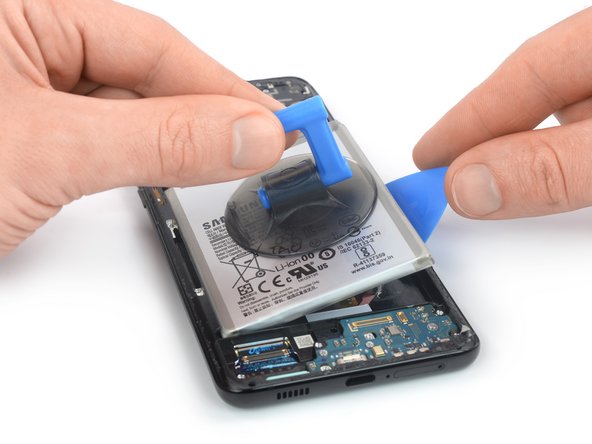
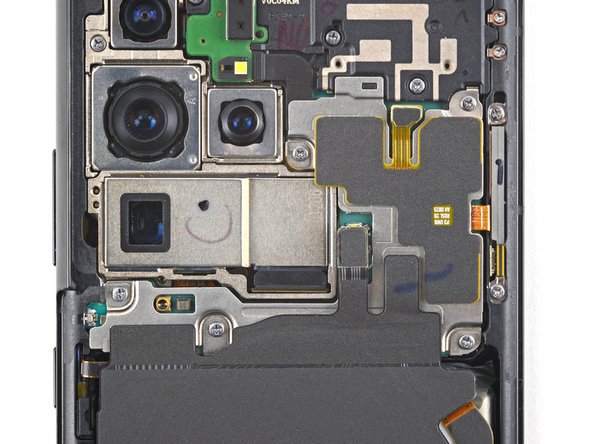
Samsung Galaxy S21 Plus Motherboard Replacement

Duration: 45 minutes
Steps: 27 Steps

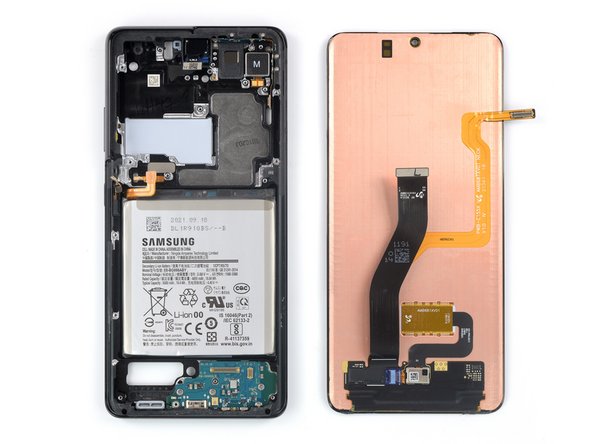
Ready to swap out the motherboard on your Samsung Galaxy S21 Plus? This guide is here to walk you through it for the SM-G996B/DS (international) model. If you have a different version, you might spot an extra antenna cable along the edge of the midframe—just a heads-up! Skipping the adhesive seals during reassembly won’t keep your phone waterproof, but everything else should work just fine. Grab some replacement adhesive so the parts stay put when you put it all back together.

Step 1

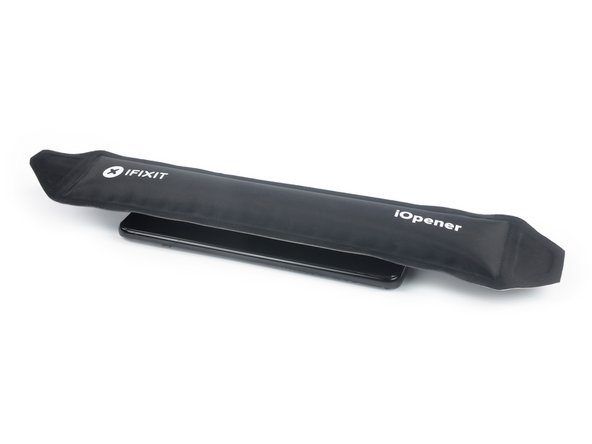
– Grab your iOpener and let it chill on the back cover for at least three minutes—this gives the adhesive underneath a chance to loosen up.

Tools Used
  1. iOpenerSamsung Galaxy S21 Plus Motherboard Replacement
  2. Heat GunSamsung Galaxy S21 Plus Motherboard Replacement

Step 2

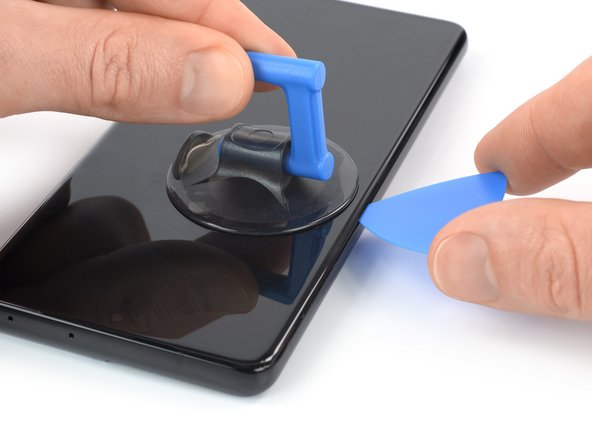
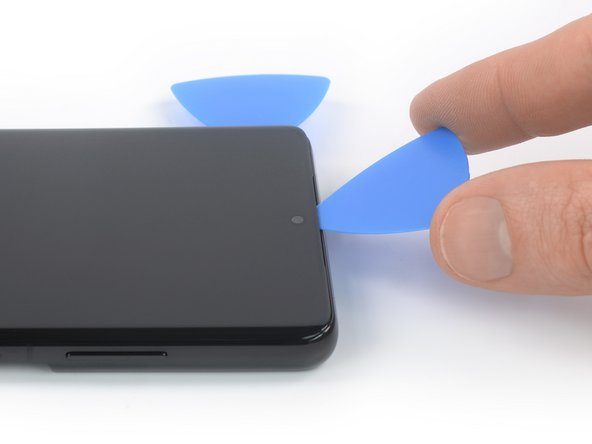
– Grab a suction cup and stick it right at the bottom edge of the back cover, as close to the edge as you can get. Then, gently lift the back cover with the suction device to create a tiny space between it and the frame. Next, slide an opening pick into that gap—think of it as your opening wedge. Carefully move the pick toward the bottom left corner to slice through the adhesive holding everything together. Keep that pick in place to prevent the adhesive from sticking back together. If you need a hand along the way, you can always schedule a repair.

Tools Used
  1. iOpenerSamsung Galaxy S21 Plus Motherboard Replacement
  2. Suction HandleSamsung Galaxy S21 Plus Motherboard Replacement

Step 3

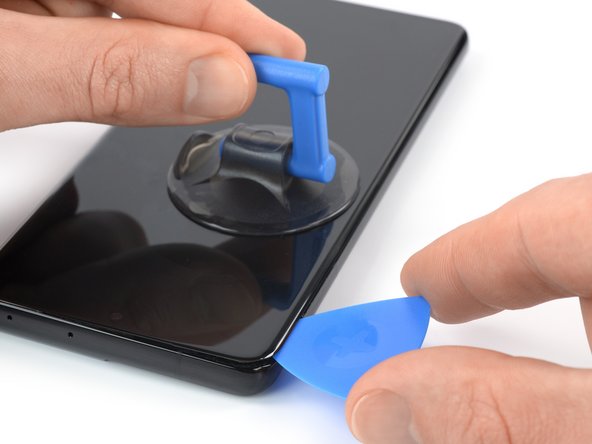
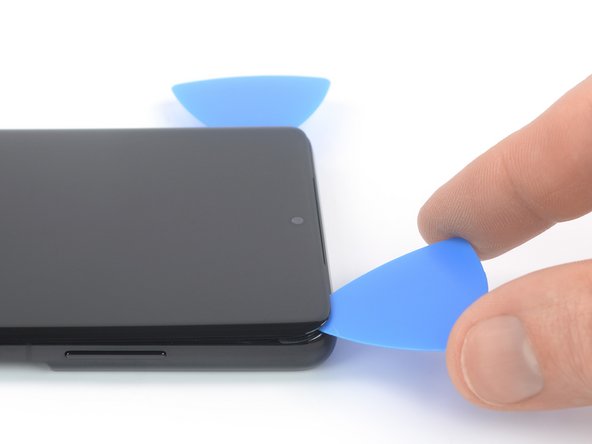
– Slide another pick under the lower edge—think of it as giving the glue a gentle nudge to loosen up.

– Glide the pick down toward the bottom-right corner, slicing the sticky stuff like you’re carving a tiny path.

– Leave both picks chilling in place so the adhesive doesn’t pull a sneaky and reseal while you’re not looking.

Step 4

– Pop a third opening pick into the bottom right corner—like you’re dealing cards, but for your phone.

– Glide that pick up the right edge to slice through the adhesive. Think of it as giving your phone a gentle haircut.

– Leave the pick chilling in the top right corner so the sticky stuff doesn’t sneak back together.

Tools Used
  1. iOpenerSamsung Galaxy S21 Plus Motherboard Replacement

Step 5

– Slide a fourth opening pick under the top right corner of your phone like a pro.

– Gently glide the pick along the top edge to cut through that sticky adhesive.

– Keep the opening pick in the top left corner to stop the adhesive from sealing back up.

Step 6

– Slide a fifth opening pick under the bottom-left corner and cruise it along the left edge to shoo away the last bits of glue.

Step 7

– Start by removing the back cover of your device. As you reassemble, it’s a good idea to power on your device and test all functions before sealing everything up tight. Make sure to shut it down completely before moving forward. Use tweezers or your fingers to carefully pick away any leftover adhesive chunks, and wipe away residue with high-concentration (over 90%) isopropyl alcohol for a clean finish. If you’re working with Samsung custom-cut adhesives, follow this guide. For double-sided tape, check out this guide. If you need a hand, remember you can always schedule a repair.

Step 8

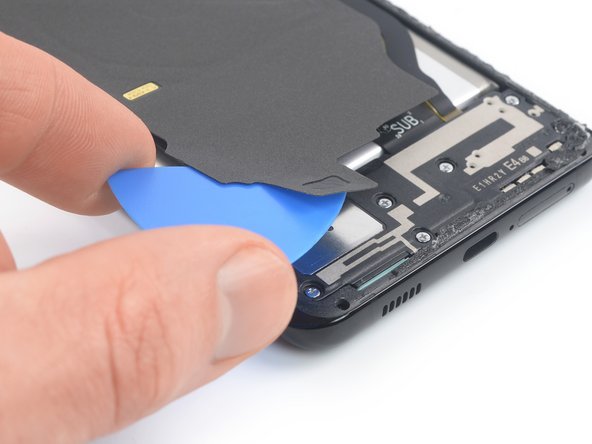
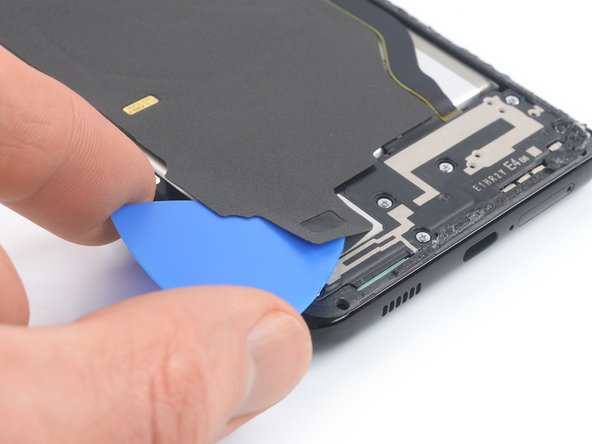
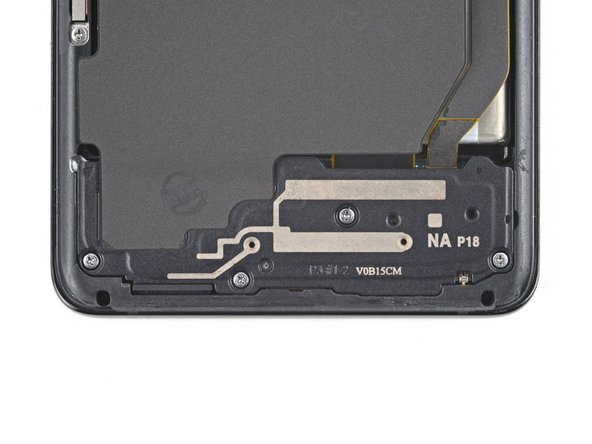
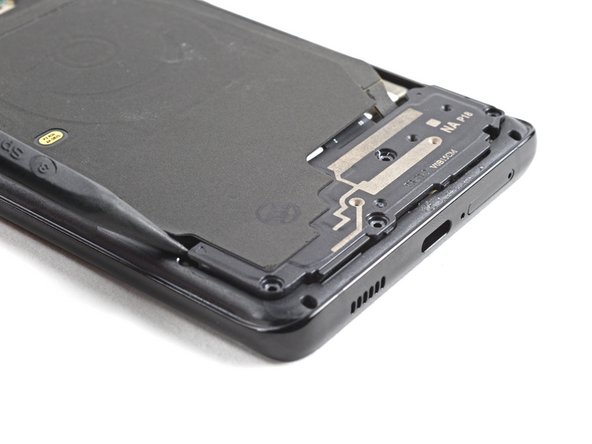
– Slip an opening pick under the lower left edge of the NFC antenna and charging coil setup—like you’re sliding into home base.

– Gently glide the pick along the bottom left side to loosen it from the battery. Take your time—no need for a wrestling match here.

Step 9

– Start by gently slipping an opening pick underneath the bottom edge of the NFC antenna and charging coil assembly. Then, carefully slide the pick along the bottom of the assembly to loosen it from the loudspeaker. If you need help along the way, you can always schedule a repair.

Step 10

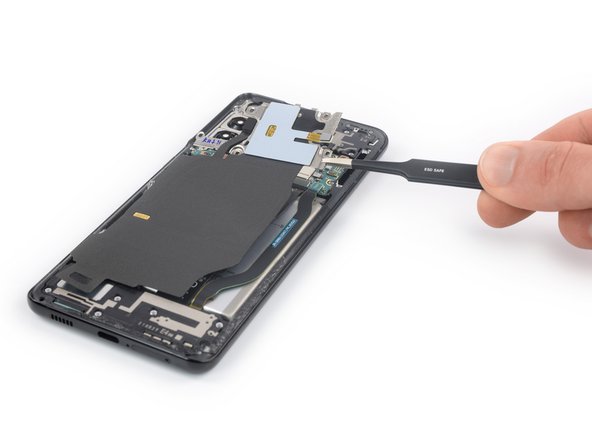
– Grab your trusty spudger and gently pop the charging coil connector straight up from its socket. You’ve got this!

Tools Used
  1. SpudgerSamsung Galaxy S21 Plus Motherboard Replacement

Step 11

– Gently pry up the NFC antenna connector using a spudger, lifting straight up from its socket. Take your time—it’s a small connection, but steady hands will do the trick. If you need help along the way, you can always schedule a repair.

Tools Used
  1. SpudgerSamsung Galaxy S21 Plus Motherboard Replacement

Step 12

– Grab your trusty Phillips screwdriver and tackle those five 3.9 mm-long screws that are holding down the NFC antenna and charging coil assembly. Let’s get it done!

Step 13

– Gently lift out the NFC antenna and charging coil assembly using tweezers or your fingers—like you’re plucking the last cookie from the jar, but with a little more precision.

Step 14

– Grab your trusty spudger and gently pop the battery connector straight up out of its socket. Easy does it—no wrestling moves required!

Tools Used
  1. SpudgerSamsung Galaxy S21 Plus Motherboard Replacement

Step 15

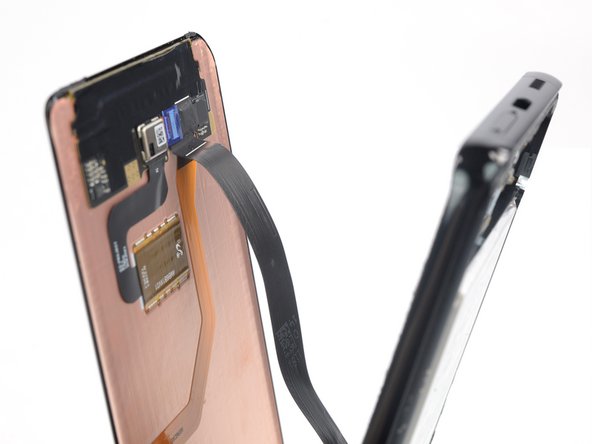
– Grab your trusty spudger and gently pop the display flex cable’s top connector straight out of its socket. Easy does it—no force needed!

Tools Used
  1. SpudgerSamsung Galaxy S21 Plus Motherboard Replacement

Step 16

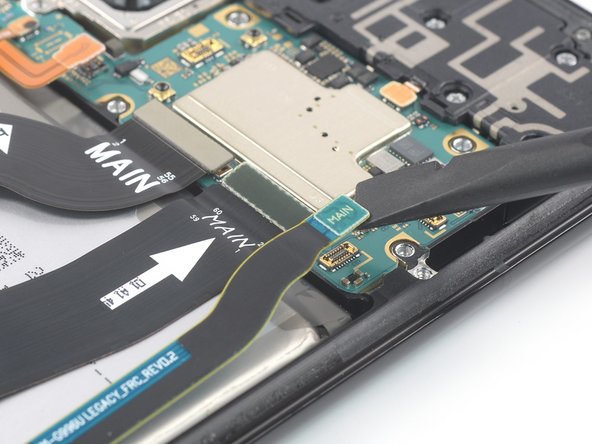
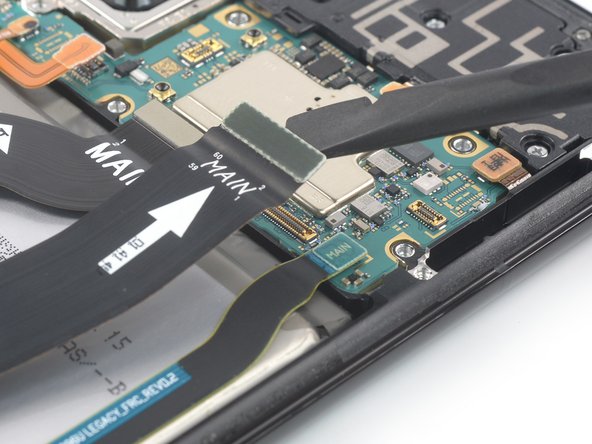
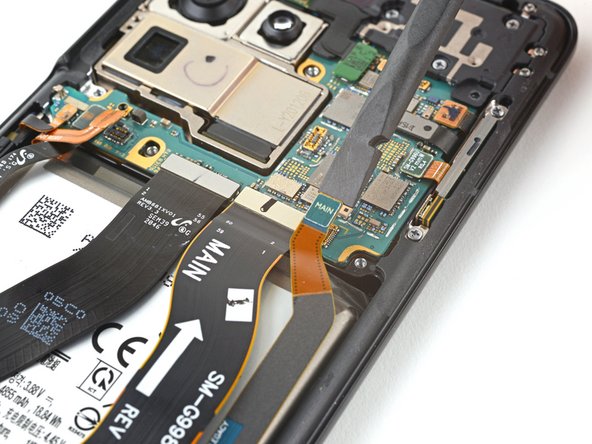
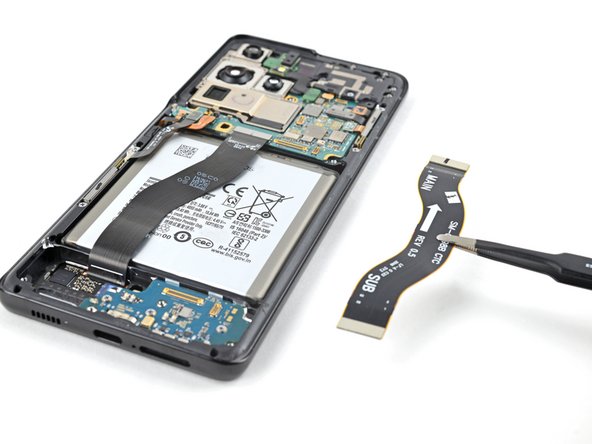
– Pop the main and interconnect flex cables loose with a spudger—just give the upper connectors a gentle upward nudge and they’ll hop right out of their sockets. Easy does it!

Tools Used
  1. SpudgerSamsung Galaxy S21 Plus Motherboard Replacement

Step 17

– Grab your trusty Phillips driver and pop out the seven 3.9 mm screws holding the earpiece speaker in place—think of it as freeing the tiny DJ from its cage.

Step 18

– Grab your trusty spudger and gently pop the earpiece speaker cable connector straight up from its socket—easy does it!

Tools Used
  1. SpudgerSamsung Galaxy S21 Plus Motherboard Replacement

Step 19

– Slide a spudger under the bottom left corner of the earpiece speaker assembly.

– Gently use your spudger to lift the earpiece speaker assembly up.

Tools Used
  1. SpudgerSamsung Galaxy S21 Plus Motherboard Replacement

Step 20

– Grab your tweezers or use your fingers—whichever feels cooler—and gently lift out the earpiece speaker assembly.

– When you’re putting things back together, lay down some fresh adhesive after giving those spots a quick clean with isopropyl alcohol (at least 90%).

Step 21

– Grab your spudger and gently lift the front-facing camera cable connector out of its socket. It should come right up without a fuss.

Tools Used
  1. SpudgerSamsung Galaxy S21 Plus Motherboard Replacement

Step 22

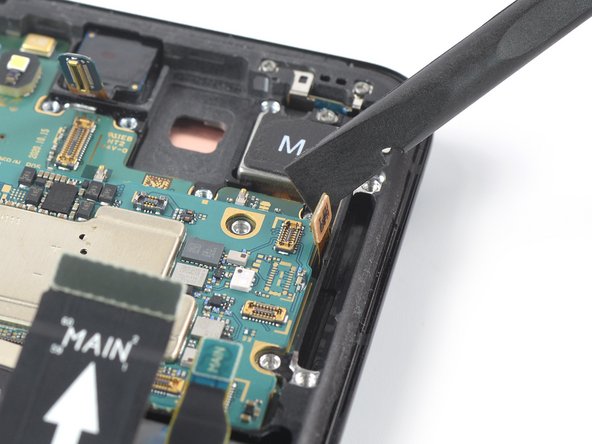
– Grab your trusty spudger and gently pop the power button flex cable connector straight up from its socket—no acrobatics required.

– Now, use your spudger to nudge the flex cable aside, so it stays safe and out of the way while you work on freeing the motherboard.

Tools Used
  1. SpudgerSamsung Galaxy S21 Plus Motherboard Replacement

Step 23

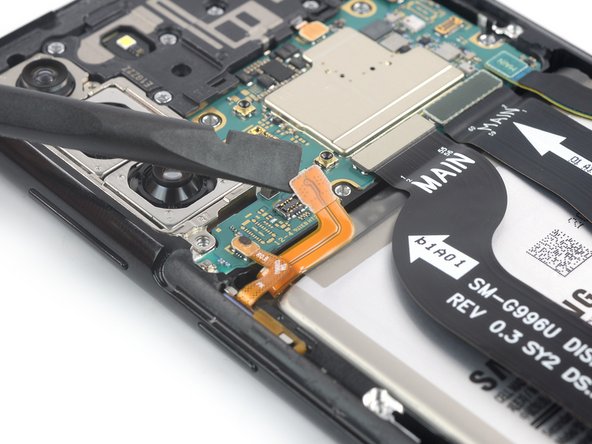
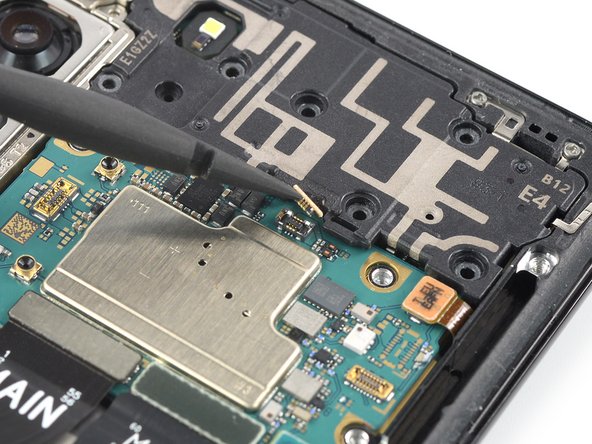
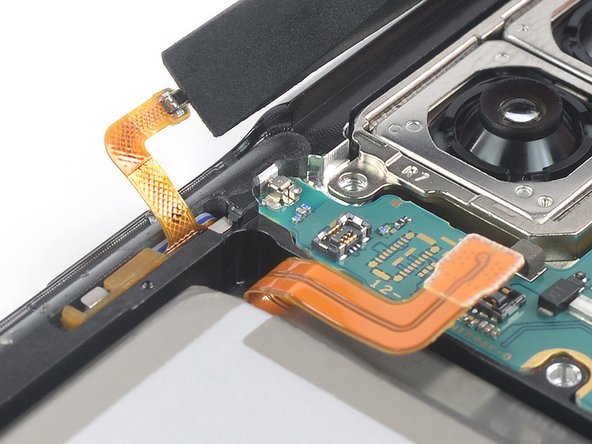
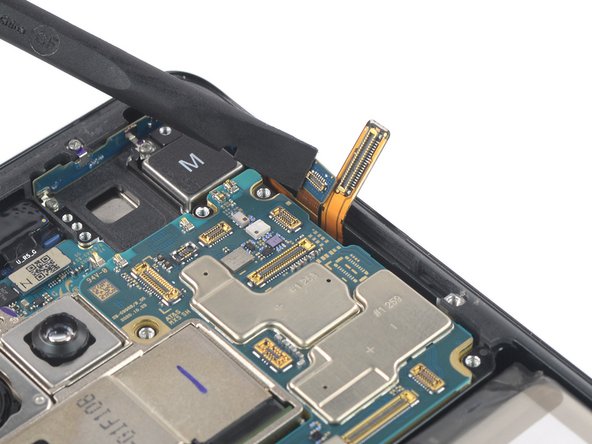
– Grab your spudger and gently pry the power antenna flex cable straight up from its socket to disconnect it—think of it as gently lifting a delicate lid.

– Carefully bend the flex cable to the side with your spudger, giving it a gentle nudge so it doesn’t get damaged when removing the motherboard. Easy does it!

Tools Used
  1. SpudgerSamsung Galaxy S21 Plus Motherboard Replacement

Step 24

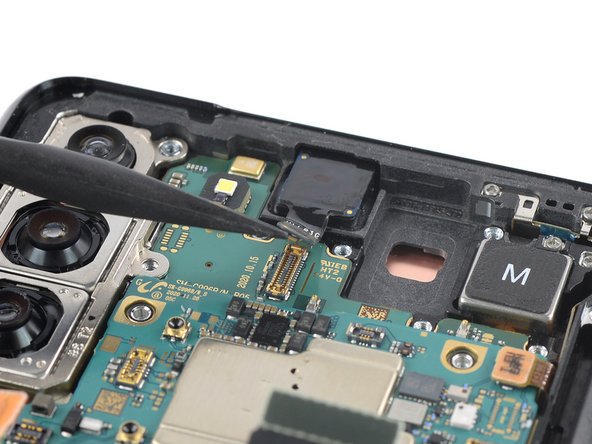
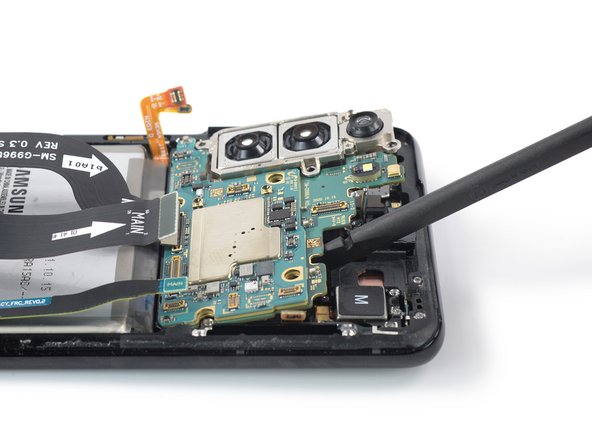
– Gently slide a spudger underneath the top edge of the motherboard assembly, right next to the vibration motor. Then, use your spudger to carefully lift and pry the motherboard assembly upward. Need a hand? You can always schedule a repair.

Tools Used
  1. SpudgerSamsung Galaxy S21 Plus Motherboard Replacement

Step 25

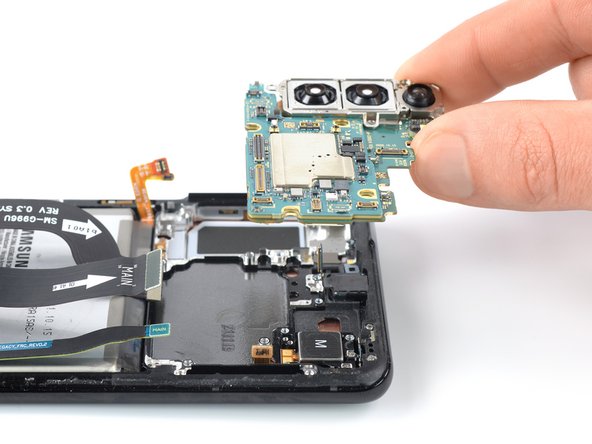
– Gently lift out the motherboard assembly, making sure to bring the rear cameras along for the ride.

Step 26

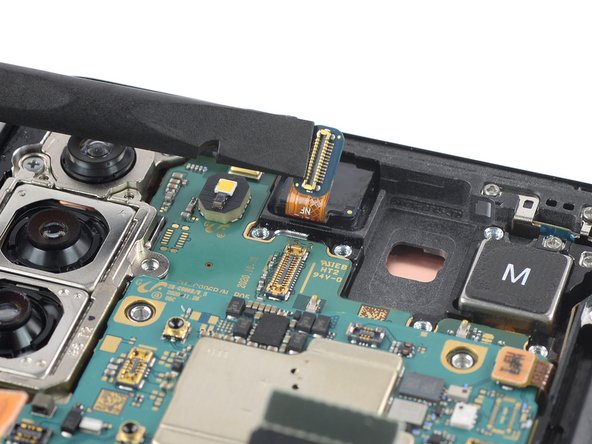
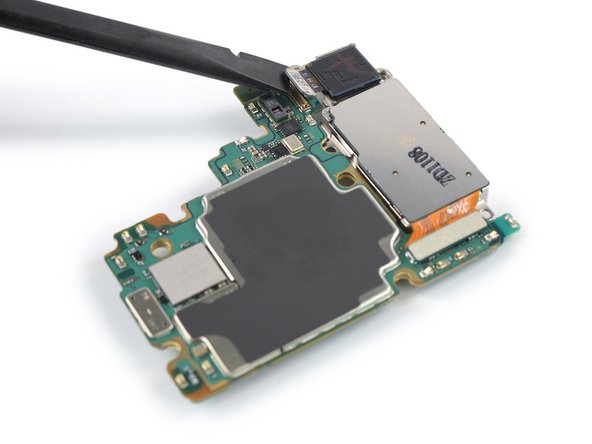
– Grab your trusty spudger and gently pop up the connector for the ultra wide camera flex cable. It’s like unplugging a tiny robot—just straight up, nice and easy.

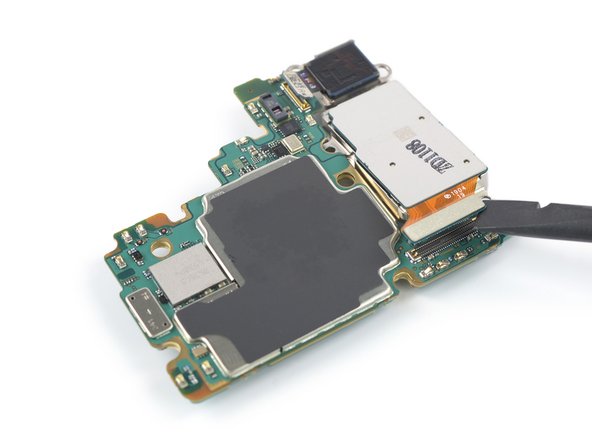
– Now, use your spudger to lift the connector for the wide and tele camera assembly. Give it a gentle nudge straight up from its socket. You’ve got this!

Tools Used
  1. SpudgerSamsung Galaxy S21 Plus Motherboard Replacement

Step 27

– Give your device a test run before sealing it up—better safe than sorry!

– Check out your new part next to the old one. You might need to move over some bits or peel off any sticky stuff before installing.

– To put everything back together, just retrace your steps.

– When you’re done, use this guide to make sure your fix did the trick.

– Got old parts? Drop them off at an R2 or e-Stewards certified recycler—your planet will thank you.

– If things got a little wild and your device isn’t cooperating, try some basic troubleshooting or get advice from our Answers community. And if you’re still stuck, you can always schedule a repair.

Success!
If it’s possible, power up your device to give your repair a little test run before sealing everything up with that fresh adhesive.
Take a moment to compare your shiny new part with the old one—you might need to swap over some bits or peel off those adhesive backings from the new part before getting it installed.
When it’s time to put everything back together, just retrace your steps in reverse order.
After you’ve wrapped up the repair, follow this guide to make sure everything’s working smoothly.
Don’t forget to recycle your e-waste responsibly by taking it to an R2 or e-Stewards certified recycler.
If things didn’t go quite as planned, don’t sweat it! Try some basic troubleshooting, or feel free to reach out to our community for some extra tips and support.

Samsung Galaxy S21 Plus Loudspeaker Replacement

Duration: 45 minutes
Steps: 17 Steps

Ready to breathe new life into your Samsung Galaxy S21 Plus? This step-by-step guide will walk you through replacing the loudspeaker on your device, specifically the SM-G996B/DS (international) model. Keep in mind that other models may have an extra antenna cable nestled in the midframe. To keep your device water-resistant, don’t forget to swap out the adhesive seals when reassembling. You’ll need some fresh adhesive to reattach components, so be sure to have that on hand. Let’s get started!

Step 1

– Get your iOpener nice and toasty, and then stick it on the back cover for a cozy three minutes. This will help loosen up that pesky adhesive hiding underneath.

Tools Used
  1. iOpenerSamsung Galaxy S21 Plus Loudspeaker Replacement
  2. Heat GunSamsung Galaxy S21 Plus Loudspeaker Replacement

Step 2

– Grab a suction handle and attach it to the bottom edge of the back cover, getting as close to the edge as you can.

– Give the back cover a gentle lift using the suction handle to create a little gap between it and the frame.

– Slide an opening pick into that gap you just made.

– Carefully slide the opening pick down to the bottom left corner to cut through the adhesive like a pro.

– Keep that opening pick in place to make sure the adhesive doesn’t seal back up.

Tools Used
  1. iOpenerSamsung Galaxy S21 Plus Loudspeaker Replacement
  2. Suction HandleSamsung Galaxy S21 Plus Loudspeaker Replacement

Step 3

– Pop in a second opening pick along the bottom edge of your phone—think of it as giving your phone a gentle nudge.

– Glide that pick over to the bottom right corner to cut through the sticky adhesive—like slicing through digital peanut butter.

– Keep those opening picks chilling in place so the adhesive doesn’t sneak back together.

Step 4

– Pop a third pick into the bottom right corner of your phone—like you’re dealing cards at a high-stakes poker game.

– Glide that pick up the right edge to break through the sticky stuff holding your phone together.

– Let the pick hang out in the top right corner to keep the glue from sneaking back together.

Tools Used
  1. iOpenerSamsung Galaxy S21 Plus Loudspeaker Replacement

Step 5

– Pop in a fourth opening pick just beneath the top right corner of your phone to get things started.

– Slide that pick along the top edge to cut through the adhesive like a hot knife through butter.

– Keep the opening pick in the top left corner to stop the adhesive from sealing back up—no surprises here.

Step 6

– Gently slide a fifth opening pick into the bottom left corner, like you’re tucking it in for a cozy nap.

– Now, glide that opening pick along the left edge of the back cover to slice through the rest of that sticky adhesive. You’re doing great!

Step 7

– First up, let’s get that back cover off! You’re on your way to a successful repair.

– Now, as you put everything back together:

– This is a perfect moment to power up your phone and give everything a good test before sealing it up tight. Just remember to power it down completely again before diving back into the assembly.

– Got any pesky adhesive chunks? Use tweezers or your fingers to remove them. A little high-concentration isopropyl alcohol (over 90%) can help you wipe away any leftover sticky residue.

– If you’re using Samsung’s custom-cut adhesives, check out this guide.

– For those using double-sided tape, make sure to follow this guide.

Step 8

– Slip an opening pick under the bottom left corner of the NFC antenna and charging coil assembly—think of it like giving your phone a gentle nudge.

– Glide the pick along the bottom left edge to loosen the assembly from the battery. No need to rush, just a smooth move does the trick!

Step 9

– Slide an opening pick under the lower edge of the NFC antenna and charging coil—think of it as giving the pick a backstage pass.

– Gently glide the pick along the bottom to loosen the assembly from the loudspeaker. Take it slow and steady—no need to rush the magic.

Step 10

– Grab your trusty spudger and gently pop the charging coil connector straight up from its socket—like opening a secret treasure chest for your device.

Tools Used
  1. SpudgerSamsung Galaxy S21 Plus Loudspeaker Replacement

Step 11

– Grab a spudger and gently pry the NFC antenna connector straight up from its socket. Easy does it—just a little lift to disconnect.

Tools Used
  1. SpudgerSamsung Galaxy S21 Plus Loudspeaker Replacement

Step 12

– Grab your trusty Phillips driver and twist out the five 3.9 mm screws holding the NFC antenna and charging coil—think of it as popping the top off a soda, except way quieter.

Step 13

– Gently lift out the NFC antenna and charging coil using tweezers or your fingers—no need to wrestle with it!

Step 14

– Grab a spudger and gently pry up the battery connector straight out of its socket. Keep it steady and avoid any wiggle-wiggle. If you need a hand with tools or the process, you can always schedule a repair.

Tools Used
  1. SpudgerSamsung Galaxy S21 Plus Loudspeaker Replacement

Step 15

– Grab your trusty Phillips screwdriver and start unscrewing the six screws that are holding the loudspeaker assembly in place. Each screw is about 3.9 mm long, so make sure to keep them safe while you work your magic!

Step 16

– Time to get this repair started! Insert an opening pick into the gap between the top edge of the loudspeaker assembly and the midframe. This is where the magic begins.

– Now, use that trusty opening pick to pry up the loudspeaker assembly by gently tilting it downwards. You’re making great progress!

Step 17

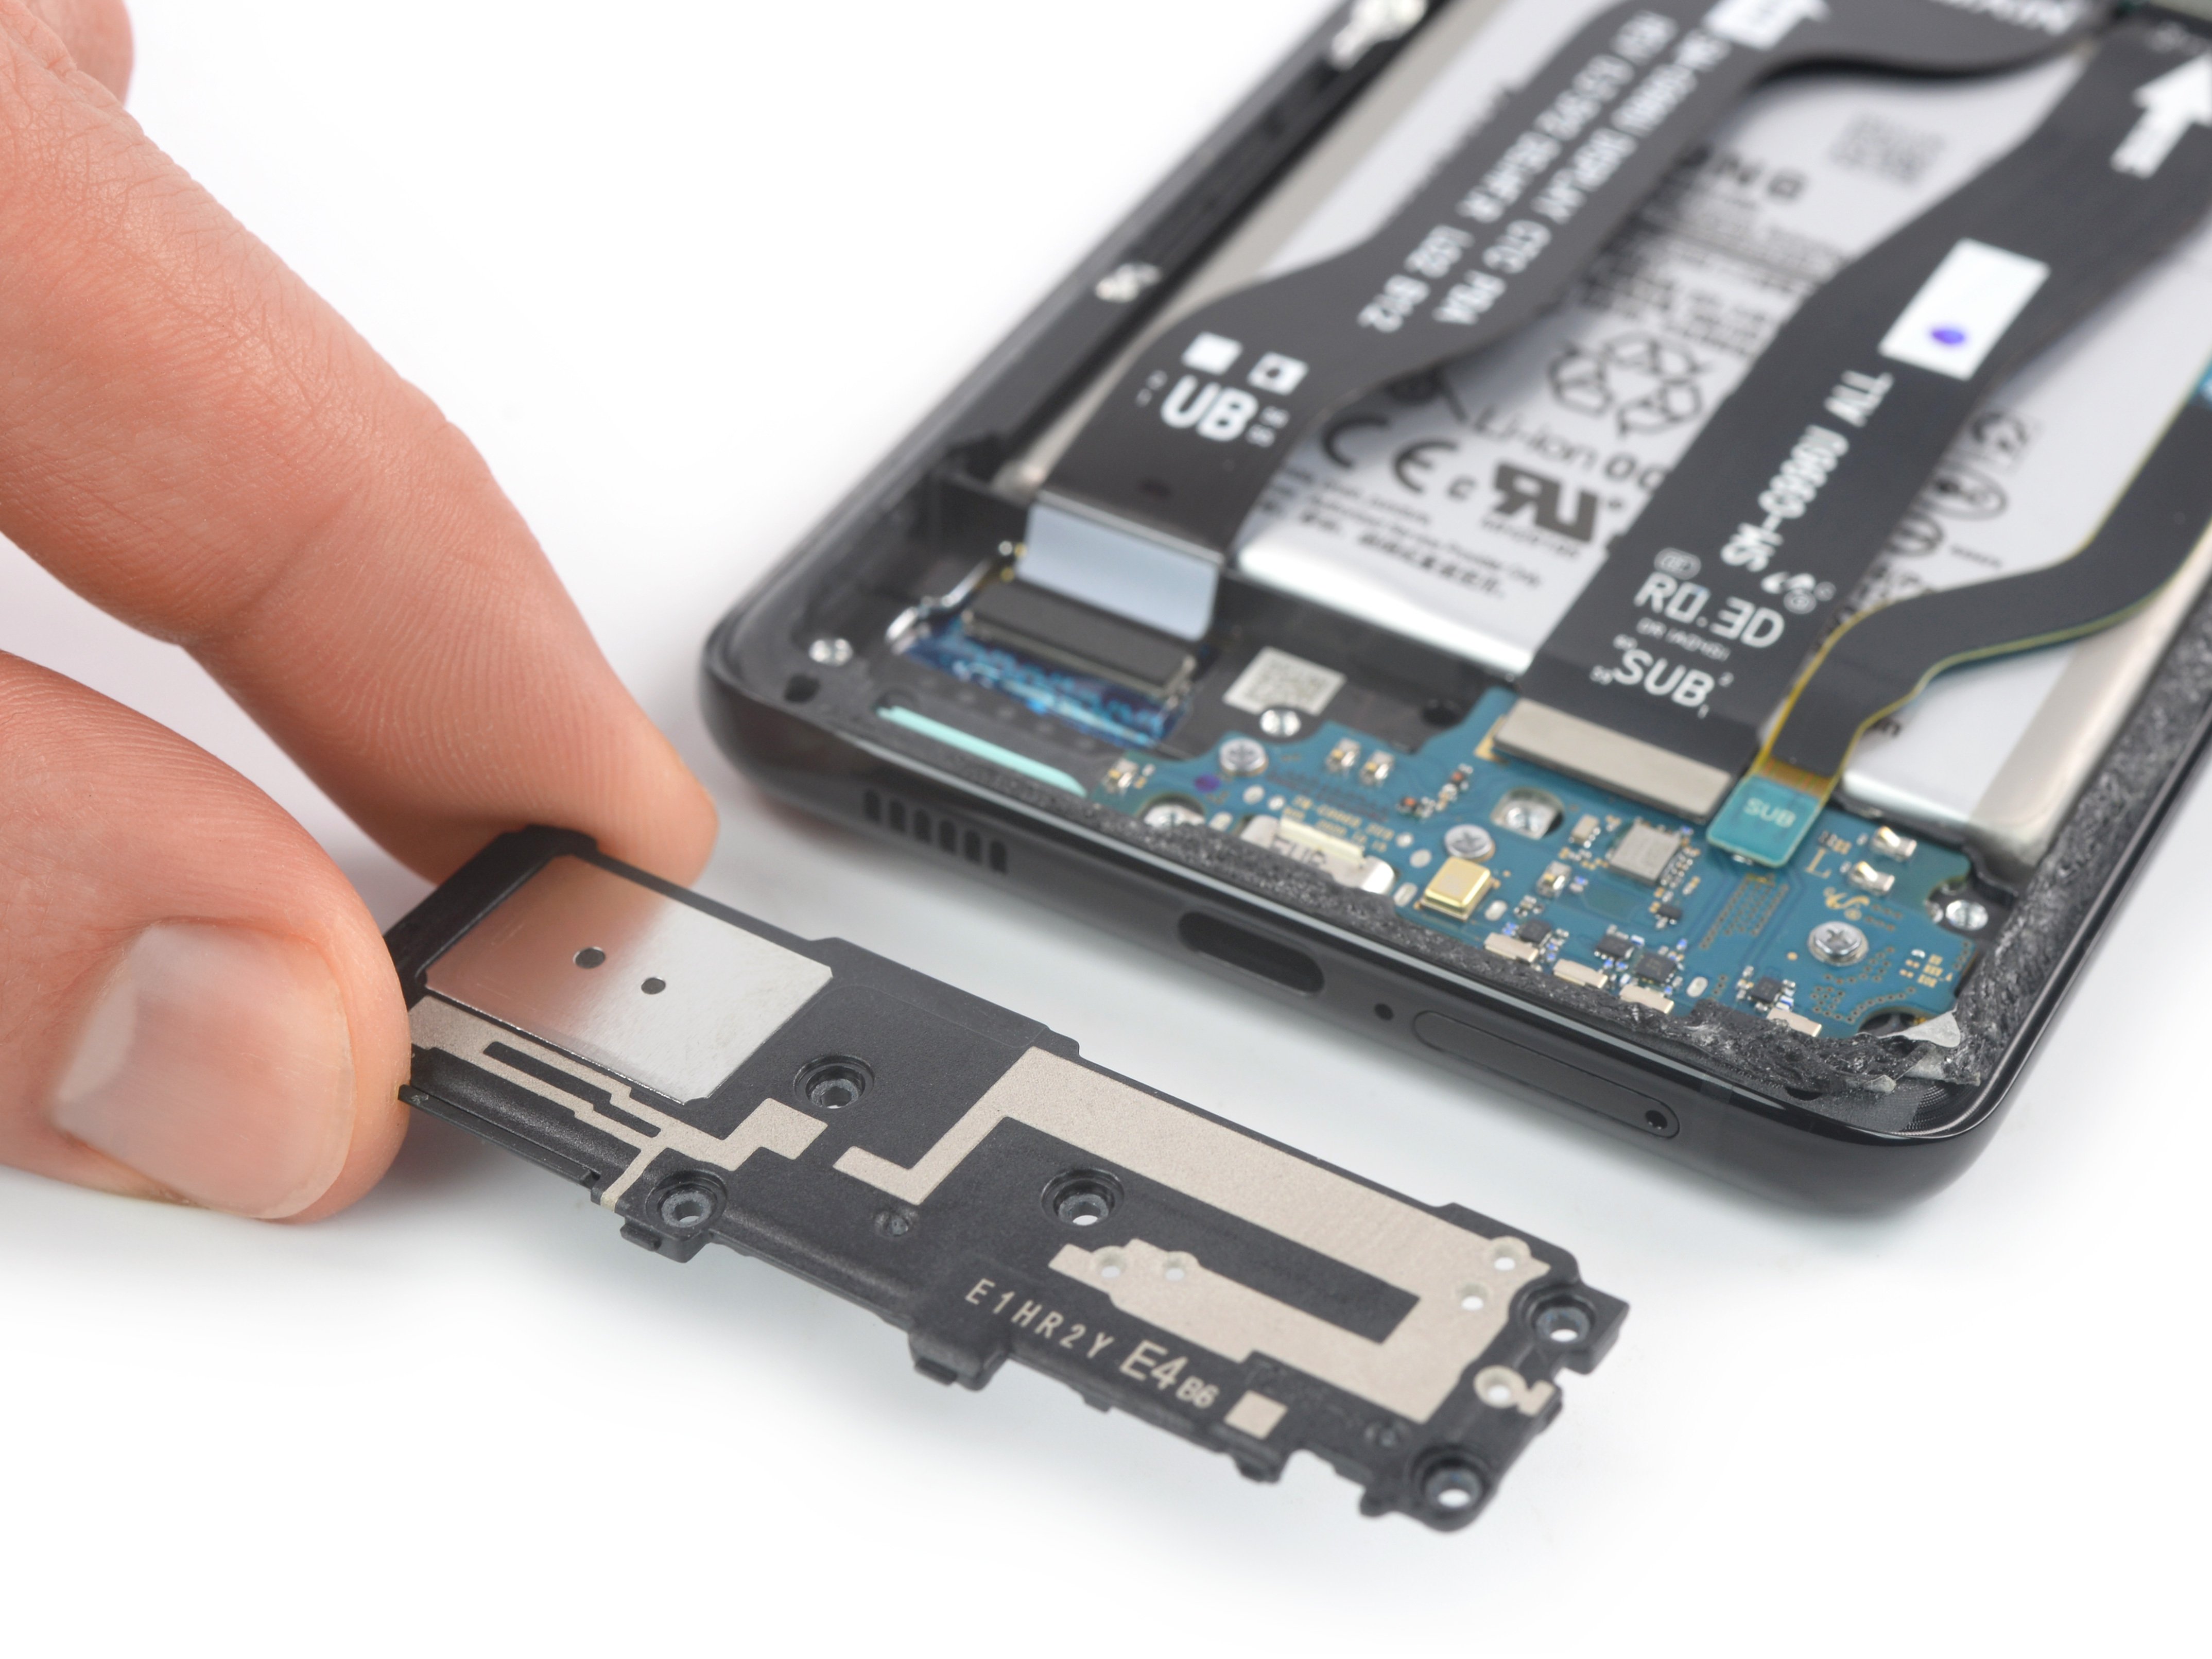
– Take out the loudspeaker assembly with care.

– When putting things back together, fresh adhesive is your friend—just make sure to clean the area first with isopropyl alcohol (over 90%).

Success!
Fire up your device and check your handy work before locking things down with fresh adhesive.
Give your new part a side-by-side with the old one—sometimes a quick transfer or peel is all it takes to get it ready for action.
Ready to put it all back together? Just flip the steps and work your way backwards.
Want to make sure everything’s working? Cruise through this guide to double-check your repair.
Got leftover parts? Toss that e-waste at an R2 or e-Stewards certified recycler and keep it green.
If things went a little sideways, try troubleshooting or tap into our Answers community for a lifeline.
Still stuck? You can always schedule a repair and let the pros handle it.

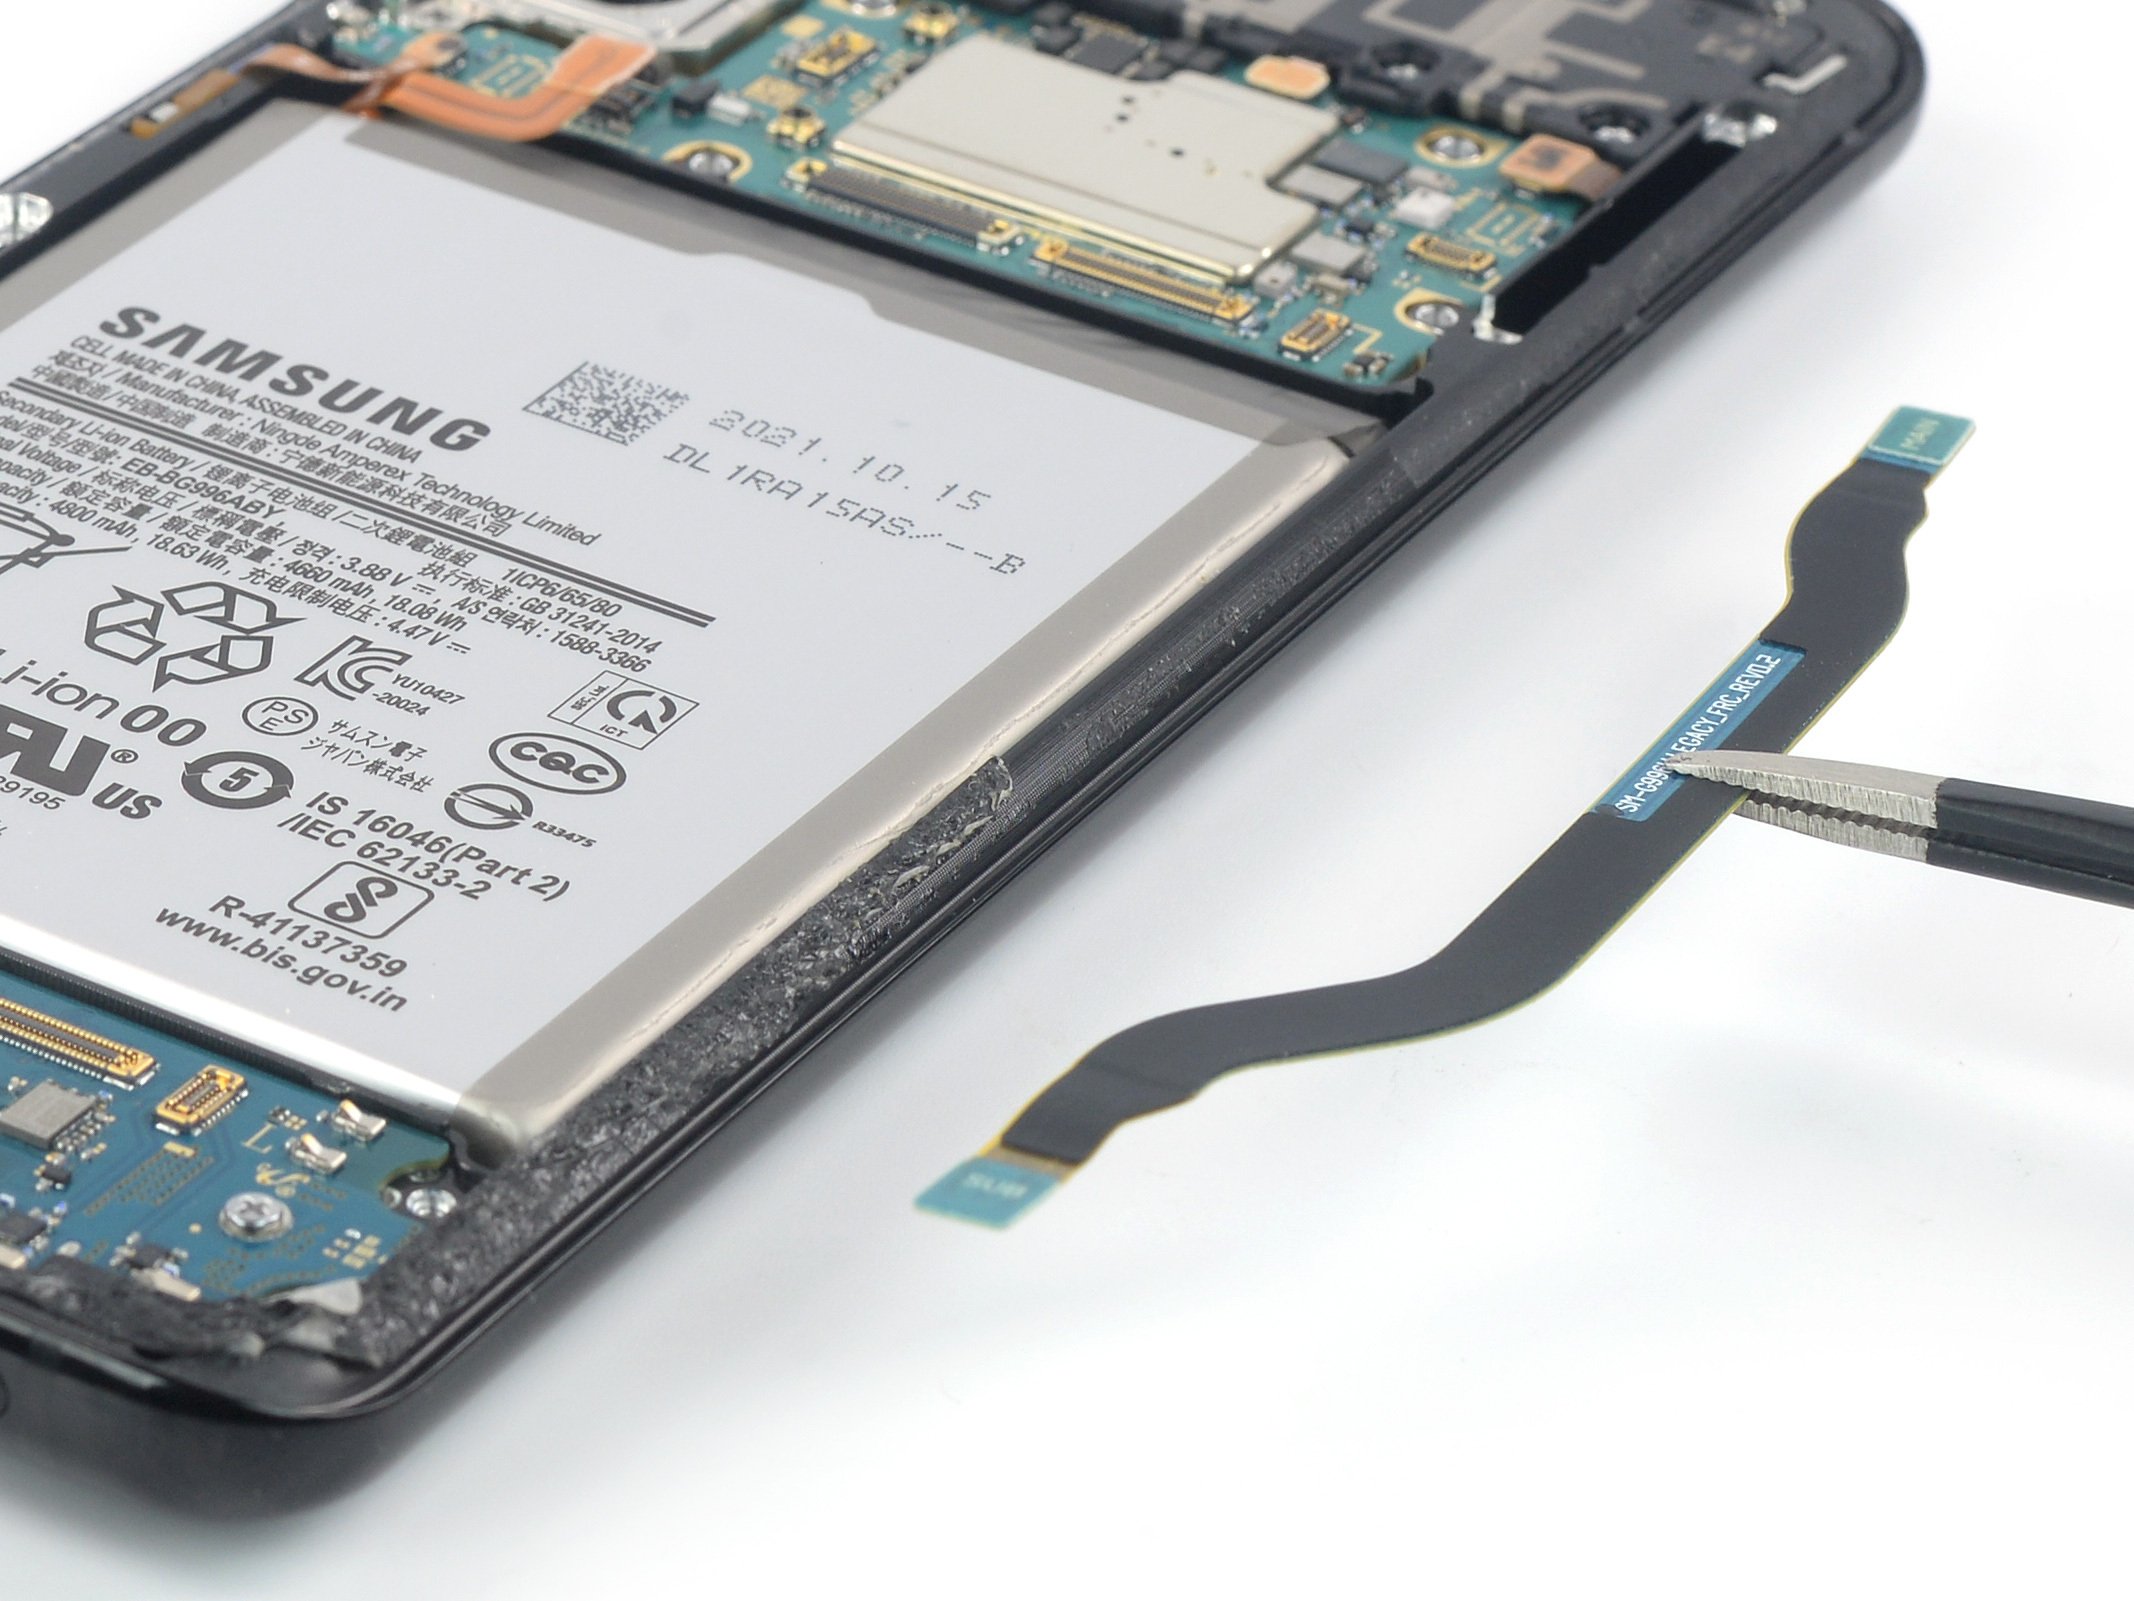
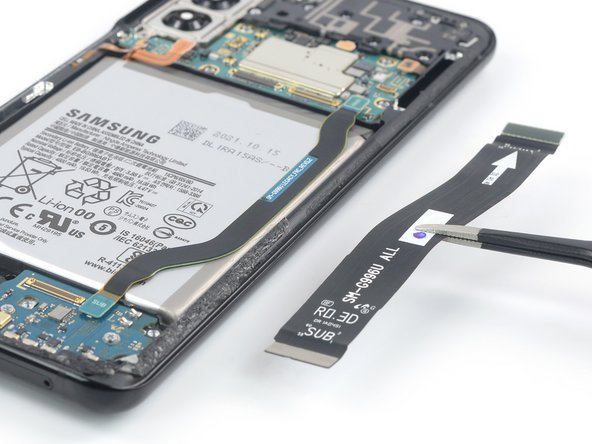
How to Remove the Interconnect Cables in the Samsung Galaxy S21 Plus

Duration: 45 minutes
Steps: 20 Steps

Get ready to tackle the task of replacing the interconnect cables on your Samsung Galaxy S21 Plus! This guide focuses on the SM-G996B/DS (international) model, but don’t fret if you’ve got a different one; just keep in mind that other models may have an extra antenna cable tucked away in the midframe. When you’re putting everything back together, remember that skipping the adhesive seals might let your device work just fine, but it could lose that all-important water protection. Make sure you’ve got some replacement adhesive handy to securely reattach those components during reassembly. And if you need help, you can always schedule a repair.

Step 1

– Warm up your iOpener and let it hang out on the back cover for a solid three minutes. This gives the adhesive underneath a chance to loosen up and makes your next moves way easier.

Tools Used
  1. iOpenerHow to Remove the Interconnect Cables in the Samsung Galaxy S21 Plus
  2. Heat GunHow to Remove the Interconnect Cables in the Samsung Galaxy S21 Plus

Step 2

– Stick a suction cup near the bottom edge of the back cover, as close to the edge as possible. Gently lift the back cover with the suction cup to create a small gap between it and the frame. Slip an opening pick into that gap. Carefully slide the pick toward the bottom left corner to cut through the adhesive. Leave the pick in place to keep the adhesive from sticking back together. If you need help, you can always schedule a repair.

Tools Used
  1. iOpenerHow to Remove the Interconnect Cables in the Samsung Galaxy S21 Plus
  2. Suction HandleHow to Remove the Interconnect Cables in the Samsung Galaxy S21 Plus

Step 3

– Slip a second pick under the bottom edge of your phone—like you’re picking a lock, but way less suspicious.

– Glide that pick over to the bottom right corner to slice through the sticky stuff holding things together.

– Let your picks hang out right where they are, so the adhesive doesn’t sneakily stick everything back together.

Step 4

– Pop in a third opening pick at the bottom right corner of your phone—it’s like giving your device a little love tap!

– Gently slide that pick right along the edge to slice through the adhesive. You’re basically making a sweet little opening here.

– Now, keep that opening pick snug in the top right corner to make sure the adhesive doesn’t decide to make a comeback!

Tools Used
  1. iOpenerHow to Remove the Interconnect Cables in the Samsung Galaxy S21 Plus

Step 5

– Pop a fourth opening pick under the top right corner of your phone—just like adding sprinkles to a cupcake.

– Slide that pick along the top edge to loosen up the sticky stuff holding things together.

– For a pro move, leave the pick chilling in the top left corner so the adhesive doesn’t get any ideas about sticking again.

Step 6

– Slip a fifth pick under the bottom left corner—just like sliding into the DMs.

– Glide the pick up the left edge to break up the last bits of sticky stuff holding the back cover on.

Step 7

– First things first, let’s pop off that back cover. It’s like opening a surprise gift!

– Now, during the reassembly phase, give yourself a moment to showcase your handiwork. Power up your phone and make sure everything’s working like a charm before putting the final seal on this tech treasure. Just remember to power it down completely before you dive back in.

– Got any sticky adhesive remnants hanging around? Grab a pair of tweezers or your fingers and show them who’s boss. A little splash of high concentration (over 90%) isopropyl alcohol will help wipe away that pesky residue.

– If you’re using Samsung custom-cut adhesives, follow this awesome guide.

– And if double-sided tape is more your style, check out this helpful guide.

Step 8

– Gently slide an opening pick underneath the lower left corner of the NFC antenna and charging coil assembly. You’re on the right track!

– Carefully glide the opening pick along the bottom left edge of the assembly to separate it from the battery. Keep it smooth and steady!

Step 9

– Slide an opening pick underneath the lower edge of the NFC antenna and charging coil assembly with care.

– Gently glide the opening pick along the bottom of the assembly to detach it from the loudspeaker.

Step 10

– Grab a spudger and gently lift the charging coil connector straight up from its socket to disconnect it. Keep it smooth and steady—no force needed. If you need a hand, you can always schedule a repair.

Tools Used
  1. SpudgerHow to Remove the Interconnect Cables in the Samsung Galaxy S21 Plus

Step 11

– Grab your trusty spudger and pop the NFC antenna connector straight up from its socket. Just a gentle lift—no wrestling required!

Tools Used
  1. SpudgerHow to Remove the Interconnect Cables in the Samsung Galaxy S21 Plus

Step 12

– Grab your Phillips screwdriver and take out the five 3.9 mm screws holding down the NFC antenna and charging coil assembly. Easy does it!

Step 13

– Gently grab your trusty tweezers or just use your fingers to carefully pop out the NFC antenna and the charging coil assembly. You’ve got this!

Step 14

– Grab your trusty spudger and gently pry the battery cable connector upward from its socket. It’s like giving it a little lift-off!

Tools Used
  1. SpudgerHow to Remove the Interconnect Cables in the Samsung Galaxy S21 Plus

Step 15

– Grab your Phillips screwdriver and unscrew the six 3.9 mm screws holding the loudspeaker assembly in place. It’s like unlocking the secret level—just keep track of those tiny screws!

Step 16

– Slide an opening pick into the little gap between the loudspeaker assembly’s top edge and the midframe. You’re on the right track!

– Now, use that trusty pick to gently pry up the loudspeaker assembly by tilting it downwards. You’ve got this!

Step 17

– First up, let’s liberate that loudspeaker assembly! It’s time to get it out of there.

– When you’re putting things back together, make sure to use some fresh adhesive where it’s needed. Don’t forget to give the surfaces a good clean with isopropyl alcohol (>90%) first—it’s like a spa day for your device!

Step 18

– Grab your trusty spudger and gently pry the upper connectors of the main and interconnect flex cables straight up from their sockets to disconnect them from the motherboard. You’ve got this!

Tools Used
  1. SpudgerHow to Remove the Interconnect Cables in the Samsung Galaxy S21 Plus

Step 19

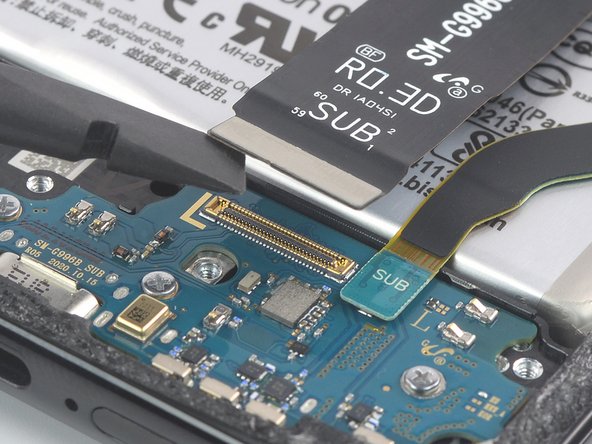
– Grab your trusty spudger and gently pop the main flex cable’s bottom connector up from the daughterboard socket. Easy does it—think of it like unplugging a stubborn headphone jack.

– With your fingers or tweezers, lift out the main flex cable with care. No tug-of-war here—just a smooth removal!

Tools Used
  1. SpudgerHow to Remove the Interconnect Cables in the Samsung Galaxy S21 Plus

Step 20

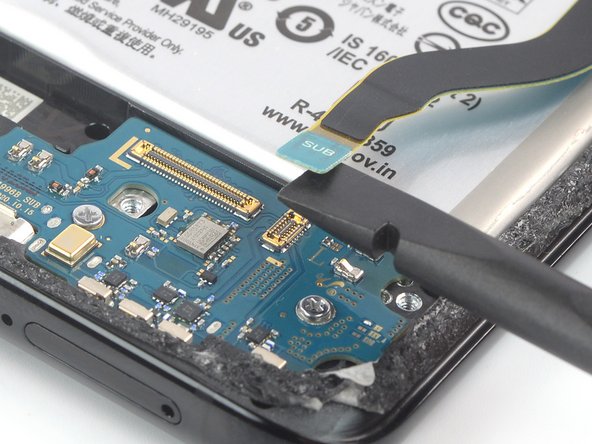
– Grab your trusty spudger and gently nudge the interconnect flex cable off the daughterboard. Just pry that bottom connector straight up from its cozy socket, and it should pop right out!

– Now, with a delicate touch—either with your fingers or a pair of tweezers—carefully lift out the interconnect flex cable. You’re doing great!

Tools Used
  1. SpudgerHow to Remove the Interconnect Cables in the Samsung Galaxy S21 Plus

Success!
Power up your gadget and give your handiwork a quick high-five test before you glue it shut.
Hold your shiny new part up to the old one—double-check if any leftover bits need to jump ship or if there’s still a plastic coat to peel off.
Reassembly? Just moonwalk through the steps in reverse.
Once everything’s snug, run our quick post-repair checkup to make sure you nailed it.
Send your retired parts on a guilt-free trip to an R2 or e-Stewards recycler.
Things went sideways? Hit up our troubleshooting tips or tap the community for a lifeline.
Still stuck? schedule a repair and we’ll jump in.

Samsung Galaxy S21 Plus Earpiece Speaker Replacement

Duration: 45 minutes
Steps: 18 Steps

Get ready to swap out the earpiece speaker on your Samsung Galaxy S21 Plus! This guide is tailored for the SM-G996B/DS (international) model, but keep in mind that other models might have an extra antenna cable tucked away in the midframe. When you’re putting everything back together, remember that if you skip replacing the adhesive seals, your device will still work like a champ, but it might lose some of that sweet water protection. So, make sure to grab some replacement adhesive to keep everything snug and secure during reassembly. If you need help, you can always schedule a repair.

Step 1

– Grab an iOpener and gently place it on the back cover. Let it sit there for at least three minutes to help loosen that stubborn adhesive. If you need a hand or want to get this done smoothly, you can always schedule a repair.

Tools Used
  1. iOpenerSamsung Galaxy S21 Plus Earpiece Speaker Replacement
  2. Heat GunSamsung Galaxy S21 Plus Earpiece Speaker Replacement

Step 2

– Stick a suction handle right near the bottom edge of the back cover—get it as close as you can.

– Gently pull up with the suction handle to pop open a tiny gap between the cover and the frame. You got this!

– Slide an opening pick into that little gap you made.

– Glide the pick over to the bottom left corner and slice through the sticky stuff holding it together.

– Leave the pick chilling in the corner to stop the adhesive from sticking itself back together.

Tools Used
  1. iOpenerSamsung Galaxy S21 Plus Earpiece Speaker Replacement
  2. Suction HandleSamsung Galaxy S21 Plus Earpiece Speaker Replacement

Step 3

– Pop in a second opening pick at the bottom edge of your phone.

– Gently slide that opening pick over to the bottom right corner to cut through the adhesive.

– Keep those opening picks in place so the adhesive doesn’t decide to stick back together!

Step 4

– Pop a third opening pick into the bottom right corner of your phone.

– Gently glide that pick along the right edge to cut through the adhesive like a pro.

– Keep that pick snug in the top right corner to stop the adhesive from sticking back together.

Tools Used
  1. iOpenerSamsung Galaxy S21 Plus Earpiece Speaker Replacement

Step 5

– Pop in a fourth opening pick under the top right corner of your phone—like sneaking an extra fry into your order.

– Glide that pick across the top edge to slice through the sticky stuff holding things together.

– Let the pick chill in the top left corner, so the adhesive doesn’t get any ideas about sealing back up.

Step 6

– Time to get this repair started! Insert a fifth opening pick underneath the bottom left corner to begin loosening the adhesive.

– Now, gently slide the opening pick along the left edge of the back cover to slice through the remaining adhesive, making sure to take your time and be patient.

Step 7

– Take off the back cover with a gentle touch.

– When putting everything back together:

– Now’s a great time to power up your phone and check that everything works like a charm before sealing it up! Just make sure to switch your phone off completely before diving back in.

– Use tweezers or your fingers to get rid of any sticky adhesive bits. A little high concentration (over 90%) isopropyl alcohol will help wipe away any stubborn residue.

– If you’ve got Samsung custom-cut adhesives, be sure to check out this guide.

– For those using double-sided tape, follow this guide.

Step 8

– Slide an opening pick under the left bottom corner of the NFC antenna and charging coil assembly, just like you’re sneaking in a surprise party.

– Gently glide that pick along the bottom left edge of the assembly to separate it from the battery, as if you’re gracefully dancing your way to a smooth repair.

Step 9

– Slide an opening pick gently beneath the lower edge of the NFC antenna and charging coil assembly. You’re doing great!

– Carefully glide the opening pick along the bottom of the assembly to detach it from the loudspeaker. Keep it smooth and steady!

Step 10

– Grab a spudger and gently pry the charging coil connector straight up from its socket to disconnect it. If you need a hand with this, you can always schedule a repair.

Tools Used
  1. SpudgerSamsung Galaxy S21 Plus Earpiece Speaker Replacement

Step 11

– Grab a spudger and gently pry the NFC antenna connector straight up from its socket. Take your time to avoid damage, and if you need a hand, you can always schedule a repair.

Tools Used
  1. SpudgerSamsung Galaxy S21 Plus Earpiece Speaker Replacement

Step 12

– Grab a Phillips screwdriver and loosen those five 3.9 mm screws holding down the NFC antenna and charging coil assembly. Easy does it—you’re just removing the hardware that keeps everything in place. Need a hand? Remember, you can always schedule a repair if things get tricky.

Step 13

– Grab a trusty pair of tweezers or just your fingers, and gently lift out the NFC antenna and charging coil assembly. You’ve got this!

Step 14

– Grab your spudger and gently lift the battery connector straight up from its socket to disconnect the cable.

Tools Used
  1. SpudgerSamsung Galaxy S21 Plus Earpiece Speaker Replacement

Step 15

– Grab your trusty Phillips screwdriver and get ready for some fun! Let’s unscrew those seven 3.9 mm-long screws that are keeping the earpiece speaker assembly in place. You’ve got this!

Step 16

– Grab your trusty spudger and gently pry the earpiece speaker cable connector straight up from its socket. You’ve got this!

Tools Used
  1. SpudgerSamsung Galaxy S21 Plus Earpiece Speaker Replacement

Step 17

– Slide your spudger under the bottom left corner of the earpiece speaker assembly. Get in there like you mean it!

– Gently pop up the earpiece speaker assembly with your spudger. Take it slow—no need for a wrestling match.

Tools Used
  1. SpudgerSamsung Galaxy S21 Plus Earpiece Speaker Replacement

Step 18

– Grab some tweezers or just use your fingers—whatever works best for you—and gently lift out the earpiece speaker assembly. No need to rush; slow and steady wins here.

– When putting everything back together, fresh adhesive is your friend! Make sure the area’s clean by wiping it with some isopropyl alcohol (90% or stronger) before sticking things down.

Success!
You’re almost done! If possible, power on your device and give your repair a test run before sealing it up.
Take a moment to compare your new part with the original one – you might need to transfer some components or remove adhesive backing from the new part.
To put everything back together, just follow these steps in reverse.
After you’ve finished the repair, check out our guide on how to test it out.
Don’t forget to responsibly recycle your e-waste with an R2 or e-Stewards certified recycler.
If things didn’t quite go as planned, try some troubleshooting or reach out to our community for help.
Pat yourself on the back – you did it! If you need help with anything else, you can always schedule a repair

Samsung Galaxy S21 Plus Display Cable Replacement

Duration: 45 minutes
Steps: 19 Steps

Ready to tackle the display cable replacement on your Samsung Galaxy S21 Plus? You’re in for a treat! This guide is based on the SM-G996B/DS (international) model, but don’t fret if you have a different version—just keep an eye out for an extra antenna cable tucked away in the midframe. Remember, if you skip replacing those adhesive seals during reassembly, your phone may still work like a champ, but it might lose a bit of its water resistance. Make sure you grab some replacement adhesive to keep everything snug when putting your device back together. If you ever find yourself in a pickle, don’t hesitate to schedule a repair!

Step 1

– Grab your trusty iOpener and give it a warm hug against the back cover for a solid three minutes. This will help loosen up that stubborn adhesive hiding underneath, making your repair journey a breeze!

Tools Used
  1. iOpenerSamsung Galaxy S21 Plus Display Cable Replacement
  2. Heat GunSamsung Galaxy S21 Plus Display Cable Replacement

Step 2

– Grab a suction handle and stick it to the bottom edge of the back cover, getting as close to the edge as you can.

– Give that back cover a gentle lift using the suction handle to make a tiny gap between it and the frame.

– Slide an opening pick into the gap you’ve made.

– Carefully glide the opening pick towards the bottom left corner to slice through that pesky adhesive.

– Keep the opening pick in place to stop the adhesive from playing tricks and sealing back up.

Tools Used
  1. iOpenerSamsung Galaxy S21 Plus Display Cable Replacement
  2. Suction HandleSamsung Galaxy S21 Plus Display Cable Replacement

Step 3

– Place a second opening pick at the bottom edge of your device.

– Carefully slide the pick towards the bottom right corner to cut through the adhesive.

– Keep the opening picks in place to prevent the adhesive from sealing back up.

Step 4

– Pop in a third opening pick at the bottom right corner of your phone.

– Gently glide that opening pick along the right edge to cut through the adhesive like a pro.

– Keep the opening pick snug in the top right corner to stop that pesky adhesive from trying to reseal.

Tools Used
  1. iOpenerSamsung Galaxy S21 Plus Display Cable Replacement

Step 5

– Pop a fourth pick under the top right corner—like you’re sneaking an extra fry on your plate.

– Glide that pick along the top edge to slice through the adhesive, smooth moves only.

– Leave your pick chillin’ in the top left corner so the adhesive doesn’t get any ideas about sticking things back together.

Step 6

– Slip a fifth opening pick under the bottom left corner—like you’re sliding a secret note to your device.

– Glide the pick up the left edge to slice through the last bits of sticky stuff holding the back cover on.

Step 7

– Pop off the back cover.

– When you’re putting things back together:

– Now’s a smart time to power up your phone and check that everything’s working. Make sure to shut it down again before you jump back in.

– Clear away any leftover adhesive with tweezers or your fingers. For any sticky residue, a little isopropyl alcohol (90% or higher) will work wonders.

– Rocking Samsung custom-cut adhesives? Here’s a guide for that.

– Going with double-sided tape? Check out this guide.

Step 8

– Slip an opening pick under the bottom left corner of the NFC antenna and charging coil combo—like you’re sneaking dessert before dinner.

– Gently glide the pick along the lower left edge to free the assembly from the battery. Smooth moves, minimal fuss!

Step 9

– Slide an opening pick beneath the lower edge of the NFC antenna and charging coil assembly. You’ve got this!

– Gently glide the opening pick along the bottom of the assembly to separate it from the loudspeaker. Take your time, and remember, you’re doing great!

Step 10

– Grab your spudger and gently pop the charging coil connector straight out of its socket. Take it easy, no need to rush—just a little lift and you’re good!

Tools Used
  1. SpudgerSamsung Galaxy S21 Plus Display Cable Replacement

Step 11

– Grab your spudger and gently pop the NFC antenna connector straight up from its socket. Easy does it!

Tools Used
  1. SpudgerSamsung Galaxy S21 Plus Display Cable Replacement

Step 12

– Grab a Phillips screwdriver and unscrew those five 3.9 mm screws holding down the NFC antenna and charging coil assembly. Easy does it—once those screws are out, you’re one step closer to the fix. If you need a hand along the way, you can always schedule a repair.

Step 13

– Gently grab your trusty tweezers or just your fingers and carefully lift out the NFC antenna and charging coil assembly. You’ve got this!

Step 14

– Grab your trusty spudger and gently pry the battery cable connector straight up from its socket. You’ve got this!

Tools Used
  1. SpudgerSamsung Galaxy S21 Plus Display Cable Replacement

Step 15

– Grab your trusty Phillips screwdriver and get ready for some action! Unscrew those six 3.9 mm-long screws holding the loudspeaker assembly in place. You’ve got this!

Step 16

– Slide an opening pick into the tiny gap between the top of the loudspeaker assembly and the midframe. You’re doing great!

– Now, gently tilt that opening pick downward to pry up the loudspeaker assembly. Keep going, you’ve got this!

Step 17

– Time to say goodbye to that loudspeaker assembly – carefully remove it.

– When you’re putting everything back together, don’t forget to add some fresh adhesive where it’s needed. First, give the relevant areas a good clean with isopropyl alcohol (>90%).

Step 18

– Grab your trusty spudger and gently pop the display flex cable’s top connector straight up out of its socket. Easy does it—no need to wrestle with it!

Tools Used
  1. SpudgerSamsung Galaxy S21 Plus Display Cable Replacement

Step 19

– If you can, power up your device and give your repair a quick test before you seal it all up with new adhesive.

– Check out your new replacement part against the original one—don’t forget to transfer any leftover components or peel off those pesky adhesive backings before you install.

– To put everything back together, just follow these instructions in reverse order.

– Once you’ve wrapped up the repair, use this guide to test your handiwork.

– Got some e-waste? Make sure to drop it off at an R2 or e-Stewards certified recycler.

– Things didn’t go as smoothly as you’d hoped? No worries! Try some basic troubleshooting, or if you’re still stuck, feel free to schedule a repair for some extra help.

Tools Used
  1. SpudgerSamsung Galaxy S21 Plus Display Cable Replacement

Success!
Almost done! If possible, power up your device and give your repair a test run before sealing it back up.
Take a closer look at your new part and compare it to the original – you might need to transfer some components or remove adhesive backing before installing.
To put everything back together, just follow these steps in reverse order.
Once you’ve completed the repair, check out our testing guide to make sure everything is working smoothly.
Remember to recycle your e-waste responsibly with an R2 or e-Stewards certified recycler.
If things didn’t quite go as planned, don’t worry! Try some troubleshooting or reach out to our community at Salvation Repair for help. If you need a hand, you can always schedule a repair.

Samsung Galaxy S21 Plus Charging Board Replacement

Duration: 45 minutes
Steps: 25 Steps

Ready to swap out the charging board on your Samsung Galaxy S21 Plus? You’ve come to the right place! This guide is tailored for the SM-G996B/DS (international) model. Just a heads up, if you’re working with other models, they may have an extra antenna cable tucked away in the edge of the midframe. When you’re putting everything back together, remember that skipping the adhesive seals might leave your device functioning but could dampen its water protection. So, make sure to grab some replacement adhesive to keep everything snug and secure. Let’s dive in!

Step 1

– Grab an iOpener and gently lay it over the back cover. Let it sit for about three minutes to give the glue a little time to relax and loosen up.

Tools Used
  1. iOpenerSamsung Galaxy S21 Plus Charging Board Replacement
  2. Heat GunSamsung Galaxy S21 Plus Charging Board Replacement

Step 2

– Get a grip on that back cover by attaching a suction handle to the bottom edge – the closer to the edge, the better!

– Use the suction handle to carefully lift the back cover and create a small gap between it and the frame. You’re making progress!

– Now it’s time to bring in the opening pick. Insert it into the gap you just created and get ready to loosen things up.

– Slide the opening pick all the way to the bottom left corner. This is where the magic happens, and you’ll start to slice through the adhesive.

– Leave the opening pick in place for now. This will prevent the adhesive from sneaking back in and resealing itself. You’re doing great!

Tools Used
  1. iOpenerSamsung Galaxy S21 Plus Charging Board Replacement
  2. Suction HandleSamsung Galaxy S21 Plus Charging Board Replacement

Step 3

– Time to get this repair started! Insert a second opening pick at the bottom edge of your phone to help loosen things up.

– Now, carefully slide the opening pick to the bottom right corner to slice through the adhesive – you’re making great progress!

– Leave the opening picks in place for now, so the adhesive doesn’t reseal and you can keep moving forward with your repair.

Step 4

– Pop in a third opening pick at the bottom right corner of your phone.

– Gently slide that opening pick along the right edge to cut through the adhesive like a pro.

– Keep the opening pick parked in the top right corner to stop the adhesive from sealing up again.

Tools Used
  1. iOpenerSamsung Galaxy S21 Plus Charging Board Replacement

Step 5

– Pop a fourth opening pick under the top right corner of your phone—like you’re sneaking in an extra slice of pizza.

– Glide that pick along the top edge to slice through the sticky stuff holding it together.

– Leave the pick chilling in the top left corner so the adhesive doesn’t get any ideas about sealing back up.

Step 6

– Slip in a fifth opening pick right under the bottom left corner to get things started.

– Then, glide your opening tool along the left side of the back cover to carefully cut through the remaining adhesive.

Step 7

– Pop off the back cover.

– When you’re putting things back together:

– Now’s a great time to fire up your phone and make sure everything works before you seal it up. Don’t forget to power it down again before you get back to business.

– Clear away any leftover adhesive bits with tweezers or your fingers. For those stubborn sticky spots, grab some isopropyl alcohol (90% or higher) and wipe them clean.

– Rocking Samsung custom-cut adhesives? Check out this guide.

– Rolling with double-sided tape? This guide’s got your back.

Step 8

– Sneak an opening pick under the bottom left corner of the NFC antenna and charging coil assembly—like a secret agent on a mission.

– Glide the pick along that bottom left edge, gently separating the assembly from the battery. No need to rush, smooth moves only.

Step 9

– Slip an opening pick under the bottom edge of the NFC antenna and charging coil assembly—like you’re slicing into a tech sandwich.

– Gently glide the pick along the bottom to separate the assembly from the loudspeaker. Take it slow and steady, you got this!

Step 10

– Grab your trusty spudger and gently pry the connector for the charging coil straight up from its socket. It’s like a little dance move—just keep it smooth and steady!

Tools Used
  1. SpudgerSamsung Galaxy S21 Plus Charging Board Replacement

Step 11

– Grab a spudger and gently pry the connector of the NFC antenna straight up from its socket. You’ve got this!

Tools Used
  1. SpudgerSamsung Galaxy S21 Plus Charging Board Replacement

Step 12

– Grab a Phillips screwdriver and loosen those five 3.9 mm screws holding down the NFC antenna and charging coil assembly. Easy peasy—just keep track of those screws so nothing goes missing. If you run into trouble or need a hand, you can always schedule a repair.

Step 13

– Next, use a pair of tweezers or your fingers to gently pull out the NFC antenna and charging coil assembly. Take your time and be careful not to damage any of the surrounding components.

Step 14

– Grab your trusty spudger and gently lift the battery connector straight up out of its socket. Easy does it—no need to fight with it!

Tools Used
  1. SpudgerSamsung Galaxy S21 Plus Charging Board Replacement

Step 15

– Grab your Phillips screwdriver and unscrew the six 3.9 mm screws holding down the loudspeaker assembly. Don’t worry, they’re all the same size—no screw mix-ups here!

Step 16

– Slip an opening pick into the space between the top edge of the loudspeaker assembly and the midframe—like sliding a note to your secret crush.

– Gently pry up the loudspeaker assembly by tipping it downward. Think of it as giving the assembly a little nudge to get it moving.

Step 17

– Let’s kick things off by gently removing the loudspeaker assembly. No need to rush, take your time!

– When you’re putting things back together, don’t forget to apply fresh adhesive where needed after giving those areas a good clean with isopropyl alcohol (>90%). It’s all about keeping things nice and tidy!

Step 18

– Grab a spudger and gently pry the main and interconnect flex cables away from the motherboard, lifting their top connectors straight up from their sockets. Easy does it—patience is key! If you need help, you can always schedule a repair.

Tools Used
  1. SpudgerSamsung Galaxy S21 Plus Charging Board Replacement

Step 19

– Grab a spudger and gently pry the bottom connector of the main flex cable straight up from its socket to disconnect it from the daughterboard.

– Next, use your fingers or a pair of tweezers to carefully lift the main flex cable out of the way. Easy peasy!

Tools Used
  1. SpudgerSamsung Galaxy S21 Plus Charging Board Replacement

Step 20

– Grab your trusty spudger and gently pop up the bottom connector of the interconnect flex cable from its socket on the daughterboard. Treat it like opening a stubborn snack bag—firm but careful!

– Now, use your fingers or tweezers to lift out the interconnect flex cable. Take it slow; this cable isn’t going to win any tug-of-war contests.

Tools Used
  1. SpudgerSamsung Galaxy S21 Plus Charging Board Replacement

Step 21

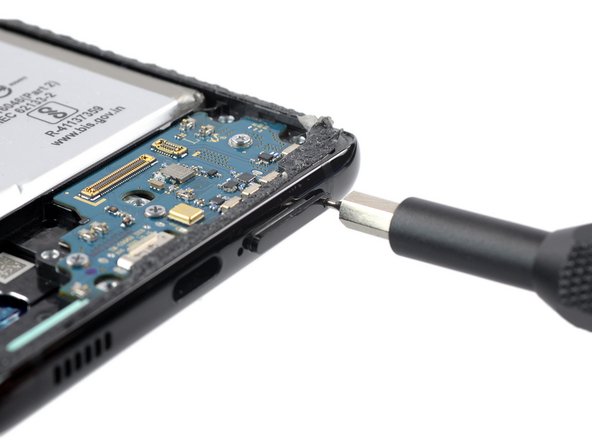
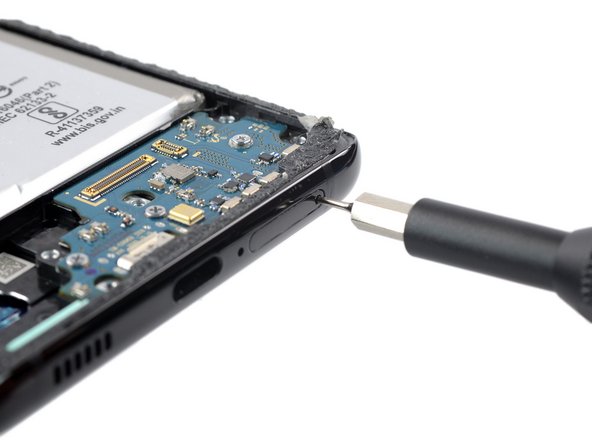
– Grab your trusty SIM card eject tool, a SIM eject bit, or even a straightened paper clip. Find the tiny hole on the SIM tray at the bottom edge of your phone.

– Give that hole a gentle poke to pop the SIM card tray out like a pro!

Tools Used
  1. SIM Card Eject ToolSamsung Galaxy S21 Plus Charging Board Replacement

Step 22

– Pop out the SIM card tray with a gentle push or pry. Keep it smooth, and if you need a hand, you can always schedule a repair.

Step 23

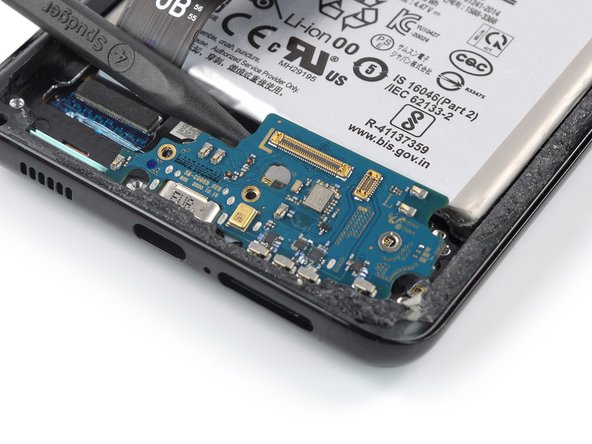
– Grab your Phillips screwdriver and loosen those three 3.4 mm screws holding the charging board in place. Easy does it—you’re almost there! If you need help, you can always schedule a repair.

Step 24

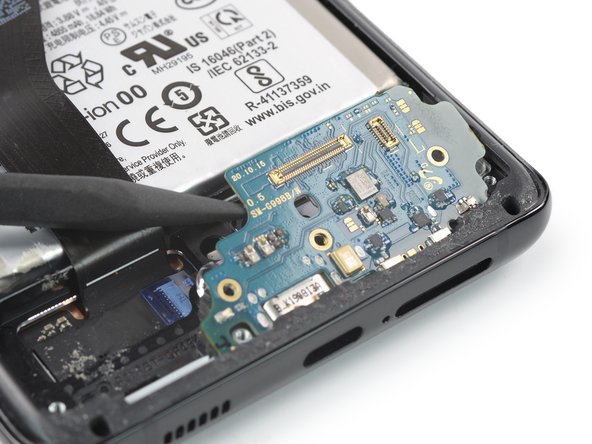
– Gently slide the pointed end of your trusty spudger under the left edge of the charging board, right next to where the main flex cable connects.

– Now, give that charging board a little nudge upwards with your spudger to free it from its snug spot.

Tools Used
  1. SpudgerSamsung Galaxy S21 Plus Charging Board Replacement

Step 25

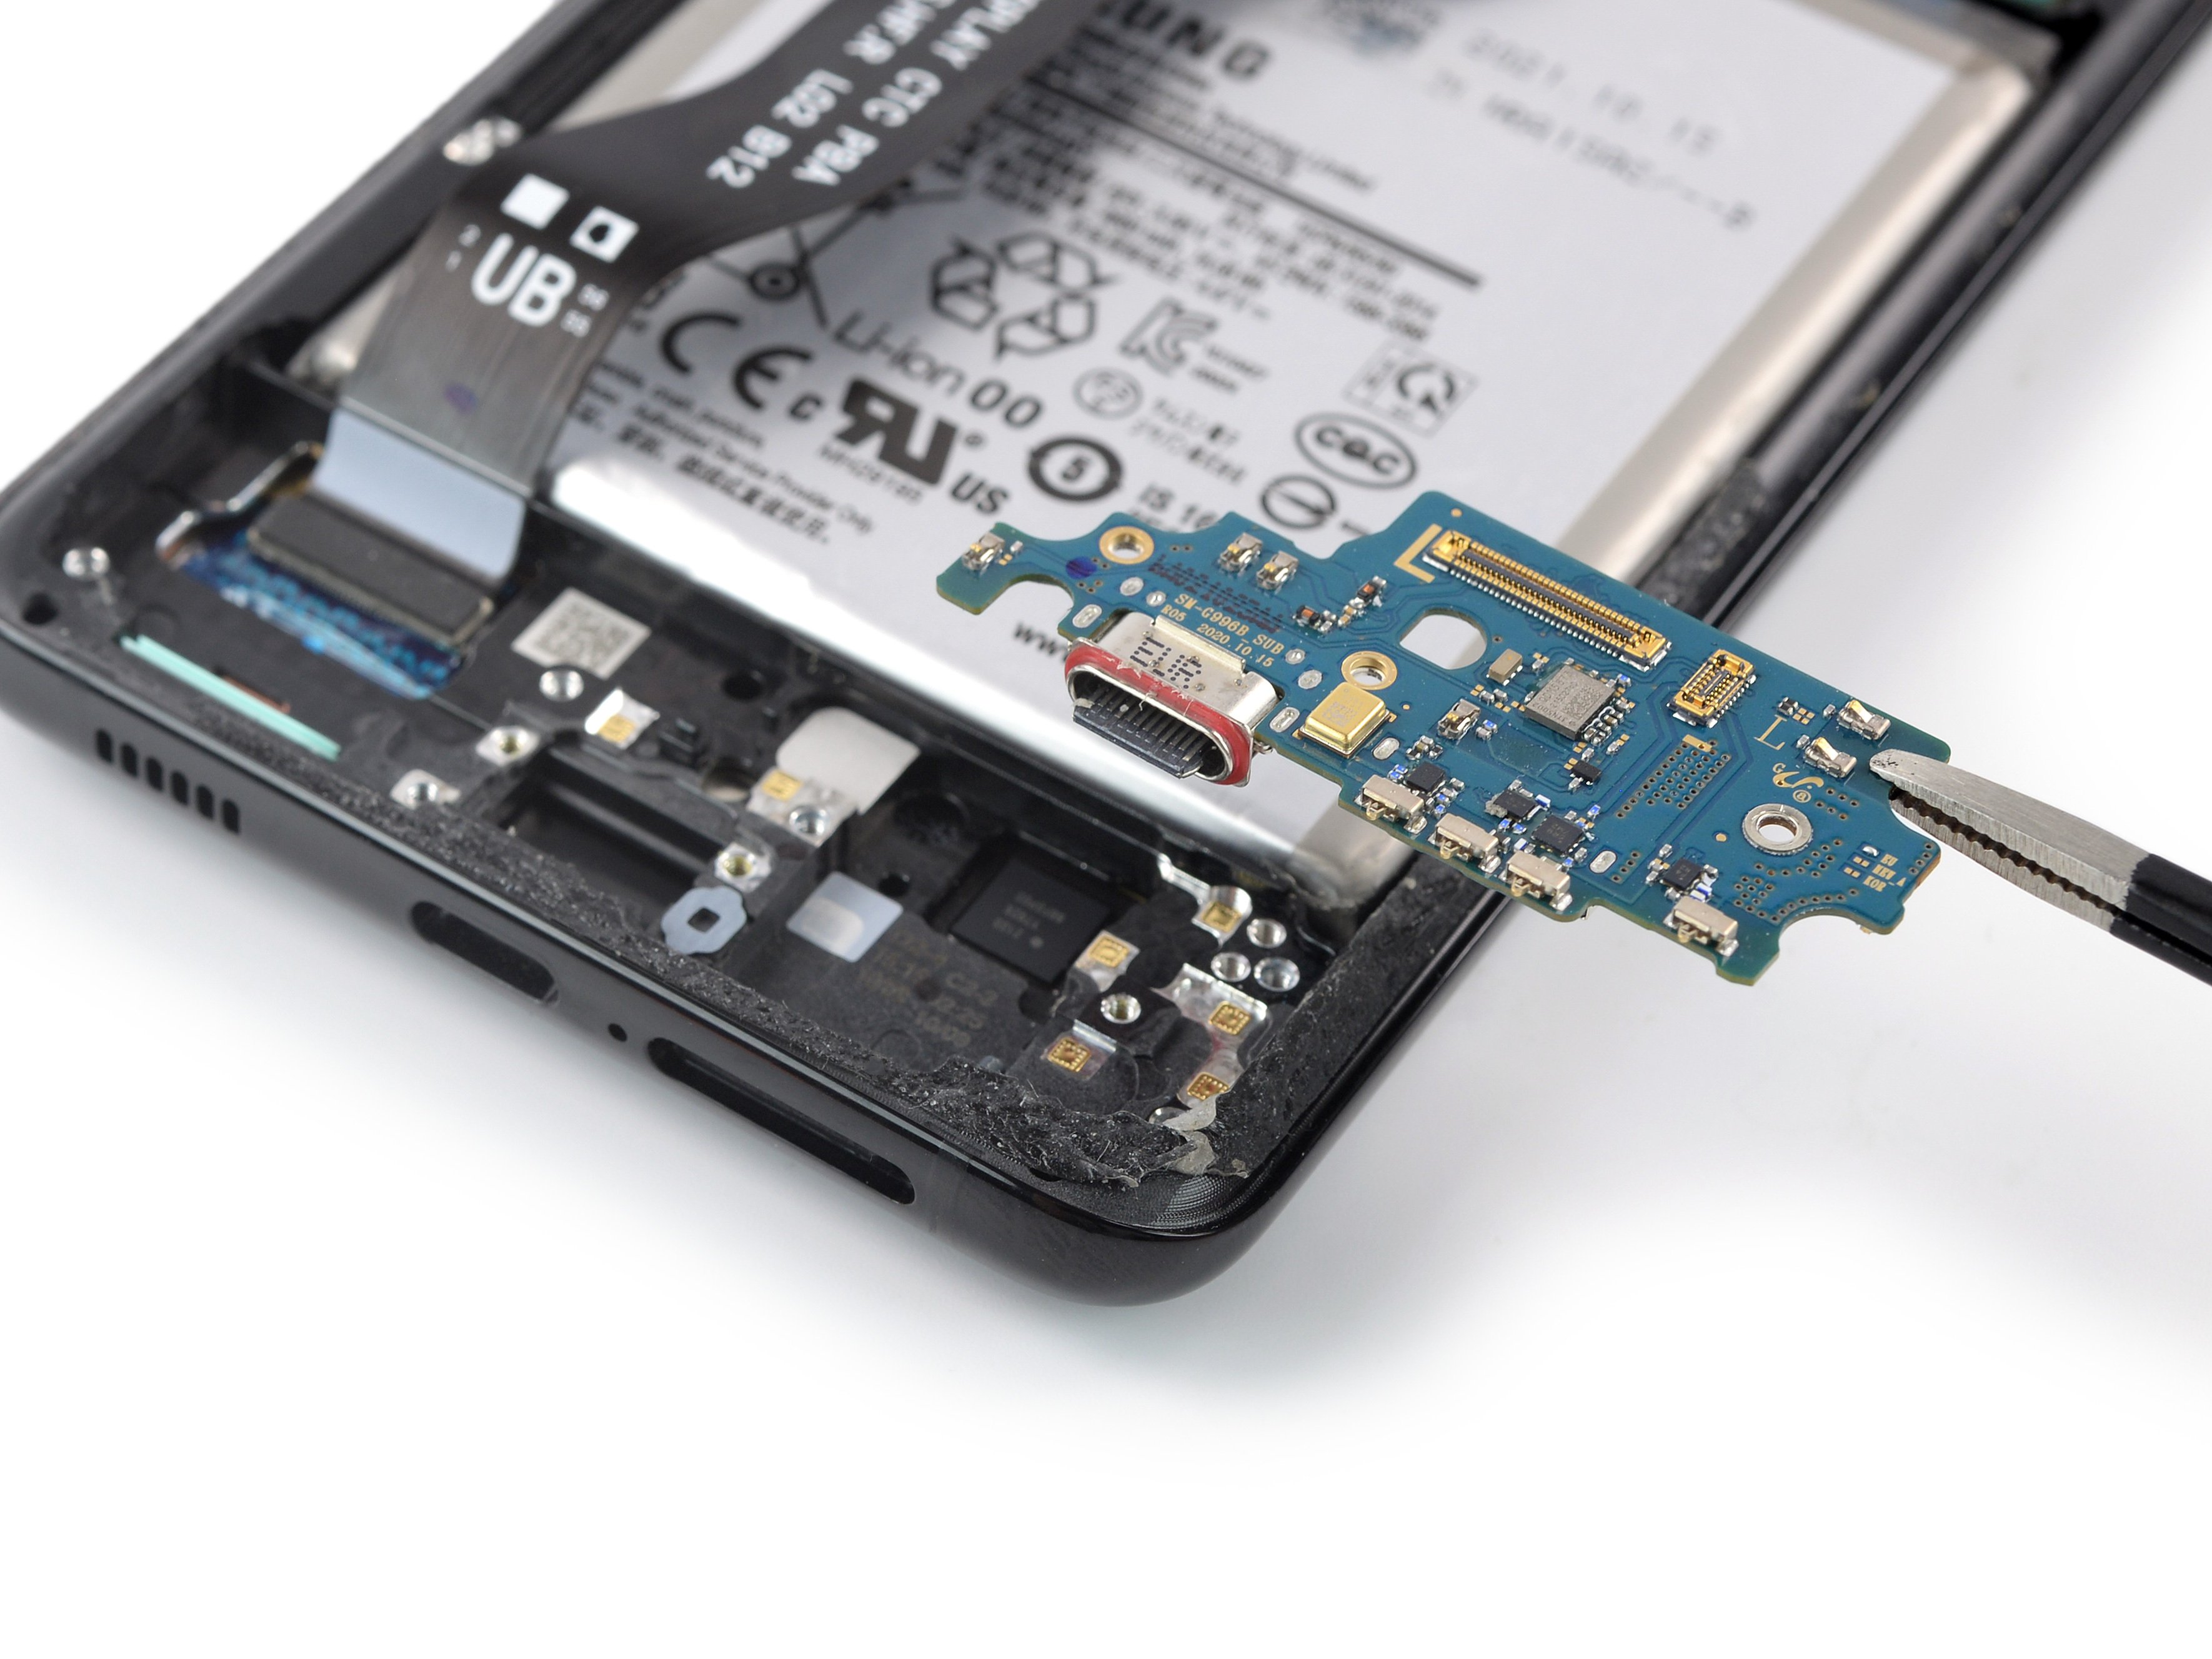
– Grab some blunt tweezers or just use your fingers—no need to get fancy. Gently lift the top edge of the charging board and then slide that USB-C connector out like you’re unplugging from a wild Friday night.

– When you’re putting things back together, fresh adhesive is your friend. Clean up those spots with isopropyl alcohol (90% or higher) before you lay it down. Smooth, clean, and ready to stick!

Success!
Power up your device and give your repair a quick test drive before sealing things up.
Line up your new part with the original—sometimes you’ll need to move over a few components or peel off adhesive covers before installing.
To put your device back together, just walk through these steps in reverse.
When you’re done, check out our guide to make sure everything’s working like a charm.
Got leftover parts or busted bits? Drop them off at a certified e-waste recycler.
If things didn’t go quite as planned, try some troubleshooting, or ask our Answers community for backup.
Still stuck? You can always schedule a repair.

Samsung Galaxy S21 Plus Battery Replacement

Duration: 45 minutes
Steps: 27 Steps

Ready to give your Samsung Galaxy S21 Plus a new lease on life? This guide walks you through swapping out an old or tired battery. Heads up: If you’re rocking a different model, you might spot an extra antenna cable along the midframe. If your battery looks swollen—handle it with care! For safety, try to run your battery down below 25% before popping your phone open; it helps keep things chill if the battery gets bumped. You don’t absolutely have to unplug the interconnect cables, but trust us—it makes getting the battery out and putting everything back together way smoother. Skipping the adhesive seals? Your phone will still work, but say goodbye to water resistance. Grab some fresh adhesive if you want things to stick like new when you reassemble.

Step 1

– Get your iOpener ready and stick it on that back cover for a solid three minutes. This will help loosen up the adhesive lurking underneath, making things a whole lot easier for your next steps!

Tools Used
  1. iOpenerSamsung Galaxy S21 Plus Battery Replacement
  2. Heat GunSamsung Galaxy S21 Plus Battery Replacement

Step 2

– Grab a suction handle and secure it to the bottom edge of the back cover, keeping it nice and close to the edge.

– Give the back cover a gentle lift with the suction handle to create a tiny gap between it and the frame.

– Slide an opening pick into that gap you just made.

– Carefully glide the opening pick down to the bottom left corner to slice through the adhesive.

– Keep that opening pick in place so the adhesive doesn’t decide to seal up again!

Tools Used
  1. iOpenerSamsung Galaxy S21 Plus Battery Replacement
  2. Suction HandleSamsung Galaxy S21 Plus Battery Replacement

Step 3

– Pop in a second opening pick at the bottom edge of your phone like a pro.

– Gently slide that pick over to the bottom right corner to cut through the adhesive.

– Keep those opening picks in place to stop that adhesive from sealing up again.

Step 4

– Pop a third opening pick into the bottom right corner of your phone—like you’re dealing cards, but for tech.

– Slide that pick up the right edge to loosen up the stubborn adhesive. Take it slow; no need to rush.

– Leave the pick chilling in the top right corner to keep the adhesive from getting cozy again.

Tools Used
  1. iOpenerSamsung Galaxy S21 Plus Battery Replacement

Step 5

– Gently wedge a fourth pick under the top right corner of your device to start loosening things up.

– Carefully slide the pick along the top edge to cut through the adhesive holding it together.

– Keep the pick in the top left corner to stop the adhesive from sticking back together as you work.

Step 6

– Slip a fifth opening pick beneath the bottom left corner to get things started. Then, glide the pick along the left edge of the back cover, carefully slicing through any remaining glue. Take your time—patience makes perfect. If you need a hand, you can always schedule a repair.

Step 7

– Start by removing the back cover to get to the inside. When you’re ready to put everything back together, take a moment to power on your device and test all functions—this way, you catch any issues early before sealing it up tight. Once you’re satisfied, shut down your device completely before proceeding. Gently peel away any leftover adhesive chunks using tweezers or your fingers, and wipe away any sticky residue with some high-concentration (over 90%) isopropyl alcohol for a clean finish. If you’re using Samsung-specific pre-cut adhesives, follow this guide. For double-sided tape, follow this guide to get it just right. If you need a hand at any point, you can always schedule a repair.

Step 8

– Gently slide an opening pick under the lower left corner of the NFC antenna and charging coil assembly.

– Carefully maneuver the pick along the bottom left edge to wiggle it free from the battery. Keep it smooth and steady!

Step 9

– Slide an opening pick under the lower edge of the NFC antenna and charging coil assembly. You’re doing great!

– Gently glide the opening pick along the bottom of the assembly to detach it from the loudspeaker. Keep it smooth and steady!

Step 10

– Grab your trusty spudger and gently pry the charging coil connector straight up from its socket. It’s like giving it a little lift!

Tools Used
  1. SpudgerSamsung Galaxy S21 Plus Battery Replacement

Step 11

– Grab your trusty spudger and gently pry the NFC antenna connector straight up from its socket. You’re doing great!

Tools Used
  1. SpudgerSamsung Galaxy S21 Plus Battery Replacement

Step 12

– Grab your trusty Phillips screwdriver and get ready to tackle those five 3.9 mm-long screws holding the NFC antenna and charging coil assembly in place. You’re going to do great!

Step 13

– Grab a trusty pair of tweezers or just your nimble fingers, and gently lift out the NFC antenna and charging coil assembly. You’ve got this!

Step 14

– Grab your trusty spudger and gently pry the battery cable connector straight up from its socket. Easy peasy!

Tools Used
  1. SpudgerSamsung Galaxy S21 Plus Battery Replacement

Step 15

– Grab your Phillips screwdriver and take out those six 3.9 mm screws holding the loudspeaker assembly in place. Let’s get that speaker ready for its big exit!

Step 16

– Slide an opening pick into the tiny gap between the top of the loudspeaker assembly and the midframe. It’s like a little dance move for your tools!

– Now, use that opening pick to gently nudge the loudspeaker assembly upwards by tilting it down. You’re doing great—keep it smooth and steady!

Step 17

– Carefully detach the loudspeaker assembly. Once you’re ready to put everything back together, make sure to reapply fresh adhesive in the spots that need it, after giving the area a good clean with isopropyl alcohol (>90%). If you get stuck or need a hand, you can always schedule a repair.

Step 18

– Grab a spudger and gently pry up the upper connector of the display flex cable to disconnect it from the socket. Easy does it—just lift straight up to keep things safe. If you need help, you can always schedule a repair.

Tools Used
  1. SpudgerSamsung Galaxy S21 Plus Battery Replacement

Step 19

– Grab your trusty spudger and gently pop the main and interconnect flex cables off the motherboard by lifting their top connectors straight out of their sockets. Easy does it—no need to rush, just a smooth little pry!

Tools Used
  1. SpudgerSamsung Galaxy S21 Plus Battery Replacement

Step 20

– Pop the display flex cable connector up with your spudger—just a gentle upward flick and it’s free.

– Pinch or tweeze the flex cable out like you’re picking the first pickle from the jar—slow and steady wins the race.

Tools Used
  1. SpudgerSamsung Galaxy S21 Plus Battery Replacement

Step 21

– Grab your trusty spudger and gently pry the main flex cable off the daughterboard by lifting its bottom connector straight up from the socket. You’ve got this!

– Now, use your fingers or a pair of tweezers to delicately detach the main flex cable. Easy peasy!

Tools Used
  1. SpudgerSamsung Galaxy S21 Plus Battery Replacement

Step 22

– Grab your trusty spudger and gently lift the bottom connector of the interconnect flex cable straight up from its socket on the daughterboard. Time to disconnect!

– Now, with a steady hand, use your fingers or tweezers to carefully detach the interconnect flex cable. You’re doing great!

Tools Used
  1. SpudgerSamsung Galaxy S21 Plus Battery Replacement

Step 23

– Grab your spudger and gently pry the power button flex cable straight up to disconnect it from its socket. Then, carefully bend the flex cable aside with your spudger to keep it out of harm’s way during the battery removal. If you need a hand, you can always schedule a repair.

Tools Used
  1. SpudgerSamsung Galaxy S21 Plus Battery Replacement

Step 24

– Drop 1-2 drops of high-concentration (over 90%) isopropyl alcohol into the gaps between the frame and the edges of the battery. Don’t be shy—get those gaps nicely coated.

– Give the alcohol a couple of minutes to work its magic and loosen up the battery adhesive. Patience pays off—let it soak in for at least two to three minutes to make the removal smoother.

Tools Used
  1. iOpenerSamsung Galaxy S21 Plus Battery Replacement

Step 25

– Stick a suction handle onto the battery, getting it as close to the battery’s edge as you can—no need to wrestle with it.

– Slide an opening pick into the gap between the battery’s edge and the frame. Take it slow and steady; no need to rush.

– Twist the pick so its long edge slips right into the gap. You got this!

Tools Used
  1. Suction HandleSamsung Galaxy S21 Plus Battery Replacement

Step 26

– With a steady grip, lift the suction handle and gently angle the opening pick downward to coax the battery free. You’ve got this!

Tools Used
  1. Suction HandleSamsung Galaxy S21 Plus Battery Replacement

Step 27

– Pop out the battery—don’t forget to peel away any stubborn sticky bits.

– If you used isopropyl alcohol, give it a chill ten-minute break before you toss in the new battery. This lets everything dry out nicely.

– Reassembly time:

– Stick the fresh battery down with pre-cut adhesive or double-sided tape. For perfect placement, slap the adhesive inside your device right where the old stuff was—don’t put it straight on the battery. Press it in so it feels secure.

– For a smooth fit, hook the battery up to the motherboard briefly to line it up. Once it’s in place, unplug it again.

Success!
Give your device a quick test drive before sealing it up with fresh adhesive—just to make sure everything’s working like a charm.
Line up your shiny new part with the old one. You might need to move over a couple of bits or peel off any sticky backings before you snap it in.
Ready to put things back together? Just reverse these steps, and remember to use new adhesive after a little isopropyl alcohol clean-up where it counts.
Got a new battery in there? Run through a battery cycle reset to help it settle in—calibration keeps your power game strong.
Done with old parts? Recycle them right by dropping them off at an R2 or e-Stewards certified recycler.
If your repair threw you a curveball, try a bit of troubleshooting, or tap into the Salvation Repair Answers community for some wisdom. If things get tricky, you can always schedule a repair.

Samsung Galaxy S21+ Back Cover Replacement

Duration: 45 minutes
Steps: 10 Steps

Ready to give your Samsung Galaxy S21+ a fresh back? Let’s dive in! Just a heads up: keeping that water resistance intact after your repair is all about how well you reapply that adhesive. Remember, your device will lose its IP (Ingress Protection) rating, but don’t worry, you’ve got this!

Step 1

– Warm up an iOpener and gently press it against the bottom edge of the back cover for about two minutes. This helps loosen things up so you can get inside more easily. If you need a hand, you can always schedule a repair.

Tools Used
  1. iOpenerSamsung Galaxy S21+ Back Cover Replacement
  2. Heat GunSamsung Galaxy S21+ Back Cover Replacement

Step 2

– Grab a suction handle and stick it to the bottom edge of the back cover, right up against the edge for the best grip.

– Gently pull on the suction handle to lift the back cover just enough to create a tiny gap between it and the frame.

– Slide an opening pick into that little gap you just made.

– Carefully glide the opening pick down to the bottom left corner to cut through the adhesive.

– Keep that opening pick in place to stop the adhesive from sealing back up.

Tools Used
  1. iOpenerSamsung Galaxy S21+ Back Cover Replacement
  2. Suction HandleSamsung Galaxy S21+ Back Cover Replacement

Step 3

– Pop a second opening pick down along the bottom edge of your phone—like you’re dealing cards to a really stubborn opponent.

– Glide that pick over to the bottom right corner to slice through the sticky adhesive. Think of it as cutting through a gooey slice of pizza.

– Leave your picks hanging out where they are to stop the adhesive from sticking things back together. No surprise reunions here!

Step 4

– Warm up that iOpener and give it a cozy hug on the right edge of the back cover for a solid two minutes.

Tools Used
  1. iOpenerSamsung Galaxy S21+ Back Cover Replacement

Step 5

– Time to get this repair started! Insert a third opening pick at the bottom right corner of your phone – it’s going to help you get inside.

– Now, gently slide the opening pick along the right edge of your phone to loosen the adhesive. Take your time, you got this!

– Leave the opening pick in the top right corner to keep the adhesive from sealing back up. You’re making great progress!

Tools Used
  1. iOpenerSamsung Galaxy S21+ Back Cover Replacement

Step 6

– Warm up your iOpener and give the top edge of that back cover a cozy two-minute hug.

Tools Used
  1. iOpenerSamsung Galaxy S21+ Back Cover Replacement

Step 7

– Pop that fourth opening pick right under the top right corner of your phone.

– Gently slide the opening pick along the top edge to cut through the adhesive like butter.

– Keep the opening pick snug in the top left corner to stop that adhesive from trying to reseal.

Step 8

– Warm up your iOpener and park it on the left edge of the back cover for a solid two minutes. Let that heat work its magic!

Tools Used
  1. iOpenerSamsung Galaxy S21+ Back Cover Replacement

Step 9

– Now it’s time to add a fifth opening pick under the bottom left corner – nice and easy!

– Gently slide the opening pick along the left edge of the back cover to cut through the remaining adhesive. You’re making great progress!

Step 10

– Before installing the new part, take a good look at it and compare it with the original. Don’t forget to transfer any leftover components and peel off any adhesive backings from the new part.

– To put everything back together, just follow the instructions in reverse order. Simple as that!

– Got some e-waste lying around? Make sure to drop it off at an R2 or e-Stewards certified recycler to keep things eco-friendly.

– Things not going as planned? No worries, try some quick troubleshooting or reach out to our community for a hand. We’re here to help!

Success!

Samsung Galaxy S21 Ultra USB-C Charging Port and Daughterboard Replacement

Duration: 45 minutes
Steps: 21 Steps

Follow this guide to swap out the USB-C charging port and daughterboard on your Samsung Galaxy S21 Ultra. Keep in mind, your water resistance might not be the same afterward—it’s all about how well you reapply that adhesive. Your device will lose its IP rating, but with a steady hand and some patience, you’ll have it back in shape.

Step 1

– Grab a SIM ejector tool, a tiny bit, or even a straightened paperclip, and gently insert it into the tiny hole on the top edge of your phone where the SIM card tray hides. Push in steadily to pop the tray out. Once it’s partially out, grab it with your fingers and pull it the rest of the way. If you need a hand, you can always schedule a repair.

Step 2

– Grab your trusty iOpener and give that back cover some love! Apply it for a solid three minutes to help loosen the adhesive hiding underneath. You’ve got this!

Tools Used
  1. iOpenerSamsung Galaxy S21 Ultra USB-C Charging Port and Daughterboard Replacement
  2. Heat GunSamsung Galaxy S21 Ultra USB-C Charging Port and Daughterboard Replacement

Step 3

– Stick your suction handle nice and snug on the bottom edge of the back cover—get it as close to the edge as you can.

– Give the handle a gentle lift to sneak a tiny gap between the back cover and the frame.

– Slip an opening pick into that gap like a pro.

– Glide the pick over to the bottom left corner to slice through the sticky adhesive.

– Leave the pick hanging out there so the adhesive doesn’t get any ideas about sealing itself back up.

Tools Used
  1. iOpenerSamsung Galaxy S21 Ultra USB-C Charging Port and Daughterboard Replacement
  2. Suction HandleSamsung Galaxy S21 Ultra USB-C Charging Port and Daughterboard Replacement

Step 4

– Pop in a second opening pick at the bottom edge of your phone.

– Gently slide that pick over to the bottom right corner to cut through the adhesive like a pro.

– Keep those opening picks in place to stop the adhesive from sealing back up. You’re doing great!

Step 5

– Pop a third opening pick into the bottom right corner of your phone—like you’re adding toppings to a pizza, but way more technical.

– Glide that pick up the right edge to slice through the sticky stuff holding things together. Smooth moves only.

– Let the pick chill in the top right corner so the adhesive doesn’t get any ideas about sticking back together.

Tools Used
  1. iOpenerSamsung Galaxy S21 Ultra USB-C Charging Port and Daughterboard Replacement

Step 6

– Slide a fourth opening pick under the top right corner of your phone like a pro.

– Gently glide the opening pick along the top edge to cut through that pesky adhesive.

– Keep the opening pick lodged in the top left corner to make sure the adhesive doesn’t seal back up.

Step 7

– Pop a fifth pick under the top left corner like a pro.

– Glide that pick smoothly down the left edge to break up the last bits of sticky stuff holding on.

Step 8

– Pop off the back cover—like opening a treasure chest, minus the pirates.

– When putting everything back together:

– Now’s a great time to fire up your phone and make sure everything’s working. Just don’t forget to shut it down completely before moving on.

– Use tweezers or your fingers to evict any leftover adhesive bits. Got stubborn glue? A little heat can help loosen things up.

– If you’ve got custom-cut adhesives, check out the guide linked above.

– Rocking double-sided tape instead? There’s a guide for that, too.

Step 9

– Grab your trusty opening pick and slide it under the lower left corner of the NFC antenna and charging coil setup.

– Gently coast the pick along the bottom edge to loosen it from the battery—no need to rush, just keep it smooth.

Step 10

– Grab your trusty spudger and gently pry the connector of the charging coil upwards from its socket. You’ve got this!

Tools Used
  1. SpudgerSamsung Galaxy S21 Ultra USB-C Charging Port and Daughterboard Replacement

Step 11

– Grab your trusty spudger and gently nudge the NFC antenna connector upwards, freeing it from its cozy little socket. You’re doing great!

Tools Used
  1. SpudgerSamsung Galaxy S21 Ultra USB-C Charging Port and Daughterboard Replacement

Step 12

– Grab your Phillips screwdriver and unscrew the five 3.9 mm screws holding down the NFC antenna and charging coil. Keep those screws handy—you’ll need them later!

Step 13

– Let’s get started! Use a Phillips screwdriver to remove the four 3.9 mm-long screws that hold the loudspeaker assembly in place. This is a straightforward step, but if you’re not feeling confident, don’t worry – we’ve got you covered. Just take your time and make sure those screws are removed securely.

Step 14

– Gently slide the spudger’s tip into the space between the frame and the upper-left notch of the loudspeaker.

– Give it a little pry with the spudger to pop the loudspeaker free from its plastic clips.

Tools Used
  1. SpudgerSamsung Galaxy S21 Ultra USB-C Charging Port and Daughterboard Replacement

Step 15

– Grab a pair of tweezers or your fingers and gently pluck out the NFC antenna, charging coil, and loudspeaker assembly. Once you’ve got them free, set the assembly aside—you’re going to reuse it later during reassembly. Need a hand? Remember, you can always schedule a repair if things get tricky.

Step 16

– Grab your trusty spudger and gently wiggle it to lift up and disconnect those pesky primary and secondary interconnect cables’ press connectors on the motherboard. You’ve got this!

Tools Used
  1. SpudgerSamsung Galaxy S21 Ultra USB-C Charging Port and Daughterboard Replacement

Step 17

– Grab a spudger and gently pry the bottom connector of the secondary interconnect cable straight up to disconnect it from the daughterboard. Then, carefully peel the cable away using your fingers or a pair of tweezers. Once free, set the cable aside—you’ll be reusing it when you put everything back together. If you need a hand with any part of this process, remember you can always schedule a repair.

Tools Used
  1. SpudgerSamsung Galaxy S21 Ultra USB-C Charging Port and Daughterboard Replacement

Step 18

– Grab a spudger and gently pop the main interconnect cable loose from the daughterboard by lifting its bottom connector straight out of the socket.

– Use your fingertips or a pair of tweezers to carefully lift and remove the primary interconnect cable.

– Set the cable aside—you’ll be reattaching it during reassembly. If you need assistance, you can always schedule a repair.

Tools Used
  1. SpudgerSamsung Galaxy S21 Ultra USB-C Charging Port and Daughterboard Replacement

Step 19

– Grab your trusty Phillips screwdriver and get ready to work some magic! Unscrew the three 3.4 mm-long screws that are holding the charging board in place. You’ve got this!

Step 20

– Slide the pointed end of a spudger carefully under the left edge of the charging board, right next to the main flex cable connector. Then, gently pry up the charging board with your spudger—it’s a smooth move to free it up.

Tools Used
  1. SpudgerSamsung Galaxy S21 Ultra USB-C Charging Port and Daughterboard Replacement

Step 21

– To put your device back together, just follow these steps in reverse—like rewinding a mixtape.

– Got old parts? Drop them off with an R2 or e-Stewards certified recycler and keep things green.

– If things went sideways, try some classic troubleshooting moves or connect with our Answers community. Still stuck? You can always schedule a repair.

Success!
To wrap things up, simply reverse the steps you followed to get here, and you’ll be back in business!
Don’t forget to responsibly recycle your e-waste with an R2 or e-Stewards certified recycler.
If things didn’t quite go as planned, don’t worry! Try some basic troubleshooting or reach out to our Answers community for help. And if you’re still stuck, you can always schedule a repair with Salvation Repair.

Samsung Galaxy S21 Ultra Screen Replacement

Duration: 45 minutes
Steps: 38 Steps

Get ready to tackle that cracked or broken screen on your Samsung Galaxy S21 Ultra! We’re focusing on the SM-G998B/DS (international) model here, but keep in mind that other models may have an extra antenna cable snuggled in the midframe. If your frame looks a bit bent, it’s best to swap it out to ensure the new screen fits just right and avoids any damage from awkward pressure. And hey, if your battery is looking swollen, take the necessary precautions! Before you dive in, make sure to drop that battery charge below 25% to keep things safe during the repair. Just a heads up: this guide is all about swapping the screen while keeping the original frame and motherboard intact. Some replacement screens come with a brand new frame (or chassis), which means a whole different ball game. So double-check you’ve got the right part before you start! While it’s not essential to remove the interconnect cables for the screen swap, doing so can make motherboard removal and reassembly a breeze. Just a friendly reminder: if you skip replacing the adhesive seals when putting everything back together, your device will still work, but it might lose some of its water protection. Before jumping in, make sure you have a set of replacement adhesives for both the rear glass and the screen. Happy fixing!

Step 1

– Grab your trusty iOpener and give it a warm hug against the back cover for about three minutes. This little buddy will help loosen up that pesky adhesive hiding underneath!

Tools Used
  1. iOpenerSamsung Galaxy S21 Ultra Screen Replacement
  2. Heat GunSamsung Galaxy S21 Ultra Screen Replacement

Step 2

– Stick a suction cup right on the bottom edge of the back cover—snug up against the rim like it’s waiting in line for coffee.

– Give the handle a gentle tug upward to pop a tiny gap between the cover and the frame—think of it as opening a stubborn bag of chips.

– Wiggle an opening pick into that fresh gap like you’re slipping a note through a locker door.

– Slide the pick down to the bottom-left corner, gliding through the adhesive like a DJ scratching vinyl.

– Let the pick chill there like a doorstop so the sticky stuff doesn’t throw the cover back on while you’re not looking.

Tools Used
  1. iOpenerSamsung Galaxy S21 Ultra Screen Replacement
  2. Suction HandleSamsung Galaxy S21 Ultra Screen Replacement

Step 3

– Slide a second pick in at the bottom edge—your phone’s about to meet its match.

– Glide that pick down to the bottom right corner like you’re carving a Thanksgiving turkey (but with way less drama).

– Park the picks there so the adhesive doesn’t get any funny ideas about resealing itself.

Step 4

– Pop in a third opening pick at the bottom right corner of your device.

– Gently glide that opening pick along the right edge to cut through the adhesive like a pro.

– Keep the opening pick nestled in the top right corner to stop the adhesive from making a comeback.

Tools Used
  1. iOpenerSamsung Galaxy S21 Ultra Screen Replacement

Step 5

– Pop a fourth pick under the top right corner, like you’re giving your phone a little haircut.

– Run the pick along the top edge to slice through that sticky adhesive—think of it as opening a stubborn snack bag.

– Let that pick chill in the top left corner so the adhesive doesn’t sneak back together.

Step 6

– Pop in a fifth opening pick right under the top left corner to get things started.

– Gently slide that opening pick along the left edge of the back cover to cut through the last of the adhesive. Keep it smooth and steady!

Step 7

– Time to take off that back cover! Gently remove it and set it aside.

– Now, let’s start the reassembly party. Be sure to test your phone before sealing it up. Turn it on and check if everything’s working like it should. But don’t forget – power it down completely before getting back to work.

– Any sticky bits left over? Grab some tweezers or just use your fingers to remove those adhesive chunks.

– Got some residue left behind? Take a cotton pad and wipe it off with some high-concentration (over 90%) isopropyl alcohol. That should do the trick.

– Using custom-cut adhesives? Follow this guide and get it just right.

– If you’re opting for double-sided tape, follow this guide for a smooth finish.

Step 8

– Slip an opening pick under the left bottom corner of the NFC antenna and charging coil assembly—like you’re sliding a secret note.

– Gently glide the pick along the bottom left edge to loosen the assembly from the battery. Smooth moves win the day!

Step 9

– Slide your trusty opening pick right under the bottom edge of that NFC antenna and charging coil assembly. You’re doing great!

– Gently glide the pick along the base of the assembly—like butter on warm toast—to free it from its cozy spot next to the loudspeaker.

Step 10

– Grab a spudger and gently work your magic to disconnect that charging coil! Just pry the connector straight up from its cozy socket, and you’ll be one step closer to getting everything back in action.

Tools Used
  1. SpudgerSamsung Galaxy S21 Ultra Screen Replacement

Step 11

– Grab your trusty spudger and gently pry the NFC antenna connector straight up from its socket. You got this!

Tools Used
  1. SpudgerSamsung Galaxy S21 Ultra Screen Replacement

Step 12

– Grab a Phillips screwdriver and unscrew the five 3.9 mm-long screws holding down the NFC antenna and charging coil assembly. Easy does it—just a few turns to free that part up. If you hit any snags, remember, you can always schedule a repair with Salvation Repair for a hand.

Step 13

– Gently lift out the NFC antenna and charging coil assembly using tweezers or your fingers. Easy does it—no need to rush!

Step 14

– Grab your trusty spudger and gently pry the battery cable connector upwards straight from its socket. You’re doing great!

Tools Used
  1. SpudgerSamsung Galaxy S21 Ultra Screen Replacement

Step 15

– Grab your trusty Phillips screwdriver and get ready to tackle those four 3.9 mm-long screws holding the loudspeaker assembly in place. You’ve got this!

Step 16

– Slip your spudger into the gap at the top edge of the loudspeaker assembly, right where it meets the midframe.

– Gently pry the loudspeaker assembly upward by tilting your spudger downward. Go slow—no need to rush!

Tools Used
  1. SpudgerSamsung Galaxy S21 Ultra Screen Replacement

Step 17

– Take out the loudspeaker assembly. When putting things back together, make sure to add fresh adhesive where needed after giving the area a good clean with isopropyl alcohol (>90%). If you need a hand, you can always schedule a repair.

Step 18

– Grab a spudger and gently pry up the display flex cable connector straight from its socket. Easy does it—no force needed!

Tools Used
  1. SpudgerSamsung Galaxy S21 Ultra Screen Replacement

Step 19

– Grab your trusty spudger and gently pop the main and interconnect flex cables loose from the motherboard by lifting their connectors straight up. Easy does it—you’re just giving them a little nudge out of their sockets!

Tools Used
  1. SpudgerSamsung Galaxy S21 Ultra Screen Replacement

Step 20

– Grab your trusty spudger and gently pry the interconnect flex cable off the daughterboard. Just lift that bottom connector straight up from its socket like it’s taking a little stretch break.

– Now, it’s time to delicately coax that interconnect flex cable out of its home using your fingers or a pair of tweezers. Easy does it!

Tools Used
  1. SpudgerSamsung Galaxy S21 Ultra Screen Replacement

Step 21

– Grab your trusty spudger and gently pry the bottom connector of the main flex cable straight up from its socket to disconnect it from the daughterboard. Easy peasy!

– Now, with a little finesse, use your fingers or a pair of tweezers to carefully lift out the main flex cable. You’ve got this!

Tools Used
  1. SpudgerSamsung Galaxy S21 Ultra Screen Replacement

Step 22

– Grab your trusty Phillips screwdriver and get ready to tackle those four 3.9 mm-long screws that are holding the earpiece speaker and laser AF module assembly in place. You’ve got this!

Step 23

– Grab your trusty spudger and gently pop up the connectors for the laser AF module and the earpiece speaker flex cables. Just lift them straight out of their sockets—no wrestling required!

Tools Used
  1. SpudgerSamsung Galaxy S21 Ultra Screen Replacement

Step 24

– With a pair of blunt nose tweezers in hand, gently grasp the bottom right corner of the earpiece speaker and laser AF module assembly, and lift it up with care.

– Now, go ahead and remove the earpiece speaker and laser AF module assembly. You’ve got this!

Step 25

– Grab your trusty spudger and gently nudge those in-display fingerprint and antenna flex cables by lifting the connectors straight up from their cozy little sockets.

– With a touch of care, slightly bend both connectors to the side to set the motherboard free. You’re doing great!

Tools Used
  1. SpudgerSamsung Galaxy S21 Ultra Screen Replacement

Step 26

– Grab your trusty spudger and gently lift the front facing camera cable connector straight up from its socket. Easy does it!

Tools Used
  1. SpudgerSamsung Galaxy S21 Ultra Screen Replacement

Step 27

– Grab your trusty spudger and gently pop the power button flex cable connector straight up from its cozy spot.

– Give the connector a gentle nudge to the side so the motherboard has some wiggle room.

Tools Used
  1. SpudgerSamsung Galaxy S21 Ultra Screen Replacement

Step 28

– Let’s get started! Use a Phillips screwdriver to carefully remove the 3.9 mm-long screw that’s holding the camera module in place.

Step 29

– Slide a spudger underneath the top edge of the motherboard, right next to the vibration motor. You’ve got this!

– Now, use your trusty spudger to gently lift the motherboard by tilting it downwards and giving it a little twist to the side. Easy peasy!

Tools Used
  1. SpudgerSamsung Galaxy S21 Ultra Screen Replacement

Step 30

– Gently lift out the motherboard, making sure to keep everything steady. If you need a hand or want to get it done right, you can always schedule a repair.

Step 31

– Grab that trusty iOpener and give your screen a warm hug! Apply it for a solid 5 minutes to help loosen up that sticky adhesive hiding underneath.

Tools Used
  1. iOpenerSamsung Galaxy S21 Ultra Screen Replacement
  2. Heat GunSamsung Galaxy S21 Ultra Screen Replacement

Step 32

– Once the screen is nice and warm to the touch, stick a suction handle onto the left edge of the display, getting as close to the edge as you can. Gently lift with the suction handle to create a tiny gap between the screen and the frame. Next, slide an opening pick into that gap between the midframe and the display. Carefully guide the pick up towards the top left corner to cut through the adhesive holding everything in place. Keep that opening pick in position to stop the adhesive from sealing back up as you work. If you need a hand, you can always schedule a repair.

Tools Used
  1. Suction HandleSamsung Galaxy S21 Ultra Screen Replacement

Step 33

– Slide a second opening pick into the top left corner and gently glide it down to the bottom left corner of the screen to cut through that pesky adhesive.

– Keep that opening pick snugly in place to stop the adhesive from sticking back together.

Step 34

– Pop a third pick into the top left corner of the screen—like adding another friend to the party.

– Glide that pick along the top edge to break up the sticky adhesive. Smooth moves only.

– Let the pick hang out there to keep the glue from sneaking back together. Prevention is key!

Step 35

– Pop a fourth opening pick right under that top right corner of your screen. You’ve got this!

– Gently slide the opening pick down the right edge to cut through the adhesive like a pro.

– Keep that opening pick in place to stop the adhesive from sealing back up. You’re on a roll!

Tools Used
  1. iOpenerSamsung Galaxy S21 Ultra Screen Replacement
  2. Heat GunSamsung Galaxy S21 Ultra Screen Replacement

Step 36

– Pop the fifth pick into the lower-right corner like you’re sneaking the last cookie into the jar.

– Slide that pick along the bottom edge and give the leftover glue a friendly wave goodbye.

Step 37

– Gently guide the fingerprint flex cable through the slot in the midframe—think of it as threading a needle, but with way cooler tech.

Step 38

– If you can, power up your device and give your repair a quick test drive before you seal everything up with new adhesive.

– Time to put Humpty Dumpty back together again! Just retrace your steps using these instructions in reverse order.

– Once you’ve wrapped up the repair, follow this guide to ensure everything’s working like a charm.

– For a snug fit, the best trick is to use a custom-cut sheet of double-sided tape on the back of your new screen.

– Got some e-waste? Make sure to drop it off at an R2 or e-Stewards certified recycler.

– Things didn’t go as smoothly as you’d hoped? No worries! Try some basic troubleshooting or feel free to reach out to our community for support. And remember, if the going gets tough, you can always schedule a repair.

Success!
You’re almost done! If you can, power on your device and give it a quick test before sealing it up with new adhesive.
To put everything back together, just follow these steps in reverse. Easy peasy!
Now that you’ve completed the repair, check out our guide on how to test it to make sure everything is working smoothly.
The best way to keep your new screen secure is to attach a custom-cut sheet of double-sided tape to the back. Simple and effective!
Don’t forget to responsibly recycle your e-waste with an R2 or e-Stewards certified recycler.
If things didn’t quite go as planned, try some basic troubleshooting or reach out to our community at Salvation Repair for some help. And if you’re really stuck, you can always schedule a repair with us.

🍪
Have a cookie! This site uses cookies to enhance your experience. Opt-Out Options.