Samsung Galaxy S9 Plus Fingerprint Sensor and Camera Lens Cover Replacement

Duration: 45 minutes
Steps: 12 Steps

Ready to give your Samsung Galaxy S9+ a little TLC? Here’s how to remove the fingerprint sensor and camera lens cover. Just a heads up—cracking open your phone will break its waterproof seal, so unless you swap out those adhesive seals, your phone won’t be winning any swimming contests. You’ll want fresh adhesive to stick things back together when you’re done. Take your time and keep it chill—your phone will thank you for it!

Step 1

– Power down your device to start things off. Then, grab an iOpener and gently warm up the adhesive under the back glass. Keep the iOpener in place for at least two minutes to soften things up. You might find it helpful to repeat this step a few times as you carefully lift off the rear cover. If you need a hand, you can always schedule a repair.

Tools Used
  1. iOpenerSamsung Galaxy S9 Plus Fingerprint Sensor and Camera Lens Cover Replacement

Step 2

– Time to tackle the adhesive holding the back cover in place. Get ready to slice and dice in style.

– You’ll be running your tool through the sticky zones shown here:

– Extra-thick strips of adhesive—these require some muscle.

– Slimmer adhesive areas—these come up easier.

– Steer clear of this spot so you don’t mess with the fingerprint sensor cable hiding underneath.

Step 3

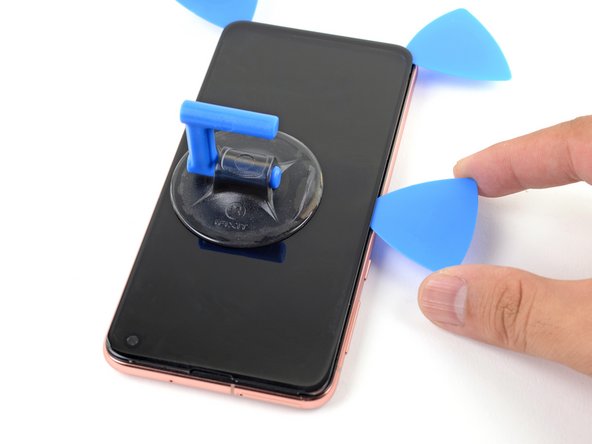
– Stick a suction cup onto the back cover and give it a gentle tug to start loosening things up.

– Pull up on the suction cup at the bottom edge of the back cover, creating a small gap between the cover and the frame—think of it as a tiny opening for your next move.

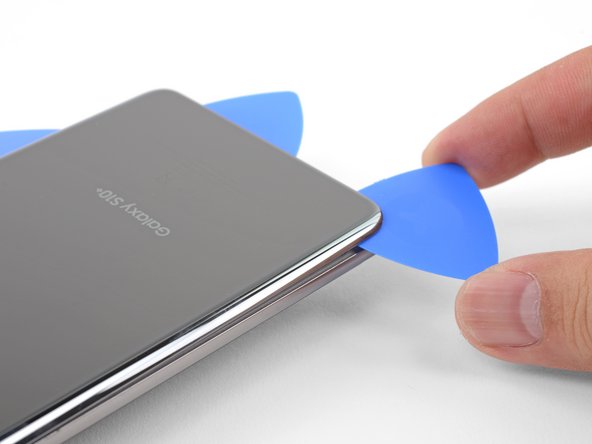
– Slide an opening pick into that gap and carefully work it toward the bottom right corner, easing the cover away without any drama.

Step 4

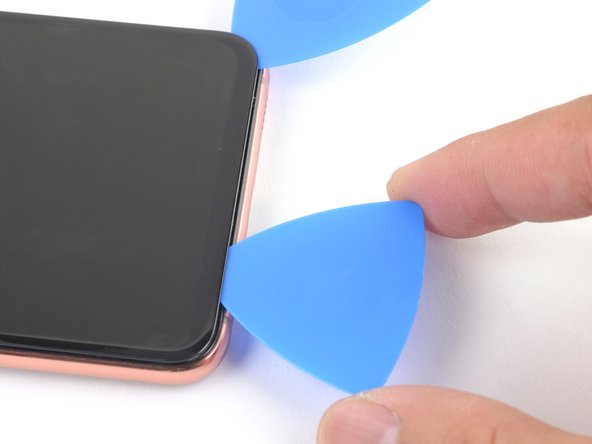
– Pop in a second opening pick and gently slide it to the bottom left corner. Take your time, it’s all about precision!

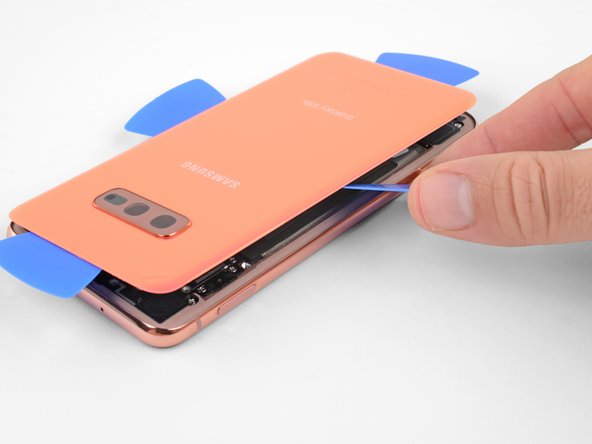
– Now, grab a third opening pick and wedge it at the bottom of the phone. Leave it there during the rear glass removal to keep that pesky adhesive from sealing up again. It’s like holding the door open while you work your magic.

Step 5

– Begin by gently sliding the tip of your opening pick from the bottom left corner, making your way up the side of the S9 Plus.

– Once you’ve sliced through the adhesive halfway up the left side, leave that pick in place like a trusty sidekick.

– Next, glide the opening pick from the bottom right corner, traveling halfway up the frame, and let it chill there for a bit.

Step 6

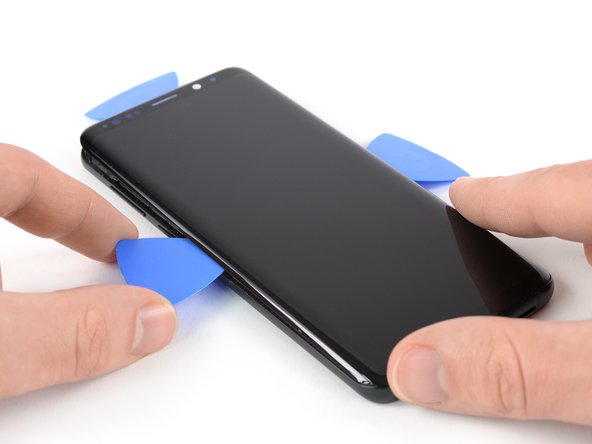
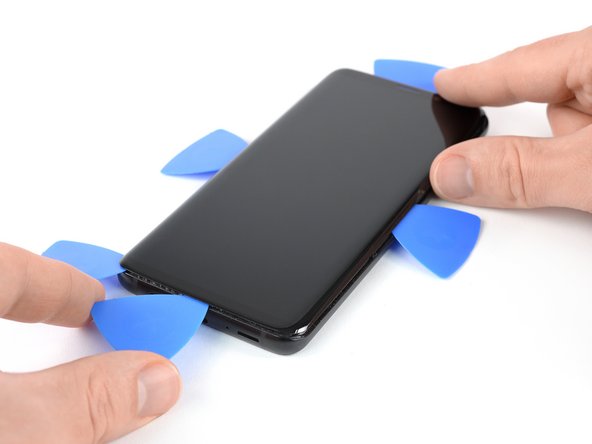
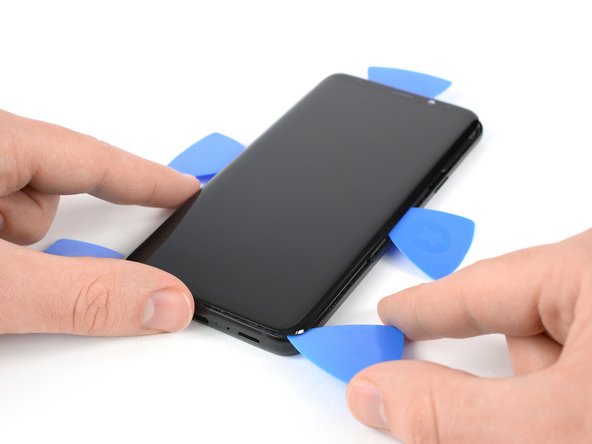
– Pop a fourth opening pick into the right side of the frame and gently slide it to the top right corner.

– Now grab a fifth opening pick and slide it along the left side, making your way up to the top left corner.

– Use the pick to carefully slice through any remaining adhesive under the upper part of the rear glass.

Step 7

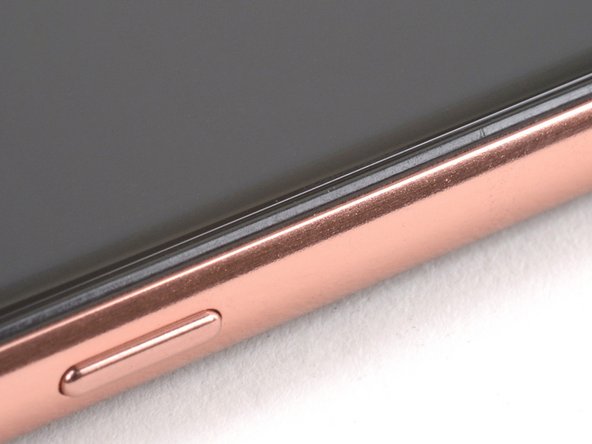
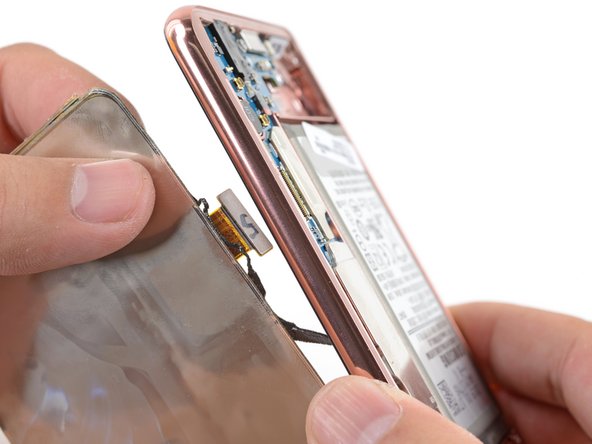
– Gently lift the edge of the rear glass where the volume button hangs out. It’s like giving it a little nudge!

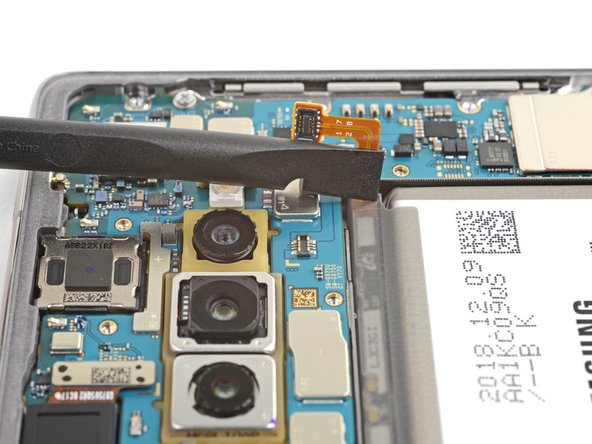
– Grab your trusty spudger and use its edge to carefully pry up and disconnect that sneaky fingerprint sensor flex cable.

Tools Used
  1. SpudgerSamsung Galaxy S9 Plus Fingerprint Sensor and Camera Lens Cover Replacement

Step 8

– Start by gently removing the rear glass—don’t rush, a careful touch goes a long way!

– When you’re putting everything back together, follow this guide to reapply the adhesive and get that rear glass sitting pretty again.

– If you’re swapping out the rear glass, no worries—just follow this guide to safely transfer the rear camera bezel and fingerprint sensor.

Step 9

– Warm up the rear camera lens cover with a heated iOpener—let it sit for at least two minutes to loosen things up.

Tools Used
  1. iOpenerSamsung Galaxy S9 Plus Fingerprint Sensor and Camera Lens Cover Replacement

Step 10

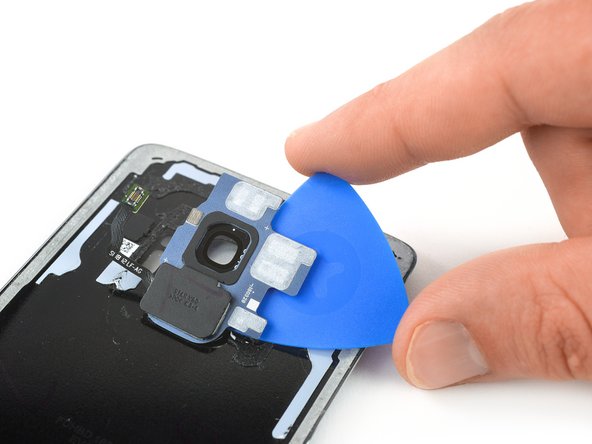
– Slide an opening pick carefully between the top edge of the bezel and the rear glass to get things started.

– Use the pick to gently cut through the adhesive underneath the upper part of the bezel, easing it away with a steady hand.

Step 11

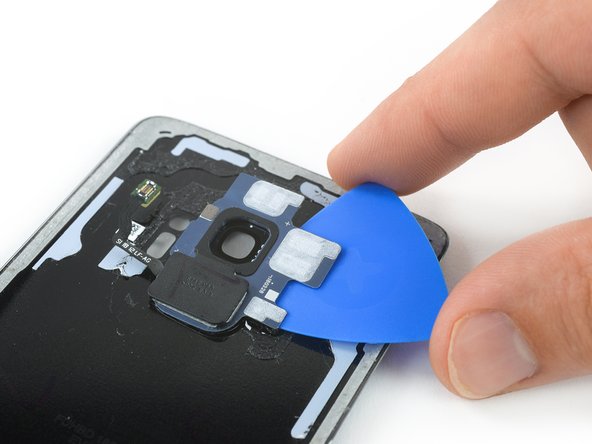
– Slip the opening pick under the right side of the rear camera bezel like a pro.

– Gently slide the pick along the bezel to break that adhesive seal.

– Twist the pick to carefully lift the rear camera bezel along with the fingerprint sensor. Easy does it!

Step 12

– Stick that new back cover on with some trusty adhesive or double-sided tape.

– Ready to put things back together? Just follow these steps in reverse.

– Once the rear cover is in place, press firmly for a few minutes—maybe stack a couple of books on top for good measure—so everything bonds nicely.

– When you’re done, take a moment to run through the guide and make sure your device is working as it should. If you hit any snags, you can always schedule a repair.

Tools Used
  1. TweezersSamsung Galaxy S9 Plus Fingerprint Sensor and Camera Lens Cover Replacement

Success!
Stick on the new back cover using pre-cut adhesive or double-sided tape—make sure it’s lined up just right.
Put your device back together by doing everything in reverse. Easy peasy!
Once the rear cover’s in place, press down firmly for a few minutes so the adhesive gets a solid grip. Heavy books work great for this.
Give your device a quick test run to make sure everything’s working. If things aren’t looking good, or you just want a pro to handle it, you can always schedule a repair.

Samsung Galaxy S9 Plus Display Replacement

Duration: 45 minutes
Steps: 22 Steps

Ready to swap out that shattered screen on your Samsung Galaxy S9 Plus? Let’s get started! First things first—drain your battery to below 25%. Trust us, low battery means a much safer repair (no accidental fireworks here). This guide covers swapping out just the display, keeping your frame, motherboard, and battery right where they are. Heads up: Some replacement displays come already attached to a new frame, which is a whole different ballgame—make sure you’ve got the right part before you dive in. You’ll be popping off the glass back cover, so grab some replacement adhesive to seal things up after. If your new screen doesn’t include adhesive, a strong double-sided tape like Tesa 61395 works great. Cracking open your S9 Plus will mess with its waterproof seals, so unless you replace those, your phone won’t be water-resistant anymore. If your frame looks bent or busted, swap it out, or your new screen might not fit right (and could get damaged). Once you separate the display from the frame, the old screen is toast—so only do this if you’re set on putting in a fresh one. If you get stuck or want to avoid the tricky bits, you can always schedule a repair.

Step 1

– Power down your phone. Give it a moment to say goodbye.

– Grab your iOpener and let it work its magic on the sticky stuff under the rear glass. Keep it pressed for at least two minutes. You might need to do this a few times for stubborn glue, so no shame in a little repeat action.

Tools Used
  1. iOpenerSamsung Galaxy S9 Plus Display Replacement

Step 2

– Alright, it’s time to get rid of that back cover! We’re going to carefully cut through the adhesive holding it in place.

– Focus on slicing through the sticky spots in these areas:

– Thicker adhesive spots that need a little extra effort

– Thinner adhesive areas that are a bit more forgiving

– A quick reminder—don’t go prying or slicing near the fingerprint sensor flex cable. You don’t want to damage that little guy!

Step 3

– Stick your suction cup right onto the back cover—it’s about to be your best friend.

– Gently pull up on the bottom edge using the suction cup, just enough to crack open a tiny gap between the cover and the frame.

– Slide an opening pick into the gap you just made, then cruise it over to the bottom right corner.

Step 4

– Grab a second opening pick and slide it down to the bottom left corner—like you’re drawing a little line dance for your phone.

– Now, bring in a third pick and stick it at the bottom of your device. Let it hang out there! It’ll keep the sticky adhesive from sneakily closing up shop while you work your magic on the rear glass.

Step 5

– Begin by sliding the tip of your opening pick gently from the bottom left corner up along the side of the S9 Plus.

– Once you’ve sliced through the adhesive halfway up the left side, just let that pick chill in place.

– Now, slide your opening pick from the bottom right corner halfway up the frame and leave it there, just like a pro!

Step 6

– Pop in a fourth pick on the right edge and slide it up to the top right corner—think of it as your trusty sidekick.

– Take a fifth pick for a spin up the left edge until you hit the top left corner—like marking your territory.

– Work that pick along the upper part of the rear glass to slice through the last bits of clingy adhesive. Keep going, you’re almost there!

Step 7

– Gently lift up the side of the rear glass where the volume button hangs out—no need for superhero strength here.

– Grab your trusty spudger and pop up the fingerprint sensor flex cable like you’re flipping the lid on your favorite snack.

Tools Used
  1. SpudgerSamsung Galaxy S9 Plus Display Replacement

Step 8

– Gently remove the rear glass—it’s like peeling a sticker off, but more satisfying.

– When putting things back together, make sure to replace the adhesive and snug that rear glass back into place.

– If you’re swapping out the rear glass, follow this guide to carefully move the rear camera bezel and fingerprint sensor to the new one.

Step 9

– Unscrew those nine 4 mm Phillips #00 screws—think of it as your device’s way of letting you in. Keep them safe for the grand reassembly!

Step 10

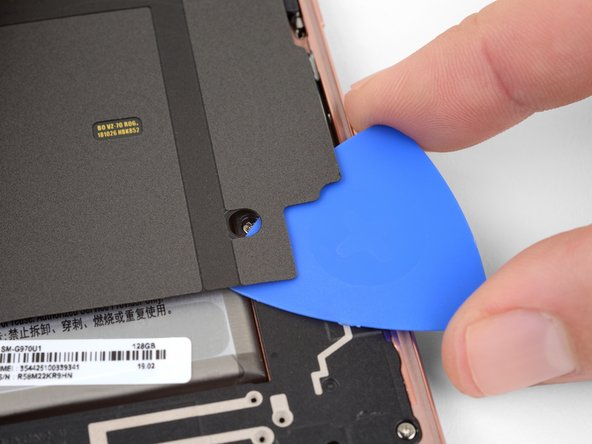
– Slide an opening pick under the right edge of the plastic cover—yep, the one with the NFC antenna and charging coil hiding underneath.

– Give the pick a little twist to pop the cover out of its plastic clips, like you’re flipping the switch on a secret door.

– Keep cruising around the cover, prying up gently to free those last stubborn clips. Almost there!

Step 11

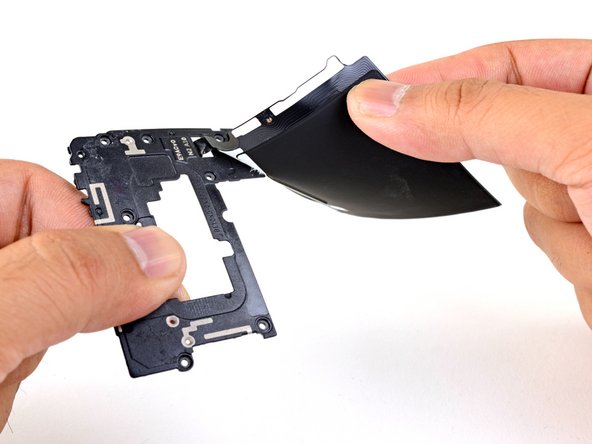
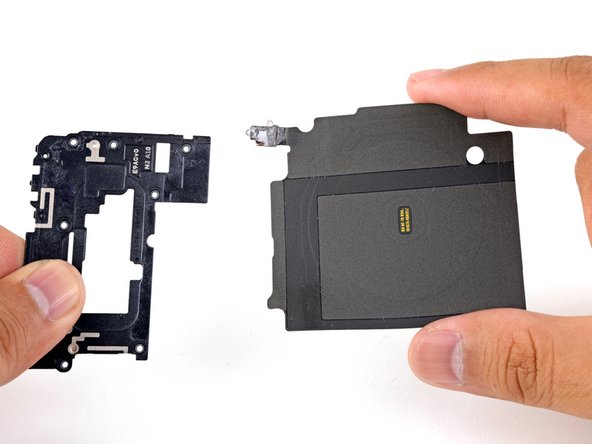
– Carefully peel off the plastic cover that’s hiding the NFC antenna and charging coil. If you need a hand or run into trouble, you can always schedule a repair.

Step 12

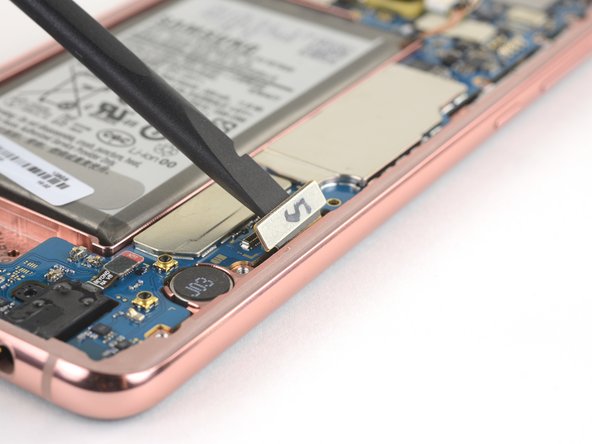
– Take the flat end of your spudger and gently pop up the battery flex cable—like giving your phone a little nudge to wake up.

Tools Used
  1. SpudgerSamsung Galaxy S9 Plus Display Replacement

Step 13

– Unscrew those two 4 mm Phillips #00 screws and set them aside. Keep track of them so you don’t lose any tiny treasures during the process. If you run into any trouble, remember you can always schedule a repair with Salvation Repair for extra help.

Step 14

– Pop off that plastic cover from the motherboard—just lift it gently and set it aside for now.

Step 15

– Grab the flat end of your spudger and gently pop off that display flex cable—easy does it!

Tools Used
  1. SpudgerSamsung Galaxy S9 Plus Display Replacement

Step 16

– Get an iOpener and warm it up a bit, then gently press it onto the display for at least two minutes to loosen up that sticky adhesive underneath.

– Cover the entire screen with overlapping strips of clear packing tape. This keeps any glass shards in check and adds some strength before you start prying and lifting.

– Think of it as giving the display a little armor—making sure everything stays intact and safe as you work your magic.

Tools Used
  1. iOpenerSamsung Galaxy S9 Plus Display Replacement

Step 17

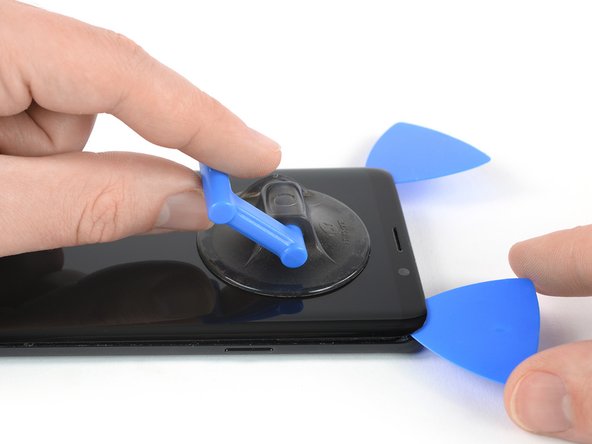
– Once the screen feels a little toasty, grab your suction cup and gently place it on the top edge of your phone.

– Now, slide an opening pick into the gap and start slicing through the adhesive, heading up to the top-left corner. Easy does it!

Step 18

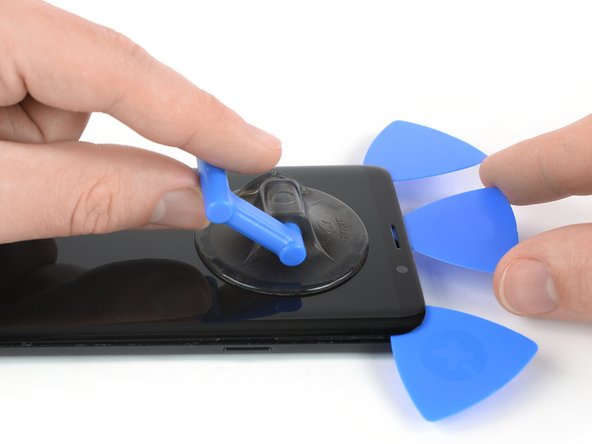
– Slide another opening pick up to the top right corner like you’re tracing a secret map.

– Pop in a third pick to keep that sneaky adhesive from gluing itself back together while you work.

Step 19

– Grab your right opening pick and slide it halfway down the side of the frame—think of it as slicing through a stubborn sandwich.

– If it feels like you’re arm-wrestling the adhesive, give it another warm-up session with the iOpener and try again.

– Now, take a left opening pick, glide it halfway down the other side of the frame, and let it hang out there for moral support.

Tools Used
  1. iOpenerSamsung Galaxy S9 Plus Display Replacement

Step 20

– Grab a fourth pick and work it along the left edge, sliding down to the bottom left corner. This will slice through that stubborn adhesive—almost there!

Step 21

– Grab a fifth pick and cruise down the right side like you own the place.

– Swing around that bottom right corner and slice through the last bit of sticky stuff holding the display in place.

Step 22

– After you’ve snipped the adhesive all around the phone, gently lift the display upwards and say goodbye to the old screen!

– Before you pop in that shiny new display, make sure to wipe away any remnants of the old adhesive from the frame. Grab some isopropyl alcohol (over 90% is best) and a lint-free cloth to give those glued areas a good clean.

Tools Used
  1. Isopropyl AlcoholSamsung Galaxy S9 Plus Display Replacement

Success!

Samsung Galaxy S9 Plus Battery Replacement

Duration: 45 minutes
Steps: 16 Steps

Ready to replace the battery in your Samsung Galaxy S9 Plus? Here’s the deal: opening up your device will compromise its waterproof seals. So, while your phone will still work, you’ll lose that sweet water resistance. Before you get started, make sure to drain the battery below 25%. And, if the battery is swollen, don’t even think about heating your phone. Swollen batteries can be hazardous, so make sure to protect your eyes and be cautious. If you’re not feeling confident, it’s totally cool to let a professional handle it. When putting everything back together, don’t forget to grab some replacement adhesive to keep things intact. If you’re stuck, schedule a repair.

Step 1

– Power down your phone before you start. No one likes surprises.

– Grab your iOpener and give the rear glass some spa treatment for at least two minutes to loosen that stubborn adhesive. You might need to repeat this heat therapy a few times as you work the back cover free.

Tools Used
  1. iOpenerSamsung Galaxy S9 Plus Battery Replacement

Step 2

– Next up, we’ll be slicing through the sticky adhesive holding the back cover in place. Grab your tool and let’s get into it.

– Target these zones as you work:

– Extra-thick strips of adhesive

– Thin, sneaky bits of adhesive

– Steer clear of this spot—there’s a fingerprint sensor flex cable lurking there, and we want to keep it safe.

Step 3

– Stick that suction cup smack onto the back cover.

– Gently pull up on the bottom edge with your suction cup until you see a little gap peek open between the cover and the frame.

– Slide an opening pick into that gap and cruise it over to the bottom right corner.

Step 4

– Grab a second opening pick and gently slide it into the bottom left corner to get things started.

– Place a third opening pick at the bottom edge of the phone—leave it there during the rear glass removal to keep the adhesive from sticking back together.

Step 5

– Kick things off by sliding the tip of your opening pick from the bottom left corner up the side of your S9 Plus. Smooth moves, friend.

– Once you’ve sliced through about half the adhesive on the left side, leave that pick parked right where it is. No need to rush.

– Now, grab another pick and glide it from the bottom right corner up the frame—just halfway. Let it chill there for a bit.

Step 6

– Pop a fourth opening pick into the right side of the frame and gently slide it toward the top right corner.

– Next, grab a fifth opening pick and carefully slide it along the left side of the phone, moving toward the top left corner.

– Now, use that opening pick to cut through the rest of the adhesive along the upper part of the rear glass.

Step 7

– Gently lift the rear glass from the side where the volume button hangs out—like you’re opening a secret door.

– Grab your trusty spudger and carefully pop up the fingerprint sensor flex cable. No sudden moves—think ninja, not lumberjack.

Tools Used
  1. SpudgerSamsung Galaxy S9 Plus Battery Replacement

Step 8

– Pop off that rear glass like a pro.

– When putting everything back together, use this guide to get the adhesive in place and slap that rear glass back on.

– If you’re swapping out your rear glass, follow these steps to move the rear camera bezel and the fingerprint sensor along for the ride.

Step 9

– Start by removing the nine 4 mm Phillips #00 screws holding things down. Keep your screwdriver handy and go for a smooth, steady turn—these screws are just snug enough to keep you on your toes. If you need a hand, you can always schedule a repair.

Step 10

– Slide an opening pick under the right edge of the plastic cover that houses the NFC antenna and charging coil.

– Twist the pick sideways and pop the cover out of its plastic clips—like you’re flipping a pancake.

– Keep cruising around the cover, gently prying up to set the rest of those clips free.

Step 11

– Lift off the plastic cover that holds the NFC antenna and charging coil—easy does it, like opening a present!

Step 12

– Grab the flat end of your spudger and gently pop up the battery flex cable like you’re flipping a light switch. Easy does it!

Tools Used
  1. SpudgerSamsung Galaxy S9 Plus Battery Replacement

Step 13

– Grab your trusty iOpener and let’s get that battery adhesive loosened up! Just apply it for a solid two minutes to work its magic.

– Next up, when you’re using the spudger, make sure to stick to the areas highlighted in red. That’s where the battery adhesive is hanging out!

– And hey, steer clear of this spot! There’s a sneaky gap in the mid-frame right below the battery, and we wouldn’t want you to accidentally give the display a little love tap.

Tools Used
  1. iOpenerSamsung Galaxy S9 Plus Battery Replacement
  2. SpudgerSamsung Galaxy S9 Plus Battery Replacement

Step 14

– Grab your trusty spudger and gently wedge the flat end into the top left corner of the battery, right where that flex cable is hiding. Apply steady, confident pressure and start prying it up—smooth and steady wins the race.

– Next, glide your way down the left edge of the battery, working the adhesive loose with your spudger. Keep it gentle but firm, and you’ll free that battery in no time.

Step 15

– Slide your spudger into the top right corner of the battery and gently pop it up—like you’re opening a snack you really want.

Tools Used
  1. SpudgerSamsung Galaxy S9 Plus Battery Replacement

Step 16

– To put your device back together, just walk through these steps in reverse.

– If you can, power up your phone and check your repair before you seal everything up.

– Give your new battery a quick calibration for best performance once you’re done.

– Don’t toss those old parts—drop your e-waste off at an R2 or e-Stewards certified recycler.

– Need a hand or stumped by a stubborn step? Swing by our Answers community for some troubleshooting magic, or schedule a repair if you want pro backup.

Tools Used
  1. Isopropyl AlcoholSamsung Galaxy S9 Plus Battery Replacement

Success!
Put your device back together by reversing these steps—like rewinding a DIY montage.
If it powers up, give your repair a quick test run before sealing everything up with new adhesive.
To keep your battery happy, run through a full charge cycle after you finish.
Don’t toss old parts in the trash—find an R2 or e-Stewards recycler and give them a responsible send-off.
Something didn’t go quite right? Our Answers community is packed with troubleshooting wisdom.
If you get stuck or just want a pro to handle it, you can always schedule a repair.

Samsung Galaxy S10 Motherboard Replacement

Duration: 45 minutes
Steps: 21 Steps

Ready to swap out that motherboard on your Galaxy S10? This step-by-step guide will steer you through removing the old board, including the now-soldered USB-C port, and installing a fresh one. Keep calm, follow along, and if you hit a snag, you can always schedule a repair for extra help.

Step 1

– Grab your trusty SIM card eject tool, a SIM eject bit, or even a straightened paperclip, and gently insert it into the tiny hole on the SIM tray at the top edge of your phone, right next to that sleek plastic antenna band.

– Give it a firm press to pop that tray out like a champ.

– Carefully remove the SIM card tray from its cozy little home.

– When you’re ready to put the SIM card back in, just make sure it’s facing the right way in relation to the tray. You’ve got this!

Tools Used
  1. SIM Card Eject ToolSamsung Galaxy S10 Motherboard Replacement

Step 2

– First things first—disconnect your phone and shut it down before you dive in.

– Warm up your iOpener and park it on the right edge of the back cover for about two minutes. Let that heat do its magic.

– While the iOpener works, check out the image of the removed back cover and scope out where the adhesive is hiding.

Tools Used
  1. iOpenerSamsung Galaxy S10 Motherboard Replacement

Step 3

– Prop up the warmed right side of your phone on something about half an inch (13 mm) thick—this gives you a handy angle for using the opening tool.

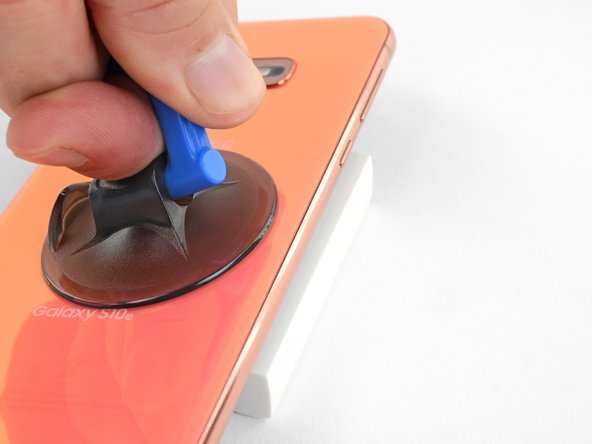
– Hold the left edge steady with your fingers so your phone doesn’t take a little trip across the table. Give the suction cup a confident tug.

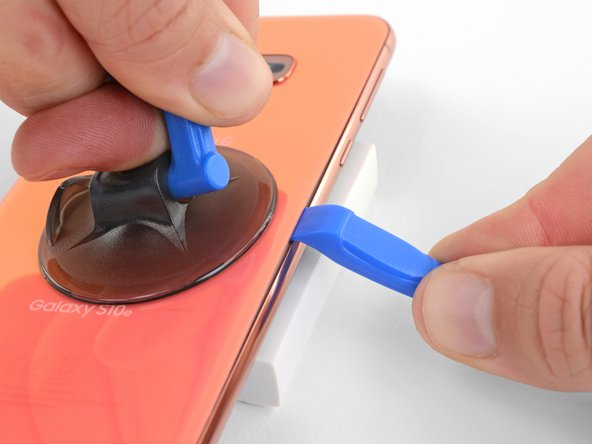
– Press the tip of your opening tool into the tiny gap between the back cover and the frame—think of it like sneaking a chip into salsa.

– With your tool in the gap, slide it back and forth along the seam to loosen up the back cover. Slow and steady wins the race!

Step 4

– Warm up that iOpener and press it against the same edge of your phone for a solid two minutes. Let’s get that adhesive nice and cozy!

– Grab a suction cup and stick it on the back of your phone, aiming for the center of the right edge (that’s where the adhesive is the thinnest, so it’s the sweet spot!).

– Give that suction cup a strong, steady pull to wiggle open a little gap between the back cover and the frame. You got this!

– Slide the point of an opening pick into the gap you’ve created. Let’s get this party started!

– If you’re struggling to make that gap, it might be that the adhesive isn’t feeling warm and fuzzy enough. Heat that edge until it’s just shy of too hot to touch, and give it another go.

– Feeling stuck? You can always drop a few splashes of high concentration (over 90%) isopropyl alcohol into the seam to help loosen up the adhesive. It’ll be like a spa day for your phone!

Tools Used
  1. iOpenerSamsung Galaxy S10 Motherboard Replacement

Step 5

– Glide your pick along the edge of the phone to slice through that sneaky adhesive.

– Pop a pick in the gap to keep the adhesive from making a comeback.

Step 6

– Warm up the bottom edge of your phone with a heated iOpener for a couple of minutes—think of it as giving your device a mini spa treatment.

– Grab an opening pick and sneak it into the right edge, close to the bottom right corner. No need to rush—precision is key here.

– Glide the pick smoothly around the corner, then keep slicing along the bottom edge and cruise past the bottom left corner. You’re on a roll!

– Pop an opening pick into the seam to stop that stubborn adhesive from sticking things back together.

Tools Used
  1. iOpenerSamsung Galaxy S10 Motherboard Replacement

Step 7

– Keep that heat going and slice away at those remaining edges of the phone with style!

Step 8

– After you’ve made your way around the phone with your trusty tool, gently twist an opening pick into one of the edges to help pop the back cover away from the frame.

– Carefully lift the back cover. If there’s any stubborn adhesive still hanging on, use those opening picks to help slice through the last bits.

– Now, go ahead and remove the back cover completely.

– This is a great moment to power on your phone and check that everything’s working like a charm before sealing up the back cover. Just remember to turn it off completely before diving back into the repair.

– Follow this guide to put the back cover back on, transfer and install the camera bezel, and replace that adhesive like a pro.

Step 9

– Take out the eight 4 mm Phillips screws holding the top midframe in place. Time to show those screws who’s boss!

Step 10

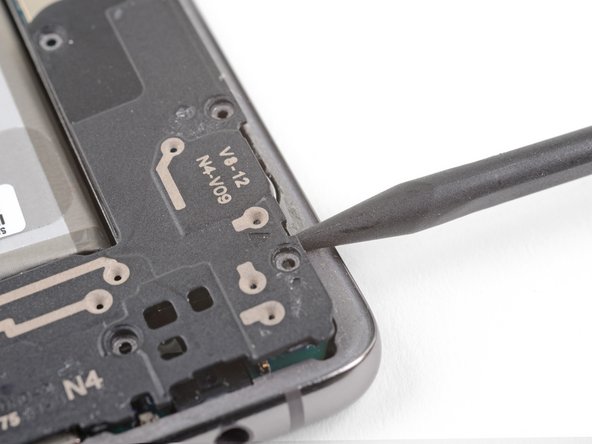
– The midframe is still hanging on with a few plastic clips along the edges. Grab a spudger and slip its tip into the notch on the right side of the midframe, near the volume up button. Gently pry upward to loosen the midframe from the phone. If you need a hand, you can always schedule a repair.

Tools Used
  1. SpudgerSamsung Galaxy S10 Motherboard Replacement

Step 11

– Start by gently lifting the midframe from the top corners and pull it off the phone.

– To get the top midframe back in place:

– Line up the midframe’s top edge with the phone, and carefully lower it onto the device.

– Press gently around the edges of the midframe to make sure the clips snap back in. The frame should sit flush against the phone’s body.

Step 12

– Slide the flat end of your trusty spudger under the battery connector that’s cozying up to the motherboard beneath the rear-facing camera.

– Gently pry upwards to free that connector from its socket—it’s just a little shy!

– Carefully nudge the battery’s flex cable away from the motherboard socket, just to keep things from bumping into each other accidentally.

Tools Used
  1. SpudgerSamsung Galaxy S10 Motherboard Replacement

Step 13

– Loosen and remove the seven 4 mm Phillips screws holding down the lower midframe. Keep them safe—you’ll need them to put everything back together later. If you need a hand with anything, remember you can always schedule a repair.

Step 14

– Slide the tip of your trusty spudger under the top right corner of the lower midframe.

– Gently pry it up to pop that midframe free from the phone!

Tools Used
  1. SpudgerSamsung Galaxy S10 Motherboard Replacement

Step 15

– Grab that loose end of the midframe with your fingers and gently lift it up, nice and easy.

– Give the midframe a little wiggle to help pop those stubborn edge clips free.

– Now, go ahead and take out the lower midframe. Just a heads up, the loudspeaker is snugly tucked into the lower midframe.

Step 16

– Grab the flat end of a spudger and gently pry up the display connector from its socket on the motherboard, which is near the bottom right corner of the phone. Easy does it—just a little wiggle and lift.

Tools Used
  1. SpudgerSamsung Galaxy S10 Motherboard Replacement

Step 17

– Take your spudger and gently pop the headphone jack connector out of its spot on the motherboard. Easy does it!

Tools Used
  1. SpudgerSamsung Galaxy S10 Motherboard Replacement

Step 18

– Unscrew the three 3.7 mm Phillips screws that are holding the motherboard in place. You’ve got this!

Step 19

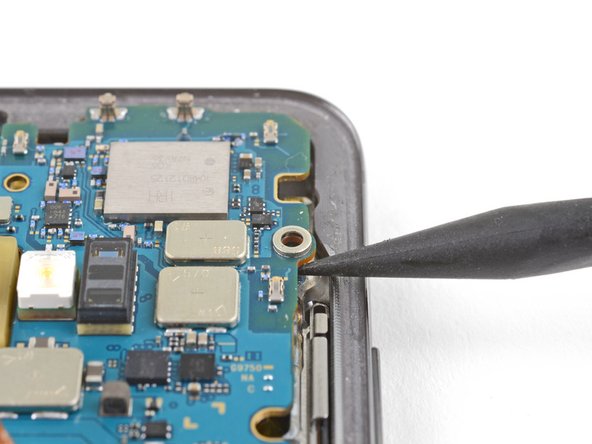
– Slide the tip of your spudger under the right side of the motherboard—yep, right by the volume down button.

– Give it a gentle lift to help nudge the motherboard out of its cozy spot.

Tools Used
  1. SpudgerSamsung Galaxy S10 Motherboard Replacement

Step 20

– Take your spudger and slide its tip under the bottom left corner of the motherboard—like you’re flipping a pancake, but gentler.

– Give it a careful lift to loosen the motherboard from its spot. No need to flex those muscles—let the tool do the work.

Tools Used
  1. SpudgerSamsung Galaxy S10 Motherboard Replacement

Step 21

– With a gentle grip, take hold of the motherboard by its top corners.

– Carefully swing the motherboard out of its snug little home. Watch out for any cables that might want to tag along!

– Now, give the motherboard a little nudge towards the top edge of the phone while giving it a slight wiggle. This will help free the charging port from its cozy socket.

– Once the charging port is free, go ahead and remove the motherboard.

– Ready to put the motherboard back in? Here’s how:

– Line up the charging port of the motherboard with the bottom edge of the phone.

– Gently press the motherboard against the bottom edge until the charging port is snugly seated.

– Lower the motherboard and press it into place. Just be careful not to squish any cables underneath! The board should sit nice and flush against the frame.

Success!
Now it’s time to put your gadget back together like a pro! Just follow these steps in reverse order and you’ll be golden.
Once you’re done, be sure to give your repair a quick test run to ensure everything’s working smoothly.
And remember, when it’s time to part ways with old electronics, take them to a certified recycler like R2 or e-Stewards. They’ll take good care of your e-waste!

How to Fix a Samsung Galaxy S10 Plus That Does Not Turn On/Power On

Duration: 45 minutes
Steps: 5 Steps

Ready to bring your Samsung Galaxy S10+ back to life? This guide walks you through the steps to get your device powering on again—no tech wizardry required. Just follow along, and if things get tricky, you can always schedule a repair.

Step 1

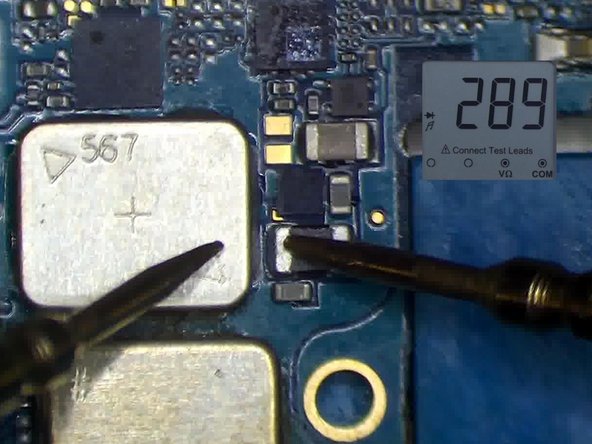
– First, give the motherboard a once-over—both the power IC and camera IC have been soldered previously, so check for any obvious issues. Next, install the motherboard back into the device and connect the display along with the power cable. Watch the current draw—if it’s hanging around 52 mA, that’s a sign to dig deeper. Press the power button—if the reading stays the same, the main power supply line might be acting up. To narrow things down, measure a few power lines on the motherboard with your multimeter in diode mode. Keep an eye on inductor L5039—it might be shorted to ground, which can cause trouble down the line. If you need help, you can always schedule a repair.

Step 2

– Take a peek at the schematic! It reveals that L5039 is snugly connected to both the main power supply line, VBAT, and the power IC, U8031. Let’s keep things powered up!

Step 3

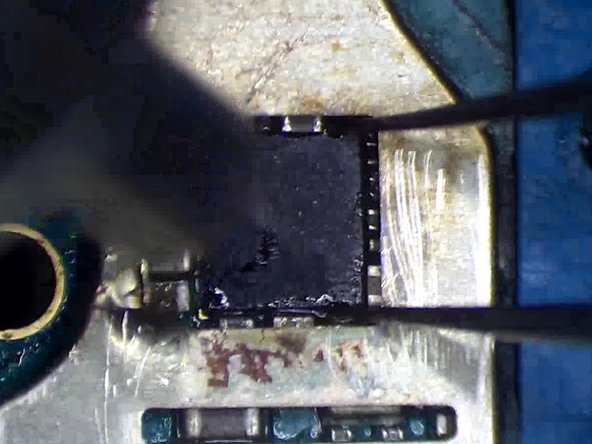
– Looks like power IC U8031 has already had a dance with a soldering iron, so let’s check if it’s still up for the job or ready to retire.

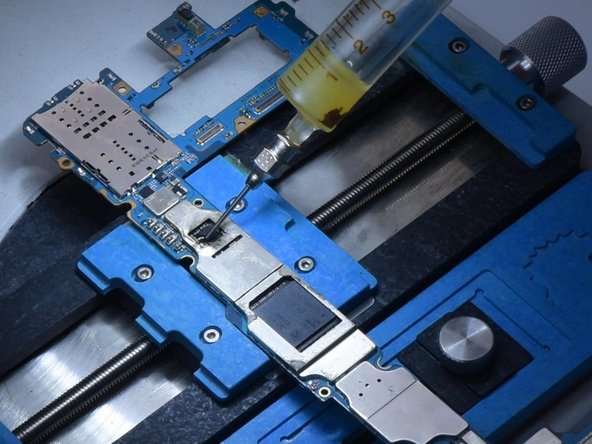
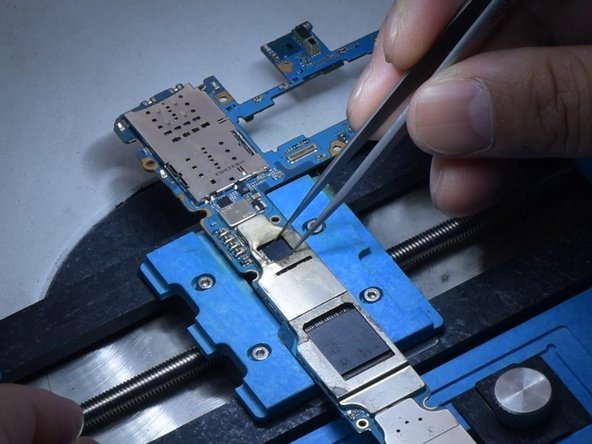
– Pop the motherboard onto the holder and treat the power IC to some paste flux—think of it as a spa day for your circuit.

– Fire up the hot air gun to 340°C, set the airflow to 3, and gently lift off the IC. Smooth and steady wins the race!

Step 4

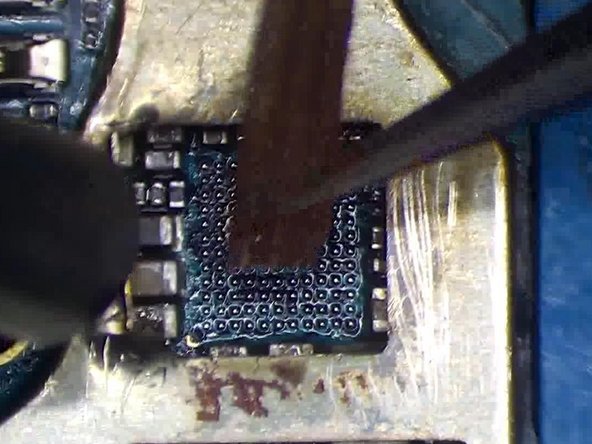
– Grab your solder wick and give that bonding pad a good clean-up.

– Flip your multimeter to diode mode and check the vibes on inductor L5039.

– Spruce up the bonding pad with some PCB cleaner, hit it with a little paste flux, and you’re golden!

Step 5

– Line up your new IC like a pro. Hit it with a hot air gun at 340°C, airflow on 2. Let the motherboard cool off, then reconnect the power cable.

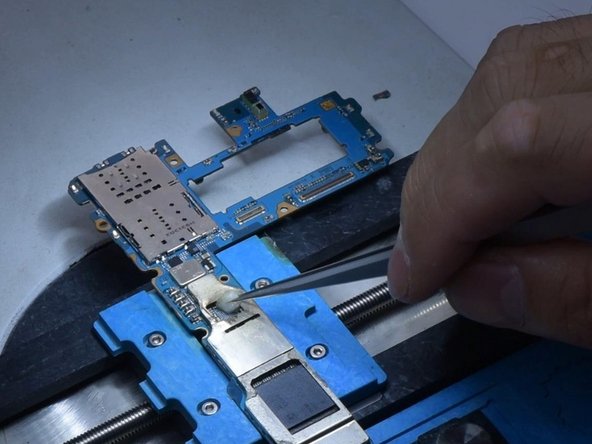
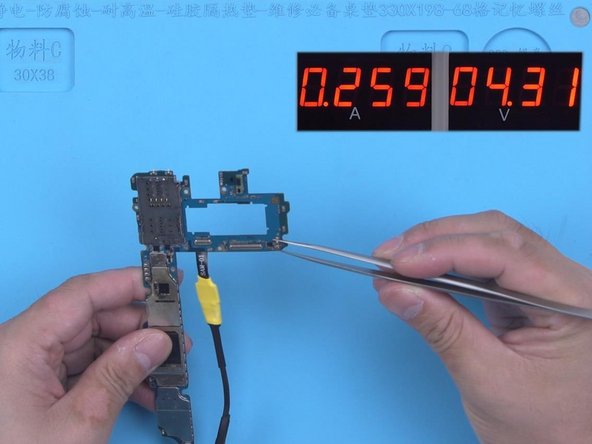
– Grab your trusty tweezers and trigger the boot-up. Watch as the boot current gets back to normal—just like magic.

– Pop that motherboard back in. The phone fires up as usual and your issue is history. If you get stuck, you can always schedule a repair.

Success!
Time to put everything back together—just retrace your steps, and your device will be rocking again in no time. If you hit a snag, you can always schedule a repair.

Samsung Galaxy S10 Plus Motherboard Replacement

Duration: 45 minutes
Steps: 22 Steps

Get ready to tackle the motherboard swap for your Galaxy S10+! The trickiest part? That sneaky back cover. But don’t worry, you’ve got this! Just take it step by step, and if you find yourself in a pickle, you can always schedule a repair.

Step 1

– Grab a SIM card ejector, the right screwdriver bit, or just a trusty paperclip that’s seen better days—poke it into the little hole on the SIM tray at the top edge of the phone, next to the plastic antenna strip.

– Give it a good push—the tray will pop out like magic.

– Slide the SIM card tray out and set it aside.

– When you’re ready to put everything back, just make sure the SIM card sits in the tray the right way. No upside-down surprises!

Tools Used
  1. SIM Card Eject ToolSamsung Galaxy S10 Plus Motherboard Replacement

Step 2

– First up, unplug your device and power it down — no surprises here. Next, warm up an iOpener and gently press it against the back cover’s right edge for about two minutes to soften things up. While you’re waiting, glance at the image of the back cover you’ve removed and take note of where the adhesive is sticking—it’s like your map for the next steps. If you hit a snag or need hands-on help, remember you can always schedule a repair with Salvation Repair.

Tools Used
  1. iOpenerSamsung Galaxy S10 Plus Motherboard Replacement

Step 3

– Stick a suction cup on the back of your phone, aiming for the center of the right edge—that’s where the glue takes a coffee break.

– Give the suction cup a solid pull, nice and steady, until you spot a gap forming between the back cover and the frame.

– Slide the pointy end of an opening pick into that newly formed gap like you’re sneaking into a secret club.

– If the gap is playing hard to get, hit the edge with a little more heat and repeat your previous moves.

– Feeling stubborn resistance? A few drops of strong isopropyl alcohol (90% or higher) along the seam can help the glue loosen up.

Step 4

– Rest the warm right edge of your phone on something that’s about 0.5 inches (13 mm) thick. This helps tilt the phone just right for that opening tool action!

– Hold the left edge of the phone with your fingers to keep it steady while you give that suction cup a good, firm pull.

– Gently press the edge of your opening tool into the gap between the back cover and the frame.

– Slide the opening tool back and forth along that seam a few times to work it open.

Step 5

– Gently slide a opening pick around the edge of the device, slicing through the adhesive like a hot knife through butter. Keep it smooth and steady to avoid any damage.

– Once you’ve got a good groove going, leave that pick in the seam to hold the adhesive apart—think of it as a little spacer to keep things from sealing back up too soon. If you need a hand, you can always schedule a repair.

Step 6

– Warm up the bottom edge of your phone with a heated iOpener for about two minutes.

Tools Used
  1. iOpenerSamsung Galaxy S10 Plus Motherboard Replacement

Step 7

– Grab your opening pick and slide it into the right edge near the bottom right corner—think of it as giving your device a gentle nudge.

– Ease the pick around the corner, gliding along the bottom edge and looping around the bottom left like you’re tracing a secret path.

– Leave your pick chilling in the seam so the adhesive doesn’t get any ideas about sticking back together.

Step 8

– Keep that heat flowing and gently slice around the leftover edges of your phone. You’ve got this!

Step 9

– After you’ve worked your way around the phone with the opening pick, give one edge a gentle twist. This will help pop the back cover loose from the frame.

– Slow and steady wins the race—lift the back cover carefully. If it’s still sticking, go ahead and slice through any stubborn adhesive with your picks.

– Remove the back cover and set it aside. You’re halfway there!

– When putting things back together, it’s a smart move to turn on your phone and check that everything works before sealing the back cover. Don’t forget to power down again before you keep tinkering.

– Follow this guide to slap the back cover back on, move and install the camera bezel, and swap out the adhesive for a fresh stick. If you run into trouble, you can always schedule a repair.

Step 10

– Take out all nine of those 4 mm Phillips screws holding the top midframe in place. Let’s get this phone ready for its next move!

Step 11

– Pop the pointy end of your spudger into the little notch on the midframe’s right side, hanging out near the Bixby button.

– Give it a gentle pry to loosen up the midframe. It’s like convincing the phone to let go—no arm wrestling required.

Tools Used
  1. SpudgerSamsung Galaxy S10 Plus Motherboard Replacement

Step 12

– Slip the tip of your spudger into the little notch on the left side of the phone, just hanging out near the power button.

– Gently pry upwards to start freeing the midframe from its snug spot in the phone.

Tools Used
  1. SpudgerSamsung Galaxy S10 Plus Motherboard Replacement

Step 13

– Gently lift the midframe from the top corners and set it aside—like you’re opening a treasure chest filled with circuits.

– Ready to put the top midframe back on? Here’s the smooth way:

– Line up the top edge of the midframe with the phone, then lay it down like you’re tucking it in for a nap.

– Give the edges a little press with your fingers all around the perimeter until you hear those satisfying clicks. The midframe should sit flush with the phone edge, looking neat and snug.

Step 14

– Slide the flat end of a spudger right under that battery connector, which is hanging out with the motherboard just below the rear-facing camera. It’s like a little game of hide-and-seek!

– Gently pry upwards to give that connector the nudge it needs to disconnect from its cozy socket.

– Now, carefully push the battery’s flex cable away from the motherboard socket. We don’t want any accidental reunions happening here!

Tools Used
  1. SpudgerSamsung Galaxy S10 Plus Motherboard Replacement

Step 15

– Start by removing the seven 4 mm Phillips screws that hold the lower midframe to the phone. Once those are out, you’re on your way to opening things up—no sweat. If you need a hand, just schedule a repair and we’ll take care of the heavy lifting.

Step 16

– Take your spudger and slide the tip into the notch near the bottom right corner of the lower midframe—look for the tiny triangle marking the spot.

– Give it a gentle lift to pop the midframe loose from the phone.

Tools Used
  1. SpudgerSamsung Galaxy S10 Plus Motherboard Replacement

Step 17

– Grip the loose end of the midframe with your fingers and gently lift it upward. Give the midframe a little wiggle to help loosen those remaining clips. Carefully remove the lower midframe — keep in mind, the loudspeaker is built right into it. To put the lower midframe back, line up its bottom edge with the phone’s edge and press it into place. If you need a hand, you can always schedule a repair.

Step 18

– Grab the flat end of your spudger and gently pop up the display connector from its spot on the motherboard (bottom right corner of the phone). Easy does it—no need to rush!

Tools Used
  1. SpudgerSamsung Galaxy S10 Plus Motherboard Replacement

Step 19

– Grab the flat end of your spudger and gently pop the headphone jack connector out of its cozy spot on the motherboard.

Tools Used
  1. SpudgerSamsung Galaxy S10 Plus Motherboard Replacement

Step 20

– Loosen and remove the three Phillips screws holding the motherboard in place: one 3.8 mm screw and two 3.7 mm screws. Keep these screws safe if you plan to reassemble later. Need a hand? You can always schedule a repair.

Step 21

– Slip the tip of your spudger under the right side of the motherboard, hanging out near the volume up button.

– Lift up gently and give the motherboard a nudge to pop it loose from its spot.

Tools Used
  1. SpudgerSamsung Galaxy S10 Plus Motherboard Replacement

Step 22

– Now it’s time to put your device back together—just follow these steps in reverse, and you’ll be golden!

– Once you’ve wrapped up the repair, be sure to give your handiwork a test run with this guide.

– Got e-waste? Don’t toss it! Take it to an R2 or e-Stewards certified recycler and do your part for the planet.

– If things didn’t quite go according to plan, no worries! Swing by our Answers community for some troubleshooting tips and tricks.

Success!

Samsung Galaxy S10 and S10e Teardown

Duration: 45 minutes
Steps: 17 Steps

The iPhone may have gone full Roman numerals, but Samsung kept things classic with the S10 and S10e. Are these phones as straightforward as their names? Let’s crack them open and see what’s really inside. Want more tech teardown goodness? Follow us on Twitter, Instagram, and Facebook. If you want updates delivered straight to your inbox, check out our newsletter.

Step 1

– Curious about what makes the S10e stand out from the S10? Let’s dig into the specs and find out! We’ll look at the display sizes—5.8″ Super AMOLED Infinity-O on the S10e versus 6.1″ on the S10—along with the processors, cameras, and fingerprint sensors. The S10e features a side-mounted fingerprint button, while the S10 sports an ultrasonic sensor tucked under the screen. Plus, we’ll check out the headphone jack, microSD slot, and water resistance ratings. Exploring these differences helps us understand what’s behind the design choices. If you need a hand with anything more involved, you can always schedule a repair.

Step 2

– At first glance, these smartphones might seem pretty mysterious with their sleek, monolithic designs. But take a closer look at the S10 and S10+—you’ll find those cool curved display edges waiting to be admired!

– Turning these devices around reveals a fascinating feature: while all of them come equipped with wide-angle and ultra-wide cameras, the S10 and S10+ have a little extra flair with their telephoto camera.

– While we might feel like we’ve time-traveled back to the 1800s when gazing at these phones, Creative Electron has got our back with their cutting-edge X-ray photos that unveil all the secrets hidden beneath the surface.

– Check this out: the S10+ sports a thick ceramic back cover that makes it much less transparent to X-rays compared to its glassy counterparts. In other words, it shows up much darker on X-ray scans!

Step 3

– The S10e and S10 may look like twins, but the S10e rocks a chunky power button that moonlights as a fingerprint sensor.

– The S10 is a bit mysterious—you won’t spot its fingerprint sensor unless you bust out the teardown skills.

– Both models are still rocking headphone jacks, plus matching USB-C, mic, and speaker ports. Classic moves.

– Up top, you’ll catch your first real-life look at those hole-punch displays, already sporting their screen protectors.

Step 4

– A shiny new phone may come with a shiny new way to open it… or maybe not! We’re back to warming things up and putting our trusty iSclack to work.

– As we peel the backs off our phones, we’re on the lookout for traps. Not today, Admiral Ackbar! The panels pop off with ease.

– Just when things start to cool down, we spot some clever heat-dissipating graphite pads snugly placed on the back covers. Looks like something’s built to handle the heat without singeing your fingers.

– And wait, is it just us, or is the adhesive playing nice this time around?

Tools Used
  1. iSclackSamsung Galaxy S10 and S10e Teardown

Step 5

– Just a few standard Phillips screws stand between us and the exciting parts! Our Marlin driver set has got your back, and thankfully Samsung has kept it simple with just one driver for this step.

– These midframe assemblies come with their own special feature: they can now wirelessly charge other gadgets too!

– That’s likely why the coils are snugly nestled between two layers of graphite this year—a wireless charger that can both send and receive will create a lot more heat.

Step 6

– Samsung’s headphone jacks are compact—just 12 mm tall and 8 mm wide—and completely standalone. We love a good modular part! Too bad there’s no space for one in iPhones or iPads.

– We’ll dive into cameras soon, but first, let’s move those selfie cams aside so we can free the motherboard.

– Our teardown pro pulls off a smooth, perfectly coordinated motherboard lift…

– …or do they? Stay tuned!

Step 7

– Peeking under the motherboard reveals some pretty interesting bits. First off, that big copper heat pipe sitting beneath the board is definitely beefier than the one in the S9—it’s more like the one from the Note9. Next, we carefully peel away a multi-layer thermal interface material from the board. That wide copper surface helps with heat transfer, but since it’s soft metal, a flexible interface layer helps fill in gaps and keeps everything running cool and smooth. We also notice a thin sticker that looks like it provides RF shielding, especially since there’s a large hole in the can lid underneath—showing a PMIC and a pink thermal pad. To sum it up: fast charging and reverse wireless charging crank up the thermal stress on the system, and Samsung has gone all out with cooling measures to keep things in check. If you want to get more hands-on, you can always schedule a repair with Salvation Repair.

Step 8

– Start by carefully removing the main camera array from the board. It’s housed in a yellow plastic frame—probably ABS or nylon in its natural hue, giving it a slightly retro vibe, but that’s part of the charm. Next, set each camera array aside near its corresponding selfie camera—left for the main, right for the selfie. For the Galaxy S10, note that the left array has an extra camera: a 12 MP telephoto with ƒ/2.4 aperture and OIS, connected on the same connector as the standard wide-angle. The 12 MP wide-angle cameras also feature OIS and the dual-aperture setup from the S9+. Lastly, the 16 MP ultra-wide modules, with ƒ/2.2, are a bit bulkier with thicker plastic frames. Want to see what’s happening inside? An X-ray view reveals the telephoto camera’s sensor and OIS electromagnets. If you need help with the more intense teardown steps, you can always schedule a repair.

Step 9

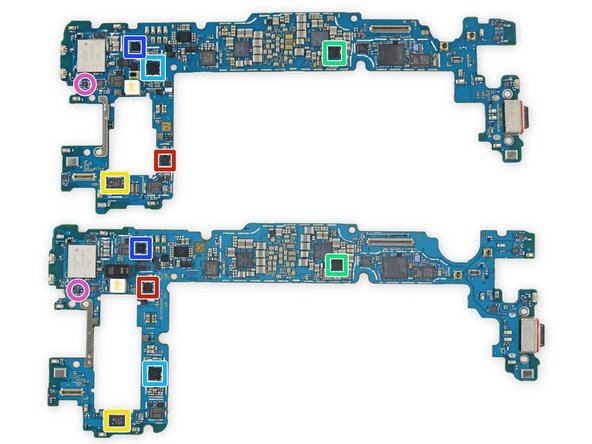
– Alright, let’s dive right into the heart of the matter—those chips! On the top side of our motherboards (S10e on top, S10 at the bottom), here’s what we’ve got:

– S10e: THGAF8T0T43BAIR 128 GB Toshiba UFS NAND flash storage

– S10: KLUFG8R1EM-B0C1 512 GB Samsung eUFS NAND flash storage

– Samsung K3UH7H70AM-AGCL LPDDR4X sitting proudly above the Qualcomm Snapdragon 855 SoC

– Qualcomm WCD9341 audio codec making sure your tunes sound great

– Qorvo QM78062, probably a snazzy RF Fusion front-end module

– Maxim MAX77705C PMIC keeping everything powered up

– Skyworks SKY78160-51 Low Noise Amplifier, because noise is so last season

Step 10

– Samsung really went all out this time, adding even more tech magic to the flip sides:

– Murata KM8D03042 (your likely Wi-Fi/Bluetooth buddy)

– Qualcomm SDR8150 RF Transceiver (the communication wizard)

– Qualcomm PM8150 Power Management (keeping the power flow just right)

– IDT P9320S wireless power receiver (your wireless charging friend)

– Qorvo QM78062 Power Amplifier Module (likely boosting those signals)

– NXP PN80T NFC controller w/ Secure Element (for those tap-to-pay moments)

– Qualcomm QDM3870 RF front end module (laying the groundwork for great connectivity)

Step 11

– We’ve checked out the big-ticket components—now let’s give a shout-out to the unsung heroes playing backstage:

– Cirrus Logic CS35L40 audio amplifier

– Qualcomm QET5100 envelope tracker

– Skyworks SKY13716-11 low-band LNA front-end module

– Probably a Samsung S2DOS05 display power management IC

– Probably a Samsung S2MPB02 camera power management IC

– STMicroelectronics STM32G071EBY6 32-Bit Arm Cortex-M0+ microcontroller with 128 Kb flash memory

– NXP Semiconductor BGU8103 GPS/GLONASS/Galileo/COMPASS low noise amplifier

Step 12

– And now, for the grand finale:

– STMicroelectronics LPS22HH pressure sensor

– STMicroelectronics LSM6DSO accelerometer

– Samsung S2MIS01 MST driver

– Most likely a Diodes Incorporated AH1897T Hall Effect sensor

– Vishay DG2730 USB 2.0 DPDT analog switch

– NXP Semiconductor NCX2200 low voltage comparator

– RDA Microelectronics RDA6213N FM transceiver (probably)

Step 13

– Time to tackle those batteries! Both are stuck down tight to their metal midframes—no easy pull tabs here.

– No stress—we’ll use some adhesive remover and let it do its thing while the glue chills out.

– The S10e packs an 11.94 Wh battery, while the S10 steps it up with 13.09 Wh (that’s a 13% bump from last year’s 11.55 Wh).

– Just for comparison, the iPhone XR runs on 11.16 Wh, and the XS has 10.13 Wh.

Step 14

– Alright, we’re going in! Removing these ultra-thin displays is always a gamble, but we like living dangerously. Once inside the S10, you’ll spot the fancy ultrasonic fingerprint reader.

– Cool tech, but don’t get too attached—the sensor is stubborn and not likely to survive an extraction. We threw everything short of a kitchen sink at it, and it’s still holding on for dear life.

– Other chips you’ll see:

– Qualcomm QBT2000 Ultrasonic Fingerprint Sensor Controller

– If the fingerprint sensor ever throws a tantrum, just know that a new screen might cost you a small fortune. If things get dicey, you can always schedule a repair.

– Samsung S6SY771X Touchscreen Controller

– Winbond W25Q80EWUXIE 8 Mb Serial Flash Memory

Step 15

– Removing the flat display on the S10e isn’t exactly a walk in the park, but it’s a bit less intimidating than tackling the curved S10 screen. Heads up—these displays probably won’t be winning any Fortnite tournaments after this. The S10e doesn’t have that fancy ultrasonic tech glued on the back, but it’s got its own familiar feature: a capacitive touch sensor built right into the power button. Just a heads-up: this repair means peeling the entire screen off to get to the button—kind of a full-on display removal mission. The touch controller IC inside is the same one used in last year’s S9s and previous Galaxy models, so it’s a familiar face in the repair world. And that serial flash memory? It’s a GigaDevice GD25LH40C 4 Megabit chip, sitting quietly, waiting to be handled. If you need a hand with any of this, you can always schedule a repair.

Step 16

– These ultra-slim Samsung displays don’t just look cool—they also help keep things chill inside your phone with layers of copper and graphite working together to whisk away heat from those busy components.

– See that camera hole? That’s no accident! It’s laser-zapped out, pixel by pixel, carving a perfect tunnel right through the midframe and motherboard straight to the camera. Science, but make it snazzy.

– Now, the hidden sensors—proximity and fingerprint—are even sneakier. They peek straight through the OLED screen, making for a wild edge-to-edge look. You won’t notice them during regular use, but with the screen popped off, they’re suddenly playing peekaboo.

Step 17

– We went all-in and took apart two phones just for you—here’s the highlights if you’re short on time:

– But that’s not all! If you’re feeling extra curious, check out our third teardown: we’ve got a video walkthrough of the S10+.

– Now let’s see how these phones stack up with their repair scores.

– Big batteries inside, but they’re stuck down with glue and swapping them isn’t a breeze.

– These phones can wirelessly charge other devices, but heads up—it generates a lot of heat and could be tough on your battery in the long run.

– The screens are cool and packed with tech, but replacing them will still hit your wallet and patience hard—especially now that the fingerprint sensor’s moved. If this step looks impossible, you can always schedule a repair.

Success!

Samsung Galaxy S10e Bixby Button Remap

Duration: 45 minutes
Steps: 6 Steps

Looking to give your Bixby button a new job on your Samsung Galaxy S10e? You’ve landed in the right spot! There’s a simple way to remap that button right from your settings app, so no need to stress about your phone getting hurt. Let’s dive in and make it happen!

Step 1

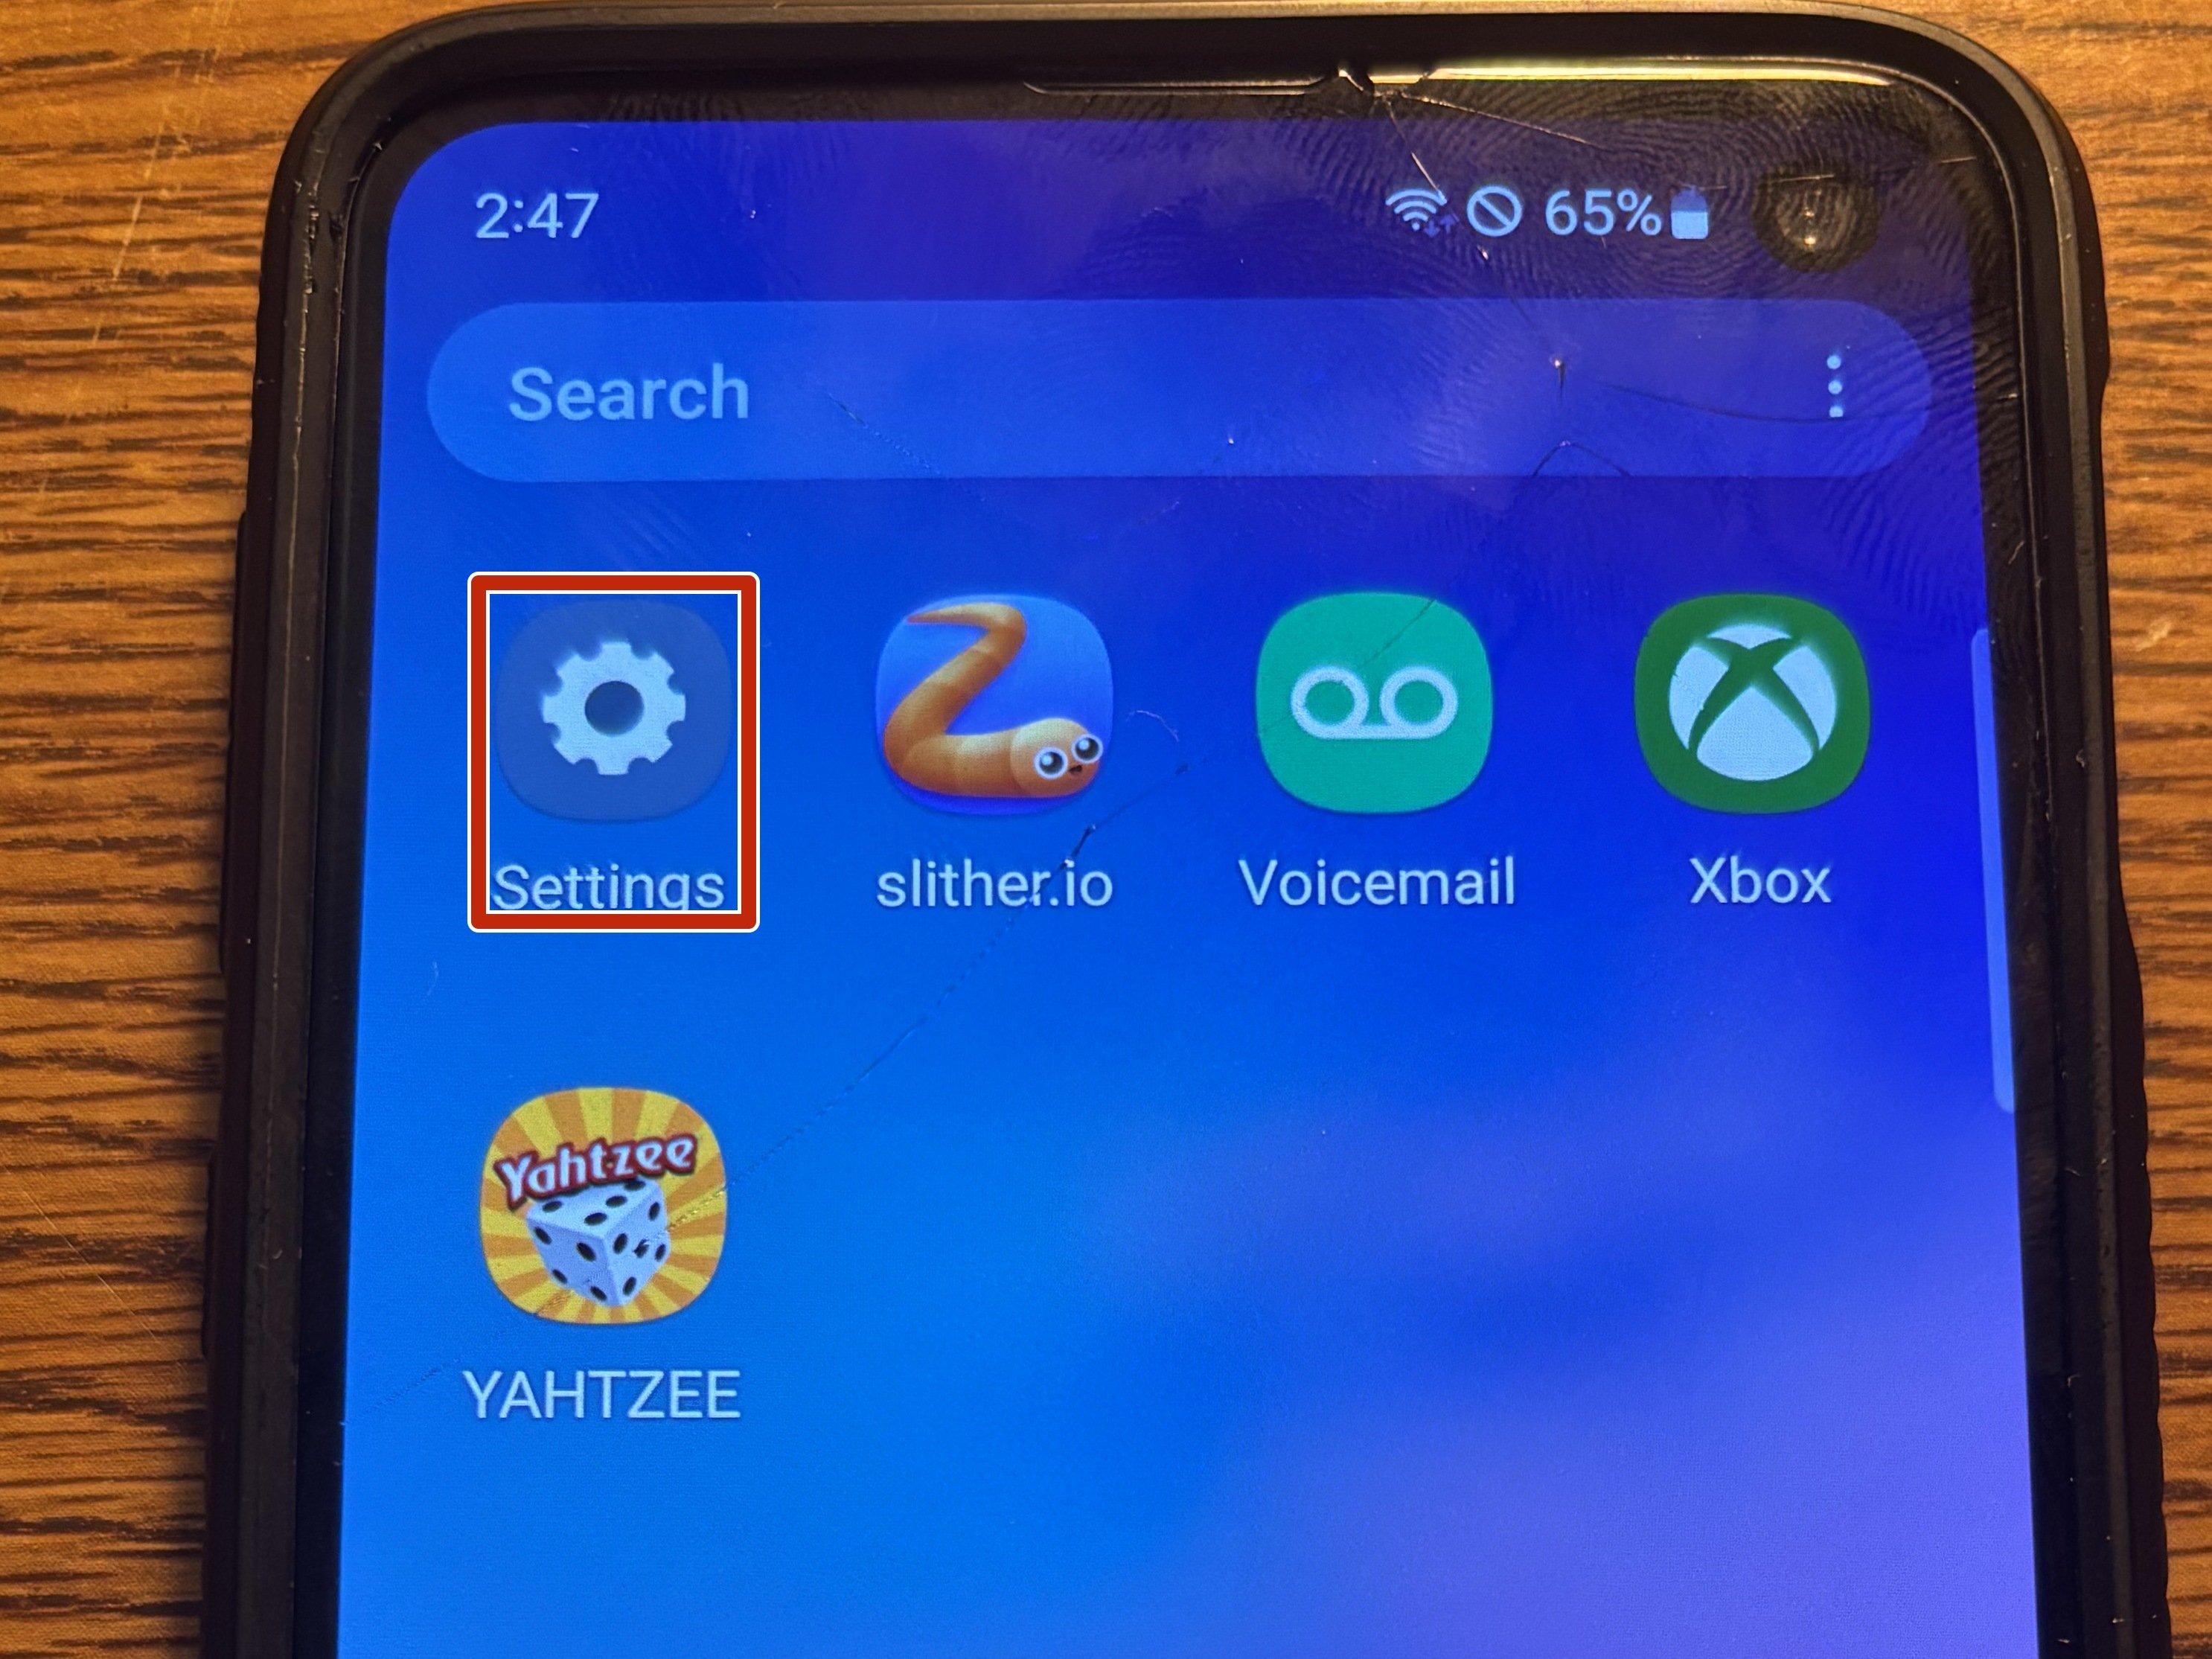
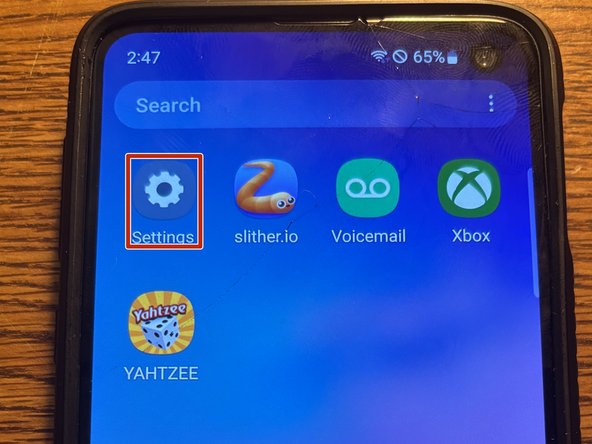
– Pop open your settings app—it’s where the magic happens!

Step 2

– Head over to the ‘Advanced Features’ section—it’s usually hanging out right there in your settings, just waiting for you to tap it.

Step 3

– Tap that Bixby key like you mean it!

Step 4

– Flip the switch for ‘Single press to open Bixby’ to turn on ‘Use double press,’ then tap on the text to confirm. Easy peasy! If you need a hand, you can always schedule a repair.

Step 5

– Next, go ahead and tap on ‘Open App’ to get things rolling!

Step 6

– Give that ‘Flashlight’ button a tap, or pick any other feature that catches your eye.

Success!
Your phone’s new feature is ready for action! If you run into any trouble, you can always schedule a repair.

Samsung Galaxy S10e Wireless Charging Coil Replacement

Duration: 45 minutes
Steps: 22 Steps

In this guide, we’ll walk you through the fun adventure of removing and swapping out the wireless charging coil for your Samsung Galaxy S10e. With just a little bit of care and attention, you’ll have your device charged up and ready to go in no time!

Step 1

– Power down your phone before you get started—let’s not have any unexpected surprises.

– Grab your iOpener and heat up the right edge of the back cover for a couple of minutes to loosen up that stubborn adhesive.

Tools Used
  1. iOpenerSamsung Galaxy S10e Wireless Charging Coil Replacement

Step 2

– Get ready to dive in! In the upcoming steps, we’re going to slice through the adhesive that’s holding the back cover in place.

– From the outside of your phone, you’ll be making your way through the adhesive in the areas we’ve highlighted for you.

– The adhesive is a bit more chill on the right side of the phone, just under the Bixby button, so that’s where you want to start!

Step 3

– Attach a suction cup to the back cover, aiming for the heated edge near the Bixby button where the adhesive is at its weakest. Let’s get that cover off with a little finesse!

Step 4

– Prop up the warm edge of your phone on something that’s about 0.5 inches (13 mm) thick. This nifty angle will make it a breeze to slide in that opening tool.

– Use your suction cup to gently lift the right edge of the back cover, creating a little gap between the back cover and the frame.

– Now, slide the edge of your opening tool into that gap.

– It might take a bit of muscle! If you’re struggling, don’t hesitate to apply a little more heat to soften that adhesive, and give it another go. Just a heads up, the adhesive cools off quickly, so you might need to warm it up a few times.

Tools Used
  1. iOpenerSamsung Galaxy S10e Wireless Charging Coil Replacement

Step 5

– Gently slide the opening tool along the right edge of your phone to carefully cut through the adhesive holding the back cover in place. Take it slow—you’ve got this!

Step 6

– Slide an opening pick along the edge, right next to the opening tool. Let it hang out there to stop the glue from sticking back together while you keep working.

Step 7

– Warm up your trusty iOpener and give the top edge of your phone a cozy two-minute hug.

Tools Used
  1. iOpenerSamsung Galaxy S10e Wireless Charging Coil Replacement

Step 8

– Grab your trusty opening pick and gently insert it at the top right corner of your device. Slide it around the corner and across the top edge like you’re tracing a smile!

– Keep that opening pick in place to keep the adhesive from staging a comeback. You’ve got this!

Step 9

– Warm up the left edge of your phone with a heated iOpener for about two minutes.

Tools Used
  1. iOpenerSamsung Galaxy S10e Wireless Charging Coil Replacement

Step 10

– Slide a new opening pick into the top left corner and gently glide it down the left edge of your phone. You’re doing great!

– Keep that opening pick snugly in place along the left edge to stop the adhesive from getting all clingy again. Nice work!

Step 11

– Heat things up by placing a warmed iOpener along the bottom edge of your phone for about two minutes.

Tools Used
  1. iOpenerSamsung Galaxy S10e Wireless Charging Coil Replacement

Step 12

– Grab an opening pick, sneak it into a bottom corner of your phone, and glide it smoothly along the bottom edge to loosen up that sticky adhesive.

Step 13

– Grab those opening picks and gently wiggle them to lift the back cover. Take your time, we want to keep things smooth!

– Once you’ve got it, go ahead and remove the back cover like a pro.

– If you feel any stubbornness, just pause for a moment. Use an opening pick to slice through any leftover adhesive. You’ve got this!

Step 14

– Follow this step-by-step to pop off the back cover and swap out the adhesive. Keep it steady and gentle—you’re almost there! If you hit a snag, remember you can always schedule a repair for extra help.

Step 15

– Time to grab your Phillips screwdriver and take out those eight 3.9 mm screws holding the upper midframe in place. Let’s make it rain screws—just keep them somewhere safe!

Step 16

– Gently slide an opening pick into the bottom right corner of the upper midframe to break free the adhesive that’s binding it to the lower midframe. Take your time and be careful—you’re doing great!

Step 17

– Let’s kick things off! Slide the point of your spudger into that nifty little cutout on the right edge of the plastic upper midframe, just a stone’s throw from the Bixby button.

– Now, using that same trusty spudger, give the midframe a gentle pry to lift it away from the phone’s chassis. You’ve got this!

Tools Used
  1. SpudgerSamsung Galaxy S10e Wireless Charging Coil Replacement

Step 18

– Gently lift the midframe using the plastic section and slide it out of the phone. To put it back, start by hooking the top edge of the assembly into the phone’s frame, then carefully press down on the rest of the assembly until it clicks into place. If you need a hand, you can always schedule a repair.

Step 19

– Place a heated iOpener on the top half of the midframe and hold it there for about a minute. This gentle warmth helps loosen things up, making the rest of the disassembly smoother. If you need a hand with the process, you can always schedule a repair.

Tools Used
  1. iOpenerSamsung Galaxy S10e Wireless Charging Coil Replacement

Step 20

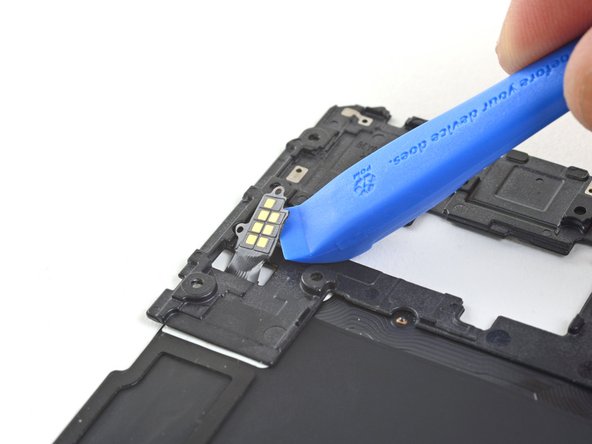
– Take your opening tool and gently lift the wireless charging coil’s contact pad away from the midframe—no need to rush, just a smooth move!

Tools Used
  1. Isopropyl AlcoholSamsung Galaxy S10e Wireless Charging Coil Replacement

Step 21

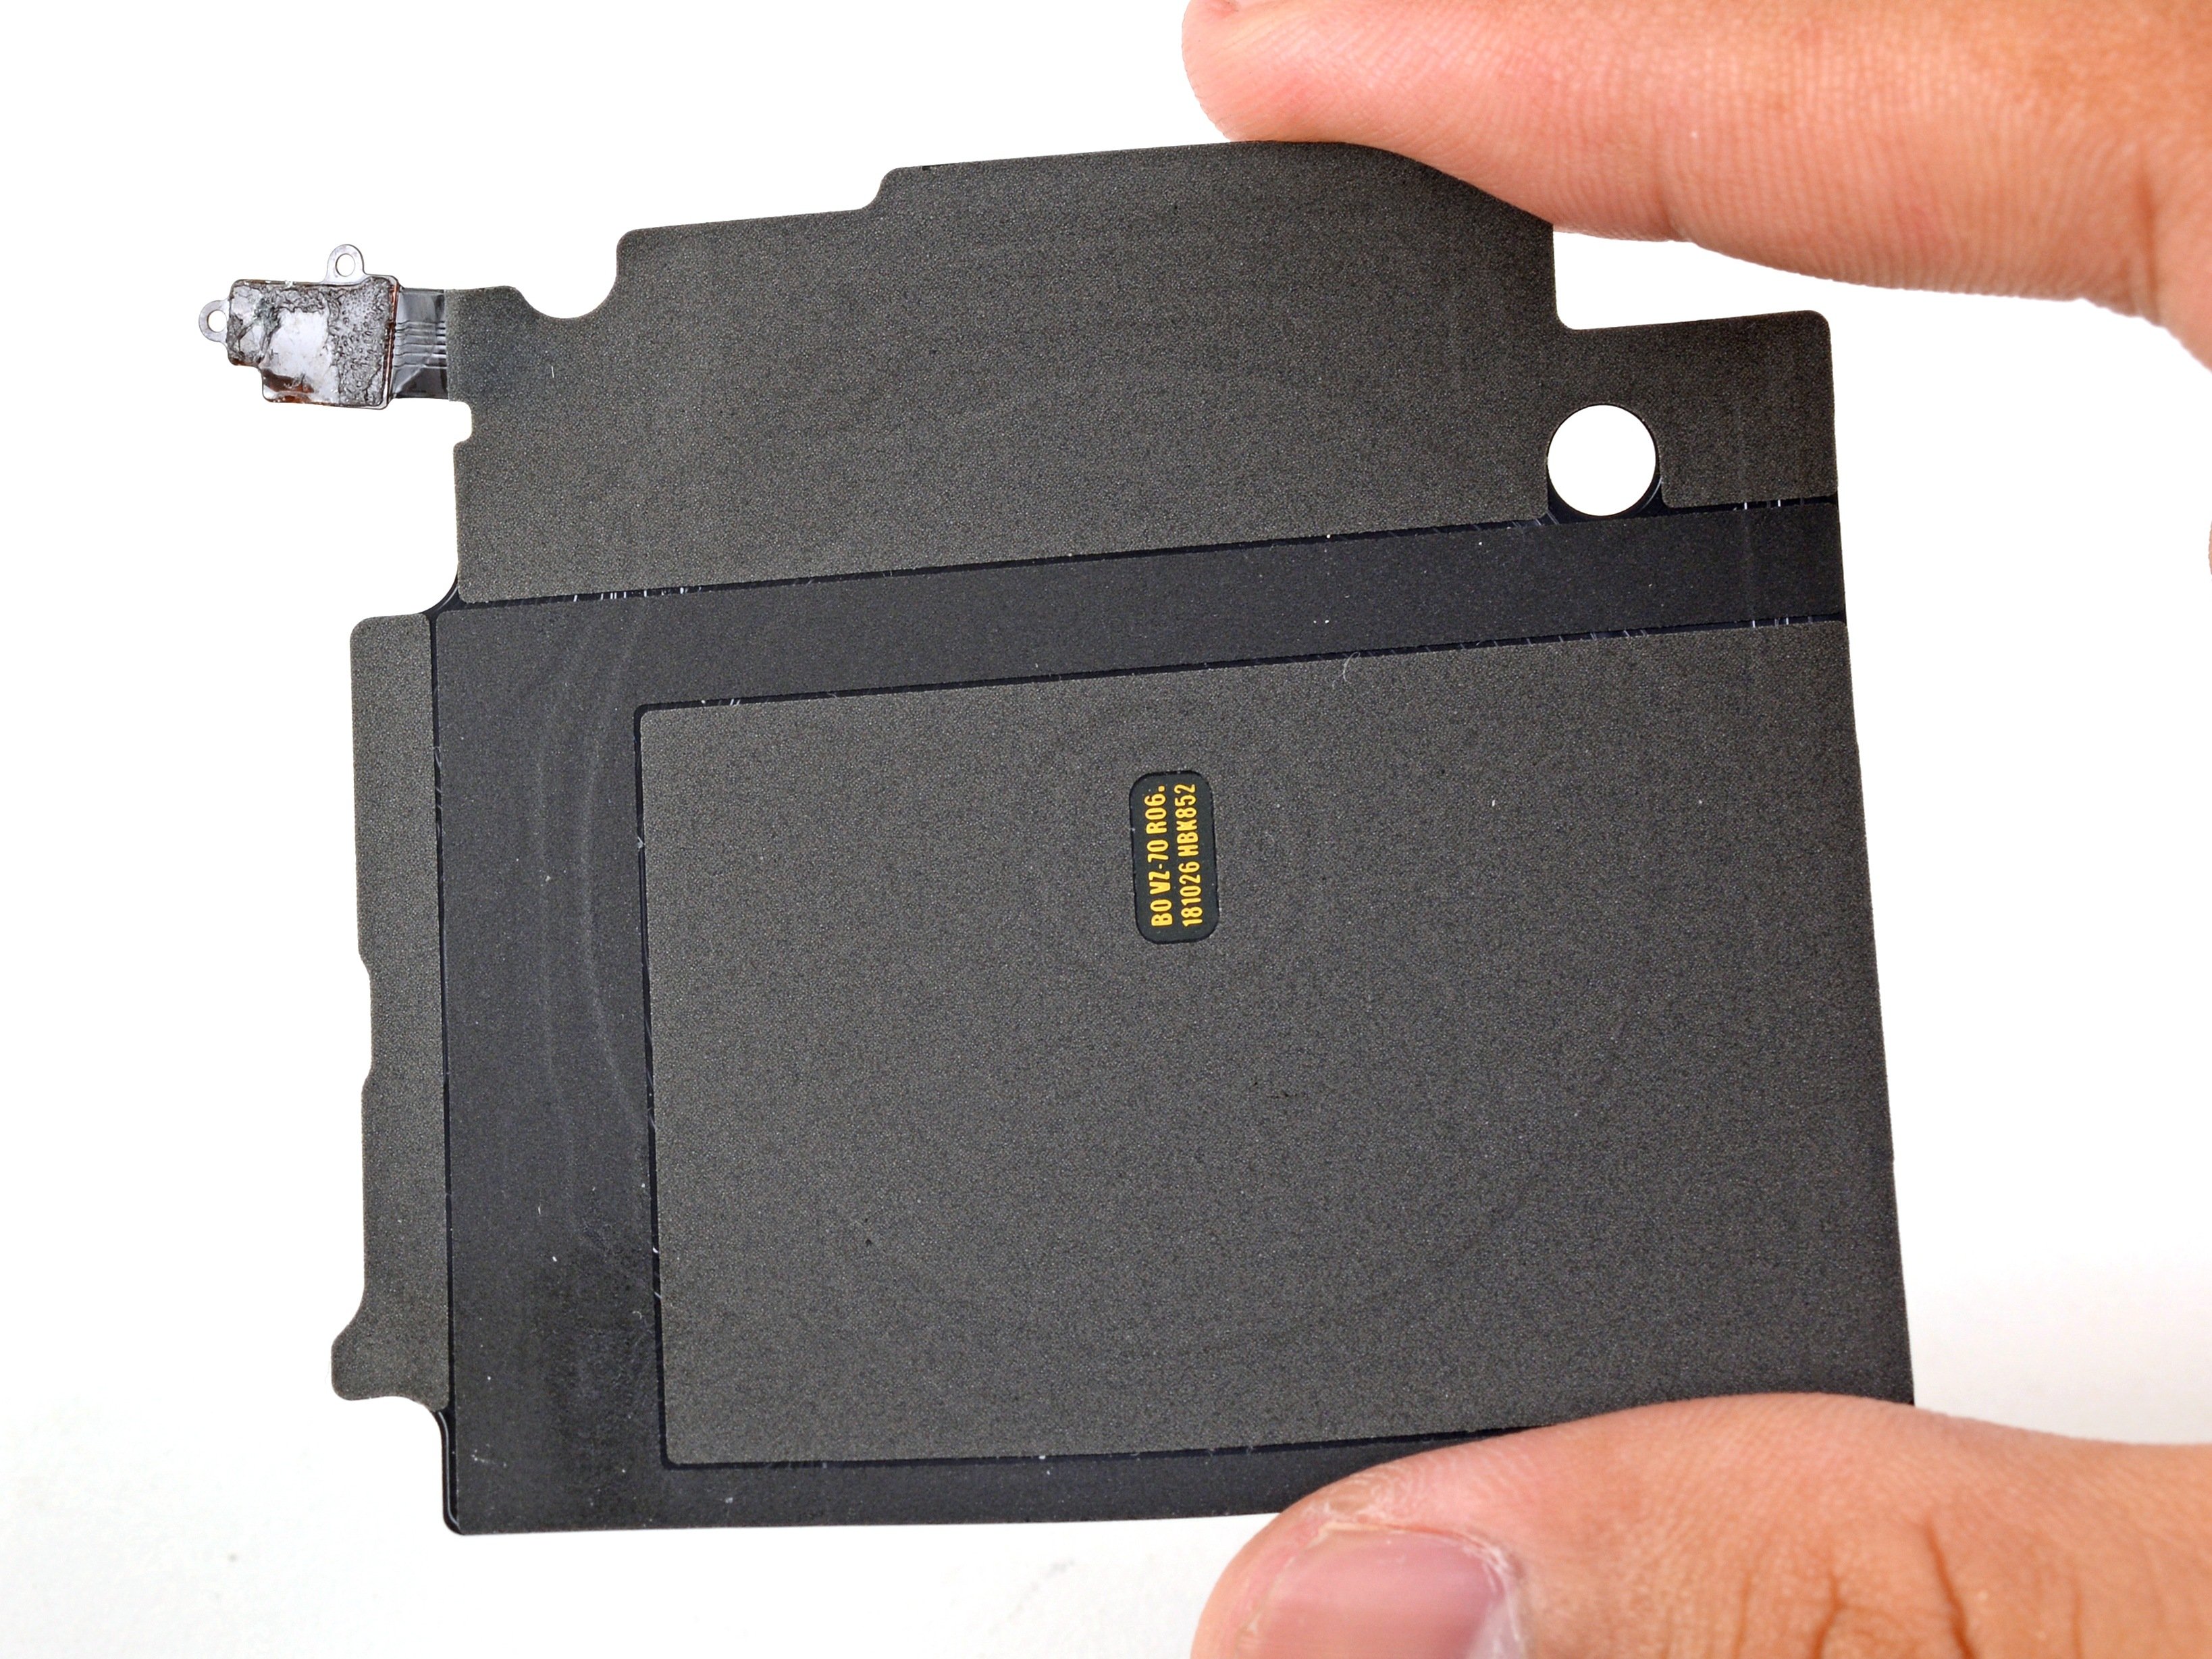
– Gently lift the wireless charging coil off the midframe—no need to rush, just take it slow and steady.

Step 22

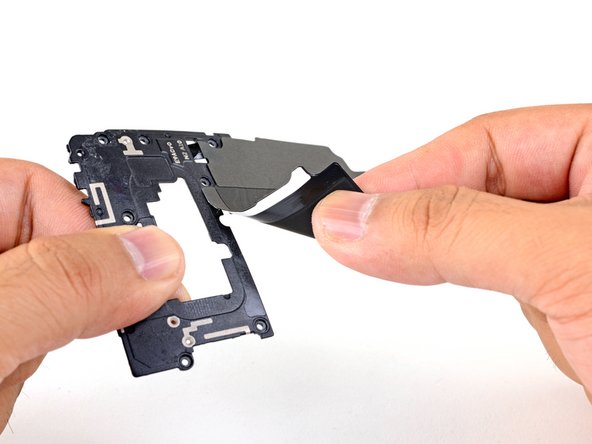
– Gently pull the wireless charging coil’s contact pad out of its midframe slot to loosen it up.

– Take out the wireless charging coil carefully.

– When you’re putting things back together, use some double-sided Tesa tape to stick the contact pad onto the midframe—it helps keep everything in place.

– Compare your new replacement part with the original—sometimes you need to transfer bits or peel off adhesive backing on the new part before it’s ready to go.

Success!
Time to wrap it up! Just follow these steps in reverse order to put everything back together.
Once you’re done, use this guide to double-check your work and test the repair.
Things didn’t go quite as planned? No worries, try some basic troubleshooting or swing by our Answers community for some extra help.
Need a hand? If things are still a bit tricky, feel free to schedule a repair.

Samsung Galaxy S10e Screen Replacement

Duration: 45 minutes
Steps: 34 Steps

Ready to swap out that cracked screen on your Samsung Galaxy S10e? Here’s your game plan: you’ll pop off the back cover so you can unplug the screen from the motherboard. The process will break the screen panel, but your phone’s frame stays intact. The screen is made up of the top glass and the display underneath—while you’ll separate the glass from the panel during the repair, the old screen’s headed for retirement and won’t be making a comeback. If things get a bit wild, you can always schedule a repair.

Step 1

– Make sure your phone is powered all the way down before getting started—trust me, it’s less dramatic that way.

– Warm up your iOpener and give the right edge of the back cover a good two-minute spa treatment. This helps loosen up the sticky stuff holding everything together.

Tools Used
  1. iOpenerSamsung Galaxy S10e Screen Replacement

Step 2

– Next up, you’ll be working your magic to slice through the sticky stuff holding the back cover in place.

– From the outside, aim for the highlighted zones—those are your adhesive targets.

– Pro tip: The right side, just below the Bixby button, has the skinniest layer of adhesive.

Step 3

– Stick that suction cup onto the back cover, right up near the heated edge—aim for just below the Bixby button, where the glue is at its weakest. You’ve got this!

Step 4

– Prop up the heated edge of your phone on something about half an inch (13 mm) thick. This gives you a nice angle to sneak in your opening tool.

– Use your suction cup to lift up the right edge of the back cover, just enough to create a little gap between the cover and the frame.

– Slide the edge of your opening tool into that gap like you’re slicing into a stubborn avocado.

– It might take some muscle! If it’s being difficult, reheat the area to loosen up the adhesive—don’t be shy, it cools off quickly and might need a second (or third) round.

Tools Used
  1. iOpenerSamsung Galaxy S10e Screen Replacement

Step 5

– Glide your opening tool along the right side of the phone to gently cut through the adhesive holding the back cover in place.

Step 6

– Gently insert an opening pick into the edge next to the opening tool. Keep the pick in place to stop the glue from sticking back together as you work.

Step 7

– Warm up the top edge of your phone with a heated iOpener for about two minutes. Let the heat work its magic before moving on.

Tools Used
  1. iOpenerSamsung Galaxy S10e Screen Replacement

Step 8

– Slide an opening pick into the top right corner of your phone, then gently glide it around the corner and along the top edge. You’re doing great!

– Keep that opening pick snugly in place to stop the adhesive from getting all clingy again. You’re almost there!

Step 9

– Warm up the left edge of your phone for about two minutes using a heated iOpener—think of it as giving your device a quick spa treatment before you get hands-on.

Tools Used
  1. iOpenerSamsung Galaxy S10e Screen Replacement

Step 10

– Pop a new opening pick into the top left corner and slide it smoothly down the left side of your phone—like you’re buttering toast, but with more tech.

– Let that pick chill on the left edge so the sticky stuff doesn’t try to make a comeback.

Step 11

– Warm up that iOpener and give it a cozy two-minute hug on the bottom edge of your phone.

Tools Used
  1. iOpenerSamsung Galaxy S10e Screen Replacement

Step 12

– Grab an opening pick and slide it along the bottom edge of your phone, starting at one of the corners. This will loosen up that stubborn adhesive and get things moving.

Step 13

– Grab your trusty opening picks and gently get under the back cover – treat it like a secret treasure waiting to be uncovered!

– Carefully lift off the back cover once you’re in – it’s like peeling off a surprise layer of a gift!

– If you feel any stubborn resistance, pause for a moment and use an opening pick to slice through any leftover adhesive that’s playing hard to get.

Step 14

– Get ready to rock this repair! Just follow along as you reinstall the back cover and swap out that adhesive like a pro.

Step 15

– Take out the eight 3.9 mm Phillips screws holding the upper midframe to your phone. Keep those screws somewhere safe—they love to wander off!

Step 16

– Gently slide an opening pick under the bottom right corner of the upper midframe and loosen up that sticky adhesive bonding it to the lower midframe. Take it slow—no need to rush this part!

Step 17

– Begin by slipping the tip of a spudger into the small notch on the right edge of the upper midframe’s plastic section, just near the Bixby button. Gently leverage the spudger to lift the midframe away from the phone chassis. If you need a hand, you can always schedule a repair.

Tools Used
  1. SpudgerSamsung Galaxy S10e Screen Replacement

Step 18

– Gently lift the midframe using the plastic section and carefully take it out of the phone. You’ve got this!

– When it’s time to put it back together, start by inserting the top edge of the assembly into the phone’s frame. Then, with a little love, press down on the rest of the assembly until it clicks into place. Easy peasy!

Step 19

– Gently slide the flat end of a spudger under the battery connector and lift it straight up to disconnect it. Nice and easy—no rush!

Tools Used
  1. SpudgerSamsung Galaxy S10e Screen Replacement

Step 20

– Grab your Phillips driver and get ready to unscrew those seven 3.9mm screws holding the loudspeaker in place. You’ve got this!

Step 21

– Gently insert the tip of a spudger into the notch on the right side of the loudspeaker. Carefully pry upward with the spudger to lift and loosen the speaker.

Tools Used
  1. SpudgerSamsung Galaxy S10e Screen Replacement

Step 22

– Gently lift the loudspeaker out and set it aside.

– When putting things back together, press around the edges of the loudspeaker until it clicks into place.

Step 23

– Grab your trusty spudger and gently pop the screen connector free from its spot on the motherboard. Easy does it—no need to rush!

Tools Used
  1. SpudgerSamsung Galaxy S10e Screen Replacement

Step 24

– Flip your phone over so the screen is staring right back at you.

– Warm up the right edge of the display with a heated iOpener for about two minutes—think of it as a spa day for your phone.

– Look for the display seam—it’s the one above that slim plastic bezel. That’s your VIP entrance for prying the screen loose.

– Avoid the frame seam! It’s hanging out below the bezel, and poking at it will only annoy the plastic. Stick to the display seam for smooth sailing.

Tools Used
  1. iOpenerSamsung Galaxy S10e Screen Replacement

Step 25

– Stick a suction cup onto the heated edge of the display—think of it as a little grabber for your screen.

– Gently pull up on that suction cup with steady, confident force to create a small gap.

– Slide the tip of an opening pick into the seam between the display and the frame—think of it as gently prying it open like a book.

Step 26

– Gently glide that opening pick along the right edge to cut through the sticky stuff holding your device together.

– Once you’re in there, keep the opening pick in the corner to make sure the adhesive doesn’t seal up on you again.

Step 27

– Warm up the bottom edge of the display by applying a heated iOpener for about a minute. This helps loosen things up and makes the next steps smoother. If you need a hand, remember you can always schedule a repair.

Tools Used
  1. iOpenerSamsung Galaxy S10e Screen Replacement

Step 28

– Gently slide an opening pick along the bottom edge to cut through the adhesive, like you’re opening a treasure chest. Keep the pick in the corner to prevent the adhesive from sealing back up, so your next move stays smooth. If you need a hand, you can always schedule a repair.

Step 29

– Work your magic again: heat and slice along each of the other display edges. Take it one side at a time, and keep that patience strong!

Step 30

– Gently lift the display glass and set it aside like royalty—your screen’s grand exit is complete.

Step 31

– Warm up your iOpener and place it on the OLED panel for about a minute. This will help loosen the adhesive and make the next steps way smoother.

Tools Used
  1. iOpenerSamsung Galaxy S10e Screen Replacement

Step 32

– Gently lift the display panel from the right side and ease it away from the frame. Take your time and let it peel off like a sticker—nice and smooth!

Step 33

– Carefully guide the display panel connector through the frame like you’re threading a needle—steady hands win the day!

Step 34

– Ready to put everything back together? Just retrace your steps in reverse order.

– Got old parts or gadgets? Drop them off at an R2 or e-Stewards certified recycler and give them a second life.

– Once you’re done, check out our guide to make sure your repair is working smoothly.

– If your device is still being stubborn, try some basic troubleshooting, or chat with our Answers community for advice. If you need backup, you can always schedule a repair with us!

Success!
Ready to put things back together? Just reverse the steps and you’re golden.
Got old parts? Drop them off at a certified e-waste recycler so they can be put to good use.
Done with the fix? Check out our guide to make sure everything’s working as it should.
If your repair didn’t go as planned, don’t sweat it—try some basic troubleshooting or visit our Answers community for ideas. If you’re stuck, you can always schedule a repair.

🍪
Have a cookie! This site uses cookies to enhance your experience. Opt-Out Options.