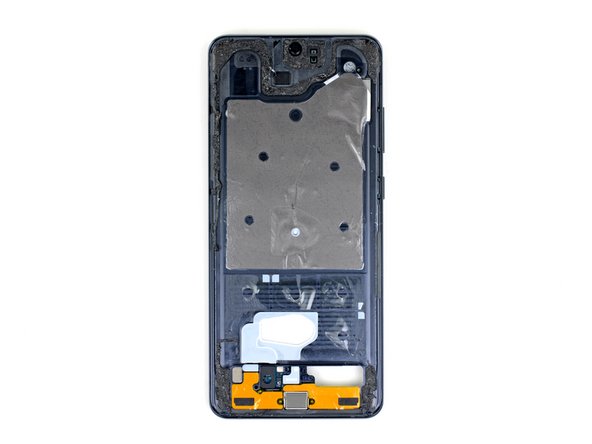
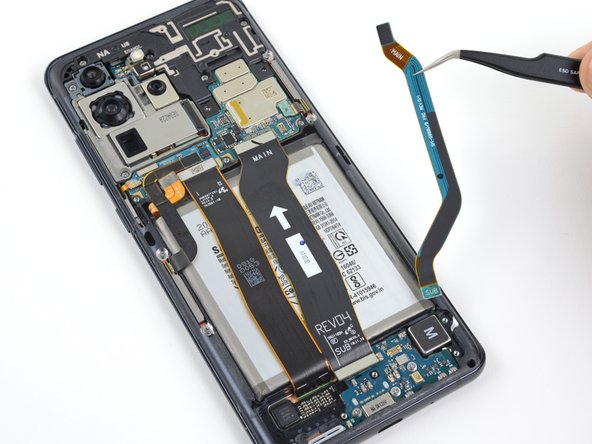
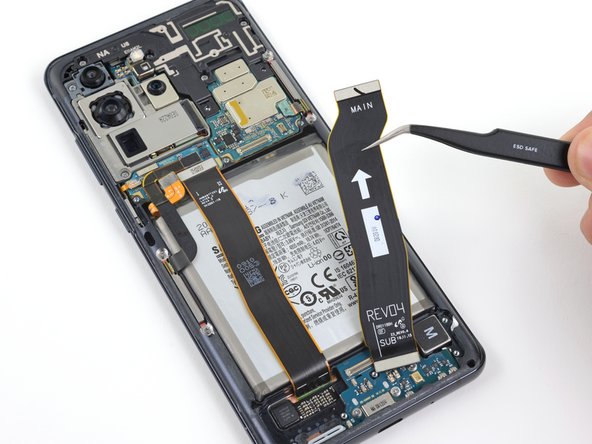
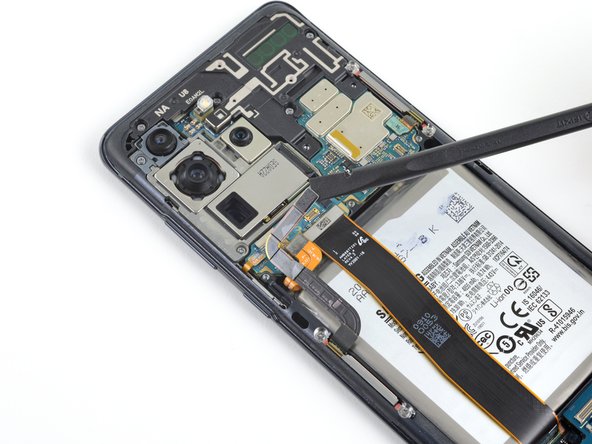
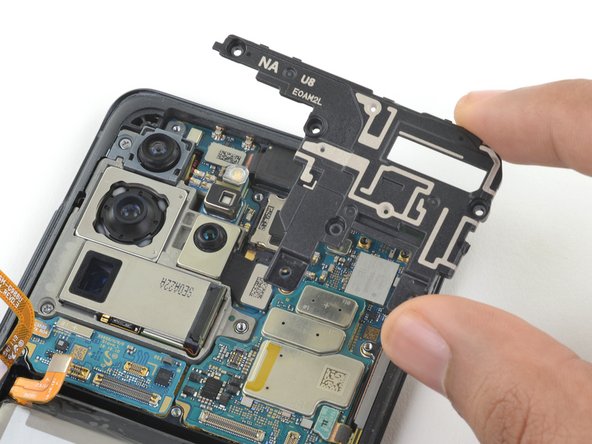
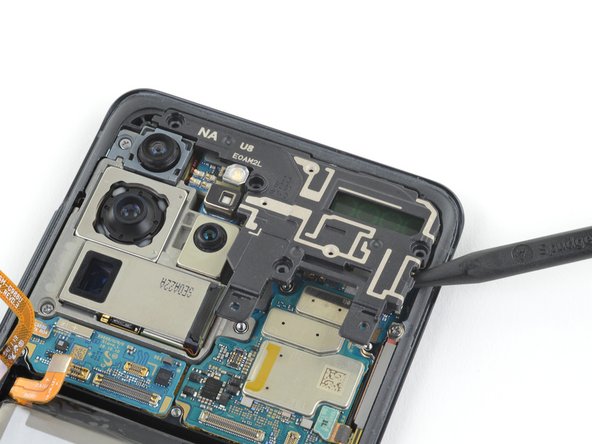
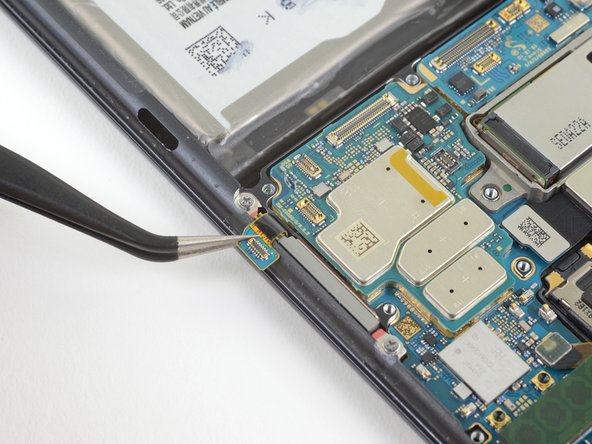
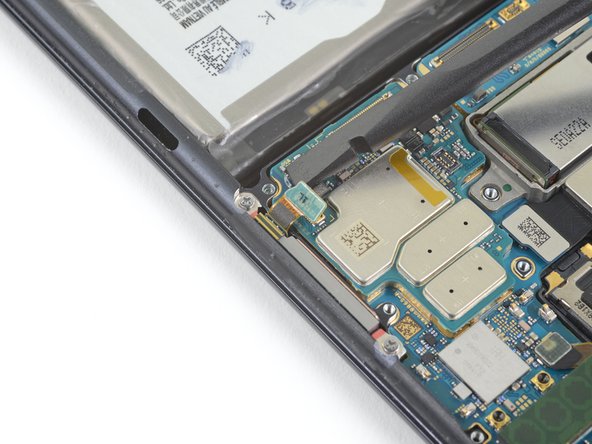
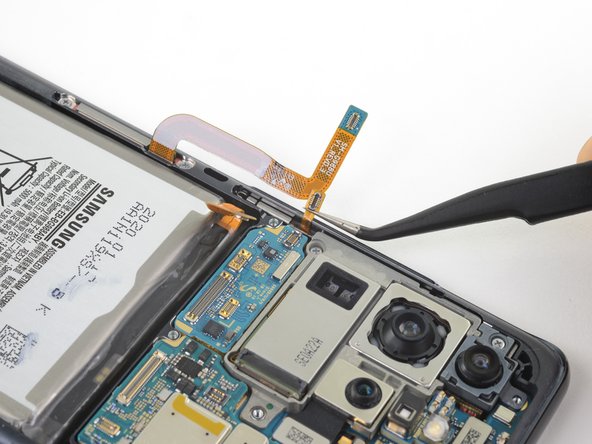
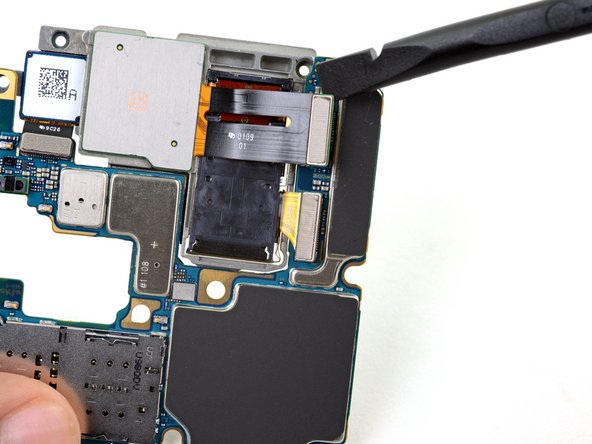
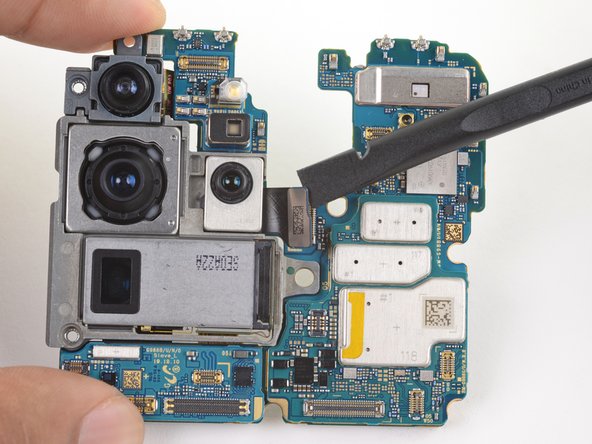
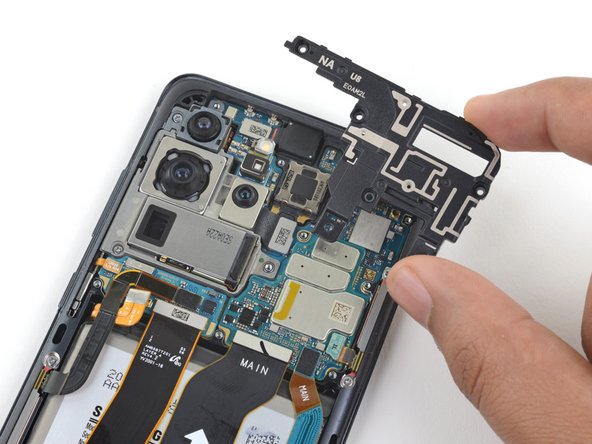
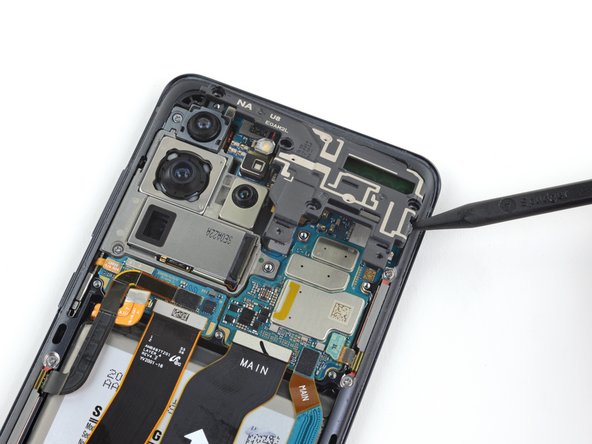
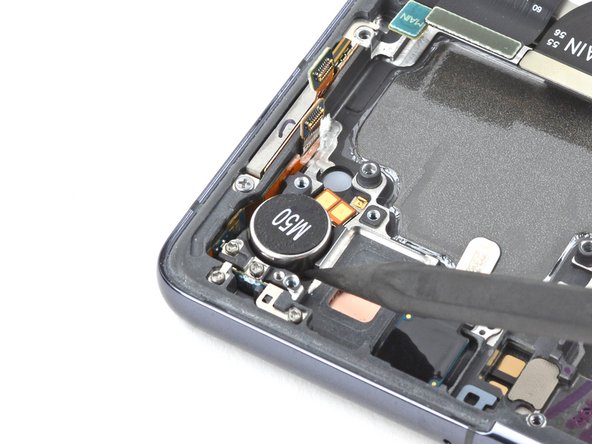
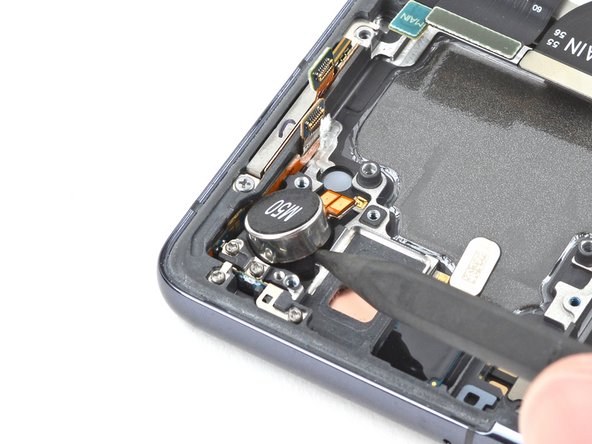
Samsung Galaxy S20 Plus Battery Replacement

Duration: 45 minutes
Steps: 31 Steps

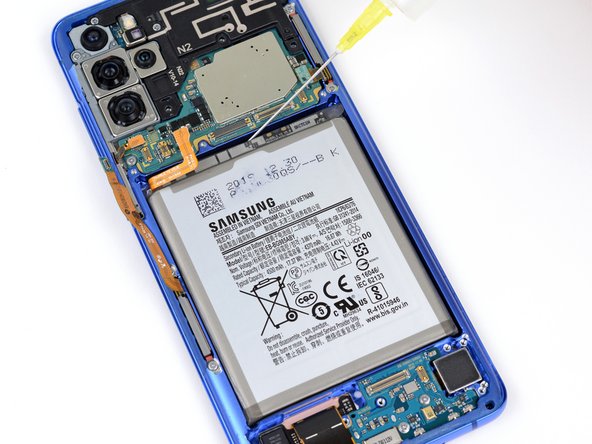
Ready to give your Samsung Galaxy S20 Plus a fresh start? Let’s tackle the battery replacement together! That battery is sticking around thanks to some serious adhesive, so we’ll need a little magic—specifically, some high concentration (over 90%) isopropyl alcohol to help us out. If your battery looks a bit puffy, no worries, just remember to keep it cool and avoid heating up your phone. Safety first! Make sure to drain your battery below 25% before we dive in; this helps prevent any unexpected excitement if we accidentally poke the battery. And don’t forget, you’ll need some fresh adhesive to wrap things up once we’re done. If things get tricky, don’t hesitate to schedule a repair!

Step 1

– Warm up that iOpener and gently press it against the bottom edge of the back cover for a solid two minutes. Patience is key, and soon you’ll be on your way to a successful repair!

Tools Used
  1. iOpenerSamsung Galaxy S20 Plus Battery Replacement

Step 2

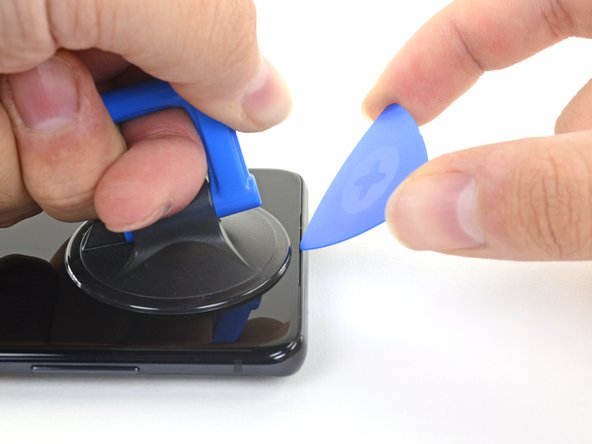
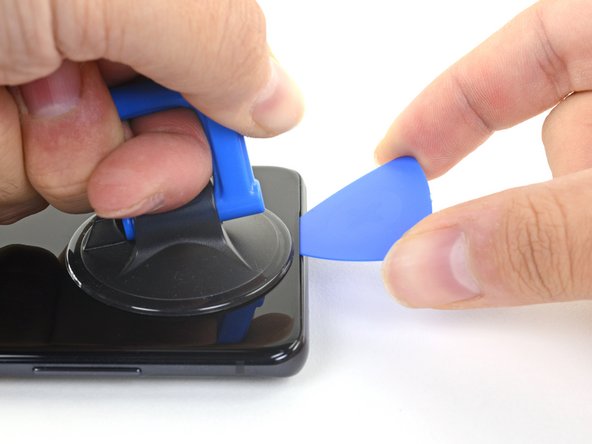
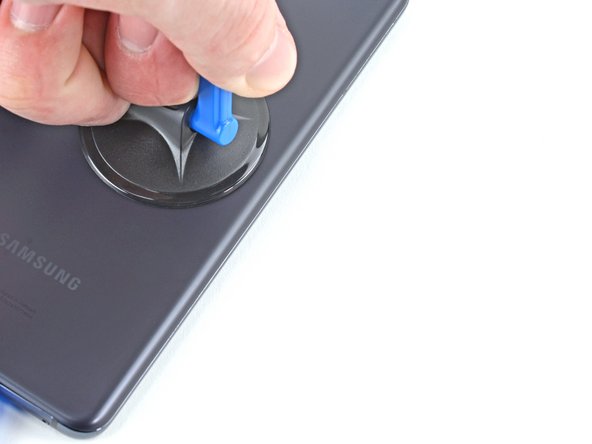
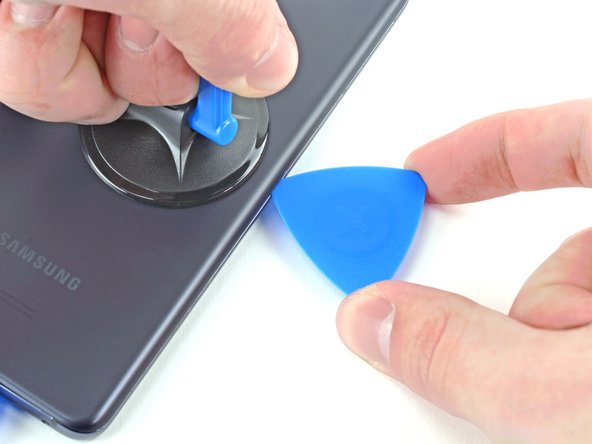
– Stick a suction cup onto the back of the phone, aiming as close to the bottom center as you can. Think of it as giving your phone a friendly kiss to start things off.

– Give the suction cup a firm, steady pull to gently pry open a little space between the back cover and the frame. No wiggling like a fish out of water—just a confident tug.

– Slide a plastic opening pick into the gap you just created. It’s like slipping a butter knife under a crust—careful but confident, to keep things moving smoothly.

Tools Used
  1. iOpenerSamsung Galaxy S20 Plus Battery Replacement

Step 3

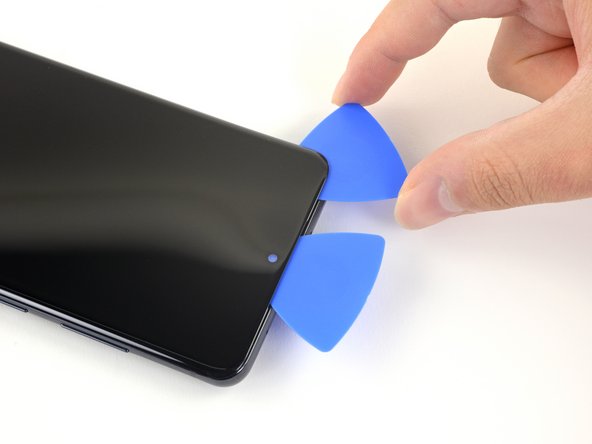
– Glide your pick back and forth along the bottom edge to slice through that stubborn adhesive.

– Keep your pick chilling in the seam to stop the adhesive from sticking itself back together.

Step 4

– Warm up the left edge of the back cover for two minutes with your heated iOpener. Let it get nice and toasty!

Tools Used
  1. iOpenerSamsung Galaxy S20 Plus Battery Replacement

Step 5

– Stick a suction cup onto the back of your phone, aiming for the center of the left side. It’s like giving your phone a little hug.

– Give the suction cup a firm, steady pull—think tug-of-war champion style—until you see a gap appear between the back cover and the frame.

– Slide the tip of an opening pick into the gap. No need to rush, just ease it in.

– Feeling some resistance? A few drops of high-strength (over 90%) isopropyl alcohol along the seam can help loosen things up. Adhesive never stood a chance.

Tools Used
  1. Isopropyl AlcoholSamsung Galaxy S20 Plus Battery Replacement

Step 6

– Once the pick is slid under the edge of the glass, tilt it downward and work it in further to break free the back cover’s adhesive. Keep at it gently—you’re on your way to opening it up. If you need help along the way, you can always schedule a repair.

Step 7

– Gently slide your pick along the left edge of the phone to loosen the back cover’s adhesive. Keep the pick in place under the left edge of the glass to prevent the adhesive from resealing. If you need help, you can always schedule a repair.

Step 8

– Warm up the right edge of the back cover with a heated iOpener for about two minutes—like giving your device a cozy spa moment.

Tools Used
  1. iOpenerSamsung Galaxy S20 Plus Battery Replacement

Step 9

– Stick a suction cup onto the back of the phone, right near the middle of the right edge—nice and close to the corner for leverage.

– Pull gently but firmly on the suction cup to create a small gap between the back cover and the frame—no need to yank, steady wins the race.

– Slide an opening pick into that gap to start prying it open, and get ready to keep the momentum going.

Step 10

– Glide your pick all the way up the right side of the phone—think of it as the red carpet for separating that sticky back cover.

– For extra style points, leave your pick hanging out under the glass near the top—this keeps the adhesive from trying to make an unexpected comeback.

Step 11

– Warm up the top edge of the back cover with a heated iOpener for about two minutes. Keep it cozy enough to loosen things up, but not so hot that you get a surprise burn. If you need a hand, you can always schedule a repair.

Tools Used
  1. iOpenerSamsung Galaxy S20 Plus Battery Replacement

Step 12

– Take your pick and cruise along the right edge, swinging up and around the top right corner like a pro.

– Keep sliding along the top edge, making your way to the left side, until the back cover is fully freed from its sticky situation.

Step 13

– Gently lift up the back cover. If it’s feeling clingy, grab those opening picks and give any leftover adhesive a little slice.

– Take off the back cover and set it aside.

– When you’re putting things back together:

– Now’s a great time to power up your phone and check that everything’s working. Make sure to shut it down completely before sealing things up again.

– If you spot any sticky adhesive chunks, nab them with tweezers (or your fingers). Heat can help if the adhesive’s being stubborn.

– Using custom-cut adhesive? Follow the guide for that.

– Using double-sided tape? There’s a guide for that too.

Tools Used
  1. TweezersSamsung Galaxy S20 Plus Battery Replacement

Step 14

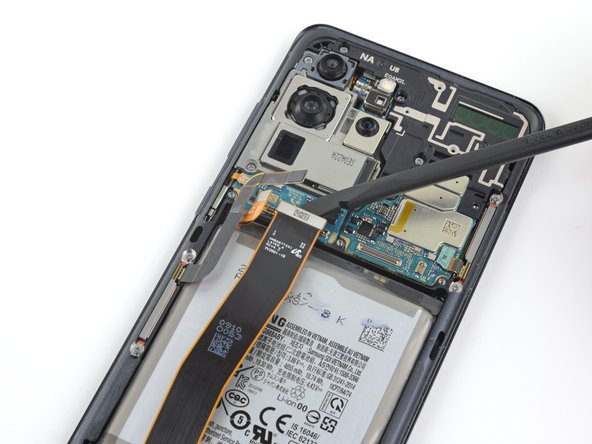
– Grab your Phillips #00 screwdriver and take out the six screws (each one is 4 mm long) holding the motherboard bracket in place.

Step 15

– Grab your tweezers and carefully lift up the motherboard bracket, unhooking it from the plastic midframe. Easy does it—no wrestling required!

Tools Used
  1. TweezersSamsung Galaxy S20 Plus Battery Replacement

Step 16

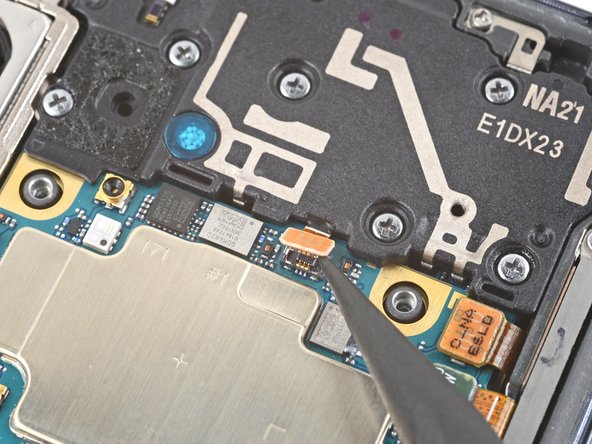
– Carefully lift the motherboard bracket to reveal the orange battery connector. You’ve got this!

Step 17

– Grab your trusty spudger and gently lift up the battery connector to disconnect it. Take it easy—you got this!

Tools Used
  1. SpudgerSamsung Galaxy S20 Plus Battery Replacement

Step 18

– Grab your trusty spudger and gently pop up the wireless charging coil connector—no need for brute force, just a smooth lift!

Tools Used
  1. SpudgerSamsung Galaxy S20 Plus Battery Replacement

Step 19

– Grab your trusty tweezers and gently lift the wireless charging coil away from the device—think of it as peeling a sticker, but way cooler.

– Take out the wireless charging coil and set it aside like the tech trophy it is.

– When putting things back together, reconnect the charging coil and battery connectors first, then secure the motherboard bracket screws to get everything lined up nicely. Press the coil pad down firmly so it sticks like it means it.

Tools Used
  1. TweezersSamsung Galaxy S20 Plus Battery Replacement

Step 20

– Grab your Phillips #00 screwdriver and take out the five 4 mm screws holding the loudspeaker and lower midframe. Let’s make those screws history!

Step 21

– Grab a spudger or tweezers and dive into the upper left notch of the midframe. Gently pry it up—those sneaky clips will pop right off.

– Lift out the loudspeaker and lower midframe. Nice work!

Tools Used
  1. TweezersSamsung Galaxy S20 Plus Battery Replacement
  2. SpudgerSamsung Galaxy S20 Plus Battery Replacement

Step 22

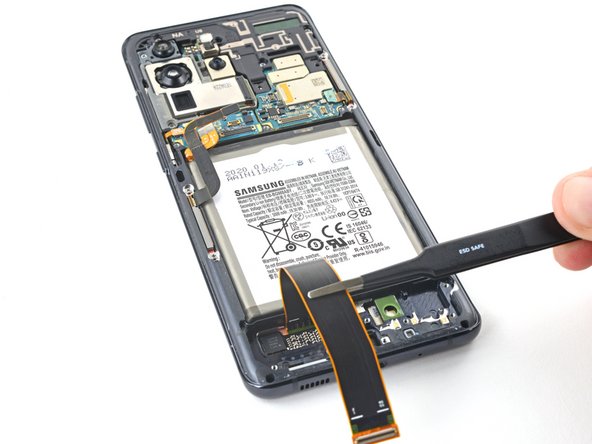
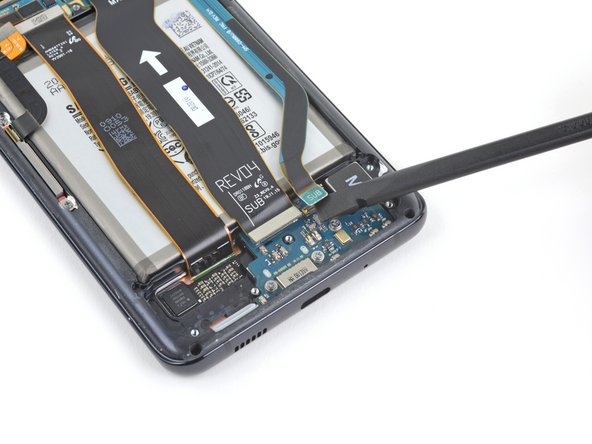
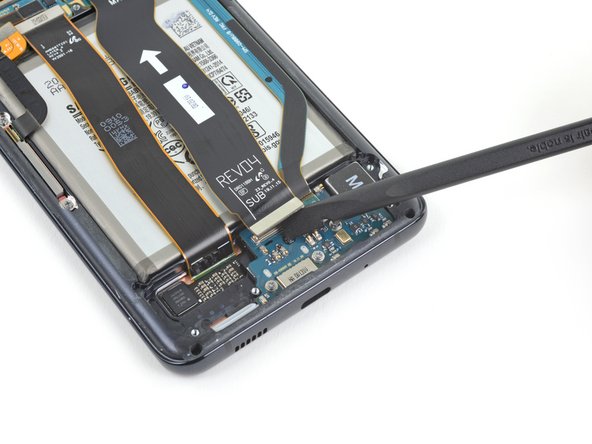
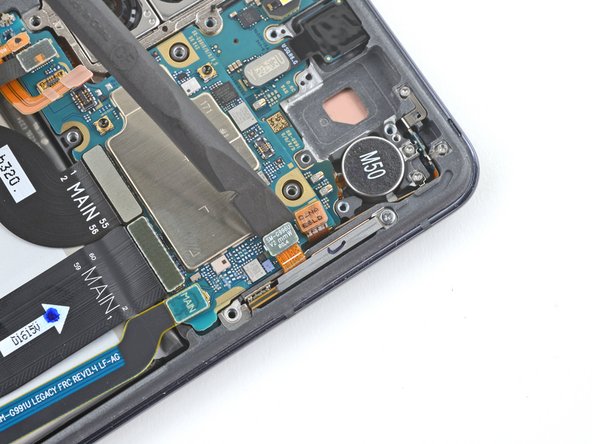
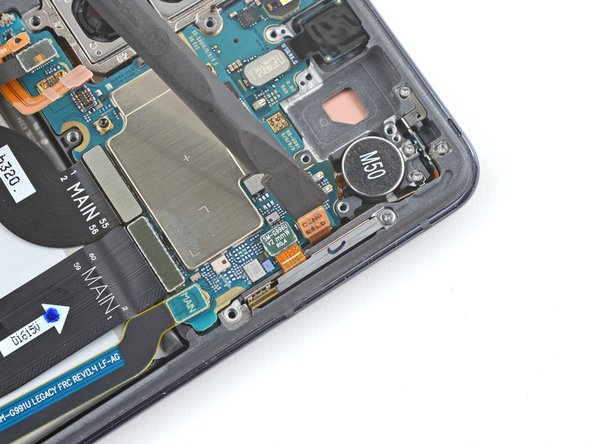
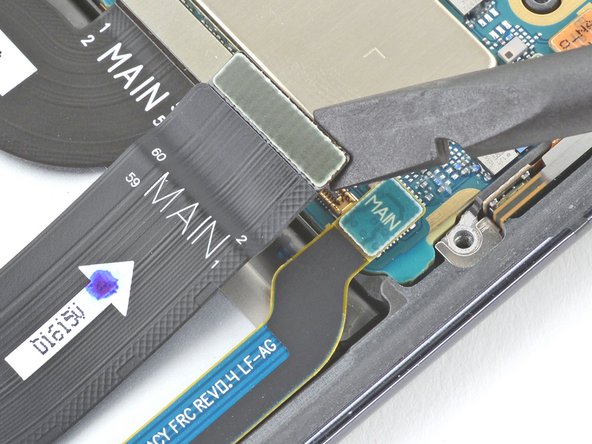
– Grab your trusty spudger and gently pry up those main and auxiliary flex cables from the daughterboard at the bottom of your device. You’ve got this!

– When it’s time to reconnect those connectors, take a moment to align them just right. Press down on one side until you hear that satisfying click, then do the same on the other side. Remember, no pressing down in the middle! If things get misaligned, those little pins can bend, and we definitely don’t want that. Keep it smooth and steady!

Tools Used
  1. SpudgerSamsung Galaxy S20 Plus Battery Replacement

Step 23

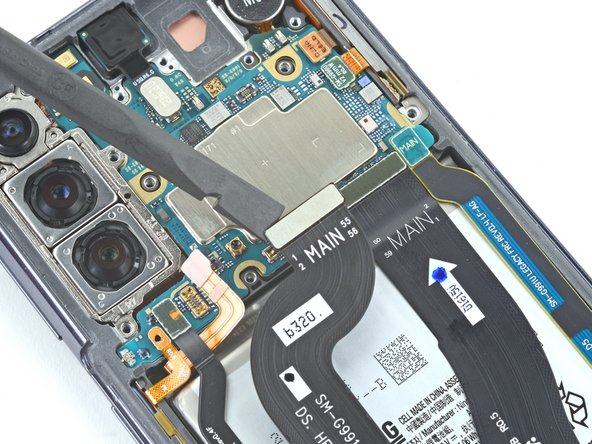
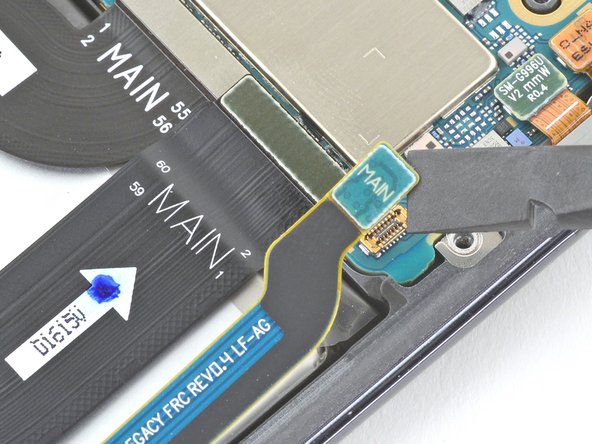
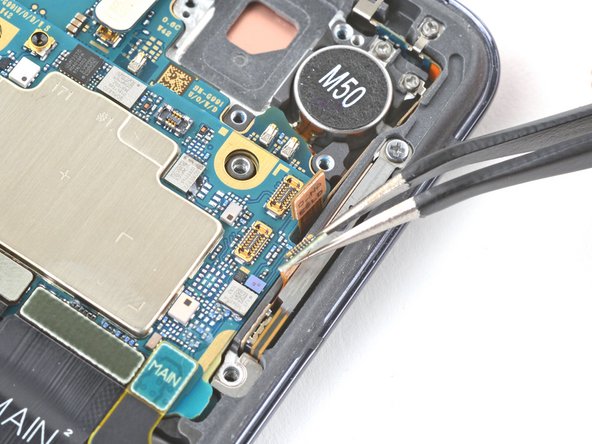
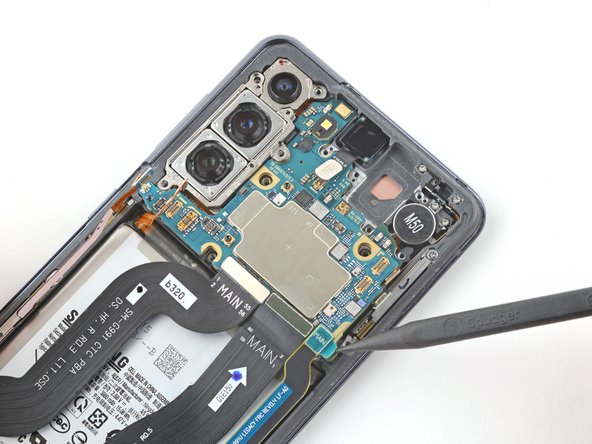
– Grab your trusty spudger and gently pop up the main and auxiliary flex cables from the motherboard. Take it slow—these connectors like a gentle touch!

Tools Used
  1. SpudgerSamsung Galaxy S20 Plus Battery Replacement

Step 24

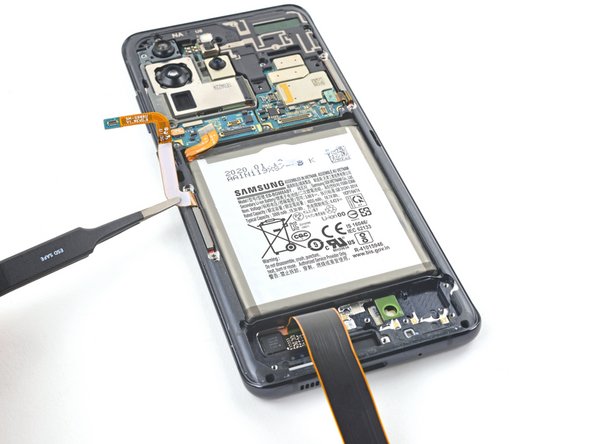
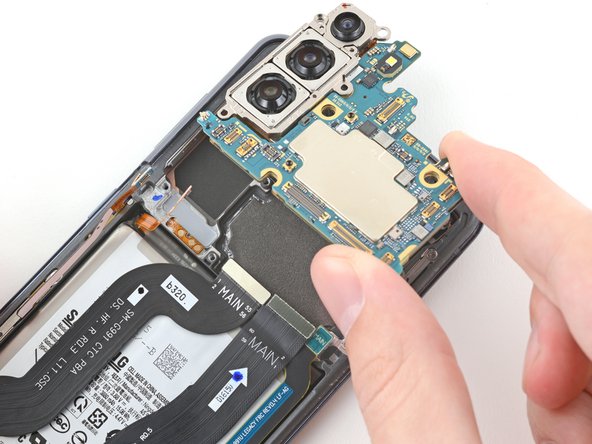
– Lift up the main and auxiliary flex cables with care, and set them aside like you’re handling secret ninja scrolls.

Step 25

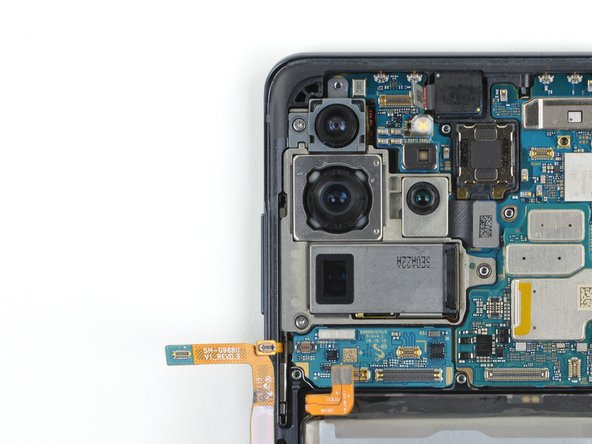
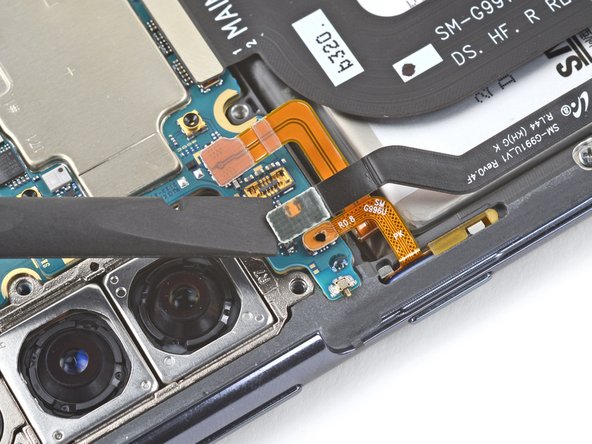
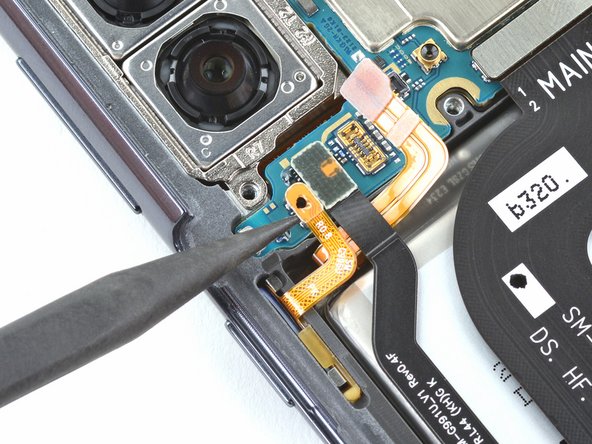
– Gently pry up and unplug the left 5G antenna cable from the motherboard. You’ve got this!

Step 26

– Pop a spudger under the main display flex cable and gently lift it off the motherboard—like you’re unplugging a stubborn headphone jack.

Tools Used
  1. SpudgerSamsung Galaxy S20 Plus Battery Replacement

Step 27

– Carefully lift and bend the display along with the left 5G antenna flex cables to clear the path for the motherboard and battery.

Step 28

– Drop 1-2 drops of high-concentration (over 90%) isopropyl alcohol into the little gaps between the frame and the edges of the battery. It’s like giving your device a refreshing drink!

– Now, let it chill for a minute to give the isopropyl alcohol some time to work its magic on that sticky adhesive.

Tools Used
  1. Isopropyl AlcoholSamsung Galaxy S20 Plus Battery Replacement

Step 29

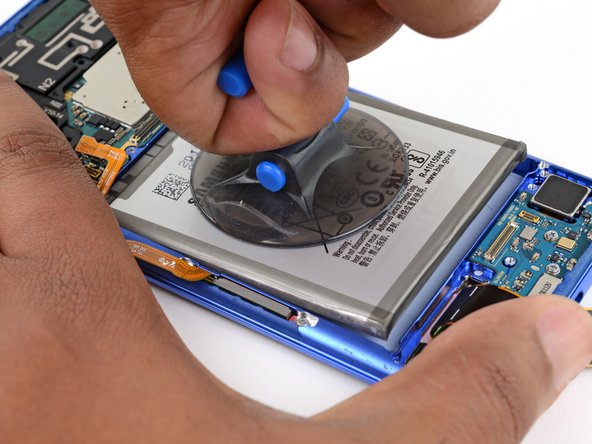
– Stick a suction cup right in the middle of the battery, then brace the top and bottom of your device against your work surface with one hand while pulling gently on the suction handle with the other. When you see the battery start to lift away from the device, you’re good to go to the next step. Keep in mind, patience is key—gentle, steady pulls over time work better than brute force. Pull on the suction cup with consistent pressure for about 15 seconds each time. If the battery refuses to budge, try adding a drop or two of isopropyl alcohol along the top, left, and right edges, wait a minute for it to soak in, then give it another gentle tug. If you need help, you can always schedule a repair.

Step 30

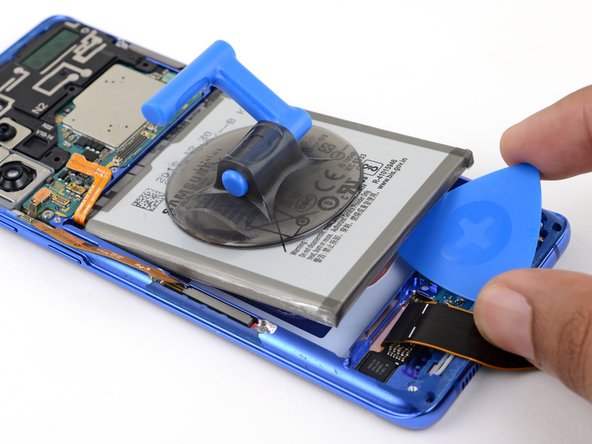
– Now it’s time to get that battery out – start by slipping an opening pick under the bottomsolid edge of the battery and give it a gentle twist to! loosen up the adhesive that’s holding it! in place.

Tools Used
  1. Isopropyl AlcoholSamsung Galaxy S20 Plus Battery Replacement

Step 31

– Double-check your shiny new part against the old one—sometimes a little sticker or leftover piece needs a home on the new guy before you install.

– Ready to put everything back together? Just flip through the steps backward and you’re golden.

– Give your battery a fresh start with a cycle reset and calibration. Your device will thank you.

– When it’s time to part ways with old electronic bits, recycle them responsibly at an R2 or e-Stewards certified location.

– Hit a snag? Our Answers community is standing by with troubleshooting tips, or you can always schedule a repair if you want some backup.

Tools Used
  1. Isopropyl AlcoholSamsung Galaxy S20 Plus Battery Replacement

Success!

Samsung Galaxy S20 Ultra Teardown

Duration: 45 minutes
Steps: 16 Steps

Get ready to dive into the world of big phones with the Samsung Galaxy S20 Ultra. This powerhouse of a device boasts a massive size, lightning-fast speed, and a whopping quad-camera setup. Let’s take a closer look at what makes this phone tick in our step-by-step repair guide. For the latest repair news and teardowns, follow us on social media. If you’re not feeling up to the challenge, don’t worry! If you need! help, you! can!! always schedule! a!! repair! with! Salvation! Repair.

Step 1

– Samsung really went all out with this phone—if you can dream up a spec, it’s probably here and cranked to maximum.

– Wondering what happened to Galaxies S11 through S19? This phone devoured them. It’s a beast.

– Gaze upon the 6.9″ Quad HD+ Dynamic AMOLED Infinity-O display (3200×1440, 511ppi) with a silky smooth 60 or 120 Hz refresh rate.

– Under the hood: a Snapdragon 865 chip plus 12 GB of LPDDR5 RAM (or 16 GB, if you want to go wild).

– Storage starts at 128 GB, with an option for 512 GB, and you can tack on more with a MicroSD card.

– Powering it all: a hefty 5,000 mAh battery.

– Camera setup? Absolutely stacked: 12 MP ultra-wide (ƒ/2.2), a whopping 108 MP wide-angle (ƒ/1.8), 48 MP telephoto (ƒ/3.5), and a ‘just because’ 40 MP selfie camera.

Step 3

– While warming up our tools, our friends at Creative Electron are busy with some X-ray imaging on the Ultra. Looking inside reveals many familiar features from last year’s Note10+5G—like those embedded mmWave antennas in the frame and the upward-firing earpiece speaker tucked behind the display. But here’s a standout: check out that massive zoom camera near the power buttons. It’s taking up the space of two or three regular cameras, and we’ll get into what that means soon. If you need a hand along the way, you can always schedule a repair.

Step 4

– Kicking off with the classic Samsung Opening Procedure, we get things heated—literally. Warm up the back panel to soften up that stubborn adhesive.

– All that glue might look intimidating, but good news: the back panel pops off without any surprise cable drama.

– This is where our jumbo suction cup earns its keep. Perfect for those moments when you need a little extra grip.

Step 5

– We’re diving into the toolbox for some bigger, bolder tools—like this Manta kit driver that’s perfect for unscrewing stubborn screws or cracking open a nut (not at the same time, of course). Just keep the snacks and the hardware separate. Next, with the top layer of antennas, speaker, and charge coils flipped aside, we get a good look at the internals. It’s pretty reminiscent of a Note10+ 5G in there—if you swapped out the stylus and used that space for more battery power. Stay tuned for our teardown wallpaper post! We’ll be sharing wallpapers for your Ultra, Plus, and standard S20. Finally, we’re quickly removing the main board, which is packed with cameras, millimeter-wave hardware, and extra layers—so it’s almost like a mini city. Time to start clearing out the clutter and making room for the new parts. If you need help along the way, you can always schedule a repair.

Step 6

– Let’s dive into the 108 MP wide-angle camera—Samsung’s really showing off this sensor’s power. But hey, bigger sensors and more pixels aren’t always a guarantee for better pics! Those tiny 108 million pixels packed into a small area can lead to some noisy shots, especially in low-light situations. Samsung says this new sensor can still pull off clear shots in the dark thanks to a special barrier around each pixel and a clever 3×3 pixel binning technique they call ‘nona-binning’—because nine pixels team up to boost light gathering. The sensor’s surface area is more than double that of the iPhone 11 Pro’s 12 MP sensor, giving it plenty of room to shine. And don’t worry—this pixel partying happens right at the hardware level, cutting out the usual conversion errors. If you need help with this repair, you can always schedule a repair.

Step 7

– Ready for a close-up? This camera module sprawls across the phone like it owns the place. Samsung loves it so much, they’ve plastered its specs right on the bump. Time to crack it open and see what all the fuss is about.

– So, how do you squeeze a bunch of zoom lenses into a phone that’s barely thicker than a pencil? Samsung’s answer: flip the whole thing sideways! Instead of beaming light straight to the sensor, this camera uses a prism to redirect it with a slick 90-degree twist.

– It’s a wild ride for the light! After hitting the prism (which, by the way, has its own image stabilizer), the image zooms through a sliding stack of telephoto lenses, finally landing on the sensor at the end of the tunnel.

– The lens itself handles a solid 4x magnification—anything beyond that is a mix of sensor cropping, binning (crunching 48 megapixels down to 12), and your classic digital zoom. That’s how they get to that headline-grabbing 100x.

– Pop the prism out, and you’ll spot copper coils, magnets, and tiny white bearings on the bracket. That prism glides back and forth to smooth out your shaky hands, so you can snap crystal-clear shots without sweat.

Step 8

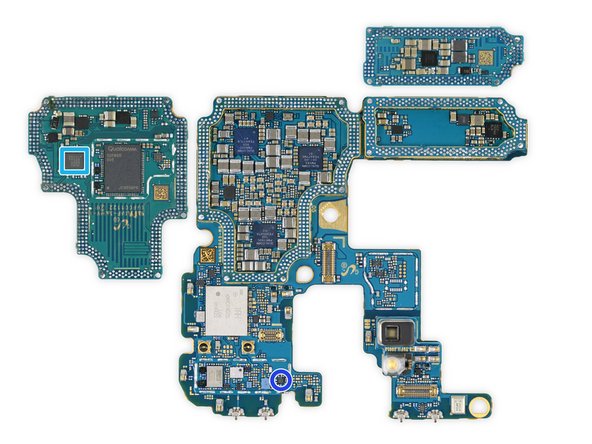
– With the shields out of the way, it’s time to check out the silicon superstars underneath:

– Samsung K3LK4K40BM-BGCN 12 GB LPDDR5 RAM stacked on top of the Qualcomm 865 SoC—double tech trouble.

– Samsung KLUDG4UHDB-B2D1 128 GB UFS 3.0 flash storage—speedy and spacious.

– Qualcomm SDX55M 2nd-gen 5G modem—your link to lightning-fast data.

– Skyworks SKY58210-11 RF Front-End Module—handling those wireless signals.

– Qorvo QM78092 Front-End Module—another key player for your phone’s radio game.

– Maxim MAX77705C power management IC—keeping everything powered up and smooth.

– Qualcomm QPM5677 and QPM6585 5G power amplification modules—cranking up that 5G performance.

Step 9

– Hang tight! Flipping the boards over unveils a treasure trove of even more nifty chips:

– Qualcomm SDR865 RF Transceiver

– Murata KM9D19075 Wi-Fi & Bluetooth Module

– Qualcomm PM8250 power management IC

– Qualcomm PMX55 power management IC

– Qualcomm PM8150C power management IC

– Qualcomm QDM4870 front-end module

– Silicon Mitus SM3080 power management IC

Step 10

– You’ve already met the big players—now let’s check out some extra goodies:

– Qualcomm SMR526 RF transceiver

– Qualcomm QDM5872 front end module

– Skyworks SKY77365-11 quad-band GSM/GPRS/EDGE power amplifier module

– Qualcomm QET5100 envelope tracker module

– NXP Semiconductor SN110U NFC controller w/ Secure Element and eSIM

– NXP Semiconductor BGU8103 GPS/GLONASS/Galileo/BeiDou low noise amplifier

– NXP Semiconductor NCX2200 low voltage comparator

Step 11

– Let’s talk bonus chips! These are the behind-the-scenes MVPs:

– Qualcomm PM3003A power management – keeps the juice flowing.

– NXP Semiconductor PCA9468 – handles super-fast charging.

– Cirrus Logic CS35L40 – cranks up the audio vibes.

– Cirrus Logic CS40L25 – gives your device that satisfying haptic buzz.

– Maxim Integrated MAX77816 – the buck-boost muscle with 5A switches.

– ON Semiconductor NCP59744 – dual-rail LDO regulator for extra stability.

– Vishay DG2730 – manages your speedy USB 2.0 connections like a pro.

Step 12

– IC Identification, continued:

– Spot the Qualcomm QET6100 envelope tracker—this chip helps keep power delivery smart and efficient.

– Check out the Samsung S2MIS0A MST Driver. It’s the magic behind contactless payments.

– Say hello to the STMicroelectronics STM32G071EB, a 32-bit ARM Cortex-M0+ microcontroller loaded with 128 KB flash—tiny but mighty.

– Find the Samsung S2MIW04X, your power management partner on this board.

– Likely you’ll see the ON Semiconductor FPF3788UCX OVP load switch, protecting your device from unwanted voltage spikes.

– Meet the Silergy DC-DC converter, working behind the scenes to keep your voltages just right.

– Spot the Richtek RT8010GQW DC-DC converter, another hero managing your device’s power.

– If you ever get stuck or need a hand, you can always schedule a repair.

Step 13

– Let’s dive into some of the sensors on this board and see what they’re up to:

– STMicroelectronics LPS22HD pressure sensor

– STMicroelectronics LSM6DSO accelerometer

– Probably an Austria Micro Systems TMD4903 color/proximity sensor with an IR emitter

– Likely a Bosch Sensortec BMM150 geomagnetic sensor

Step 14

– Time for round two with our jumbo suction cup—this battery isn’t coming out without a little drama. Add a dash of isopropyl alcohol to the mix and you’ll have it released in no time.

– This battery is a powerhouse: 5000 mAh cruising at 3.86 V, delivering an impressive total of 19.30 Wh.

– Before you wrap up, scan the phone’s edges for any sneaky components. You’ll spot a slim millimeter-wave antenna tucked beside a copper heat spreader—yep, that classic combo.

Step 15

– That 120 Hz screen refreshes super fast, but taking it off is still a slow and painfulurement process.

– Compared to the Note10+ display, you won’t notice much of a difference with this faster refresh rate. However, the design does look a bit more streamlined – Samsung managed to simplify things by using a single ribbon cable, making repairs a tad easier.

– Let’s take a look at the onboard silicon:

– Fittingly, the codename for this ‘space zoom’ phone is Hubble. And, as we all know, the Hubble space telescope had a flawless launch and never needed any repairs… yeah, right!

– Here are the specs: Qualcomm QBT2000 3D Sonic Sensor controller, Samsung S6SY79AX Touchscreen Controller, and Winbond W25Q80EWUXIE 8 Mb Serial NOR Flash.

Step 16

– Samsung keeps innovating, but this time with a less bendy design. While smartphone shapes have mostly settled into the same big black glass slab, there’s some cool stuff hidden inside the S20 Ultra! It might be tempting to shrug off features like 5G (which really shines in big cities) or ultra-high-res cameras and periscopes as mere gimmicks, but those little hardware tweaks can turn into real game-changers (hello, selfie cameras!). In a landscape full of safe upgrades, it’s refreshing to see Samsung pushing the envelope with wild tech and seeing what works. That said, when it comes to repairs, Samsung isn’t exactly breaking new ground—this phone’s repairability score shows it. If you run into trouble, you can always schedule a repair with Salvation Repair to get it sorted.

Success!

Samsung Galaxy S20 Ultra Wireless Charging Coil Replacement

Duration: 45 minutes
Steps: 17 Steps

Get ready to tackle the task of swapping out the wireless charging coil in your Galaxy S20 Ultra! Just a heads up, you’ll want to grab some replacement adhesive to make everything stick like it should. Let’s get started and bring that charging power back to life!

Step 1

– Warm up an iOpener and gently press it onto the bottom edge of the back cover for about two minutes. If you need a hand, you can always schedule a repair.

Tools Used
  1. iOpenerSamsung Galaxy S20 Ultra Wireless Charging Coil Replacement

Step 2

– Stick a suction cup onto the back of your phone, aiming for as close to the bottom center as you can get. Think of it as a tiny trampoline for your device.

– Pull on the suction cup with steady, confident pressure to gently pry open a little space between the back cover and the frame. No need to go all Hulk on it—gentle wins the race.

– Carefully slide an opening pick into that newly formed gap to start separating the parts. You’ve got this—just take it slow and steady.

Tools Used
  1. iOpenerSamsung Galaxy S20 Ultra Wireless Charging Coil Replacement

Step 3

– Gently work your pick back and forth along the bottom edge to cut through the adhesive. Keep it steady and patient—slow wins the race here.

– Once you’ve got a good groove going, leave your opening pick tucked in the seam to stop the adhesive from closing back up. If you need a hand, you can always schedule a repair.

Step 4

– Warm up the left edge of the back cover by applying a heated iOpener for about two minutes. Keep at it until the adhesive loosens up, making your next step smoother. If you need a hand, you can always schedule a repair.

Tools Used
  1. iOpenerSamsung Galaxy S20 Ultra Wireless Charging Coil Replacement

Step 5

– Grab a suction cup and stick it to the back of your phone, aiming for the center of the left edge. Let’s get that cover off!

– Give that suction cup a good, steady pull to create a little gap between the back cover and the frame. You got this!

– Slide the tip of an opening pick into that gap you just made. We’re making progress!

– For an extra boost, consider adding a few drops of high concentration (over 90%) isopropyl alcohol into the seam to help loosen up that stubborn adhesive. Just a little help goes a long way!

Step 6

– Once you’ve got the pick sliding under the glass edge, tilt it down gently and work it in further to break free the back cover’s adhesive. Keep things steady, and if you need a hand, you can always schedule a repair.

Step 7

– Gently slide your pick toward the bottom edge of the phone to loosen the adhesive holding the back cover. Then, keep your pick tucked under the left edge of the glass near the bottom to prevent the adhesive from sticking back together. If you need a hand, you can always schedule a repair.

Step 8

– Slide a pick gently under the center of the left edge of the back cover to get things started.

– Slowly work the pick upward toward the top of the device, carefully separating the adhesive as you go.

– Keep your pick under the left edge of the glass near the top to stop the adhesive from snapping back together.

Step 9

– Warm up your iOpener and apply it to the right edge of the back cover for about two minutes. Let the heat do its magic, and get ready to tackle the next step.

Tools Used
  1. iOpenerSamsung Galaxy S20 Ultra Wireless Charging Coil Replacement

Step 10

– Stick a suction cup on the back of the phone, aiming for the center of the right edge. You’re a precision artist.

– Give the suction cup a good, firm pull—steady is the name of the game. Watch for that sneak-peek gap between the back cover and the frame.

– Slide the tip of an opening pick into the gap like you’re a lock-picking pro.

Step 11

– Gently slide your pick towards the bottom edge of the phone to loosen the back cover’s adhesive—think of it as giving it a little nudge to say hello.

– Keep your pick wedged under the right edge of the glass near the bottom to stop the adhesive from sealing back up—it’s like holding the door open for a smooth reveal.

Step 12

– Now it’s time to get that back cover off – start by inserting another pick under the center of the right edge.

– Gently slide the pick upwards towards the top of the device, loosening the adhesive that’s holding the back cover in place.

Step 13

– Apply a heated iOpener to the top edge of the back cover for two minutes.

Tools Used
  1. iOpenerSamsung Galaxy S20 Ultra Wireless Charging Coil Replacement

Step 14

– Gently wiggle the pick from the right edge, working your way around the top right corner of the device.

– Keep sliding along the top edge until the adhesive holding the back cover releases completely.

Step 15

– Gently lift up the back cover. Use opening picks to slice through any leftover adhesive—like slicing through soft cheese.

– Take off the back cover and set it aside.

– When you’re putting things back together:

– This is a great moment to turn your phone on and make sure everything works before sealing it up.

– Clear away any stubborn bits of adhesive with tweezers or your fingers. If it’s being sticky, a little heat can help loosen things up.

– If you’ve got Samsung custom-cut adhesives, check out this guide.

– Using double-sided tape? This guide is your friend.

Tools Used
  1. TweezersSamsung Galaxy S20 Ultra Wireless Charging Coil Replacement

Step 16

– Grab your trusty spudger and gently nudge up the wireless charging coil connector to disconnect it. You’ve got this!

Tools Used
  1. SpudgerSamsung Galaxy S20 Ultra Wireless Charging Coil Replacement

Step 17

– Now, let’s make sure everything is in order! Give your new part a quick comparison with the original—you might need to shift some components around or peel off those sticky backings before going for the install.

– Time to put it all back together! Just retrace your steps from above, and you’ll have your device all set in no time.

– Once you’re done, use this guide to test out your handy work and see if it all works like a charm.

– Got some old tech laying around? Don’t forget to drop it off at an R2 or e-Stewards certified recycler.

– Things didn’t go quite as you hoped? No worries! Swing by our Answers community for some troubleshooting cheer.

Tools Used
  1. TweezersSamsung Galaxy S20 Ultra Wireless Charging Coil Replacement

Success!
Line up your new part with the old one—sometimes a few bits or sticky stuff need to make the leap from old to new before you put it in.
Ready to close things up? Just backtrack through the steps in reverse, like rewinding a movie, but with more screws.
Once you’re done, check out Salvation Repair’s guide to make sure everything’s working smoothly.
Got leftover parts or busted bits? Drop them off at an R2 or e-Stewards recycler and give your e-junk a second chance.
If things didn’t go quite as planned, swing by our Answers community for some troubleshooting wisdom.
Still stuck? You can always schedule a repair and let the pros handle it.

Samsung Galaxy S20 Ultra Screen and Battery Assembly Replacement

Duration: 45 minutes
Steps: 50 Steps

Ready to upgrade your Samsung Galaxy S20 Ultra? This guide is your go-to for swapping out the screen and battery assembly. We’re talking full assembly action here, including the screen, battery, and frame all in one neat package. Before diving in, make sure you’ve got the right part to avoid any hiccups. If you spot a swollen battery, remember to take extra care—safety first! Oh, and don’t forget to fully discharge your device’s battery before starting. This helps keep things safe and sound during the repair process. Just a heads-up: keeping that water resistance intact post-repair relies on how well you reapply the adhesive, but your device might lose its official IP rating. Lastly, a few images in this guide may show slight variations, but don’t let that trip you up; they won’t affect the overall repair steps!

Step 1

– Grab your SIM eject tool, the tiniest screwdriver bit you have, or a trusty straightened paperclip and poke it into the little hole on the SIM tray up top by the antenna band.

– Give it a good push! The tray will pop out and you’re on your way.

Tools Used
  1. SIM Card Eject ToolSamsung Galaxy S20 Ultra Screen and Battery Assembly Replacement

Step 2

– Let’s kick things off by taking out that SIM card tray. You’ve got this!

– When you’re popping that SIM card back in, make sure it’s facing the right way in relation to the tray. It’s like a puzzle piece that needs to fit just right.

– Don’t forget about the thin rubber gasket that hugs the SIM tray. It’s there to keep out the pesky water and dust. If it’s looking a bit worn out or has gone AWOL, time to replace that gasket or grab a new SIM tray to keep your phone’s insides safe and sound.

Step 3

– Warm up your iOpener and let it chill on the bottom edge of the back cover for a couple minutes.

Tools Used
  1. iOpenerSamsung Galaxy S20 Ultra Screen and Battery Assembly Replacement
  2. Heat GunSamsung Galaxy S20 Ultra Screen and Battery Assembly Replacement

Step 4

– Stick a suction cup on the back of the phone, aiming for the center of the bottom edge.

– Give the suction cup a good, steady pull to crack open a gap between the back cover and the frame.

– Slide the tip of your opening pick into that gap—like a pro sneaking into a secret club.

Tools Used
  1. iOpenerSamsung Galaxy S20 Ultra Screen and Battery Assembly Replacement

Step 5

– Gently slide your pick along the bottom edge, working back and forth to cut through the adhesive like a pro. Keep it steady and confident! Leave your opening pick tucked in the seam to keep the adhesive from sealing back up—nobody wants that to happen. If you need a hand, you can always schedule a repair.

Step 6

– Warm up the left edge of the back cover with a heated iOpener for about two minutes. Keep the heat steady to help loosen the adhesive and make the cover easier to lift. If you need a hand, you can always schedule a repair.

Tools Used
  1. iOpenerSamsung Galaxy S20 Ultra Screen and Battery Assembly Replacement

Step 7

– Grab a suction cup and stick it to the back of your phone, aiming for the center of the left edge. You’re doing great!

– Give that suction cup a good, steady pull to create a little gap between the back cover and the frame. Keep it strong and steady!

– Slide the tip of an opening pick into that gap you just made. You’re almost there!

– For an extra boost, consider adding a few drops of high concentration (over 90%) isopropyl alcohol into the seam to help loosen up that stubborn adhesive. Just a little will do the trick!

Step 8

– Once the pick is tucked under the edge of the glass, tilt it gently downward and slide it in further to break through the back cover’s adhesive. Keep at it steadily to free the panel smoothly.

Step 9

– Gently slide the pick towards the bottom of your device to break the seal of the back cover’s adhesive.

– Leave your pick tucked under the left edge of the glass near the bottom to stop the adhesive from sticking back together.

Step 10

– Slip another pick under the middle of the left side of the back cover—smooth moves only.

– Gently glide the pick up toward the top edge to loosen that sticky adhesive. Take it slow; no rush.

– Keep your pick parked under the left edge near the top, so the sticky stuff doesn’t try to reunite. You’re in control here.

Step 11

– Fire up that iOpener and let it hang out on the right edge of the back cover for a cozy two-minute warm-up.

Tools Used
  1. iOpenerSamsung Galaxy S20 Ultra Screen and Battery Assembly Replacement
  2. Heat GunSamsung Galaxy S20 Ultra Screen and Battery Assembly Replacement

Step 12

– Stick a suction cup onto the back of your phone, aiming for the center of the right edge—precision is cool, but eyeballing it works too.

– Give that suction cup a firm, confident pull to open up a gap between the back cover and the frame—no need to wrestle, just steady hands.

– Slide the tip of an opening pick into the gap you just made, kind of like you’re sneaking a pick into a guitar solo.

Step 13

– Glide your pick down towards the bottom edge of the phone to loosen that stubborn back cover adhesive.

– Keep your pick chilling under the right edge of the glass near the bottom—this stops the adhesive from trying to reunite with its long-lost love, the cover.

Step 14

– Slide a plastic pick beneath the center of the right edge of the back cover. Then, gently work the pick upward, guiding it towards the top of the device to loosen the adhesive. Take your time to avoid damaging the cover. If you need help, you can always schedule a repair.

Step 15

– Warm up the top edge of the back cover with a heated iOpener for about two minutes. This helps loosen the adhesive and makes the cover easier to lift off. If you need help, you can always schedule a repair.

Tools Used
  1. iOpenerSamsung Galaxy S20 Ultra Screen and Battery Assembly Replacement

Step 16

– Gently slide the pick from the right edge of your device, making your way around the top right corner like a pro.

– Keep slicing along the top edge until the back cover adhesive is fully separated. You’ve got this!

Step 17

– Gently lift the back cover—no Hulk moves needed. Slide an opening pick along the edge to slice through any stubborn adhesive.

– Once free, remove the back cover. Victory dance optional.

– Reassembly time:

– This is your moment to power on your phone and make sure everything’s working before you seal it up. Better safe than sorry!

– Clear out any leftover adhesive chunks with tweezers or your fingers. A little heat can help loosen things up if the adhesive is playing hard to get.

– Using Samsung custom-cut adhesives? Check out Salvation Repair’s guide for details.

– Rolling with double-sided tape? Salvation Repair’s guide has you covered.

Step 18

– Grab a spudger and gently pry up to disconnect the wireless charging coil connector. Keep it friendly, keep it simple, and if you hit a snag, remember you can always schedule a repair to get professional help.

Tools Used
  1. SpudgerSamsung Galaxy S20 Ultra Screen and Battery Assembly Replacement

Step 19

– Grab a Phillips #00 screwdriver and unscrew the five 3.9 mm-long screws holding in the loudspeaker and lower midframe. Keep those screws safe—you’ll need them later! If you need a hand, you can always schedule a repair.

Step 20

– Gently slide the tip of your spudger into the little notch at the top left corner of the loudspeaker. You’re doing great!

– Now, give it a little pry to pop those clips loose. You’ve got this!

Tools Used
  1. SpudgerSamsung Galaxy S20 Ultra Screen and Battery Assembly Replacement

Step 21

– Grab your tweezers (or your fingers, if you’re feeling confident) and carefully peel the wireless charging coil away from the device. Take it slow, no need to rush!

– Now, gently lift the wireless charging coil out. Easy does it!

– Place the charging coil aside for now—don’t worry, you’ll be putting it back together later when it’s time to reassemble.

Step 22

– Grab your Phillips #00 screwdriver and whisk away those five 3.9 mm screws holding down the motherboard bracket. Precision counts, but don’t sweat it—just keep track of those tiny screws!

Step 23

– Grab a pair of blunt-nose tweezers and gently unclip the motherboard bracket. Once it’s free, set it aside—you’ll be reusing it when you put everything back together.

Step 24

– Grab your trusty spudger and gently lift the battery connector out of its spot. Disconnect like a pro!

Tools Used
  1. SpudgerSamsung Galaxy S20 Ultra Screen and Battery Assembly Replacement

Step 25

– Grab a spudger and gently pry up the primary and secondary interconnect cables from the daughterboard near the bottom of the device. To reconnect press connectors like these, carefully align them and press down on one side until it clicks, then do the same on the other side. Avoid pressing in the middle to prevent bending the pins—misalignment can lead to permanent damage. If you need a hand with tricky steps, you can always schedule a repair.

Tools Used
  1. SpudgerSamsung Galaxy S20 Ultra Screen and Battery Assembly Replacement

Step 26

– Grab your trusty spudger and gently pry up those interconnect cables from the motherboard—both the primary and secondary ones. You’ve got this!

Tools Used
  1. SpudgerSamsung Galaxy S20 Ultra Screen and Battery Assembly Replacement

Step 27

– Carefully lift up and take off the primary and secondary interconnect cables—no need to wrestle them.

– Put both cables somewhere safe. You’ll need them when it’s time to put everything back together.

Step 28

– Grab a Phillips #00 screwdriver and remove the three 3.7 mm screws holding in the USB-C port and daughterboard. Easy peasy—just a few turns and you’re on your way. If you hit any snags, remember you can always schedule a repair with the pros.

Step 29

– Slip the pointy end of your spudger under the left side of the daughterboard and gently pop it loose from its spot.

– Grab the daughterboard with tweezers or your fingers, lift it up from the bottom, and set it aside. Nice work!

Tools Used
  1. SpudgerSamsung Galaxy S20 Ultra Screen and Battery Assembly Replacement

Step 30

– Warm up your trusty iOpener and give it a cozy spot on the bottom-right corner of your device for a delightful 90 seconds.

Tools Used
  1. iOpenerSamsung Galaxy S20 Ultra Screen and Battery Assembly Replacement

Step 31

– Slide the spudger’s tip into the gap between the frame and the notch on the vibrator’s edge, right near the bottom of your device.

– Gently pry upwards with the spudger to detach the vibrator from the frame.

– Carefully take out the vibrator.

Tools Used
  1. SpudgerSamsung Galaxy S20 Ultra Screen and Battery Assembly Replacement

Step 32

– Alright, let’s get that vibrator back in action! Start by peeling off the adhesive from its liner and stick the gooey side to the bottom of the vibrator.

– Now, grab some tweezers or your fingers and gently pull up on the white liner to reveal the top layer of adhesive. It’s like a surprise party for your gadget!

– Time to insert the vibrator! Give it a little push and apply some pressure to make sure it sticks to the frame. You’re doing great!

Step 33

– Gently lift and unplug the left 5G mmWave antenna connector from the motherboard. If you need help, you can always schedule a repair.

Step 34

– Gently lift and unplug the display flex cable from the motherboard. You’re almost there!

Step 35

– Carefully lift up and tuck the display and left 5G mmWave antenna flex cables aside, keeping them out of the way of the motherboard and battery. No stress—just a little cable yoga!

Step 36

– Grab your Phillips #00 screwdriver and take out the four screws (they’re 3.9 mm long) holding the upper midframe in place. Easy does it!

Step 37

– Take your trusty spudger and slide it into the notch on the right side of the upper midframe. Give it a gentle twist to pop those clips loose.

– Lift off the upper midframe like a pro.

– Set the upper midframe aside for now—you’ll need it again when putting everything back together.

Tools Used
  1. SpudgerSamsung Galaxy S20 Ultra Screen and Battery Assembly Replacement

Step 38

– Gently lift and unplug the right 5G mmWave antenna flex cable from the motherboard. You’ve got this!

– Carefully bend the cable to keep it out of the motherboard’s way. Easy peasy!

Step 39

– Gently lift up the side button flex cable and unplug it from the motherboard—think of it as giving your phone a little stretch.

– Move the cable aside so it’s not blocking the motherboard. Easy does it!

Step 40

– Gently pop up the front camera flex cable from the motherboard. Treat it like a delicate little lever.

– Swing that cable away from the motherboard—kind of like moving a curtain aside to let the sunshine in.

Step 41

– Gently lift and unplug the upper 5G mmWave antenna cable from the motherboard. Then, use tweezers or your fingers to peel away the upper 5G antenna. Keep the antenna safe—you’ll want it again when putting everything back together. When reassembling, connect the antenna connector first to ensure it lines up perfectly, then press down on the rest of the antenna module to secure it in place. If you need a hand, you can always schedule a repair.

Step 42

– Grab your Phillips #00 screwdriver and unscrew those two 3.9 mm screws holding down the motherboard and camera assembly. Precision work, but you’ve got this!

Step 43

– Gently slide the tip of your spudger into the bottom left corner of the motherboard assembly and give it a little nudge to pop it free from the phone’s body.

– Carefully lift out the motherboard assembly.

Tools Used
  1. SpudgerSamsung Galaxy S20 Ultra Screen and Battery Assembly Replacement

Step 44

– Warm up the iOpener and place it over the front camera for about 90 seconds to loosen things up.

Tools Used
  1. iOpenerSamsung Galaxy S20 Ultra Screen and Battery Assembly Replacement

Step 45

– Slide a spudger into the little gap between the frame and the front camera. It’s like giving your device a gentle nudge!

– Gently pry up with the spudger to help the front camera break free from the frame. You’re doing great!

– Carefully use tweezers or your fingers to lift out the front camera. You’ve got this!

– Set the front camera aside for now; it will be back in action during reassembly. Keep it safe!

Tools Used
  1. SpudgerSamsung Galaxy S20 Ultra Screen and Battery Assembly Replacement

Step 46

– Time to get that front camera back in action! Here’s how to do it:

– Peel the adhesive off its liner and stick it onto the frame—make sure it’s lined up nicely.

– Grab the tab with tweezers or your fingers and pull to reveal the sticky top layer.

– Pop the front camera into place and press it down so it sticks snugly to the frame.

Step 47

– Grab a Phillips screwdriver and unscrew those four 3.4 mm-long screws holding down the 5G mmWave antennas. Easy as that—just a bit of twist to free them up. If you need help along the way, you can always schedule a repair.

Step 48

– Grab a spudger and gently lift the bottom screw tab of the 5G mmWave antenna bracket—think of it as giving it a little nudge to get things started.

– Use tweezers or your fingertips to carefully lift and remove the 5G mmWave antenna—treat it like a delicate treasure.

– Set the antenna aside in a safe spot—you’ll be bringing it back during reassembly, so keep it handy.

Tools Used
  1. SpudgerSamsung Galaxy S20 Ultra Screen and Battery Assembly Replacement

Step 49

– Grab your trusty spudger and give the top edge of that 5G mmWave antenna bracket a gentle pry. It’ll pop up just like magic!

– Now, with your fingers or some tweezers, delicately lift out the 5G mmWave antenna. Nice and easy!

– Once it’s out, place the antenna to the side—don’t lose it, as it will be making a comeback after we finish up!

Tools Used
  1. SpudgerSamsung Galaxy S20 Ultra Screen and Battery Assembly Replacement

Step 50

– Time to put everything back together! Just follow these steps in reverse, and you’ll be good as new.

– Now that you’re done, don’t forget to responsibly recycle any leftover e-waste with an R2 or e-Stewards certified recycler.

– If things didn’t quite go as planned, try some basic troubleshooting or reach out to our community at Salvation Repair for some expert help. And if you’re really stuck, you can always schedule a repair with us.

Success!

Samsung Galaxy S20 Ultra Screen Replacement

Duration: 45 minutes
Steps: 38 Steps

Ready to give your Samsung Galaxy S20 Ultra a fresh new face? This guide walks you through swapping out the entire screen assembly—including the display glass, OLED panel, and digitizer. Heads up: Some replacement screens come with a snazzy new frame (chassis), so you’ll need to move all your phone’s guts over and pop in a new battery. Double-check you’ve got the right part before diving in. The display panel is a bit of a diva—unreinforced and pretty delicate—so if you’re planning to reuse it, bring the heat and take your time with prying. Don’t forget, you’ll need fresh adhesive to seal the deal. If things get tricky, you can always schedule a repair.

Step 1

– Warm up your iOpener and set it on the bottom edge of the back cover for about two minutes. Let that heat work its magic!

Tools Used
  1. iOpenerSamsung Galaxy S20 Ultra Screen Replacement

Step 2

– Start by placing a suction cup on the back of your phone, right near the center of the bottom edge for the best grip.

– Give that suction cup a strong tug – we want to open a little gap between the back cover and the frame, so pull with steady confidence!

– Now, take an opening pick and gently slide it into the gap you just created.

Tools Used
  1. iOpenerSamsung Galaxy S20 Ultra Screen Replacement

Step 3

– Gently glide the pick back and forth along the bottom edge to cut through that sticky adhesive like a pro.

– Keep your opening pick snugly in the seam to stop the adhesive from sealing up again.

Step 4

– Take your trusty iOpener and warm it up. Now, place it gently on the left edge of the back cover for about two minutes. Let the heat work its magic, softening things up so you can get to the good stuff. Patience is key, but you’ve got this!

Tools Used
  1. iOpenerSamsung Galaxy S20 Ultra Screen Replacement

Step 5

– Grab a suction cup and stick it to the back of your phone, aiming for the center of the left edge.

– Give that suction cup a good, steady pull to create a little gap between the back cover and the frame.

– Slide the tip of an opening pick into that gap you just made.

– For an extra boost, you might want to drop a few drops of high concentration (over 90%) isopropyl alcohol into the seam to help loosen up that stubborn adhesive.

Tools Used
  1. Isopropyl AlcoholSamsung Galaxy S20 Ultra Screen Replacement

Step 6

– Slide the pick under the edge of the glass, angle it down, and work it in a little more to loosen up all that sticky back cover glue.

Step 7

– Gently slide that trusty pick toward the bottom edge of the phone to help separate the back cover from its sticky situation.

– Keep your pick snugly tucked under the left edge of the glass near the bottom of the device to stop the adhesive from getting all clingy again.

Step 8

– Slide a pick under the center of the left edge of the back cover like you’re sneaking into a secret club.

– Work the pick up toward the top, gently working the adhesive loose as you go.

– Keep the pick chilling under the left edge near the top—this stops the sticky stuff from grabbing hold again.

Step 9

– Warm up the right edge of the back cover by applying a heated iOpener for about two minutes. Keep it cozy and gentle—think of it as giving your device a little spa treatment. If you need a hand, you can always schedule a repair.

Tools Used
  1. iOpenerSamsung Galaxy S20 Ultra Screen Replacement

Step 10

– Stick a suction cup onto the back of the phone, aiming as close to the center of the right edge as you can. Keep it steady and confident.

– Pull on the suction cup with a firm, steady tug to create a little gap between the back cover and the frame. No need to go all Hulk—just enough to get some room.

– Slide a plastic opening pick into that gap. You’re on your way to freeing up the back cover—keep it smooth and steady.

Step 11

– Scoot your pick down to the bottom edge of the phone—let’s show that adhesive who’s boss.

– Park the pick near the lower right edge of the glass to keep that sticky stuff from making a comeback.

Step 12

– Slide another pick under the middle of the back cover’s right edge—think of it as giving your device a gentle nudge.

– Work the pick up toward the top, gliding along to loosen that sticky adhesive. Keep it smooth and steady!

Step 13

– Warm up the top edge of your back cover for about two minutes using a heated iOpener. Let it work its magic—your phone’s about to loosen up!

Tools Used
  1. iOpenerSamsung Galaxy S20 Ultra Screen Replacement

Step 14

– Gently slide your pick from the right edge of the device, maneuvering around the top right corner.

– Keep slicing along the top edge to carefully detach the back cover’s adhesive, making sure not to rush.

Step 15

– Gently lift off the back cover, using opening picks to carefully cut through any leftover adhesive. Next, remove the back cover completely. During reassembly, this is a good moment to power on your device and give all functions a quick test before sealing everything up. Use tweezers or your fingers to pick away any stubborn adhesive bits—apply a little heat if they’re really sticking. If you’re working with Samsung’s custom-cut adhesives, follow this guide. For double-sided tape, refer to this guide. If you’re feeling stuck or need a hand, you can always schedule a repair.

Tools Used
  1. TweezersSamsung Galaxy S20 Ultra Screen Replacement

Step 16

– Grab your trusty spudger and gently lift up the connector for the wireless charging coil—think of it as giving your phone a little nudge to wake it up.

Tools Used
  1. SpudgerSamsung Galaxy S20 Ultra Screen Replacement

Step 17

– Grab a pair of tweezers and gently lift the wireless charging coil away from the device—think of it as peeling away a sticker, but more delicate.

– Carefully remove the wireless charging coil from its spot, making sure not to bend or damage it.

– When putting everything back together, connect the wireless charging coil connector first—this helps align everything just right. Then, press down firmly on the coil to stick it in place and secure the connection. If you need a hand, you can always schedule a repair.

Tools Used
  1. TweezersSamsung Galaxy S20 Ultra Screen Replacement

Step 18

– Grab your Phillips #00 screwdriver and take out the five screws (they’re each 3.9 mm long) holding down the motherboard bracket.

Step 19

– Grab your tweezers and gently pop off the motherboard bracket—like you’re removing a stubborn popcorn kernel. Easy does it!

Tools Used
  1. TweezersSamsung Galaxy S20 Ultra Screen Replacement

Step 20

– Grab your trusty spudger and gently lift the battery connector up and away—like you’re unplugging a tiny robot’s nap cord.

Tools Used
  1. SpudgerSamsung Galaxy S20 Ultra Screen Replacement

Step 21

– Grab your trusty Phillips #00 screwdriver and get ready to work your magic! Carefully remove the five screws, each measuring 3.9 mm, that are holding the loudspeaker and lower midframe in place. You’re doing great, keep it up!

Step 22

– Grab your trusty spudger or a pair of tweezers and slide the tip into the notch at the top left corner of the midframe. Gently pop those clips loose—think of it as convincing the midframe to let go.

– Lift out the loudspeaker and lower midframe with a smooth move. Voilà!

Tools Used
  1. TweezersSamsung Galaxy S20 Ultra Screen Replacement
  2. SpudgerSamsung Galaxy S20 Ultra Screen Replacement

Step 23

– Grab your trusty spudger and gently wiggle it to lift up and disconnect that display cable. You’ve got this!

Tools Used
  1. SpudgerSamsung Galaxy S20 Ultra Screen Replacement

Step 24

– The adhesive along the long sides of the device is pretty thin, so a gentle 5 mm pick insertion is enough to start separating it. Keep in mind, though, that along the top edge, the adhesive extends quite a bit further from the device’s edge. You’ll want to insert your pick a little deeper here to get it fully separated. Take your time, and if you need a hand, you can always schedule a repair.

Step 25

– Warm up your iOpener and set it on the top edge of the screen for about two minutes to loosen things up.

Tools Used
  1. iOpenerSamsung Galaxy S20 Ultra Screen Replacement

Step 26

– Grab a suction cup and slap it onto the display glass, aiming for the center near the top edge – you got this!

– With a firm and steady pull on that suction cup, create a little gap between the display glass and the frame – feel the excitement!

– Now, take the sharp end of an opening pick and carefully slip it into the gap, starting at the earpiece speaker notch and gently slide it down beneath the display.

– Keep that pick in place to make sure the adhesive doesn’t decide to play hide and seek again!

Tools Used
  1. iOpenerSamsung Galaxy S20 Ultra Screen Replacement

Step 27

– Pop in a second pick into that same gap and glide it up to the top left corner of the display to cut through the adhesive like a pro.

– Keep your opening pick snug in the seam to stop that adhesive from sealing back up. You’re doing great!

Step 28

– Grab your third pick and wiggle it into the center gap. Slide it over to the top right corner, slicing through that stubborn adhesive like a pro.

– Leave your pick chilling in the seam—this keeps the adhesive from sticking itself back together.

Step 29

– Glide the center pick along the top edge to loosen up the sticky stuff around the earpiece and front camera. Let the pick do the work!

– Once you’ve sliced through, lift out the center pick with a little victory dance.

Step 30

– Warm up a trusty iOpener and give the right edge of the display a cozy two-minute hug.

Tools Used
  1. iOpenerSamsung Galaxy S20 Ultra Screen Replacement

Step 31

– Grab an opening pick and slip it into the top right corner of the screen—look for that little gap.

– Glide the pick smoothly down to the bottom right corner, slicing through the sticky adhesive like a pro.

– Now, tuck a pick under the middle of the screen’s right side to keep that adhesive from sticking itself back together.

Step 32

– As you glide your tool around the edge of the device to carefully slice through the adhesive, keep an extra eye on the delicate spots near the USB-C port—let’s avoid any surprises!

Step 33

– Warm up the left edge of the display with a heated iOpener for about two minutes—think of it as giving your device a gentle spa treatment before you start.

Tools Used
  1. iOpenerSamsung Galaxy S20 Ultra Screen Replacement

Step 34

– Gently insert a pick into the gap at the top-left corner of the display.

– Carefully slide the pick down along the edge to the bottom-left corner to loosen the adhesive.

– Slide a pick underneath the center of the screen’s left edge to keep the adhesive from sealing back up.

Step 35

– Start by squirting a generous amount of over 90% isopropyl alcohol behind the display, aiming as close to the clear adhesive (marked in red) as you can. Tilt the device slightly as you do this—it’s like giving the adhesive a little nudge to let the alcohol sneak in underneath. Once you’ve applied the alcohol, keep tilting the bottom of the phone downward for a couple of minutes—think of it as giving the alcohol time to do its magic and loosen things up. If you need help, you can always schedule a repair.

Tools Used
  1. Isopropyl AlcoholSamsung Galaxy S20 Ultra Screen Replacement

Step 36

– Gently slide your spudger under the top edge of the screen and work it along to loosen up that sticky clear adhesive. Take it slow—no need to rush!

Tools Used
  1. SpudgerSamsung Galaxy S20 Ultra Screen Replacement

Step 37

– Carefully detach the display from the frame, keeping it gentle so nothing cracks. When it’s time to put the new display back in, thread the display cable through the frame’s cutout before pressing the screen into the adhesive. Remember, don’t insert the cable before the adhesive is ready—wait until you’re all set for a smooth fit. If you need a hand, you can always schedule a repair.

Step 38

– Grab some tweezers to gently lift away any leftover adhesive from the frame—no need to scrape or force it. Next, grab some isopropyl alcohol and a lint-free cloth to give the frame’s surface a good clean, wiping in one steady direction to keep things neat and smear-free. When it’s time to reassemble, follow this guide to install custom-cut adhesives designed for your device. If you need a hand along the way, you can always schedule a repair.

Success!
Before you wrap things up, compare your new part to the old one and make sure you’ve moved over any bits and peeled off any stickers or backing you need.
To put your device back together, just reverse the steps above. It’s like a dance, but with screws and gadgets.
Give your device a spin using our guide to make sure everything’s working like it should.
When you’ve got leftover parts that are ready to retire, drop them off at an R2 or e-Stewards certified recycler. Your future self and the planet will high-five you.
If your device is still acting up, swing by our Answers community for some troubleshooting magic. And if you’re feeling stuck, you can always schedule a repair with Salvation Repair.

Samsung Galaxy S20 Ultra Motherboard Replacement

Duration: 45 minutes
Steps: 44 Steps

Time to get that Galaxy S20 Ultra back in shape! Follow these steps to swap out the motherboard and breathe new life into your device. Just make sure you’ve got some replacement adhesive on hand to wrap up the repair.

Step 1

– Grab your SIM eject tool, a tiny bit, or even a trusty straightened paperclip—whatever you’ve got on hand works!

– Give it a confident poke into the little hole on the SIM tray (you’ll find it at the top edge of your phone, hanging out next to the plastic antenna band).

– Push in with a bit of oomph, and voilà—the tray pops out!

Tools Used
  1. SIM Card Eject ToolSamsung Galaxy S20 Ultra Motherboard Replacement

Step 2

– Pop out the SIM card tray like a pro.

– When sliding the SIM card back in, make sure it matches up with the tray—no upside-down acrobatics needed.

– Spot a thin rubber gasket around the SIM tray? That’s your phone’s water and dust bouncer. If it’s torn or missing, swap out the gasket or tray to keep your phone safe and sound.

Step 3

– Warm up your iOpener and set it on the bottom edge of the back cover for about two minutes. Let it work its magic to soften up the adhesive.

Tools Used
  1. iOpenerSamsung Galaxy S20 Ultra Motherboard Replacement

Step 4

– Grab a suction cup and stick it onto the back of your phone, aiming for that sweet spot near the middle of the bottom edge.

– Give that suction cup a solid pull! You want to make a nice little gap between the back cover and the phone frame.

– Slide the tip of an opening pick into that newly formed gap and get ready to work your magic.

Tools Used
  1. iOpenerSamsung Galaxy S20 Ultra Motherboard Replacement

Step 5

– Glide the pick back and forth along the bottom edge to slice through that stubborn adhesive—it’s like convincing gum to let go of your shoe.

– Leave the pick chilling in the seam to keep the adhesive from making a comeback.

Step 6

– Give the left edge of the back cover a spa day with a heated iOpener for about two minutes—let that warmth work its magic.

Tools Used
  1. iOpenerSamsung Galaxy S20 Ultra Motherboard Replacement

Step 7

– Start by sticking a suction cup onto the back of the phone, near the left edge and as close to the center as possible. Then, gently pull on the suction cup with steady, firm pressure to create a small gap between the back cover and the frame. Next, slide an opening pick into the gap to help loosen the adhesive. For an extra boost, try applying a few drops of high-concentration (over 90%) isopropyl alcohol into the seam—this can help dissolve the glue and make the process smoother. If you need assistance, you can always schedule a repair.

Step 8

– Gently slide the pick under the edge of the glass, then give it a little tilt and push it along to fully free the back cover from its sticky grip.

Step 9

– Gently slide your pick along the bottom edge of the phone to break the back cover’s adhesive seal.

– Leave the pick resting under the left side of the glass, near the bottom, to stop the adhesive from sticking back together.

Step 10

– Slip a pick right under the middle of the left edge of the back cover to get started.

– Slowly work your pick upward along the device to loosen the adhesive holding the back on.

– Keep your pick tucked under the top-left corner of the glass near the top of the device so the adhesive doesn’t stick back together. If you need a hand, you can always schedule a repair.

Step 11

– Place a heated iOpener on the right edge of the back cover and hold it there for about two minutes. This helps loosen things up, making your next steps smoother. If you need a hand, you can always schedule a repair.

Tools Used
  1. iOpenerSamsung Galaxy S20 Ultra Motherboard Replacement

Step 12

– Stick a suction cup on the back of your phone, aiming for the center near the right edge—think of it as the phone’s sweet spot.

– Give that suction cup a firm, steady pull to coax a gap open between the back cover and the frame. Slow and steady wins the race here.

– Slide the tip of an opening pick into the gap you just made. Like sneaking a chip into a bag, but with more purpose.

Step 13

– Gently slide your pick down towards the bottom edge of the phone to break the seal of the back cover’s adhesive. You’ve got this!

– Once you’re in, tuck your pick under the right edge of the glass near the bottom. This will keep that pesky adhesive from sticking back together while you work your magic!

Step 14

– Slide another pick under the center of the right edge of the back cover. You’re halfway there!

– Carefully move the pick upwards along the edge of the device to gently break the seal of the adhesive. Easy peasy!

Step 15

– Warm up the top edge of the back cover by pressing a heated iOpener against it for two minutes. This helps loosen the adhesive so the cover can come off more easily.

Tools Used
  1. iOpenerSamsung Galaxy S20 Ultra Motherboard Replacement

Step 16

– Gently slide your pick from the right edge of the device, moving around the top right corner. Keep going along the top edge until you’ve fully separated the back cover adhesive. If you need help, you can always schedule a repair.

Step 17

– Gently lift the back cover. If there’s any stubborn adhesive hanging around, use an opening pick to slice through it with ease.

– Carefully remove the back cover and set it aside.

– Pro tip: Before you start reassembling, power up your device and make sure everything is working smoothly. You’ll thank yourself later!

– If you’re dealing with some leftover adhesive, grab some tweezers (or your fingers) to clear it out. Need extra help? A little heat should do the trick to loosen it up.

– Using Samsung custom-cut adhesives? No worries, just follow the guide here for a smooth process.

– Got double-sided tape on hand? Follow this guide for detailed steps and you’ll be good to go.

Tools Used
  1. TweezersSamsung Galaxy S20 Ultra Motherboard Replacement

Step 18

– Grab your trusty spudger and pop up the wireless charging coil connector—just a gentle nudge will do the trick.

Tools Used
  1. SpudgerSamsung Galaxy S20 Ultra Motherboard Replacement

Step 19

– Grab a trusty pair of tweezers and carefully lift the wireless charging coil away from the device. Take your time, it’s like a delicate dance!

– Now, go ahead and remove that wireless charging coil. You’ve got this!

– When it’s time to put everything back together, start by reconnecting the wireless charging coil connector first. This will help you get it all lined up just right. Then, give the rest of the coil a good press down to make sure it sticks. You’re almost there!

Tools Used
  1. TweezersSamsung Galaxy S20 Ultra Motherboard Replacement

Step 20

– Grab your Phillips #00 screwdriver and take out the five screws (they’re 3.9 mm long) that are holding the motherboard bracket in place.

Step 21

– Grab those tweezers and gently unclip the motherboard bracket to free it up. Easy does it—no force needed. If you hit a snag, remember you can always schedule a repair for extra help.

Tools Used
  1. TweezersSamsung Galaxy S20 Ultra Motherboard Replacement

Step 22

– Grab your trusty spudger and gently lift up the battery connector to disconnect it.

Tools Used
  1. SpudgerSamsung Galaxy S20 Ultra Motherboard Replacement

Step 23

– Grab your trusty Phillips #00 screwdriver and tackle those five 3.9 mm-long screws that are holding the loudspeaker and lower midframe in place. You’ve got this!

Step 24

– Take your spudger or tweezers and pop them into the top left notch of the midframe—give it a gentle pry to unclip those sneaky fasteners holding everything together.

– Lift out the loudspeaker and the lower midframe like you’re revealing the secret sauce behind your device’s coolness.

Tools Used
  1. SpudgerSamsung Galaxy S20 Ultra Motherboard Replacement
  2. TweezersSamsung Galaxy S20 Ultra Motherboard Replacement

Step 25

– Grab a spudger and gently pry up the main and auxiliary flex cables from the daughterboard near the bottom of your device. When it’s time to reconnect those press connectors, line them up carefully and press down on one side until it clicks, then do the same on the other. Avoid pressing on the middle to prevent bending the pins—bending is bad news. Need a hand? You can always schedule a repair if things get tricky.

Tools Used
  1. SpudgerSamsung Galaxy S20 Ultra Motherboard Replacement

Step 26

– Gently pop up those main and auxiliary flex cables from the motherboard using your trusty spudger. One smooth move and they’re free!

Tools Used
  1. SpudgerSamsung Galaxy S20 Ultra Motherboard Replacement

Step 27

– Carefully lift and slide out the main and auxiliary flex cables—like you’re removing spaghetti from a bowl, but way less messy.

Step 28

– Gently pop up the left 5G antenna cable and unplug it from the motherboard—easy does it!

Step 29

– Gently lift up and unplug the main display flex cable from the motherboard. Easy does it, but make sure it’s fully disconnected before moving on.

Step 30

– Carefully lift and flex the display and left 5G antenna cables aside, making sure they don’t block access to the motherboard or battery.

Step 31

– Grab a Phillips #00 screwdriver and unscrew the four 3.9 mm screws holding down the upper midframe. Easy does it!

Step 32

– Grab your trusty spudger and pop it into the notch on the right side of the upper midframe. Give it a gentle twist to unclip those stubborn clips.

– Lift off the upper midframe and set it aside like a pro.

Tools Used
  1. SpudgerSamsung Galaxy S20 Ultra Motherboard Replacement

Step 33

– Gently lift and disconnect the right 5G antenna flex cable from the motherboard—think of it as unplugging a little spaghetti noodle.

– Grab your trusty tweezers and nudge that cable out of the motherboard’s way, like you’re clearing a dance floor for the next move.

Tools Used
  1. TweezersSamsung Galaxy S20 Ultra Motherboard Replacement

Step 34

– Gently pry up the side button flex cable to unplug it from the motherboard. No wrestling moves needed.

– Swing the cable out of the way so the motherboard has some breathing room.

Step 35

– Gently pop up the front-facing camera flex cable from the motherboard—like opening a stubborn jar, but with way less mess.

– Swing that cable away from the motherboard so it’s not photobombing your next repair move.

Step 36

– Gently pop up and unplug the upper 5G antenna cable from the motherboard.

Step 37

– Grab your trusty spudger and gently coax up the corner of the 5G millimeter wave antenna module. It’s like a little surprise waiting to be uncovered!

– Time to say goodbye to the 5G antenna module. It served you well!

– When you’re putting everything back together, make sure to connect that 5G antenna first. It’s like getting the first piece of a puzzle just right! Then, give the rest of the antenna module a solid press to make sure it’s snug and secure. You’ve got this!

Tools Used
  1. SpudgerSamsung Galaxy S20 Ultra Motherboard Replacement

Step 38

– Grab a Phillips #00 screwdriver and carefully remove the pair of 3.9 mm screws holding down the motherboard and camera assembly. Easy does it—you’re well on your way to the next step. If you need help, you can always schedule a repair.

Step 39

– Slide the tip of your spudger into the bottom left corner of the motherboard assembly and gently lever it up—think of it like popping open a stubborn jar, but cooler.

– Lift out the motherboard assembly. Go slow and steady, and let gravity help you out.

Tools Used
  1. SpudgerSamsung Galaxy S20 Ultra Motherboard Replacement

Step 40

– Gently lift and disconnect the ultrawide camera connector from the motherboard. Keep things careful and friendly—you’re doing great! If you need a hand, remember you can always schedule a repair.

Step 41

– Gently lift and unplug the telephoto and wide-angle camera connectors from the motherboard with a dash of finesse.

Step 42

– Flip the motherboard assembly over, then gently pop up and disconnect the depth sensor connector from the motherboard.

Step 43

– Gently lift out the rear camera module—like you’re removing a jewel from a crown.

Step 44

– Double-check your new part next to the original—sometimes there’s a little leftover adhesive or a sneaky component that needs transferring.

– Ready to put it all back together? Just reverse the steps and watch your device come back to life.

– Once you’re done, run through our guide to make sure everything’s working smoothly.

– Old parts lying around? Keep the planet happy and drop them off at an R2 or e-Stewards certified recycler.

– Stuck or things got weird? The Answers community is loaded with troubleshooting tips, or you can always schedule a repair.

Success!
Take a moment to compare your shiny new replacement part with the original—there might be some bits to swap over or pesky adhesive to peel off before you dive into the installation.
Time to put your device back together! Just retrace your steps like a pro.
Once you’ve wrapped up your repair adventure, be sure to follow this guide to give your handiwork a test run.
Got some old tech lying around? Make sure to drop it off at an R2 or e-Stewards certified recycler—let’s keep it green!
Things not going as smoothly as you’d hoped? No worries! Swing by our Answers community for some troubleshooting tips and tricks. And remember, if things get too tricky, you can always schedule a repair.

Samsung Galaxy S20 Ultra Front-Facing Camera Module Replacement

Duration: 45 minutes
Steps: 26 Steps

Ready to swap out the front-facing camera module on your Galaxy S20 Ultra? You’re in the right place! Heads up: removing the camera module is a bit tricky and can easily damage it, so if you want to reuse it, go slow and pay close attention to the warnings. Don’t forget, you’ll need some fresh adhesive to seal things up once you’re done.

Step 1

– Fire up your iOpener and let it work its magic on the bottom edge of the back cover for a couple of minutes. Heat makes everything easier!

Tools Used
  1. iOpenerSamsung Galaxy S20 Ultra Front-Facing Camera Module Replacement

Step 2

– Stick a suction cup on the back of the phone, aiming for the very bottom center for best grip.

– Pull steadily on the suction cup—no need to go Hulk on it—just firm and consistent to create a little space between the back cover and the frame.

– Gently slip the tip of an opening pick into that gap and you’re all set to get things started.

Tools Used
  1. iOpenerSamsung Galaxy S20 Ultra Front-Facing Camera Module Replacement

Step 3

– Gently wiggle your opening pick along the bottom edge to slice through the adhesive—think of it as giving the glue a gentle tease.

– Keep that pick in the seam once you’ve got it open to prevent the adhesive from sneaking back and sticking everything shut again.

Step 4

– Warm up the left edge of the back cover with a heated iOpener for about two minutes. This helps loosen things up for the next steps.

Tools Used
  1. iOpenerSamsung Galaxy S20 Ultra Front-Facing Camera Module Replacement

Step 5

– Stick a suction cup onto the back of your device, aiming for the area near the left edge but as close to the middle as possible. Give it a firm, steady pull to gently pry open a gap between the back cover and the frame. Carefully slide an opening pick into that gap to start loosening things up. If the adhesive seems stubborn, a few drops of high-concentration (over 90%) isopropyl alcohol applied into the seam might help loosen it up. If you need a hand with the process, you can always schedule a repair.

Tools Used
  1. Isopropyl AlcoholSamsung Galaxy S20 Ultra Front-Facing Camera Module Replacement

Step 6

– Once the pick slips under the edge of the glass, tilt it downward and wiggle it in further to loosen the back cover’s adhesive. Keep at it until it’s fully separated.

Step 7

– Glide the pick down towards the bottom edge of your phone—you’re loosening up that sticky adhesive holding the back cover.

– Let your pick chill under the left edge of the glass, near the bottom. This keeps the glue from sneakily sticking itself back together while you work.

Step 8

– Slide another pick under the center of the left edge of the back cover—like you’re playing a game of phone Tetris.

– Gently work the pick up toward the top, loosening that stubborn back cover adhesive as you go.

– Let your pick chill under the left edge near the top. That way, the sticky stuff doesn’t sneak back together while you’re working.

Step 9

– Warm up your iOpener and let it chill on the right edge of the back cover for about two minutes.

Tools Used
  1. iOpenerSamsung Galaxy S20 Ultra Front-Facing Camera Module Replacement

Step 10

– Stick a suction cup onto the back of the phone, aiming as close to the middle of the right edge as you can. Think of it as a tiny grappling hook!

– Give that suction cup a firm, steady tug to pop open a small gap between the back cover and the frame. No need to yank—just a confident pull!

– Slide the pointy end of an opening pick into that gap to start prying it open. Keep it gentle but persistent—you’re just getting the party started!

Step 11

– Gently slide your pick towards the bottom edge of the phone to loosen the back cover’s adhesive. Keep the pick in place, and leave it tucked under the right edge of the glass near the bottom of the device—this way, the adhesive won’t seal back up. If you need a hand, you can always schedule a repair.

Step 12

– Slide a plastic pick just beneath the center of the right edge of the back cover. Then, gently work the pick upward and outward, gradually separating the back cover from the device by easing the adhesive apart.

Step 13

– Warm up the top edge of the back cover with a heated iOpener for about two minutes. Give it some time to loosen things up.

Tools Used
  1. iOpenerSamsung Galaxy S20 Ultra Front-Facing Camera Module Replacement

Step 14

– Gently slide your opening tool from the right edge of the device, working your way around the top right corner. Keep at it until you’ve loosened the back cover’s adhesive along the top edge — it’s like peeling a sticker, but for tech! If you need help, you can always schedule a repair.

Step 15

– Gently lift the back cover, taking your time. Slice through any leftover adhesive with some opening picks.

– Take off the back cover and set it aside.

– On your way back to reassembly:

– This is a great moment to power up your phone and make sure everything’s working before locking things down.

– Clear out any adhesive debris using tweezers or your fingers. If the adhesive is stubborn, hit it with some heat.

– Using Samsung custom-cut adhesives? Check out Salvation Repair’s guide.

– If you’re going with double-sided tape, Salvation Repair’s guide has you covered.

Tools Used
  1. TweezersSamsung Galaxy S20 Ultra Front-Facing Camera Module Replacement

Step 16

– Grab a spudger and gently pry up the wireless charging coil connector to disconnect it. Take your time—patience pays off! If you need a hand, you can always schedule a repair.

Tools Used
  1. SpudgerSamsung Galaxy S20 Ultra Front-Facing Camera Module Replacement

Step 17

– Grab your trusty tweezers and carefully lift the wireless charging coil away—think of it as removing a sticker, but way cooler.

– Take out the wireless charging coil and set it aside like the VIP it is.

– When you’re putting things back together, reconnect the wireless charging coil connector first. This lines everything up nicely. Then press the coil down so it sticks like it means it.

Tools Used
  1. TweezersSamsung Galaxy S20 Ultra Front-Facing Camera Module Replacement

Step 18

– Grab your trusty Phillips #00 screwdriver and take out the five screws (3.9 mm long) that are holding down the motherboard bracket.

Step 19

– Grab a trusty pair of tweezers and gently unclip the motherboard bracket, then lift it away like a pro!

Tools Used
  1. TweezersSamsung Galaxy S20 Ultra Front-Facing Camera Module Replacement

Step 20

– Grab your trusty spudger and gently pop up the battery connector to disconnect it.

Tools Used
  1. SpudgerSamsung Galaxy S20 Ultra Front-Facing Camera Module Replacement

Step 21

– Grab a Phillips #00 screwdriver and unscrew those four tiny 3.9 mm screws holding down the upper midframe. Keep them safe—you’ll need them later. If you need a hand with this step, you can always schedule a repair.

Step 22

– Gently slide the pointed end of your trusty spudger into the notch on the upper right side of the midframe and give it a little pry – this will pop those pesky clips loose and set you on your way!

– Carefully lift off the upper midframe and set it aside, you’re doing awesome!

Tools Used
  1. SpudgerSamsung Galaxy S20 Ultra Front-Facing Camera Module Replacement

Step 23

– Gently lift and pop the front-facing camera cable off the motherboard—like you’re flipping the perfect pancake, but with way less syrup.

– When you’re putting the connector back, line it up with care and press down one side until it clicks, then do the other. Avoid pressing the middle like it’s hot lava! Misaligned pins can bend, and that’s a party foul you definitely want to skip.

Step 24

– Splash some high-octane isopropyl alcohol (over 90%, if you’re feeling adventurous!) around the edges of the front-facing camera module to give that sticky adhesive a little nudge. It’s like a spa day for your device!

– Let that alcohol work its magic for about 1-2 minutes so it can dive in and soften the adhesive. Patience is key—good things come to those who wait!

Tools Used
  1. Isopropyl AlcoholSamsung Galaxy S20 Ultra Front-Facing Camera Module Replacement

Step 25

– Gently pop up the bottom edge of the front-facing camera module using the flat end of a spudger—like you’re opening a stubborn bag of chips.

– Lift out the front-facing camera module and set it aside. You’ve got this!

– The original camera adhesive might still do the trick when you put everything back together. If it’s seen better days, swap it out with a pre-cut adhesive sheet.

Tools Used
  1. SpudgerSamsung Galaxy S20 Ultra Front-Facing Camera Module Replacement

Step 26

– Double-check your new part against the old one—sometimes there’s hidden tape, stickers, or bits that need to switch over before installation.

– To put everything back together, just follow these steps in reverse. It’s like rewinding your favorite song.

– Once you’re done, run through the test guide to make sure everything’s working as it should.

– Got leftover electronics? Drop them off with an R2 or e-Stewards certified recycler so your old gear gets a second life.

– If things didn’t go quite according to plan, our Answers community is a solid spot to troubleshoot weird glitches.

– If you want a pro to handle it or you just need a break, you can always schedule a repair.

Success!

Samsung Galaxy S20 Ultra Earpiece Speaker Replacement

Duration: 45 minutes
Steps: 40 Steps

Ready to swap out the earpiece speaker in your Galaxy S20 Ultra? While you can technically leave the motherboard in place, removing it makes the whole process a lot smoother. Grab some fresh adhesive before diving in, and follow these steps to get that earpiece back in action. Need a hand? You can always schedule a repair with us for extra help.

Step 1

– Grab your SIM card eject tool, a small bit, or just straighten out a paperclip—whatever works! Find the little hole on the SIM tray up at the top edge of your phone, right next to the plastic antenna band.

– Give it a confident push to pop that tray out.

Tools Used
  1. SIM Card Eject ToolSamsung Galaxy S20 Ultra Earpiece Speaker Replacement

Step 2

– Pop out the SIM card tray and get ready for some reorganization. When slipping the SIM back in, double-check that it’s facing the right way—no one likes a sideways card! A slim rubber gasket around the tray keeps water and dust out, so if it’s torn or missing, swap it out or replace the whole tray to keep your device happy and healthy.

Step 3

– Warm up an iOpener and press it against the bottom edge of the back cover for a solid two minutes.

Tools Used
  1. iOpenerSamsung Galaxy S20 Ultra Earpiece Speaker Replacement

Step 4

– Stick a suction cup onto the back of your device, aiming for as close to the middle of the bottom edge as you can get.

– Give the suction cup a firm, steady tug to loosen the back cover from the frame and create a small gap.

– Gently slide the tip of an opening pick into that gap to start prying it open.

Tools Used
  1. iOpenerSamsung Galaxy S20 Ultra Earpiece Speaker Replacement

Step 5

– Gently glide the pick back and forth along the bottom edge to cut through that sticky adhesive like a pro.

– Keep your opening pick snugly in the seam to stop the adhesive from sealing back up. You’re doing great!

Step 6

– Warm up the left edge of the back cover with a heated iOpener for about two minutes. Keep it cozy to help loosen things up.

Tools Used
  1. iOpenerSamsung Galaxy S20 Ultra Earpiece Speaker Replacement

Step 7

– Place the suction cup on the back of the phone, close to the center of the left edge. Get it in a nice, snug spot.

– Now, pull gently but firmly on the suction cup. You’ll create a small gap between the back cover and the frame—just enough to work with.

– Take your opening pick and slide it into the gap you just created. Keep it steady.

– If you’re feeling adventurous, try a couple of drops of high-concentration (over 90%) isopropyl alcohol into the seam. It’ll help loosen up that adhesive a little more.

Step 8

– Once your pick is cozy under the edge of the glass, angle it down and slide it deeper to break up all that stubborn adhesive holding the back cover. You got this—peel away like a pro!

Step 9

– Glide your pick along the bottom edge to loosen up that stubborn back cover adhesive.

– Let your pick chill under the left edge of the glass near the bottom—this keeps the glue from sticking things back together when you’re not looking.

Step 10

– Slide another pick right under the center of the left edge of the back cover.

– Gently glide that pick toward the top of the device to break free the back cover’s sticky grip.

– Keep your pick tucked under the left edge of the glass near the top of the device to stop the adhesive from making a comeback.

Step 11

– Place a heated iOpener on the right edge of the back cover and hold it there for about two minutes. This will help loosen things up so you can get inside more easily.

Tools Used
  1. iOpenerSamsung Galaxy S20 Ultra Earpiece Speaker Replacement

Step 12

– Stick a suction cup on the back of your phone, aiming for the center of the right edge—bullseye!

– Give that suction cup a solid, steady pull to pop open a gap between the back cover and the frame.

– Slip the tip of an opening pick into the gap you just made.

Step 13

– Gently slide your pick towards the bottom edge of the phone to break free the sticky adhesive holding the back cover.

– Leave your pick resting under the right edge of the glass, near the bottom, to keep that adhesive from sealing back up. It’s like holding the door open for a smooth repair!

Step 14

– Slide another pick under the middle of the right edge of the back cover—like you’re sneaking it into a secret club.

– Glide the pick up toward the top of the device, gently breaking up that sticky adhesive as you go.

Step 15

– Heat up the top edge of the back cover with a warmed iOpener for about two minutes—let it work its magic!

Tools Used
  1. iOpenerSamsung Galaxy S20 Ultra Earpiece Speaker Replacement

Step 16

– Gently slide the pick along the right edge, then curve it around the top right corner. Keep it smooth and steady.

– Keep slicing along the top edge to finish separating the back cover adhesive. Almost there!

Step 17

– Gently lift the back cover, working slowly to avoid cracks. Use opening picks to carefully slice through any stubborn adhesive. Once loose, remove the back cover. During reassembly, it’s a good idea to power on your device and check that all functions are working before sealing it back up—no point in putting it all together only to find something’s off. If you encounter any leftover adhesive chunks, grab some tweezers or your fingers to pluck them out. Having trouble separating adhesive? Applying a bit of heat can help loosen things up. For Samsung custom-cut adhesives, follow this guide. If you’re working with double-sided tape, this guide has you covered.

Tools Used
  1. TweezersSamsung Galaxy S20 Ultra Earpiece Speaker Replacement

Step 18

– Grab your spudger and gently pop up the wireless charging coil connector—just like opening a stubborn pickle jar, but with way less mess.

Tools Used
  1. SpudgerSamsung Galaxy S20 Ultra Earpiece Speaker Replacement

Step 19

– Grab your trusty tweezers and gently lift the wireless charging coil—slow and steady wins this race.

– Take out the wireless charging coil. Give it a little wiggle if it’s stuck, but don’t force it.

– When putting things back together, connect the wireless charging coil’s connector first to line it up nicely, then press down to secure the rest of the coil. Nice work!

Tools Used
  1. TweezersSamsung Galaxy S20 Ultra Earpiece Speaker Replacement

Step 20

– Grab your trusty Phillips #00 and twist out the five 3.9 mm screws holding the motherboard bracket—easy does it!

Step 21

– Grab a trusty pair of tweezers and gently pop out the motherboard bracket. Easy does it—just unclip and lift it away to keep things moving smoothly.

Tools Used
  1. TweezersSamsung Galaxy S20 Ultra Earpiece Speaker Replacement

Step 22

– Grab a spudger and gently pry up the battery connector to disconnect it. Easy does it—no force needed to keep things safe. If you run into any trouble, you can always schedule a repair for extra help.

Tools Used
  1. SpudgerSamsung Galaxy S20 Ultra Earpiece Speaker Replacement

Step 23

– Grab your Phillips #00 screwdriver and remove the five screws (they’re all 3.9 mm long) that are holding the loudspeaker and lower midframe in place.

Step 24

– Grab the pointy end of a spudger or a trusty pair of tweezers and gently slide it into the little notch at the top left corner of the midframe. Give it a careful pry to pop those clips loose and set it free!

– Now, go ahead and take out the loudspeaker along with the lower midframe.

Tools Used
  1. SpudgerSamsung Galaxy S20 Ultra Earpiece Speaker Replacement
  2. TweezersSamsung Galaxy S20 Ultra Earpiece Speaker Replacement

Step 25

– Grab your trusty spudger and gently lift up the main and auxiliary flex cables from the daughterboard at the bottom of your device. Take it slow—these cables like a gentle touch.

– When reconnecting press connectors, line them up carefully and press down on one side until you hear that satisfying click, then do the same for the other side. Skip pressing the middle—misaligned pins can spell trouble. If things aren’t lining up, double-check to avoid any bent pins or permanent damage.

Tools Used
  1. SpudgerSamsung Galaxy S20 Ultra Earpiece Speaker Replacement

Step 26

– Grab a spudger and gently pry up those main and auxiliary flex cables to disconnect them from the motherboard. You’ve got this!

Tools Used
  1. SpudgerSamsung Galaxy S20 Ultra Earpiece Speaker Replacement

Step 27

– Give those cables a gentle lift-off—main and aux flex are officially out of the game.

Step 28

– Gently lift up and disconnect the left 5G antenna cable from the motherboard.

Step 29

– Gently lift up the main display flex cable and disconnect it from the motherboard.

Step 30

– Carefully lift and nudge the display and left 5G antenna flex cables aside, making sure they’re clear of the motherboard and battery.

Step 31

– Grab your Phillips #00 screwdriver and take out the four screws (they’re 3.9 mm long) holding down the upper midframe. Easy does it!

Step 32

– Gently slide the spudger into the notch on the right side of the upper midframe. Give it a little pry to release those clips holding everything in place.

– Now, lift off the upper midframe with ease.

Tools Used
  1. SpudgerSamsung Galaxy S20 Ultra Earpiece Speaker Replacement

Step 33

– Gently pry up and detach the right 5G antenna flex cable from the motherboard—no need to rush, we’re in this together!

– Grab a pair of tweezers and carefully bend the cable to the side, giving the motherboard some space to breathe.

Tools Used
  1. TweezersSamsung Galaxy S20 Ultra Earpiece Speaker Replacement

Step 34

– Gently lift and disconnect the side button flex cable from the motherboard—easy peasy!

– Now, bend that cable out of the way so it doesn’t interfere with the motherboard magic.

Step 35

– Gently lift the front-facing camera flex cable from its spot on the motherboard and give it a gentle disconnect. Then, carefully bend the cable out of the way so it doesn’t get in the way of the work ahead. If you need a hand, you can always schedule a repair.

Step 36

– Gently pop up the upper 5G antenna cable and unplug it from the motherboard—easy does it!

Step 37

– Grab your trusty spudger and gently lift the corner of the 5G millimeter wave antenna module. You’re doing great!

– Carefully take out the 5G antenna module like a pro.

– When it’s time to put it all back together, make sure to reconnect that 5G antenna connector first so everything lines up just right. Then, give the rest of the antenna module a solid press down to secure it in place. Nice work!

Tools Used
  1. SpudgerSamsung Galaxy S20 Ultra Earpiece Speaker Replacement

Step 38

– Grab your Phillips #00 screwdriver and get ready to remove the two screws—each about 3.9 mm long—that hold the motherboard and camera assembly in place. Easy peasy! If you need a hand along the way, remember you can always schedule a repair.

Step 39

– Gently insert the pointed end of a spudger into the bottom-left corner of the motherboard assembly and carefully pry upward to loosen it from the phone body. Once it’s free, lift out the motherboard assembly. If you need help along the way, you can always schedule a repair.

Tools Used
  1. SpudgerSamsung Galaxy S20 Ultra Earpiece Speaker Replacement

Step 40

– Take a look at your shiny new part versus the old one—make sure nothing’s left behind, and peel off any sticker or adhesive that’s tagging along for the ride.

– Put everything back together by reversing the steps above. Your device will appreciate the reunion.

– Ready for the moment of truth? Use our guide to put your fix to the test and celebrate your handiwork.

– Got leftover bits or busted parts? Drop them off at an R2 or e-Stewards certified recycler—Mother Earth says thanks.

– If things got a little wild and your device isn’t cooperating, swing by our Answers community for some friendly troubleshooting, or you can always schedule a repair if you need backup.

Tools Used
  1. TweezersSamsung Galaxy S20 Ultra Earpiece Speaker Replacement

Success!

Samsung Galaxy S21 Wireless Charging Coil Replacement

Duration: 45 minutes
Steps: 23 Steps

Ready to tackle the task of removing or replacing your Samsung Galaxy S21’s wireless charging coil? Before you dive in, make sure to juice your battery down to below 25%. It’s a smart move to keep things safe and avoid any thermal mishaps if the battery takes a hit during disassembly. If you’re dealing with a swollen battery, be sure to take all the necessary precautions. And just a heads-up: you’ll want some replacement adhesive on hand to wrap up this repair like a pro!

Step 1

– Warm up your iOpener and let it chill on the bottom edge of the back cover for a couple of minutes.

Tools Used
  1. iOpenerSamsung Galaxy S21 Wireless Charging Coil Replacement

Step 2

– Stick a suction cup on the back of the phone, aiming for the sweet spot near the center of the bottom edge.

– Give the suction cup a firm, steady pull—this should create just enough of a gap between the back cover and the frame.

– Slide an opening pick into that gap and get ready to keep going!

Step 3

– Gently slide your pick back and forth along the bottom edge to cut through the adhesive. Keep the pick in place afterward to stop the adhesive from sealing back up. If you need assistance, you can always schedule a repair.

Step 4

– Warm up the left edge of the back cover with a toasty iOpener for a couple of minutes—just enough to make the adhesive loosen up and say ‘uncle’.

Tools Used
  1. iOpenerSamsung Galaxy S21 Wireless Charging Coil Replacement

Step 5

– Stick a suction cup onto the back of your phone, aiming for the center along the left edge—precision is cool, but there’s wiggle room.

– Give the suction cup a firm, steady tug upward to start cracking open a gap between the back cover and the frame (think of it as opening a stubborn jar, but gentler).

– Slide an opening pick into that gap like a pro. You’re on your way!

Step 6

– Gently slide an opening pick down the left edge and towards the bottom left corner, slicing through that stubborn adhesive like a pro.

– Leave that pick in place to keep the adhesive from playing tricks on you and sealing back up!

Step 7

– Warm up that iOpener and give the right edge of the back cover a cozy two-minute hug!

Tools Used
  1. iOpenerSamsung Galaxy S21 Wireless Charging Coil Replacement

Step 8

– Grab a suction cup and stick it onto the back of your phone, as close to the center of the right edge as you can. Get that cup firmly in place.

– Now, pull up with a steady but strong hand to gently open a gap between the back cover and the frame. You got this!

– Slide an opening pick into that new gap you just created, and you’re on your way to unlocking this repair.

Step 9

– Gently slide an opening pick back and forth along the right edge of the back cover to loosen the adhesive. Keep the pick in place afterward to prevent the adhesive from sealing back up.

Step 10

– Gently rotate the right edge opening pick around the top-right corner of the phone to get things started. Keep it smooth and steady—you’re just loosening things up! If you need a hand, you can always schedule a repair.

Step 11

– Gently slide the opening pick closest to the camera shell to get things started right.

– Now, give the left-edge pick some love by repeating the same smooth move.

Step 12

– Warm up your iOpener and gently press it against the camera shell for about two minutes. Let the heat do its magic, softening everything up so you can get to the next step with ease.

Tools Used
  1. iOpenerSamsung Galaxy S21 Wireless Charging Coil Replacement

Step 13

– Turn the back cover counterclockwise until it starts to loosen, creating a small gap between the camera shell and the frame.

– Slide an opening pick into that gap to get things moving.

Step 14

– Carefully slide the two picks toward the camera shell, slipping them underneath the corners of the back cover near the camera. Then, gently work the picks back and forth along the bridge connecting the back cover and the camera shell until you’ve created a small gap between the camera shell and the frame. If you need a hand along the way, you can always schedule a repair.

Step 15

– Gently slide an opening pick between the camera shell and the frame to carefully cut through the adhesive holding them together.

Step 16

– Don’t forget to slice through the extra adhesive hanging out to the right of the camera. It’s just waiting for you to give it a little snip!

– When you’re using the pick, tilt it downwards to keep everything safe and sound. We want to avoid any mishaps!

Step 17

– Aim the tip of your opening pick right at your phone’s flash, like a pro.

– Gently slide the pick in—easy does it! Steer clear of the flash plate.

– Carefully slice through the sticky stuff just to the right of the camera.

Step 18

– Let’s kick things off by popping off the back cover.

– When you’re putting everything back together:

– Now’s a perfect time to power up your phone and check out all its features before you close it up. Just make sure to shut it down completely before diving back in!

– If you’ve got any sticky adhesive bits hanging around, grab some tweezers or just use your fingers to pick them out. A dash of high-concentration (over 90%) isopropyl alcohol will help you wipe away any leftover adhesive residue like a pro.

– Got Samsung custom-cut adhesives? Be sure to check out this nifty guide.

– Using double-sided tape? Don’t forget to follow this guide.

Tools Used
  1. TweezersSamsung Galaxy S21 Wireless Charging Coil Replacement

Step 19

– Grab your Phillips screwdriver and go ahead and unscrew the five 4mm screws holding that motherboard bracket in place. Easy, right? Just a few twists, and you’re one step closer!

Step 20

– Grab your tweezers and gently lift the motherboard bracket up and away from the frame—just unclip it like you’re popping open a bag of chips.

Tools Used
  1. TweezersSamsung Galaxy S21 Wireless Charging Coil Replacement

Step 21

– Use tweezers or your fingers to gently hold the motherboard bracket aside. Then grab your trusty spudger and pop up the battery press connector. Easy does it!

– When reconnecting press connectors like this, line it up, then press down on one side until you hear that satisfying click, and do the same on the other. Skip pressing the middle—misaligned connectors can end up with bent pins, and nobody wants that kind of drama.

Tools Used
  1. SpudgerSamsung Galaxy S21 Wireless Charging Coil Replacement
  2. TweezersSamsung Galaxy S21 Wireless Charging Coil Replacement

Step 22

– While keeping the motherboard bracket out of the way, gently pry up the wireless charging coil’s press connector with a spudger. Take your time—careful prying keeps everything happy. If you need a hand, you can always schedule a repair.

Tools Used
  1. SpudgerSamsung Galaxy S21 Wireless Charging Coil Replacement

Step 23

– Take a moment to compare your shiny new replacement part to the original—make sure to move any leftover pieces or peel off those adhesive backings before diving into installation.

– Time to put your device back together! Just retrace your steps from the earlier tasks—it’s easier than you think!

– Once you’re all done, give your repair a quick test run using this guide to ensure everything’s working smoothly.

– Don’t let that old e-waste pile up! Be a hero and take it to an R2 or e-Stewards certified recycler.

– If things didn’t exactly go according to plan, no worries! Swing by our Answers community for some troubleshooting tips.

Success!
Take a second to make sure your new part matches the original—sometimes, a little leftover adhesive or a missing component needs your attention before you pop it in.
Ready to put things back together? Just work your way back through the steps you followed, but in reverse.
Once you’re done, check out our guide to make sure your repair is working like a charm.
Got broken bits or leftovers? Drop them off at an R2 or e-Stewards certified recycler and keep things green.
If your device is still giving you attitude, swing by our Answers community for some troubleshooting magic.
And hey, if you hit a wall, you can always schedule a repair with the pros at Salvation Repair.

Samsung Galaxy S21 Vibrator Replacement

Duration: 45 minutes
Steps: 38 Steps

Ready to get your Samsung Galaxy S21 vibrating again? Start by making sure the battery is below 25%充电 to avoid any potential thermal issues during the repair pocess. If your battery looks a bit swollen~ take the necessary precautions, safety first! You’ll also want to have some replacement adhesive Handy to complete the job. Let’s get started with this step-by-step repair guide from Salvation Repair!

Step 1

– Warm up your iOpener and let it chill on the bottom edge of the back cover for a couple of minutes.

Tools Used
  1. iOpenerSamsung Galaxy S21 Vibrator Replacement

Step 2

– Stick a suction cup on the back of your phone, aiming for the center near the bottom edge—like a pro.

– Give the suction cup a strong, steady pull upward to open up a little gap between the back cover and the frame. Don’t be shy!

– Slide an opening pick into that gap you just made—get in there gently, like you’re sneaking snacks at midnight.

Step 3

– Gently slide the plastic pick back and forth along the bottom edge to cut through the adhesive. Keep the pick in place afterward to stop the adhesive from sealing itself back up.

Step 4

– Warm up the back cover’s left edge with a heated iOpener for about two minutes to loosen things up.

Tools Used
  1. iOpenerSamsung Galaxy S21 Vibrator Replacement

Step 5

– Stick a suction cup on the back of the phone, pretty close to the center of the left edge—think of it as giving the phone a tiny high-five.

– Gently but firmly tug the cup upward until the back glass pops up a smidge and you’ve got a gap worth bragging about.

– Slide an opening pick into that fresh gap like it’s VIP at the back-cover club and keep the momentum going.

Step 6

– Gently slide a plastic opening pick along the left edge towards the bottom left corner to slice through the adhesive. Keep the pick in place afterward to stop the adhesive from sticking back together.

Step 7

– Warm up the back cover’s right edge with a heated iOpener for about two minutes. This helps loosen things up so it’s easier to get inside. If you need a hand, you can always schedule a repair.

Tools Used
  1. iOpenerSamsung Galaxy S21 Vibrator Replacement

Step 8

– Stick a suction cup onto the back of your phone, aiming for the center along the right edge—like giving your phone a little hug.

– Give that suction cup a firm, steady pull to open up a gap between the back cover and the frame. No need to wrestle, but don’t be shy!

– Slide an opening pick into the gap you’ve made. Nice and easy!

Step 9

– Work an opening pick back and forth along the right edge of the back cover to loosen up the sticky adhesive.

– Leave the pick in place so the adhesive doesn’t try to make a comeback.

Step 10

– Swing that opening pick around the top-right edge of your phone like you’re drawing a smile—just take it slow and keep things smooth.

Step 11

– Gently slide the top-most opening pick as close to the camera shell as you can—aim for precision.

– Now, repeat the process on the left edge—don’t rush, just let it glide in.

Step 12

– Warm up your iOpener and let it work its magic on the camera shell for around two minutes.

Tools Used
  1. iOpenerSamsung Galaxy S21 Vibrator Replacement

Step 13

– Give the back cover a cool counterclockwise twist to open up a gap between the camera shell and the frame.

– Slide an opening pick into that gap like you’re sneaking into a secret club.

Step 14

– Gently slide the two picks toward the camera shell, slipping them under the corners of the back cover next to the camera. Think of it as giving the cover a gentle lift with some finesse.

– Work the picks back and forth along the seam between the back cover and the camera shell until you pop a small gap open—like creating just enough space for a friendly nudge. If you run into resistance, take your time and keep it smooth—salvation repair is all about patience!

Step 15

– Gently slide an opening pick between the camera shell and the frame to carefully separate the adhesive. Take your time and be patient—this part’s all about precision.

Step 16

– There’s a sneaky patch of adhesive lurking just to the right of the camera—slice through it like a pro.

– Tilt your pick downward as you go, so you don’t end up poking something important.

Step 17

– Carefully position the tip of your opening pick right next to your phone’s flash. Make sure it’s lined up just right!

– Gently slide the pick in, but be cautious—steer clear of the flash’s metal plate as you go.

– Cut through the adhesive to the right of the camera—nice and smooth!

Step 18

– Start by removing the back cover to access the internal parts. During reassembly, it’s a good idea to power on your device and test all functions before sealing everything back up — saves you from surprises later. Make sure to fully shut down your device before continuing. To clear away stubborn adhesive bits, use tweezers or your fingers and a bit of high-concentration (over 90%) isopropyl alcohol for a clean swipe. If you’re working with Samsung-specific adhesives, follow this guide. For double-sided tape, refer to this guide to get it done right.

Tools Used
  1. TweezersSamsung Galaxy S21 Vibrator Replacement

Step 19

– Grab your Phillips screwdriver and unscrew those five 4mm screws holding the motherboard bracket in place. Once they’re out, you’ll be ready to move on to the next step. If you need help at any point, you can always schedule a repair.

Step 20

– Grab your tweezers and give a gentle tug to pop the motherboard bracket loose from the frame—no need to wrestle with it, just a smooth lift and unclip.

Tools Used
  1. TweezersSamsung Galaxy S21 Vibrator Replacement

Step 21

– Hold the motherboard bracket aside using tweezers or your fingers. Take your trusty spudger and pop up the battery press connector—gentle prying wins the day.

– When reconnecting these press connectors, line them up carefully and press down on one edge till you hear that sweet click, then do the same on the other side. Skip pressing in the middle—misaligned connectors can bend pins, and that’s a headache no one wants.

Tools Used
  1. TweezersSamsung Galaxy S21 Vibrator Replacement
  2. SpudgerSamsung Galaxy S21 Vibrator Replacement

Step 22

– While keeping the motherboard bracket out of the way, grab your trusty spudger and gently pop up that wireless charging coil’s press connector to disconnect it.

Tools Used
  1. SpudgerSamsung Galaxy S21 Vibrator Replacement

Step 23

– Gently peel off the wireless charging coil with your fingers—think of it as giving your phone a little spa treatment.

– When putting everything back together, start by tightening the motherboard bracket screws so the charging coil lines up just right. After that, press the coil down so it sticks in place. Smooth sailing!

Step 24

– Grab your spudger and gently pop up that earpiece speaker cable connector—think of it like opening a stubborn jar, but way less messy.

Tools Used
  1. SpudgerSamsung Galaxy S21 Vibrator Replacement

Step 25

– Grab your trusty Phillips screwdriver and carefully unscrew the seven 4mm screws holding the earpiece speaker in place on the motherboard. Easy, right? Just keep track of those screws!

Step 26

– Grab a spudger and gently slide its tip into the gap between the right edge of the earpiece speaker and the phone body.

– Use the spudger to carefully pry up and loosen the clips holding the earpiece speaker in place.

– Once loosened, grab some tweezers or your fingers to lift out the earpiece speaker. If you need help, you can always schedule a repair.

Tools Used
  1. TweezersSamsung Galaxy S21 Vibrator Replacement
  2. SpudgerSamsung Galaxy S21 Vibrator Replacement

Step 27

– Grab the flat end of a spudger and gently pry up the front camera’s press connector to disconnect it. Take your time—patience is key here. If you need a hand, you can always schedule a repair.

Tools Used
  1. SpudgerSamsung Galaxy S21 Vibrator Replacement

Step 28

– Grab your trusty spudger and gently pop up the orange press connector hanging out next to the 5G antenna cable’s connector. It’s a quick lift—no heavy lifting required.

– Do the same for the green 5G antenna cable’s connector. Give it a little nudge, and you’re good to go.

Tools Used
  1. SpudgerSamsung Galaxy S21 Vibrator Replacement

Step 29

– Grab your spudger and gently pop up the 5G antenna cable’s press connector—easy does it!

Tools Used
  1. SpudgerSamsung Galaxy S21 Vibrator Replacement

Step 30

– Grab your spudger, angle it like a tiny sword, and gently pop the power button cable’s press connector loose—you’ve got this!

Tools Used
  1. SpudgerSamsung Galaxy S21 Vibrator Replacement

Step 31

– Grab the flat end of a spudger and gently pry up the display cable’s press connector. Keep it steady and work your way under the connector to disconnect it smoothly. If you need a hand, you can always schedule a repair.

Tools Used
  1. SpudgerSamsung Galaxy S21 Vibrator Replacement

Step 32

– Grab your trusty spudger and gently lift up the press connector for the secondary interconnect cable. It’s like giving it a little high-five.

– Do the same move for the main interconnect cable’s press connector. Double spudger action—nice!

Tools Used
  1. SpudgerSamsung Galaxy S21 Vibrator Replacement

Step 33

– Gently nudge the power button cable out of the way with a spudger or your fingers—no need to wrestle with it.

– Do the same for the left-edge 5G antenna cable. It’s all about smooth moves!

Tools Used
  1. SpudgerSamsung Galaxy S21 Vibrator Replacement

Step 34

– Grab those tweezers or just use your fingers to gently coax the orange 5G antenna cable away from the phone. It’s like giving your phone a little stretch!

– Now, let’s show that green 5G antenna cable some love by doing the same. Just bend it away, and you’re one step closer to a happy device!

Tools Used
  1. TweezersSamsung Galaxy S21 Vibrator Replacement

Step 35

– Grab your Phillips screwdriver and take out the 4 mm screw that’s holding the camera bracket and motherboard to the frame. Easy does it!

Step 36

– Slide a spudger between the bottom-right corner of the motherboard and the frame—think of it as giving the board a gentle nudge to wake up.

– With a little upward lift, pop those clips like bubble wrap until the motherboard says ‘I’m free!’

– Lift the whole assembly out with your fingers—easy peasy, no gymnastics required.

Tools Used
  1. SpudgerSamsung Galaxy S21 Vibrator Replacement

Step 37

– Drop a few drops of high-concentration isopropyl alcohol (90% or more) into the gaps around the edges of the vibrator.

– Give it a minute or two to let the alcohol work its magic and loosen up the adhesive. Patience is key!

Step 38

– Check out your shiny new part—make sure it matches the old one. You might need to shift over a few bits or peel off any leftover stickers before popping it in.

– To put your device back together, just cruise through the steps backwards.

– Once you’re done, take a moment to test everything out using this guide.

– Got parts you’re ditching? Drop them off at an R2 or e-Stewards certified recycler.

– If things didn’t go as planned, our Answers community has your back for troubleshooting.

– Need a helping hand? You can always schedule a repair.

Tools Used
  1. TweezersSamsung Galaxy S21 Vibrator Replacement
  2. SpudgerSamsung Galaxy S21 Vibrator Replacement

Success!
Check out your new part next to the old one—sometimes little bits or sticky stuff need swapping over before you pop it in.
Ready to put it all back together? Just reverse the steps above—like rewinding a mixtape, but less retro.
Give your device a test run using the linked guide, and make sure everything’s working as it should.
Don’t toss your old electronic leftovers in the trash—drop them off at an R2 or e-Stewards certified recycler for a greener tomorrow.
Ran into a hitch? Our Answers community is your troubleshooting sidekick—come hang out and swap tips.
Still stuck? You can always schedule a repair and let the pros handle it.

🍪
Have a cookie! This site uses cookies to enhance your experience. Opt-Out Options.