Guide to Replacing Surface Tablets Hinges
Duration: 45 minutes
Steps: 22 Steps
Heads up! The display panel here is a bit delicate, so be extra careful. There’s a real risk of cracking it if you’re not cautious. Take your time, and if you’re unsure, don’t hesitate to schedule a repair.
Ready to swap out one or both kickstand hinges on your Microsoft Surface Pro 7? You’re in the right place! Heads up: the display panel is pretty delicate, so take your time with the heat and be gentle when cutting through the adhesive. Safety glasses are a smart move—just in case things get a little too exciting with the glass.
Step 1


Put on some safety glasses to keep your eyes protected, and take care not to scratch or damage the LCD screen along the way.
Using a pry tool to lift the glass keeps shards under control and maintains the structure’s strength as you carefully separate the display from the device.
– Cracked display glass? Let’s keep those shards in check and your fingers safe by taping up the screen before you dive in.
– Cover the entire display with overlapping strips of clear packing tape, making sure you’ve got every inch protected.
– Carry on with the steps as laid out. Heads up—once the glass is cracked, it might keep breaking as you work, so you may need to gently scoop out pieces with a metal prying tool.
Step 2

– Warm up an iOpener and gently press it against the right edge of the Surface’s screen for about two minutes.
Make sure the Surface is fully powered down before you start taking it apart. If you need a little extra heat, a hair dryer or heat gun can help, but use caution—overheating can damage the screen and internal battery. Keep it cool and careful, and if you need a hand, you can always schedule a repair.
You might need to give the iOpener a few rounds in the microwave and reapply it to get things nice and toasty. Stick to the iOpener instructions to keep everything safe and sound—no scorched tablets, please!
Tools Used

Step 3

– Before diving in, make a mental note of how the screen adhesive is laid out—it’s your map for a smooth removal. The areas only holding adhesive are safe to cut through, so focus there. Near the edge, the display board and flex cables are hanging out close by, so cut carefully and keep your pick movements within about 1/8 inch (3 mm) to avoid mishaps. Under this part of the screen, you’ll find delicate antenna cables—treat them with care and follow the steps in step 13 to keep them safe. Plus, the adhesive here is the thickest, so take your time and work patiently.
Step 4


Be gentle when inserting the pick—stop right at the black bezel edge around the screen. Pushing in too far could give the LCD a little love tap it doesn’t need. If you’re feeling unsure, you can always schedule a repair for extra peace of mind.
– Gently insert an opening pick into the speaker opening on the screen and carefully slide it between the glass and the speaker grille to loosen the adhesive. If you need help, you can always schedule a repair.
Step 5


– Gently tilt the pick towards the bottom of the Surface and slide it under the lower edge of the speaker cutout. A little nudge goes a long way here!
Step 6


As you work, if you hit a lot of resistance while sliding the pick, take a moment to reheat that area. Pushing too hard with the pick can cause the glass to crack—better safe than sorry!
– Gently slide the opening pick along the right edge of the Surface to cut through the adhesive holding the screen in place.
– Keep this opening pick in the right edge to prevent the adhesive from sealing back up.
Step 7

– Give your iOpener a quick reheat, then place it on the bottom edge of your Surface’s screen. Let it work its magic for two minutes.
A hair dryer or heat gun can give you a little extra heat if needed, but watch out—avoid getting the Surface too hot, since the screen and internal battery can be sensitive to heat damage.
You might need to warm up the iOpener a few times to get the tablet nice and pliable. Just follow the instructions for heating, and avoid overheating to keep everything safe and sound.
Tools Used
Step 8


Be careful not to push the opening pick too far beyond the black bezel on the screen’s edge. Going too deep could risk damaging the LCD. Take it slow, and if you need help, you can always schedule a repair.
– Pop a new opening pick into the bottom right corner and gently slide it around the corner toward the bottom edge.
– Now, slide the pick along the bottom edge of your device to slice through the screen adhesive. Easy does it.
– Keep the pick in place along the bottom edge to stop the adhesive from sticking back together. We don’t want that!
Step 9

– Warm up your iOpener again and set it along the left edge of your Surface’s screen for about two minutes to loosen things up.
You can use a hair dryer or heat gun for extra warmth, but watch out—don’t let things get too hot! The screen and internal battery are heat-sensitive, so keep the heat gentle and steady to avoid any damage.
You might need to heat up the iOpener a couple of times to get your tablet toasty enough. Just be sure to follow the iOpener instructions to keep things from getting too hot under the collar.
Tools Used
Step 10


– Start by inserting a pick into the bottom left corner of the device and gently slide it around the edge toward the left side.
– Next, glide the pick along the left edge of the Surface to carefully cut through the adhesive holding the screen in place.
– Keep this pick in the left edge to stop the adhesive from sealing back up as you work.
Take it easy when you’re working with the lower 2.5 inches (65 mm) on the left edge. Keep that opening pick no deeper than 1/8 inch (3 mm) here. The display cables are chilling right near this area, and they’re pretty easy to mess up. Once you’re past the cables, don’t push the pick further than the bezel. Stay safe, and if you need extra hands, you can always schedule a repair.
Step 11

– Warm up your iOpener and gently lay it along the left edge of the Surface’s screen for about two minutes—think of it as giving your device a warm hug to loosen things up.
A hair dryer or heat gun can be used for extra heat, but be cautious not to overdo it—excessive heat can damage the screen and internal battery. Keep it gentle to avoid any overheating mishaps.
The thickest adhesive is along this edge, so you might need to reheat and reapply the iOpener a few times to keep the tablet warm enough. Just follow the instructions for the iOpener to prevent overheating and make your job smoother.
Tools Used
Step 12


The next 6 inches (15 cm) along the top edge are covered by the left and right antennas, nestled between the case and the screen bezel. Be sure to handle this area with care – we don’t want any antenna mishaps! Keep following the steps closely to avoid any accidental damage.
– Gently round the left corner using your opening pick, then glide it smoothly along the top edge of the Surface. Stop once you’re about 2.75 inches (70 mm) away from the left edge.
Step 13


Watch out for those delicate antenna cables tucked under the top edge of the screen. Take it slow and steady so you don’t accidentally damage them. Trust us, they’re fragile!
– Start by slipping the tip of your pick under the display at your current cut point. Be gentle—don’t push it past the edge of the bezel. Next, carefully tilt the pick to the right, pressing its long side into the adhesive beneath the bezel, slicing through the glue as you go. Remember, no sliding along the surface edge—just a smooth, controlled motion. Continue this process: insert the pick where you just cut, then roll it to the right along the top edge of the Surface. Keep going until your pick is about 2.5 inches (64 mm) from the right side. If you need help, you can always schedule a repair.
Step 14


– After you’ve sliced through the adhesive near the antennas (about 8.5 inches or 22 cm from the left edge), gently slide the pick along the top edge to finish the job. Don’t forget to curve it around the top right corner to cut through any stubborn remaining adhesive. Take it slow and steady—you’ve got this!
Step 15


Hold tight—don’t yank the screen just yet! It’s still hanging in there connected to the motherboard by two cables. Gently keep it in place while you work on the next steps.
– Gently lift the screen assembly from the Surface case. If it feels stuck, pause and double-check that all the adhesive has been fully separated.
– Use an opening pick to slice through any remaining adhesive. Slow and steady!
– Be aware that the flash lens might pop out of the Surface case. Keep an eye on it and make sure to place it back in its spot when you’re reassembling.
Step 16


Be gentle with the display ribbon cables—no tugging or pulling! Keep it smooth, steady, and stress-free to avoid any accidental damage.
Grab your tweezers and spudger—they’re about to become your trusty sidekicks.
– Gently lift the top of the screen assembly away from the case while sliding the bottom of the screen closer to the motherboard display connectors. Keep a firm grip with one hand to hold the screen steady as you work. If you need help, you can always schedule a repair.


Step 17


– Take the pointy end of your spudger and nudge each side of the battery connector, one at a time.
– Gently rock the connector back and forth, alternating sides, until it strolls right out of its socket.
Tools Used
Step 18


Leave the tape on the ribbon cable for now. You’ll thank yourself later when it’s time to handle things more carefully.
– Grab a pair of tweezers and gently peel back the shiny silver tape covering the left display cable connector.
– Use the flat end of a spudger to carefully pry underneath the tape and lift up on the connector to disconnect it from the motherboard.
Step 19


Keep the tape on the ribbon cable—no need to peel it off prematurely. Stay patient and gentle to avoid any mishaps. If you need help, you can always schedule a repair.
– Grab your trusty tweezers and gently peel back the silver tape that’s holding down the right display cable on the motherboard.
– Now, with the flat end of your spudger, carefully pop the right display cable straight up to disconnect it from the motherboard. Smooth moves!
Step 20

– Carefully lift the screen away from the device, taking your time to avoid any damage. Once you’re at this stage, just follow the screen adhesive replacement guide to wrap up the rest of the repair. If you hit any snags along the way, remember you can always schedule a repair to get professional help.
Step 21


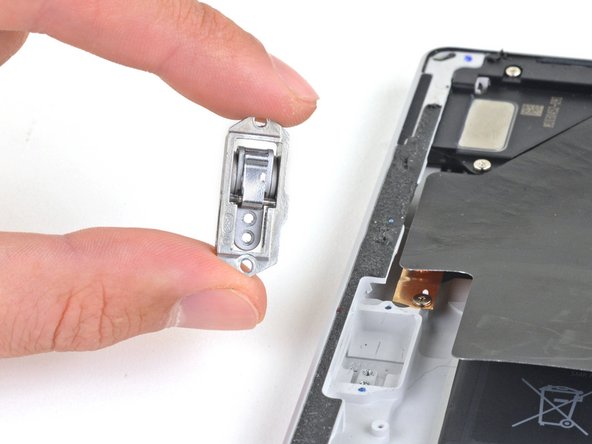
– Let’s start by removing these four screws from each kickstand hinge you’re swapping out:
– Two 2.7 mm T3 Torx screws
– Two 3.9 mm T5 Torx screws
– Take your time and keep track of these screws—they’re essential for a smooth reassembly. If you need help, you can always schedule a repair.
Step 22

– Put everything back together by working through these steps in reverse.
– Got old parts? Drop your e-waste off at an R2 or e-Stewards certified recycler to keep things green.
– If things got weird along the way, try some basic troubleshooting or ask our Answers community for a hand.
– Need extra help? You can always schedule a repair.
Success!