Samsung Galaxy S22 Plus Back Cover Replacement
Duration: 45 minutes
Steps: 11 Steps
Get ready to give your Samsung Galaxy S22+ a brand new look by replacing the back cover. Keep in mind that while you'll be able to restore some water resistance, your device won't be able to keep its IP rating. But don't worry, with this step-by-step guide from Salvation Repair, you'll be able to do it like a pro. If you need help, you can always schedule a repair
Step 1

Before you get started, make sure your phone’s battery is drained below 25%. A fully charged lithium-ion battery can be a bit of a fire hazard if it gets damaged—so, better safe than sorry. If you need a hand, you can always schedule a repair.
You can use a hair dryer, heat gun, or hot plate to help with the repair, but remember to keep an eye on the heat! Too much can be a bad thing for your phone's display and battery, which are both sensitive to overheating. Stay cool and be careful!


Step 2


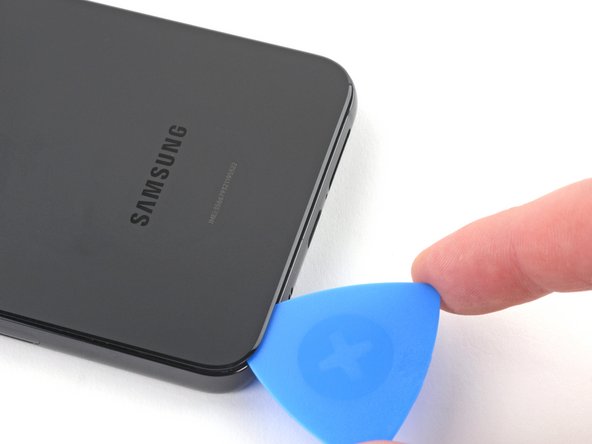
- Pop a suction handle onto the bottom edge of the back cover—get it as close to the edge as you can.
- Give the suction handle a gentle lift to crack open a tiny gap between the back cover and the frame.
- Slide an opening pick into that new gap like a pro.
If the back cover has a crack, the suction cup might not stick as well. Give it a try with some strong tape to lift it, or glue the suction handle in place with superglue and let it dry before moving on. If you're having a tough time creating a gap, try applying a bit more heat to soften the adhesive a little more—just follow the iOpener instructions to avoid overheating. Need a hand? You can always schedule a repair with Salvation Repair.
Tools Used

Step 3


If the adhesive feels tough to cut through, it’s probably cooled off. Warm it back up by using your iOpener for a couple of minutes, and you’ll be good to go.
- Let's get started! Remove the suction handle to begin the process.
- Now, take your opening pick and slide it along the bottom edge. This will help you slice through the adhesive and make the repair process smoother.
- Great job so far! Leave the opening pick inserted near the bottom left corner. This will prevent the adhesive from resealing, making it easier to continue with the repair.
Tools Used
Step 4

Heads up! Don't overheat the iOpener, or it might just burst. Let's keep it safe and get that repair done smoothly!
An adequately warmed iOpener can maintain its cozy heat for about 10 minutes.
- Place the warmed-up iOpener along the left edge of your phone for three minutes—give that sticky glue a chance to chill out.
- If the iOpener cools off, toss it back in for a quick 30-second heat session.
Tools Used
Step 5


Keep that opening pick under 5 mm, or you might accidentally poke some cables near the camera module. Let's avoid any surprises, shall we?
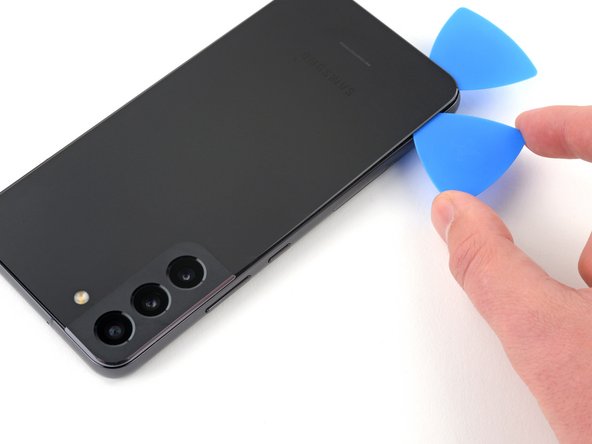
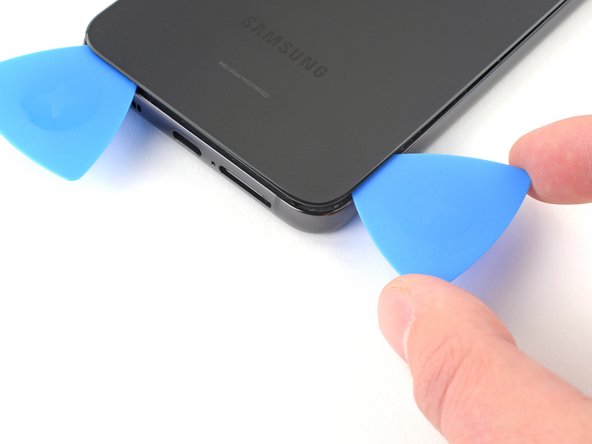
- Pop in a second opening pick near the bottom left corner to get things started.
- Gently slide that pick along the left edge to cut through the adhesive — keep it moving smoothly.
- Leave the pick in place near the top left corner so the adhesive doesn’t stick back together. If you need a hand, you can always schedule a repair.
Step 6

Keep the iOpener warm, but don’t let it get too hot—nobody wants a surprise pop!
Once your iOpener is nice and toasty, it'll keep its warmth for about 10 minutes—plenty of time to work your magic.
- Warm up your trusty iOpener and give the right edge of your phone a cozy 3-minute hug to help loosen that stubborn adhesive.
- If your iOpener starts to cool off, just give it another 30 seconds in the heat to keep the good vibes flowing.
Tools Used
Step 7

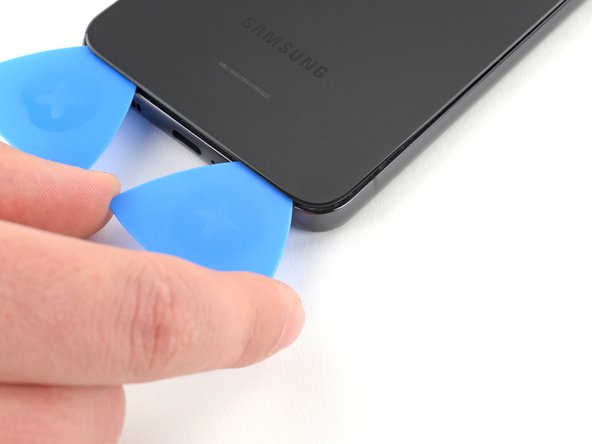
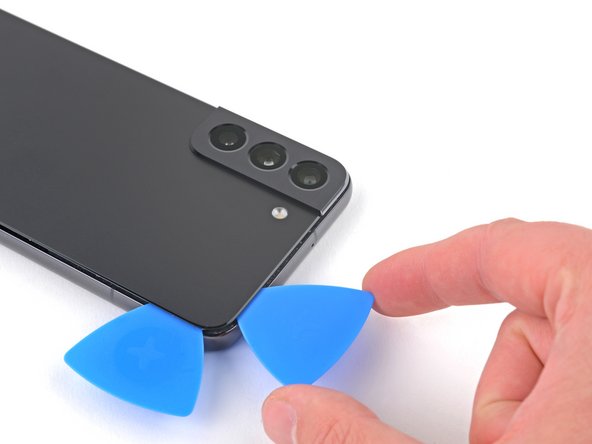
- Slide your third pick into the gap you just opened along the bottom edge—think of it as giving the glue a gentle high-five.
- Now glide that same pick around the lower-right corner; the adhesive will wave the white flag in no time.
Step 8

Be careful not to insert the opening pick more than 5 mm, or you might accidentally damage some of the internal components. Take your time and go slow to get it done right!
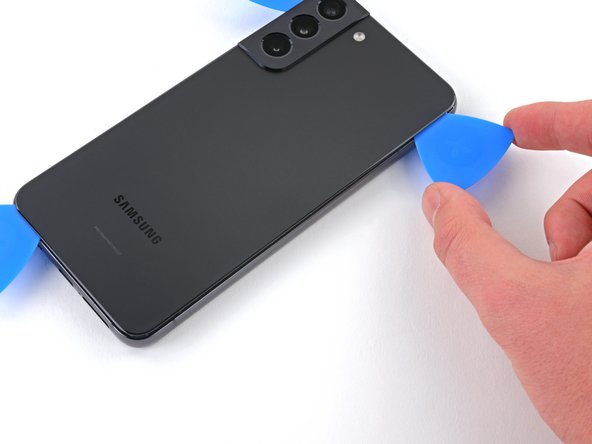
- Glide the opening pick along the right edge of the back cover to slice through the sticky stuff holding it in place.
- Leave the pick chilling near the top right corner so the adhesive doesn’t get any ideas about sticking back together.
Step 9

Easy does it with the iOpener—too much heat and it might pop like a microwave popcorn bag.
Once your iOpener is heated up, it’ll keep things toasty for a solid 10 minutes.
- Warm up your iOpener by heating it up, then gently press it against the top edge of the phone for about 3 minutes to loosen up that stubborn adhesive. If it cools down too much, just give it a quick 30-second reheat and keep going. Need a hand? You can always schedule a repair with Salvation Repair.
Tools Used
Step 10

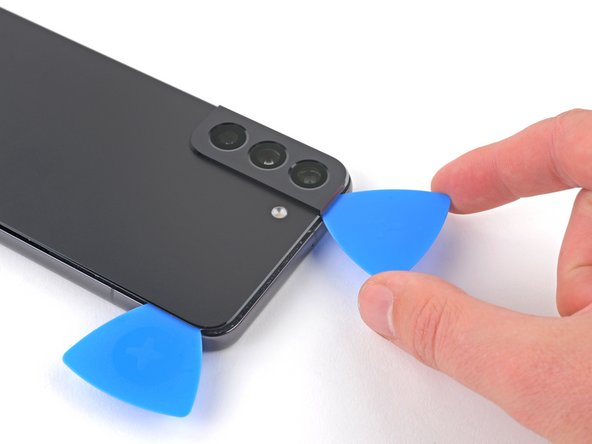
Keep the pick shallow—5 mm max—so you don’t accidentally give the rear cams or flash a surprise makeover.
- Glide your pick along the top-left corner like you’re icing a cake, slicing through the last bits of stickiness and setting the top edge free.
Step 11


- Start by removing the back cover of your device. When you're ready to put everything back together, it's a good idea to power on your device temporarily and test all functions before sealing it up tight. Make sure to turn it off completely before you proceed. Use tweezers or your fingers to gently lift away any stubborn adhesive chunks—apply some heat if they're really sticking. If you're working with custom-cut adhesives, follow the specific guide provided. For double-sided tape, use the recommended technique to peel it off cleanly. If you need help at any point, you can always schedule a repair.