Samsung Galaxy S22 Plus USB-C Port and Charging Board Replacement
Duration: 45 minutes
Steps: 25 Steps
Get ready to dive in and swap out that USB-C port and charging board in your Samsung Galaxy S22+ like a pro! Before you start, make sure to fully drain your battery. This little precaution helps prevent any sizzling surprises if the battery gets a bit bumpy during the repair. And hey, if your battery's looking a little puffed up, take the right safety measures. Just a heads up: keeping your device water-resistant post-repair will depend on how well you seal things back up, and you might notice your IP (Ingress Protection) rating won’t be quite the same afterward. Let’s get those hands busy!
Step 1


Oops! If your SIM eject tool found its way into a microphone hole, no big deal—chances are the microphone is still perfectly fine.
- Grab your trusty SIM eject tool, a paperclip you've straightened, or any small object that fits into the SIM card tray hole on the bottom edge of your phone.
- Gently push the tool into the hole to pop out the SIM card tray. You’ll feel a little resistance, then it’ll give way.
- Carefully remove the SIM card tray and set it aside. Now you're one step closer!
Step 2

Before diving into this repair, let your phone's battery dip below 25%. A fully charged lithium-ion battery can be a little too lively if it gets damaged, and we definitely want to avoid any surprises!
You can use a hair dryer, heat gun, or hot plate to loosen things up, but watch out—getting the phone too hot can mess with the display or battery. Keep it comfy, not crispy!


Step 3


If the back cover is cracked, the suction handle might not stick as well as you'd like. No worries! You can try using some strong tape to give it a lift, or if you're feeling crafty, superglue the suction handle in place and let it dry before moving on.
Having a tough time making a gap? No problem! Just apply a bit more heat to soften that adhesive even further. Remember to follow the iOpener instructions to keep things from getting too toasty.
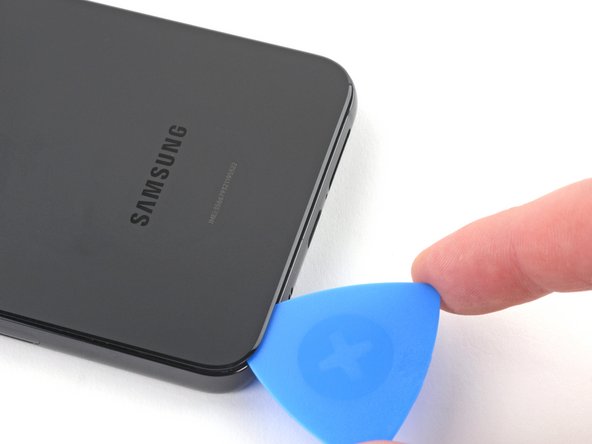
- Grab a suction handle and stick it to the bottom edge of the back cover, getting as close to the edge as you can.
- Give the back cover a gentle lift with the suction handle to create a small opening between the back cover and the frame.
- Slide an opening pick into that little gap you just made.
Tools Used

Step 4


If the adhesive starts acting stubborn, it probably cooled off. Give your iOpener another two or three minutes to warm things up and get back to slicing.
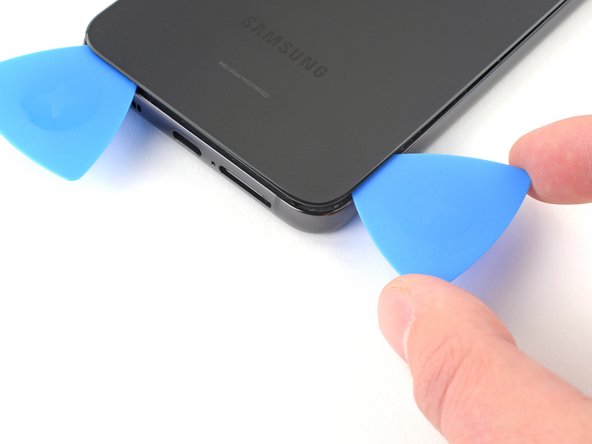
- Pull off the suction handle—nice and easy.
- Glide the opening pick along the bottom edge to cut through the sticky stuff holding it together.
- Keep that pick chilling in the bottom left corner so the adhesive doesn’t get any funny ideas about sticking itself back down.
Tools Used
Step 5

Keep an eye on that iOpener—don’t let it get too hot! Overheating could cause it to pop, and nobody wants that surprise. Stay cool, and if things get a little warm, just give it a break. Need a hand? You can always schedule a repair.
Once your iOpener is nice and toasty, it’ll stay warm for around 10 minutes—plenty of time to work your magic!
- Let's get this repair started! Apply the heated iOpener to the left edge of the phone for 3 minutes to loosen the adhesive - it's like a warm hug for your phone.
- If the iOpener needs a little pick-me-up, reheat it for 30 seconds to get it back in action.
Tools Used
Step 6


Be careful not to insert the opening pick more than 5 mm—going further could put nearby cables, especially near the camera, at risk. Take it slow and steady to keep everything safe and sound.
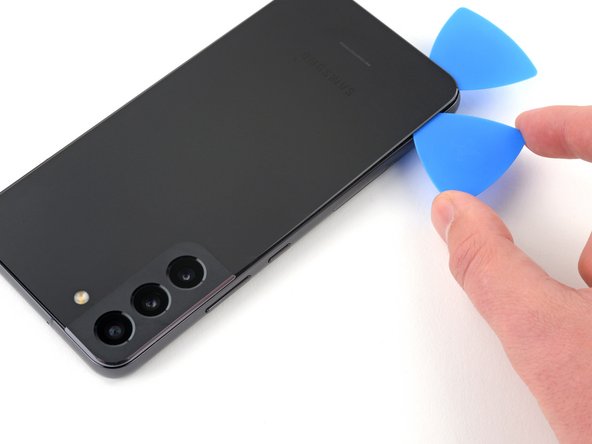
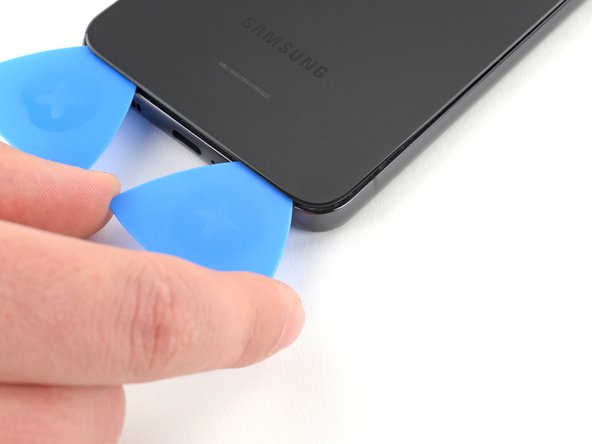
- Pop in a second pick near the bottom left corner to get things started.
- Gently slide that pick along the left edge to cut through the adhesive.
- Keep the pick in place near the top left corner so the adhesive doesn’t stick back together.
Step 7

Easy does it with the iOpener—keep it from getting too hot or it might pop like a snack in the microwave.
Once your iOpener is nice and toasty, it'll keep the heat going for up to 10 minutes.
- Place your warmed-up iOpener along the right edge of the phone for about 3 minutes to give that stubborn adhesive a little spa treatment.
- If your iOpener has cooled off, pop it back in for a 30-second heat-up—keep things toasty!
Tools Used
Step 8

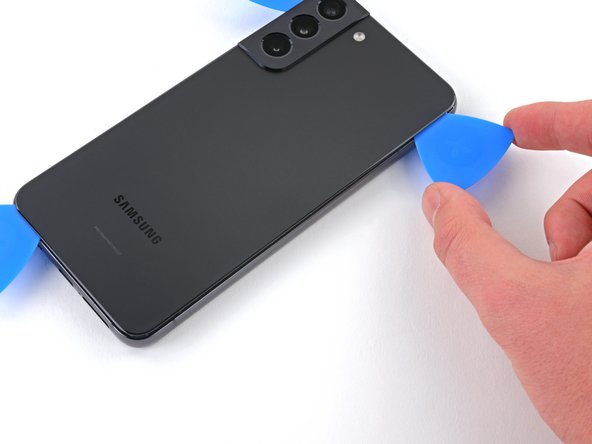
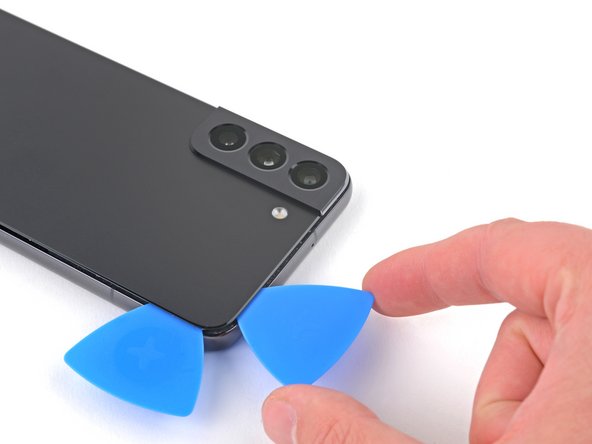
- Now it's time to bring in the reinforcements - insert a third opening pick into the gap you created along the bottom edge to help things along.
- Gently slide the opening pick around the bottom right corner of the back cover to slice through the adhesive, you're making great progress!
Step 9

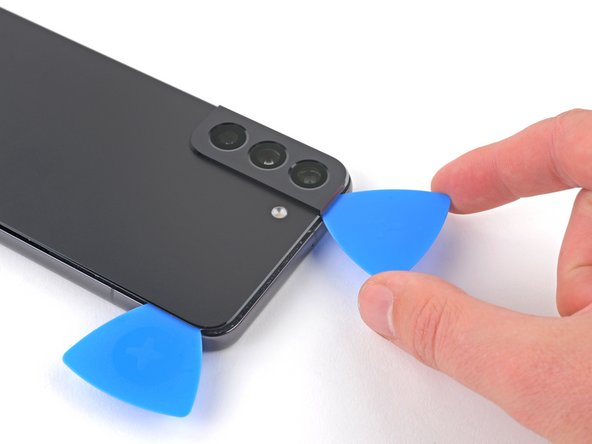
Keep that opening pick under 5 mm, alright? We want to avoid any accidental run-ins with the internal components!
- Keep sliding the opening pick up the right edge of the back cover to cut through that stubborn adhesive.
- Park the opening pick near the top right corner—it’s your friendly barrier to keep the adhesive from sneakily sticking itself back together.
Step 10

Keep an eye on that iOpener—too much heat and it might pop like a party balloon.
An adequately warmed iOpener should maintain its cozy temperature for about 10 minutes.
- Warm up your iOpener gently and press it against the top edge of the phone for about 3 minutes to loosen up that stubborn adhesive. If it cools down and isn't quite doing the trick, just pop it back in the microwave for 30 seconds to get it nice and flexible. If you need a hand, you can always schedule a repair.
Tools Used
Step 11

Be careful not to insert the pick more than 5 mm, or you might accidentally damage or smear the rear cameras and flash. Let's keep that phone in great shape!
- Now it's time to get this device opened up! Slide the opening pick across the top edge, starting from the top left corner, to loosen the remaining adhesive and make progress on your repair.
Step 12


- Pop off that back cover like it's a lid on a soda can!
- Now, as you put everything back together:
- This is a perfect moment to fire up your phone and check all the features before you seal it up tight. Just remember to switch it off completely before diving back into the repair!
- Got some stubborn adhesive bits hanging around? Use tweezers or your fingers to remove them. If they're being particularly clingy, a little heat will do the trick.
- Using custom-cut adhesives? Check out this guide for the lowdown.
- If you're all about that double-sided tape life, this guide has your back.
Step 13

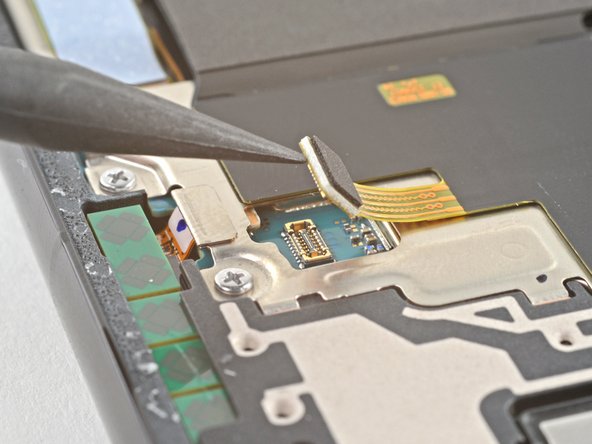
- Grab your spudger and use the pointy end to gently pop the charging coil’s connector off the motherboard. Easy does it—just a little lift and it’s free!
Tools Used

Step 14

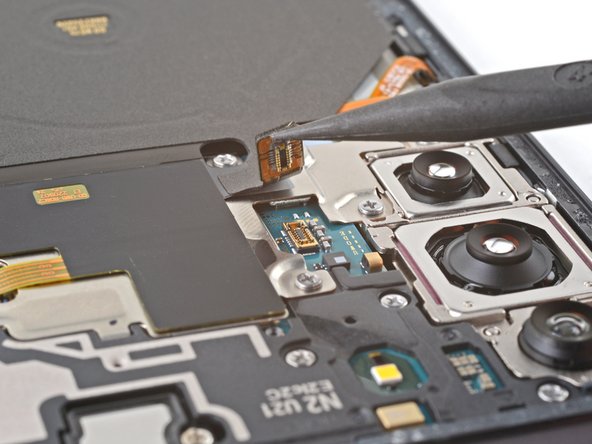
- Grab your trusty spudger and gently use the pointed end to lift up and disconnect that NFC antenna cable from the motherboard. You've got this!
Tools Used
Step 15

- Grab your Phillips screwdriver and take out the six 3.5 mm screws holding down the charging coil.
Step 16

- Grab your Phillips screwdriver and take out the seven 3.5 mm screws that are holding the loudspeaker in place.
Step 17


Keep the loudspeaker and charging coil together—don't let them split up like a bad band!
- Slide your spudger between the left side of the loudspeaker and the frame—like you're breaking up a tiny dance party.
- Lift gently to pop those clips loose and free the loudspeaker.
- When putting things back together, just press the loudspeaker into the frame until you hear those satisfying clicks.
Tools Used
Step 18

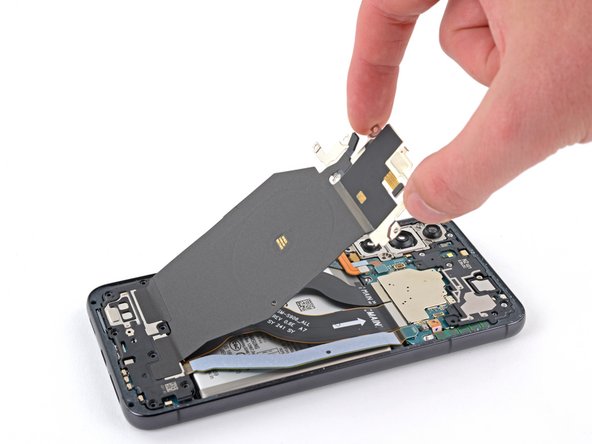

Keep the charging coil and the loudspeaker together—don't try to split them up! Keeping them intact makes the repair smoother and avoids unnecessary hassle.
- Carefully take out the charging coil and NFC antenna assembly, like you're uncovering a hidden treasure!
Step 19

- Grab your spudger and gently lift up to disconnect that battery's press connector. You've got this!
Tools Used
Step 20

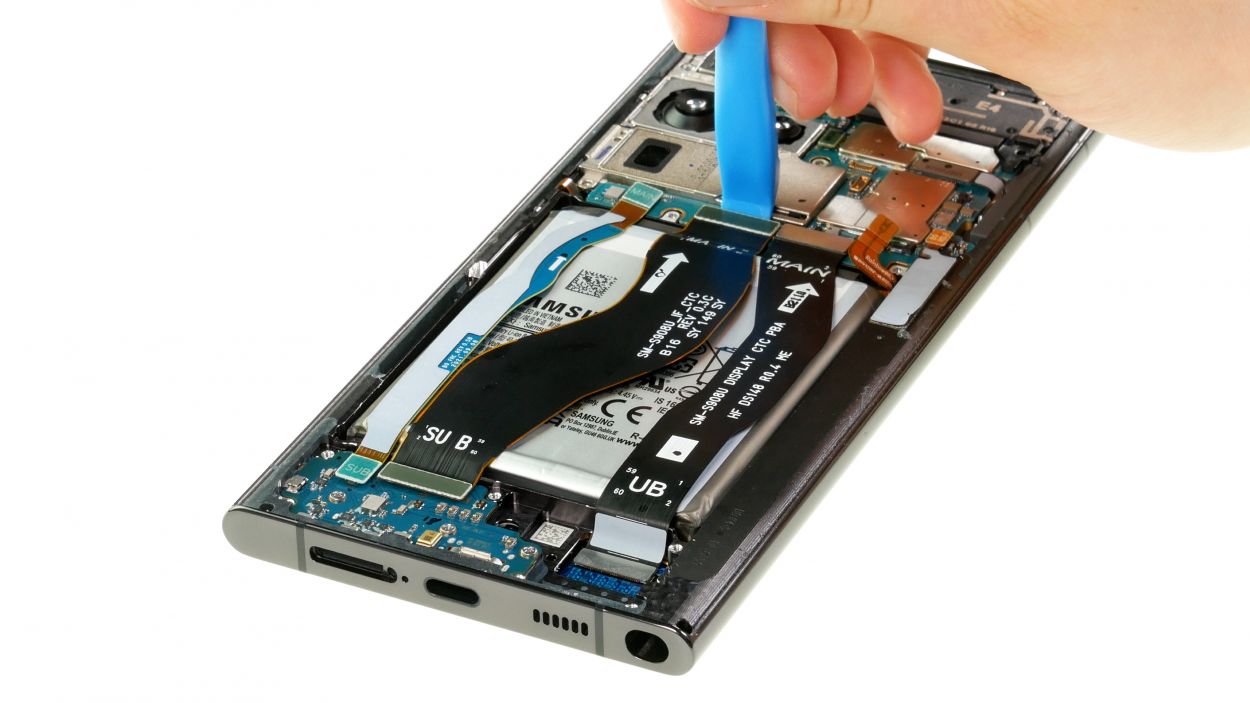
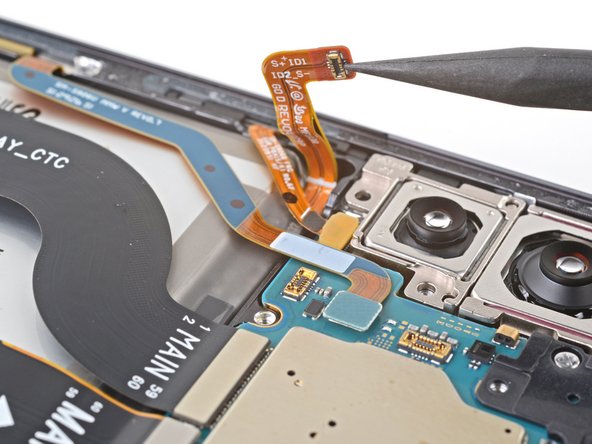
- Grab your trusty spudger and gently pop up the main interconnect cable to free it from the motherboard—like giving it a little nudge to let go.
- Now, repeat the move for the secondary interconnect cable. Lift it away with your spudger and watch it separate, easy-peasy!
Tools Used
Step 21

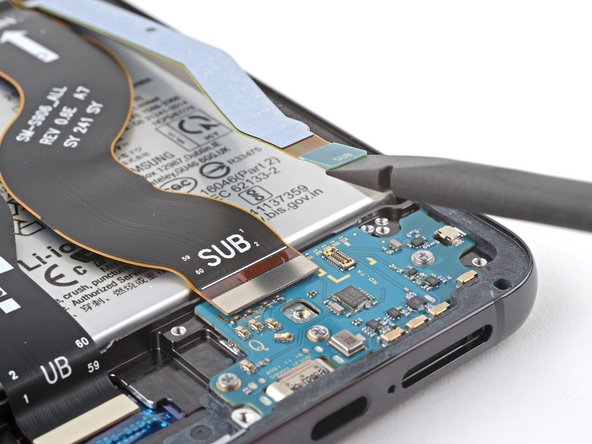
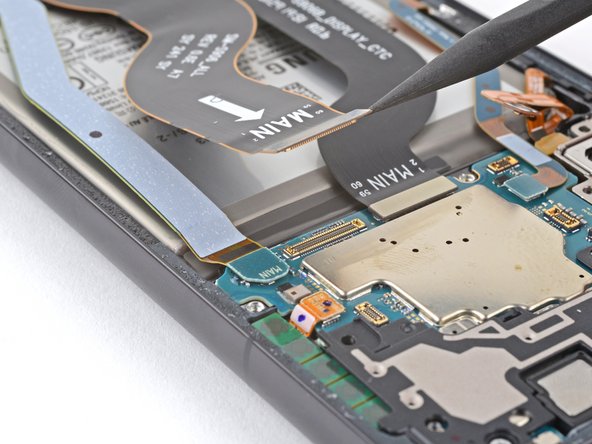
- Grab your trusty spudger and gently nudge the primary interconnect cable away from the charging board. It's like giving it a little high five!
- Now, with that same spudger, carefully pry up and disconnect the secondary interconnect cable from the charging board. You're on a roll!
Tools Used
Step 22

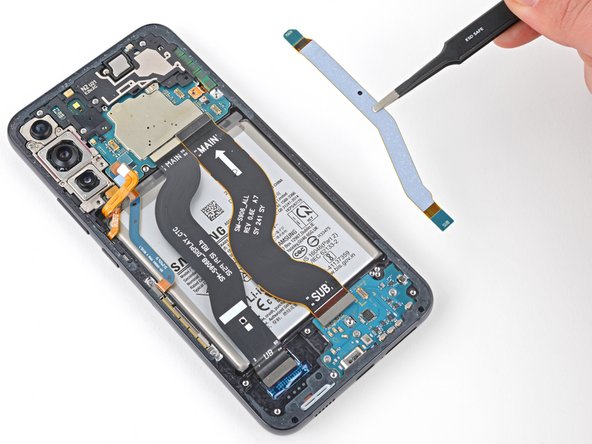
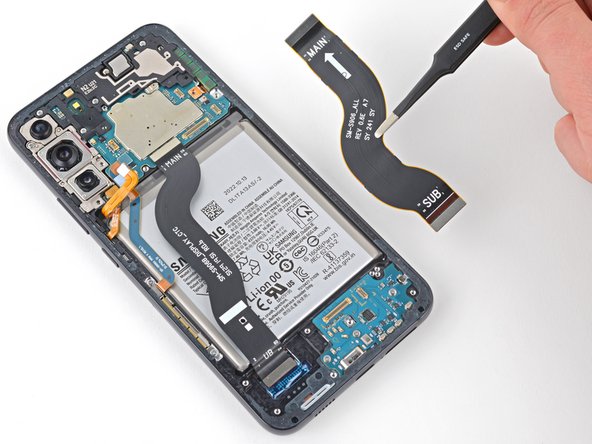
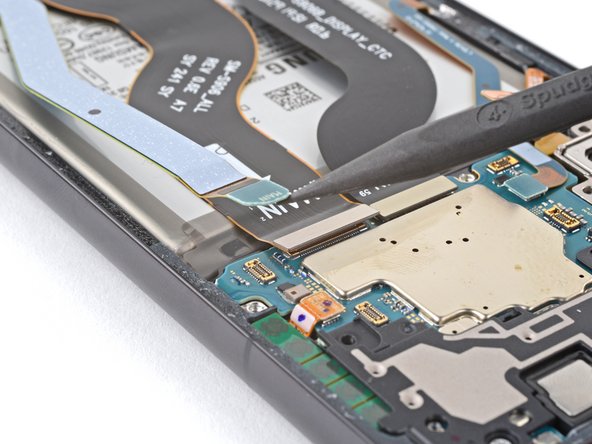
- Grab those tweezers or use your trusty fingers to gently pull away the interconnect cables.
- When you're putting everything back together, double-check that each cable marked MAIN is snugly connected to the motherboard, while the ones labeled SUB are hooked up to the charging board. You've got this!
Step 23

- Grab your trusty Phillips screwdriver and gently twist out those three 3.4 mm screws holding the charging board in place. You've got this!
Step 24
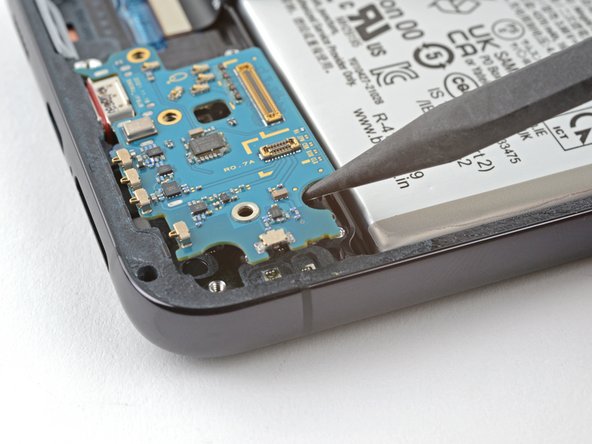

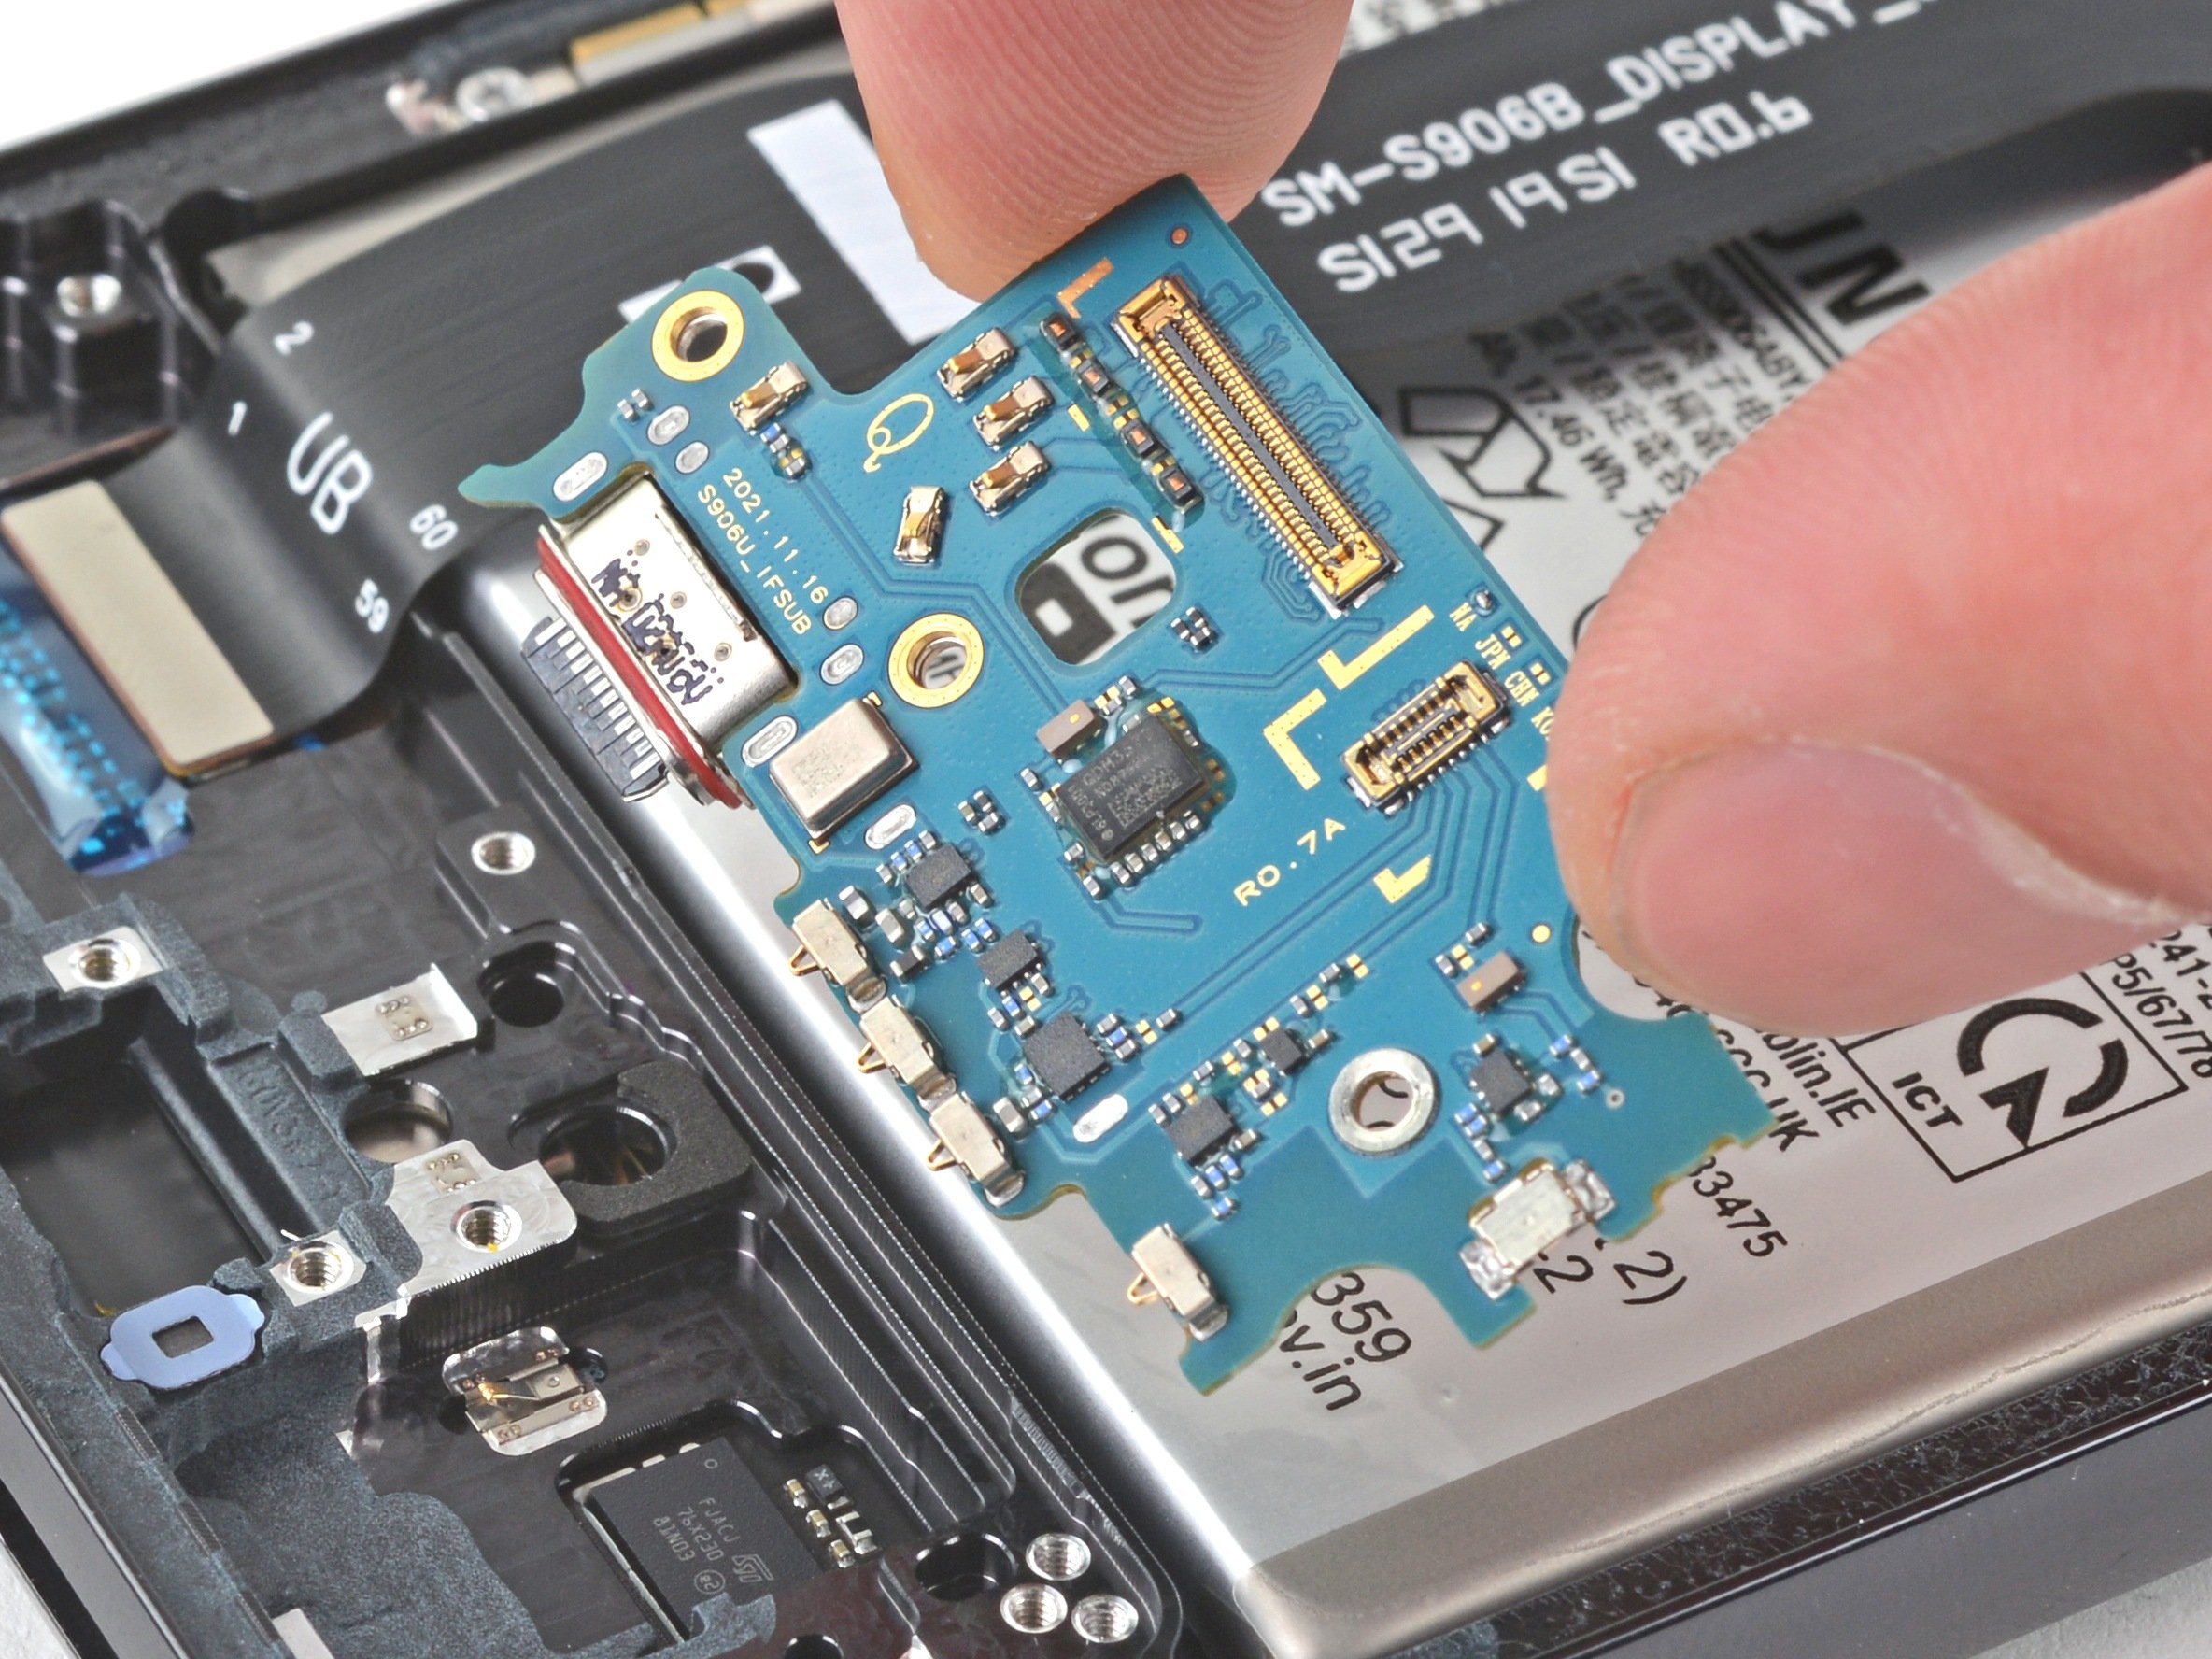
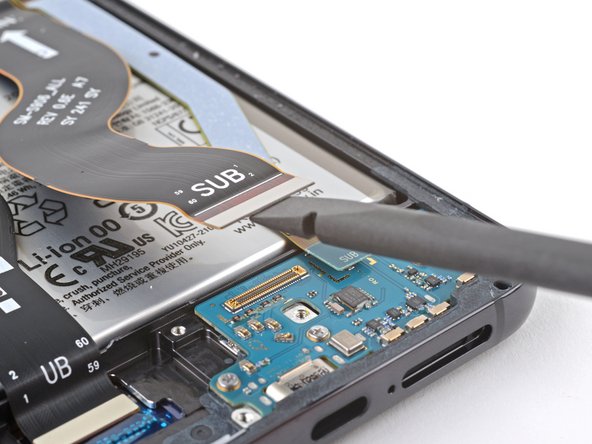
- Gently slide the pointed end of a spudger between the top right edge of the charging board and the frame. You're almost there!
- Carefully pry up to lift the charging board just enough so you can reach it with your fingers. You've got this!
Tools Used
Step 25


- Time to put everything back together—just work backwards through these steps.
- Got old parts? Drop them off at an R2 or e-Stewards certified recycler and keep things green.
- If things didn’t go quite right, try a little troubleshooting magic or swing by our Answers community. Still stuck? You can always schedule a repair with us!