Samsung Galaxy S22 USB-C Port and Charging Board Replacement
Duration: 45 minutes
Steps: 24 Steps
Ready to swap out the USB-C port and charging board on your Samsung Galaxy S22? First things first—let that battery drain all the way before you crack it open. Nobody wants a surprise thermal fireworks show. If your battery’s looking puffier than a marshmallow, take extra care. After you patch things up, water resistance depends on how well you stick that adhesive back in place, but heads-up: your device won’t have its official IP rating anymore.
Step 1


Oops! If the SIM eject tool ended up in the microphone hole, don't sweat it. Chances are, your microphone is still just fine.
- Grab a SIM eject tool, a handy bit, or even a straightened paper clip and insert it into the SIM card tray hole located on the bottom edge of your phone.
- Give that SIM eject tool a little push into the tray hole to pop out the SIM card tray.
- Carefully pull out the SIM card tray. You've got this!
Step 2

Let your battery chill below 25 % before diving in—nobody wants a spicy lithium fire show.
You can also use a hair dryer, heat gun, or hot plate to warm things up a bit, but keep an eye on it! Overheating the phone can lead to trouble—both the display and the internal battery are not fans of excessive heat. Stay cool while you repair!


Step 3


The strongest spots for the adhesive are in the bottom right and top left corners, so pay extra attention there during your peel and stick process.
- While waiting for the adhesive to loosen up, keep this in mind: there's glue holding the back cover in place all around the edges of the frame.
Step 4


Having a tough time creating that gap? No worries—apply a bit more heat to loosen up the adhesive. Just make sure to follow the iOpener instructions carefully so you don’t overheat and cause damage. If things get tricky, remember you can always schedule a repair for extra help.
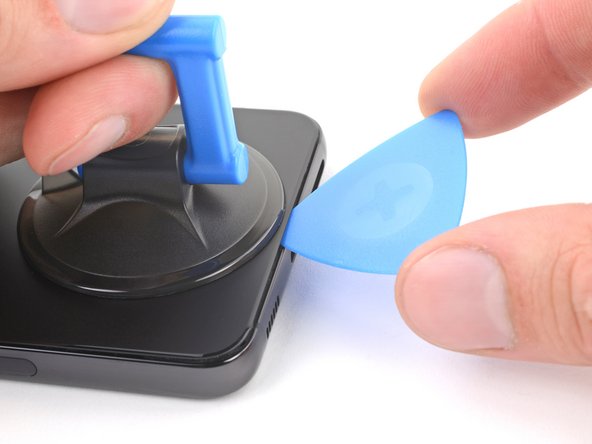
- Stick a suction cup near the bottom edge of the back cover—get it as close to the bottom as you can. Ready to pull?
- Hold onto the suction handle and give it a firm, steady tug to create a small gap between the cover and the frame. No wimping out now!
- Slide an opening pick into that gap to start prying it apart. Keep at it, and if you need a hand, you can always schedule a repair.
Tools Used

Step 5


- Gently slide the pick back and forth along the bottom edge to cut through the adhesive like a pro.
- Once you've made some progress, leave the pick snugly in the bottom left corner to keep that adhesive from making a comeback.
Step 6

- Warm up the left edge of the back cover with a heated iOpener for two minutes. Let the heat work its magic before moving on.
Tools Used
Step 7


Be careful and only slide that pick in about 5 mm max! Going deeper might just snag the antenna flex cable or the power button cable. Nobody wants that!
- Pop in a second opening pick at the bottom left corner like a pro.
- Gently slide that pick down to the bottom of the camera bezel to slice through the left adhesive like butter.
- Keep the pick in place to stop that adhesive from trying to reseal and make your life difficult.
Step 8

- Warm up an iOpener and press it against the right edge of the back cover for two minutes. Give it a little love and let that heat work its magic!
Tools Used
Step 9


If the sticky stuff has decided to stick again, slide your pick back in near the bottom edge and keep going.
- Pop in a third opening pick at the bottom right corner to get things started.
- Gently slide that pick up to the top right corner to cut through the adhesive like a pro.
- Keep the pick in the top right corner to stop the adhesive from sticking back together—smooth sailing from here.
Step 10

- Warm up that iOpener and give it a cozy hug on the top edge of the back cover for a solid two minutes.
Tools Used
Step 11


Be careful not to insert the pick more than 4mm, or you might accidentally damage the rear cameras or flash - let's avoid that!
- Wedge an opening pick into the gap at the top right edge—don’t be shy, it’s built for this.
- Glide the pick along the top edge and curve around the top left corner, slicing through any stubborn adhesive in your way.
Step 12


If your cover’s still clinging on like a stubborn sticker, just keep gliding an opening pick around the edge until it finally lets go.
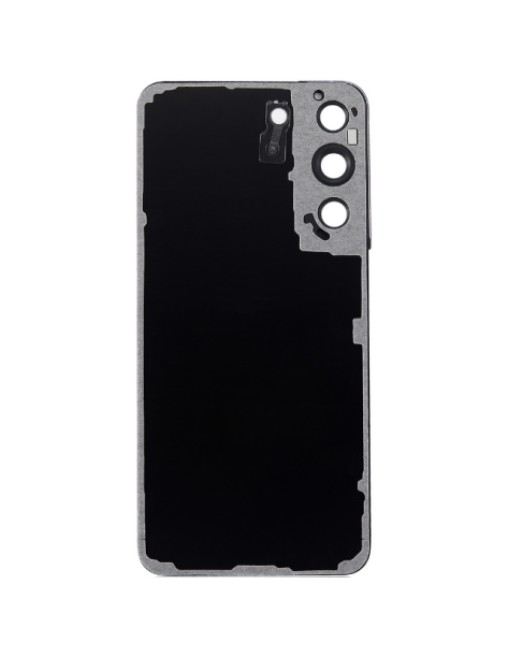
- First things first, let's get that back cover off! Grab it and carefully remove it.
- Now, as you put everything back together:
- Here's a pro tip: this is the perfect moment to power up your device and check if everything's working like a charm before sealing it up tight. Just remember to shut your phone down completely before diving back into the work.
- Got some pesky adhesive chunks hanging around? Use tweezers or your fingers to remove them. If it's being stubborn, a little heat can work wonders to help separate it.
- When it’s time to add new adhesive, make sure to follow this guide!
Step 13


To reattach those connectors, gently align them and press down on one side until you hear that satisfying click. Then, do the same on the other side. Just remember, no need to push down in the middle! If things get misaligned, those little pins can bend, and we definitely don’t want that kind of drama.
- Grab your spudger and use its sharp tip to carefully lift and disconnect the wireless charging coil from the motherboard. Take your time and don't rush!
Tools Used

Step 14

- Grab your trusty Phillips driver and give those six little 3.5 mm screws on the wireless charging coil a gentle twist—think of it as freeing the coil from its tiny jail.
Step 15

- Grab your Phillips screwdriver and unscrew all seven 3.5 mm screws holding the loudspeaker in place.
Step 16


- Gently slide the pointed end of your spudger into the upper left corner of the loudspeaker, right where it meets the frame.
- Give it a little pry to unclip that loudspeaker from the frame and set it free!
- When putting everything back together, remember to give the perimeter of the loudspeaker a nice press to snap those clips back in place.
Tools Used
Step 17


Be careful not to detach the charging coil from the speaker – they’re a team, and we want them to stay that way!
- Carefully lift out the wireless charging coil and the loudspeaker from the frame. If you need a hand with this, you can always schedule a repair.
Step 18


- Grab the pointed end of your spudger and gently pry up to disconnect the battery press connector. Keep it smooth and steady—no rush needed, just a friendly nudge to free that connection. If you need a hand, you can always schedule a repair.
Tools Used
Step 19


- Grab the spudger and gently pop those two interconnect cables off the motherboard—think of it as giving them a little nudge to let go.
Tools Used
Step 20
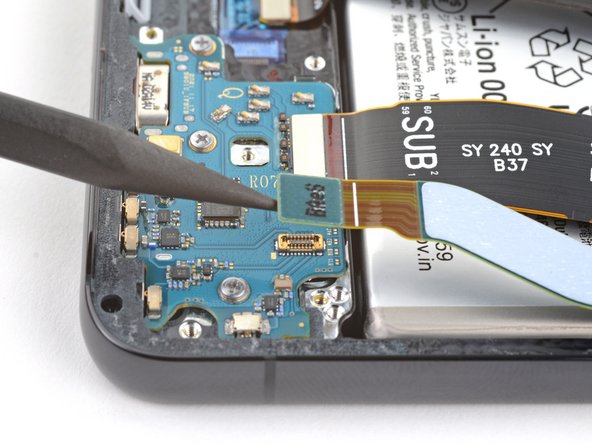

- Grab your spudger's pointed end and gently pry up those interconnect cables from the charging board. Disconnect both cables carefully—you're on your way to a smooth repair. If you need help along the way, you can always schedule a repair.
Tools Used
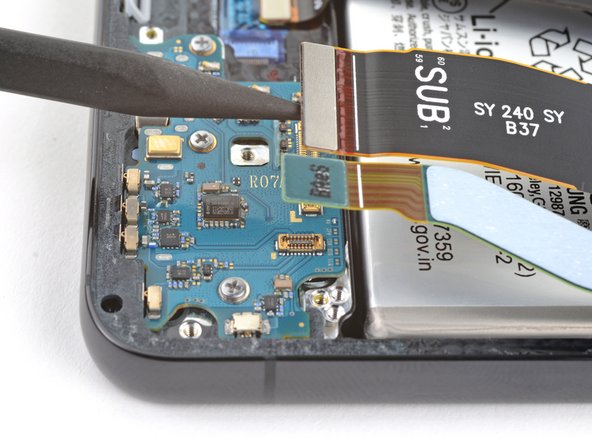
Step 21

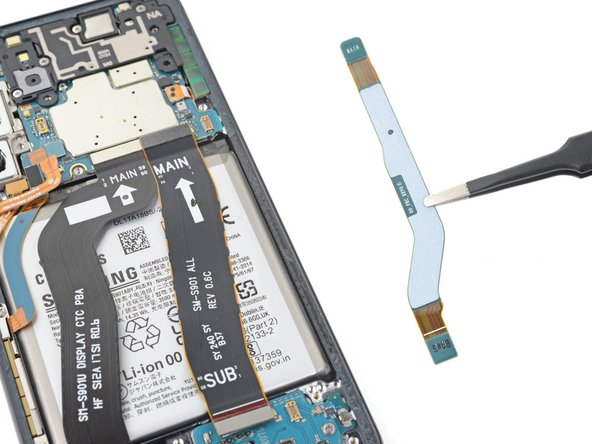
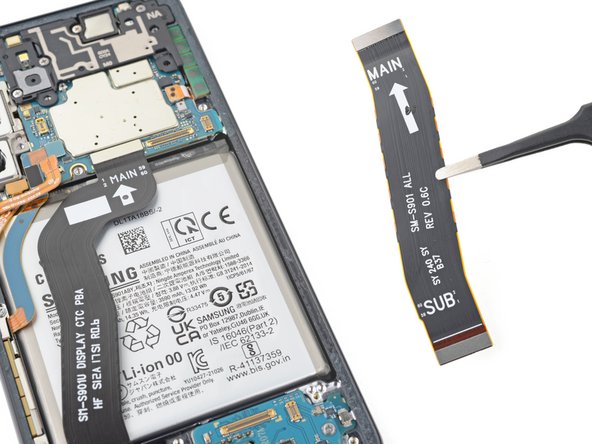
- Gently lift and pull out the two interconnect cables from the frame. Don’t worry, they’re not shy—they just need a little nudge.
- When you’re putting things back together, make sure the cables are facing the right way: 'main' ends at the top, 'sub' ends down at the bottom. It’s like giving them VIP seating.
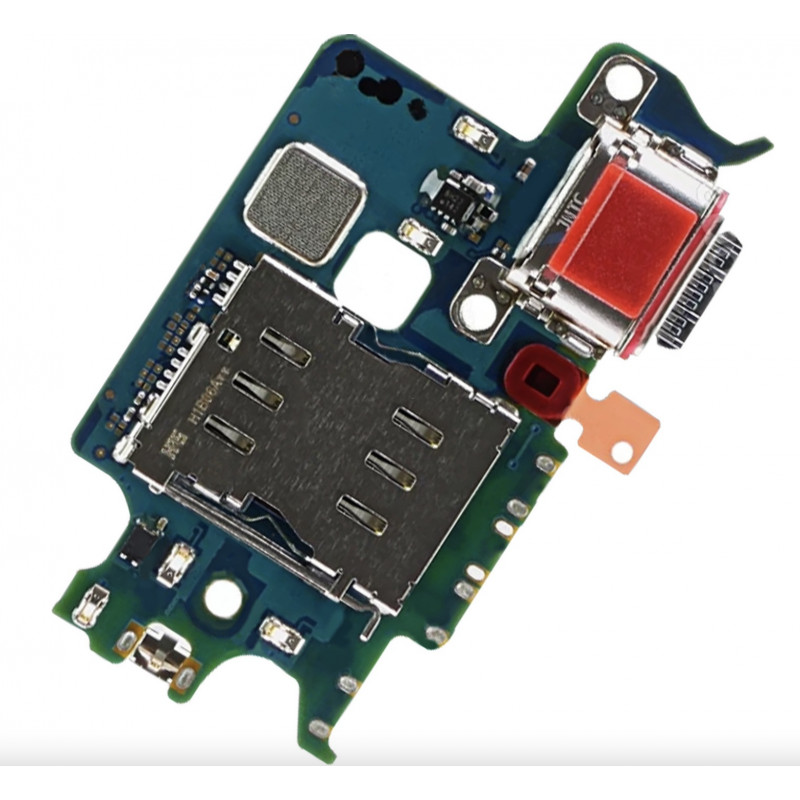
Step 22

- Grab your Phillips screwdriver and loosen those three 3.5 mm screws holding the charging board in place. Easy peasy! If you hit any snags, remember you can always schedule a repair with Salvation Repair to get professional help.
Step 23

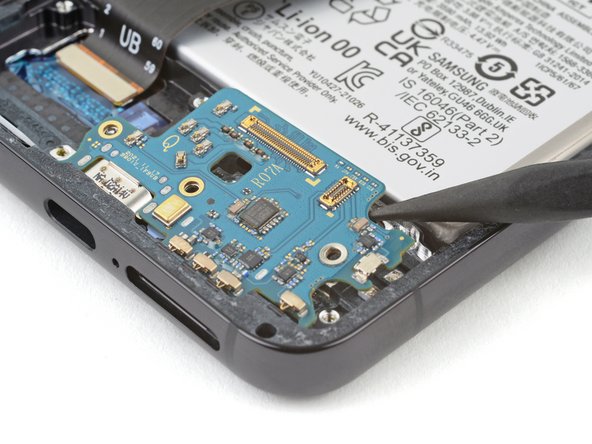
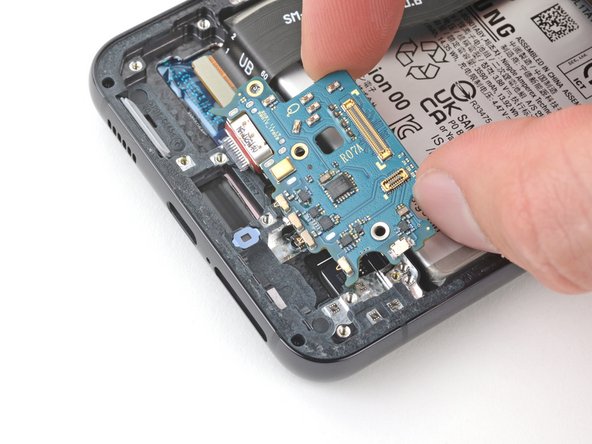
- Take the pointy end of your spudger and slide it in between the top right corner of the charging board and the frame. Give it a gentle nudge.
- Lift the charging board out of its spot until you can grab it with your fingers—like picking up a cookie off a plate.
Tools Used
Step 24

- Ready to put things back together? Just retrace your steps, swapping 'remove' for 'reattach' and you'll be good to go.
- Recycling old parts? Drop them off at an R2 or e-Stewards certified recycler to keep things eco-friendly.
- If you hit a snag, swing by our Answers community for some troubleshooting wisdom. And if you need a hand, you can always schedule a repair.