DIY Guide to Replace Earpiece in iPhone 8 Plus
Duration: 45 min.
Steps: 14 Steps
In this guide, we show you how to replace your iPhone 8 Plus’ defective earpiece. You need this repair if you can’t hear the person you’re talking to or the call is very quiet.Back up all your data before the repair, and touch something like a radiator to get rid of any static charges. In this guide, we show you how to replace your iPhone 8 Plus’ defective earpiece. You need this repair if you can’t hear the person you’re talking to or the call is very quiet. Back up all your data before the repair, and touch something like a radiator to get rid of any static charges.
Step 1


– First things first, let’s power down your iPhone completely to keep it safe during this little adventure. Just press the Sleep/Wake button for about three seconds until you see that friendly ‘power off’ slider pop up.
– Now, give that slider a swipe from left to right. Your iPhone will take a moment to say goodbye as it shuts down, which should take around ten seconds. Easy peasy!
Step 2

2 × 3,4mm Pentalob
– Time to tackle those pesky screws! Grab your trusty pentalobe screwdriver and remove the two screws located at the bottom of the enclosure, right next to the Lightning connector. Don’t let them escape—place those little guys in the same section of your magnetic pad so they don’t get lost!
Step 3


If you find it necessary, warm up the outer edges of the display a few times. Just a friendly reminder: the flex cables for the display are hanging out on the side of the Sleep/Wake button. Oh, and keep in mind that once you open up your iPhone 8, it waves goodbye to its warranty for dust and splash resistance (IP 67 rating).
– Set your iPhone 8 Plus down on a soft, clean surface so it can relax without getting scratched on the back.
– To lift the front panel, grab a suction cup, a hard plastic pick, and a heat gun. If your screen is looking like it had a rough night and is cracked, cover it all up with some packing tape before moving on.
– Since the screen is glued to the frame, warm up those outer edges with a heat gun to around 60°C (140°F) to make things easier.
– Place the suction cup over the Home button (if you can) or right next to it. While you’re gently pulling the screen up with the suction cup, slide that hard plastic pick between the aluminum frame and the display frame, and press down on the aluminum frame. Remember, the display is glued on, so you’ll need to slide the pick all around the iPhone in that gap. Just be careful not to push the pick too far near the Sleep/Wake button side, or you might end up damaging the display’s flex cables.
– Now, use the pick to pry the display away, so those tabs pop out of the aluminum frame. You can then fold the display to the side.
– Lean the display against something stable to avoid bending those delicate flex cables too much.
Step 4


2 × 1,2 mm Phillips
1 × 1,4 mm Phillips
1 × 2,6 mm Phillips
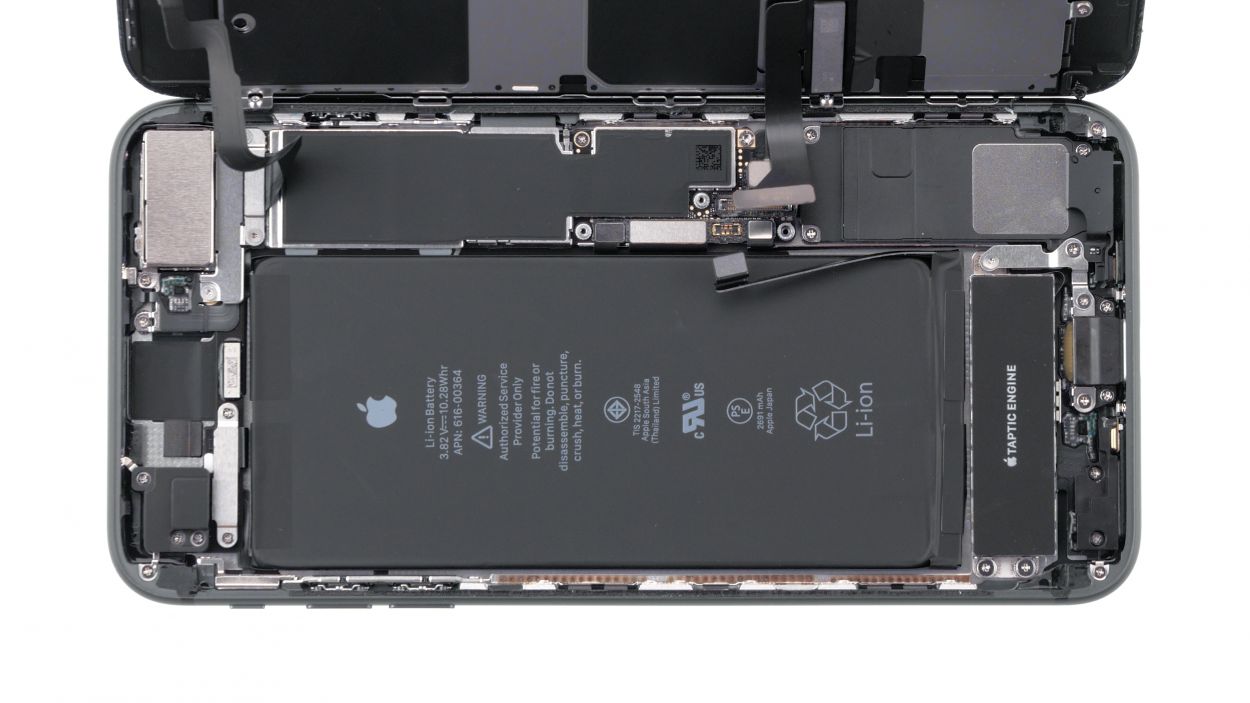
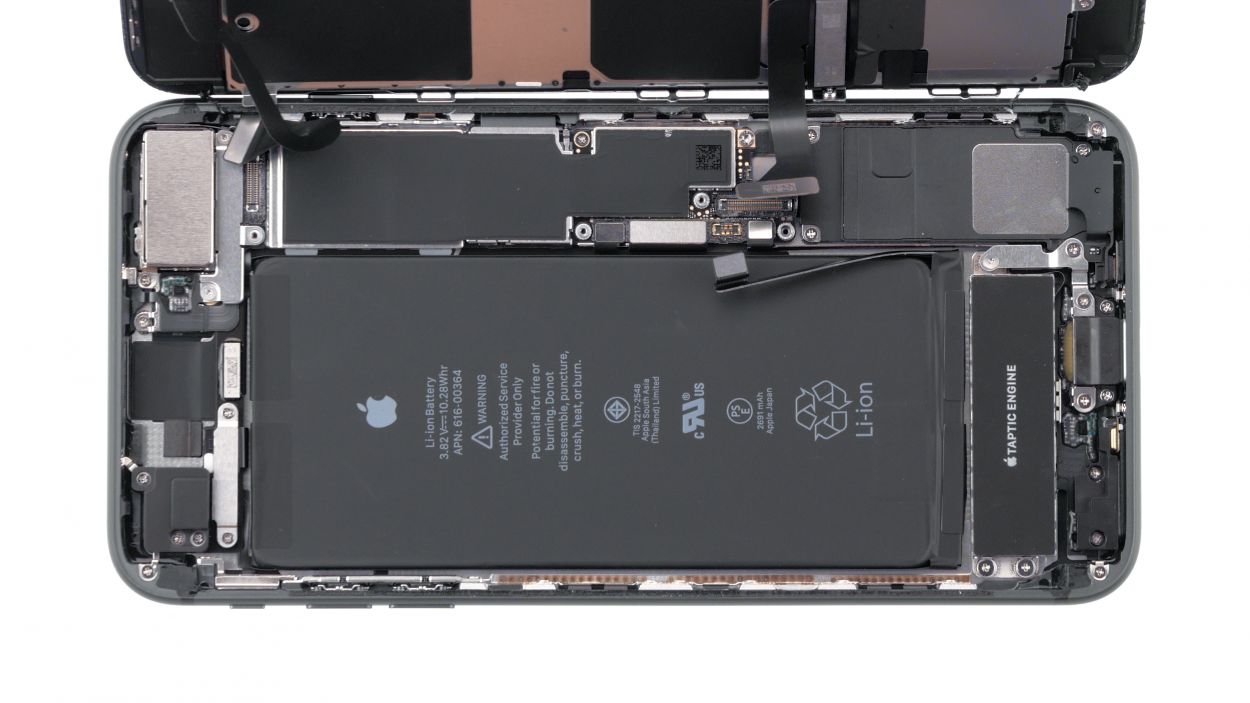
Before you dive into the repair, make sure to disconnect the battery contact. This little step helps prevent any short circuits and keeps your device from accidentally turning on while you’re in the zone!
– Grab your Phillips screwdriver (Ph00) and say goodbye to those pesky Phillips screws! Once they’re out, gently remove the cover and keep all the little pieces cozy in the same section of your magnetic pad.
– Now, it’s time to delicately lift off the battery contact. Just slide a plastic spudger right below the connector, and you’ll be good to go!
Step 5


Display Connector
Home Button Connector
Step 6


1 × 1,1 mm Y-Type
1 × 0,9 mm Y-Type
– Grab your Y-Type screwdriver (Y000) and let’s tackle those two Y-Type screws! Once they’re out of the way, gently lift off the cover. Make sure to keep all the little parts cozy in the same spot on your magnetic pad.
– Now, take a spudger and carefully disconnect that FaceTime contact from the PCB. You got this!
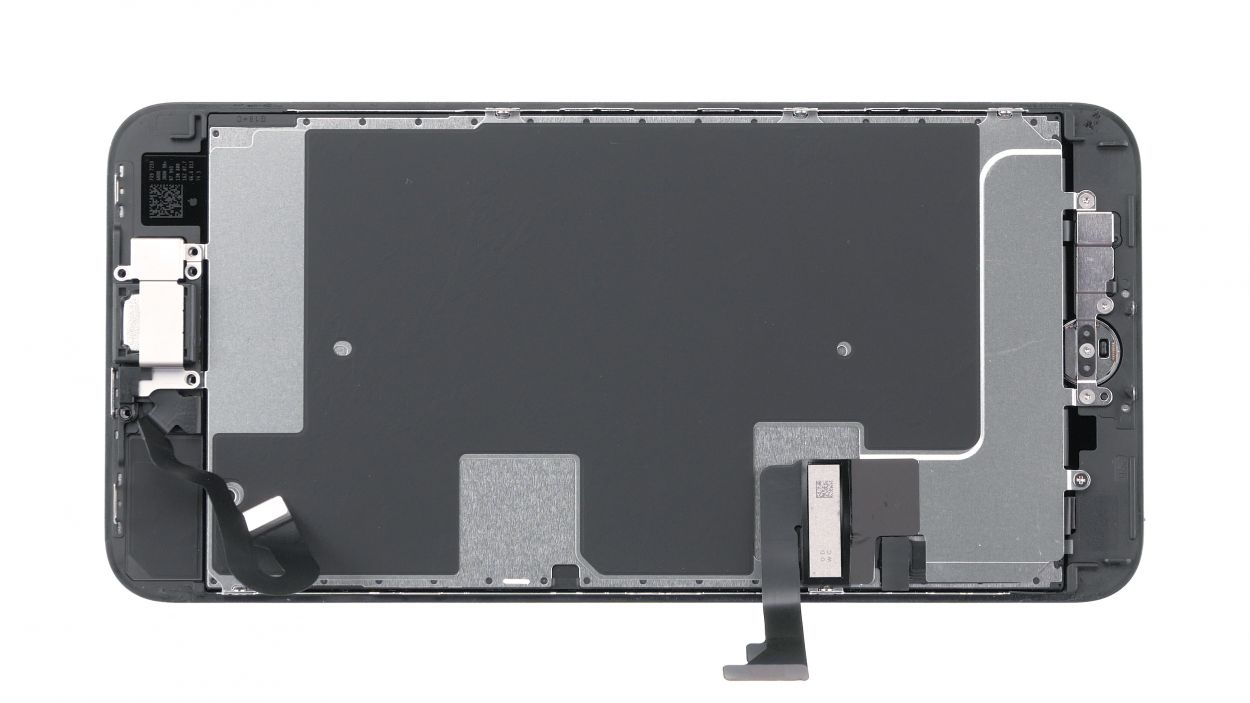
– And just like that, you can fully remove the display. Easy as pie!
Step 7
2 × 1,7 mm Phillips-Schraube
1 × 2,7 mm Phillips-Schraube
2 × 2,2 mm Phillips
Hey there! Just a quick heads-up: the screws are like a quirky family—each one has its own length. Mixing them up might lead to a display disaster during assembly, so keep them sorted!
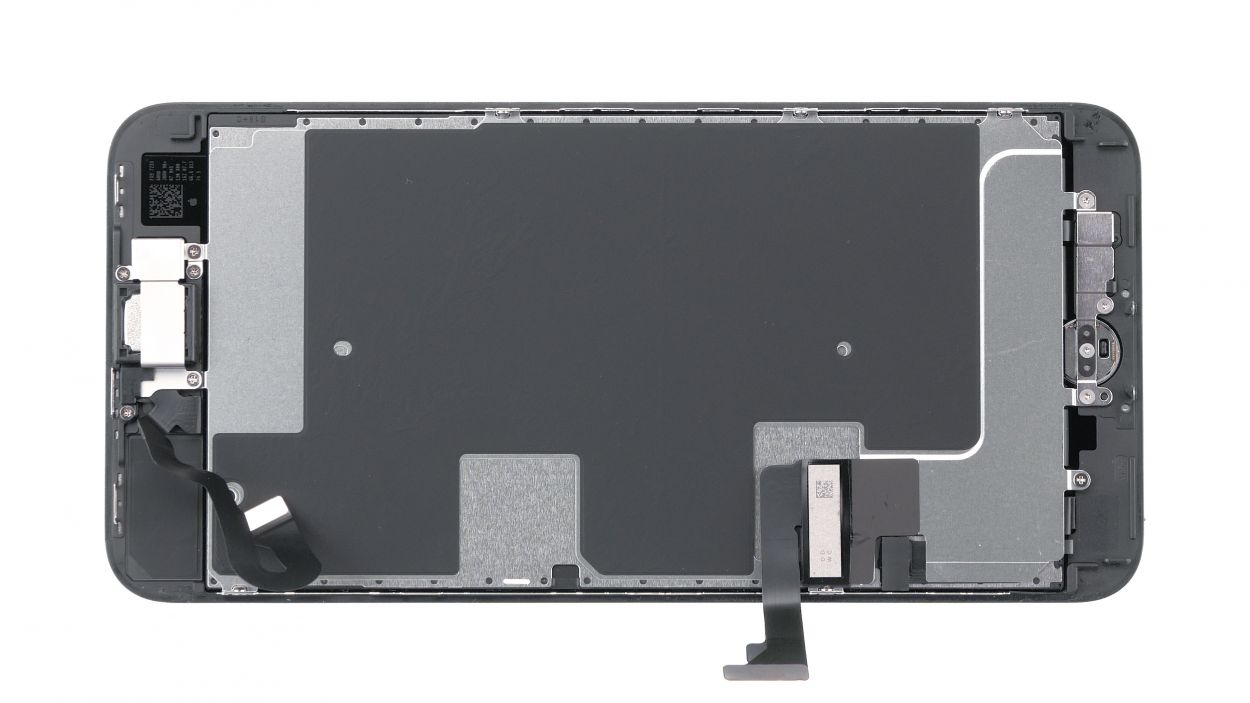
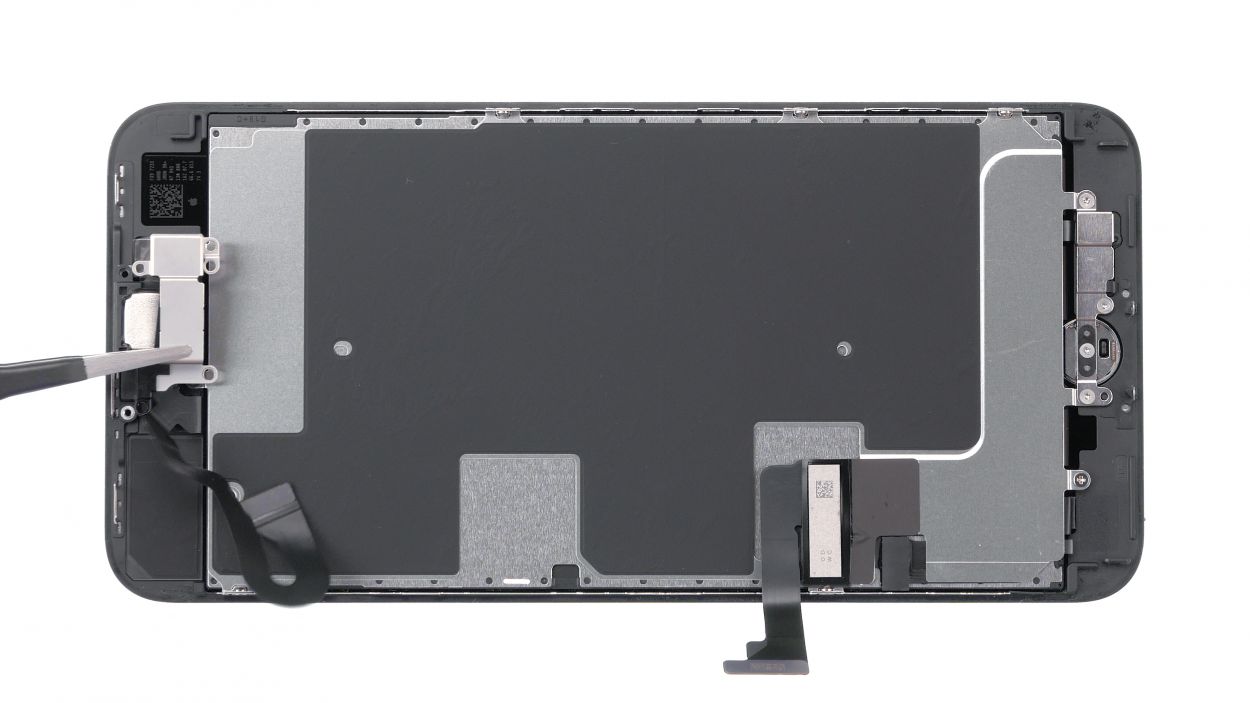
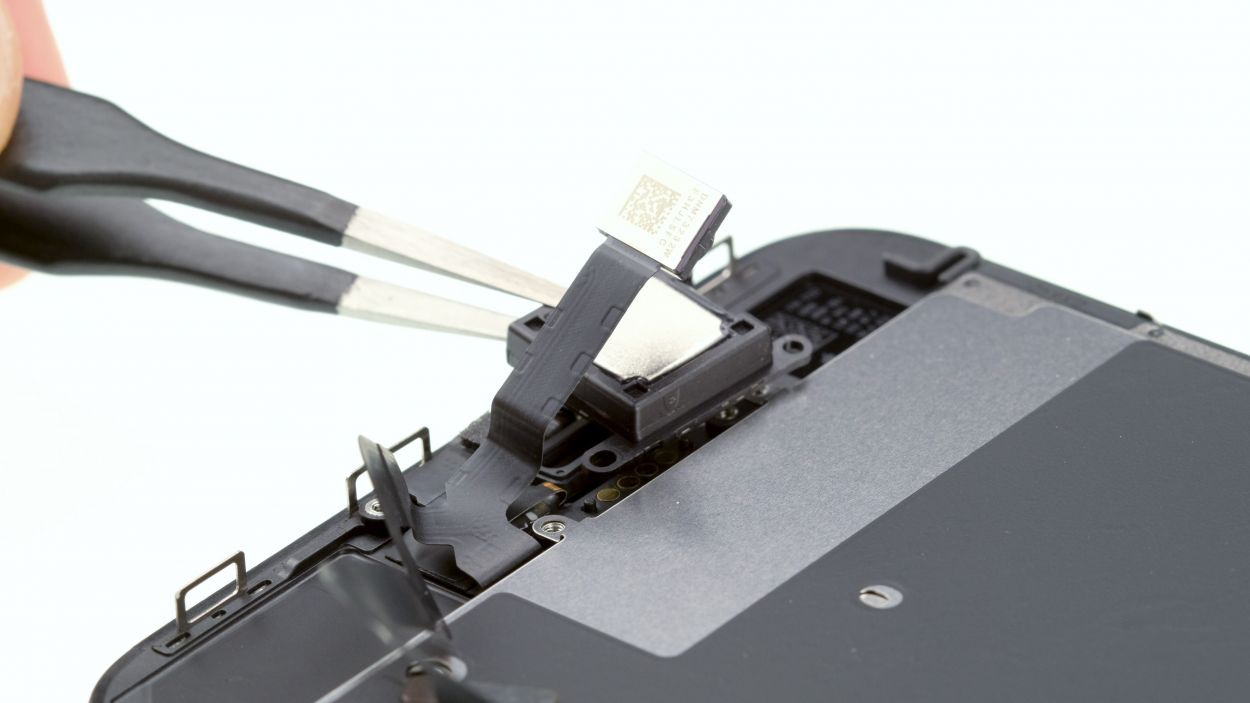
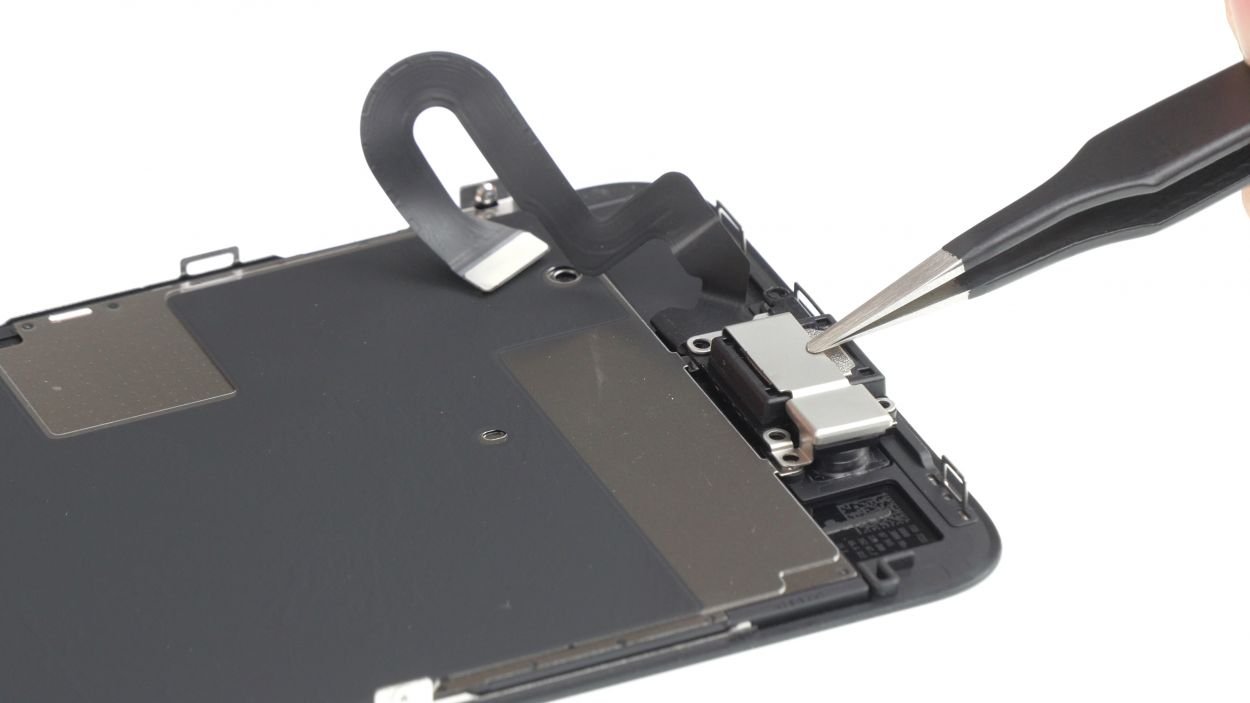
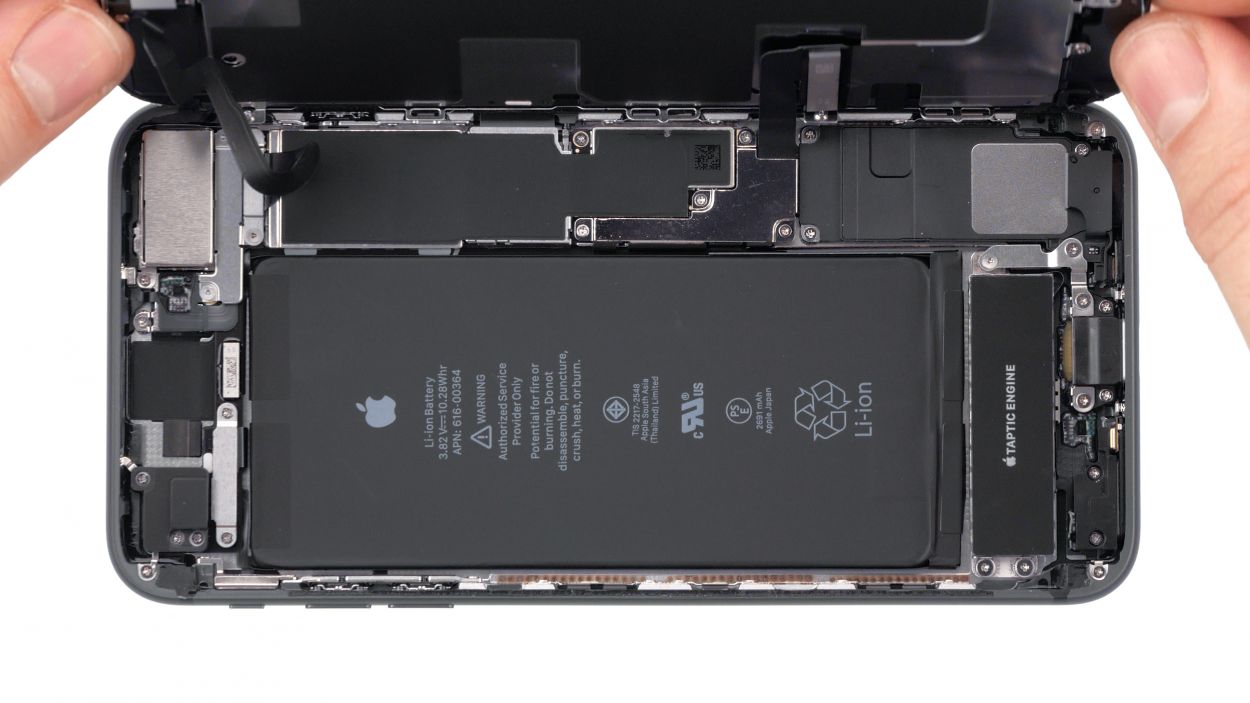
– The earpiece is located on the backside of the display unit. Remove the Phillips screws securing the cover over the earpiece. Make sure to keep all the components in the same section of your magnetic pad to avoid any mix-ups!
– The earpiece hides beneath the flexible flat cable of the front camera. Gently fold the cable to the side so you can easily access and remove the earpiece.
Step 8
2 × 1,7 mm Phillips-Schraube
1 × 2,7 mm Phillips-Schraube
2 × 2,2 mm Phillips
Don’t tighten the screws too much or you’ll see them through the finish on the front.
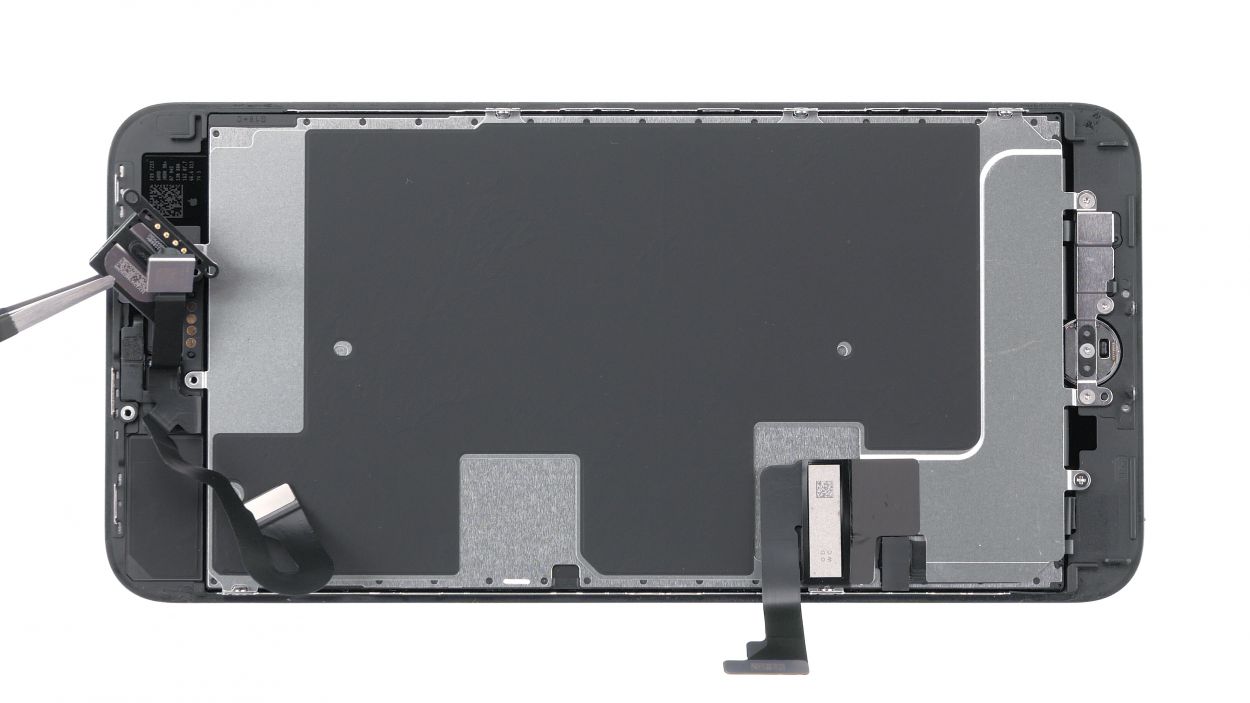
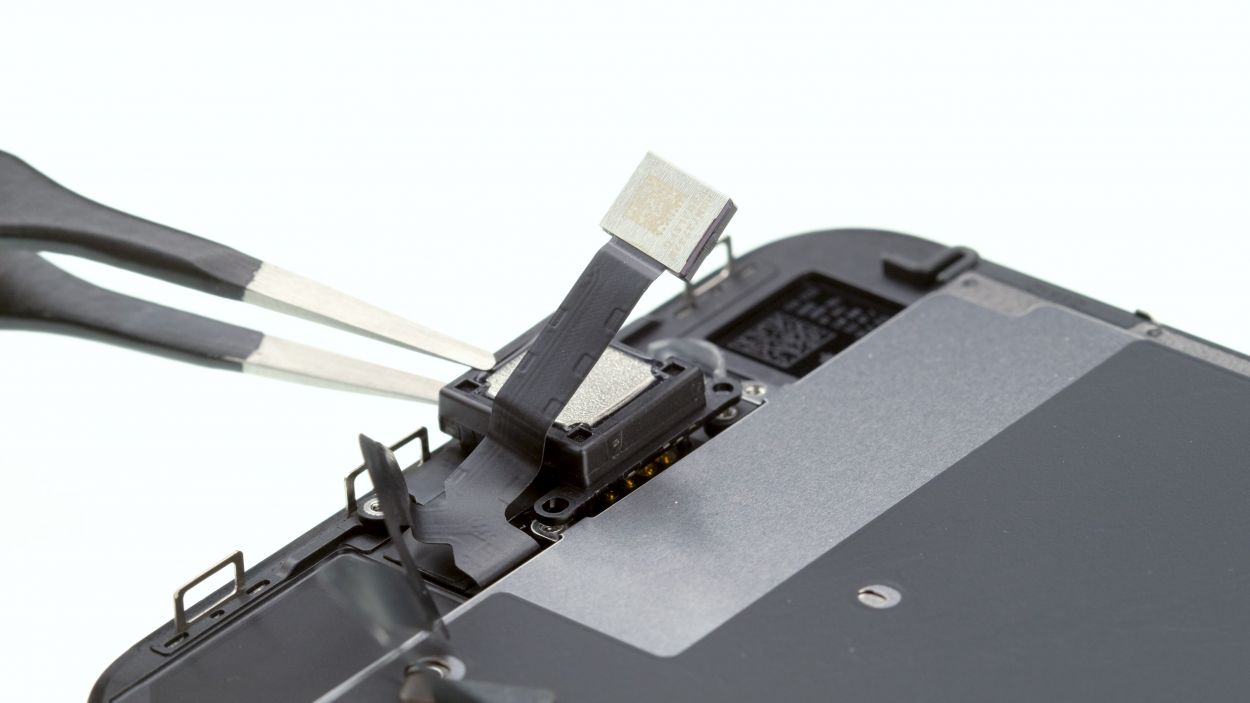
– Nestle the earpiece back in its cozy spot right below the flexible flat cable, snugly positioned between the FaceTime camera and the sensors.
– Next, pop the cover back on and secure it with those five Phillips screws. Just a little tip: ensure the front camera is perfectly centered at the front of the display. A tiny nudge might be needed to get it just right!
Step 9


When you repair your iPhone with a frame sticker, it gets a nice layer of protection against dust and light water splashes. Just remember, it’s not a full-on waterproof suit!
Make sure to position that frame sticker just right! Each corner is uniquely shaped, giving you a handy guide for orientation.
– To ensure that the new frame sticker sticks like a champ, let’s clean off all that pesky glue residue and dirt first.
– Peel away the first protective film layer from the frame sticker.
– Carefully align the frame sticker on one edge and gradually attach it. Make sure it’s even and give it a good press to secure it.
– Now, go ahead and remove the remaining film layers.
Step 10


Facetime connector
1 × 1,1 mm Y-Type
1 × 0,9 mm Y-Type
– Gently set the display on the frame like it’s taking a cozy nap, and connect the FaceTime contact to the logic board with care.
– Now, pop the FaceTime contact’s cover back into the iPhone and secure it with those three Phillips screws. You’ve got this!
Step 11


Display Connector
Home Button Connector
– Alright, let’s get those connections sorted! First, you’ll want to connect the two contacts from the Home button and the display to the logic board. It’s like a little dance party for your phone’s components—make sure they’re all linked up nicely!
Step 12


Battery Connector
2 × 1,2 mm Phillips
1 × 1,3 mm Phillips
1 × 2,6 mm Phillips
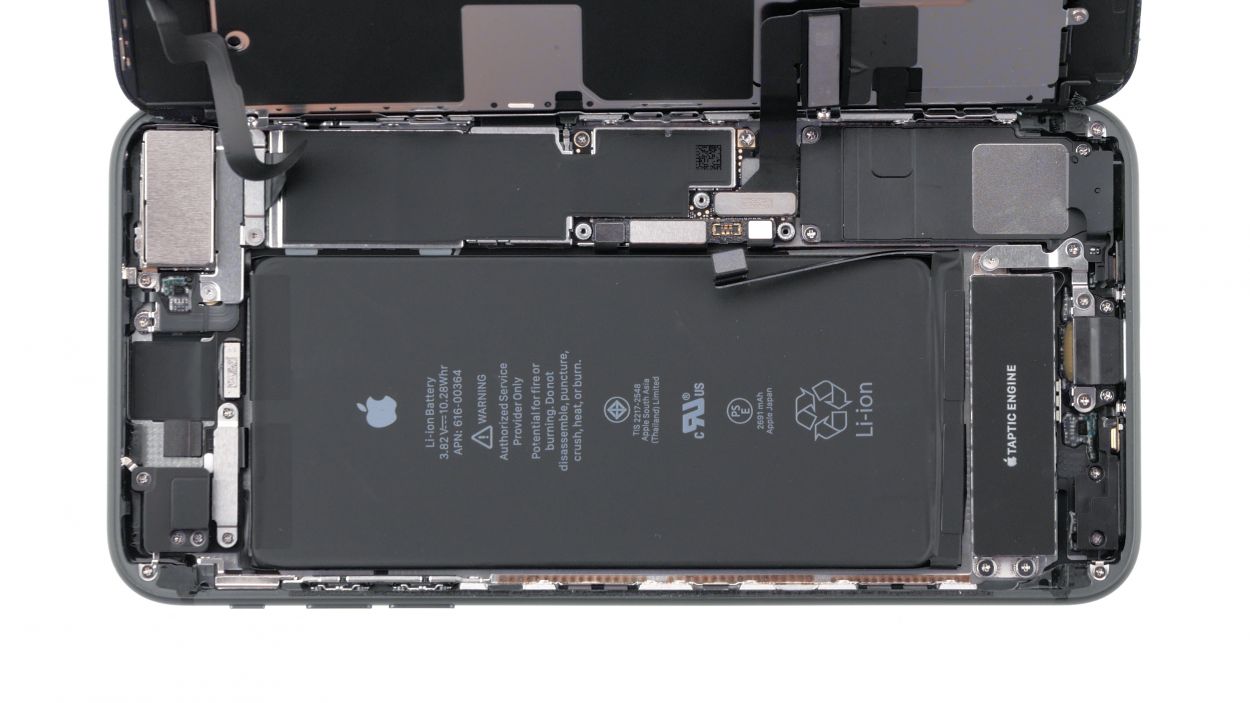
– Reconnect the battery contact like a pro! Make sure it’s snug and secure.
– Now, gently place the metal cover back onto your iPhone and fasten it down with the screws. You’re almost there!
Step 13

For optimal glue bonding, feel free to get creative! You can use some plastic clamps or even sandwich your device between two books. It’s all about giving that glue a warm hug!
Step 14

2 × 3,4mm Pentalobe
– Time to secure those little pentalobe buddies! Grab your trusty screwdriver and fasten the two pentalobe screws snugly on either side of the Lightning connector. They’ll be happy and cozy in their new home!