
Samsung Galaxy S21 Ultra USB-C Charging Port and Daughterboard Replacement
Duration: 45 minutes
Steps: 21 Steps
Follow this guide to swap out the USB-C charging port and daughterboard on your Samsung Galaxy S21 Ultra. Keep in mind, your water resistance might not be the same afterward—it's all about how well you reapply that adhesive. Your device will lose its IP rating, but with a steady hand and some patience, you'll have it back in shape.
Step 1


Uh-oh! If you accidentally poked the SIM eject tool into a microphone hole, no need to panic! Chances are, your microphone is still in one piece and ready to rock.
- Grab a SIM ejector tool, a tiny bit, or even a straightened paperclip, and gently insert it into the tiny hole on the top edge of your phone where the SIM card tray hides. Push in steadily to pop the tray out. Once it’s partially out, grab it with your fingers and pull it the rest of the way. If you need a hand, you can always schedule a repair.
Step 2

- Grab your trusty iOpener and give that back cover some love! Apply it for a solid three minutes to help loosen the adhesive hiding underneath. You've got this!
Before you get started, make sure to unplug and turn off your device. If you're feeling a bit extra, a hair dryer, heat gun, or hot plate can help loosen things up, but be cautious—overheating can fry the display or the internal battery. Keep it gentle and steady to avoid any heat-related mishaps. If you need help, you can always schedule a repair.


Step 3


If your back cover is looking like it went a few rounds in a boxing match, don’t fret! A layer of clear packing tape might just do the trick to help the suction cup stick. If you’re feeling adventurous, super strong tape can step in for the suction cup too. And if that doesn’t cut it, a little superglue on the suction cup should keep it from bouncing off that cracked cover.
Having a tough time making a gap? No worries! Just apply a bit more heat to loosen up that adhesive. Remember to follow the iOpener instructions so you don’t accidentally turn your device into a mini sauna.
- Stick your suction handle nice and snug on the bottom edge of the back cover—get it as close to the edge as you can.
- Give the handle a gentle lift to sneak a tiny gap between the back cover and the frame.
- Slip an opening pick into that gap like a pro.
- Glide the pick over to the bottom left corner to slice through the sticky adhesive.
- Leave the pick hanging out there so the adhesive doesn’t get any ideas about sealing itself back up.
Tools Used

Step 4


- Pop in a second opening pick at the bottom edge of your phone.
- Gently slide that pick over to the bottom right corner to cut through the adhesive like a pro.
- Keep those opening picks in place to stop the adhesive from sealing back up. You're doing great!
Step 5


If the adhesive is giving you a hard time and feels tough to slice through, it’s probably cooled off. Give your iOpener a quick two to three-minute workout to warm things up again!
- Pop a third opening pick into the bottom right corner of your phone—like you're adding toppings to a pizza, but way more technical.
- Glide that pick up the right edge to slice through the sticky stuff holding things together. Smooth moves only.
- Let the pick chill in the top right corner so the adhesive doesn’t get any ideas about sticking back together.
Tools Used
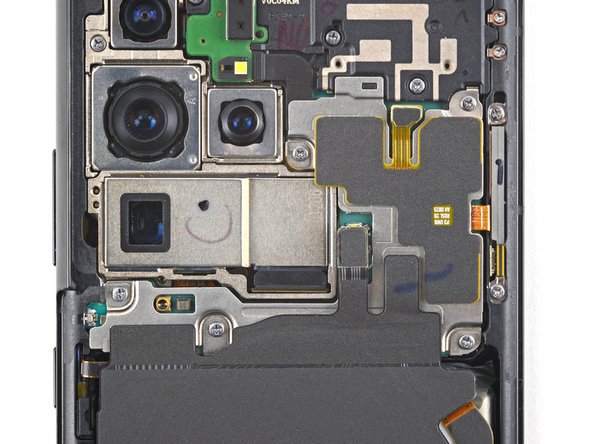
Step 6


When you're getting close to the camera assembly, just slide in the tip of the opening pick (about 4-5 mm) to keep that camera safe and sound. We want it to shine, not smear!
- Slide a fourth opening pick under the top right corner of your phone like a pro.
- Gently glide the opening pick along the top edge to cut through that pesky adhesive.
- Keep the opening pick lodged in the top left corner to make sure the adhesive doesn’t seal back up.
Step 7


Be careful when slicing near the power button - just insert the tip of the opening pick (about 3-4 mm) to avoid damaging the power and volume button flex cable. If you're not feeling confident, don't worry, you're doing great so far!
- Pop a fifth pick under the top left corner like a pro.
- Glide that pick smoothly down the left edge to break up the last bits of sticky stuff holding on.
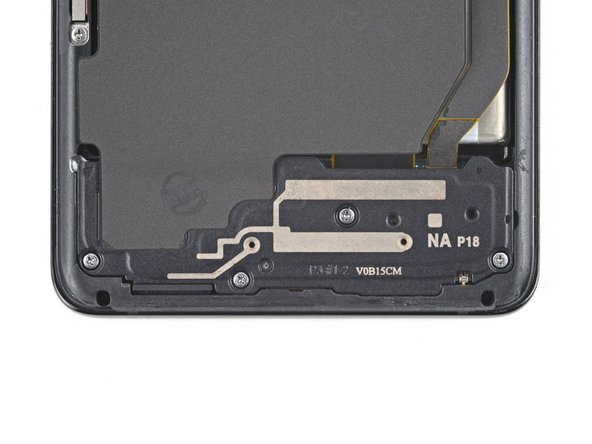
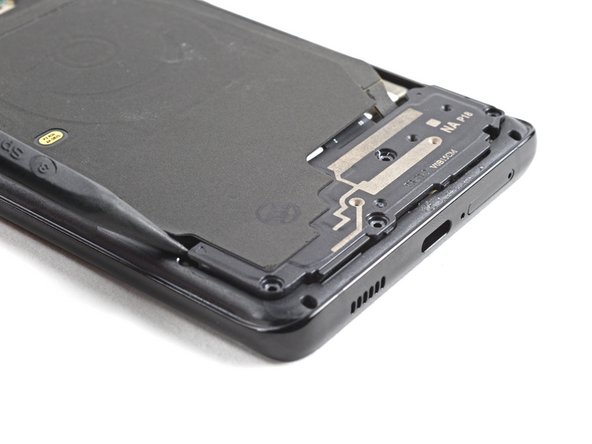
Step 8


- Pop off the back cover—like opening a treasure chest, minus the pirates.
- When putting everything back together:
- Now’s a great time to fire up your phone and make sure everything’s working. Just don’t forget to shut it down completely before moving on.
- Use tweezers or your fingers to evict any leftover adhesive bits. Got stubborn glue? A little heat can help loosen things up.
- If you’ve got custom-cut adhesives, check out the guide linked above.
- Rocking double-sided tape instead? There’s a guide for that, too.
Step 9


- Grab your trusty opening pick and slide it under the lower left corner of the NFC antenna and charging coil setup.
- Gently coast the pick along the bottom edge to loosen it from the battery—no need to rush, just keep it smooth.
Step 10


- Grab your trusty spudger and gently pry the connector of the charging coil upwards from its socket. You've got this!
Tools Used

Step 11


- Grab your trusty spudger and gently nudge the NFC antenna connector upwards, freeing it from its cozy little socket. You're doing great!
Tools Used
Step 12

- Grab your Phillips screwdriver and unscrew the five 3.9 mm screws holding down the NFC antenna and charging coil. Keep those screws handy—you’ll need them later!
Step 13

- Let's get started! Use a Phillips screwdriver to remove the four 3.9 mm-long screws that hold the loudspeaker assembly in place. This is a straightforward step, but if you're not feeling confident, don't worry - we've got you covered. Just take your time and make sure those screws are removed securely.
Step 14

- Gently slide the spudger's tip into the space between the frame and the upper-left notch of the loudspeaker.
- Give it a little pry with the spudger to pop the loudspeaker free from its plastic clips.
Tools Used
Step 15


- Grab a pair of tweezers or your fingers and gently pluck out the NFC antenna, charging coil, and loudspeaker assembly. Once you've got them free, set the assembly aside—you're going to reuse it later during reassembly. Need a hand? Remember, you can always schedule a repair if things get tricky.
Step 16

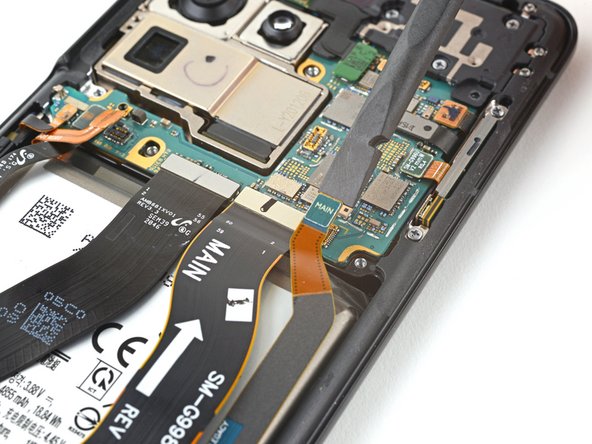

- Grab your trusty spudger and gently wiggle it to lift up and disconnect those pesky primary and secondary interconnect cables' press connectors on the motherboard. You've got this!
Tools Used
Step 17


- Grab a spudger and gently pry the bottom connector of the secondary interconnect cable straight up to disconnect it from the daughterboard. Then, carefully peel the cable away using your fingers or a pair of tweezers. Once free, set the cable aside—you'll be reusing it when you put everything back together. If you need a hand with any part of this process, remember you can always schedule a repair.
Tools Used
Step 18


- Grab a spudger and gently pop the main interconnect cable loose from the daughterboard by lifting its bottom connector straight out of the socket.
- Use your fingertips or a pair of tweezers to carefully lift and remove the primary interconnect cable.
- Set the cable aside—you'll be reattaching it during reassembly. If you need assistance, you can always schedule a repair.
Tools Used
Step 19


- Grab your trusty Phillips screwdriver and get ready to work some magic! Unscrew the three 3.4 mm-long screws that are holding the charging board in place. You've got this!
Step 20

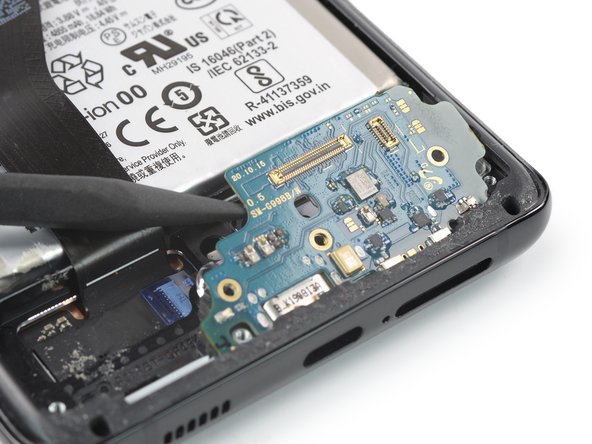
- Slide the pointed end of a spudger carefully under the left edge of the charging board, right next to the main flex cable connector. Then, gently pry up the charging board with your spudger—it's a smooth move to free it up.
Tools Used
Step 21


- To put your device back together, just follow these steps in reverse—like rewinding a mixtape.
- Got old parts? Drop them off with an R2 or e-Stewards certified recycler and keep things green.
- If things went sideways, try some classic troubleshooting moves or connect with our Answers community. Still stuck? You can always schedule a repair.


