DIY Guide to Replace iPhone 4s UMTS Antenna
Duration: 30 min.
Steps: 15 Steps
In this guide, we show you how to replace your iPhone 4s’ defective UMTS antenna. This repair can help if your iPhone can no longer find a signal, or only gets a weak one. In this guide, we show you how to replace your iPhone 4s’ defective UMTS antenna. This repair can help if your iPhone can no longer find a signal, or only gets a weak one.
Step 1
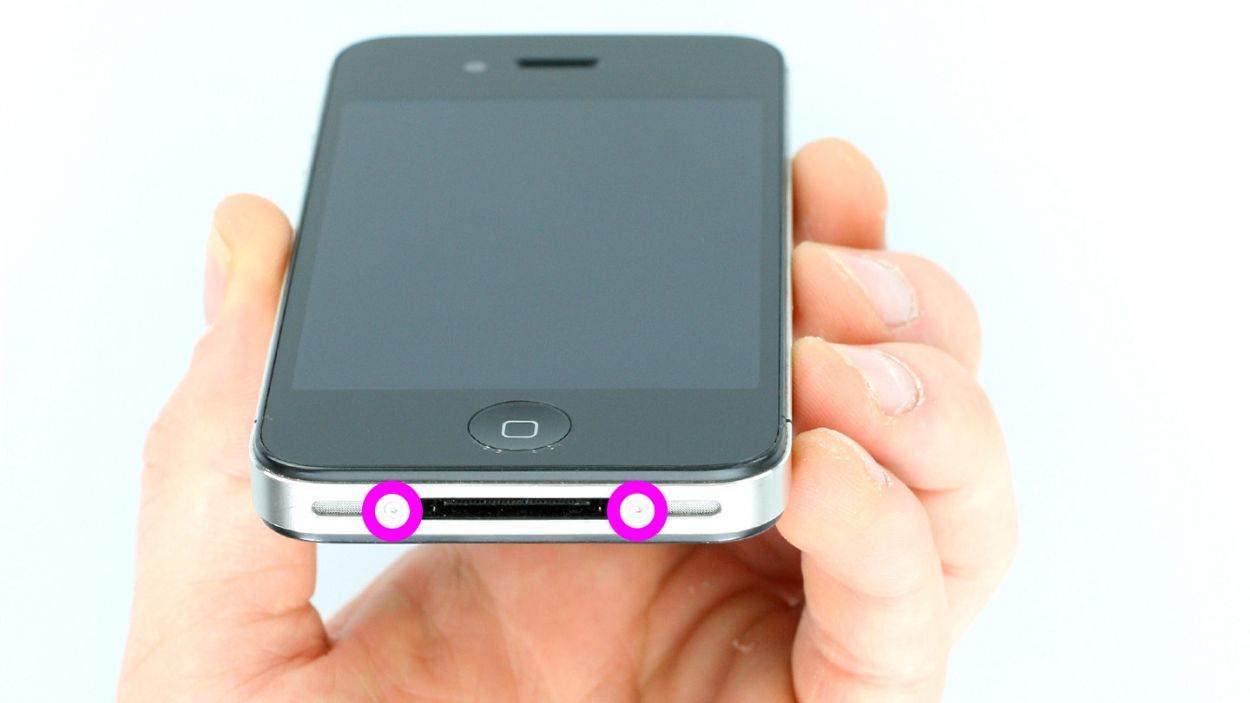
– You need a pentalobe screwdriver to open your phone.
– Remove the two pentalobe screws at the bottom of the enclosure. They are located to the right and left of the dock connector. Put the screws in the same compartment of your organizer tray.2 x 3.6 mm pentalobe screws
Step 2
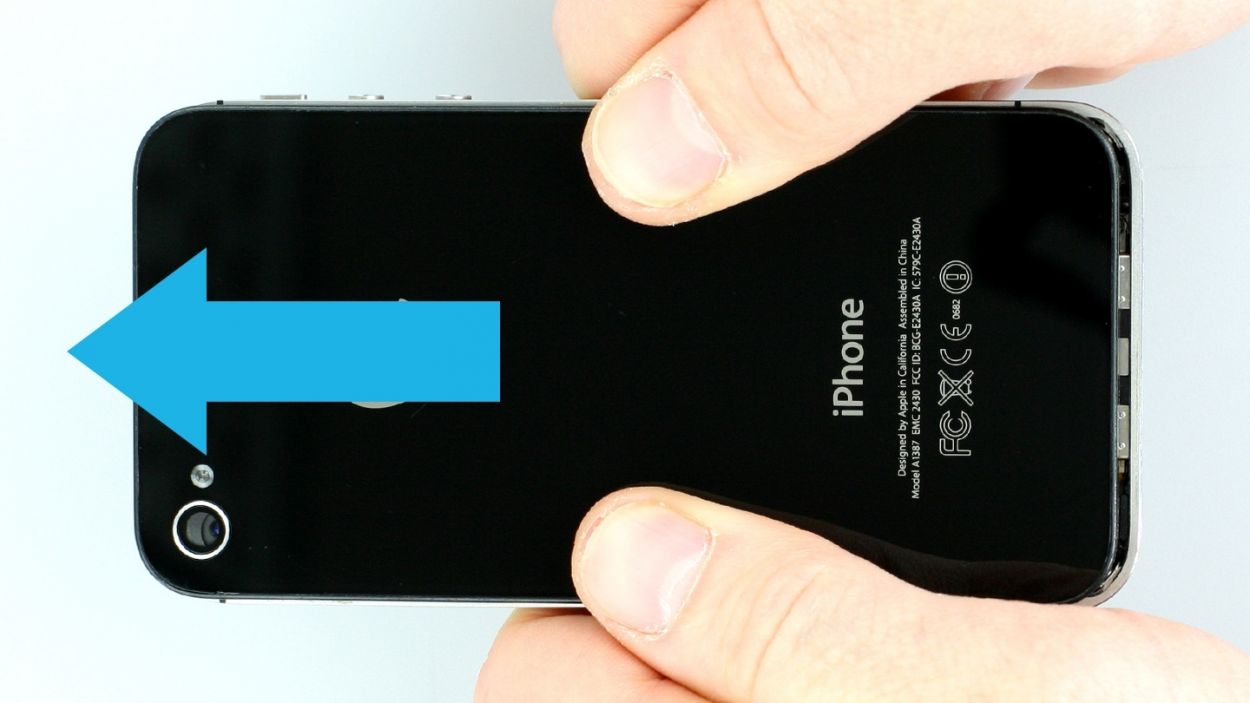
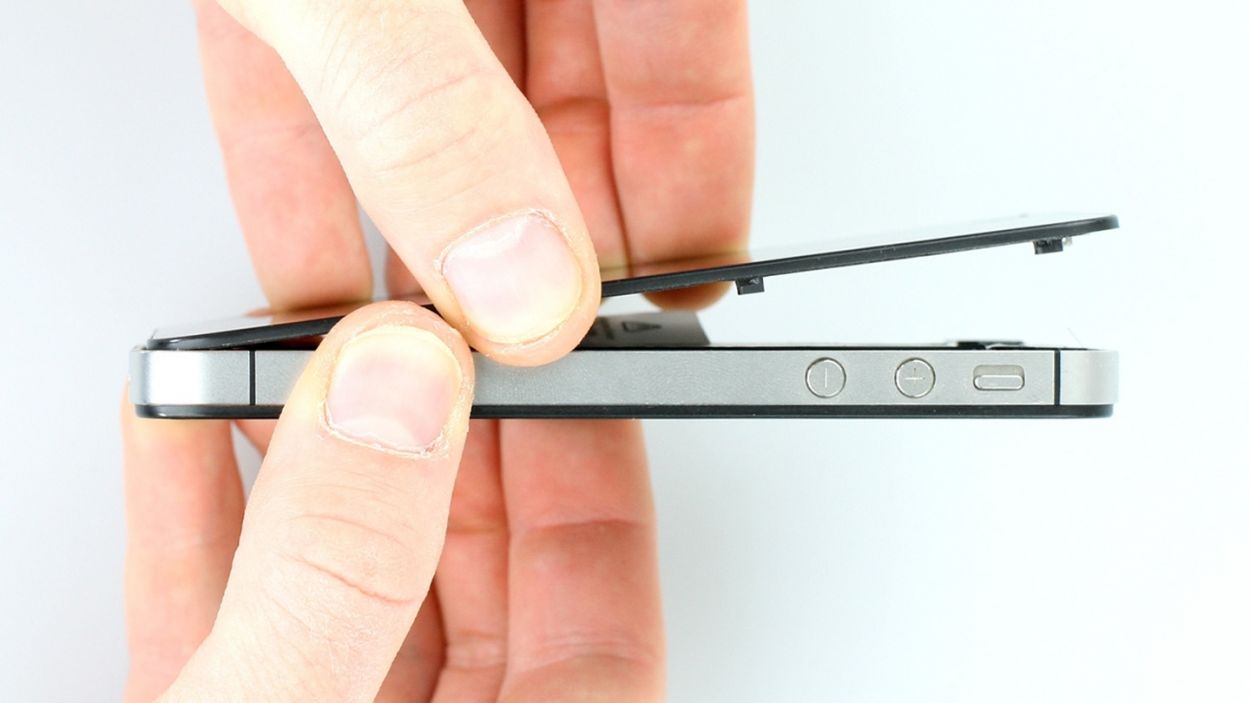
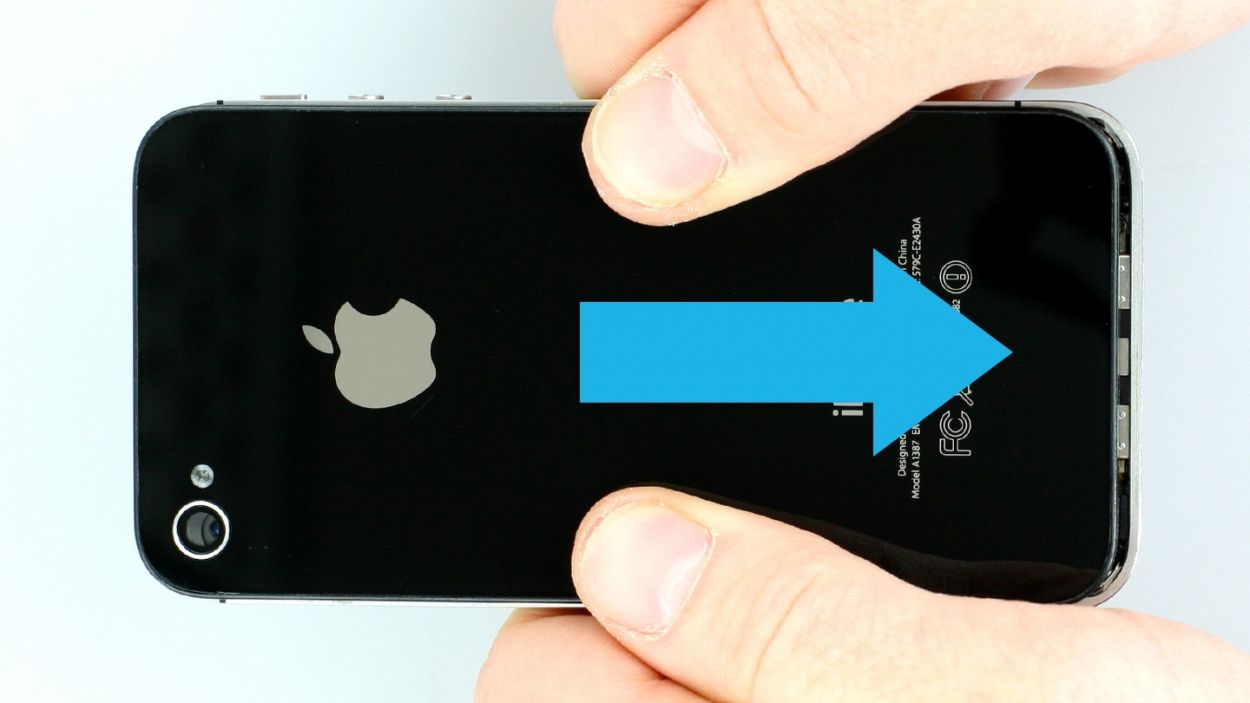
– Gently push the back cover of your iPhone about 4 mm away from the bottom of the phone where the dock connector is (see figure 1).
– Next, lift the back cover at the end that’s sticking out past the phone (see figure 2).
Step 3

The contact point on the logic board could come off. If the contact point breaks off but the soldering points are still intact, you can solder the contact point back on.
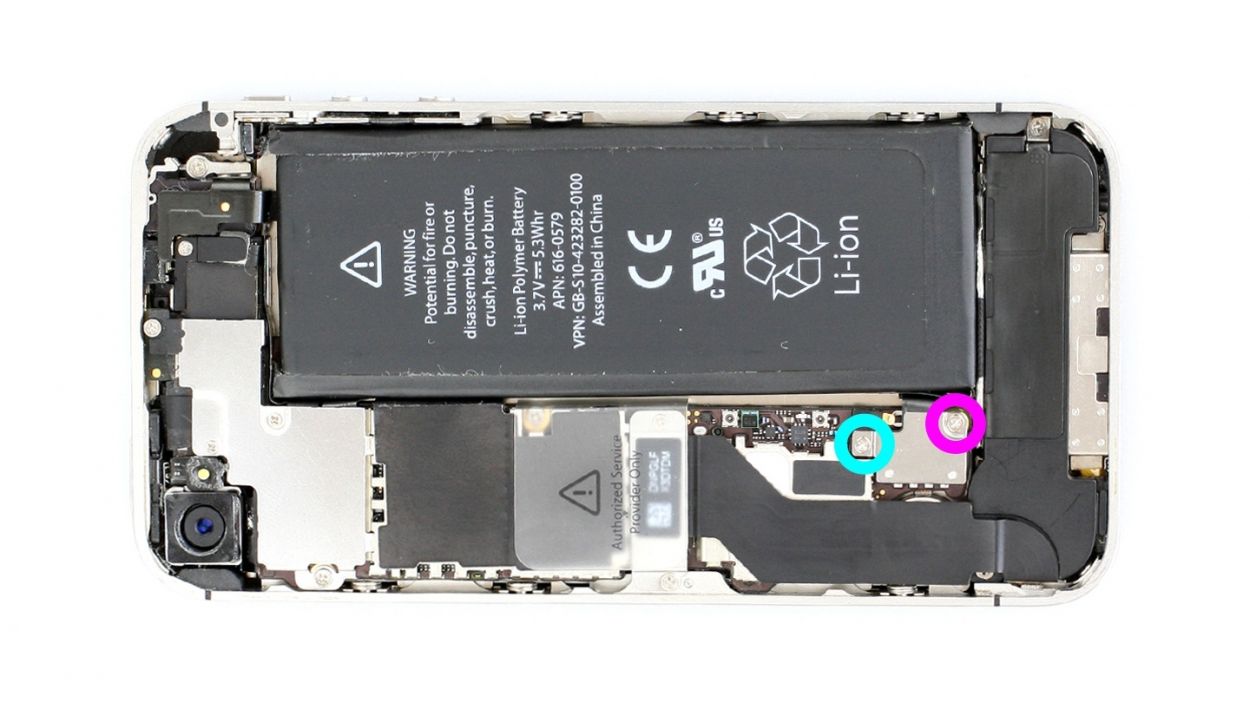
– If your iPhone’s still on, turn it off now by holding down the standby button for about five seconds and following the prompt on the display.
– Remove the two Phillips screws on the battery connector using a Phillips screwdriver (see figure 1). Put the screws in the same compartment of your organizer tray.1 x 1.5 mm Phillips screw1 x 1.3 mm Phillips screwThe contact point on the logic board could come off. If the contact point breaks off but the soldering points are still intact, you can solder the contact point back on.
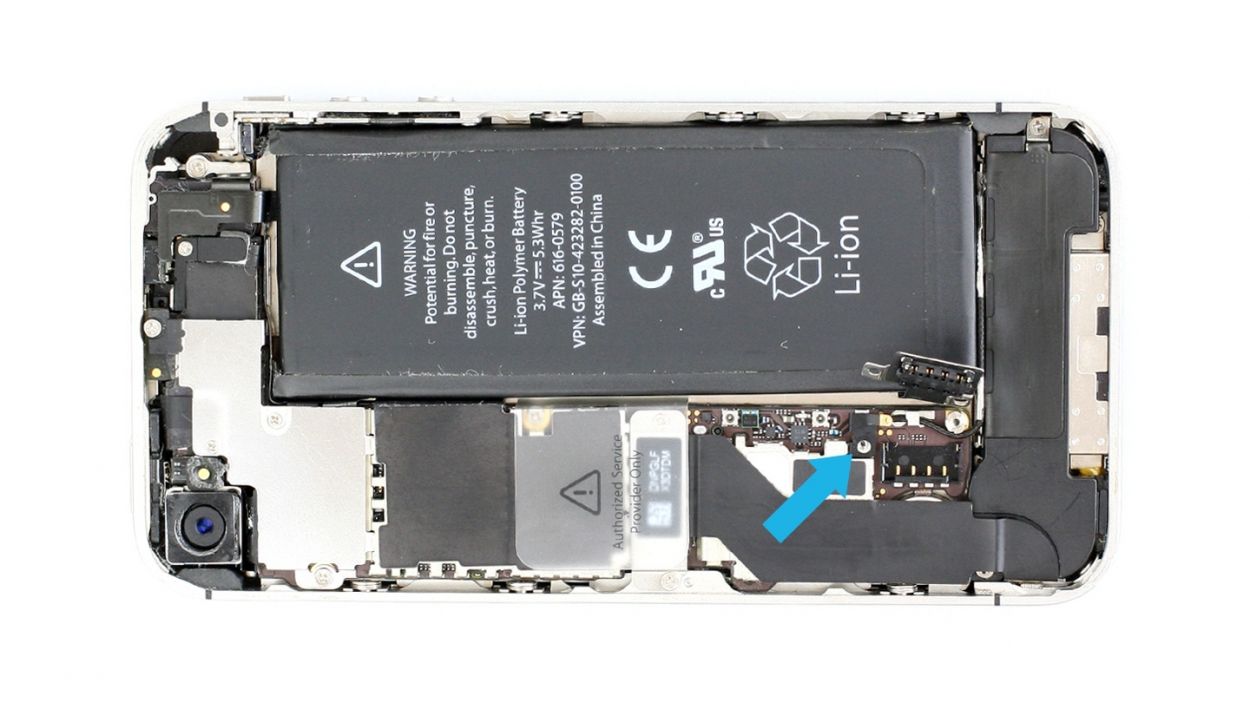
– Now carefully lift off the battery connector by inserting the pointed ESD spudger slightly below the silver cover plate (see figure 2). If you don’t have a spudger, you can also try using your fingernail.
– For the rest of the repair, you can also use the metal laboratory spatula instead of the spudger. This may make some steps easier for you. However, we explicitly recommend using the ESD spudger produced specifically for precision electronics.
Step 4
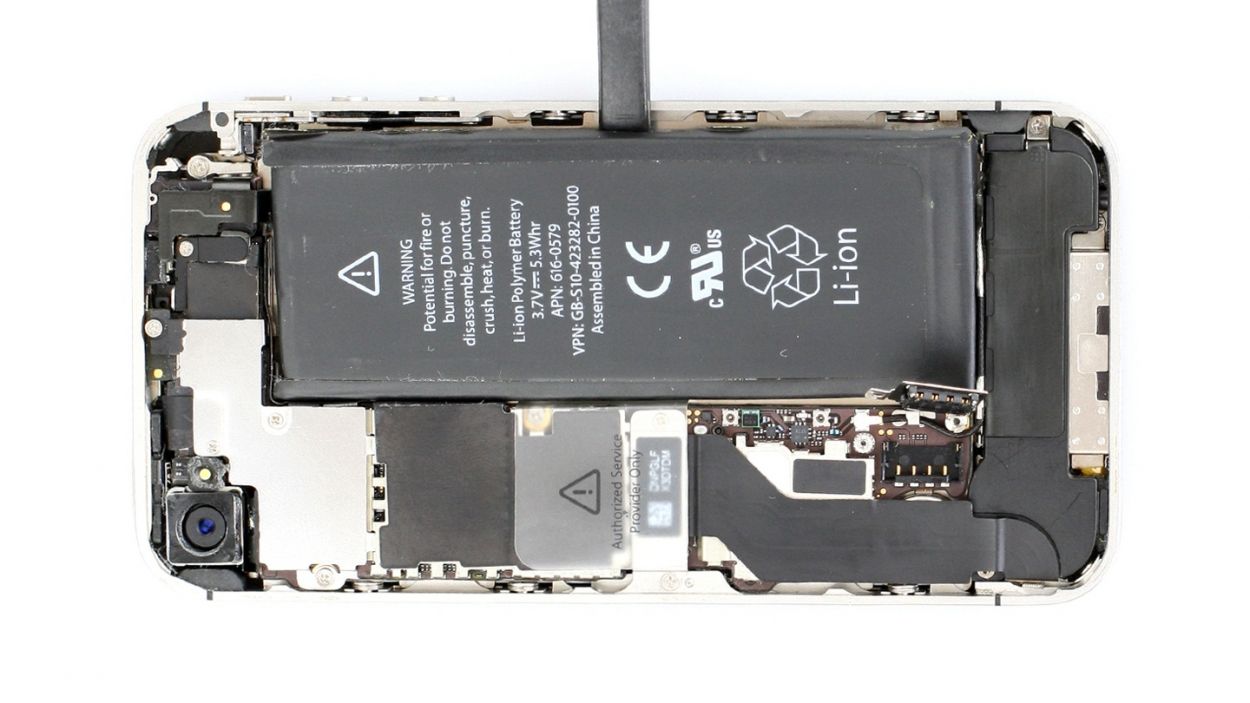

– The antenna cover is under the battery connector. Remove the cover and put it in the same compartment of your organizer tray as the Phillips screws you removed before (see figure 1).
– Now remove the battery. It’s sometimes glued firmly in place. Insert the flat end of the spudger into the space (about 1 cm to the left of the volume down button) between the battery and the outer frame, and slowly lift the battery (see figure 2). If the battery’s really stuck on, use other leverage points to the right and left of the original spot to pry it off. If you still can’t detach the battery, you can use a heat gun to warm it slightly from the outside and soften the glue.
– Now you can also disconnect the antenna connector by carefully pulling it off the plug head using the spudger (see figure 3).
Step 5


– Fold the plastic tab with the warning over and press it firmly onto the lower adhesive strip. This way, it won’t get in the way during your repair.
– Of course, you can also remove the plastic tab.
Step 6


– Remove the two Phillips screws from the dock connection cable and remove the silver cover (see figure 1).1 x 1.1 mm Phillips screw1 x 1.4 mm Phillips screw
– Put the screws and cover in the same compartment of your organizer tray. It’s easy to tell them apart.
– Now you can carefully detach the connector by using the pointed tip of the spudger to lift the connector. Alternatively, you can also use your fingernail again (see figure 2).
– Pull the flat cable that’s lightly glued in place off of the logic board and bend it carefully over the frame (see figure 3).
Step 7

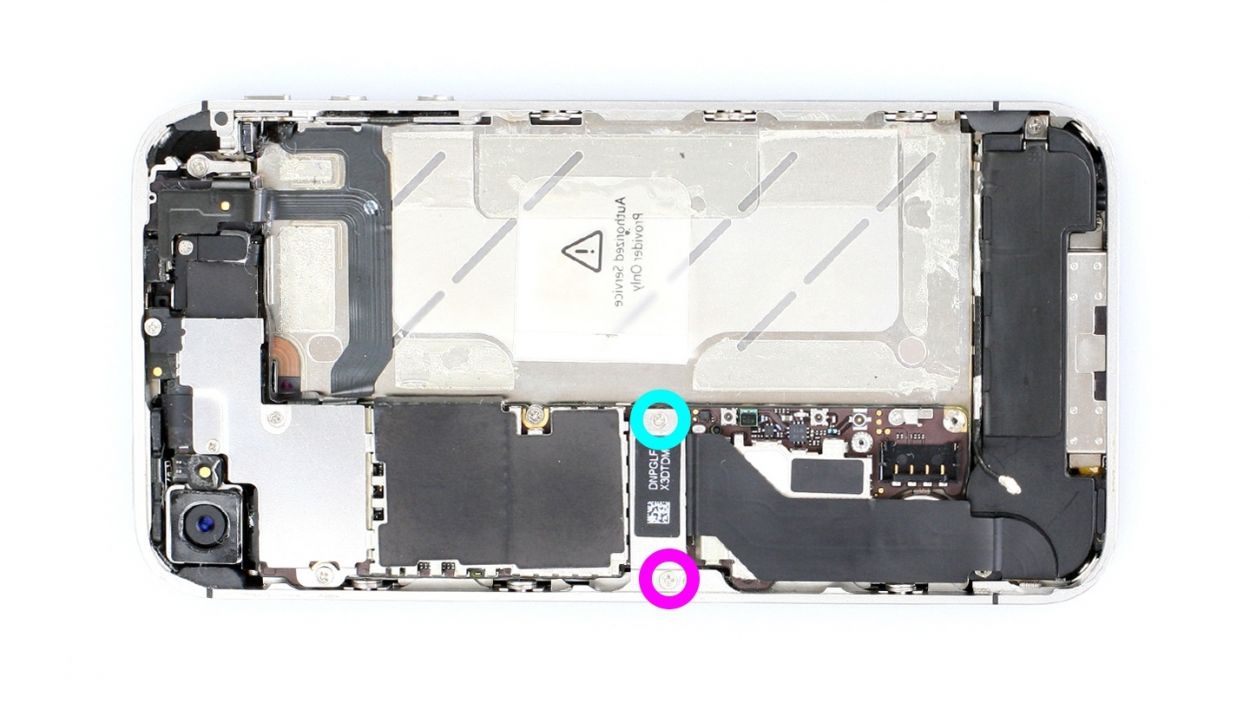
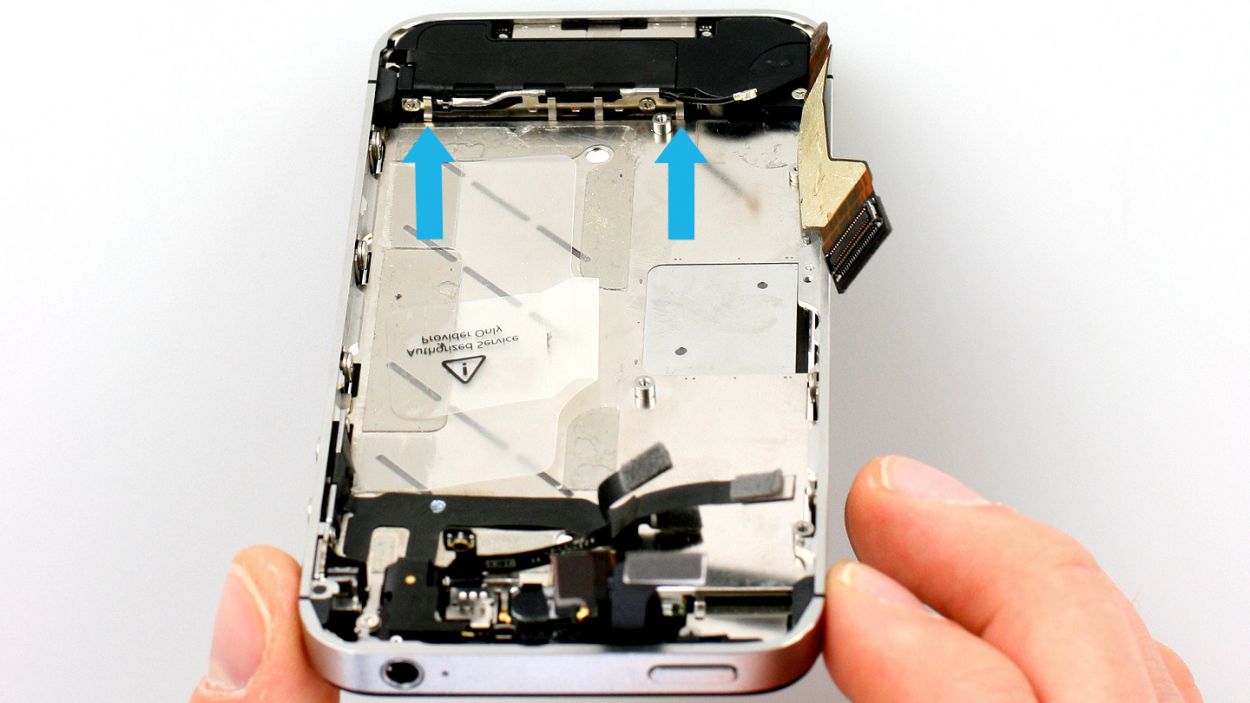
– Loosen the two Phillips screws on the speaker but only remove the one in the turquoise circle (see figure 1). This way, you won’t have to struggle to get the little black triangle back in later. Put the screw in a separate compartment of your organizer tray.1 x 2.5 mm Phillips screw (just loosen)1 x 2.5 mm Phillips screw
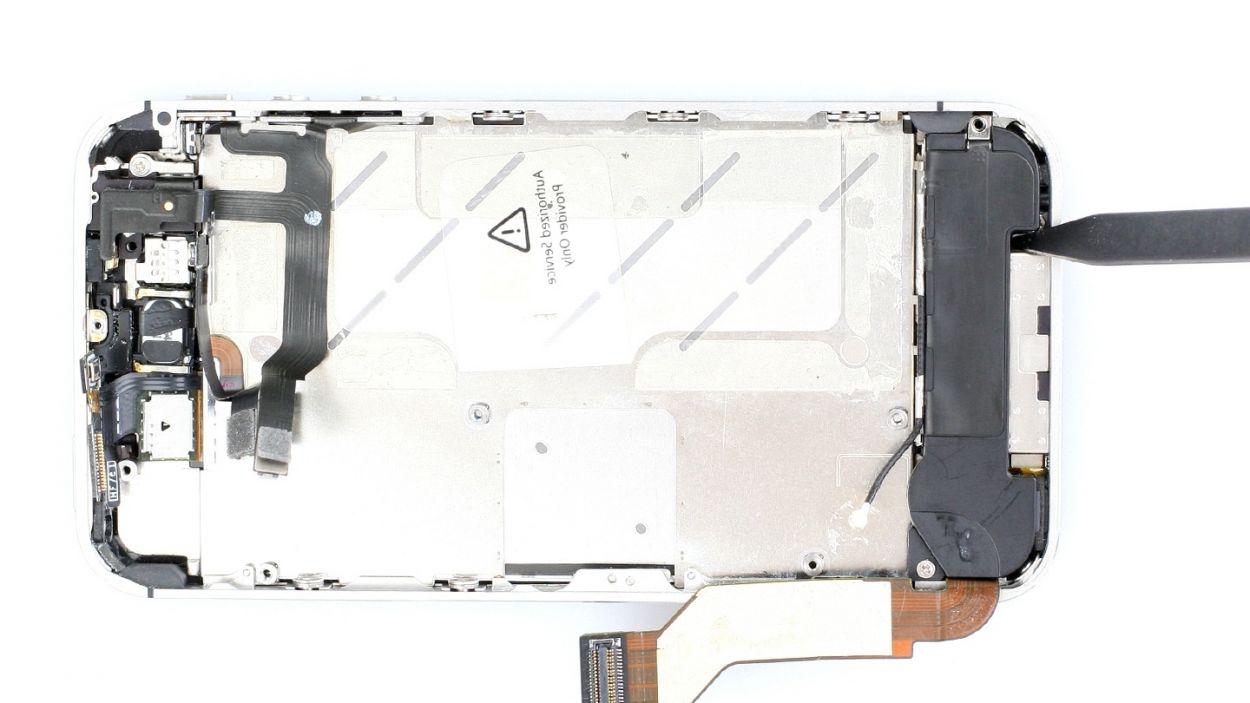
– Use the spudger to remove the speaker (see figure 2).
Step 8

– Time to swap out that old antenna! Start by unscrewing the two Phillips screws holding it in place (check out figure 1). You’ll need those screws again later, so stash them safely. 2 x 1.6 mm Phillips screws
– Next, use your trusty laboratory spatula to carefully pry the antenna off – it’s glued on, so be gentle. Then, stick a new antenna on (see figure 2).
– Finally, screw those two Phillips screws back in to secure the new antenna.
Step 9
– Put the speaker back in.
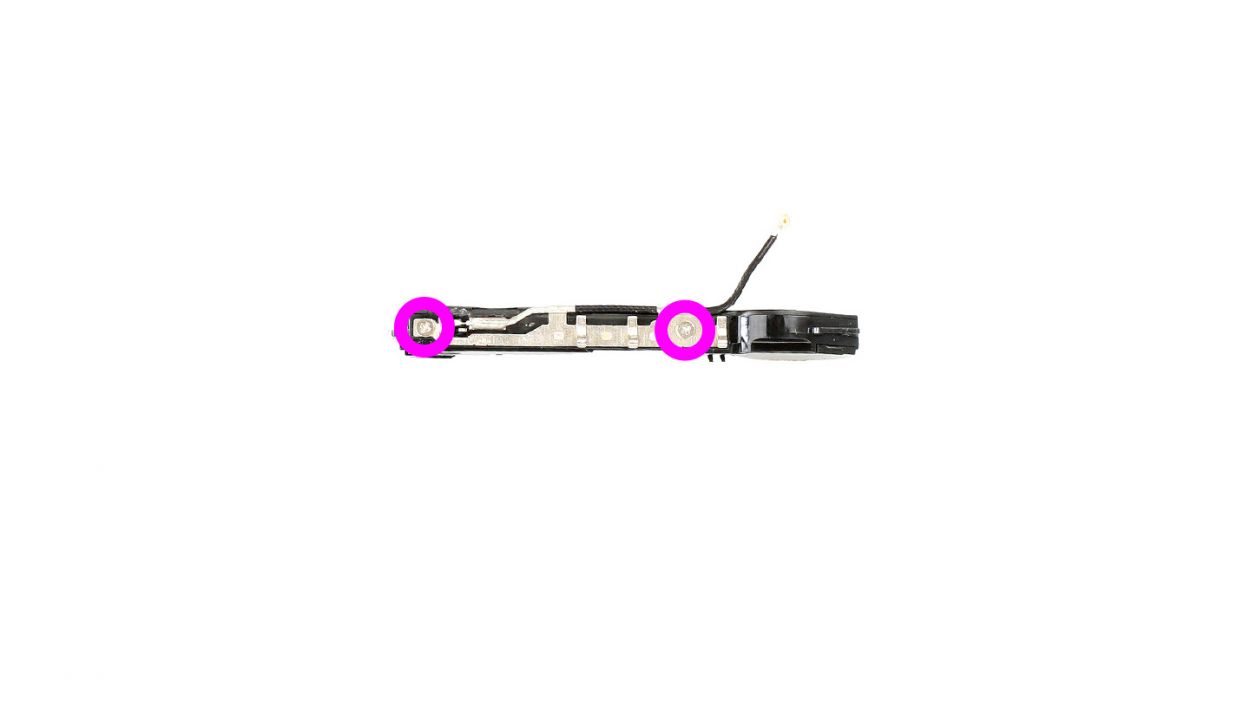
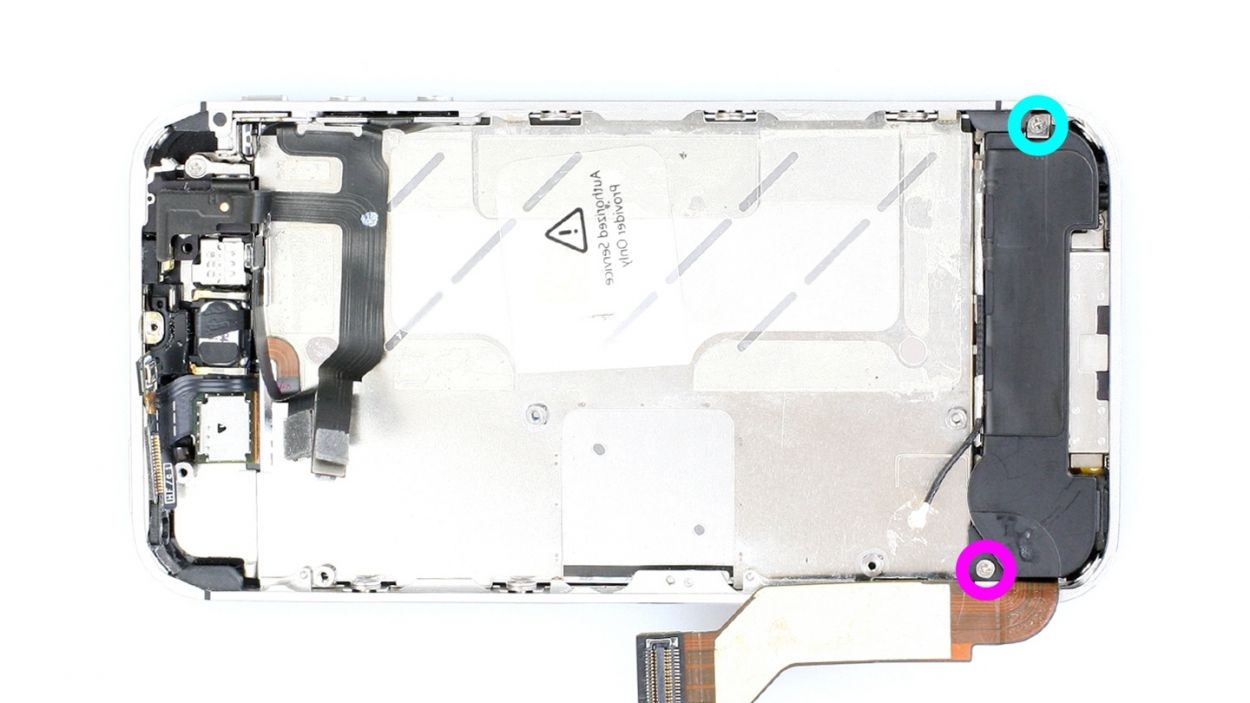
– At first, only tighten the two Phillips screws on the speaker a little bit (see figure 1).1 x 2.4 mm Phillips screw1 x 2.4 mm Phillips screw
– The speaker’s clips have to be against the speaker behind the higher level of the middle cover (see figure 2). This is easiest if you only slightly screw in the speaker at first so it can still move around a little.
– Once the clips are fitted properly, you can tighten the screws.
Step 10

– Connect the dock connection cable again and put the silver cover on it.
– Fasten the two Phillips screws for the dock connection cable.1 x 1.1 mm Phillips screw1 x 1.4 mm Phillips screw
Step 11

– Detach the plastic tab with the warning or stick it back in if you took it out.
Step 12


Step 13
– Put the back cover back on and carefully push it the last few millimeters toward the dock connector.
Step 14

– Now screw in the two screws at the bottom of the enclosure.2 x 3.6 mm pentalobe screws
– Then all you have to do is push in the SIM card tray.
Step 15

When the battery is removed from the device, the iPhone loses the time and sets itself to 1:00 a.m. on 1/1/1970. You could have trouble connecting to the cellular network if the time isn’t set.
– Get your iPhone in sync with iTunes or hop onto a WLAN network and chill for a bit until the time is all set up.
– Pop out the SIM tray, give that SIM card a little love, and then slide it back in.
– Turn on airplane mode for a moment, then switch it off. Easy peasy!