How to Replace the Rear Camera on an iPhone 5c
Duration: 30 min.
Steps: 11 Steps
In this guide, we’re here to help you swap out your iPhone 5c’s faulty rear camera all by yourself! If your rear camera is playing hard to get, your photos are coming out fuzzy, or it just won’t focus, then this repair is definitely for you. Let’s roll up our sleeves and get that camera replaced!
Step 1

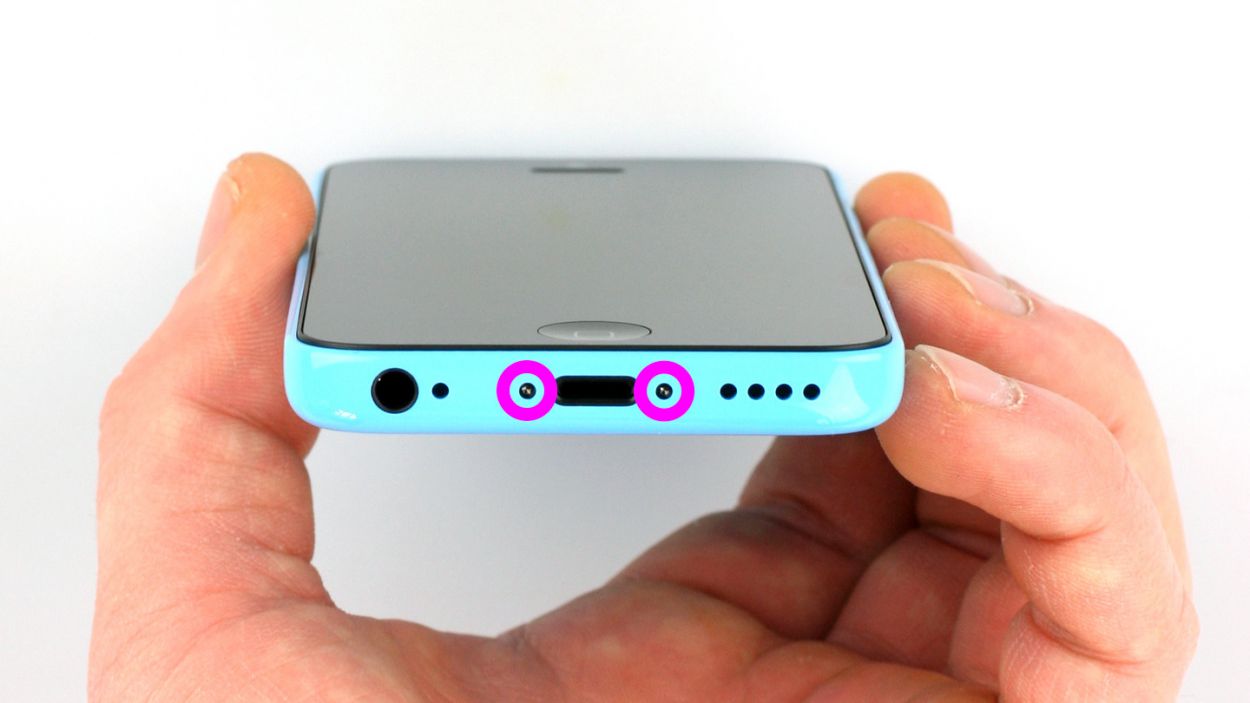
– Grab your trusty pentalobe screwdriver to get started on opening up that iPhone 5c.
– Let’s tackle those two pentalobe screws chilling at the bottom of the enclosure. They’re hanging out right next to the Lightning connector, one on each side. Make sure to stash those screws in the same compartment of your organizer tray – you’ll thank yourself later! 2 x 3.8 mm pentalobe screws
Step 2


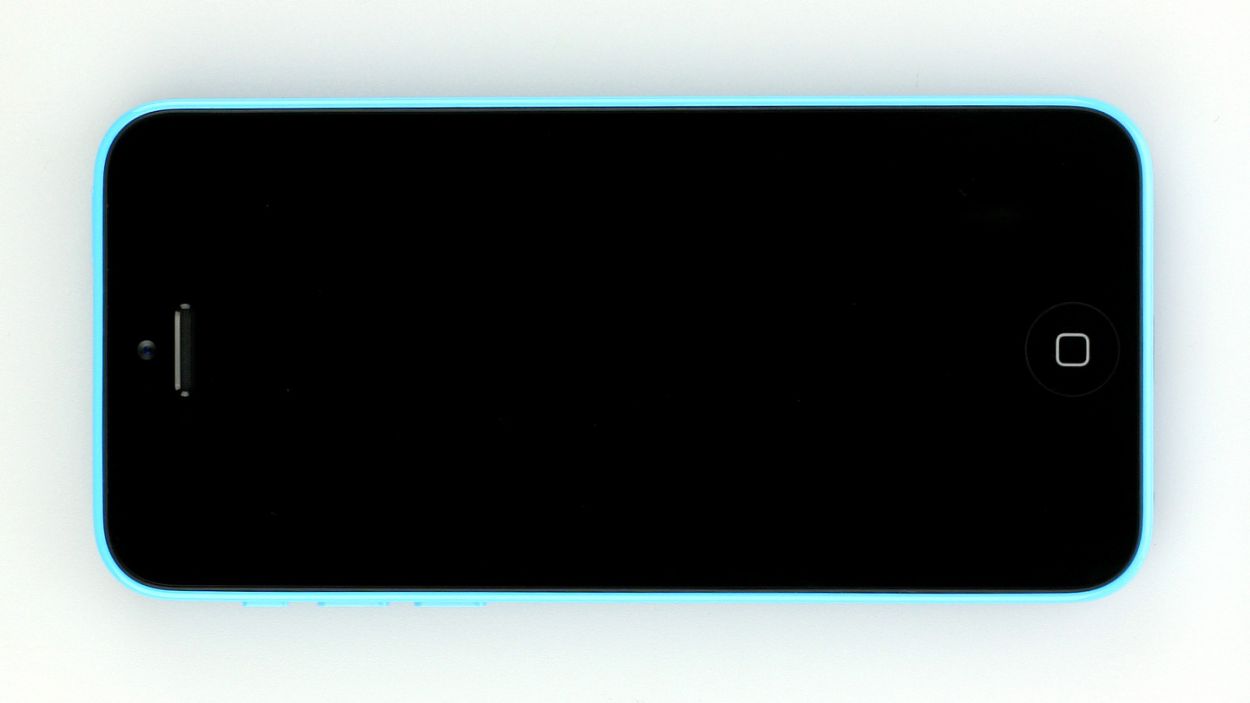
– Place your iPhone 5c on a soft and tidy surface to keep that back looking pristine.
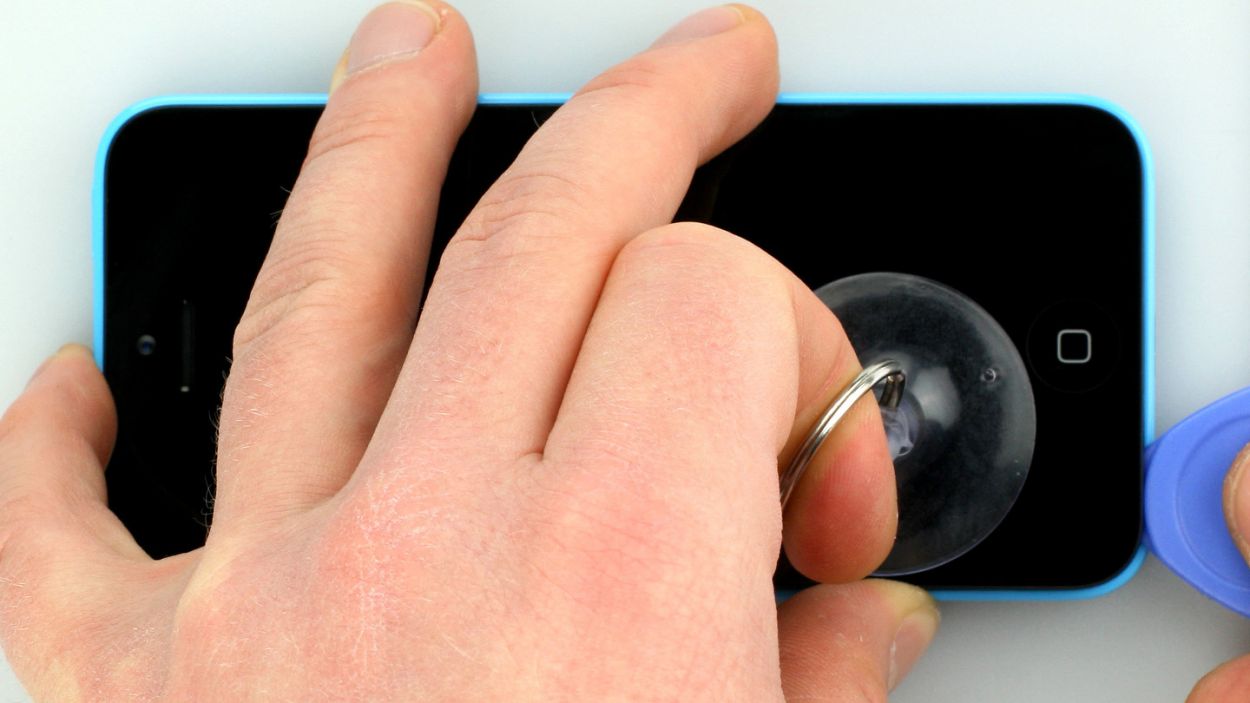
– To lift the front panel, grab a suction cup and a hard plastic pick. If your screen is looking a bit worse for wear, throw some packing tape over the cracks for good measure.
– Stick the suction cup over the Home button (if you can) or right next to it (check out figure 1). While you’re lifting the screen with the suction cup, slide the hard plastic pick between the plastic frame and the display frame and press down on the plastic frame. Use the hard plastic pick to gently lift the screen as well (see figure 2). It might take a few tries, but you’ve got this!
– Once you can lift the screen a few millimeters (see figure 3), carefully work your way around the edges until it’s loosened on both sides (see figure 4).
Step 3
– First, let’s tackle those four Phillips screws from the silver cover (check out figure 1). Make sure to toss those screws into the same compartment of your organizer tray so they don’t go wandering off. Once that’s done, lift the cover right off!
– Next, it’s time to disconnect three connectors (see figure 2). Be super careful here! Use the pointed tip of your spudger and gently slide it just below the contact to lift it up. We’re talking about the Touchscreen, LCD, and the Front camera/sensor/earpiece/ambient microphone.
– Now, let’s give that new display a test run! Temporarily connect the new display assembly and fire up your iPhone. Check if the LCD and touchscreen are working like champs. Just make sure those connectors are snugly plugged in; otherwise, your display might be a bit shy and show black or stripes. If you notice a slight yellow tint on the display, don’t forget to check the last step in this manual.
– Go ahead and temporarily connect that new display assembly.
– Start up your iPhone again and see if everything is functioning well with the LCD and touchscreen. Remember, secure those connectors! If they’re not plugged in correctly, you might end up with a black screen or some funky stripes.
– And finally, if your display is showing a hint of yellow, be sure to check out the last step in this manual.
Step 4

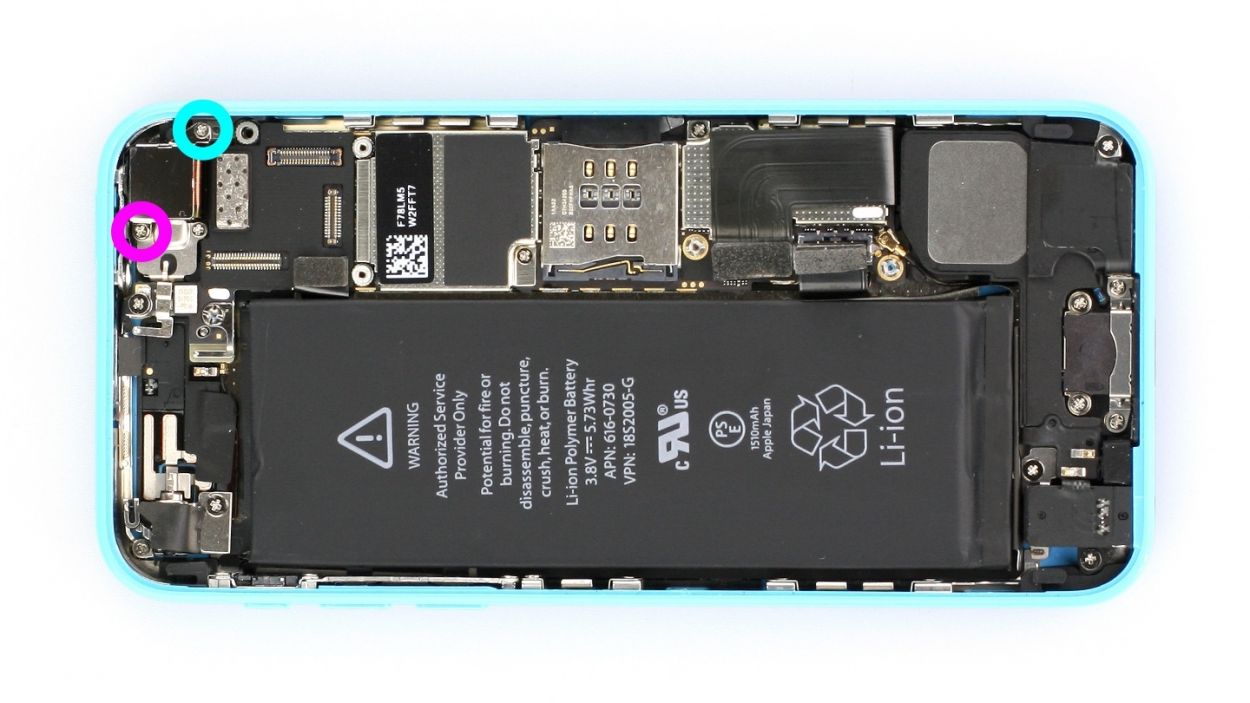
– Grab your Phillips screwdriver and let’s get those Phillips screws on the battery connector out of the way (check out figure 1). Once you’ve done that, gently lift the cover using your spudger (see figure 2). Remember to keep all those little parts together in the same compartment of your organizer tray – it’ll save you some serious hunting later! 2 x 1.6 mm Phillips screws.
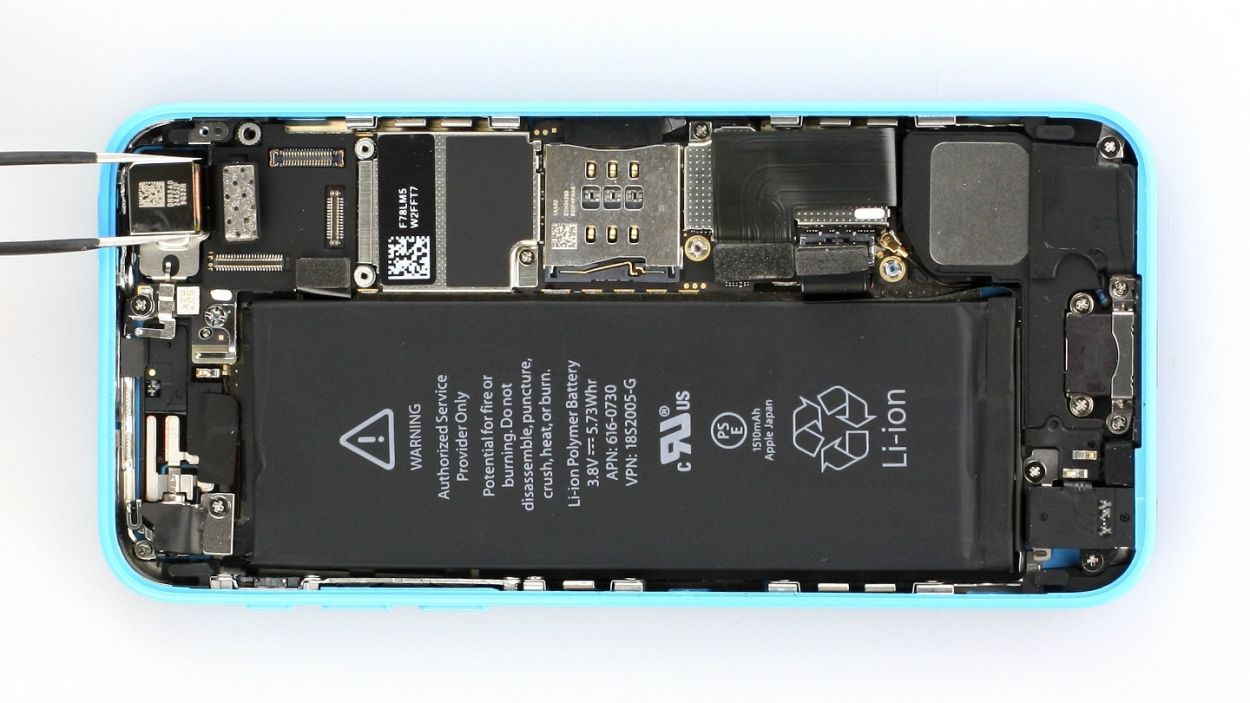
– Now, let’s delicately lift that battery connector! Use the pointed tip of your ESD spudger and slide it just below the connector (see figure 3). If you don’t have a spudger handy, your fingernail can step in as a backup!
Step 5


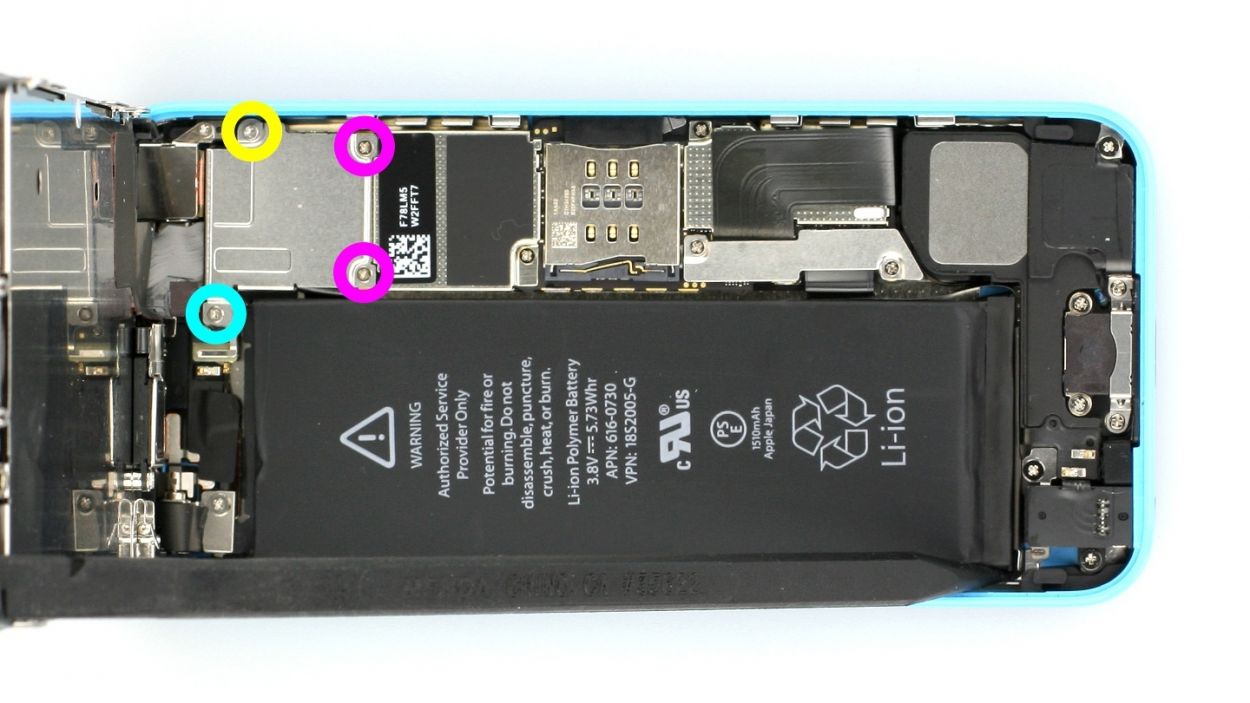
– Let’s kick things off by removing those two Phillips screws along with the shiny silver cover. You’ll need one 1.3 mm Phillips screw (smooth head) and one 1.5 mm Phillips screw for this part.
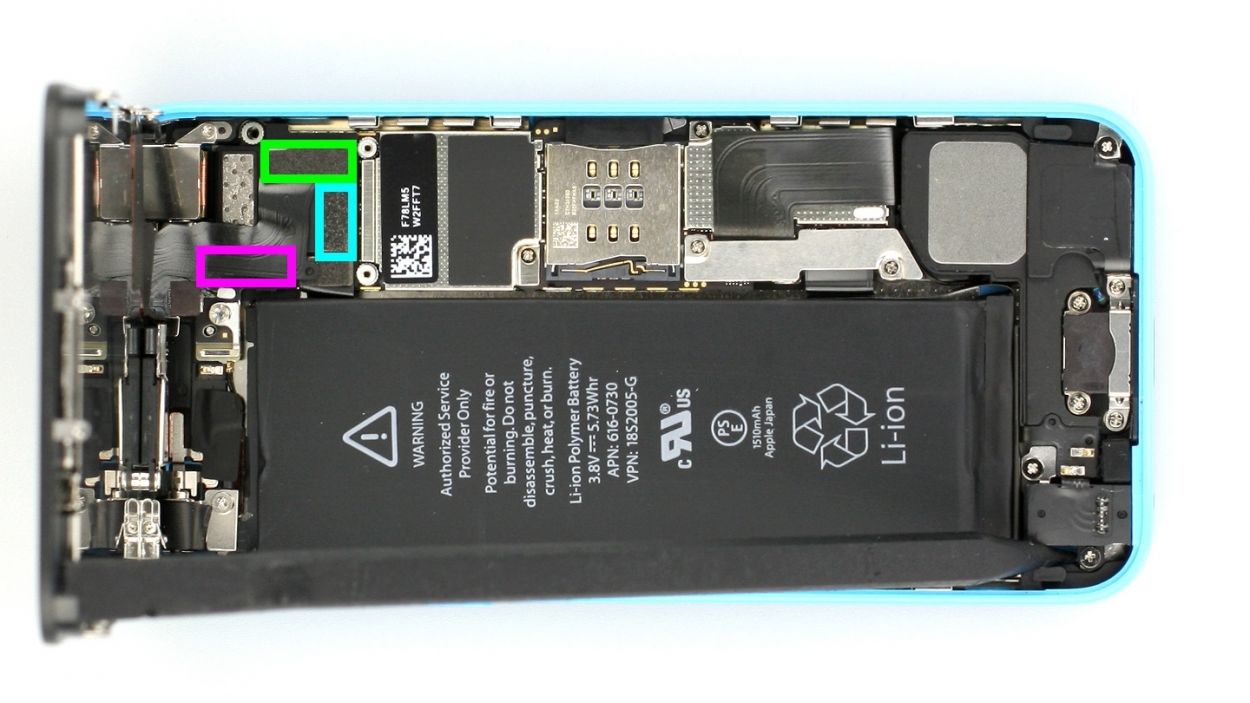
– Next up, it’s time to disconnect the connector. Gently slide the pointed tip of your spudger just below the contact and give it a little lift (check out figure 2 for guidance).
– Finally, go ahead and lift that camera right out of the phone (see figure 3).
Step 6

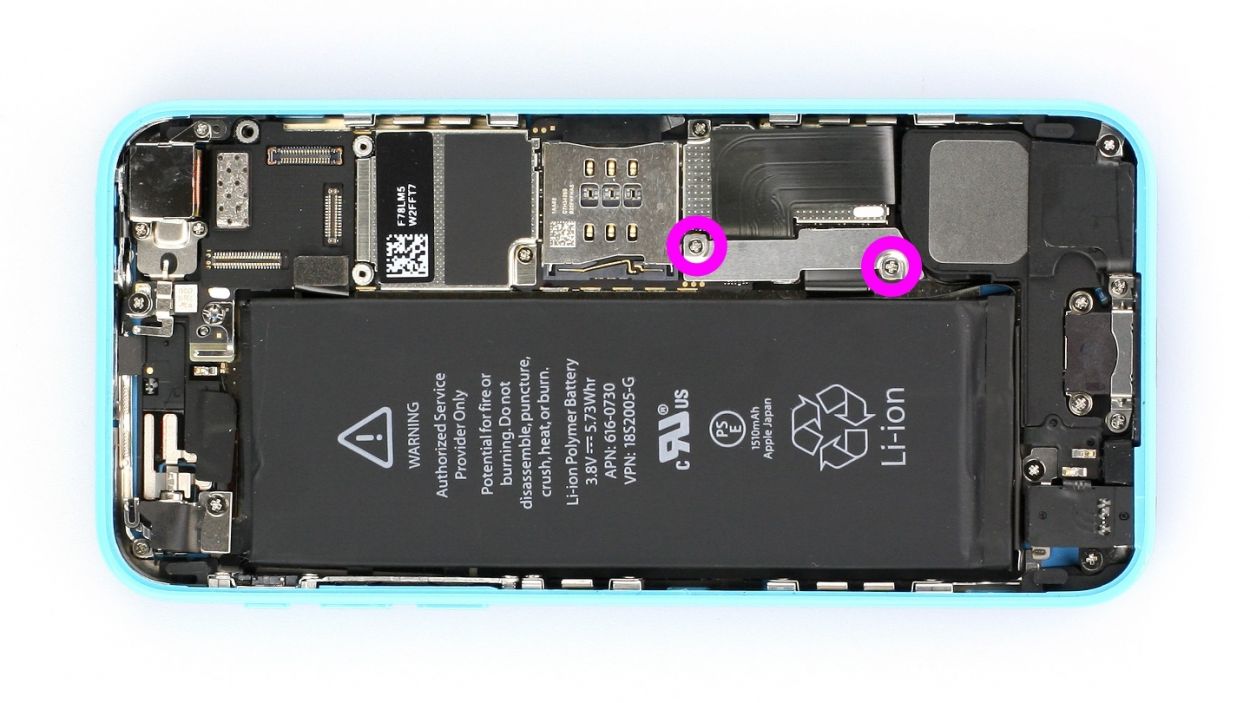
– Reconnect the camera, place the cover back on, and secure it with a couple of screws (check out figure 2). You’ll need one 1.3 mm Phillips screw (smooth head) and one 1.5 mm Phillips screw to get it all snug!
Step 7


– Alright, let’s get that battery connector back in action (check out figure 1).
– Next up, pop on the cover and secure it with a couple of screws (see figure 2). You’ll need 2 x 1.6 mm Phillips screws to make everything snug!
Step 8


If those connectors aren’t snug as a bug, you might see some funky stripes on your display or find that parts of your touchscreen are just not feeling it. So, let’s make sure everything is plugged in right!
– Reconnect those connectors (check out figure 1). Sometimes, the touchscreen connector likes to play hide and seek when you hook up the LCD connector. Just a heads up: Touchscreen, LCD, Front camera/sensor/earpiece/ambient microphone.
– Once those connectors are snug, it’s time to power up your iPhone! Check if the LCD, touchscreen, proximity sensor, front camera, and earpiece are all doing their thing. If those connectors aren’t playing nice, you might see stripes on the display or some parts of the touchscreen might be feeling a bit shy.
– Now, let’s put the cover back on and screw it in place (see figure 2). You’ll need: 1 x 3.2 mm Phillips screw (not magnetic), 2 x 1.2 mm Phillips screws, and 1 x 1.7 mm Phillips screw.
Step 9
– Now, let’s gently fold that screen down like it’s a cozy blanket. Make sure the upper edge, where all those cables are hanging out, clicks into place just right. Once you’ve got that snug, give the screen a little nudge toward the Home button until it’s all settled in its frame. You’re doing great!
Step 10
– Now, let’s get those two pentalobe screws at the bottom of the enclosure all snugged up! We’re talking about 2 x 3.8 mm pentalobe screws that are ready to secure your device.
Step 11

When you pop that battery out, your iPhone decides to take a little trip back to 1:00 a.m. on 1/1/1970. It might get a bit confused and have trouble connecting to the cellular network if you don’t set the time right. So, let’s make sure you’re back on track!
– Sync up your iPhone with iTunes or hop onto a WLAN network and chill until the time gets sorted.
– Take out the SIM tray along with the SIM card, then pop it back in.
– Turn on airplane mode for a moment, then switch it off again.