iPhone 5c: Step-by-Step Earpiece Replacement Guide
Duration: 30 min.
Steps: 8 Steps
Welcome to the world of DIY repairs! In this guide, we’re here to help you swap out that pesky earpiece on your iPhone 5c. If you find yourself straining to hear your conversation or if everything sounds like it’s coming from underwater, it’s time for a change! Let’s get your phone sounding crisp and clear again. Grab your tools, and let’s dive into this step-by-step adventure together! If you need a hand, feel free to schedule a repair with us!
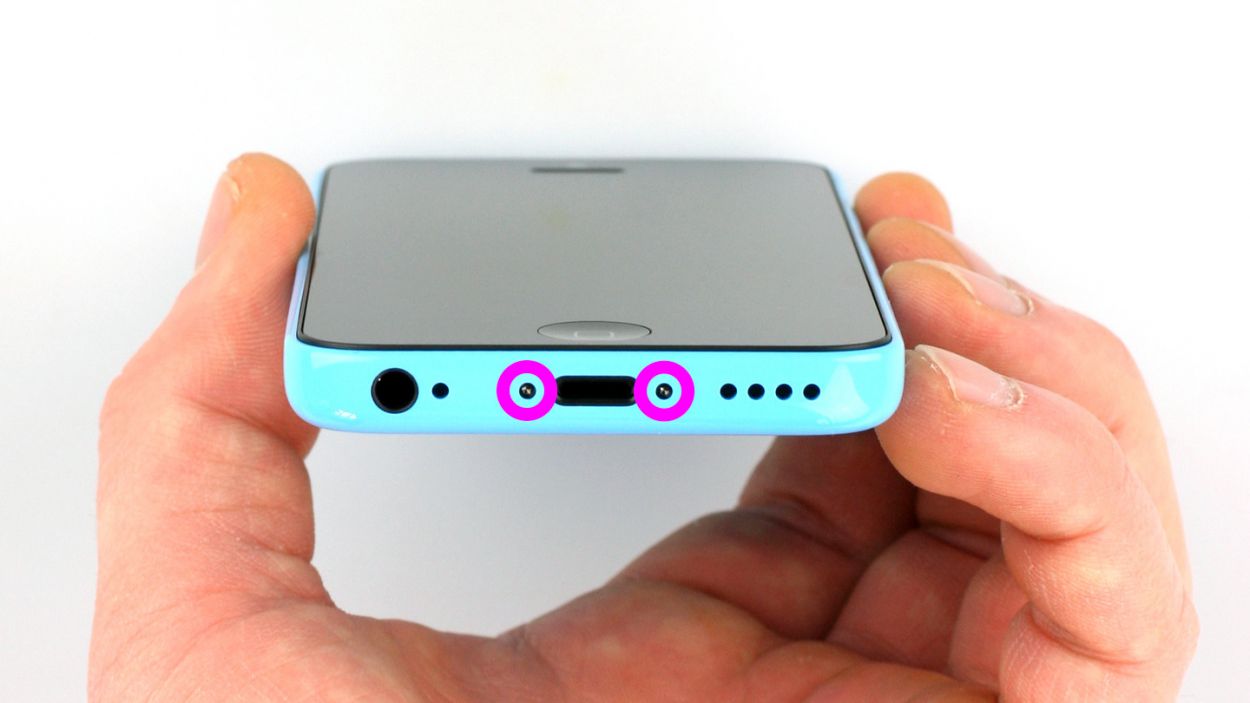
Step 1

– Grab your trusty pentalobe screwdriver to get that iPhone 5c opened up!
– Now, let’s tackle those two pentalobe screws at the bottom of the enclosure. They’re hanging out to the right and left of the Lightning connector. Be sure to pop those screws into the same compartment of your organizer tray. You’ll need 2 x 3.8 mm pentalobe screws.
Step 2


– Place your iPhone 5c on a cozy, clean surface to keep that back from getting scratched.
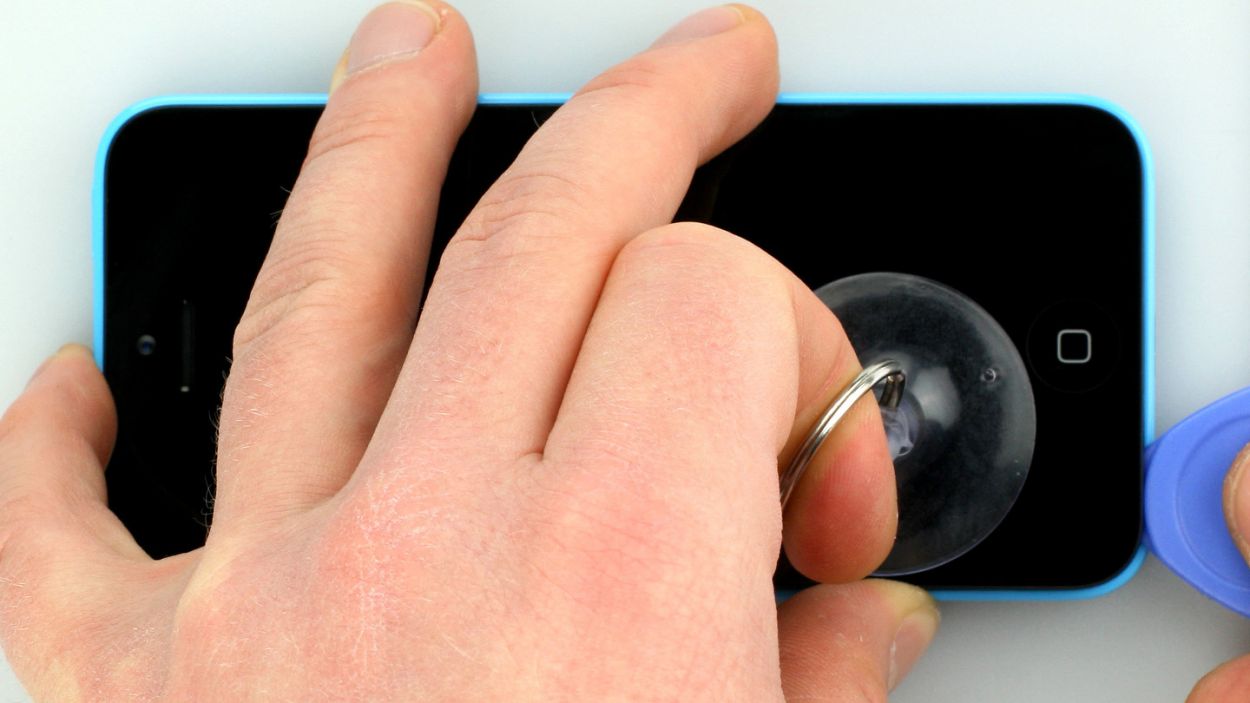
– To lift the front panel, grab a suction cup and a hard plastic pick. If your screen is looking a bit rough, cover it up with some packing tape.
– Put the suction cup over the Home button (if you can) or right next to it (check out figure 1). While you’re lifting the screen with the suction cup, slide the hard plastic pick between the plastic frame and the display frame, pressing down on the plastic frame. Use that pick to help raise the screen too (see figure 2). This might take a few tries!
– Once you’ve got the screen lifted just a little bit (see figure 3), carefully work your way around the edges until it’s loosened on both sides (see figure 4).
Step 3
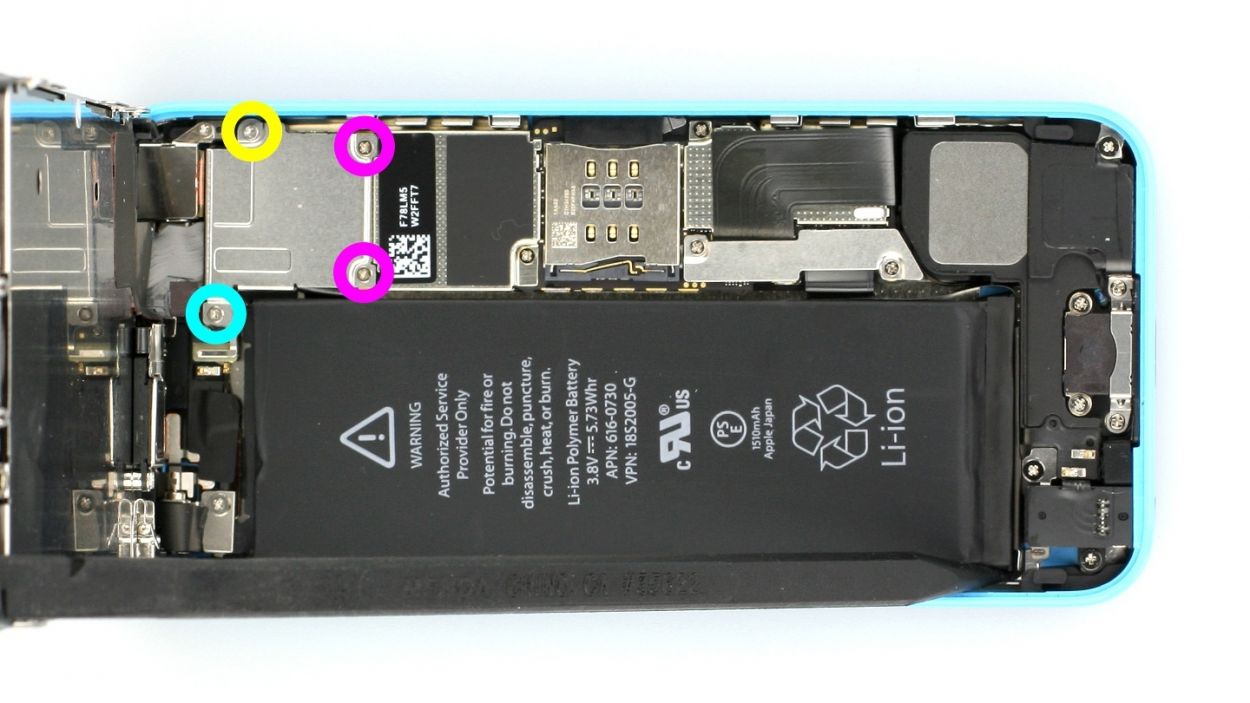
– First, let’s tackle those four Phillips screws hiding under the silver cover (check out figure 1). Make sure to stash those screws in the same compartment of your organizer tray for safekeeping. Once they’re out, gently lift that cover off!
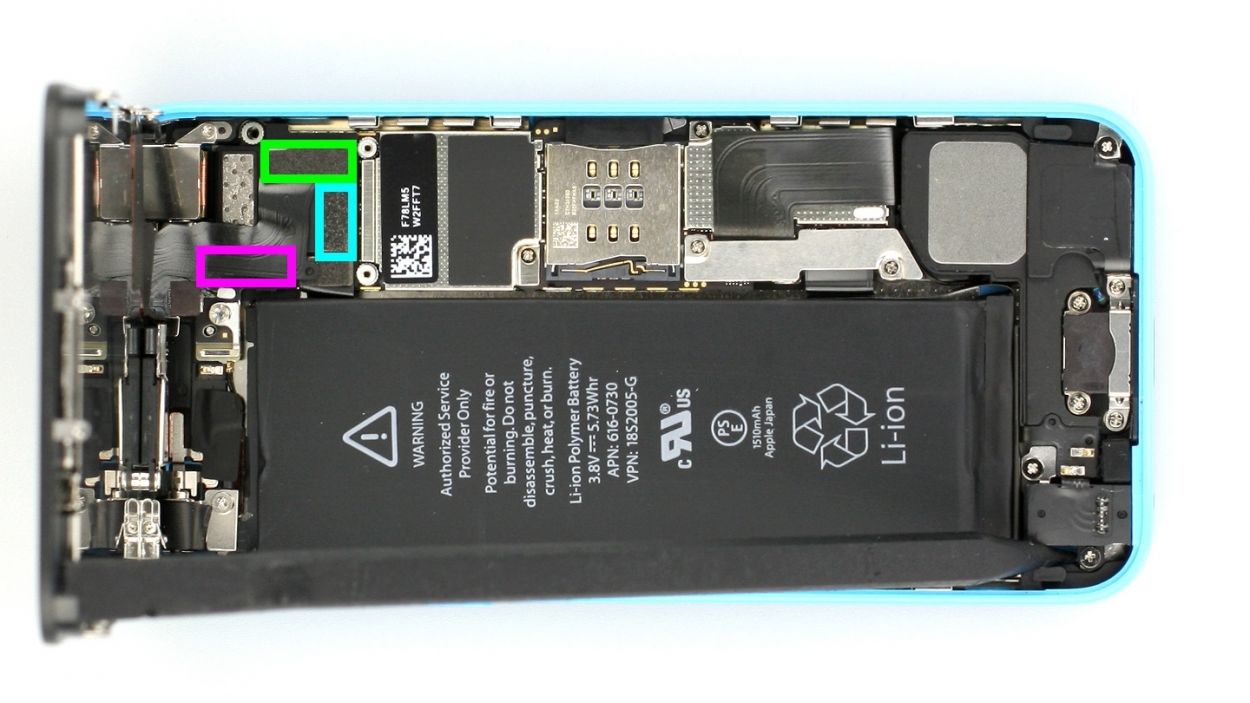
– Now, it’s time to disconnect three connectors (see figure 2). Be super careful here! Use the pointed tip of your spudger to gently nudge below the contact and lift it up. We’re talking about the Touchscreen, LCD, Front camera/sensor/earpiece, and ambient microphone.
– Next up, let’s test out that shiny new display! Temporarily connect the new display assembly, then power up your iPhone and see if the LCD and touchscreen are working like champs. Double-check that all connectors are snugly plugged in; otherwise, you might end up with a black screen or some funky stripes. If you notice a hint of yellow on the display, don’t forget to check the last step in this guide.
– Just a reminder: connect that new display assembly temporarily.
– Once your iPhone is powered on, ensure the LCD and touchscreen are functioning properly. If those connectors aren’t clicked in just right, you could end up with a black display or stripes galore.
– And if you spot any yellow tint on the display, take a peek at the last step in this manual.
Step 4

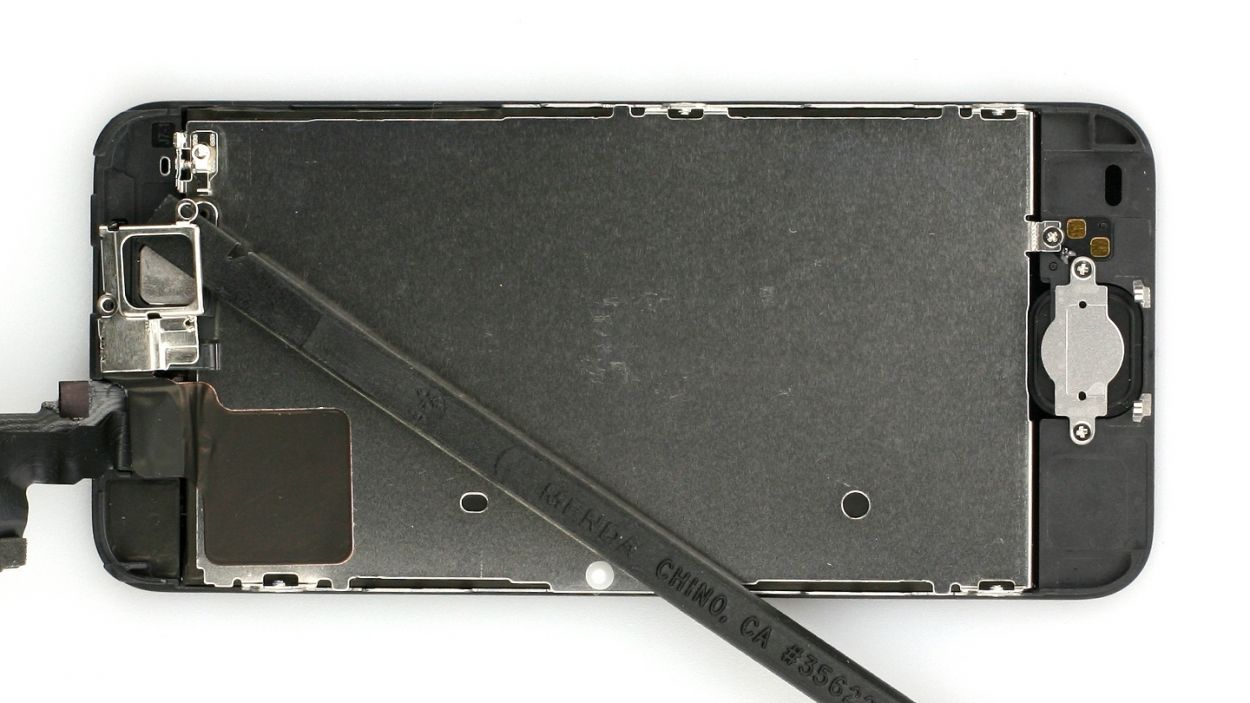

– The earpiece is nestled on the backside of the display unit. Grab your Phillips screwdriver and remove those two screws holding the cover in place (check out figure 1). Don’t forget to toss them in the same section of your organizer tray—1 x 4.0 mm Phillips screw and 1 x 2.2 mm Phillips screw are waiting for you!
– Next up, let’s lift off that cover. It’s got a couple of hooks keeping it snug. Gently unhook one side and lift it out like a pro. Make sure to add it to the screw container you set up earlier (see figure 2).
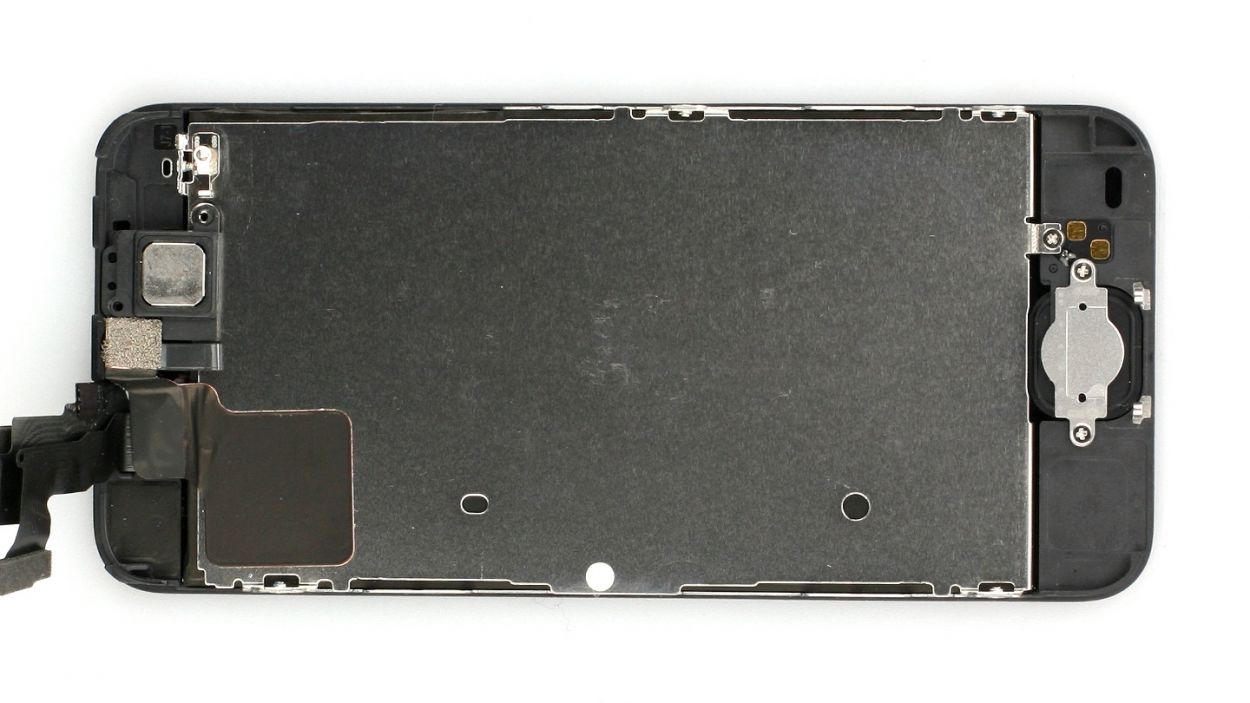
– Now, it’s time to reveal the earpiece (see figure 3). You can easily remove it with your fingers, so go ahead and give it a gentle pull!
Step 5
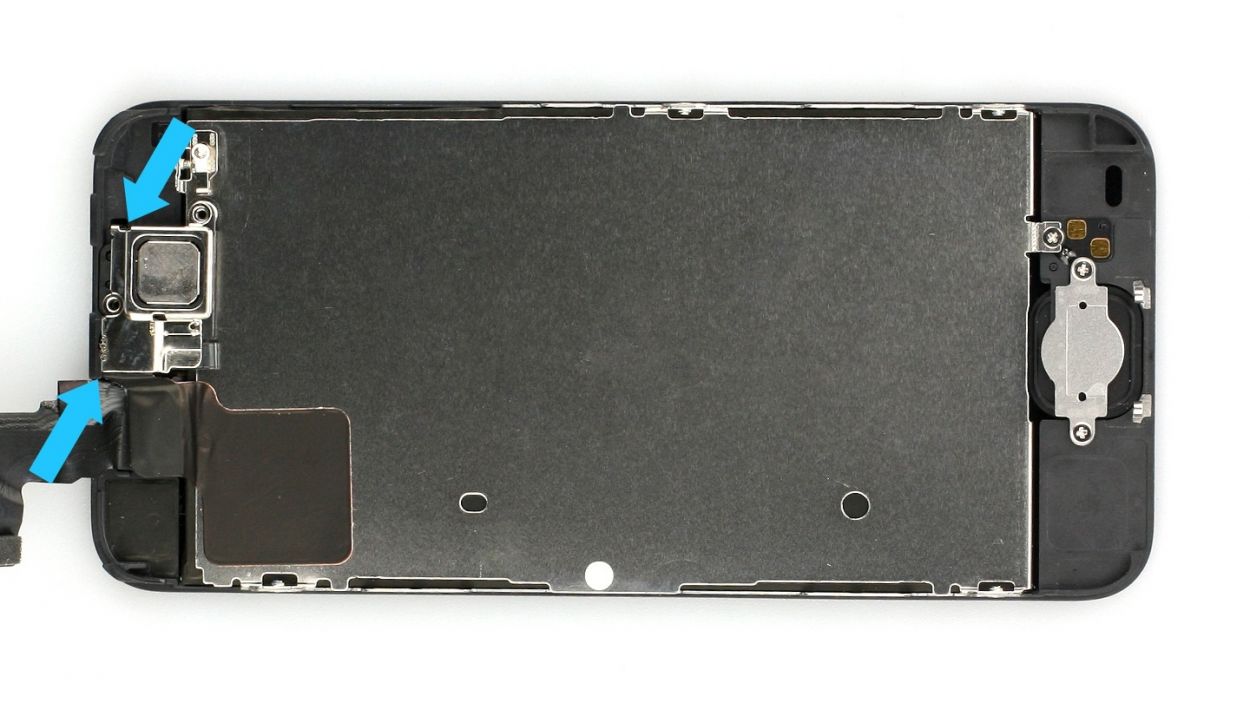
– Place the earpiece back where it belongs (check out figure 1). After that, pop the cover back on (see figure 2).
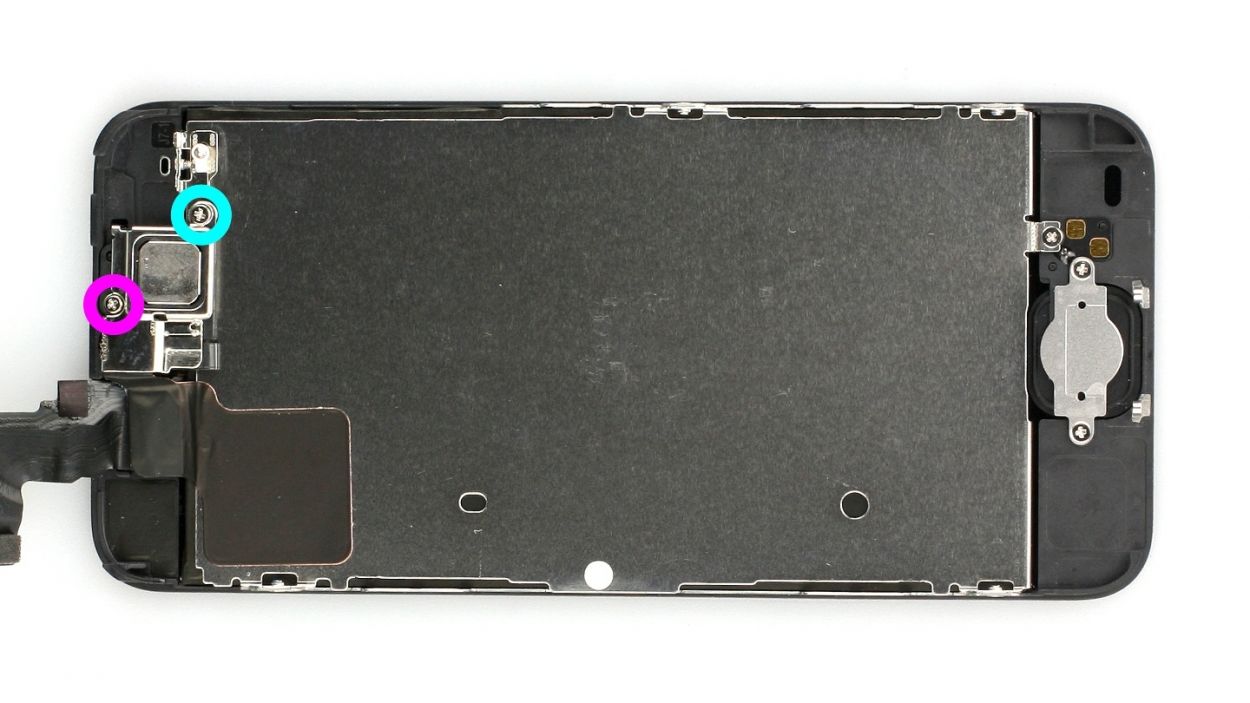
– Next, tighten up those Phillips screws (see figure 3). Ensure the front camera is nicely centered on the display. Feel free to nudge it a bit if it’s off!
Step 6


Just a little reminder! If those connectors aren’t snugly connected, you might see some funky stripes on your display or find that parts of the touchscreen are playing hide and seek. Let’s keep everything in check for a smooth experience!
– Reconnect those connectors like a pro (check out figure 1). Sometimes the touchscreen connector likes to play hide and seek when you’re connecting the LCD connector. We’re talking about the Touchscreen, LCD, Front camera/sensor/earpiece, and ambient microphone.
– Once everything is snug, power up your iPhone and let’s see if the LCD, touchscreen, proximity sensor, front camera, and earpiece are all working their magic. If those connectors aren’t clicked in just right, you might end up with some funky stripes on the display or parts of the touchscreen refusing to cooperate.
– Now, let’s put the cover back on and secure it in place (see figure 2). You’ll need 1 x 3.2 mm Phillips screw (not magnetic), 2 x 1.2 mm Phillips screws, and 1 x 1.7 mm Phillips screw to wrap things up.
Step 7
– Now, let’s get those two pentalobe screws snugly back into their home at the bottom of the enclosure. You’ll be using 2 x 3.8 mm pentalobe screws for this little task!