How to Replace iPhone 6s Back Cover: A Step-by-Step DIY Guide
Duration: 120 min.
Steps: 39 Steps
Hey there! Ready to tackle the task of swapping out your iPhone 6s’ back cover? This guide is here to help you do just that! Whether your back cover is looking a little worse for wear with some warps or scratches, or your rear camera is struggling to snap those sharp pics because the lens is all scratched up, we’ve got your back! Follow along and let’s get your iPhone looking fresh and ready to go again. If you feel like you need a helping hand, don’t hesitate to schedule a repair!
Step 1


– Before we dive into the fun of fixing your iPhone, let’s make sure it’s turned off. Just press that standby button for about three seconds until you see the slider pop up on your screen.
– Now, give that slider a swift swipe from left to right. In about 10 seconds, your iPhone will be powered down and ready for some TLC!
Step 2

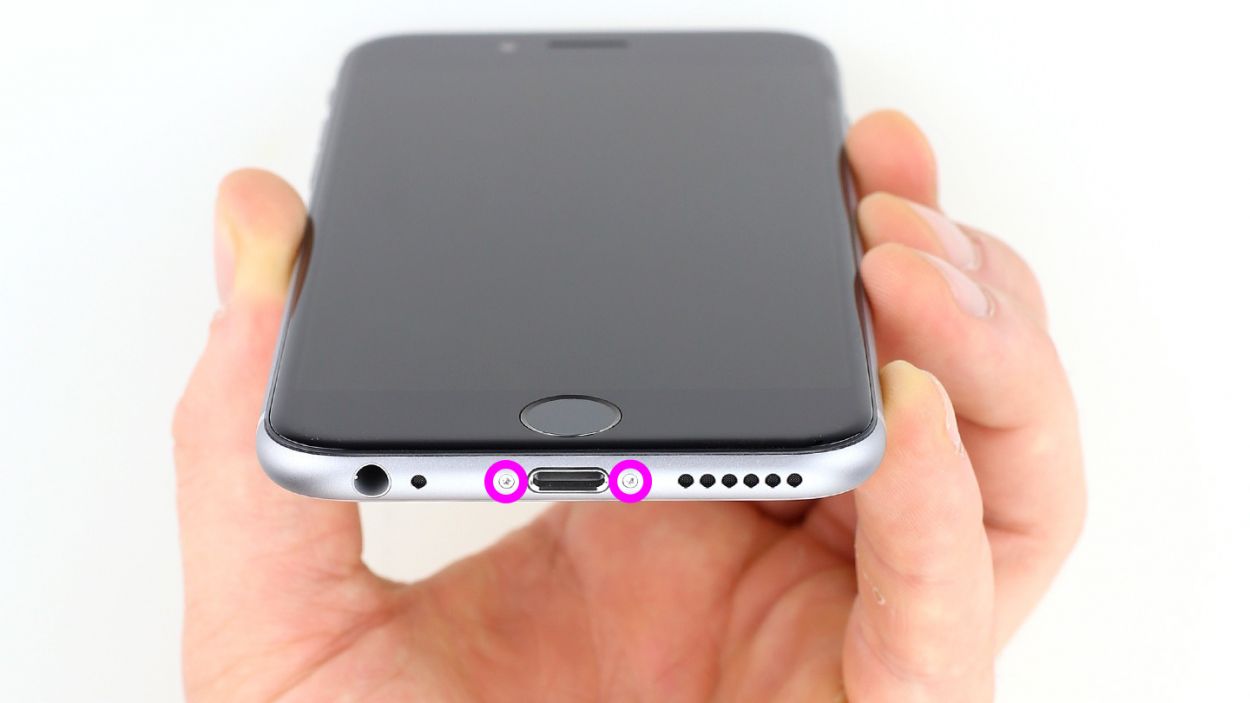
– To pop open your iPhone 6s, grab a pentalobe screwdriver – it’s your trusty sidekick for this mission!
– Next up, let’s tackle those two pentalobe screws flanking the lightning connector. We suggest you use a magnetic pad to keep those screws safe and sound, just like they were in your phone before. You’re looking for two 2 x 3.8 mm pentalobe screws.
Step 3

If needed, give those outer edges of the display a little heat love a few times.
– Set your iPhone 6s down on a soft, clean surface to keep that back looking pristine!
– Grab a suction cup to gently lift the front panel, along with a hard plastic plectrum and a hot-air gun. If your screen is in rough shape, it’s a good idea to cover it completely with adhesive tape before proceeding.
– The screen is a bit stuck to the frame. Use the hot-air gun to warm up the outer edges of the display until they reach around 60°C (140°F).
– Place the suction cup over the home button or right next to it. While you’re lifting the screen with the suction cup, slide the hard plastic plectrum between the aluminum frame and the display frame. Press down on the aluminum frame while gently pushing up on the display with the plectrum. It might take a few tries, but you’ll get there!
– Once you can lift the screen a little, slide the plectrum carefully along the outer edges until the display is loosened on both sides. If needed, heat those outer edges a few times to help things along.
Tools Used
- heat gun to heat parts that are glued on so they’re easier to remove.
In most cases, you can also use a hairdryer.” rel=”noopener”>Heat gun - Pick Set
- VAKUPLASTIC Suction Cup
Step 4

– Let’s kick things off by removing those Phillips screws and the plug cover that keep the battery plug secure. Toss those loosened parts onto your magnetic pad so they don’t play hide and seek later. You’re looking for 1 x 2.2 mm Phillips screw and 1 x 2.9 mm Phillips screw.
– Next, it’s time to gently coax out the battery plug. Grab your trusty ESD spudger and slide it under the plug. No spudger? No problem! Your fingernail can do the trick too!
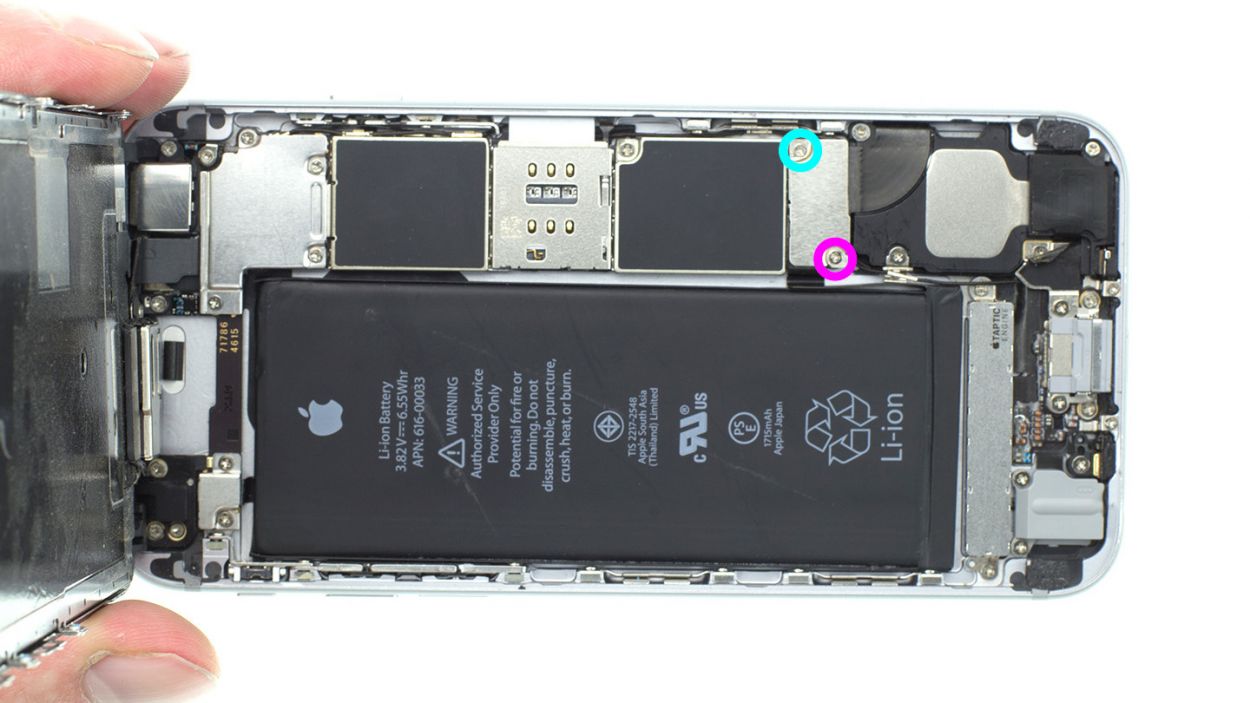
Step 5

– First, let’s loosen those four Phillips screws holding down the silver contact cover. Once they’re loose, pop them onto your magnetic pad along with the cover so they don’t play hide and seek later. You’re looking for 3 x 1.3 mm Phillips screws and 1 x 2.9 mm Phillips screw.
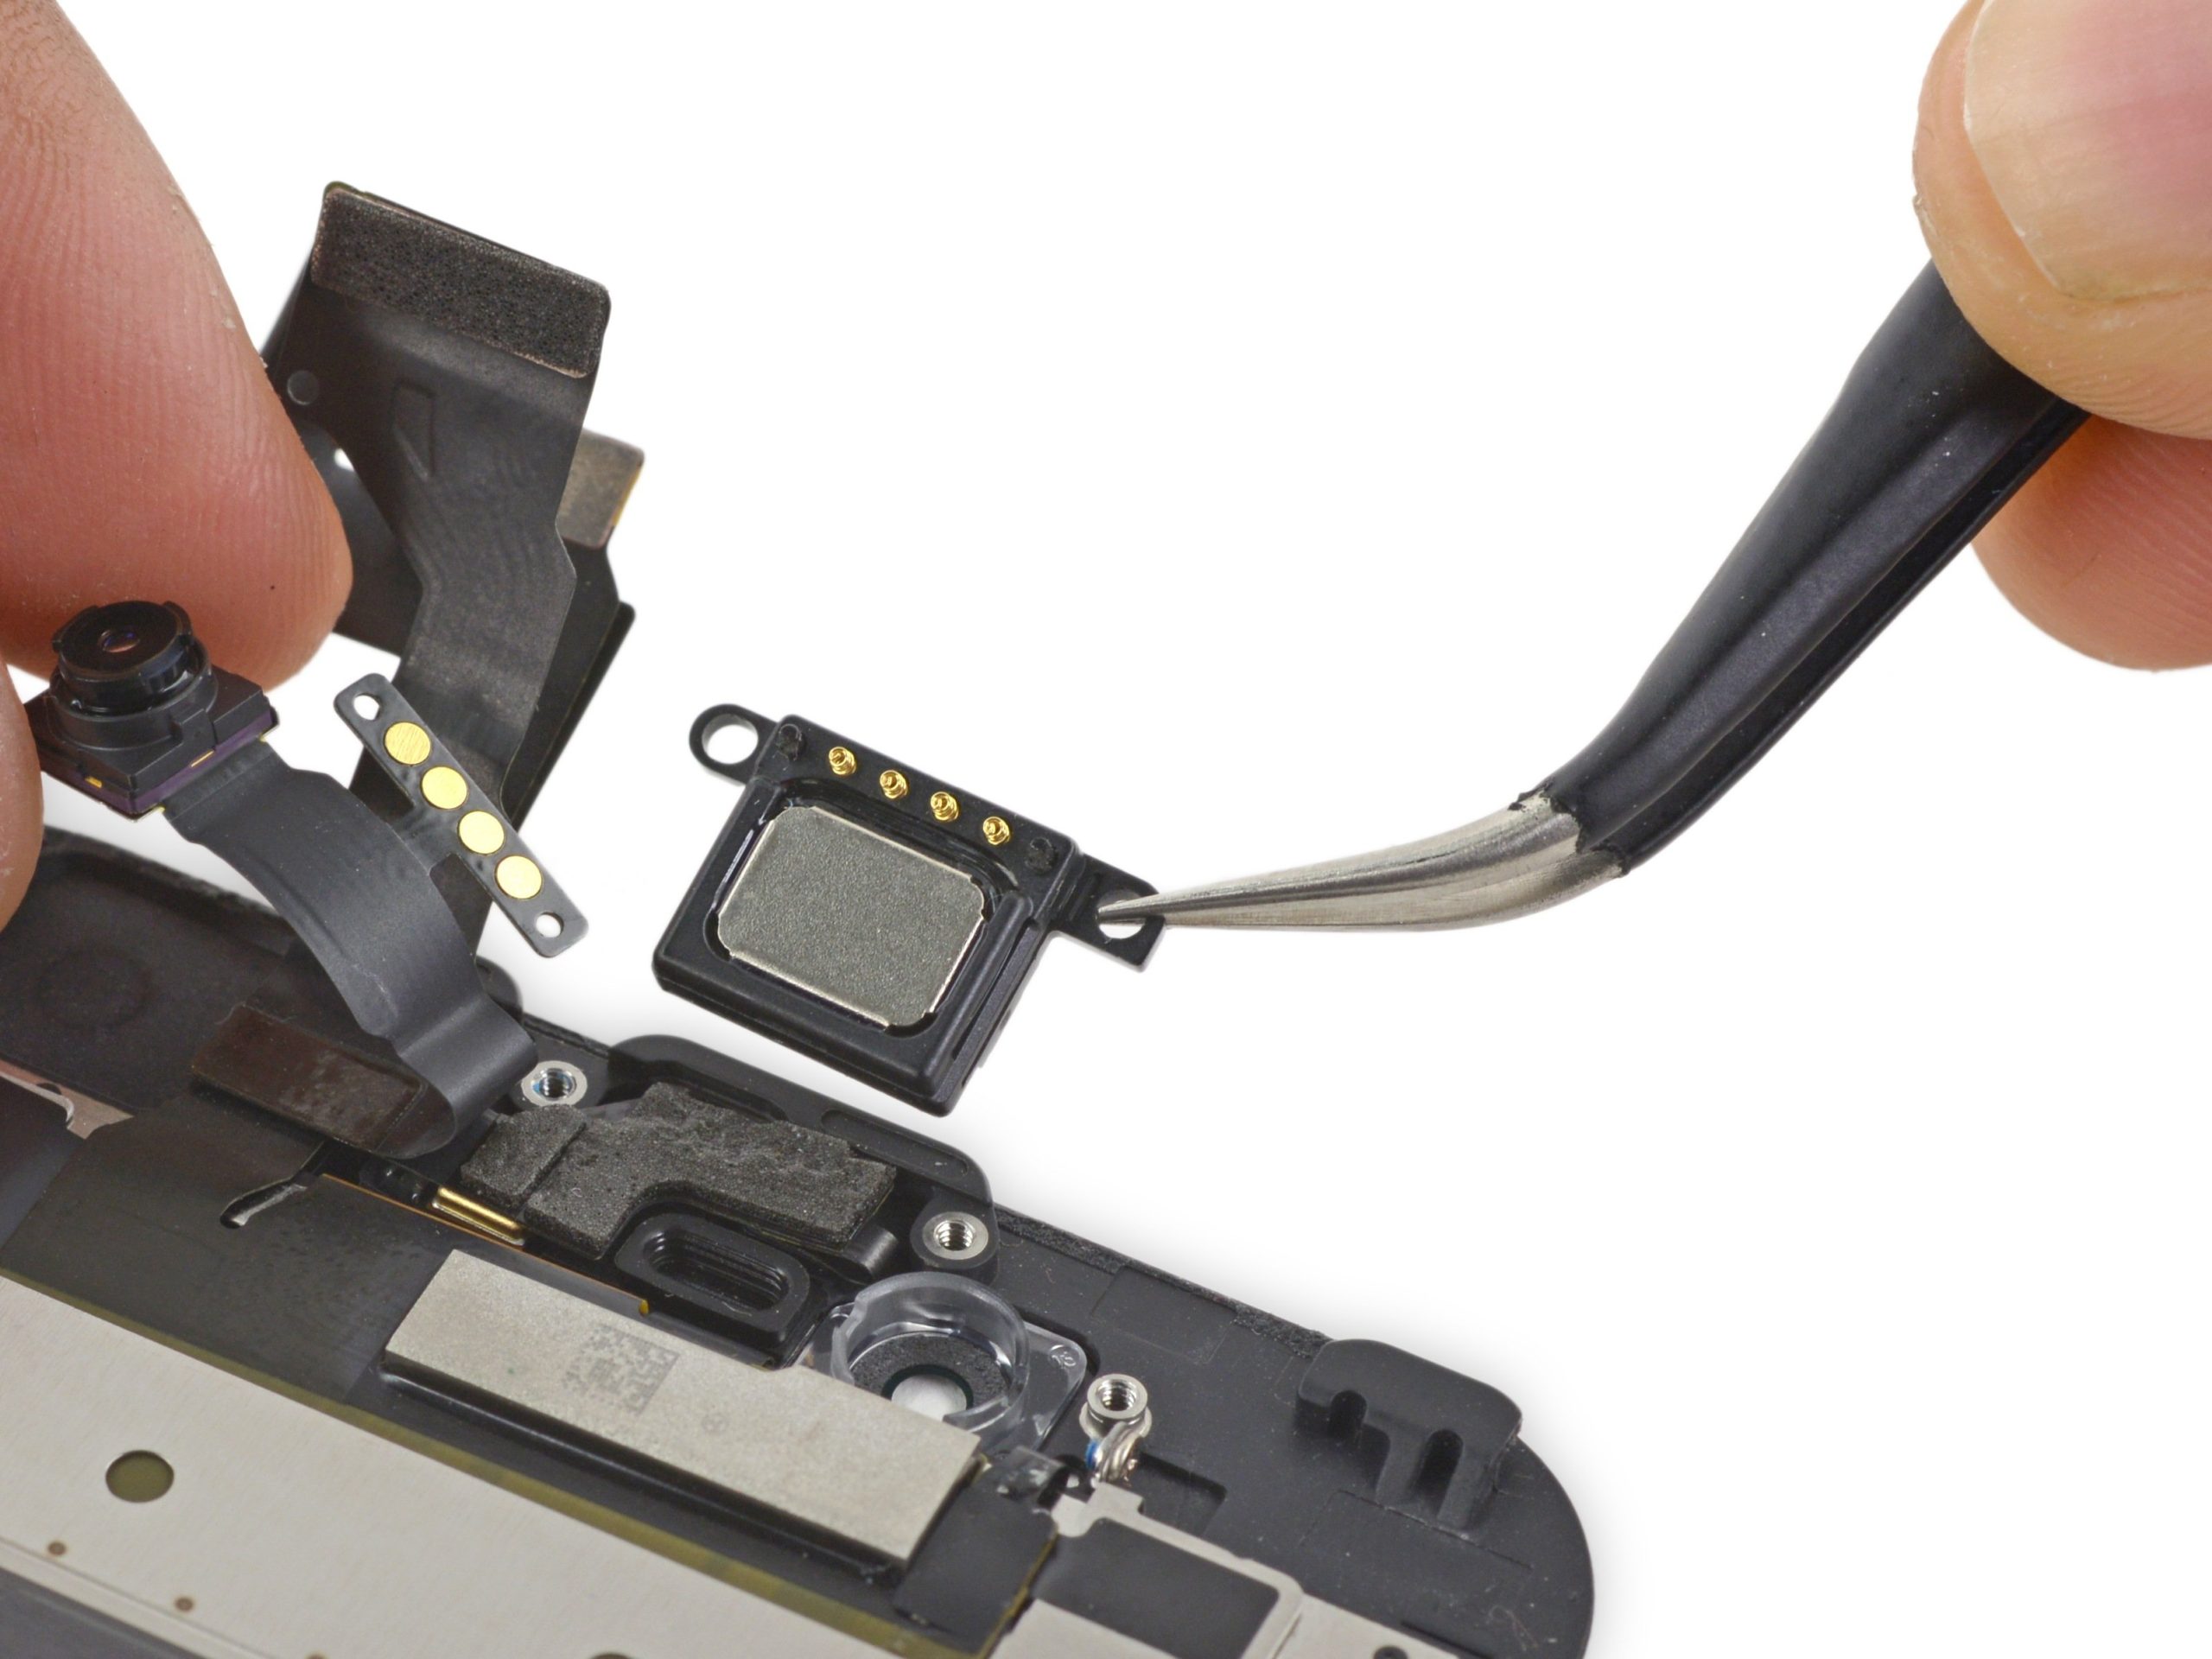
– Now it’s time to release the three overlapping display connectors in the order shown below. Just slide your spudger under each connector and gently lift it up. The connectors to release are: Front camera/sensor/earpiece/ambient microphone, Touch ID cable, and the Display.
Step 6

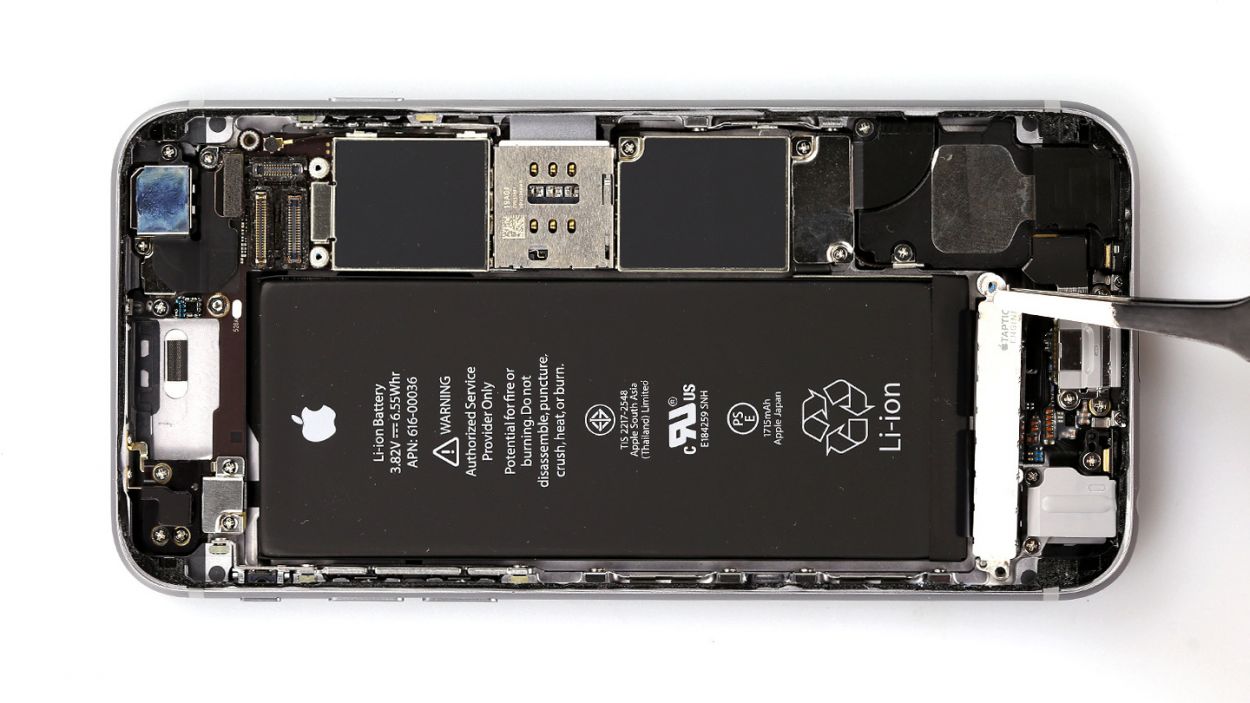
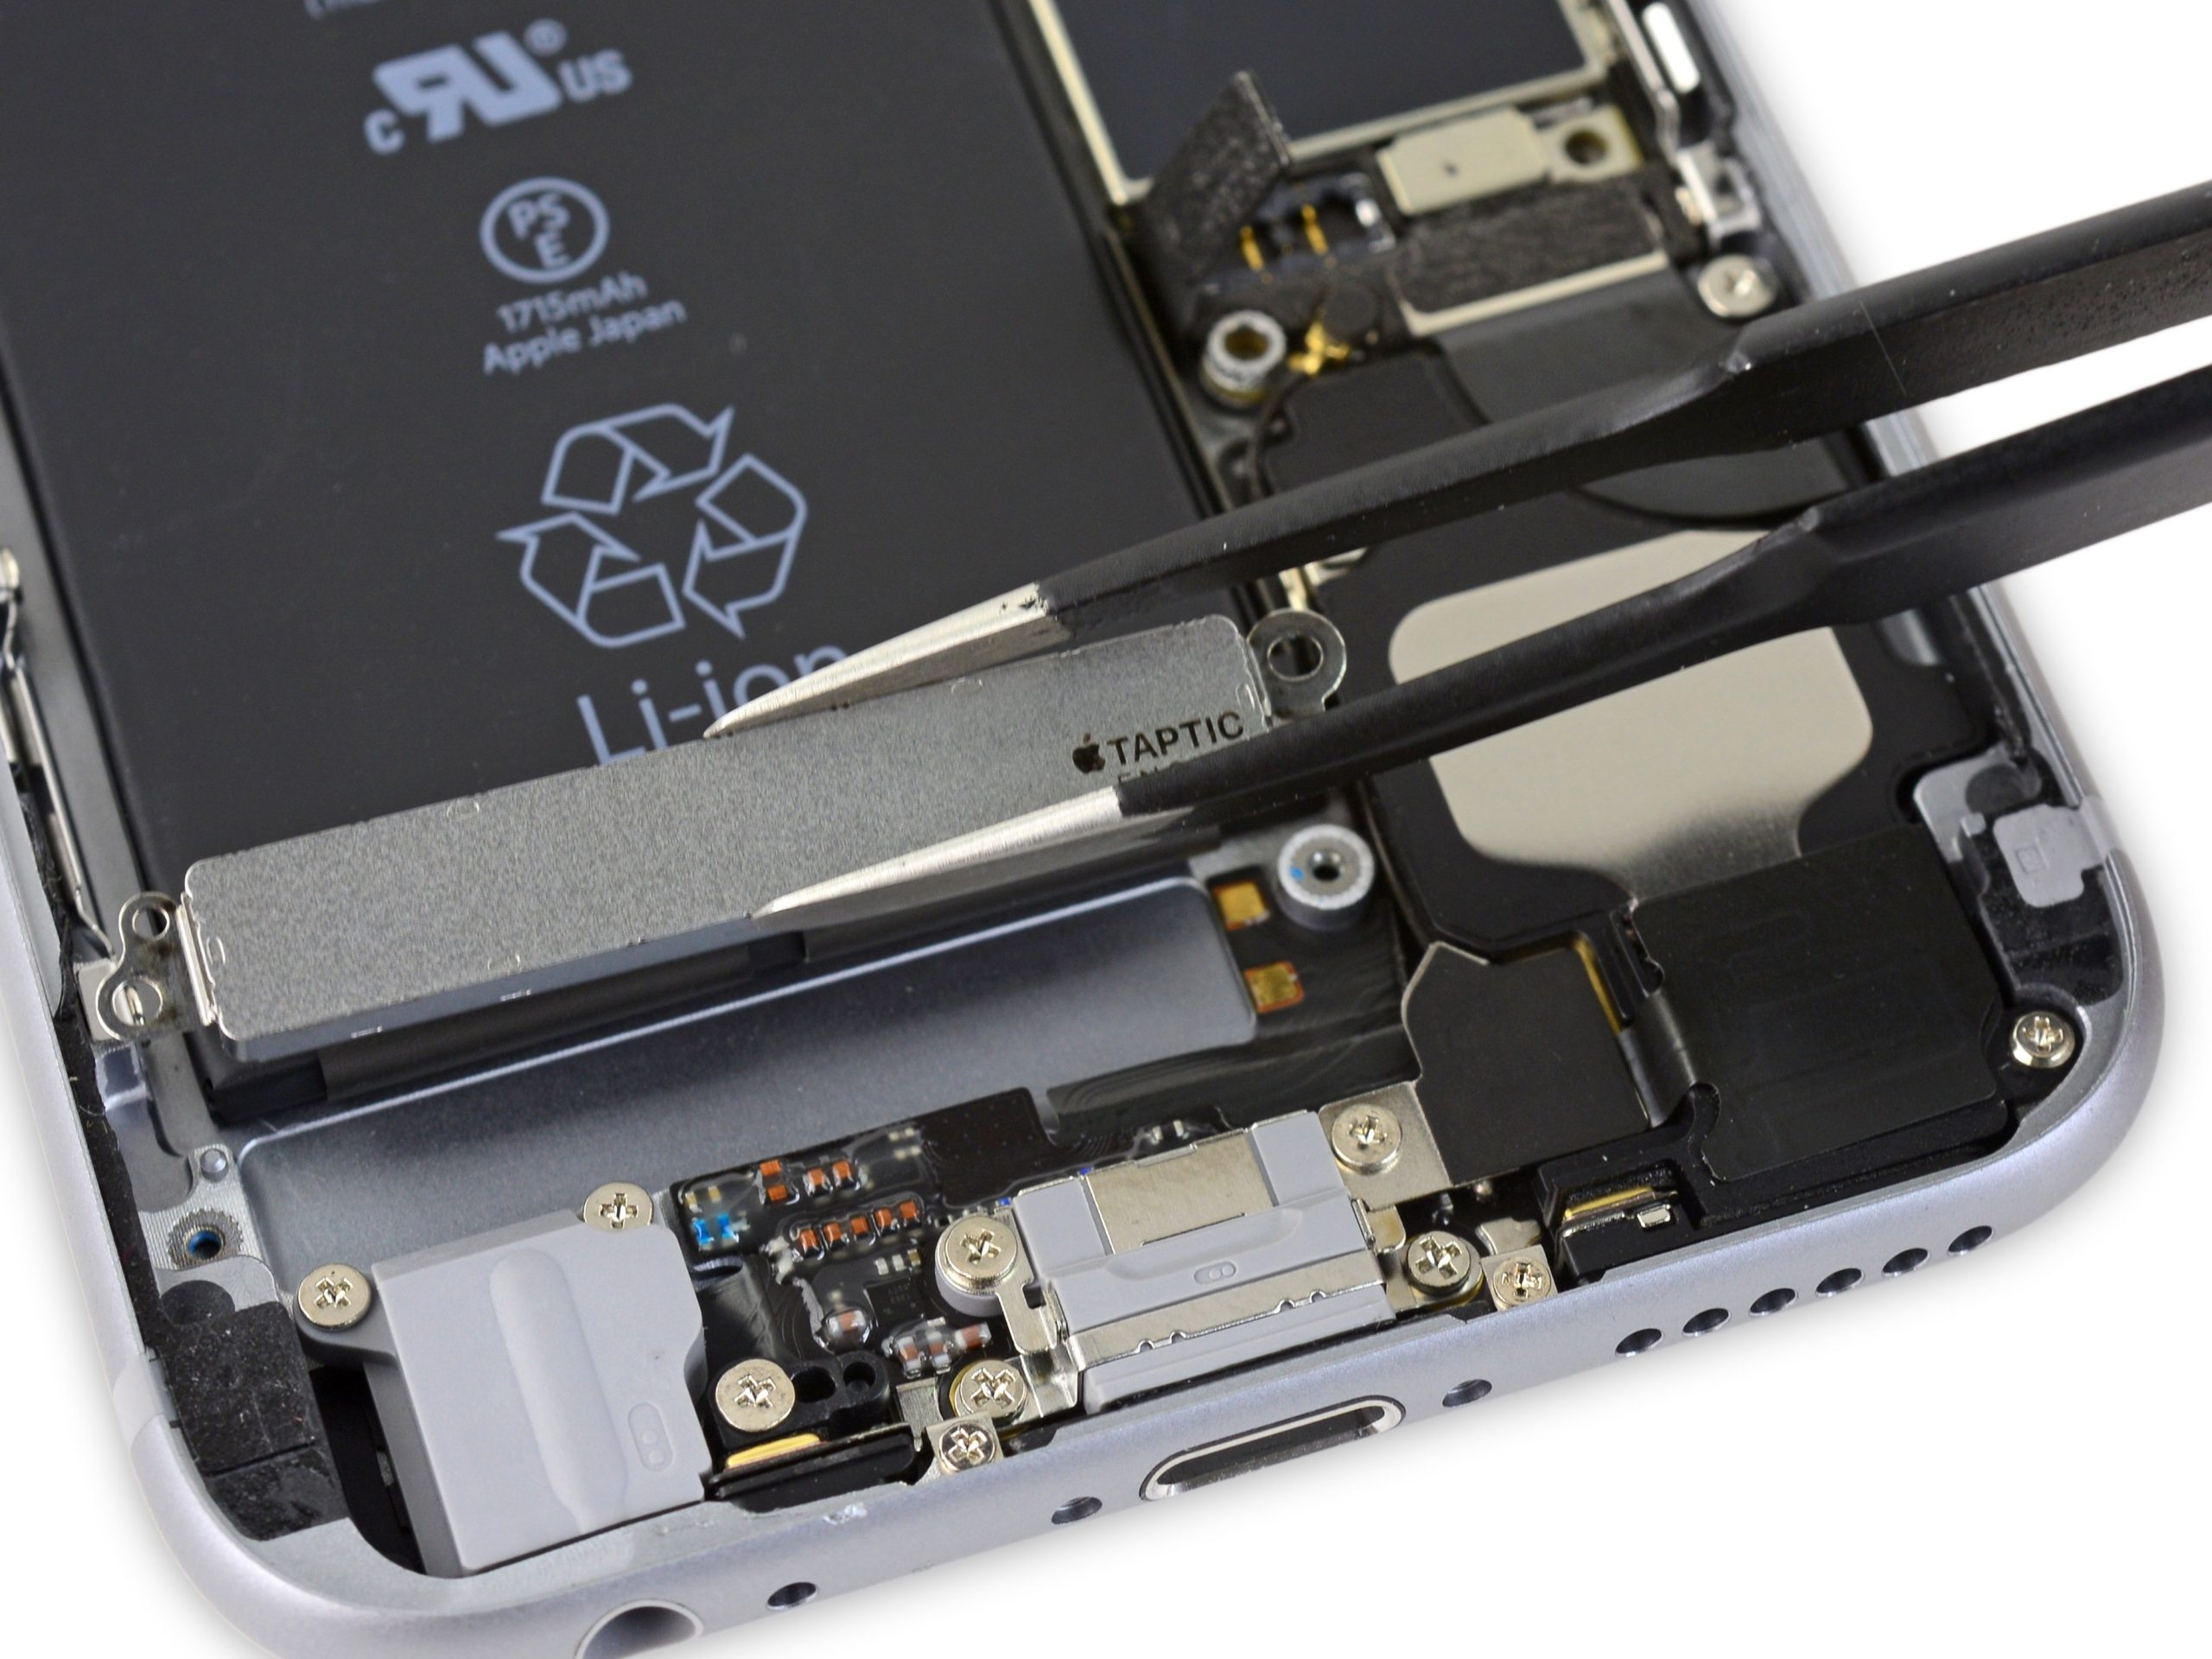
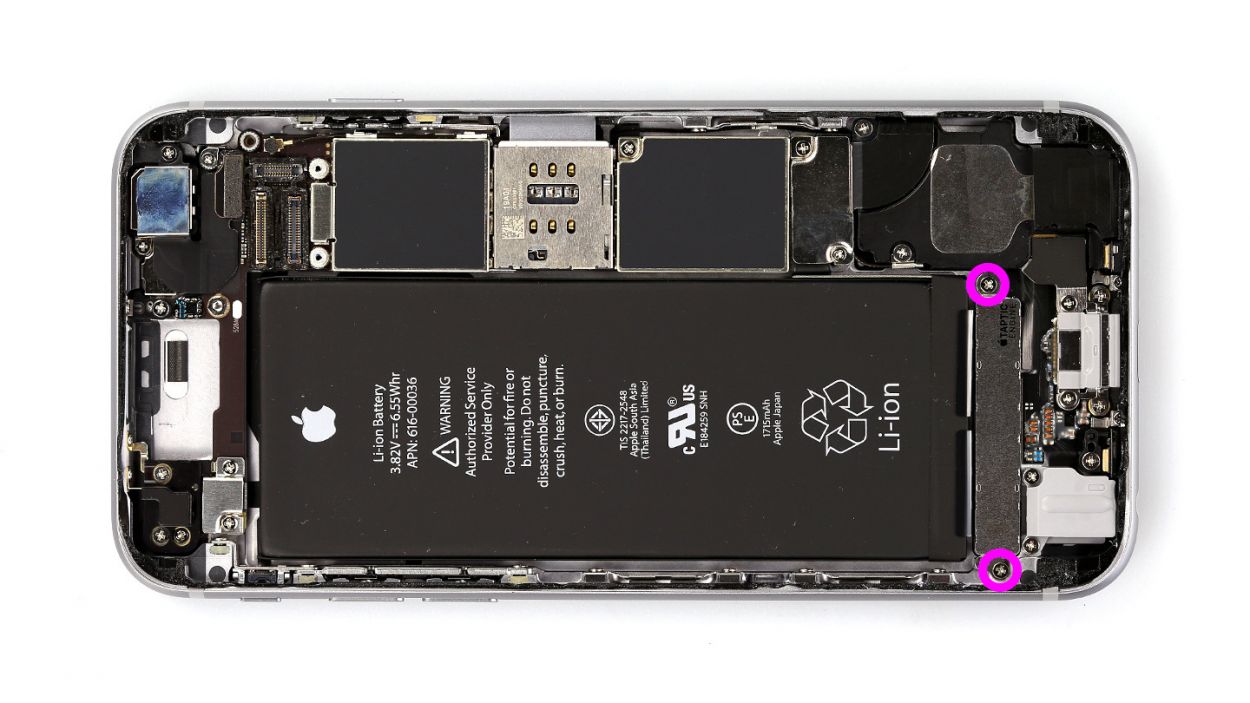
– Let’s get those two Phillips screws out of the way so we can free the taptic engine! You’ll need two 1.5 mm Phillips screws for this.
– Now that the screws are gone, you can easily lift out the taptic engine!
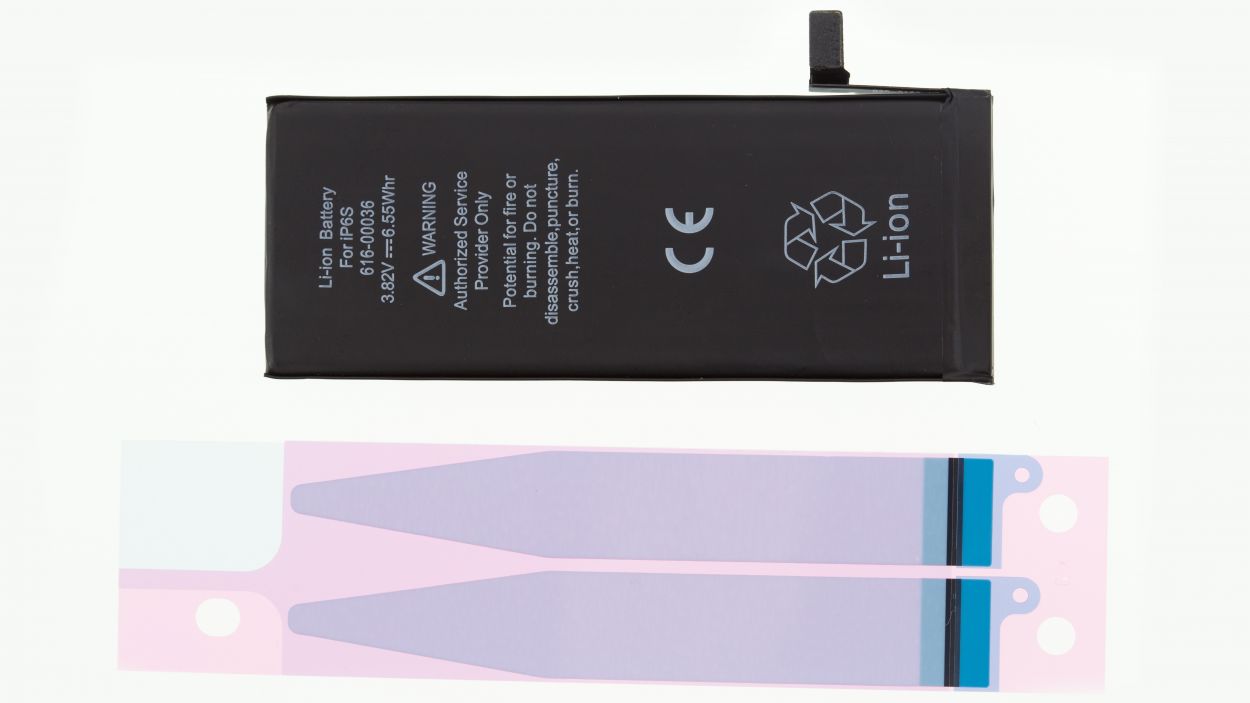
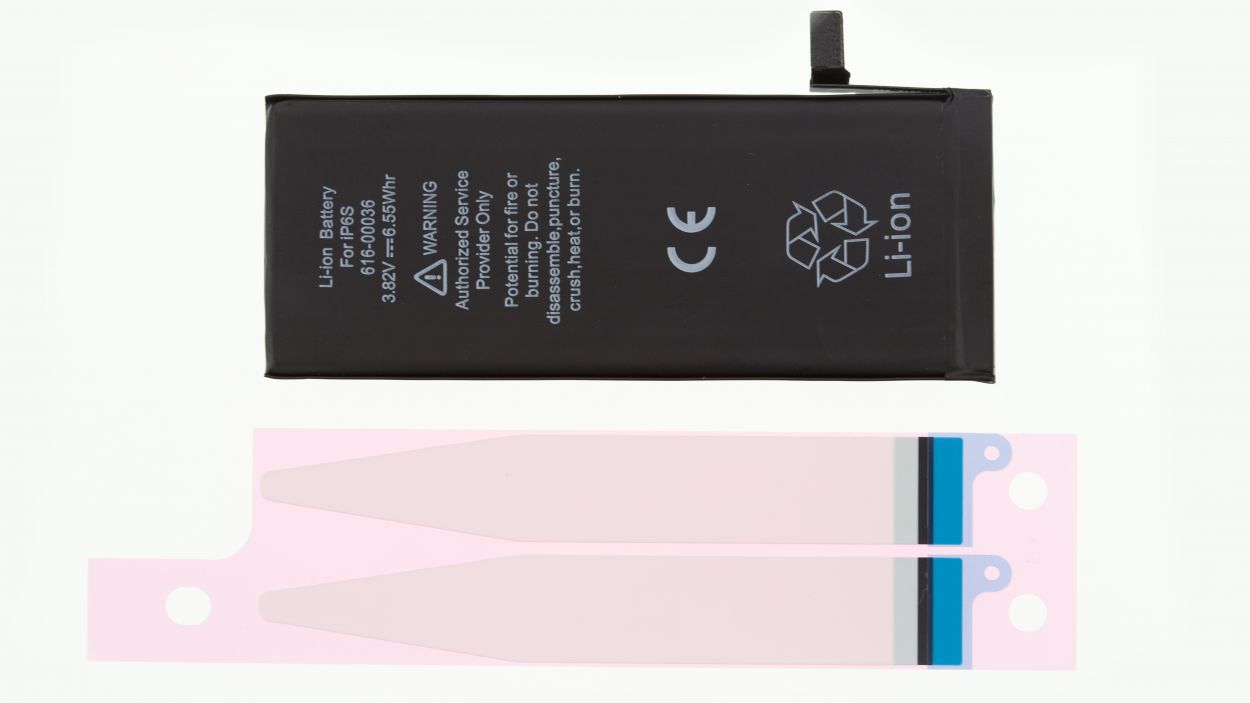
Step 7
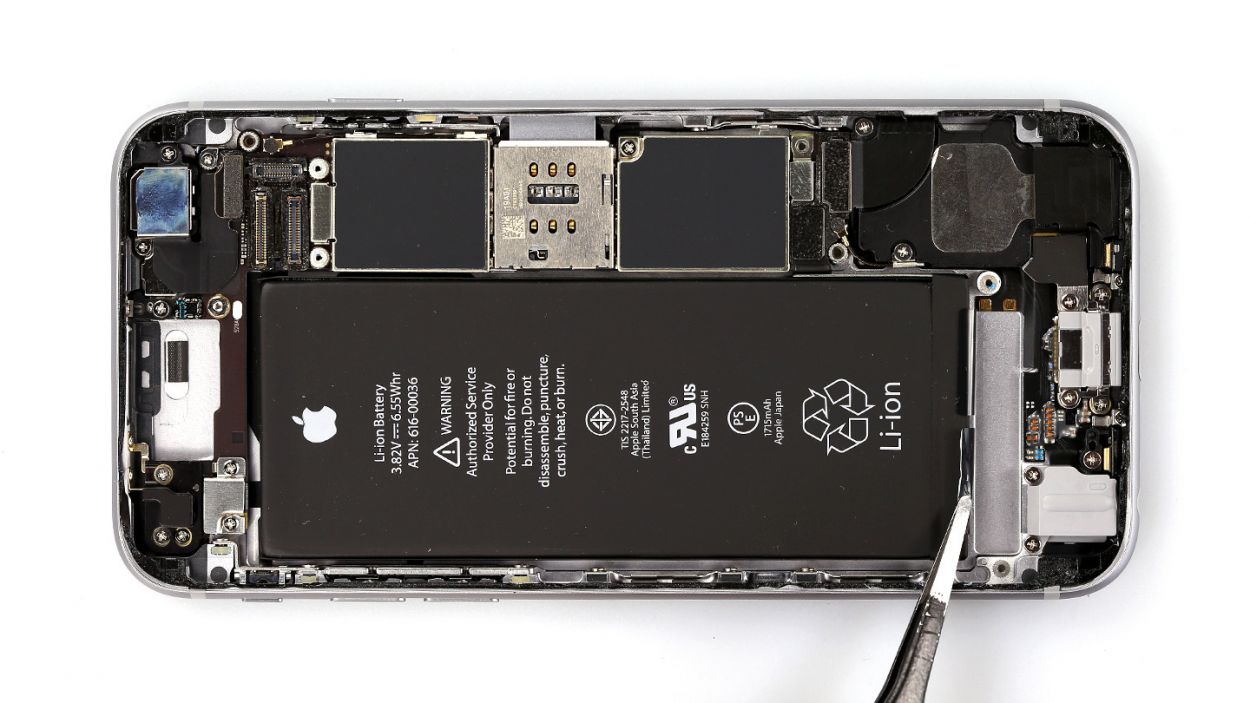
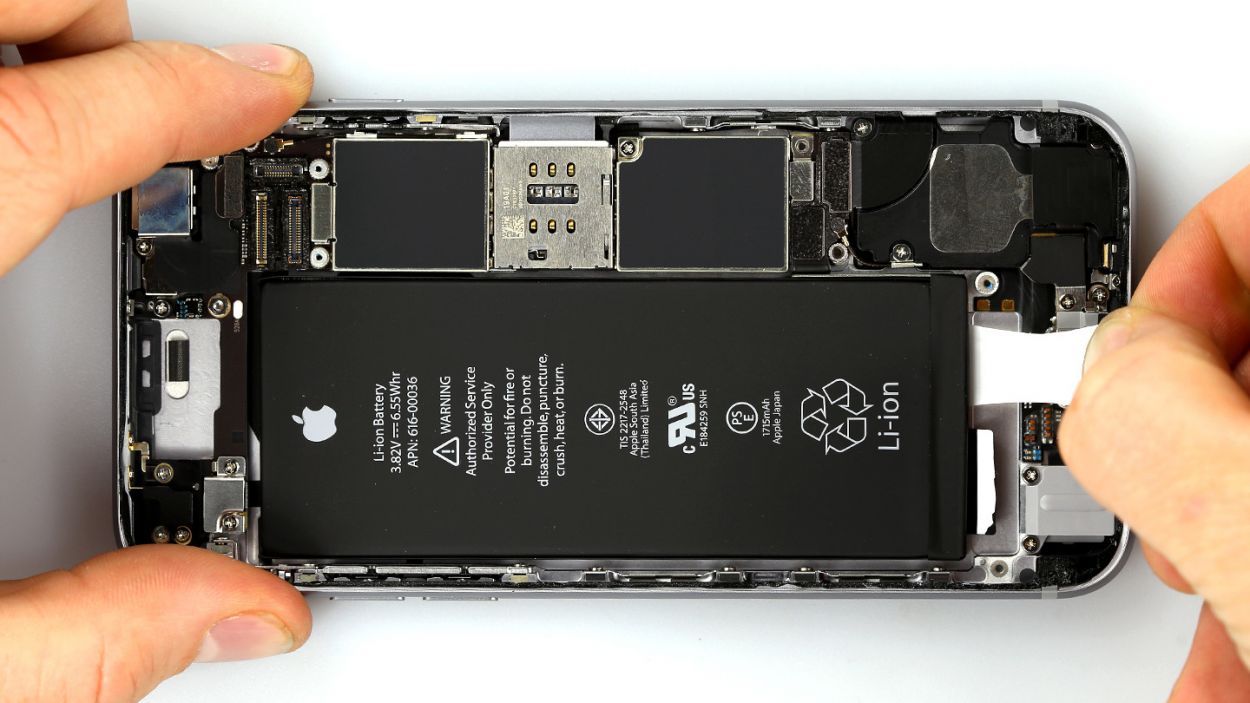
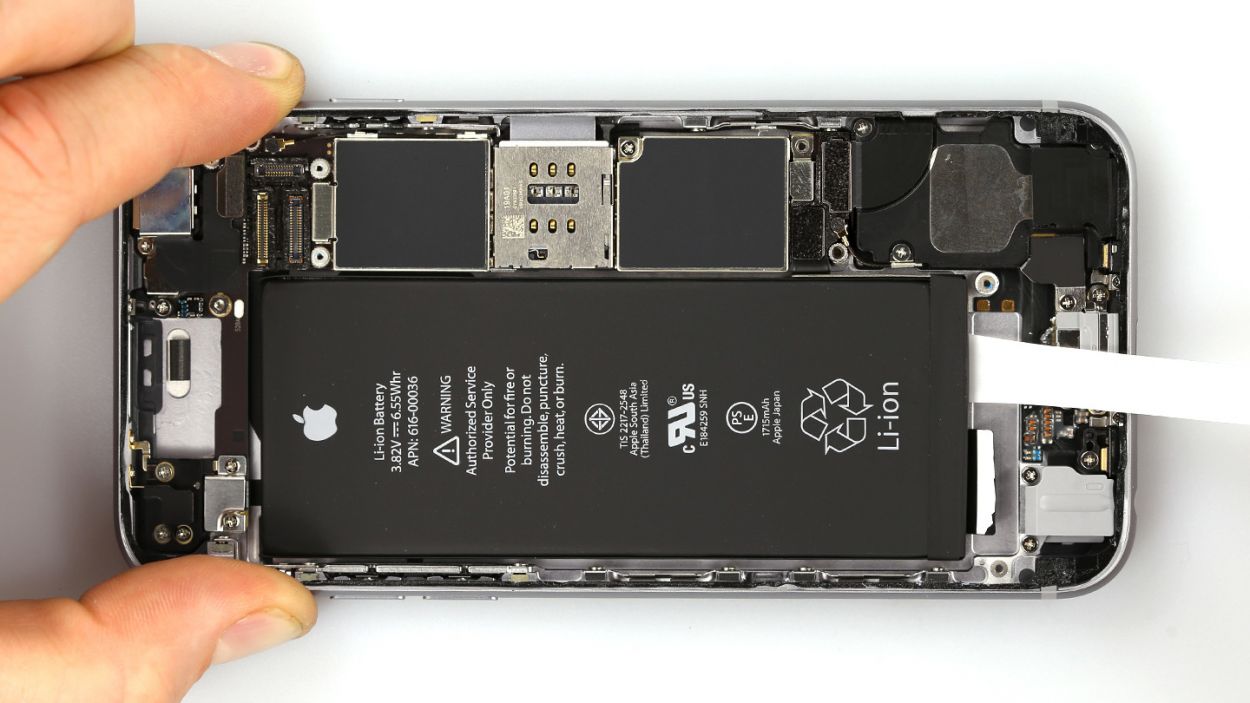

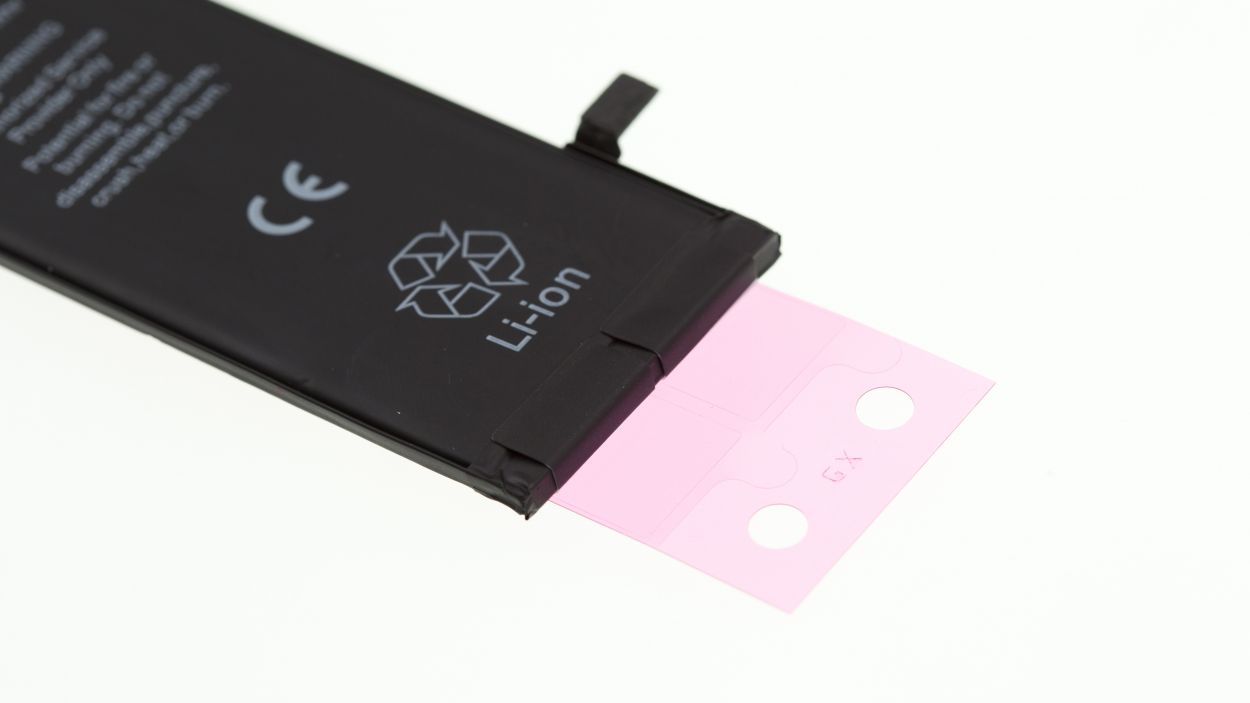
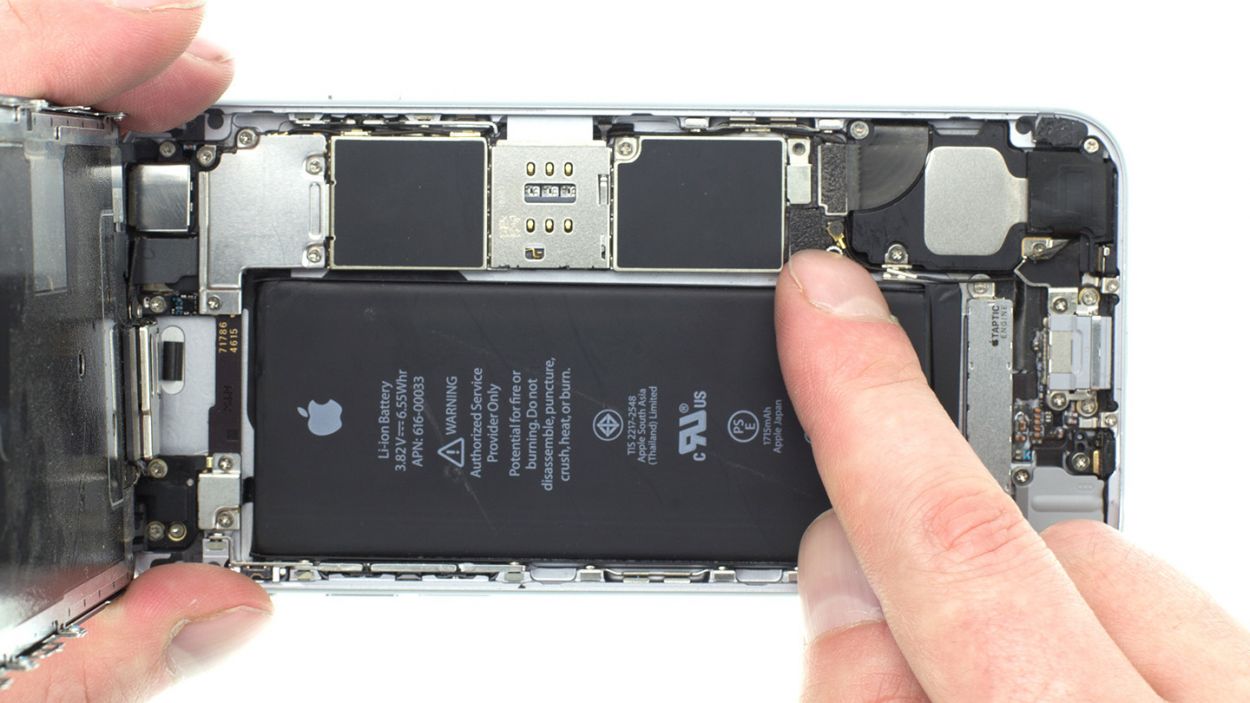
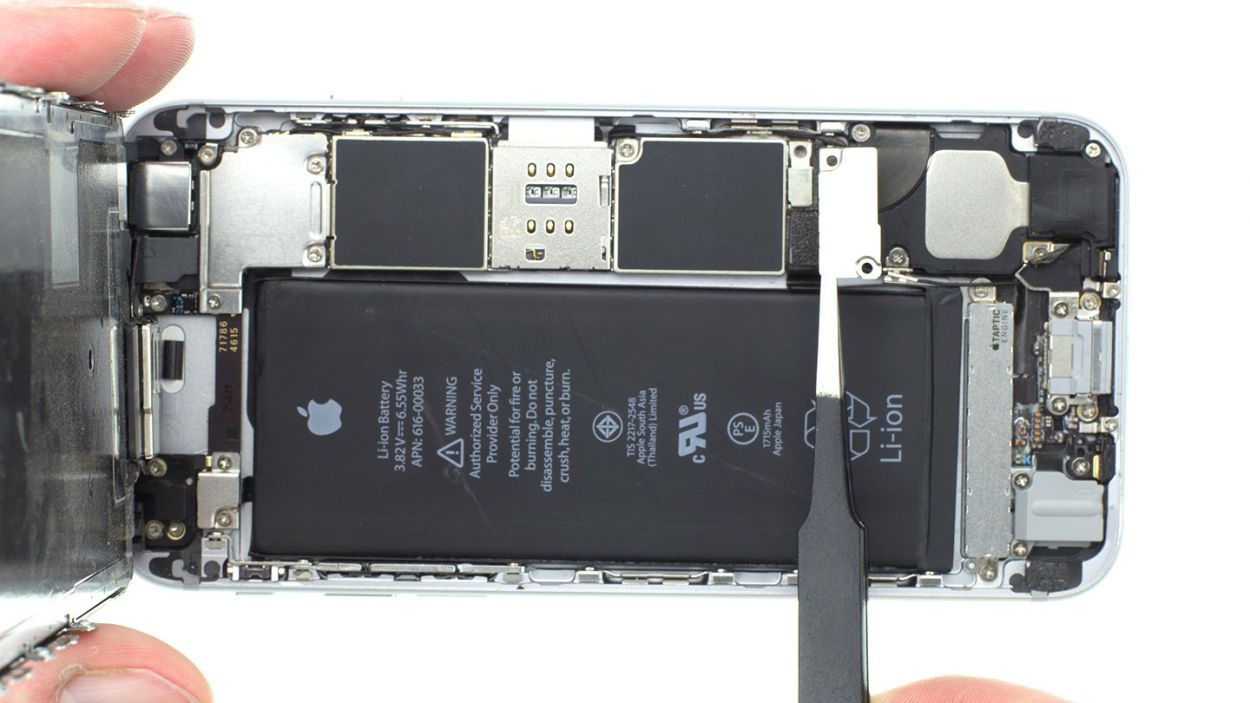
– The battery is held in place by two adhesive+strips+iPhone+6s&crid=1TJIMMAJSUJUZ&sprefix=repair+tools%2Caps%2C165&linkCode=ll2&tag=salvationrepa-20&linkId=c486487cf454ce8edd6f5beefab4110f&language=en_US&ref_=as_li_ss_tl’>adhesive strips. To get those strips off, grab a pair of tweezers or a spatula and gently peel them away.
– Take your time and slowly pull the adhesive+strips+iPhone+6s&crid=1TJIMMAJSUJUZ&sprefix=repair+tools%2Caps%2C165&linkCode=ll2&tag=salvationrepa-20&linkId=c486487cf454ce8edd6f5beefab4110f&language=en_US&ref_=as_li_ss_tl’>adhesive strips from beneath the battery. Keeping them as flat as possible will help prevent any tearing.
– Once the adhesive+strips+iPhone+6s&crid=1TJIMMAJSUJUZ&sprefix=repair+tools%2Caps%2C165&linkCode=ll2&tag=salvationrepa-20&linkId=c486487cf454ce8edd6f5beefab4110f&language=en_US&ref_=as_li_ss_tl’>adhesive strips are free, you can easily lift out the battery!
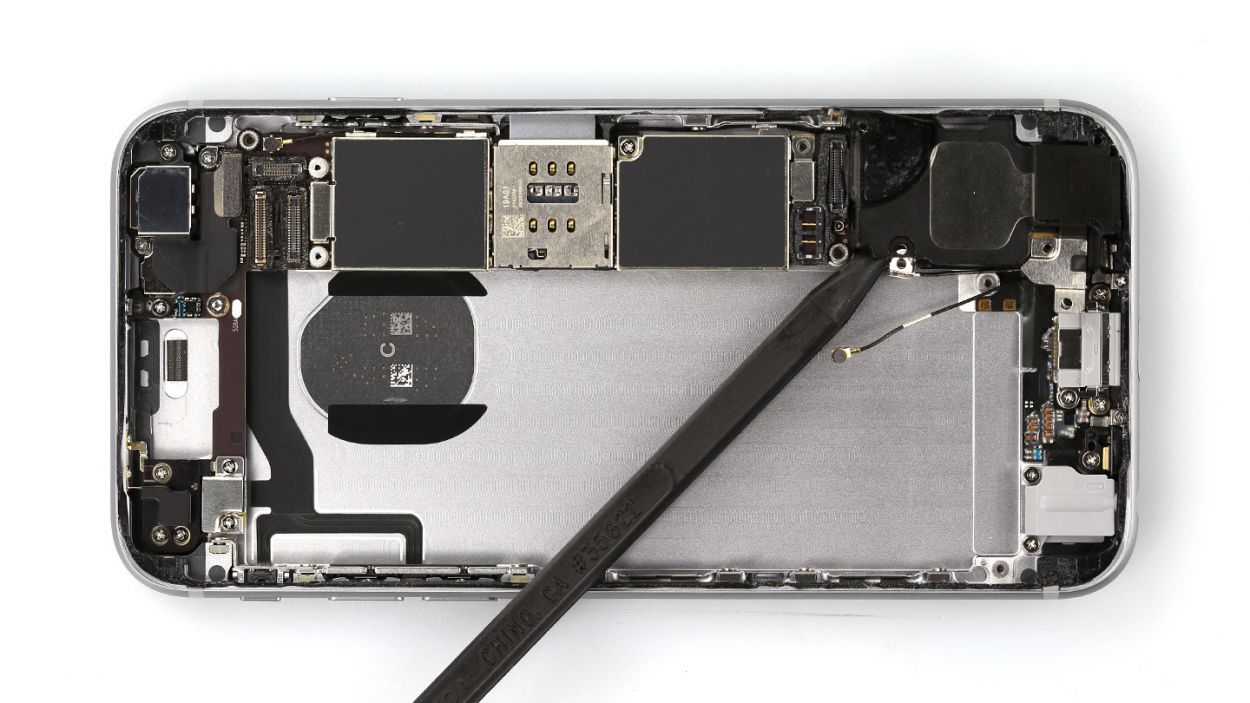
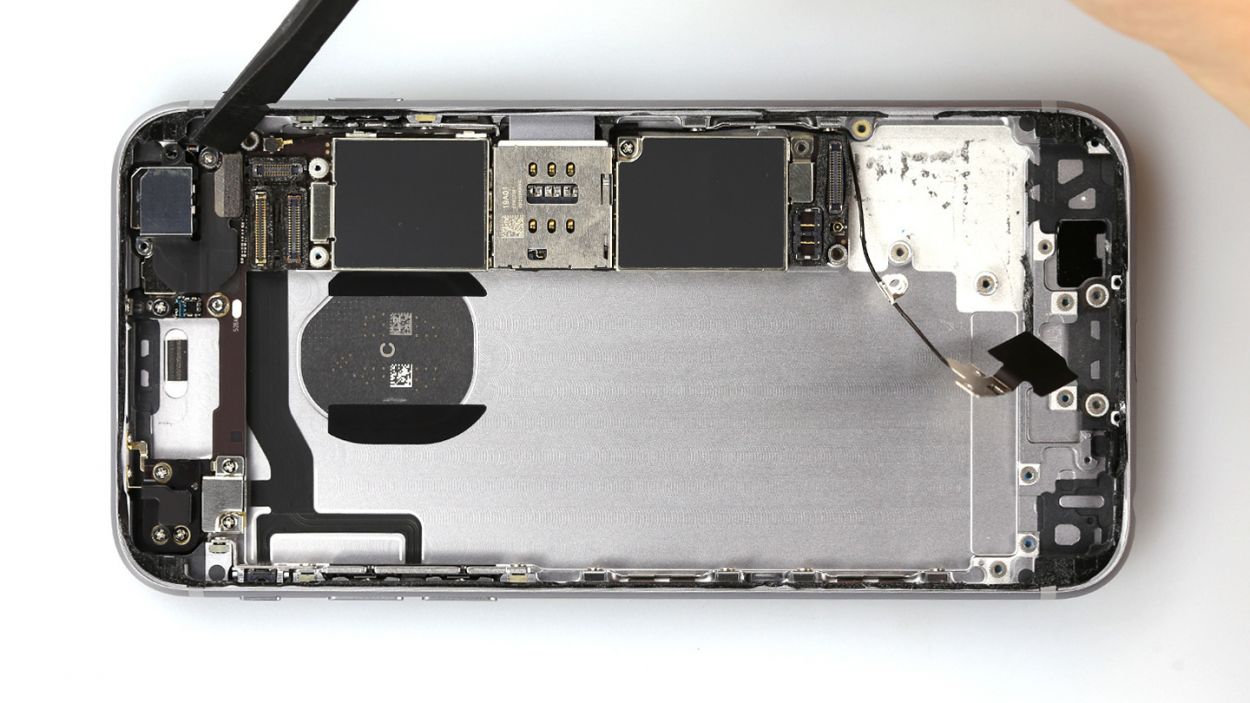
Step 8
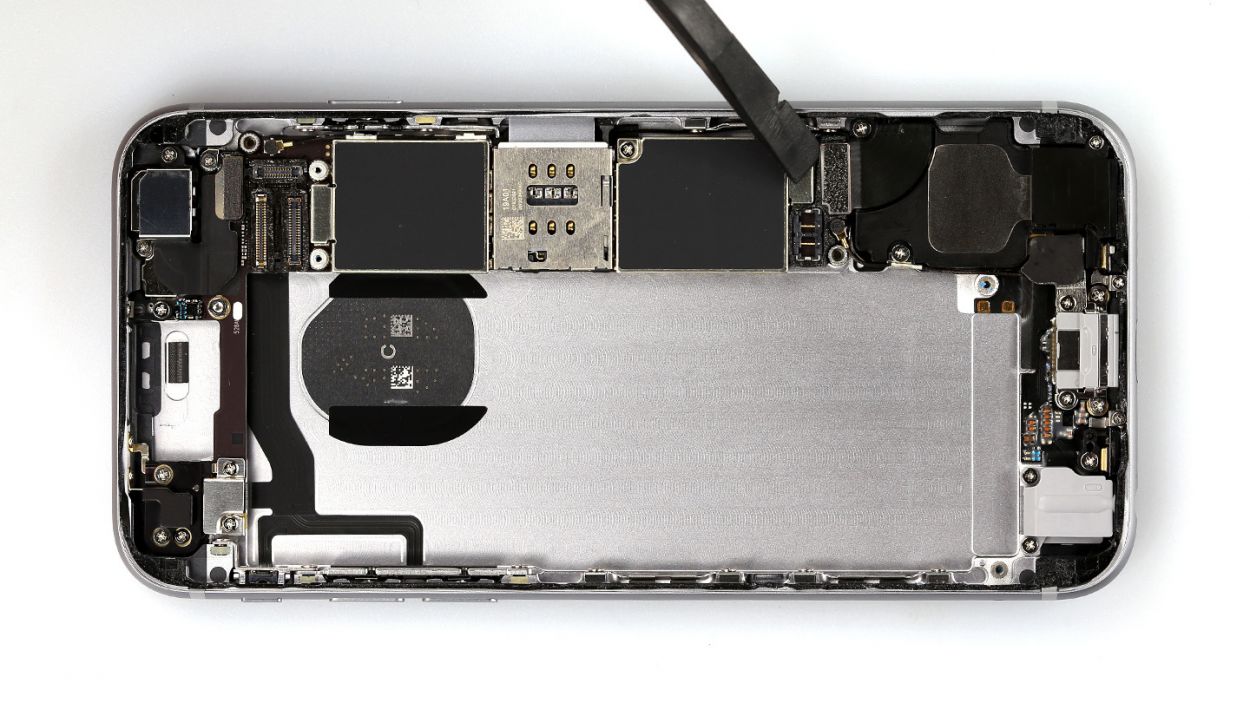
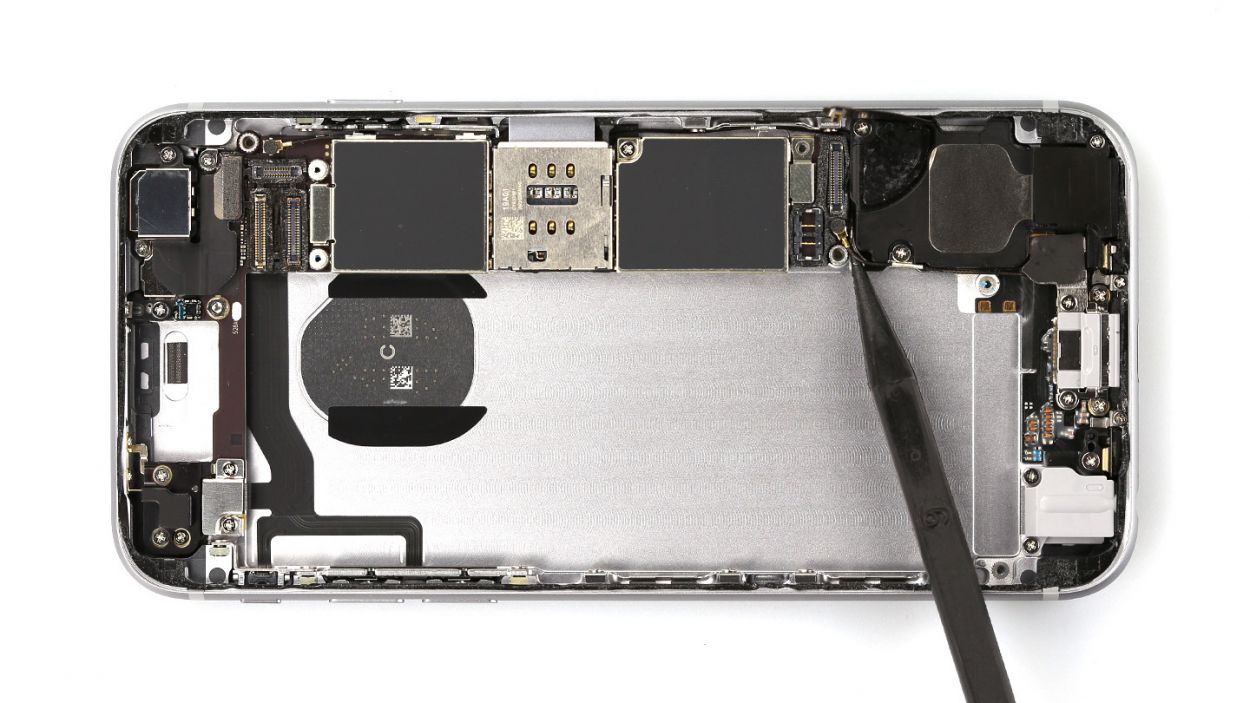
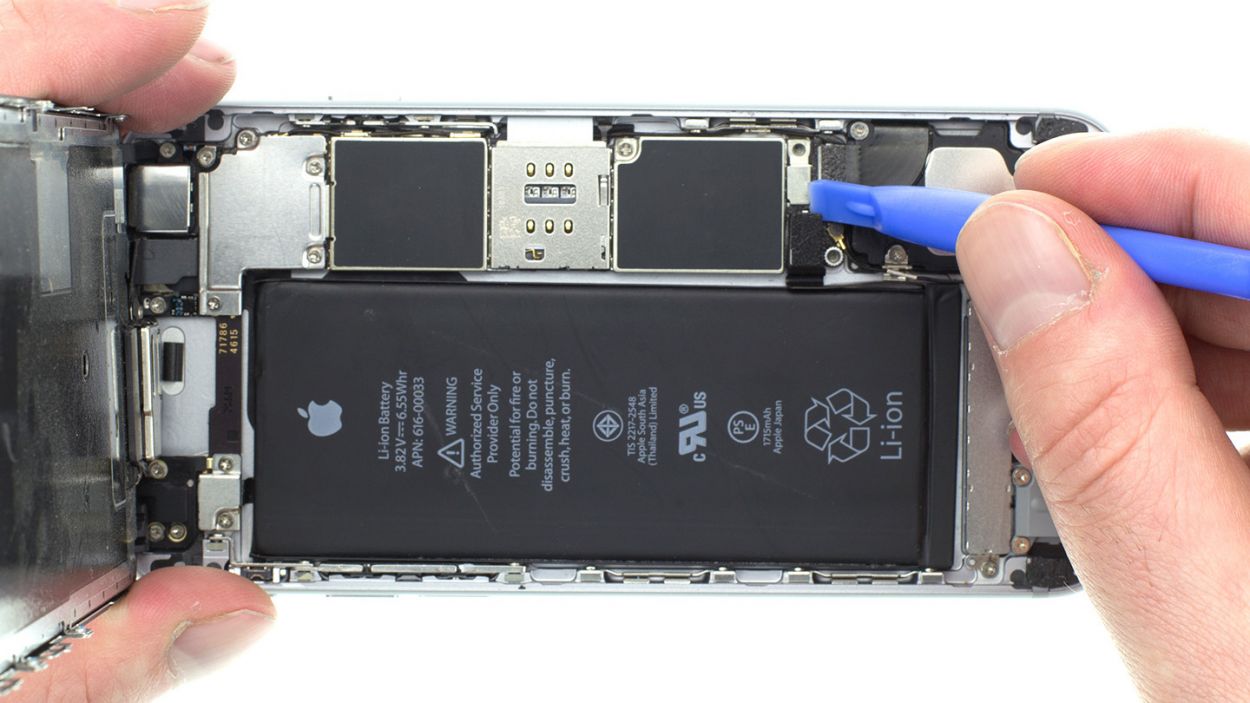
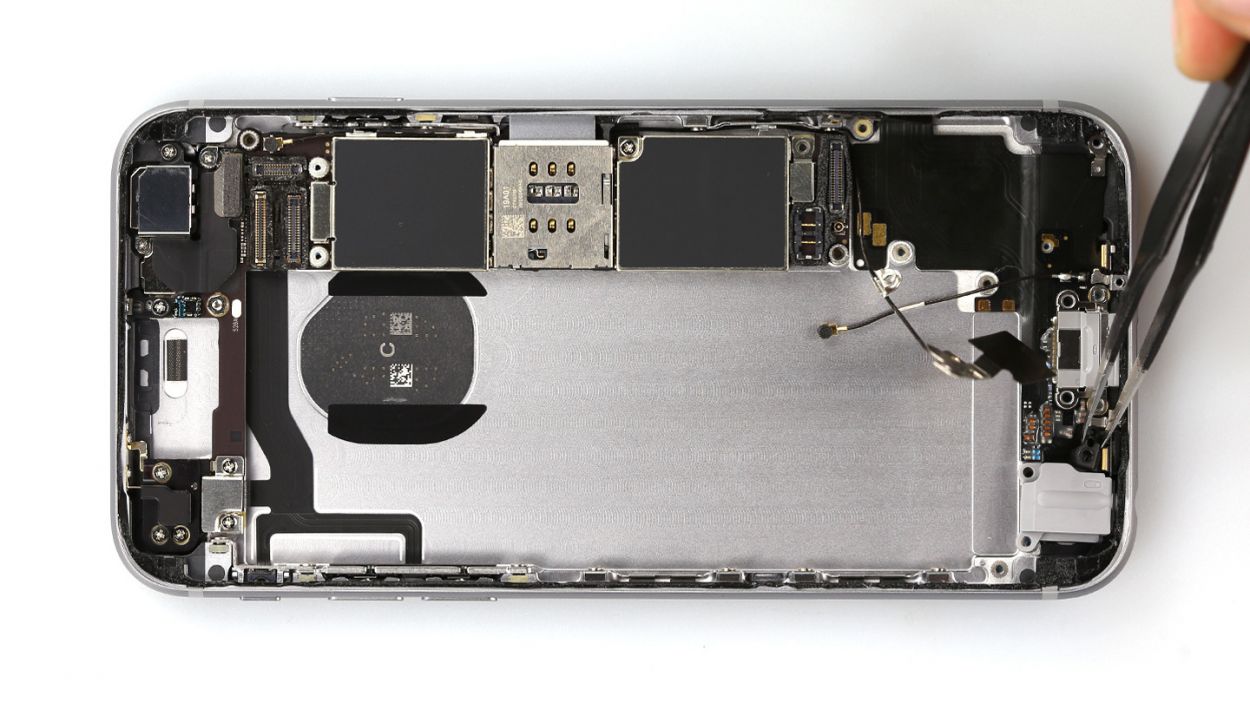
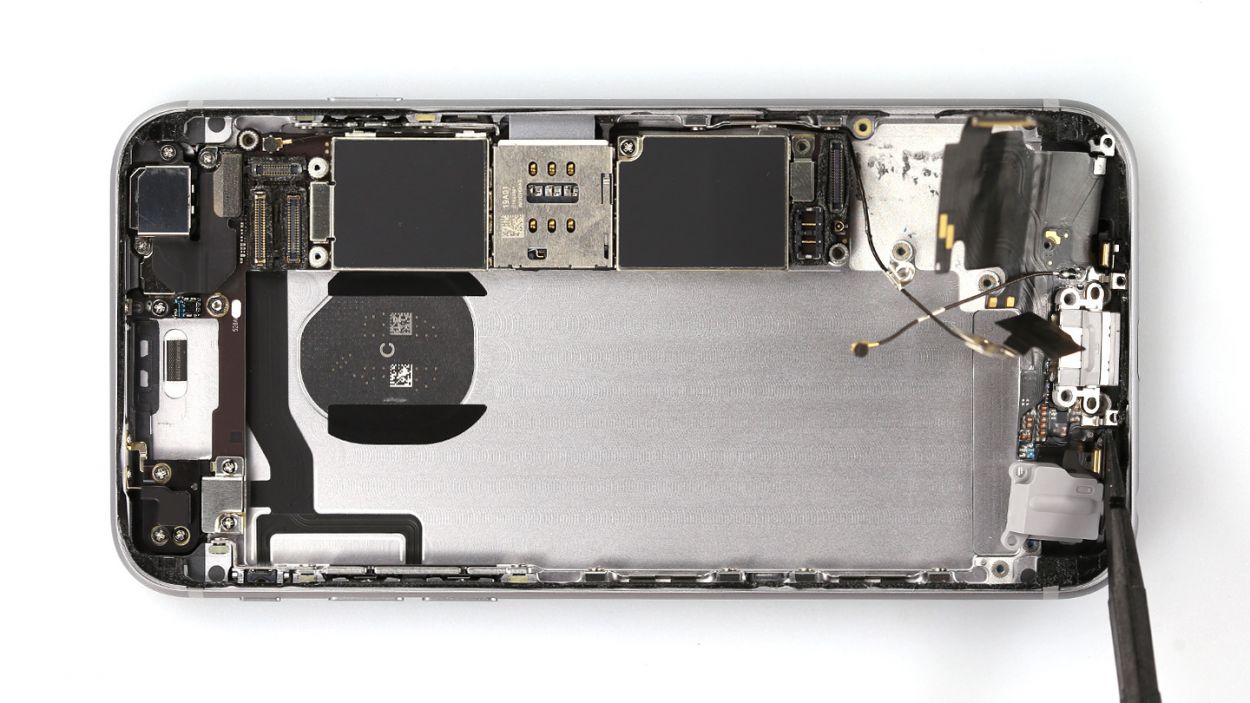
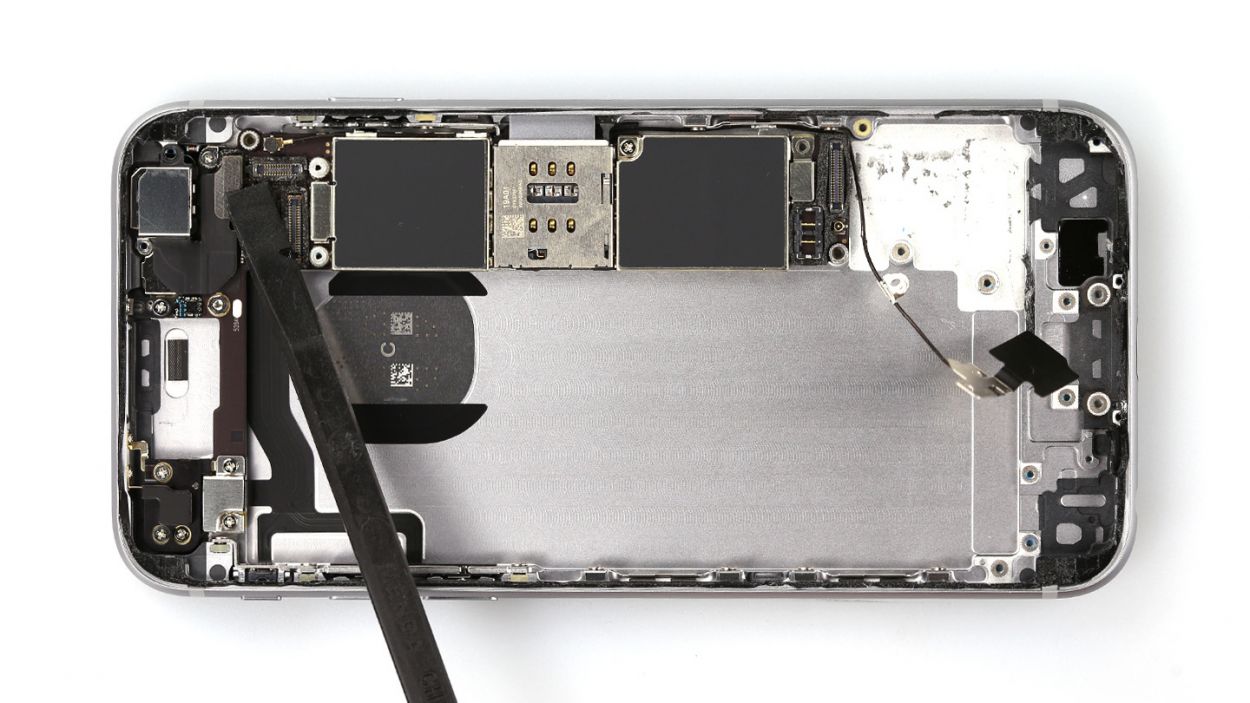
– Time to get those connectors of the lightning connector and antenna cable off the main board! Use the sharp tip of your spudger to gently disconnect them. You’ve got this!
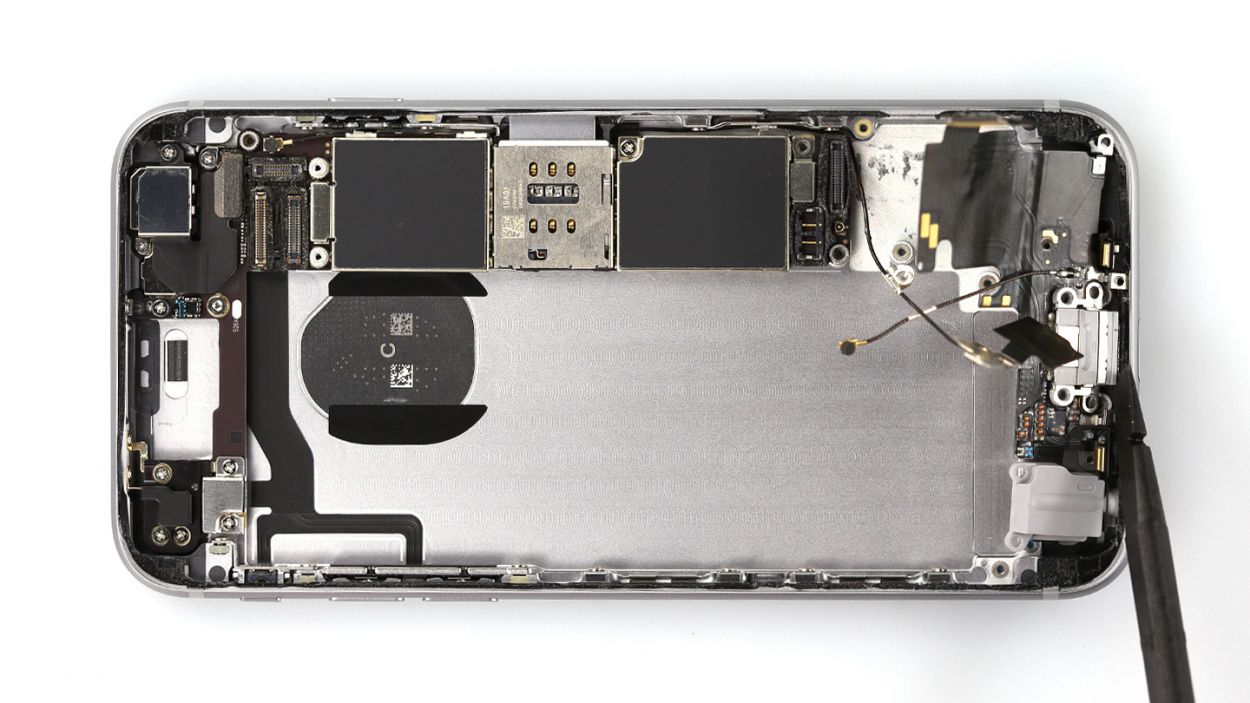
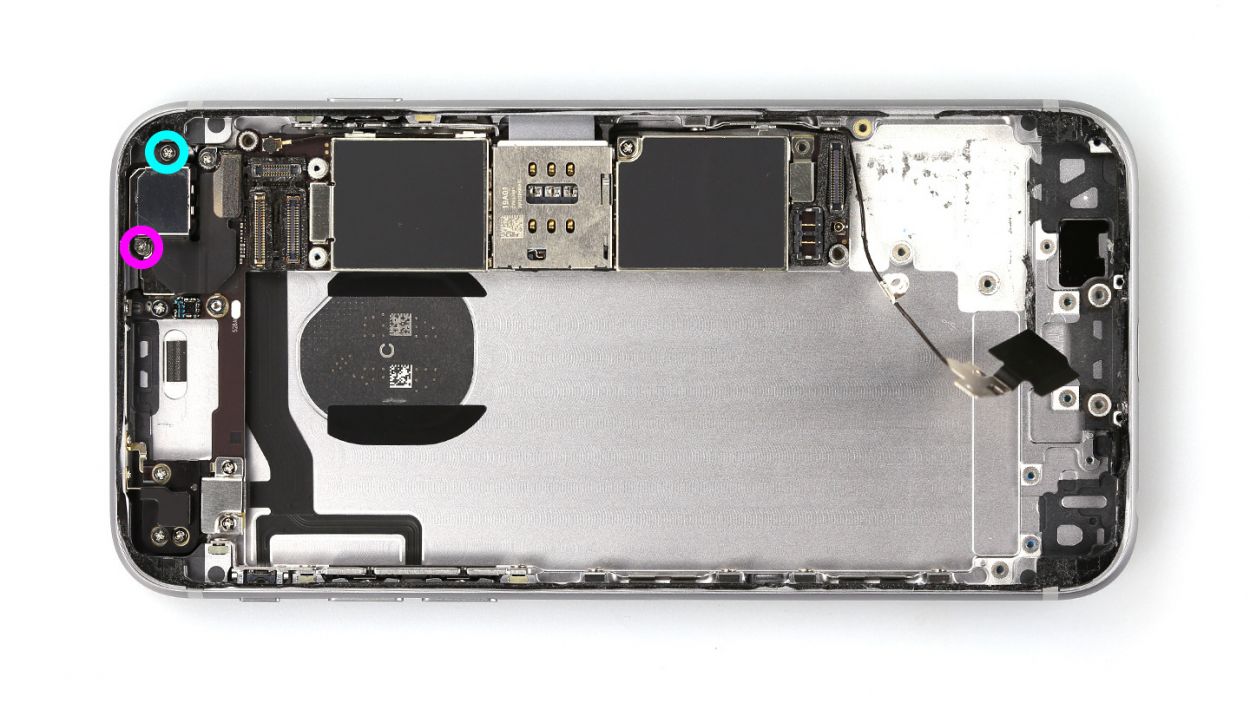
Step 9


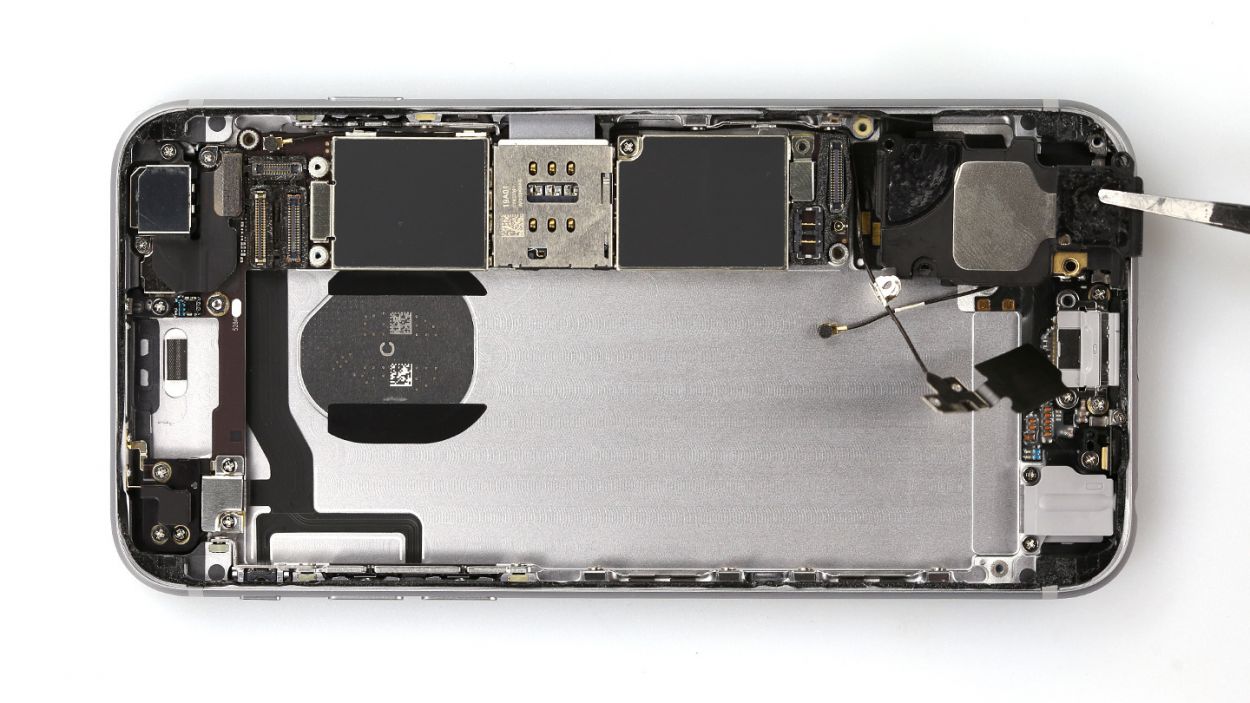
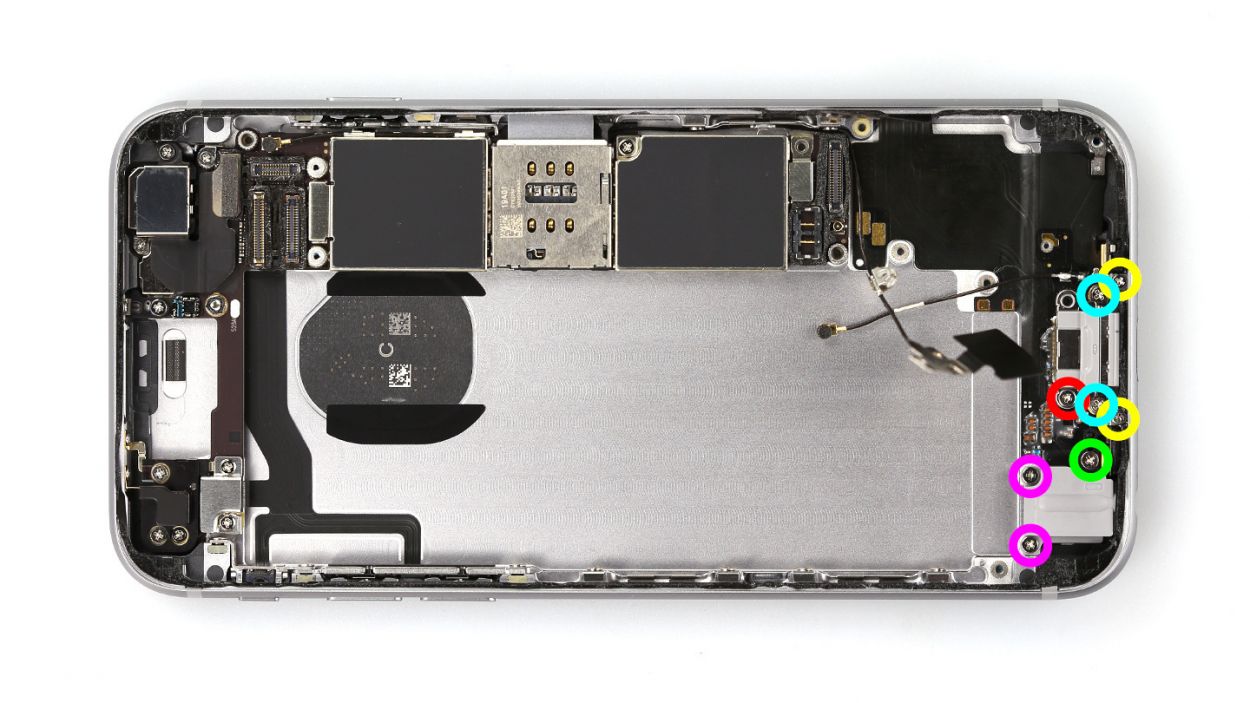
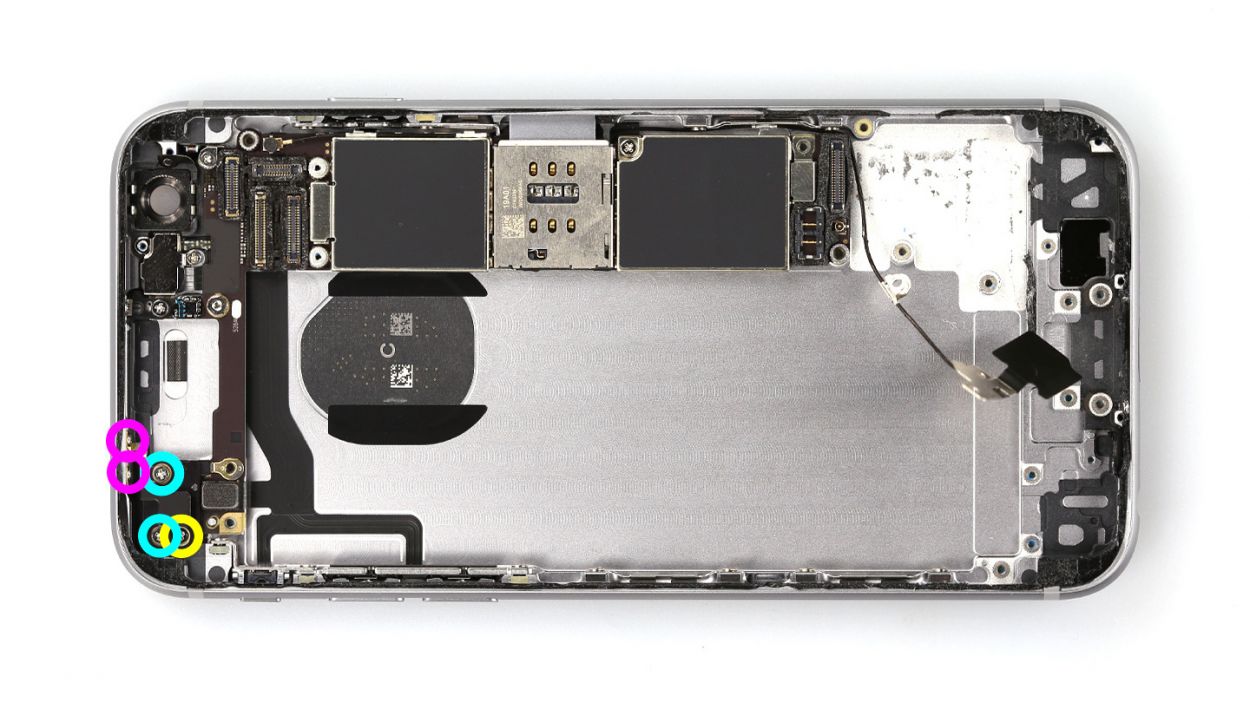
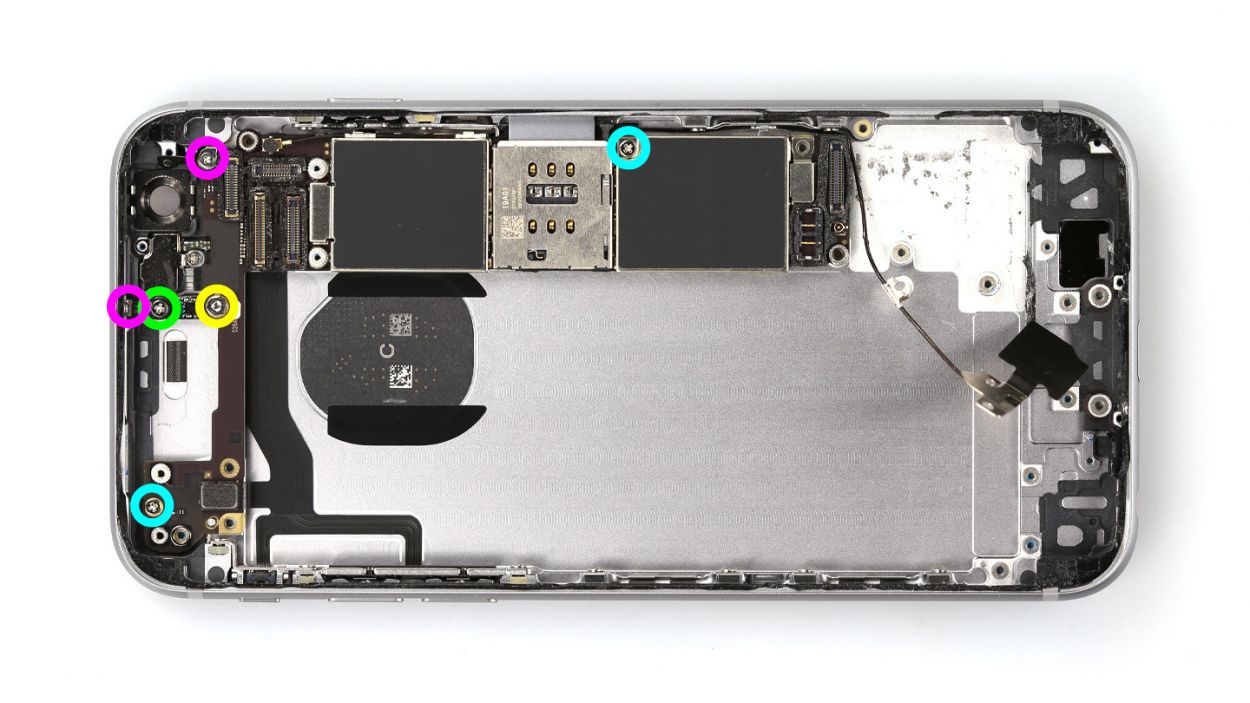
– First, let’s peel off that black adhesive strip hanging out next to the lightning connector. Surprise! There’s a Phillips screw hiding underneath it, just waiting to be discovered.
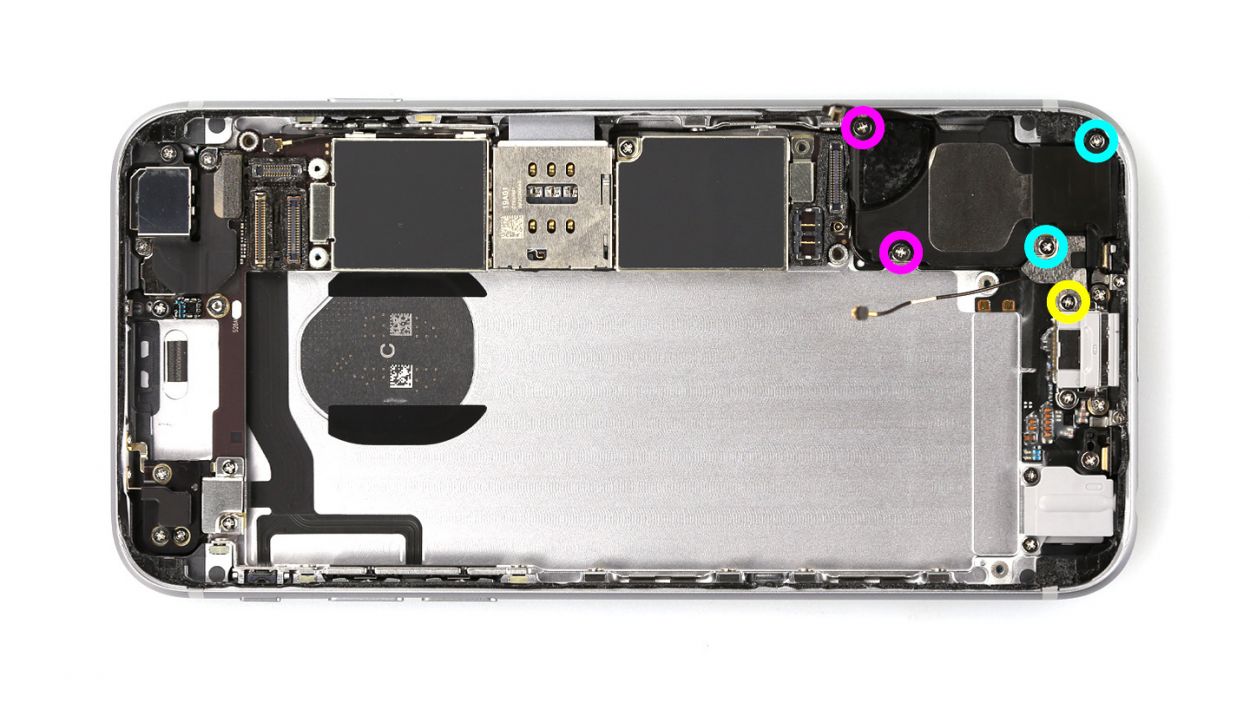
– Next up, loosen those five Phillips screws keeping the speaker snug and secure. To keep things organized, toss the screws onto different sections of your magnetic pad—this way, you’ll know exactly where to find them later! Here’s the lineup: 2 x 2.6 mm Phillips screws, 2 x 2.3 mm Phillips screws, and 1 x 3.0 mm Phillips screw.
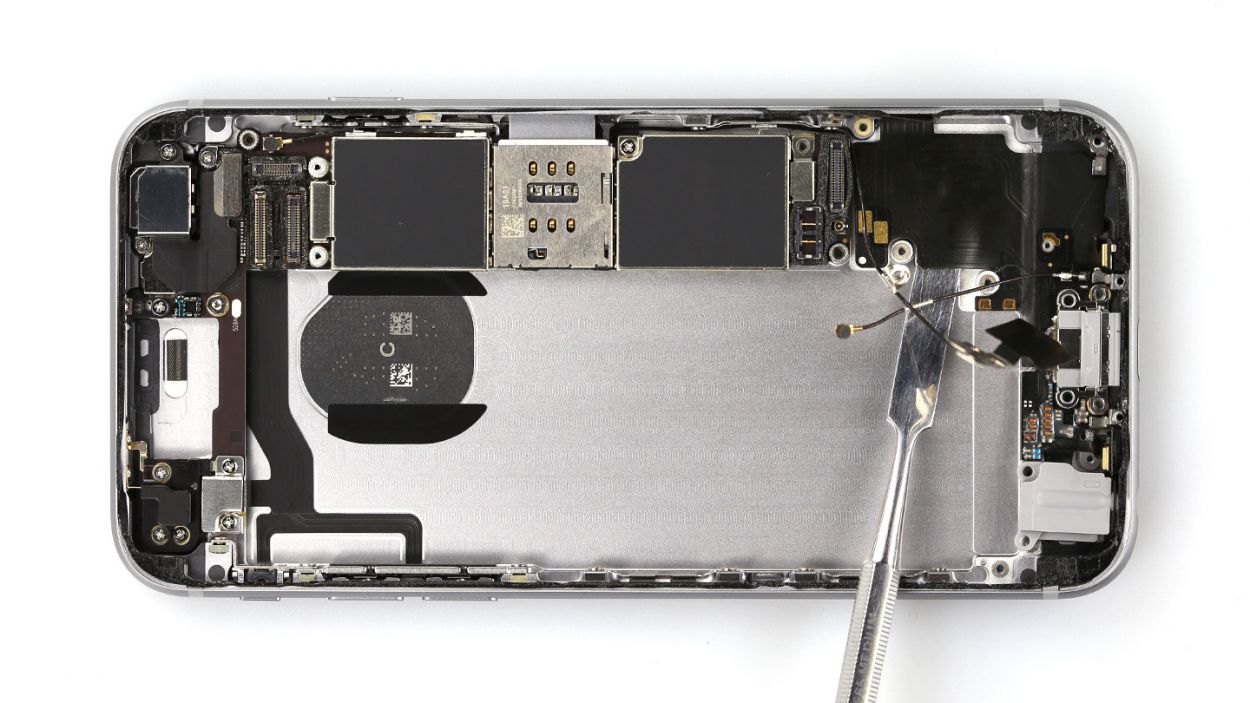
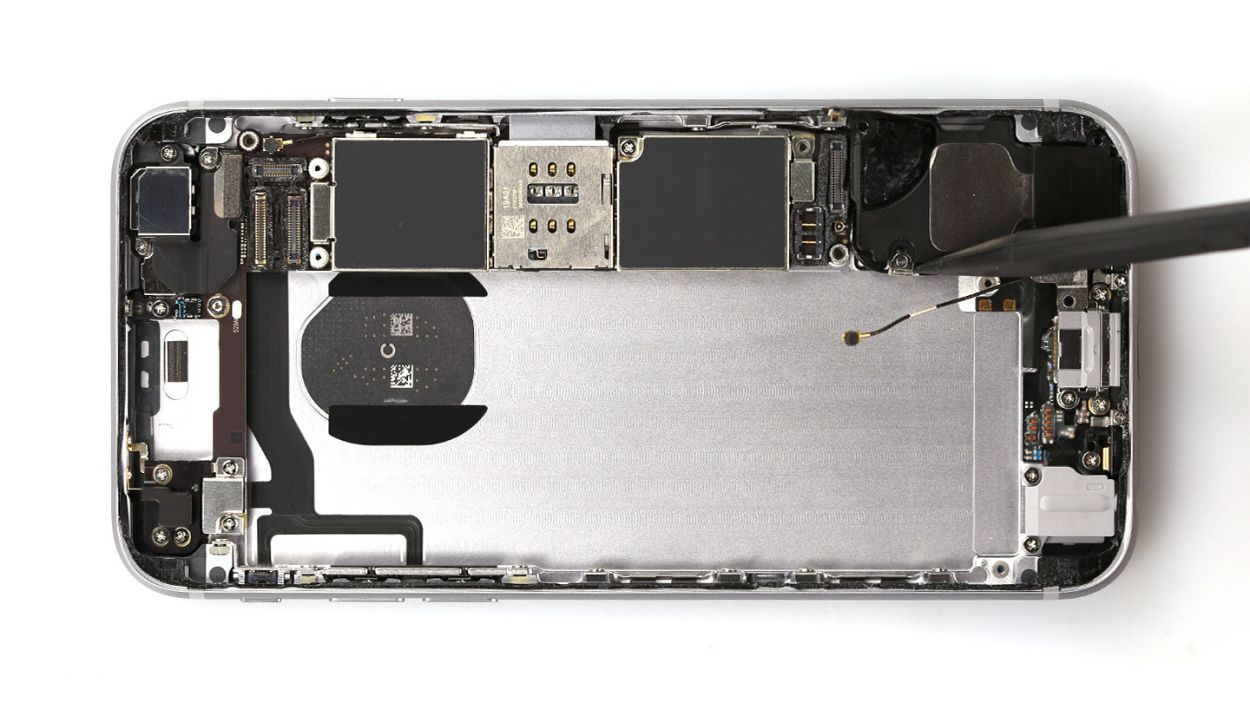
– Gently nudge the antenna cable to the side—give it a little wiggle, but be careful!
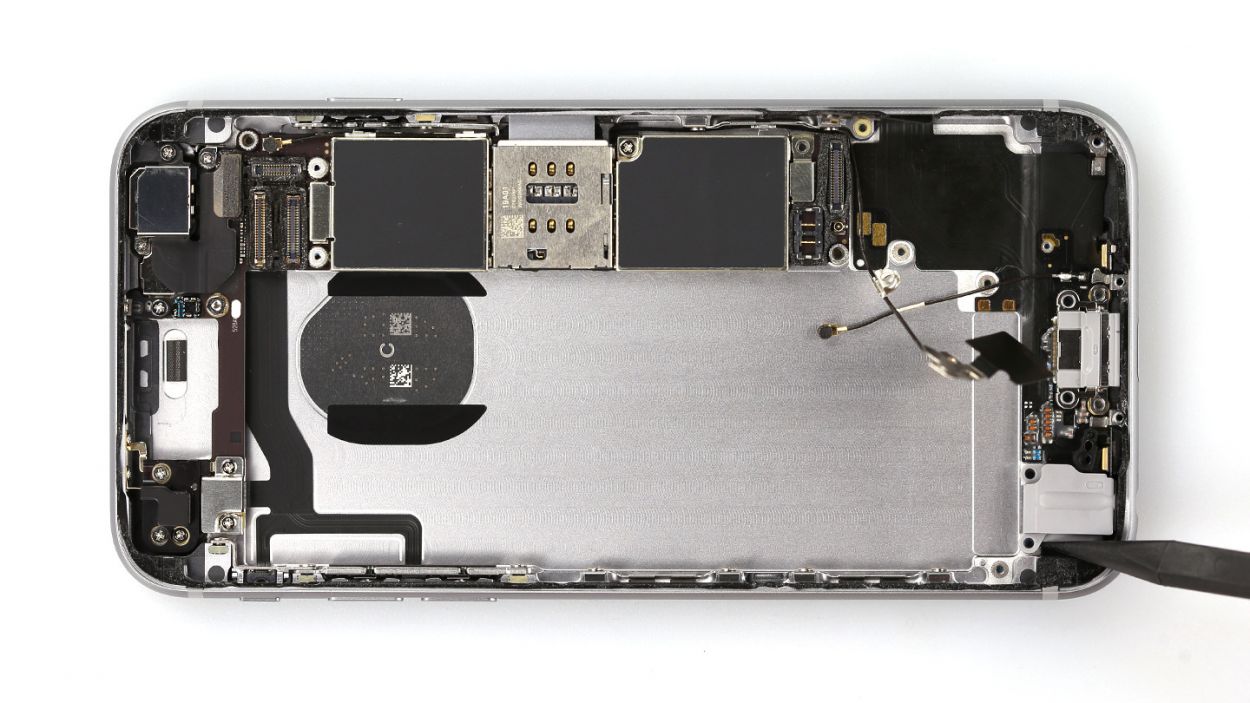
– And just like that, you can now lift out the speaker. Easy peasy!
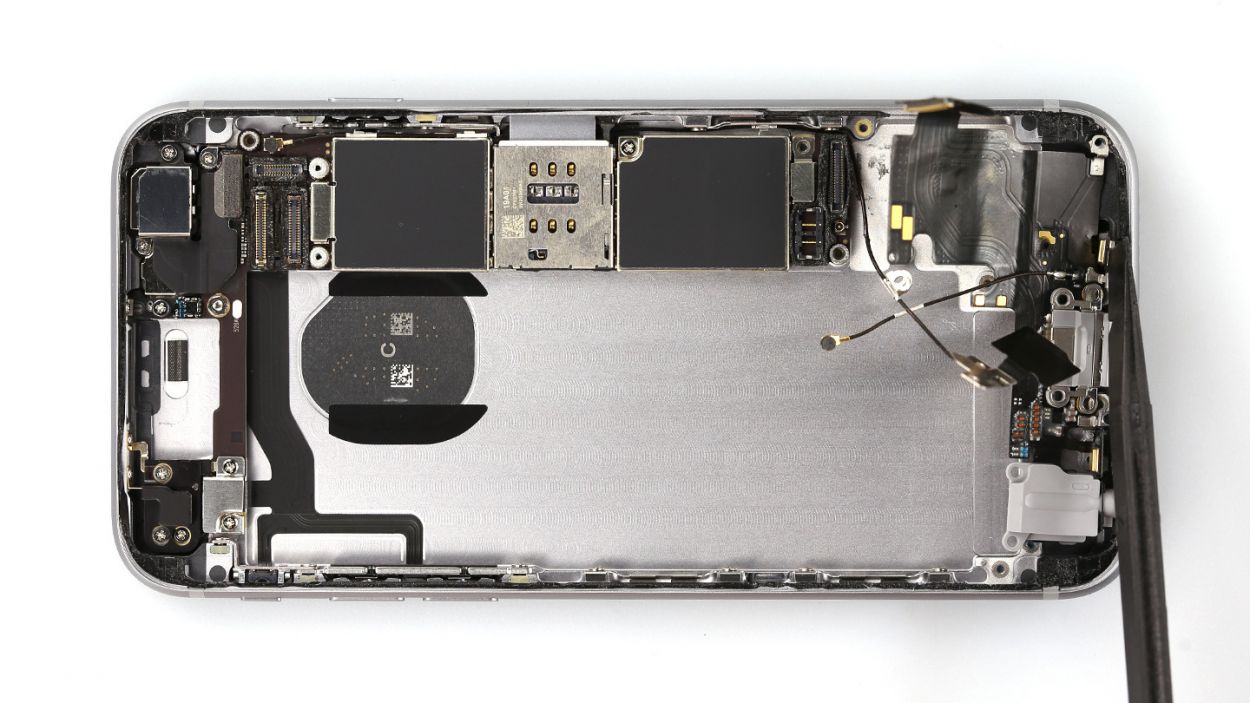
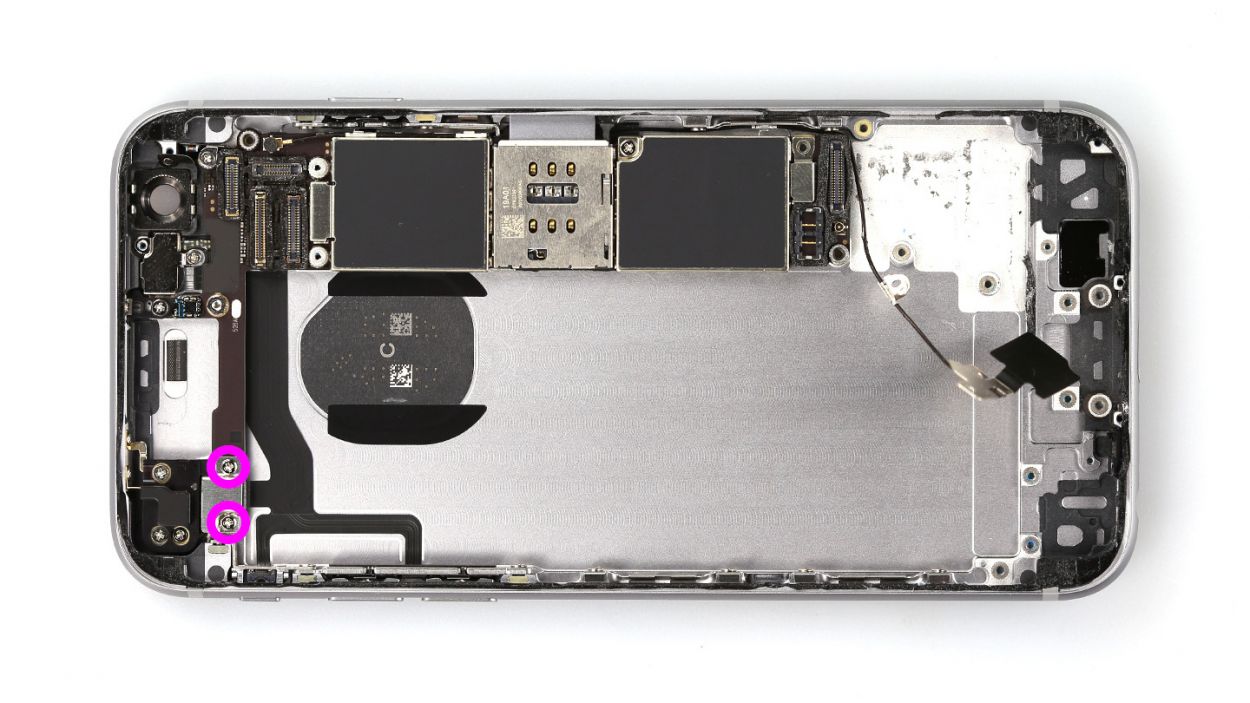
Step 10
– Time to tackle those eight Phillips screws! Once you’ve loosened them, toss them onto your magnetic mat—this way, they won’t go on an adventure without you. Arrange them just like you found them in the device, and you’ll be a screw-sorting pro! Here’s what you’re looking for: 2 x 3.0 mm Phillips screws, 1 x 3.6 mm Phillips screw, 2 x 1.4 mm Phillips screws, 2 x 1.8 mm Phillips screws, and another 1 x 3.0 mm Phillips screw.
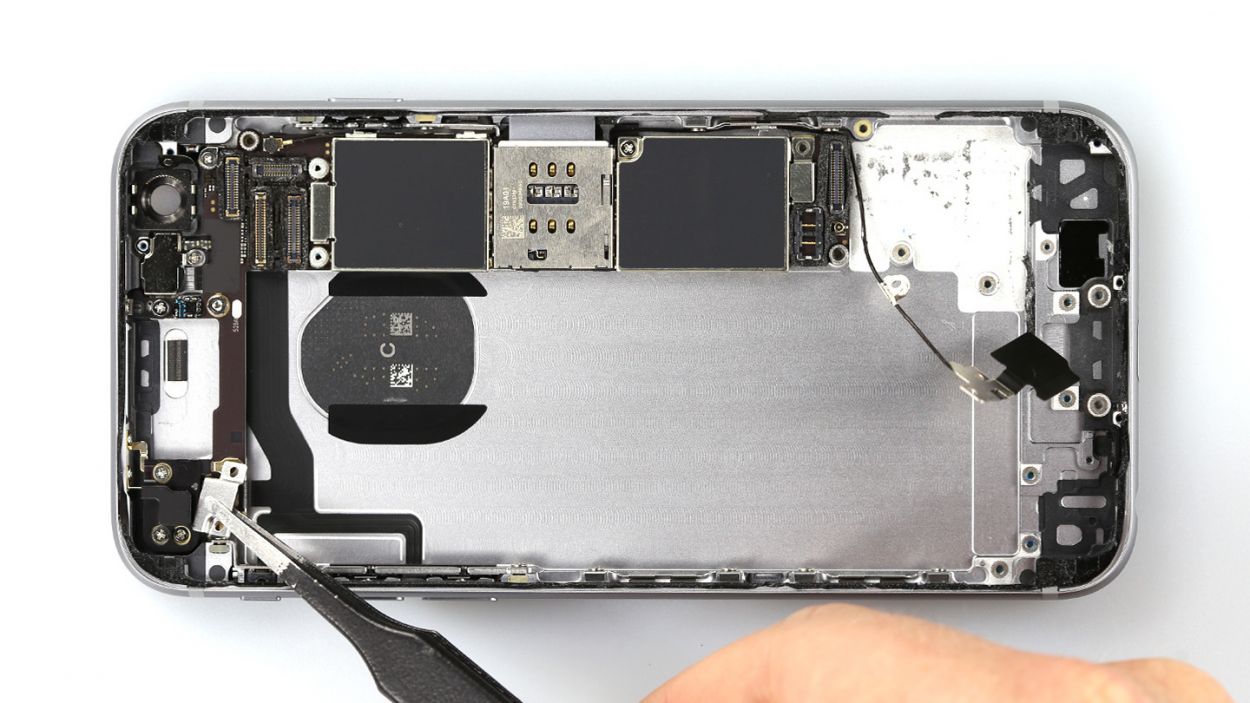
Step 11
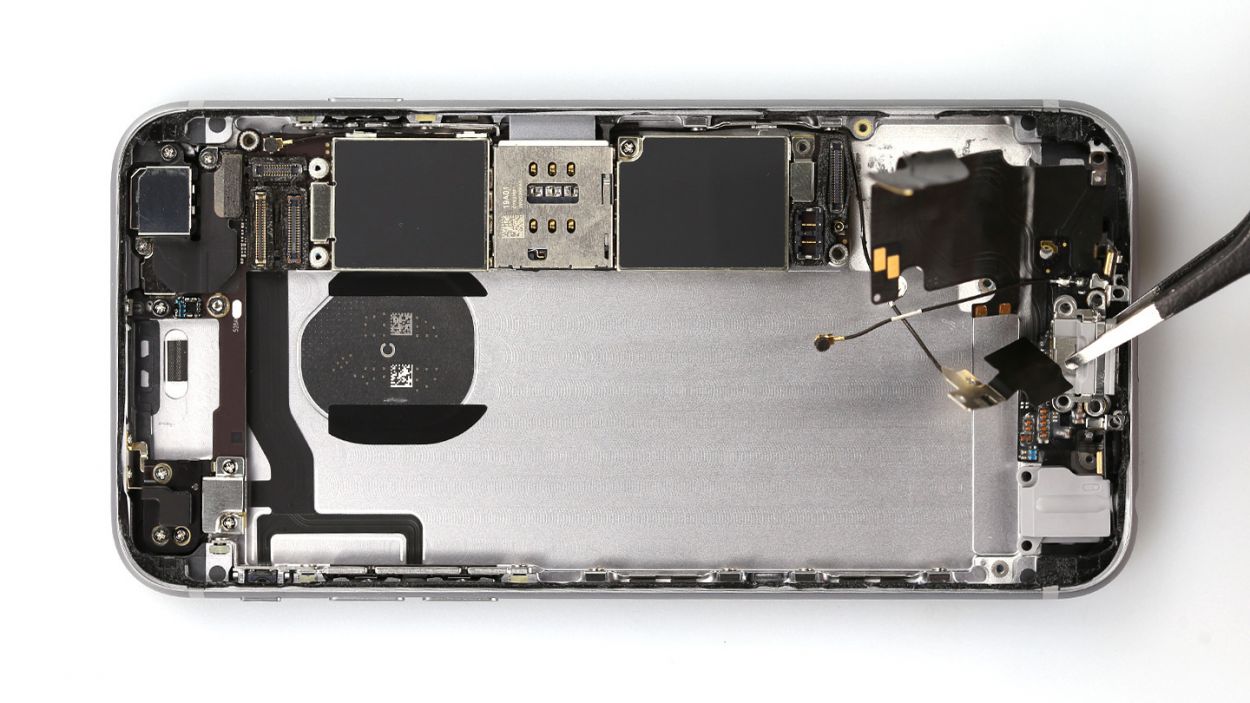
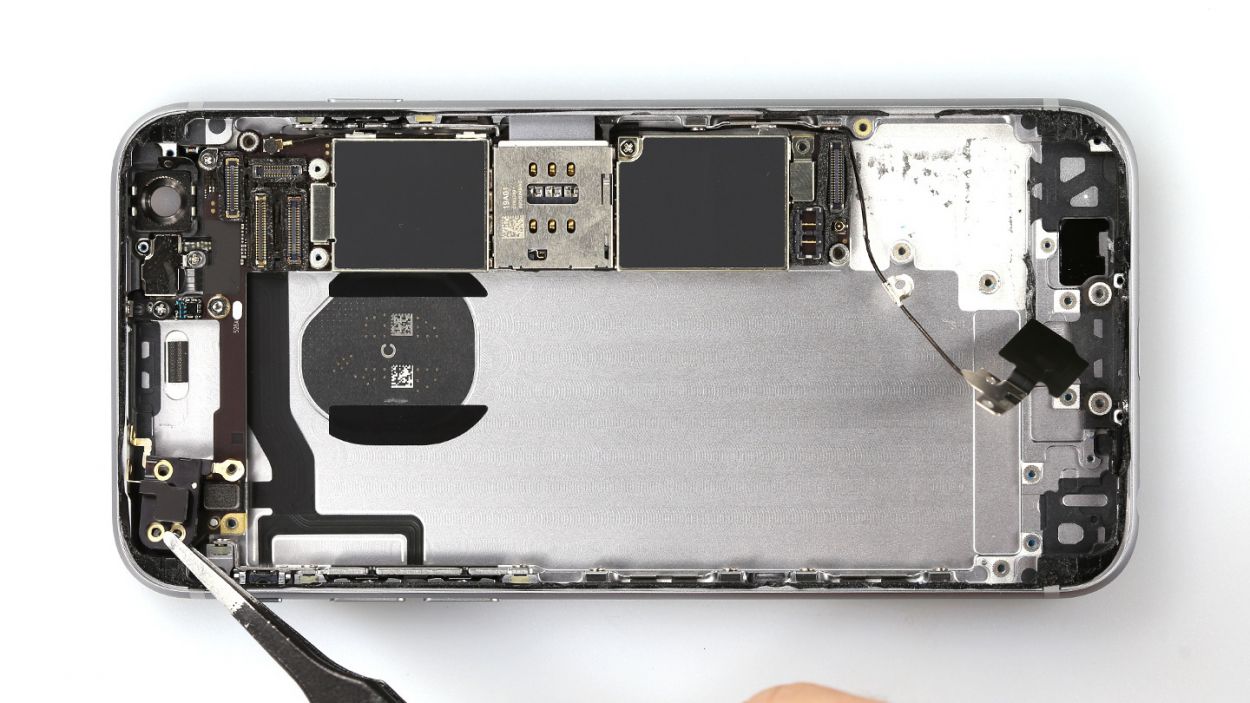
– First, let’s pop off that little black plastic piece hanging out by the headphone port. It’s just waiting for you!
– Next up, grab a laboratory spatula and slide it gently under the ribbon cable to detach it. No worries, it’s only stuck where the speaker used to be. A little hot air can really help loosen things up!
– Now, use your spatula or spudger to give the headphone port, lightning connector, and those two gold microphones a little wiggle to loosen them up.
– Finally, with a gentle touch, use your fingers or tweezers to pull off that ribbon cable. You’re doing great!
Step 12

Heads up! That shiny silver cover is just a little bit glued to the camera, so take it easy when you’re prying it off!
– First, let’s unscrew those two Phillips screws holding the camera cover in place. You’ll need one 2.0 mm Phillips screw and one 1.6 mm Phillips screw for this part.
– Next, gently unplug the camera connector. Just slide your spudger under the connector and lift it up a bit. Easy peasy!
– Now you’re all set to take the camera out of your iPhone! Just a heads up: the silver cover is a bit glued to the camera, so be careful when you’re prying it off!
Step 13
– First, let’s get those two Phillips screws loosened up that are keeping the silver connector cover snug. You’re looking for 2 x 2.3 mm Phillips screws.
– Next, gently lift off that cover and set it down on your magnetic pad along with the screws. They’ll be safe there, just chilling together!
– Now, with a little finesse, unplug the volume connector from the board using your trusty spudger. You’ve got this!
Step 14
– First, let’s loosen those five Phillips screws securing the Wi-Fi cover. Don’t forget to drop them onto your magnetic pad in the same section—it’s like giving them a cozy home! You’ll need: 2 x 2.1 mm Phillips screws, 2 x 1.3 mm Phillips screws, and 1 x 2.3 mm Phillips screw.
– Next, simply lift the cover off to remove it. You’ve got this!
Step 15

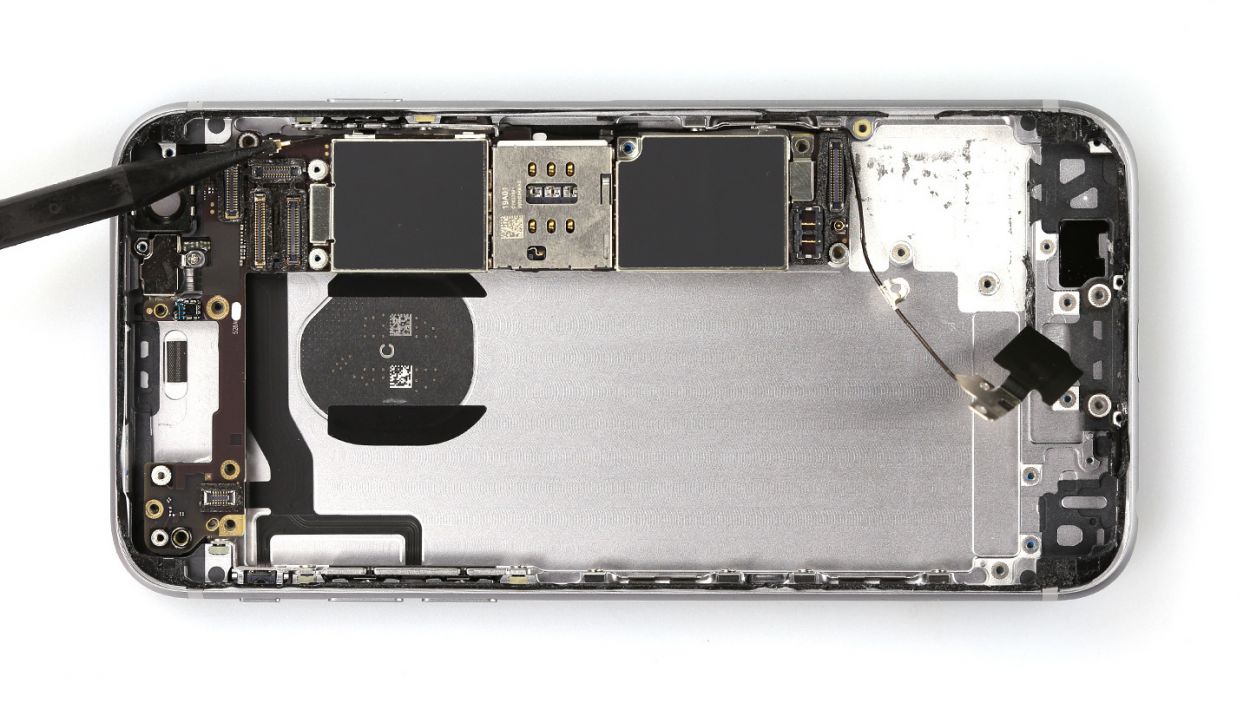
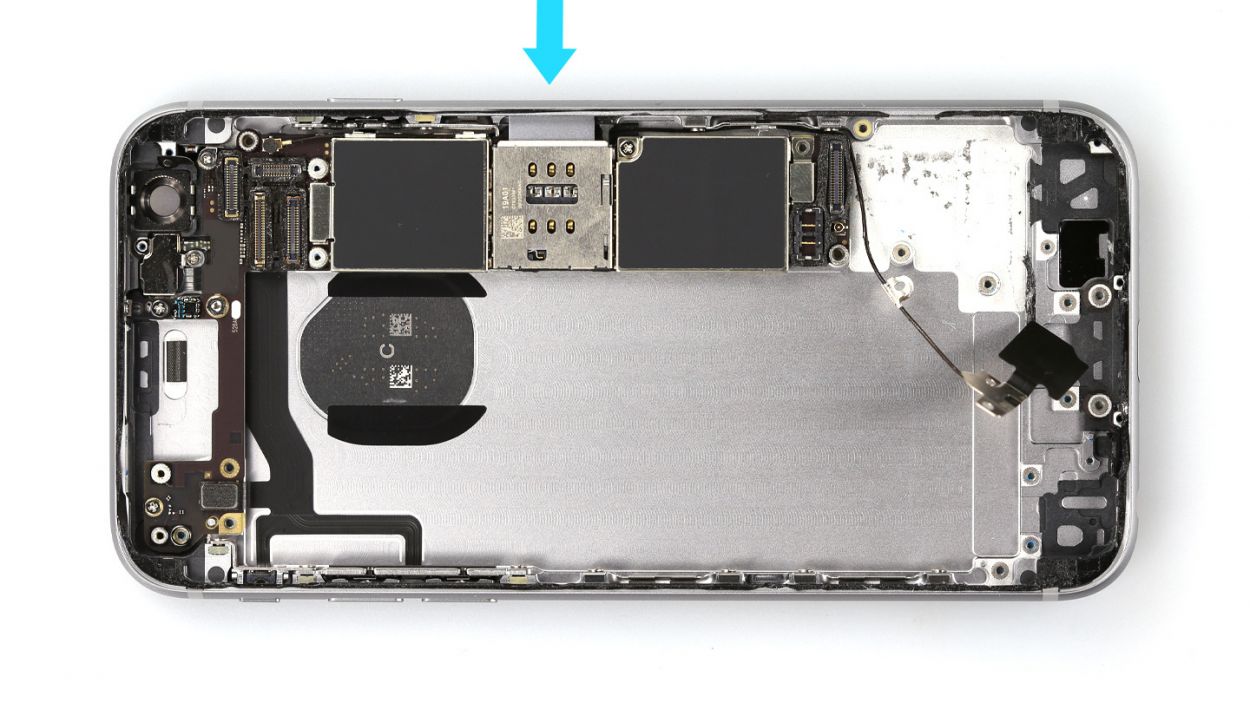
– Ready to get that SIM card tray out? Grab your SIM tool or a trusty paperclip! Just poke that tool into the tiny hole on the SIM card tray, and voilà! It should pop right out.
Step 16

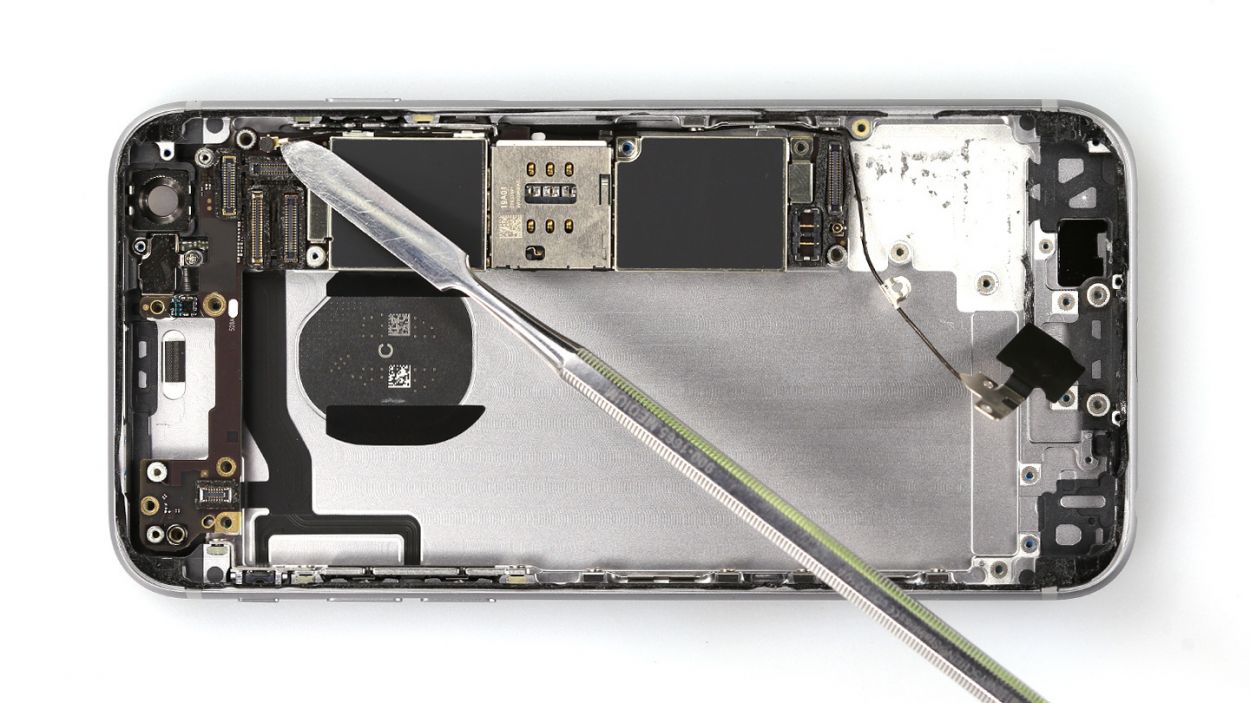
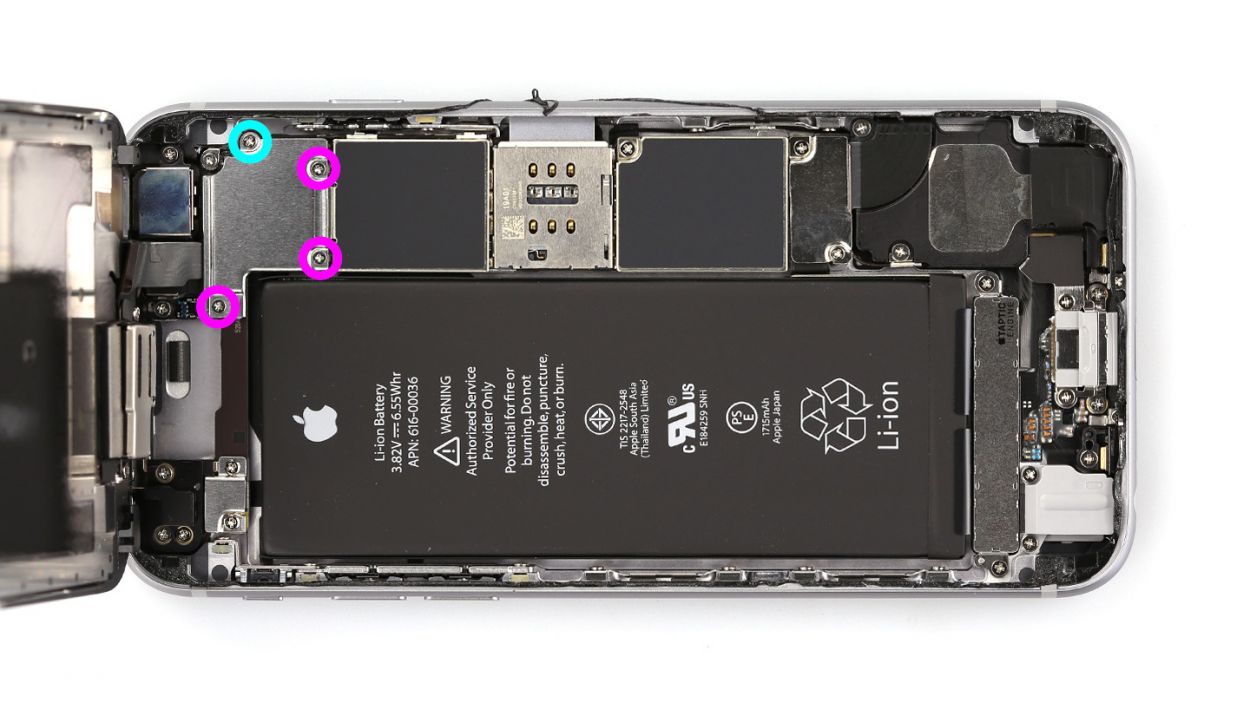
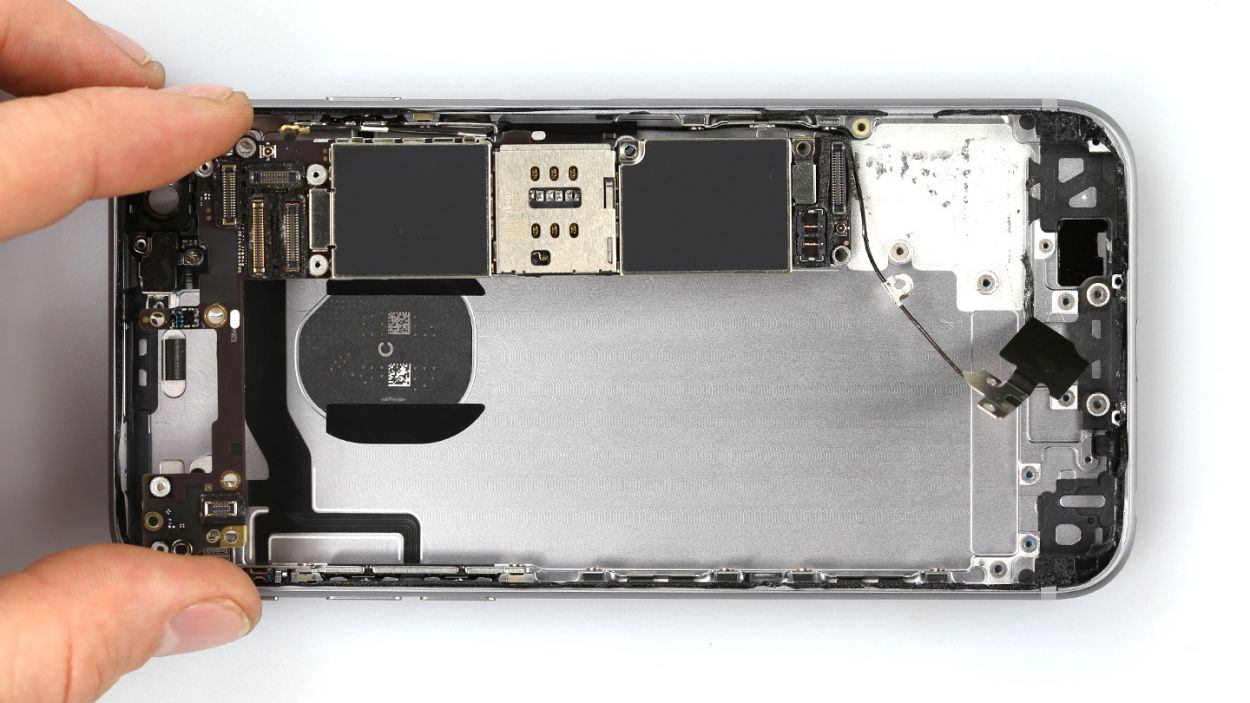
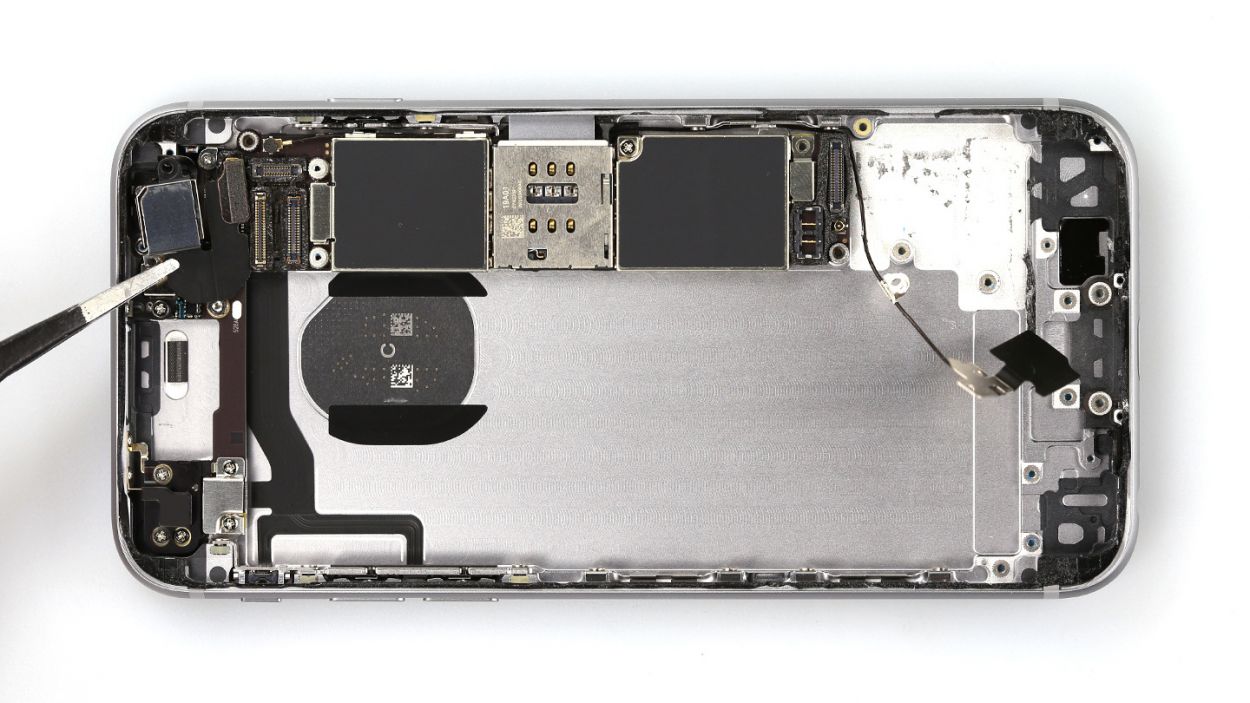
– First up, let’s tackle those six screws keeping the main board in place! You’ll need: 1 x 2.3 mm hex screw, 2 x 1.3 mm Phillips screws, 2 x 1.8 mm Phillips screws, and 1 x 2.5 mm Phillips screw. Unscrew them all with care!
– Next, gently pull out the little antenna cable. It’s just waiting to be freed!
– Now, with a steady hand, you can carefully lift out the main board. You’re doing great!
Step 17
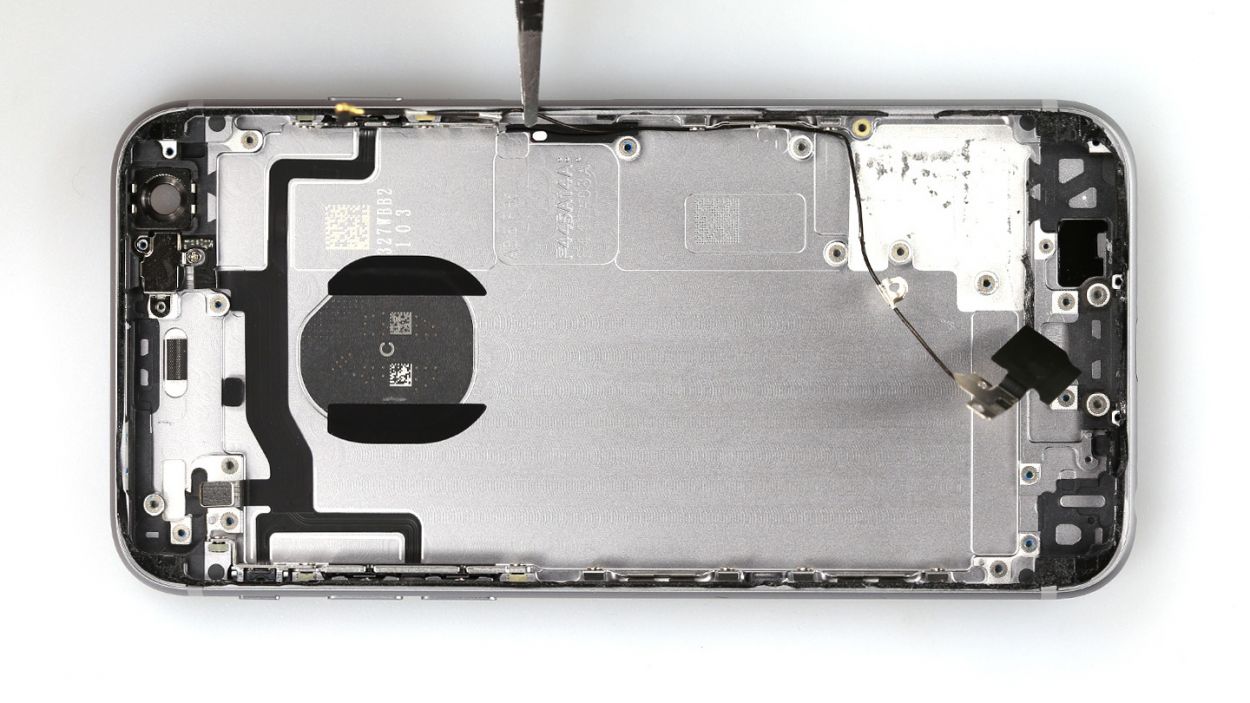
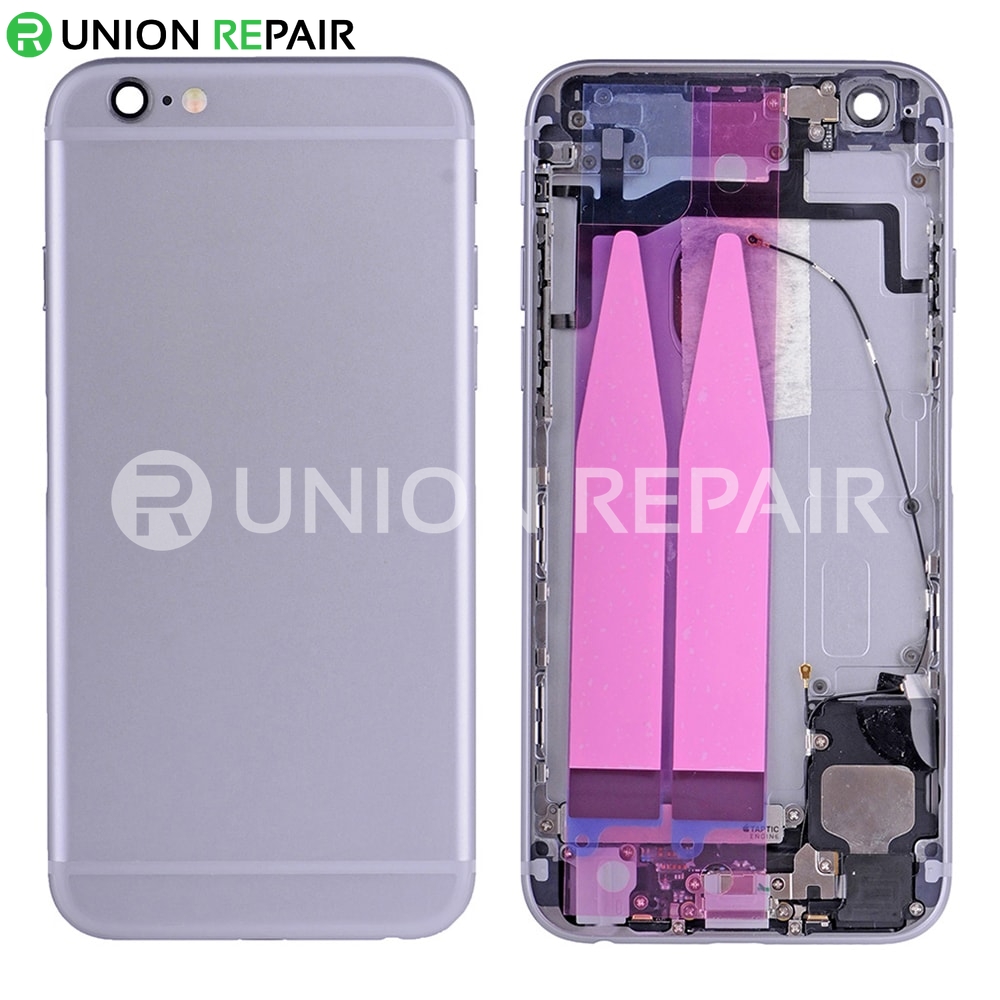
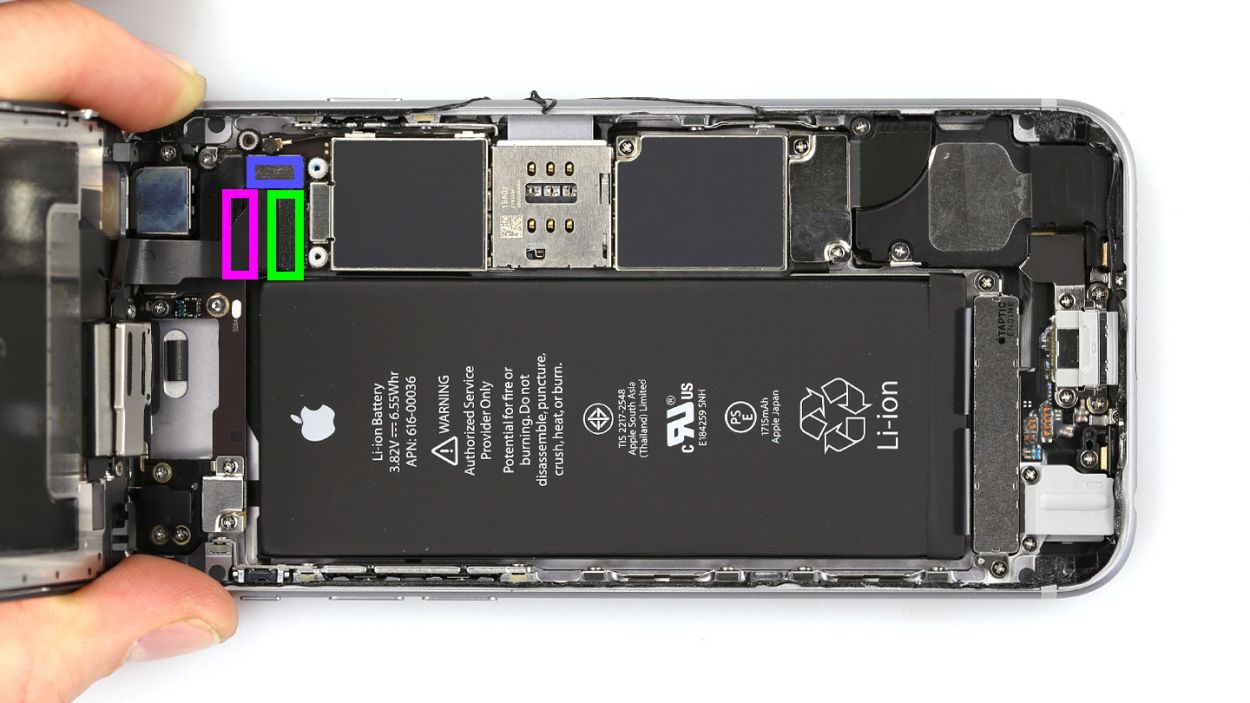
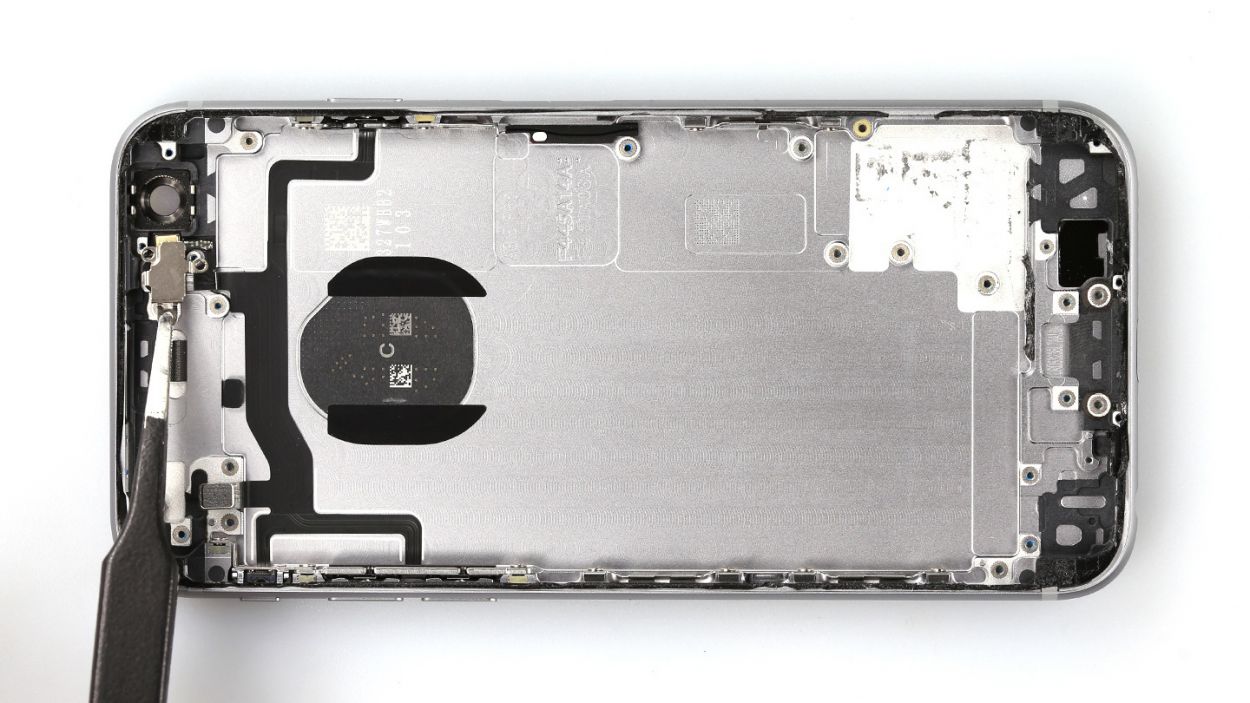
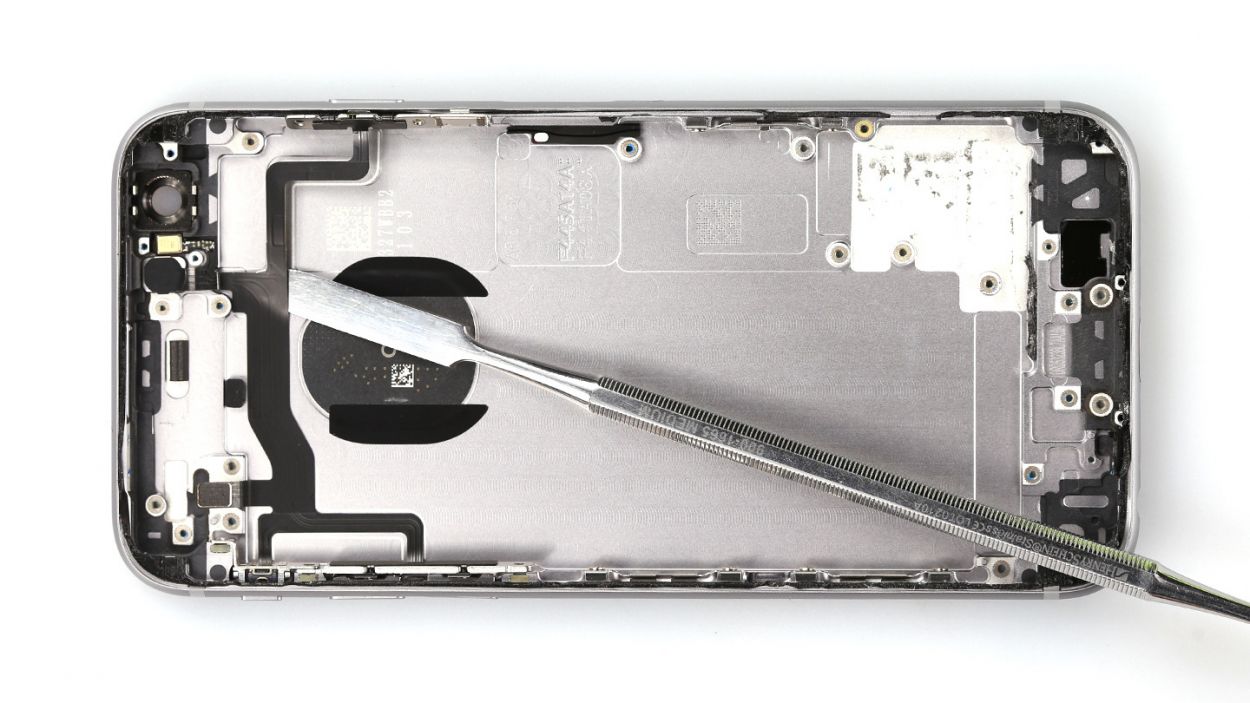
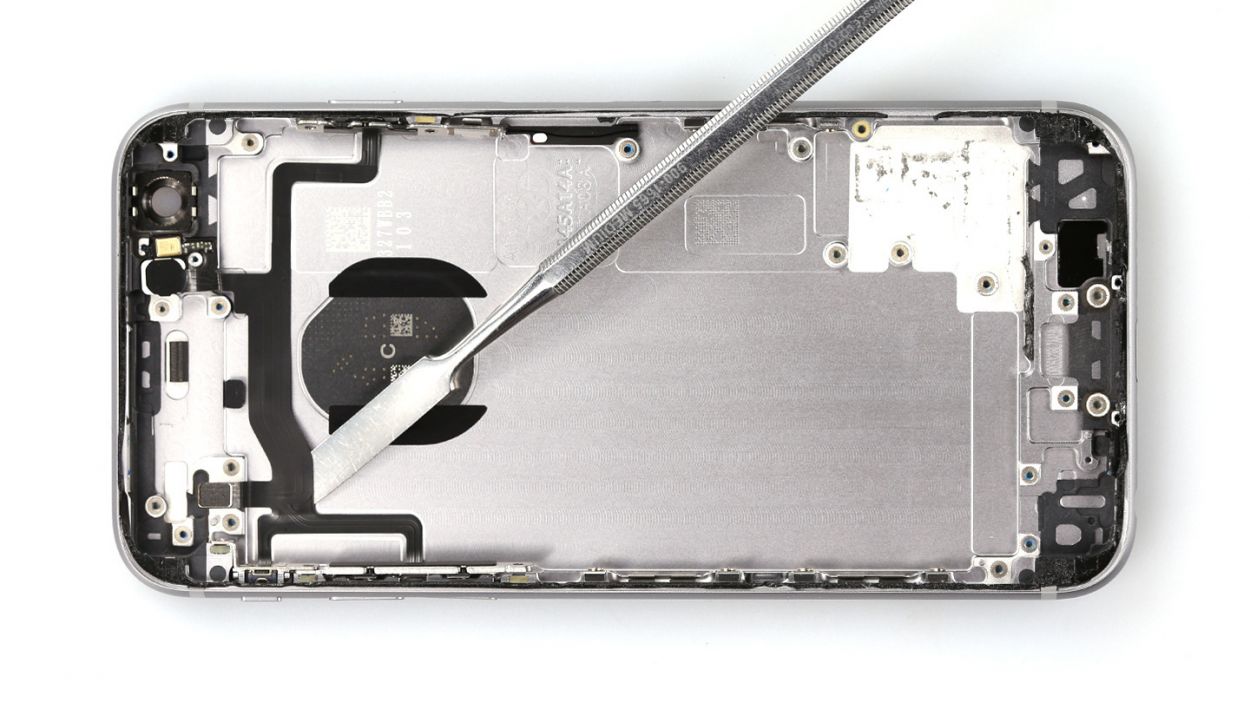
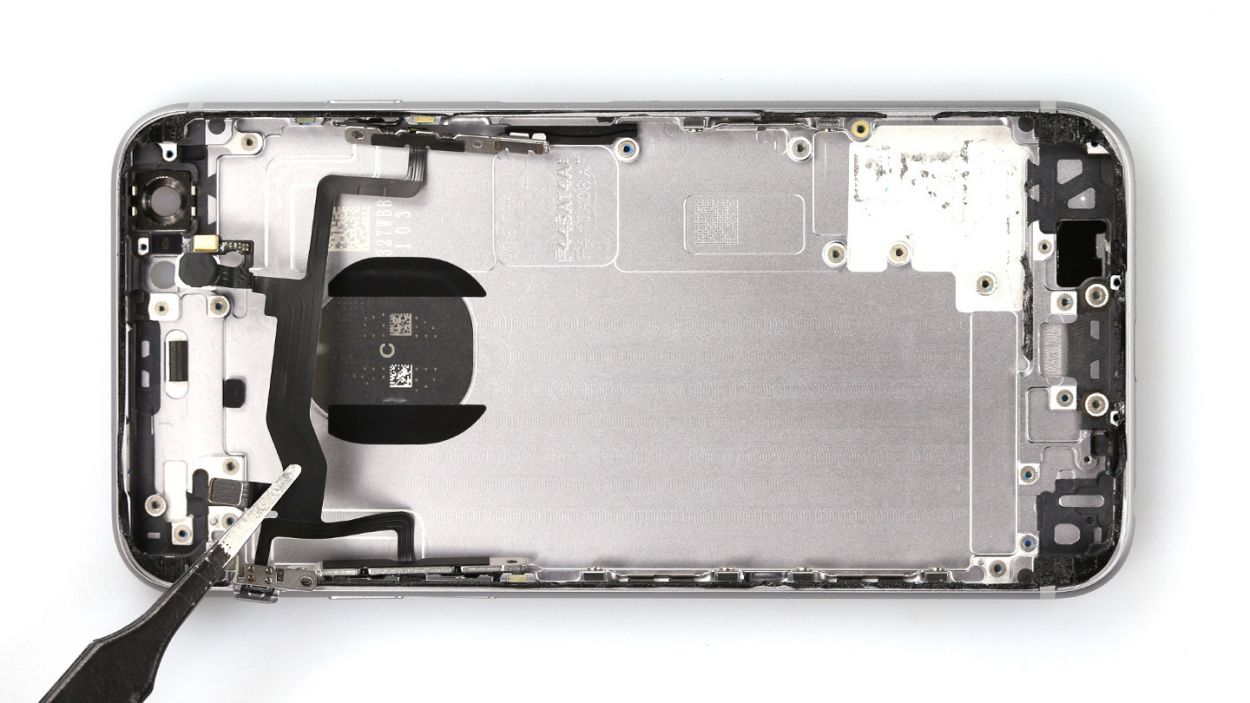
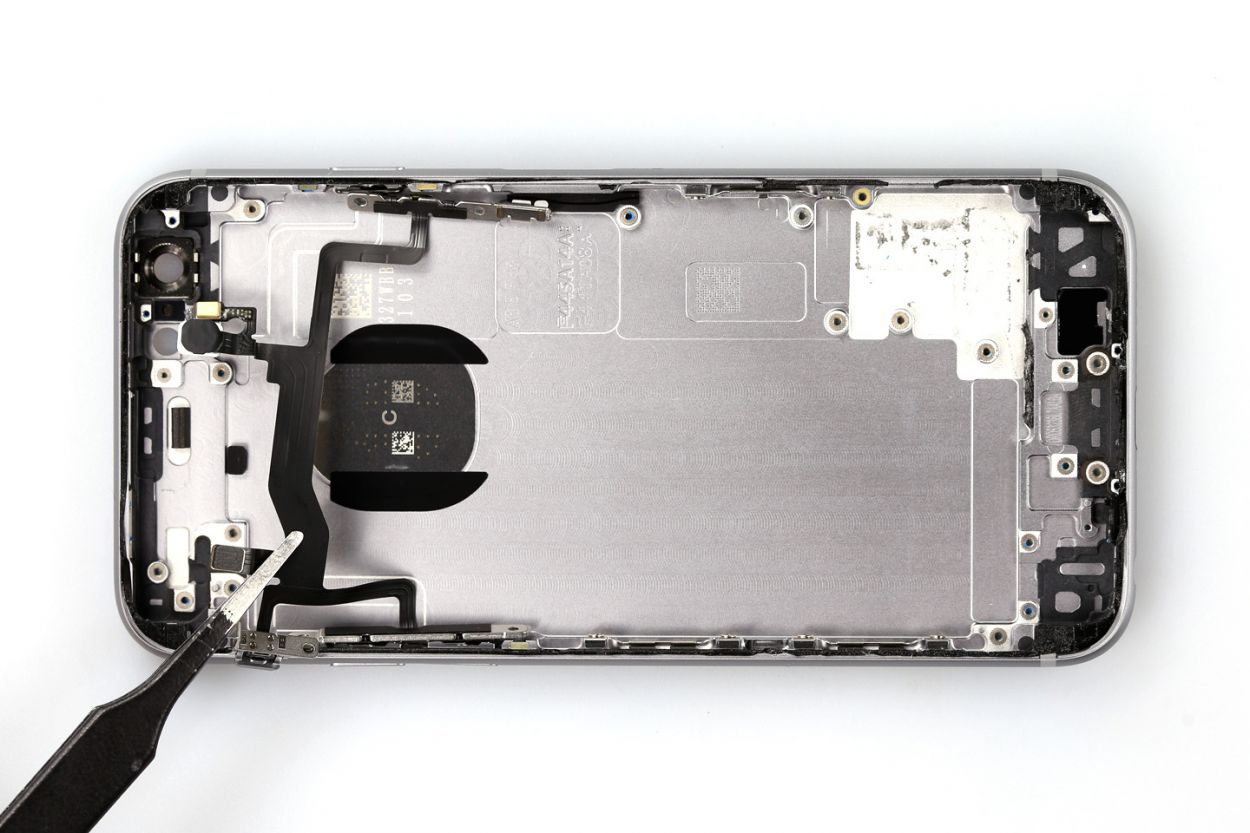
– Say goodbye to that long black antenna cable! Gently detach it from the side of the back cover and give yourself a pat on the back for a job well done!
Step 18
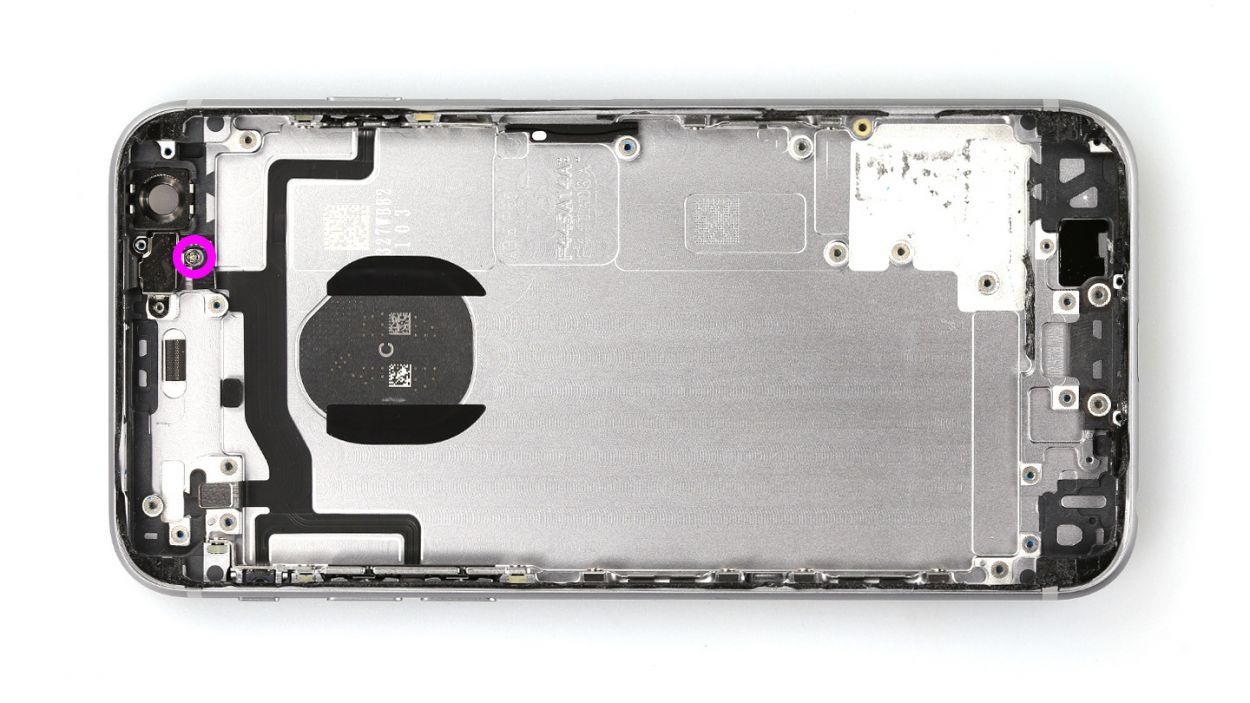
– First, let’s get that cover off by unscrewing the Phillips screw. You’re looking for one 1.2 mm Phillips screw to do the trick!
– Next up, give that flashlight cover a gentle tug and remove it. You’re on a roll!
Step 19
– Time to unscrew those five screws holding the standby/volume control cable in place! Grab your Phillips screwdriver and let’s get to it. You’ll need: 2 x 2.2 mm Phillips screws, 2 x 2.5 mm Phillips screws, and 1 x 1.9 mm Phillips screw.
– A little hot air goes a long way! Warming up the cable first makes it much easier to pull off.
– Slide your spatula gently under the ribbon cable and detach it from the base with care.
– And just like that, the cable is free! You’re doing awesome!
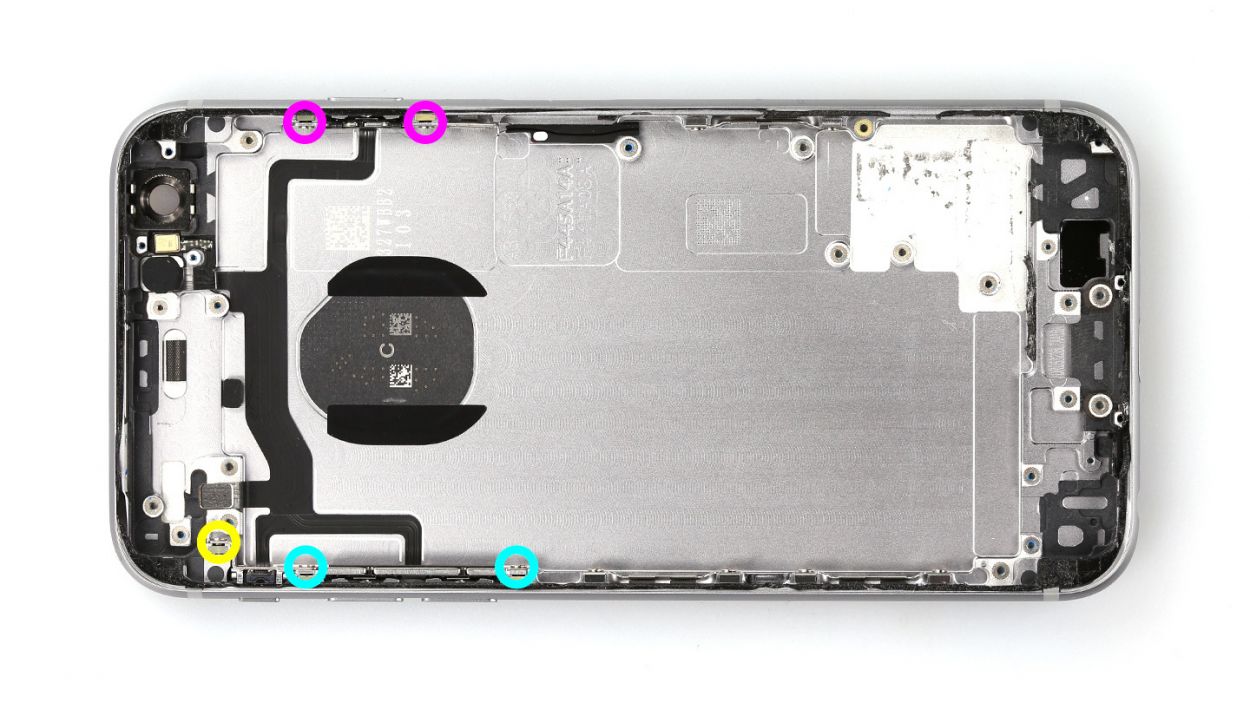
Step 20
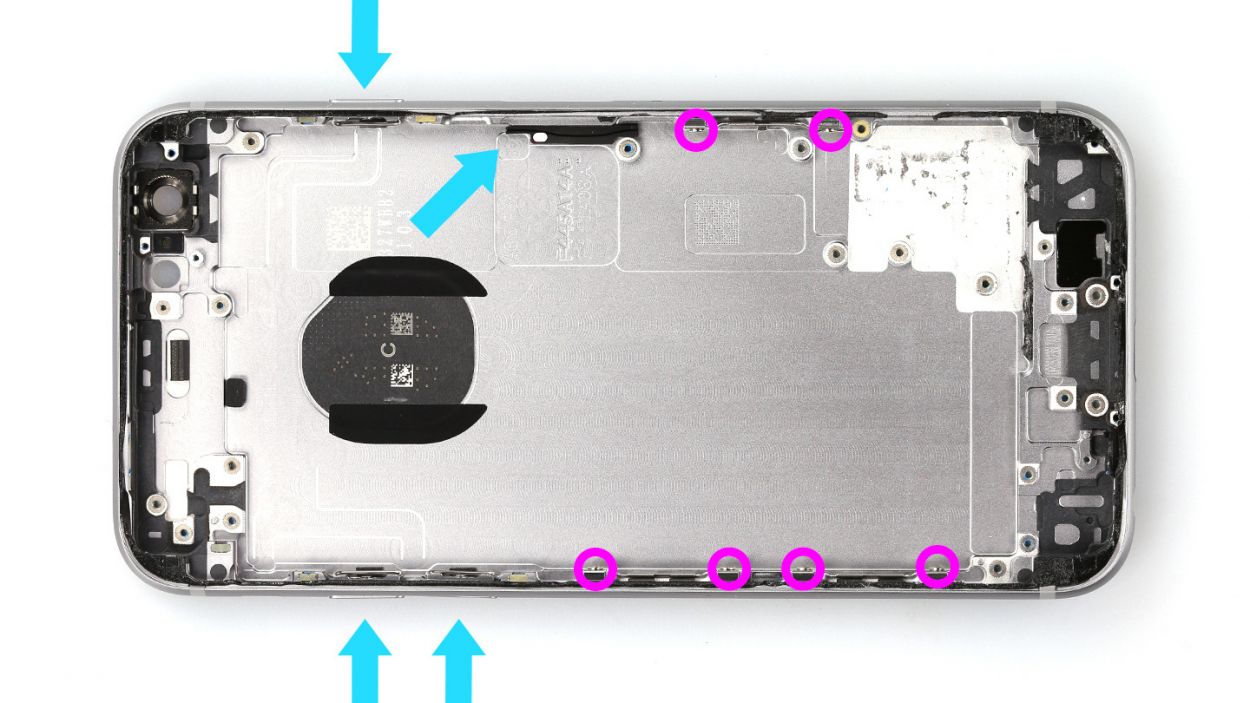
– Each of the three retaining brackets is held in place by two Phillips screws. Go ahead and unscrew them, and pop them onto your magnetic pad so they don’t wander off! You’ll be looking for those 6 x 1.8 mm Phillips screws.
– Now, don’t forget to move over all those little parts that didn’t make it into the new back cover yet. Let’s get everything in its right place!
Step 21

Ensure that the cable is laid out flat and not twisted or bent!
– Alright, it’s time to place that standby/volume control cable back where it belongs! Secure it with those five Phillips screws: 2 x 2.2 mm, 2 x 2.5 mm, and 1 x 1.9 mm. Tighten them up nice and snug!
– Once you’ve tightened everything, give those buttons a little test drive! Check their sensitivity and adjust the screws if they need a bit of tweaking.
Step 22


– Alright, let’s pop that cover back on and give it a good twist! Make sure to secure it with that 1 x 1.2 mm Phillips screw so everything stays snug as a bug!
Step 23

Make sure that cable is snugly nestled in the plastic duct, just like a cozy blanket!
– Place that black antenna cable back where it originally hung out. Make sure it snuggles perfectly into the plastic duct like it’s getting a cozy blanket!
Step 24


– Time to slide that main board back into its cozy spot where it belongs!
– Next up, plug in the contacts for the standby/volume cable set and the antenna cable. They’re eager to connect!
– Don’t forget to attach that little antenna cable – it’s a tiny but mighty part of the team!
– Now, let’s secure everything in place with those five Phillips screws. Tighten them up and you’re golden!
Step 25
Step 26


– Now, let’s get that Wi-Fi antenna in place and secure it like a pro! You’ll need to fasten it down with three screws: two 2.1 mm Phillips screws, one 1.3 mm Phillips screw, and one 2.3 mm Phillips screw. You’ve got this!
Step 27


– First, connect that little piece to the board—it’s like a reunion for your parts!
– Now, let’s get that shiny silver cover on there and secure it with a couple of screws. You’ll need two 2.3 mm Phillips screws for this step!
Step 28

– Time to slide that camera back into its cozy spot and plug in its connection cable. It’s like tucking in a friend!
– Now, let’s give that camera cover a warm welcome back! If it’s still hanging out with the camera, just screw it in place and you’re all set!
Step 29

– Pop that little black piece of plastic right over the microphone like a pro!
– Now, let’s get those eight screws tightened up to secure the lightning connector. You’ll need: 2 x 3.0 mm Phillips screws, 1 x 3.6 mm Phillips screw, 2 x 1.4 mm Phillips screws, 2 x 1.8 mm Phillips screws, and another 1 x 3.0 mm Phillips screw. You got this!
Step 30


– Nestle that shiny new speaker right back into its original spot!
– Be sure to properly install the antenna cable with its little metal ring on the speaker, and return the silver contact point to its rightful place.
– Now, grab your Phillips screwdriver and tighten those screws like a pro!
– Finally, don’t forget to put the black adhesive tape back on the antenna cable, securing it snugly on the speaker.
Step 31
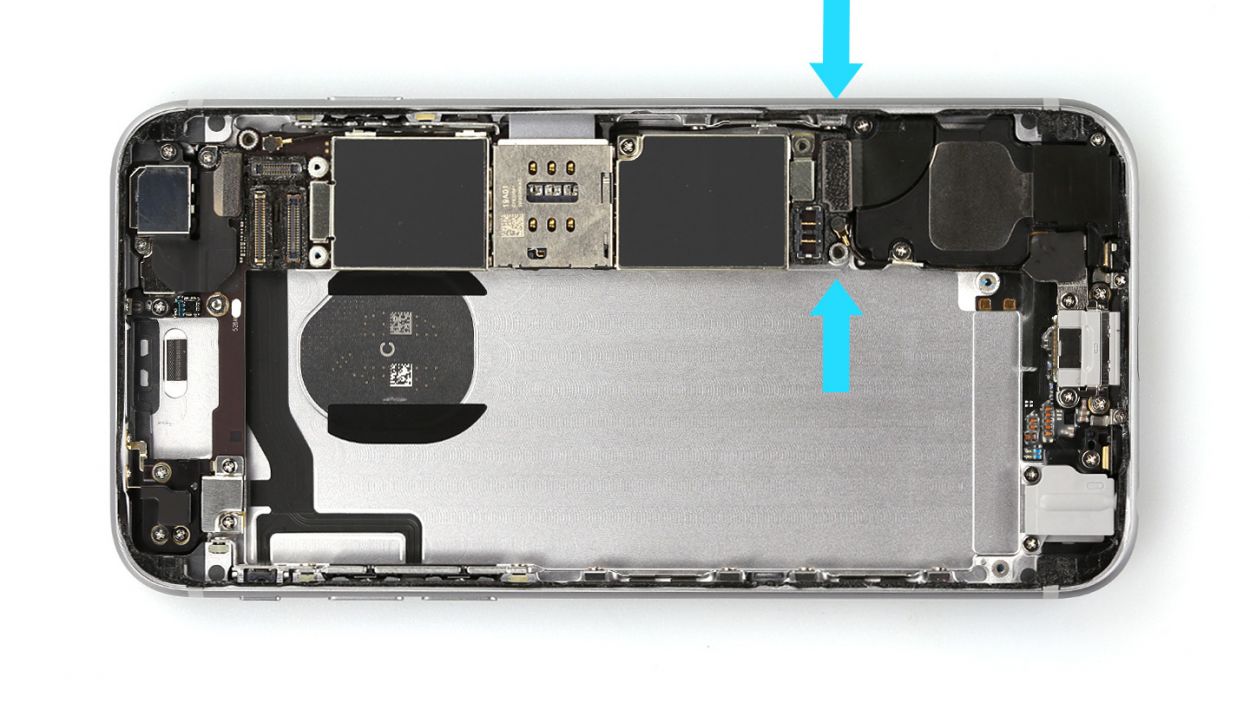
– It’s time to reconnect those connectors for the antenna and the lightning connector! Just give them a little nudge back into place, and you’ll be all set!
Step 32
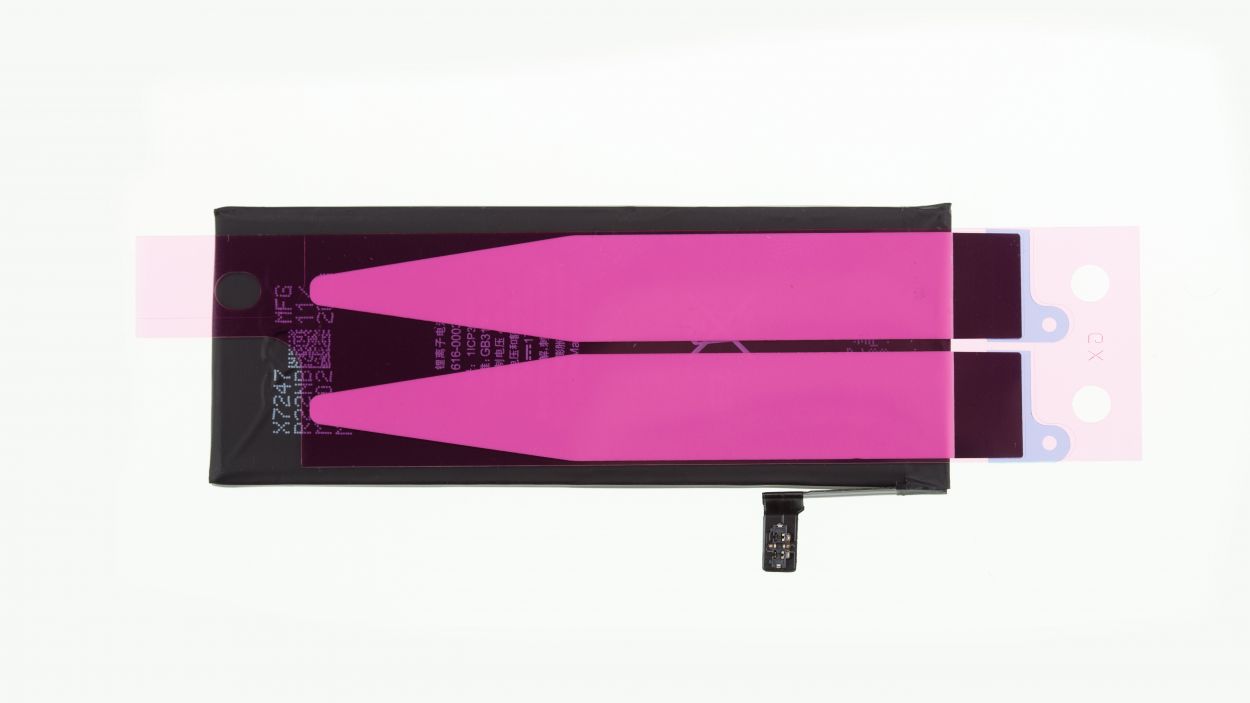
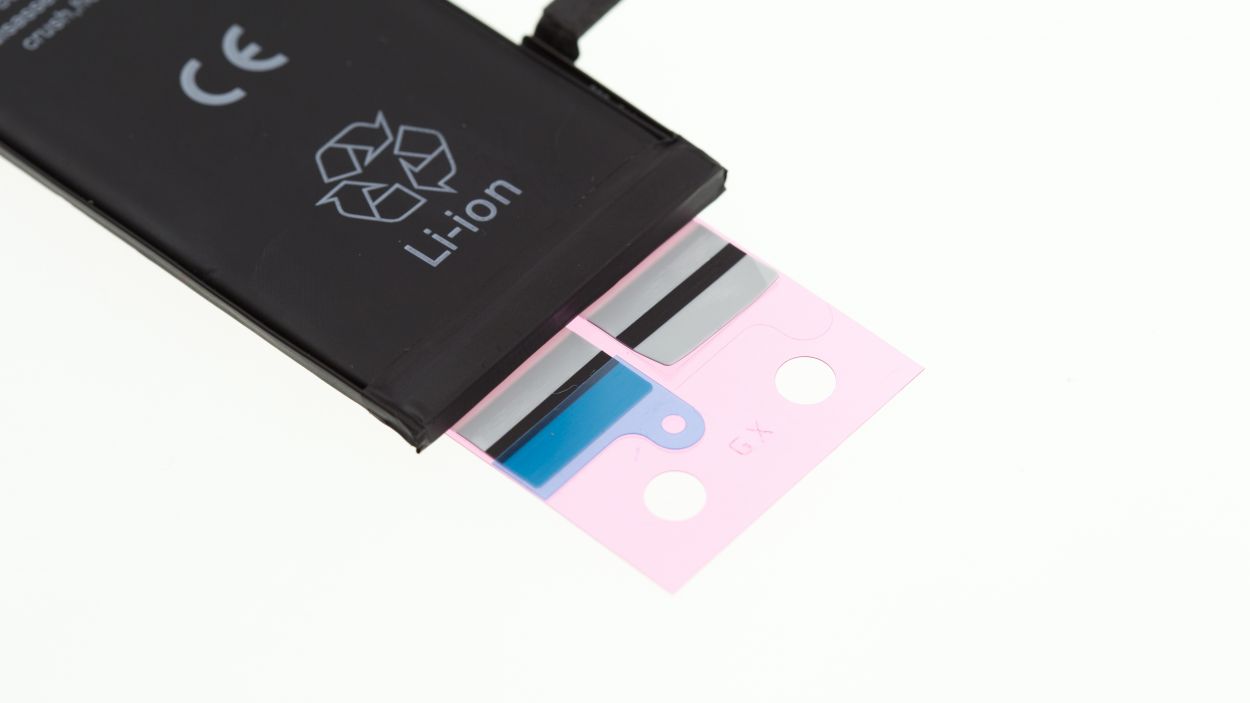
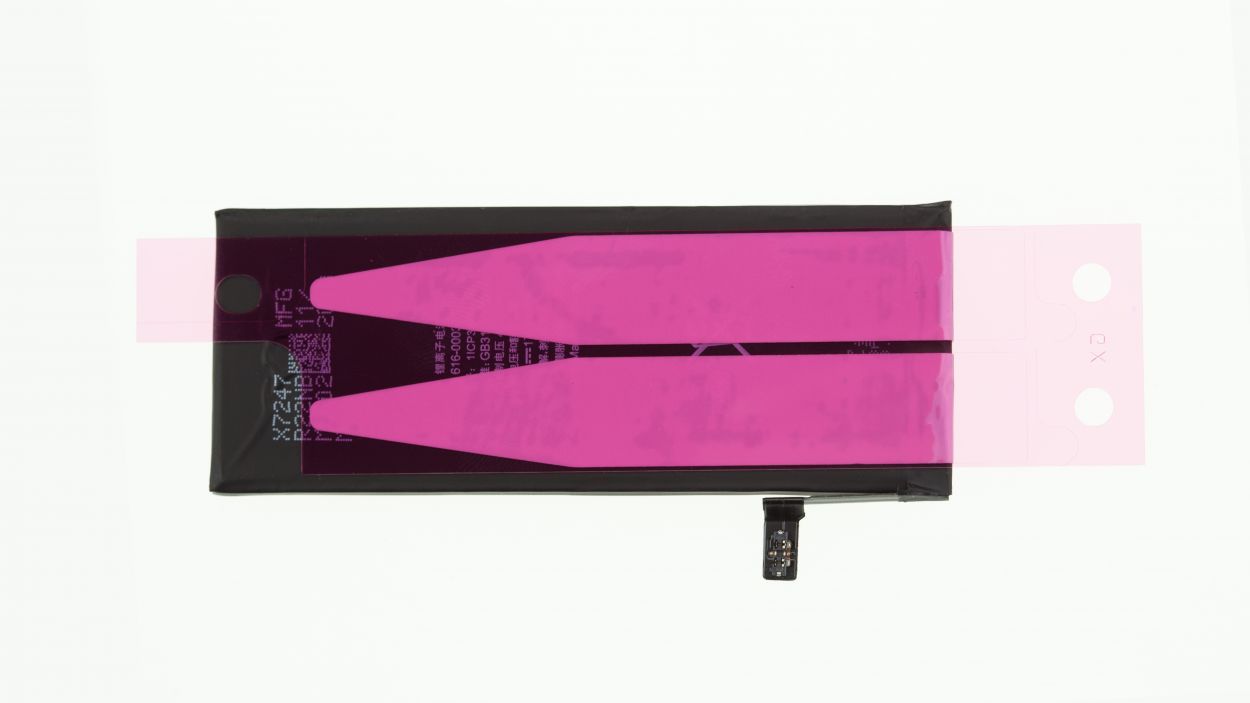

– First things first, peel off that snazzy blue protective film from your fresh adhesive+strips+iPhone+6s&crid=1TJIMMAJSUJUZ&sprefix=repair+tools%2Caps%2C165&linkCode=ll2&tag=salvationrepa-20&linkId=c486487cf454ce8edd6f5beefab4110f&language=en_US&ref_=as_li_ss_tl’>adhesive strips. It’s like unwrapping a gift!
– Now, give that exposed adhesive surface on the back of the battery a solid press. Ensure those adhesive strip tabs are sticking out like they’re ready for a high-five!
– Next up, gently peel off the tiny blue films from the black tabs and stick them right on the edge of the battery. They’re ready to help out!
– Finally, remove the last protective film and get ready to rock and roll!
Step 33
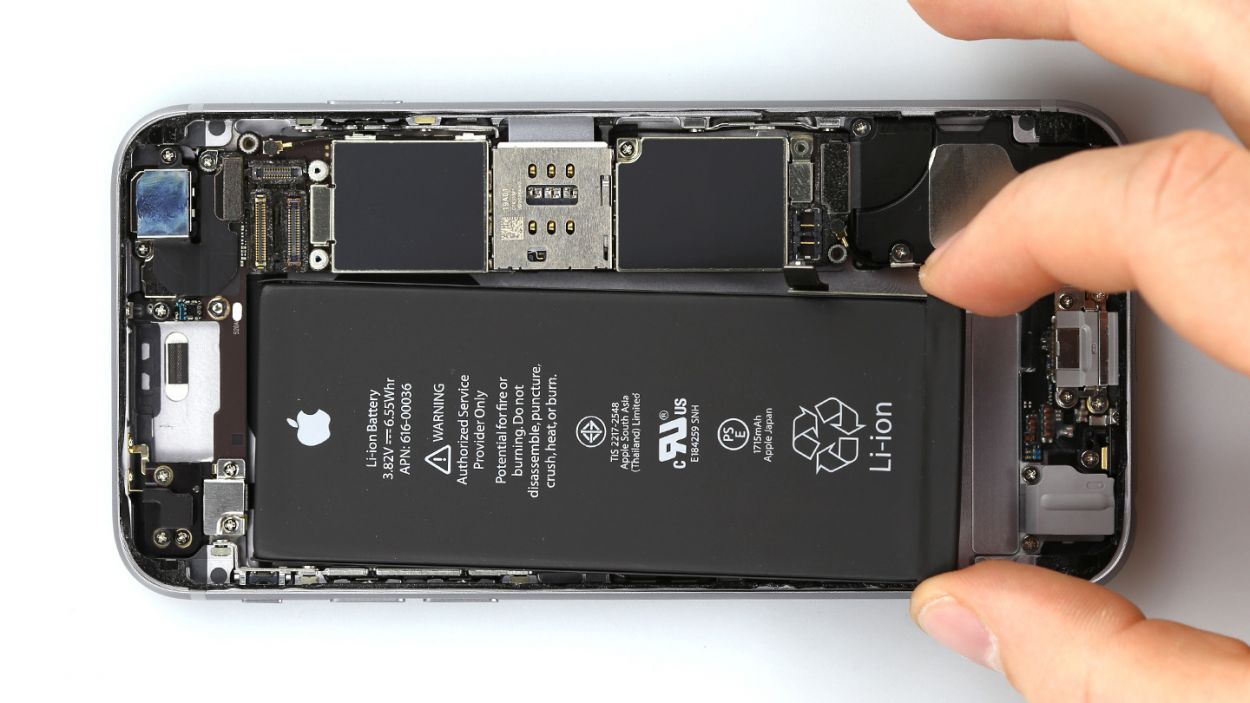
– Alright, it’s time to slide that battery back into your iPhone and reconnect the connector. You’re almost there!
Step 34

– Time to bring that taptic engine back home! Just place it right where it belongs.
– Secure it with those trusty little screws again—two 1.5 mm Phillips screws should do the trick!
Step 35


If those display connectors are feeling a bit shy and not properly connected, you might see some funky stripes or find parts of the touchscreen acting a little rebellious! Let’s make sure everything is snug and secure!
– Let’s start by connecting those display connectors! It might take a few tries, so keep at it. Just be gentle and avoid bending the connectors. You’re dealing with the Front camera/sensor/earpiece/ambient microphone, Touch ID cable, and the Display.
– Once everything is snug, fire up your iPhone! Check that the LCD, touchscreen, proximity sensor, front camera, and earpiece are all functioning. If you see stripes or if parts of the touchscreen are feeling a bit rebellious, it’s a sign those connectors need a little more love!
– Now, let’s put that connector cover back on and give it a good twist to secure it tight. You’ll need 3 x 1.3 mm Phillips screws and 1 x 2.9 mm Phillips screw for this part.
Step 36

– Let’s get that battery connector plugged in! You want to make sure it’s snug and secure.
– Next, grab that shiny silver cover plate and pop it on. Don’t forget to screw it down tight with one 2.9 mm Phillips screw and one 2.2 mm Phillips screw. You’re almost there!
Step 37
– Gently fold down that display like a pro! Make sure the edge of the upper screen, where those pesky cables are connected, clicks into place just right. Now, with a steady hand, push the display down towards the home button along the edge until it fits snugly in its frame.
Step 38
– Alright, time to tighten up those two pentalobe screws at the bottom of your enclosure! Grab your 2 x 3.8 mm pentalobe screws and give them a snug twist. You’re almost there!
Step 39

Hey there! Just a little heads up: when you take the battery out, your iPhone might decide to throw a little time party and reset itself to 1:00 a.m. on 1/1/1970. Make sure to set the time right, or you might find it tricky to connect to the cellular network!
– Time to sync up your iPhone with iTunes or hop onto a WLAN network and chill for a bit while the time gets back on track.
– Take out the SIM tray, give that SIM card a little love, and pop it back in.
– Flip the flight mode on and off to give your device a refreshing reboot.