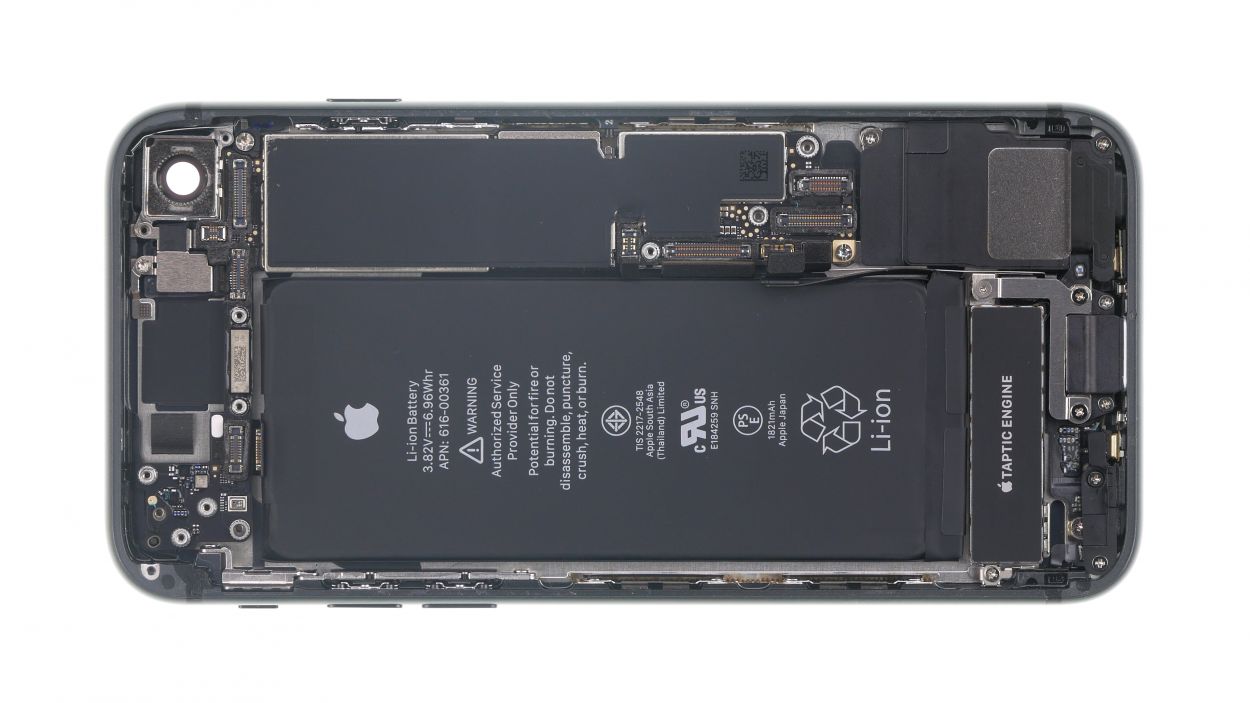
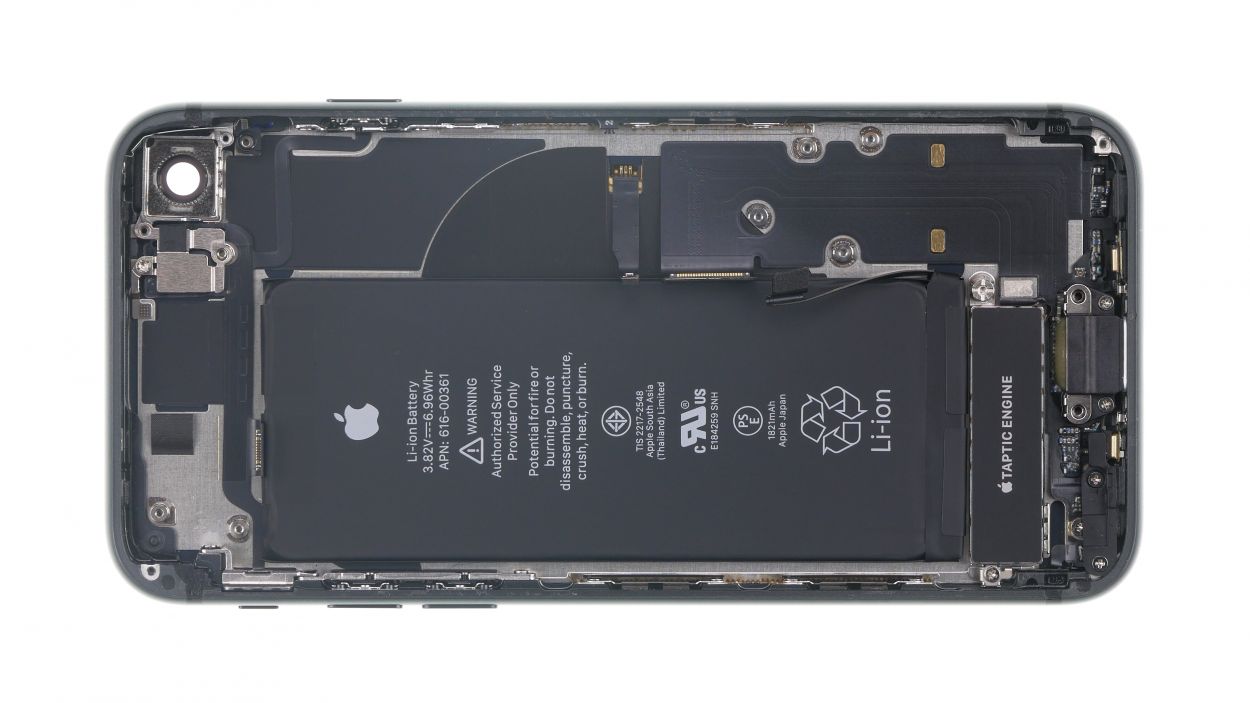
iPhone 8 Battery Replacement Guide: Step-by-Step DIY Tutorial
Duration: 45 min.
Steps: 35 Steps
Do you find yourself in this situation? Then it’s time to replace the weak battery in your iPhone 8. This guide shows you the best way to replace the battery yourself.Without pressure and with patience you will master the replacement of your battery and enjoy new battery power again.Good luck with the repair! Do you find yourself in this situation? Then it’s time to replace the weak battery in your iPhone 8. This guide shows you the best way to replace the battery yourself. Without pressure and with patience you will master the replacement of your battery and enjoy new battery power again. Good luck with the repair!
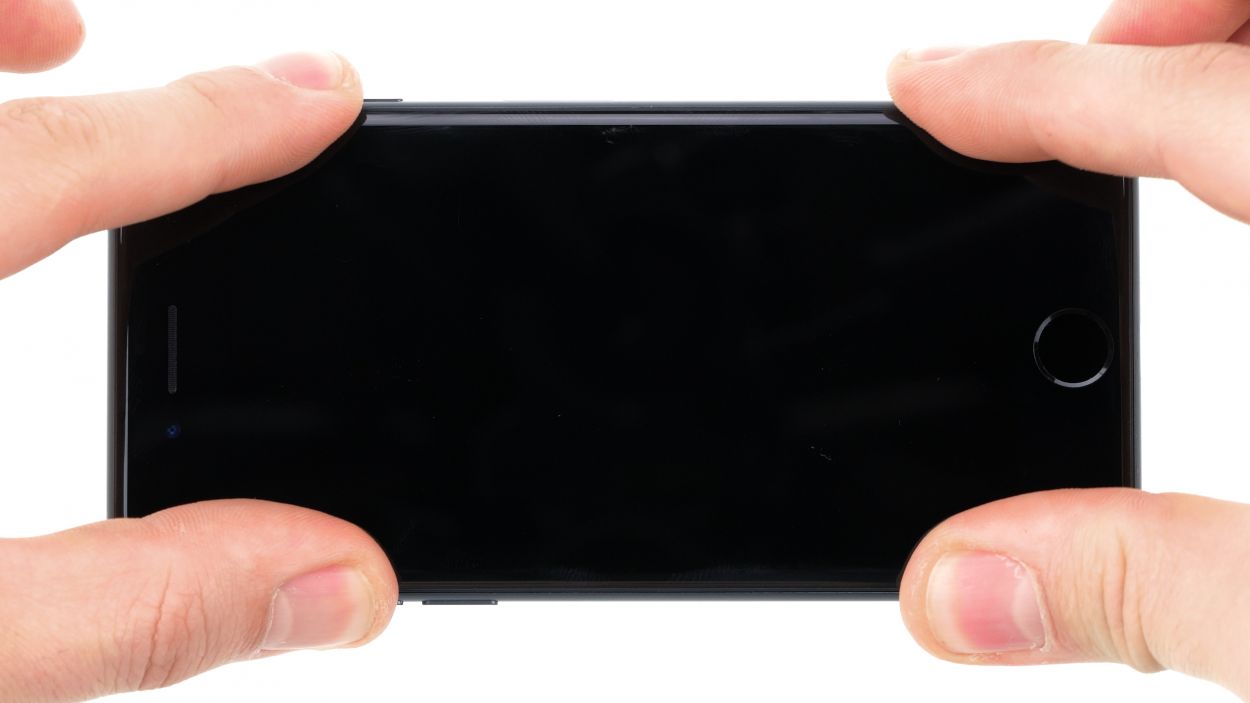
Step 1
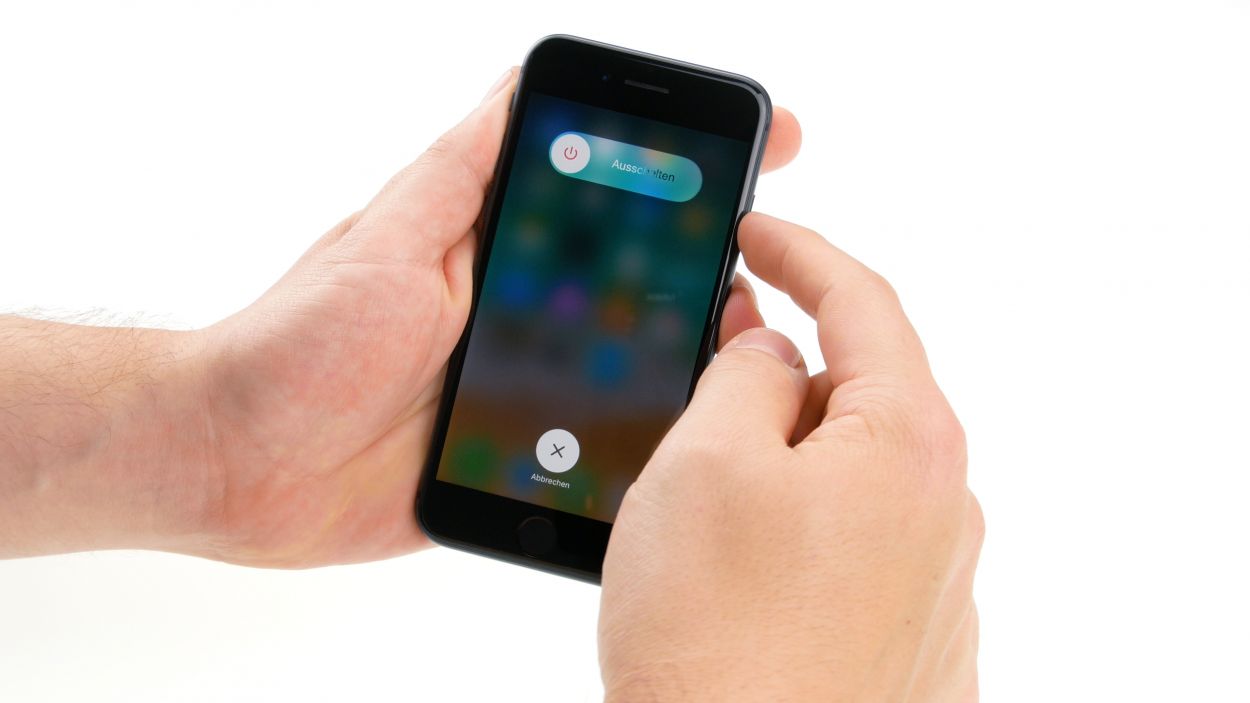
– Turn your iPhone off completely to protect it from a potential short circuit. To do this, press the standby button for about three seconds until the slider “Turn off” appears on the screen.
– Swipe the slider from left to right and wait until your iPhone has completely shut down.
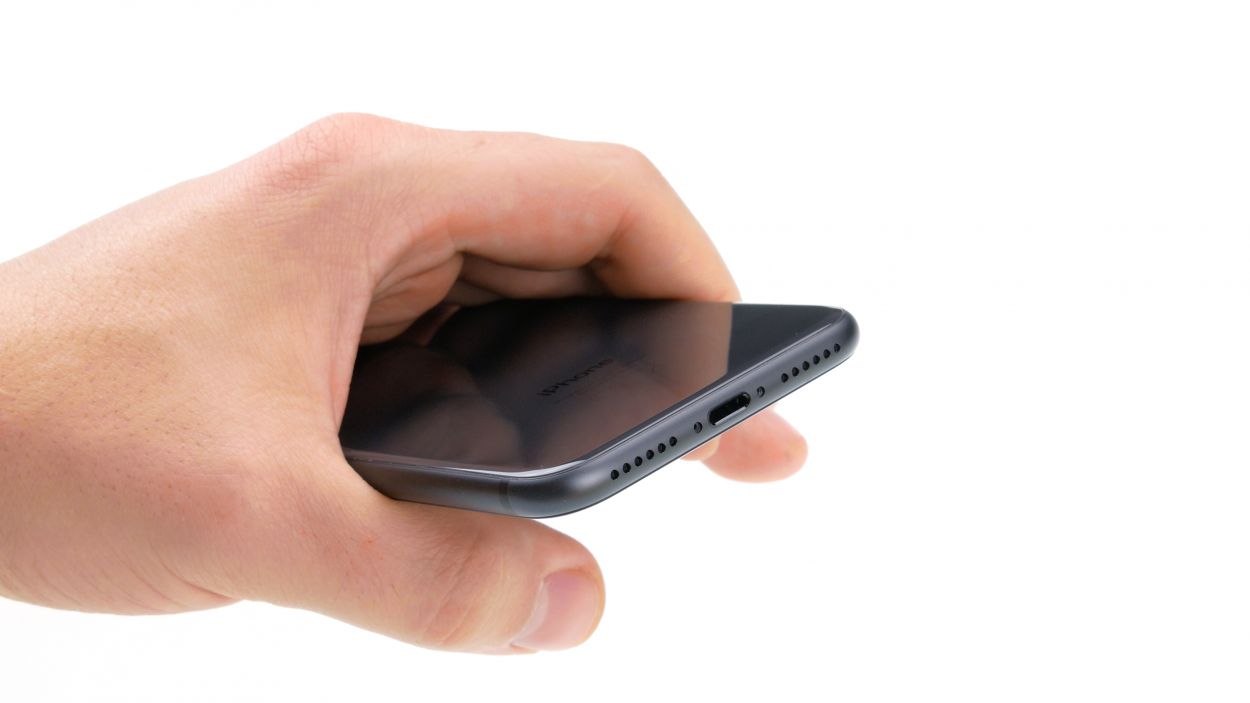
Step 2

– Loosen the two Pentalobe screws on the left and right side of the Lightning Connector and put them into a screw storage.
2 × 3.4mm Pentalobe
We recommend you using a screw storage to avoid losing any of the removed parts or screws. You can convert an old sewing box for this purpose. We at iDoc use a high quality magnetic mat for our repairs, which allows the removed parts to be arranged in the same way as they were in the phone. This way you know exactly where each screw was located, which makes it much easier for you to assemble later.
Tools Used
Step 3
The rule of thumb is to heat your device only to the extent that you can still touch it without burning your fingers.
– First, place your iPhone 8 on a soft and clean surface to avoid scratches when lifting the display.T
– Then use a hot air tool, such as a hot air dryer or a regular hairdryer, to evenly cover the outside of the display.
Tools Used
- heat gun to heat parts that are glued on so they’re easier to remove.
In most cases, you can also use a hairdryer.” rel=”noopener”>Heat gun
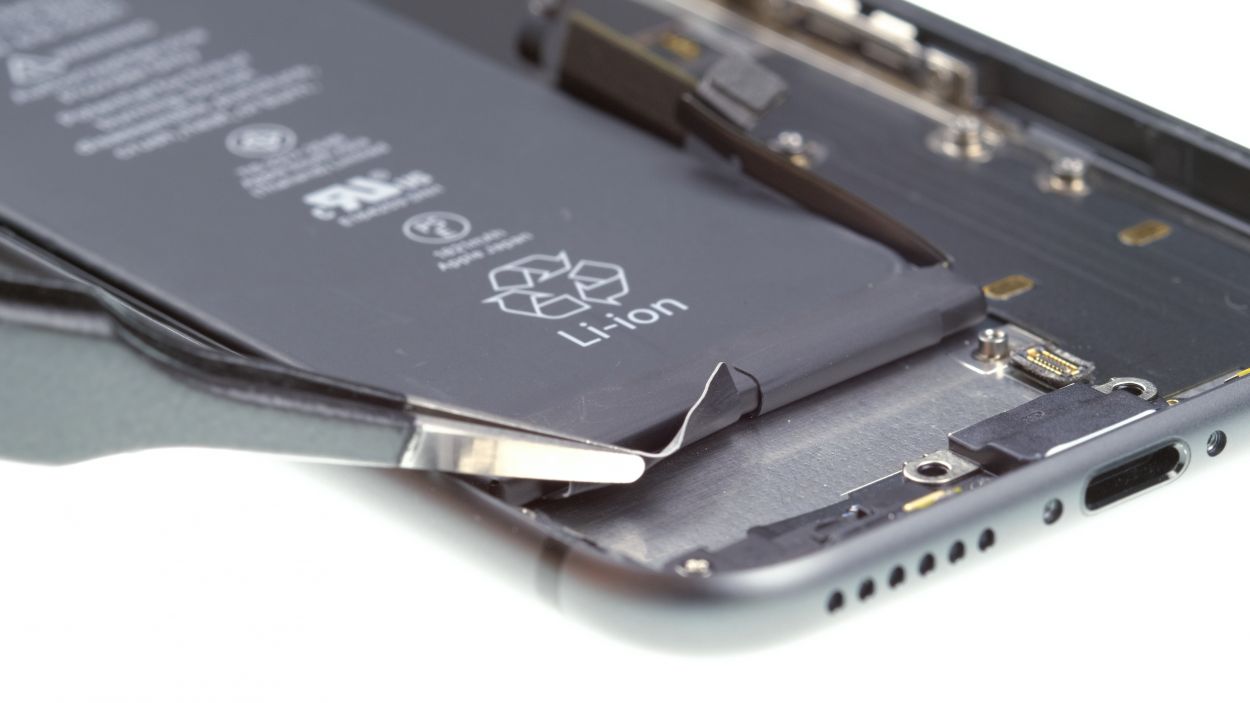
Step 4

Opening the iPhone 8 will void the warranty of protection against dust and splashing water, as well as the warranty of waterproofness.
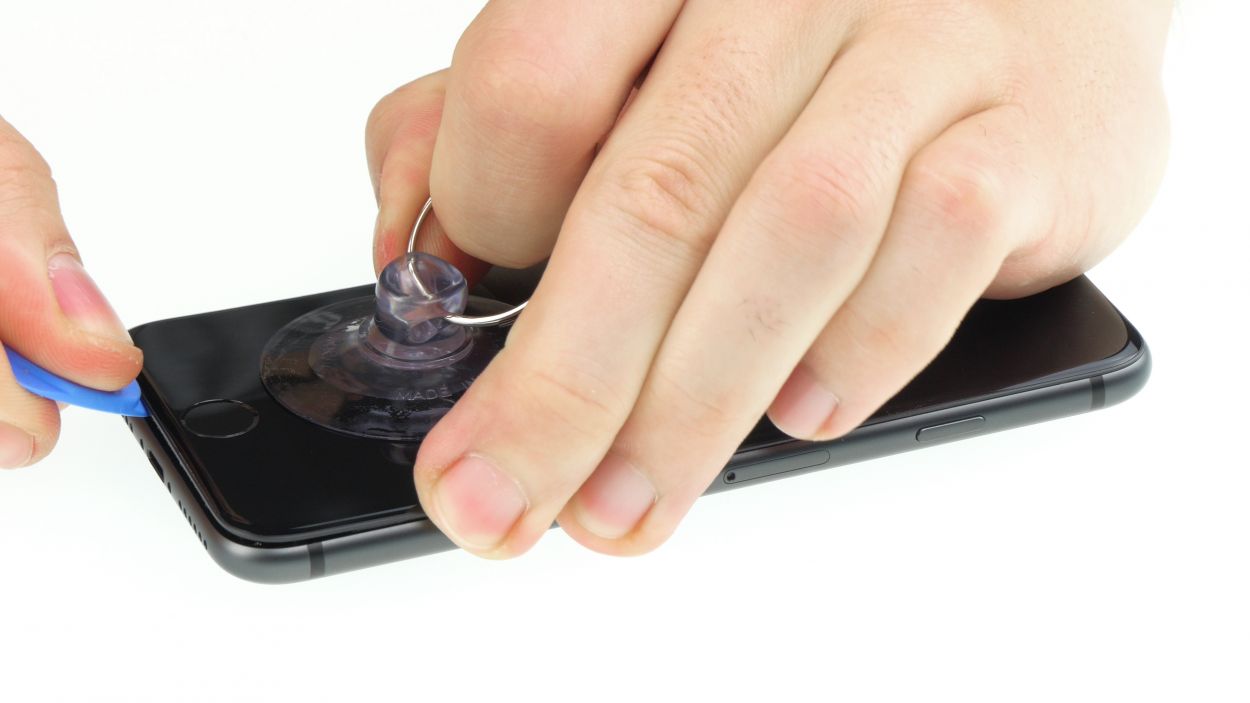
– Press a suction cup on the display above the Home button and pull it
upwards to create a narrow gap between the aluminium and display frames.
– Insert a flat plastic tool into the narrow gap between the aluminum and display frames. Try to enlarge the gap by pushing the aluminium frame upwards with the tool. We use flat plastic picks for this.
Tools Used
Step 5
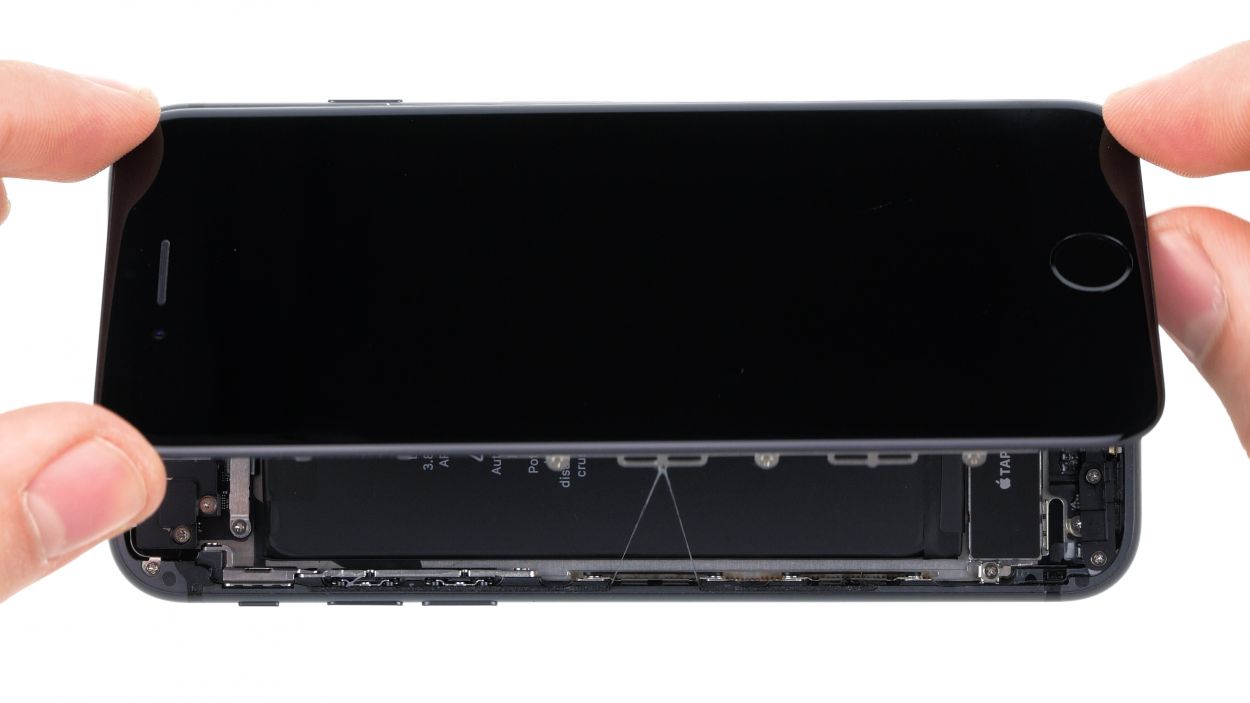
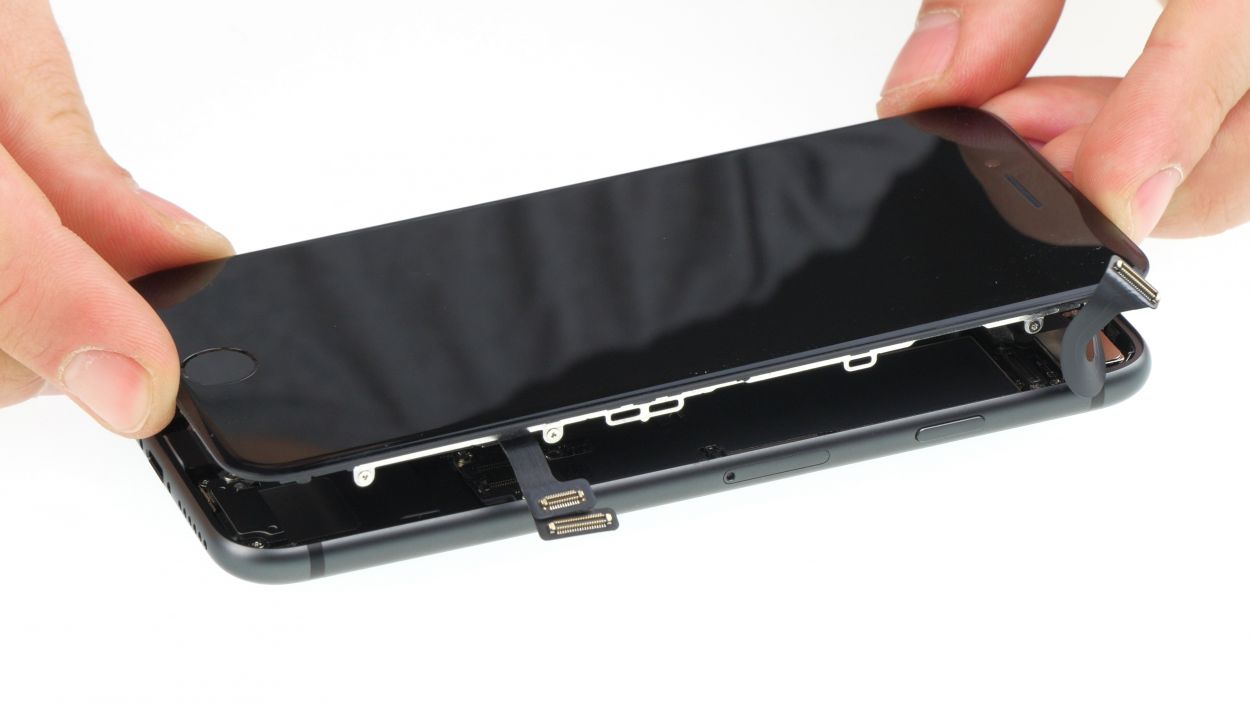
As long as it is still connected, you must never open the display more than 180°, otherwise the sensitive flex cables may tear.
Step 6
2 × 2.6 mm Phillips
2 × 1.0 mm Phillips
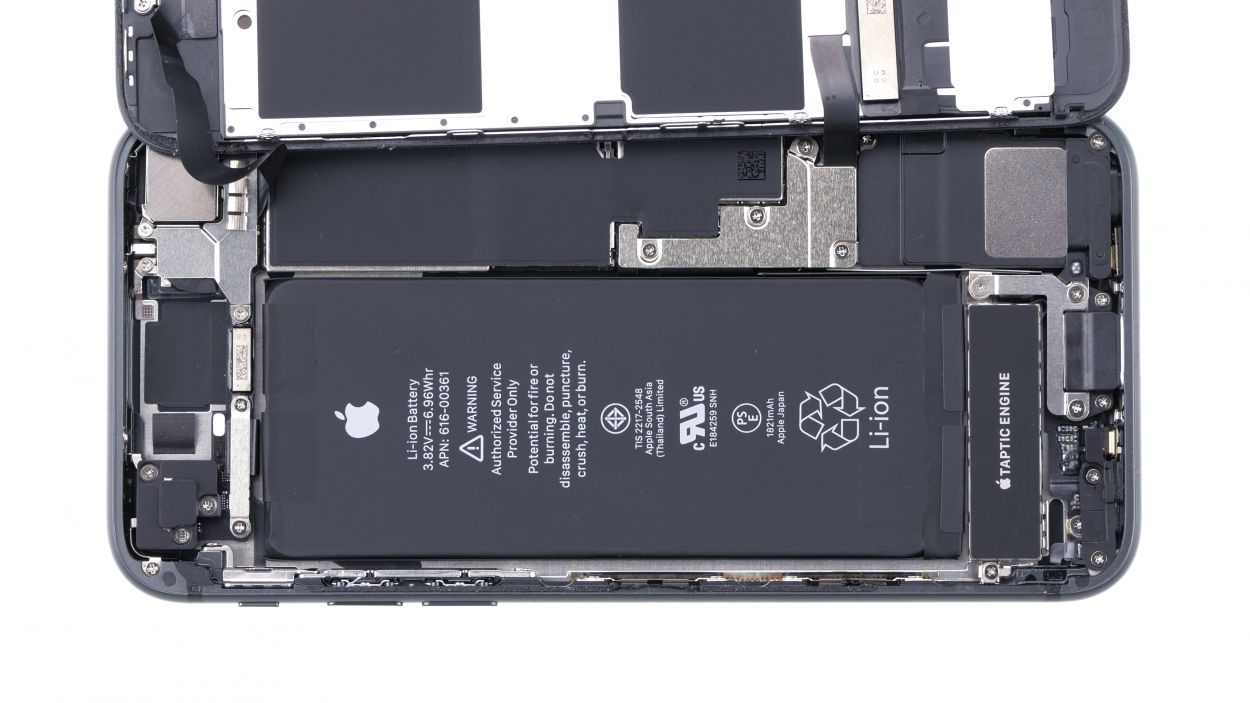
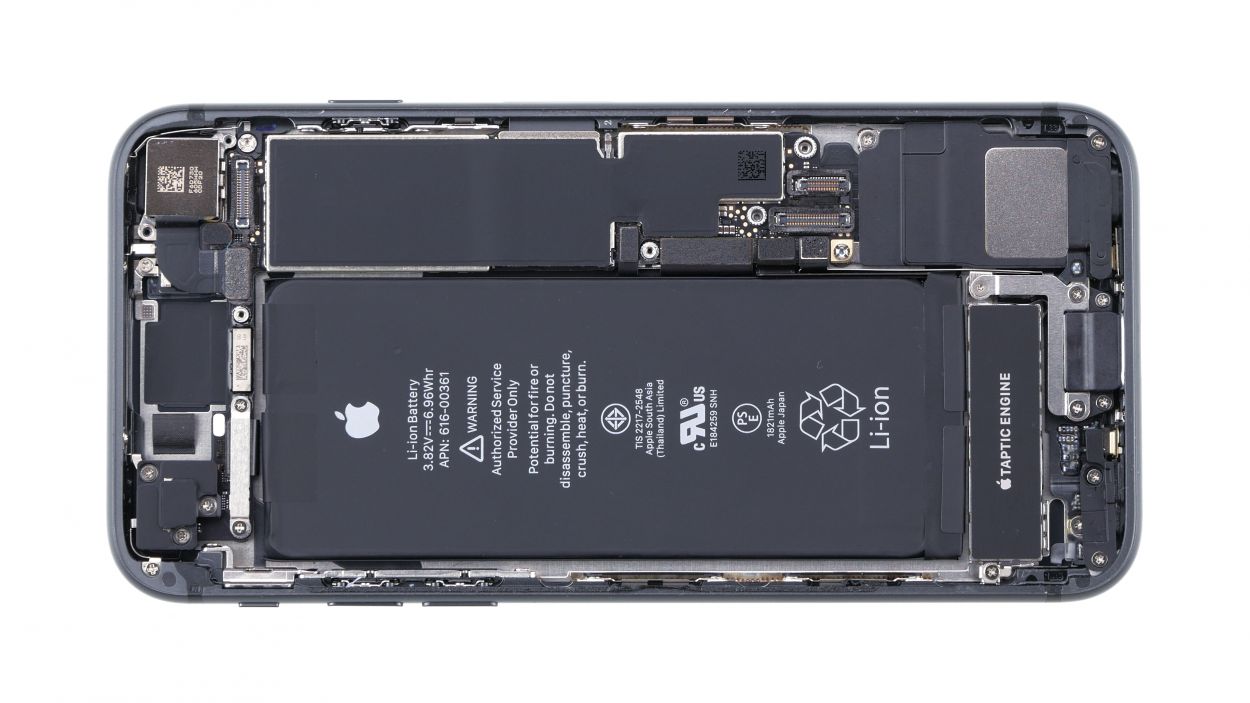
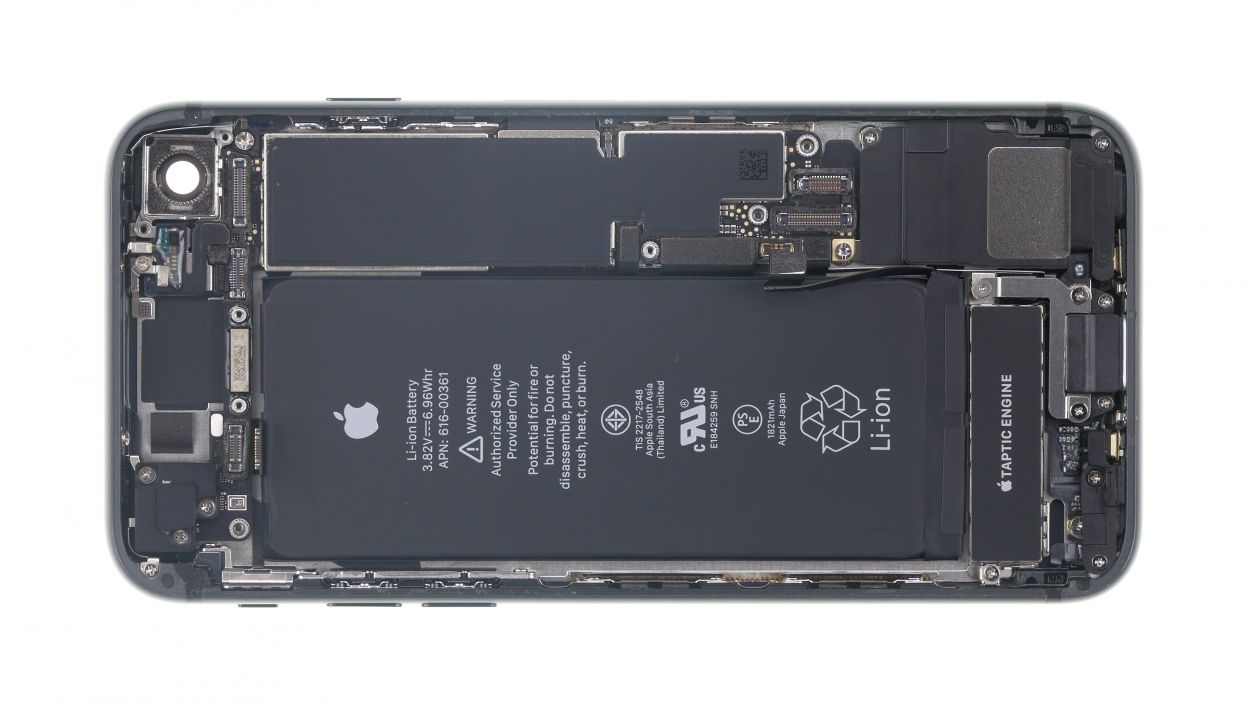
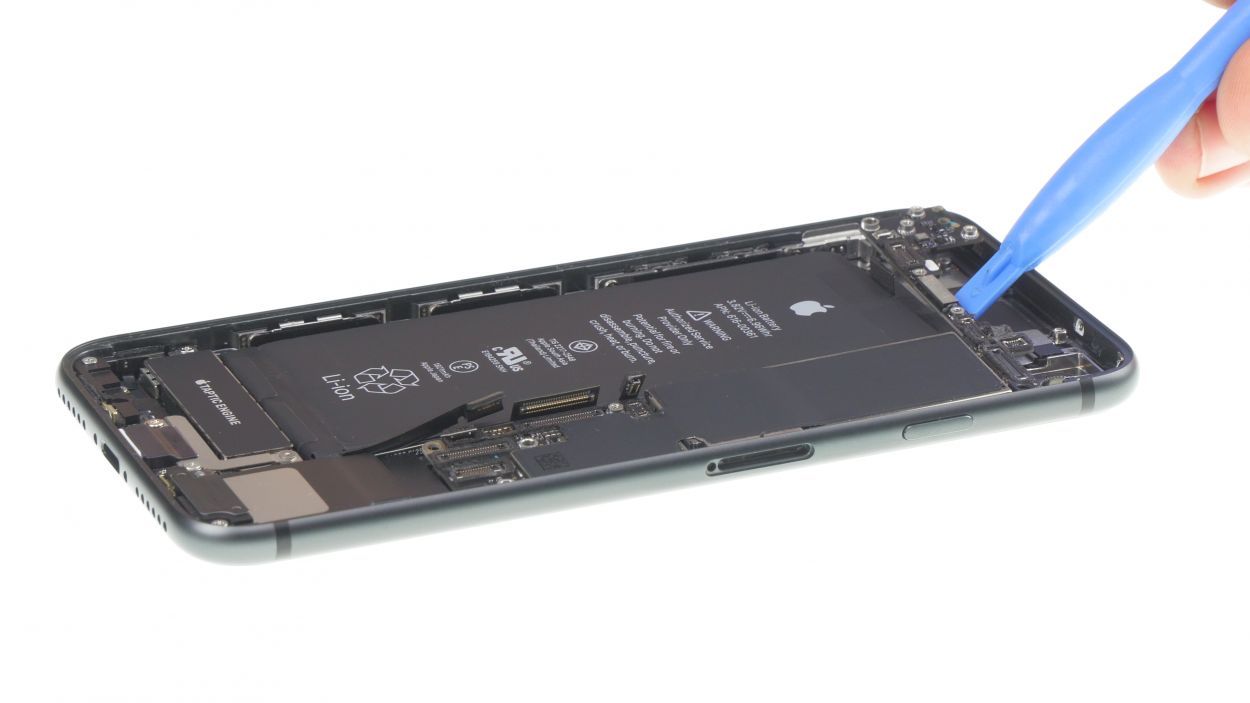
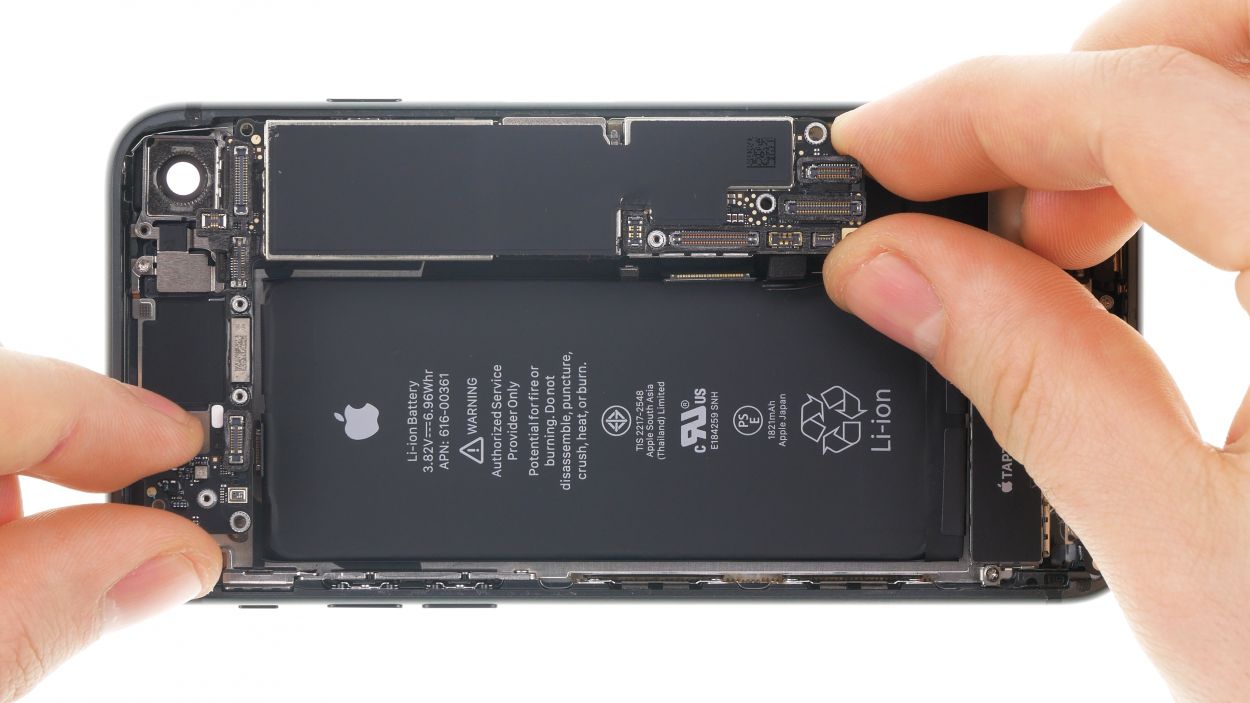
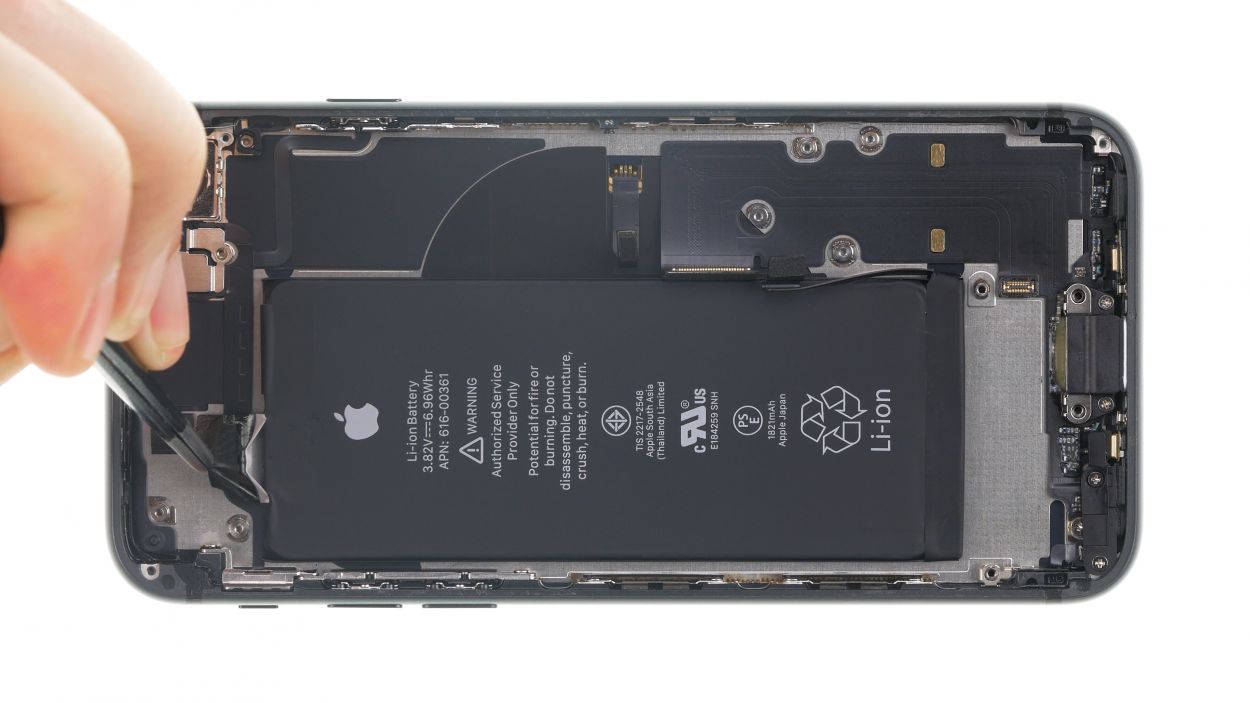
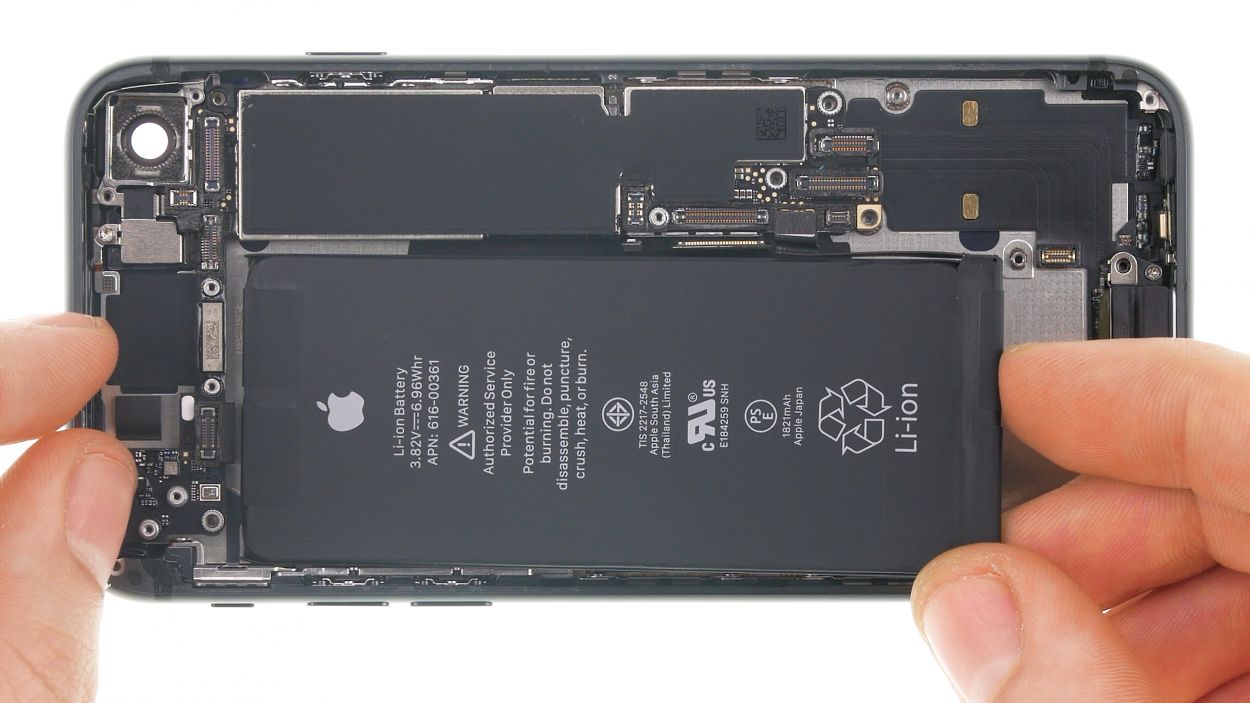
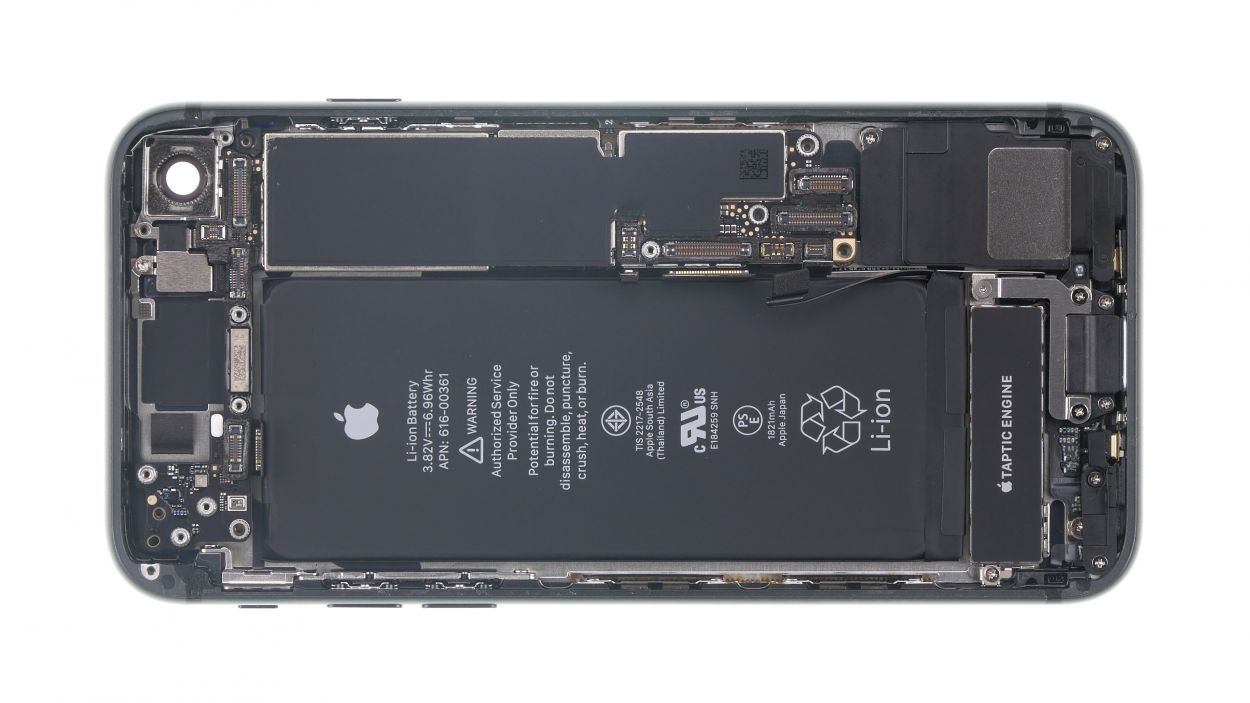
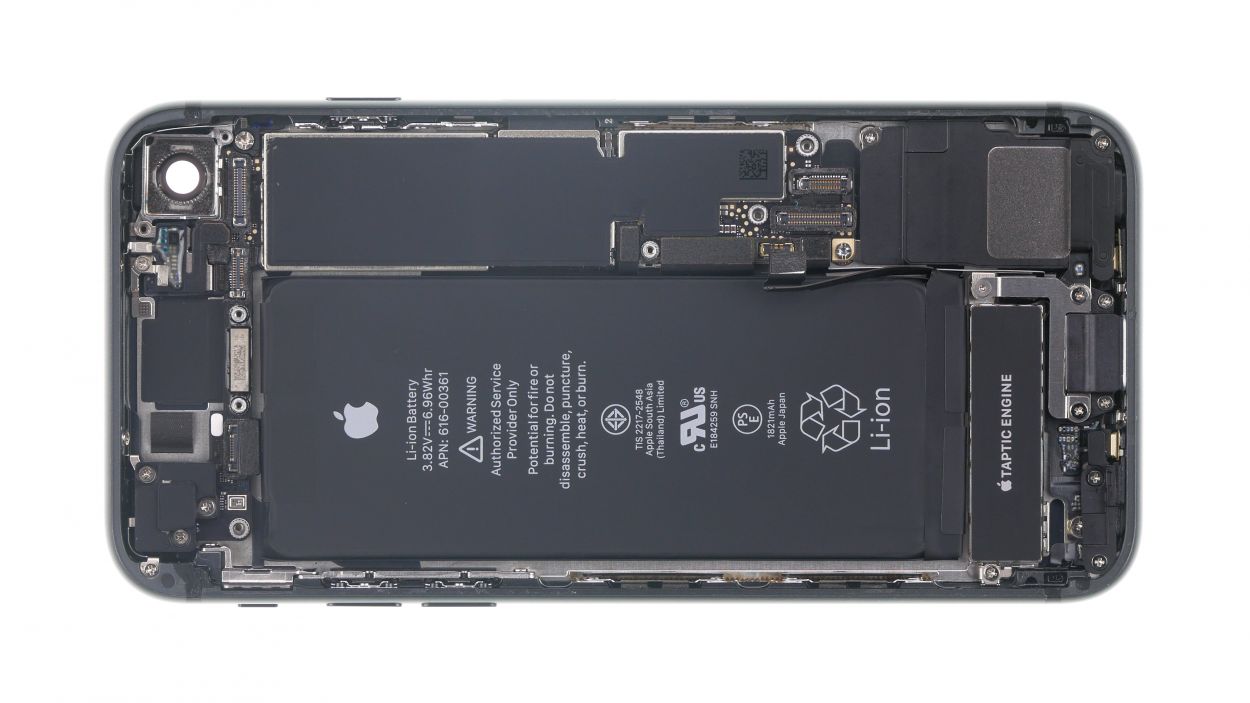
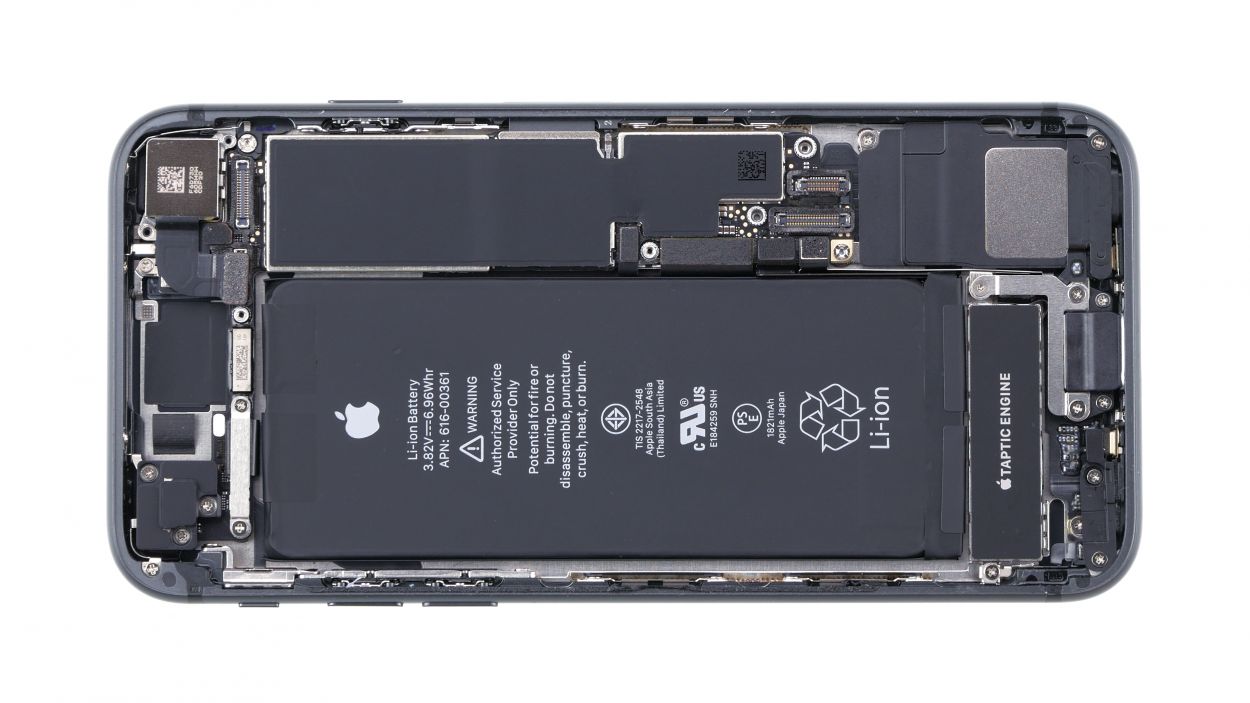
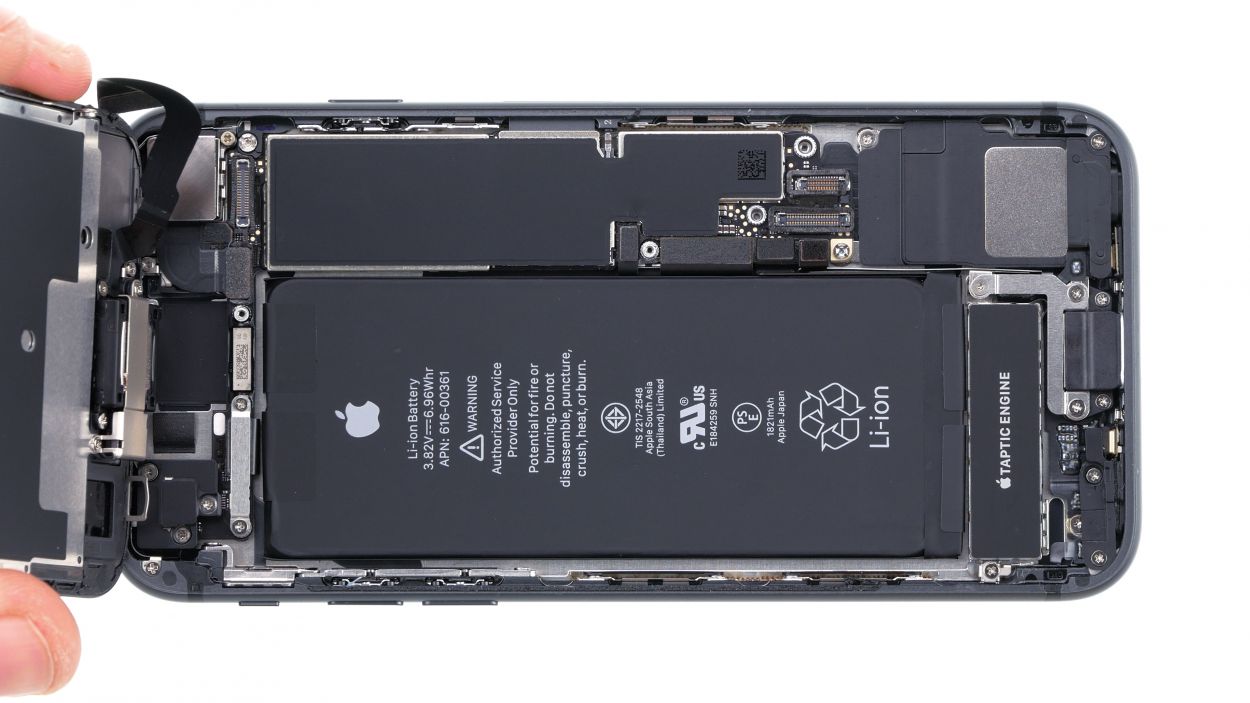
Before you dive into this repair adventure, make sure to disconnect the battery connector! This little step will keep you safe from short circuits and prevent your device from accidentally waking up during the process. Let’s keep things chill!
– Use a phillips screwdriver to remove the four phillips screws. Then carefully take off the cover with tweezers.
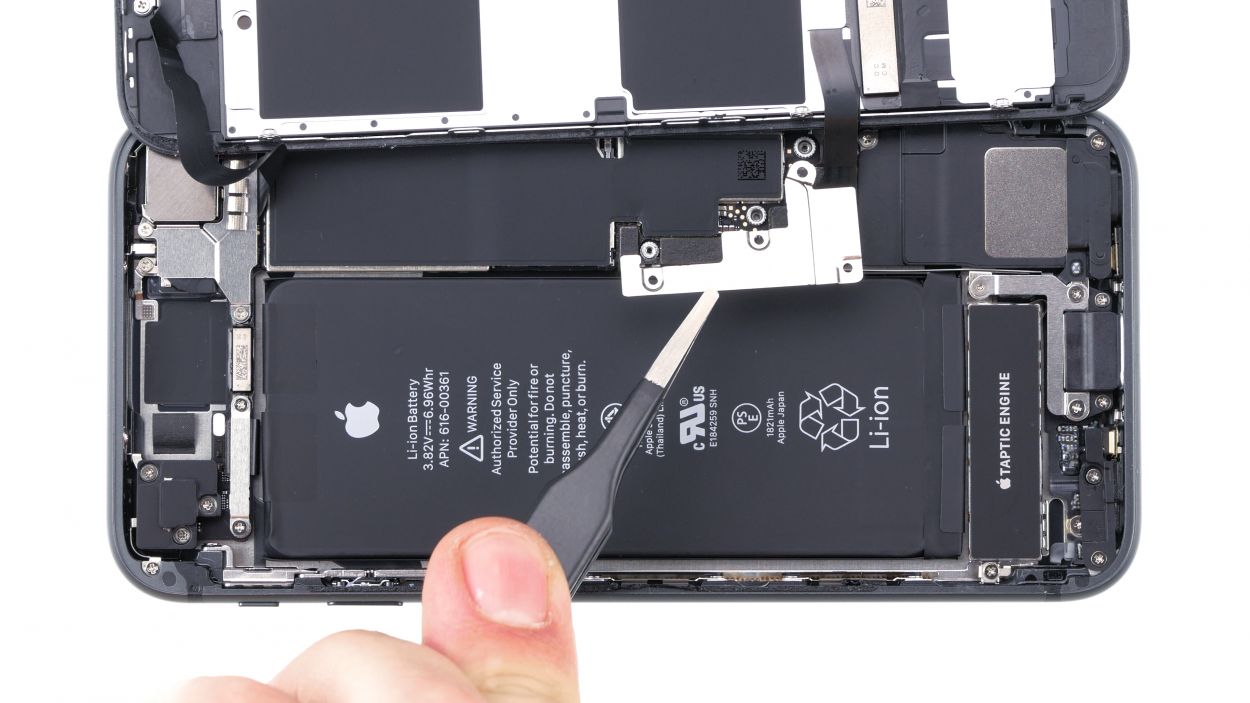
– Now disconnect the battery connector by carefully levering it off with a lever tool. For this purpose we use a plastic spudger.
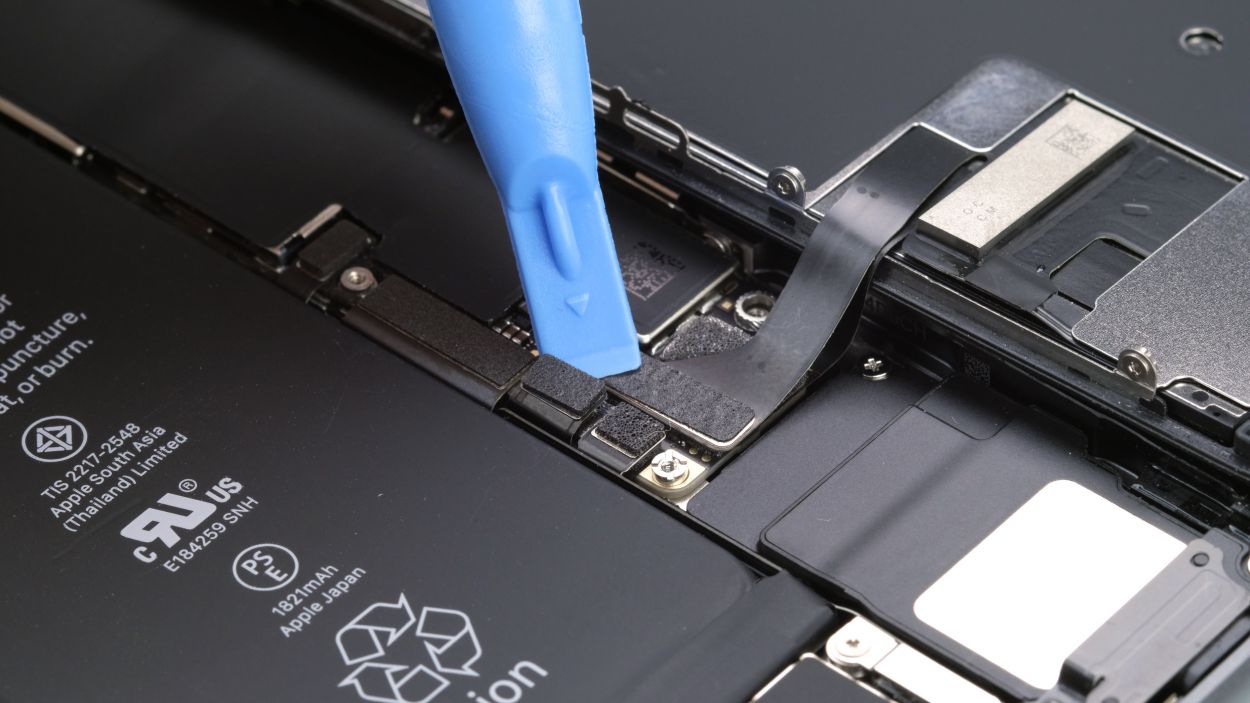
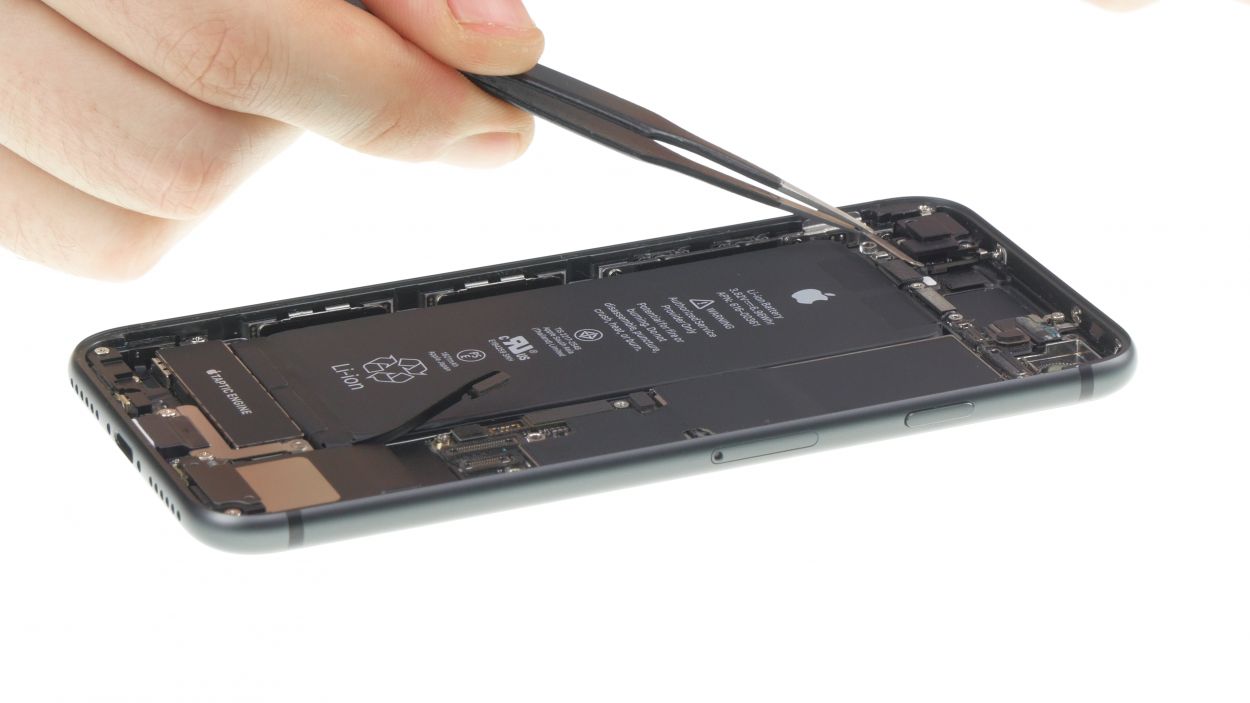
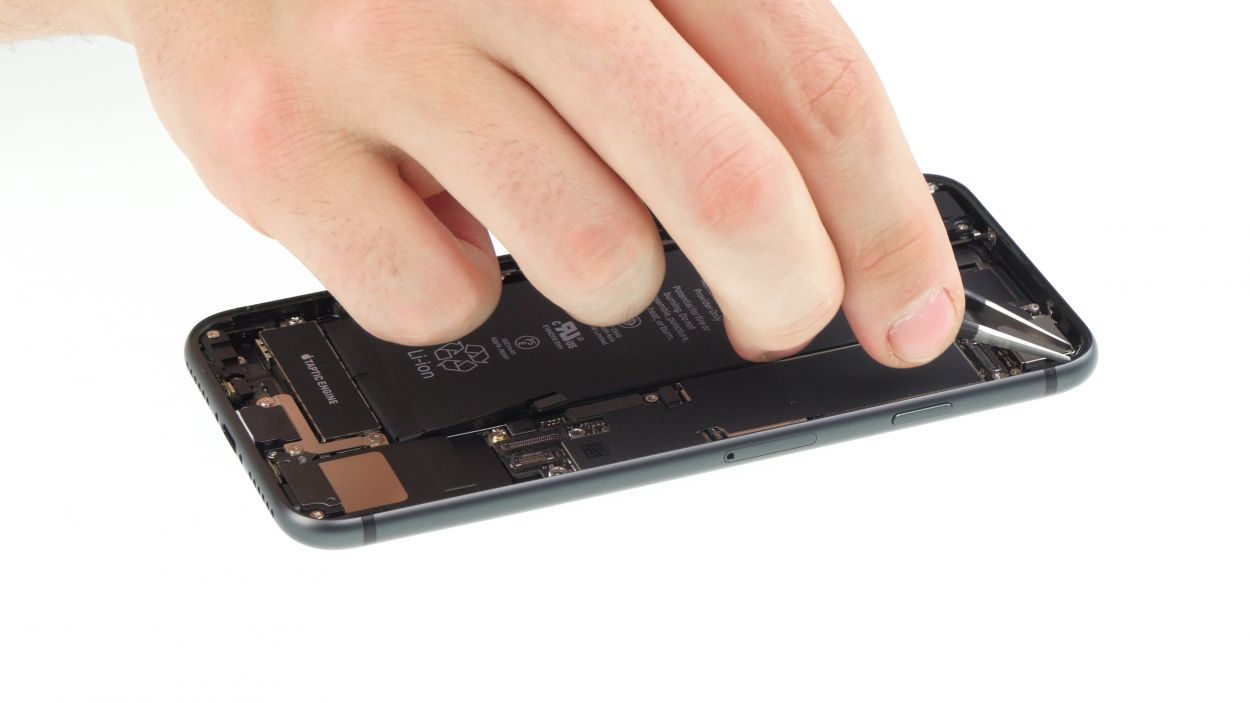
Step 7
– Use the spudger to also disconnect the display connectors (display and home button).
Tools Used
Step 8
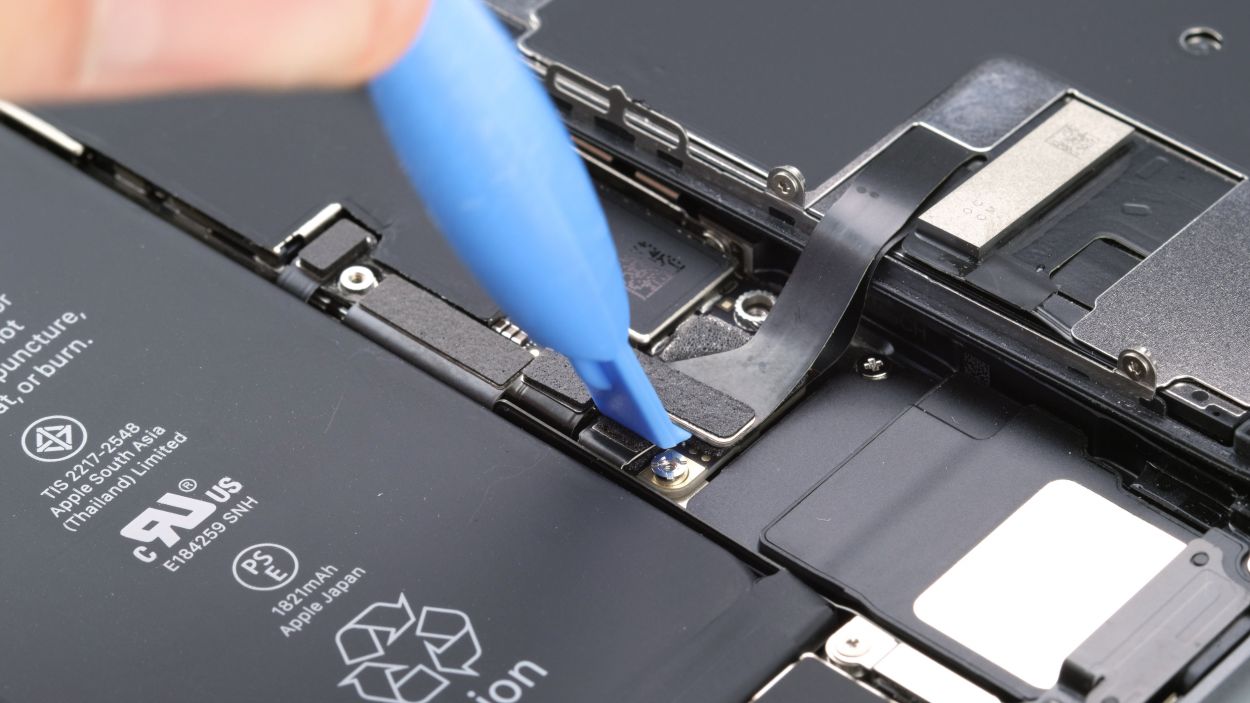
3 × 1.0 mm Phillips
– Twist off the three Phillips screws securing the cover plate above the connector. You got this!
– Grab your trusty tweezers and gently lift the cover plate off your iPhone 8. Easy peasy!
– With a steady hand, use a spudger to carefully separate the FaceTime connector from the board. You’re doing great!
– And just like that, you can now remove the display completely. Look at you go!
Step 9

1 × 2.9 mm Phillips
1 × 3.0 mm Standoff
You can grab special screwdrivers designed for the stand-off screw, but if you’re feeling adventurous, a regular narrow slotted screwdriver will do the trick too!
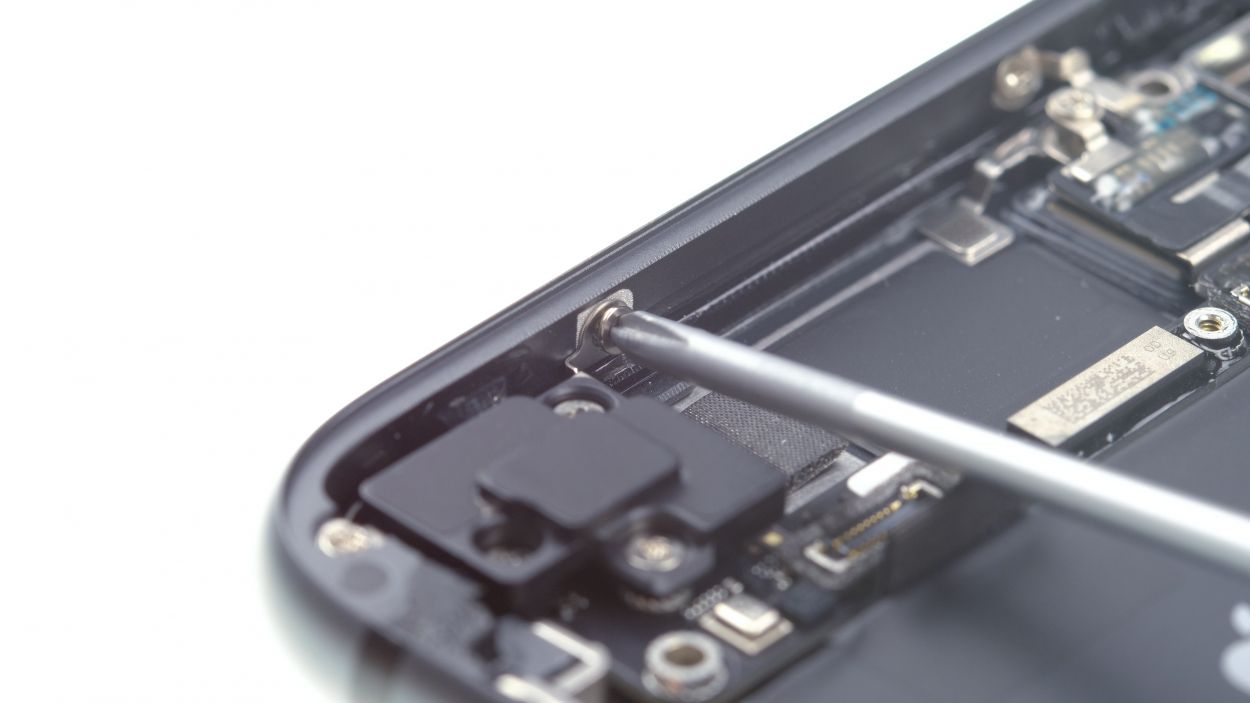
– Unscrew the cover plate of the iSight camera and gently lift it off. You’ve got this!
Step 10
1 × 1.1 mm Phillips
1 × 2.7 mm Phillips
– First, let’s get those pesky screws off the bracket plate. Grab your screwdriver and loosen them up!
– Once the screws are out, gently lift the bracket plate out of your device. You’re doing great!
– Now, it’s time to disconnect the connector from the logic board. Use a plastic spudger to carefully lever it off. You’ve got this!
Step 11


2 × 1.2 mm Philliips
2 × 1.0 mm Philliips
1 × 2.5 mm Phillips
1 × 1.4 mm Phillips
One of the screws is snugly tucked into the side of the back cover, just waiting for you to give it some attention!
– First, unscrew the little screws holding the plastic bracket in place. You’re doing awesome!
Step 12
1 × 1.3 mm Phillips
1 × 1.2 mm Phillips
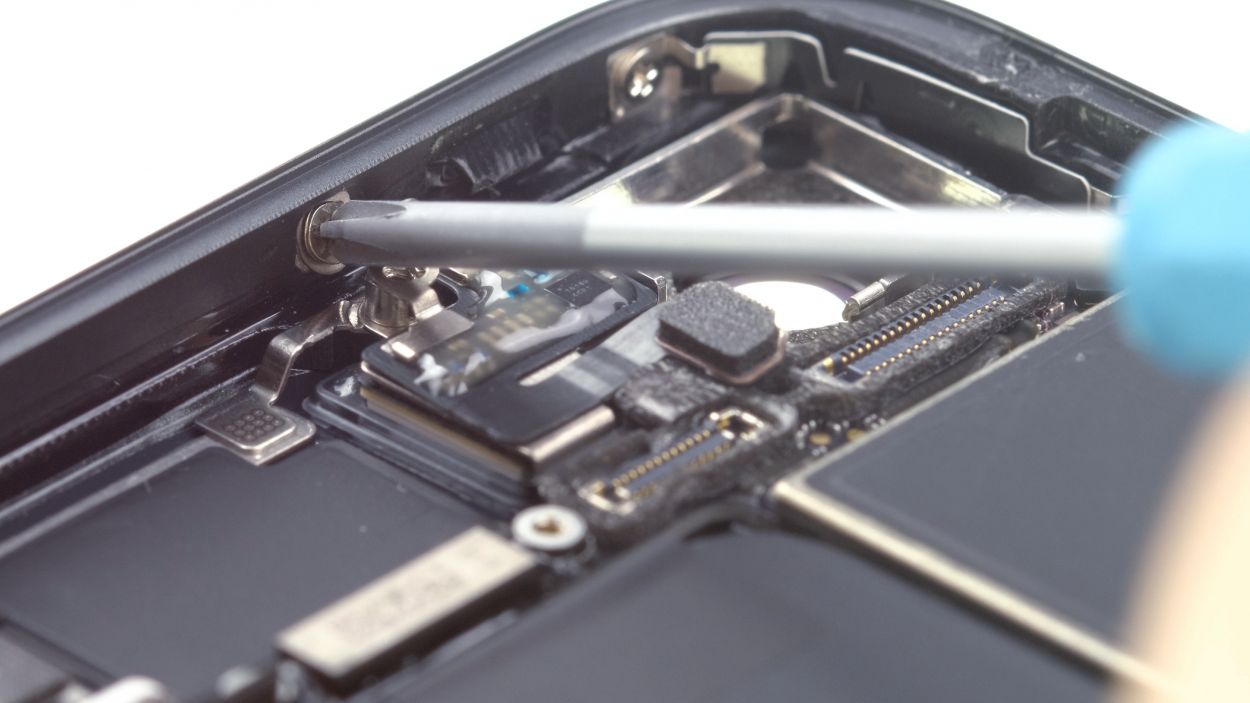
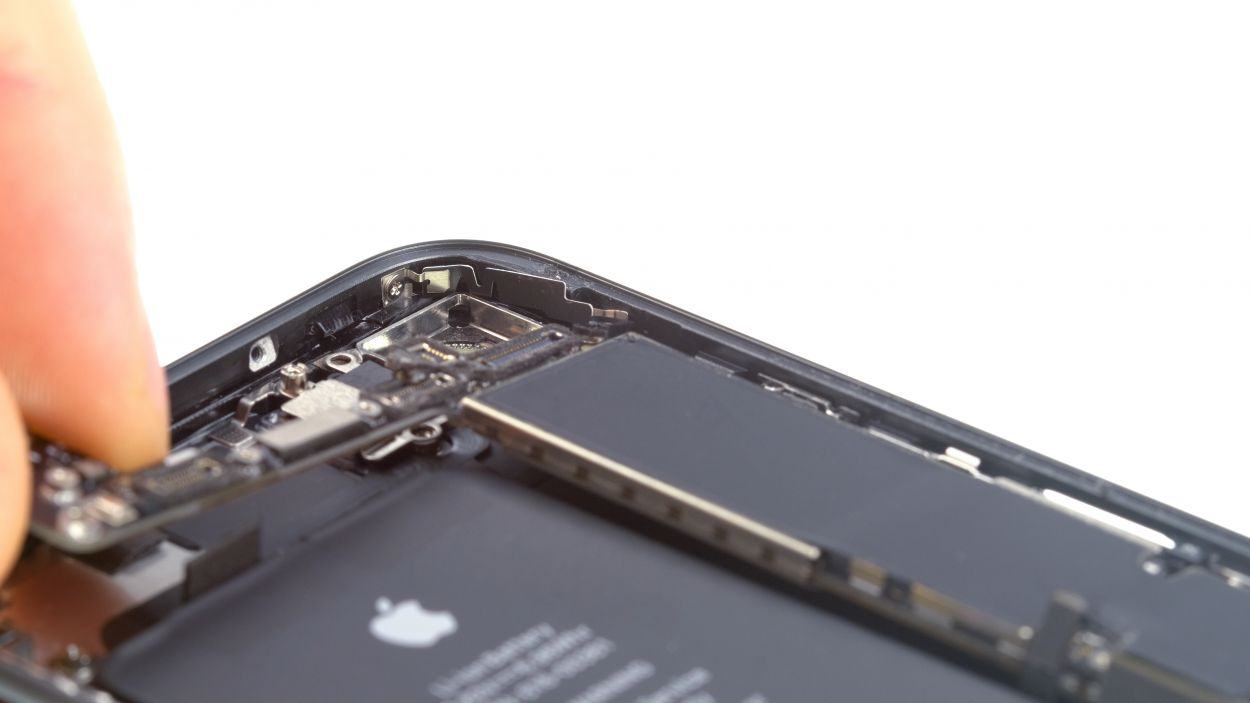
– First, let’s tackle those Phillips screws holding the antenna in place. Time to get them out!
– Next, gently disconnect the connector from the board. You’re doing great!
– If the antenna is feeling a bit stubborn, warm it up with a touch of hot air and carefully pry it off using a spatula. You’ve got this!
Step 13
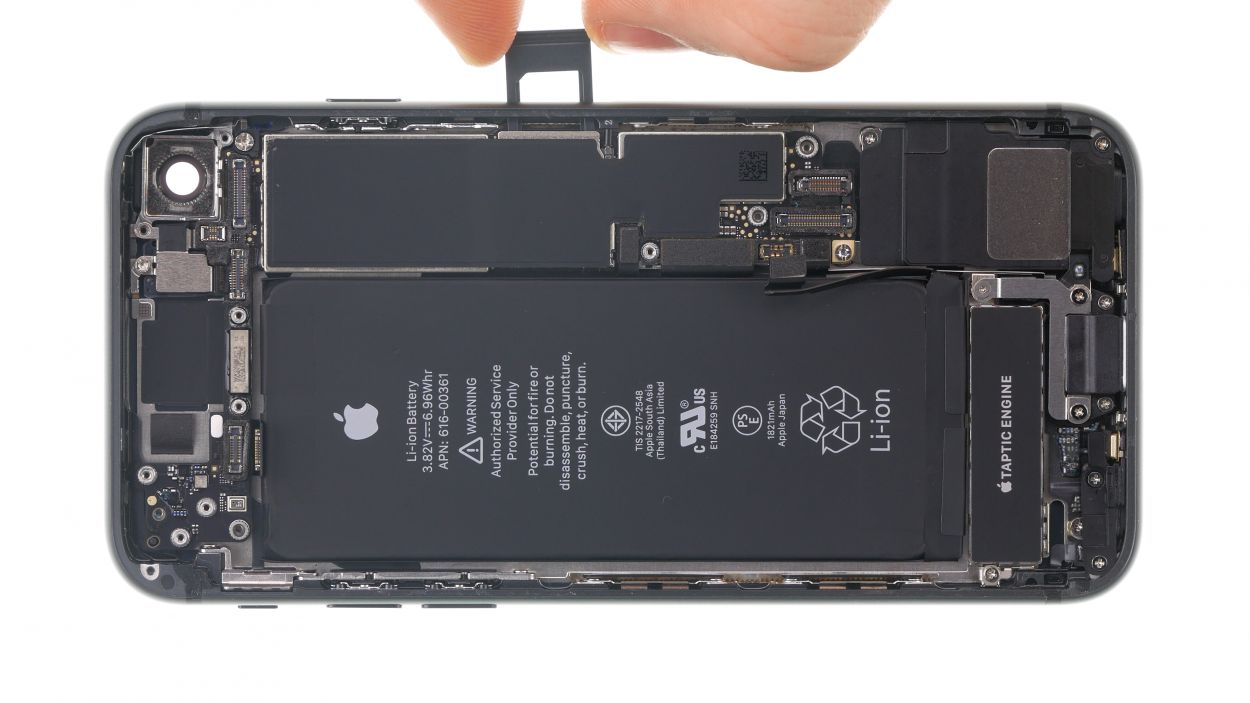
– Grab your trusty SIM tool or a paper clip to pop out the SIM card holder. Just press the SIM tool into that tiny hole next to the SIM card holder and you’re all set!
Tools Used
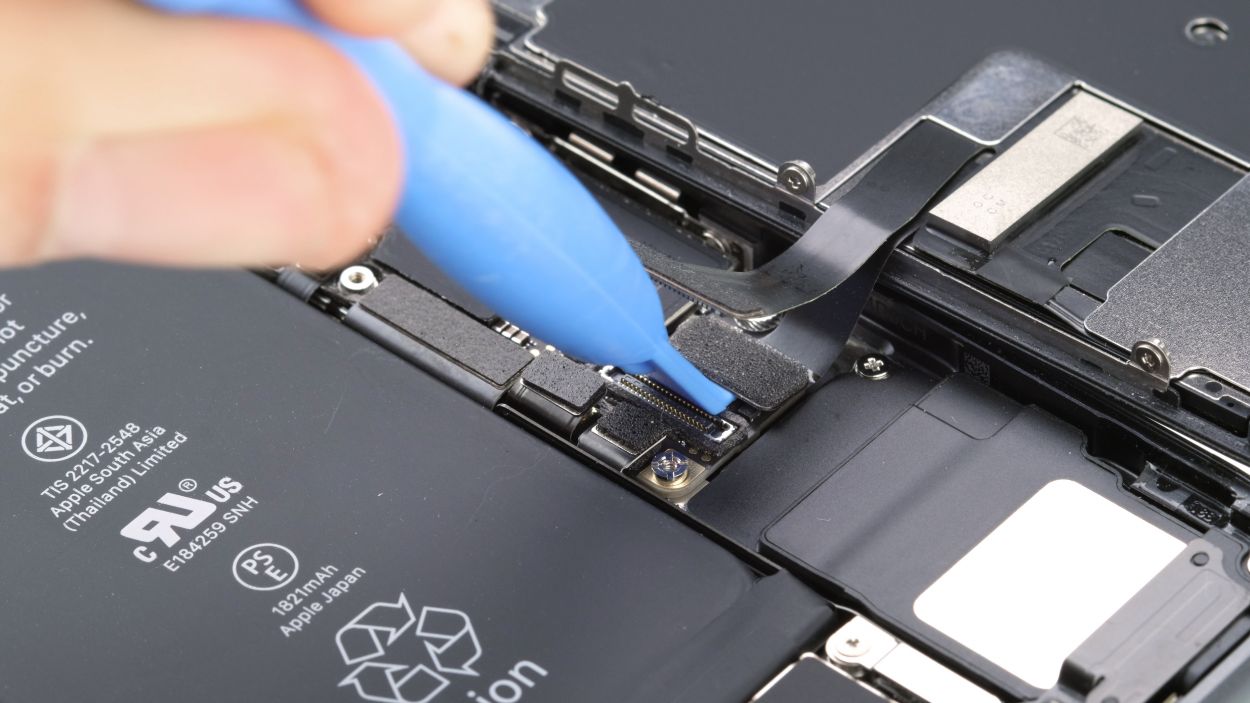
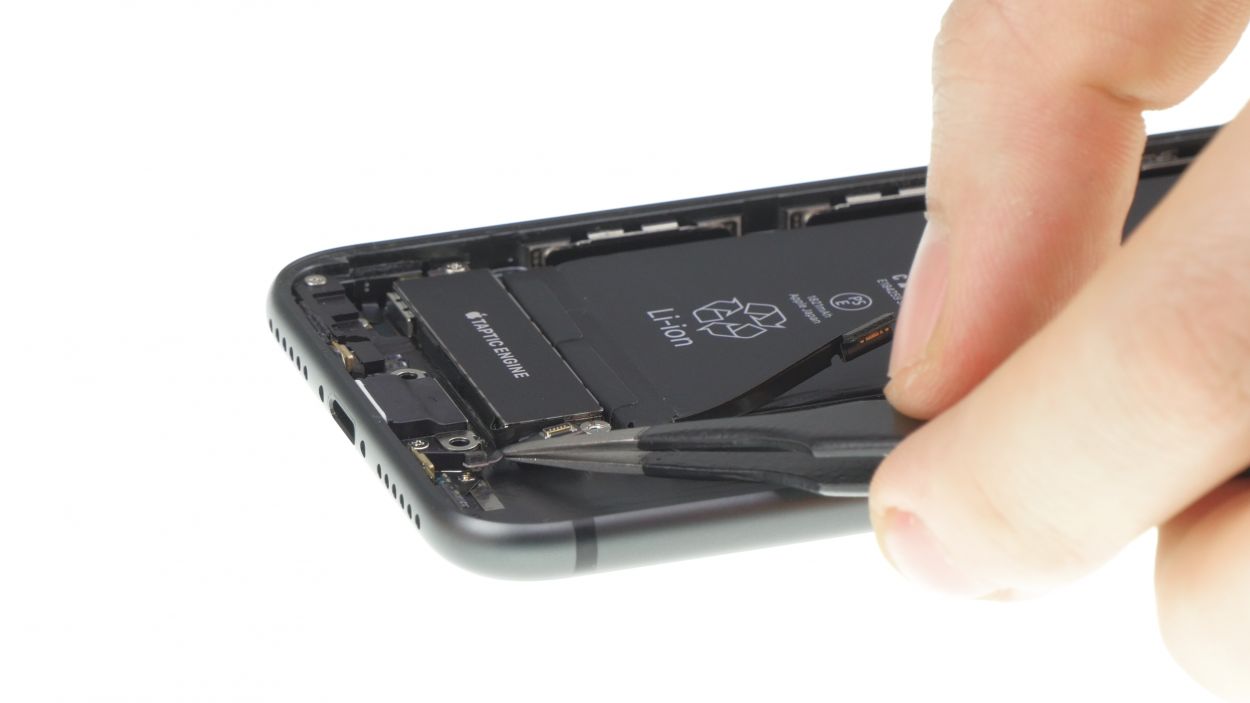
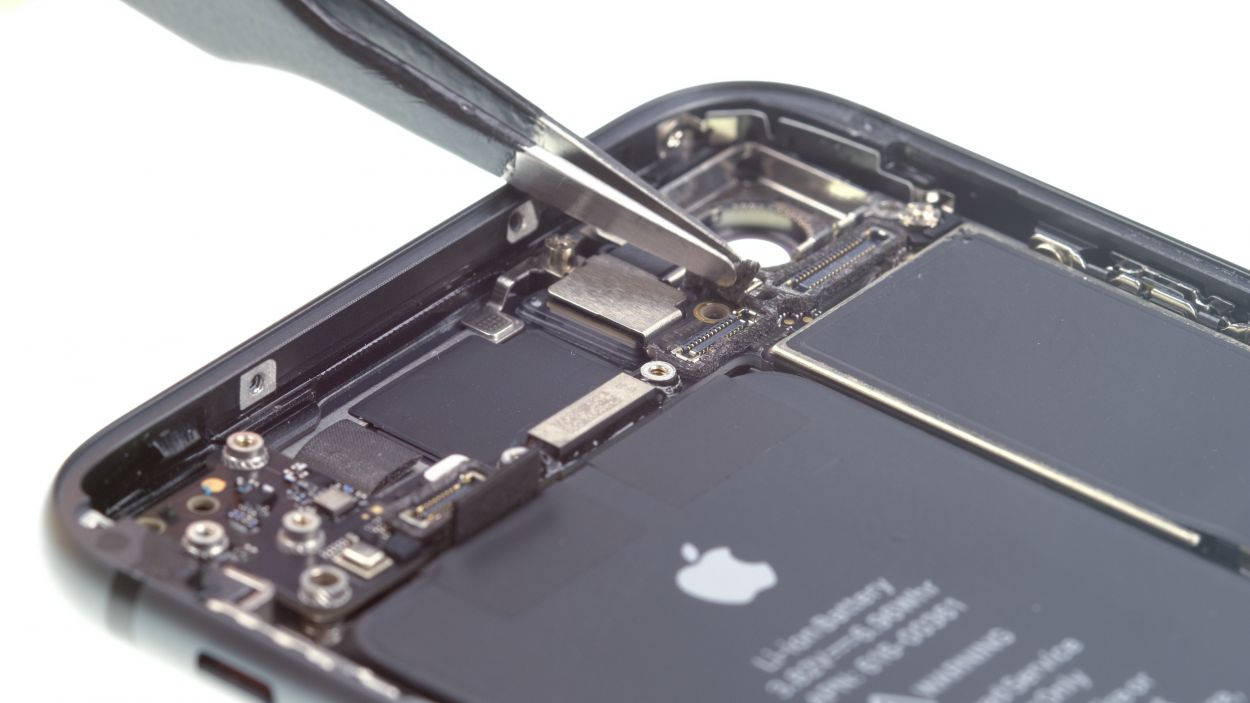
Step 14
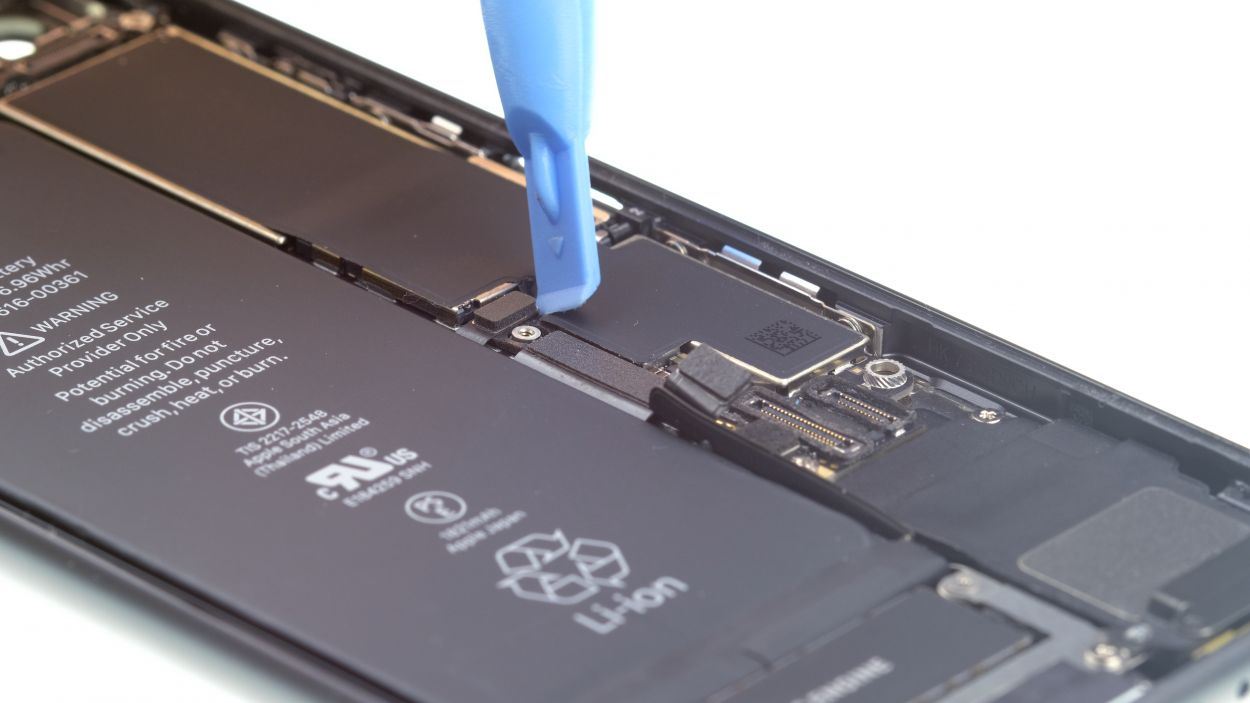

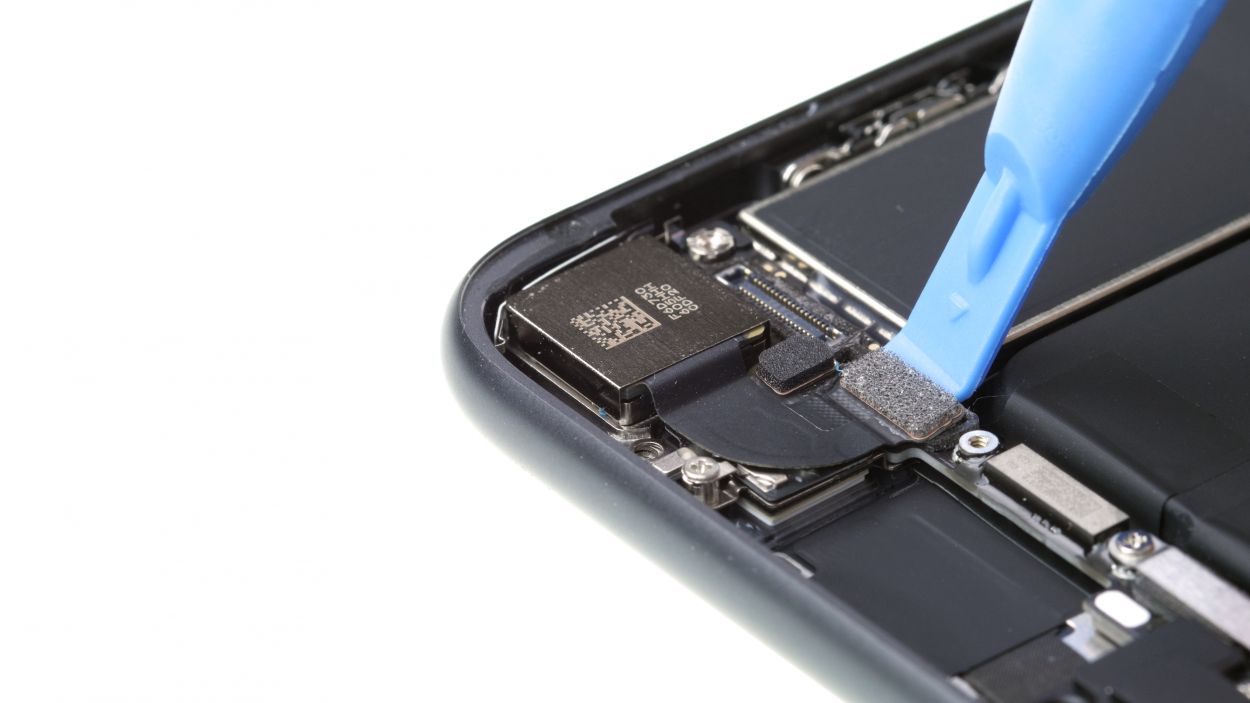
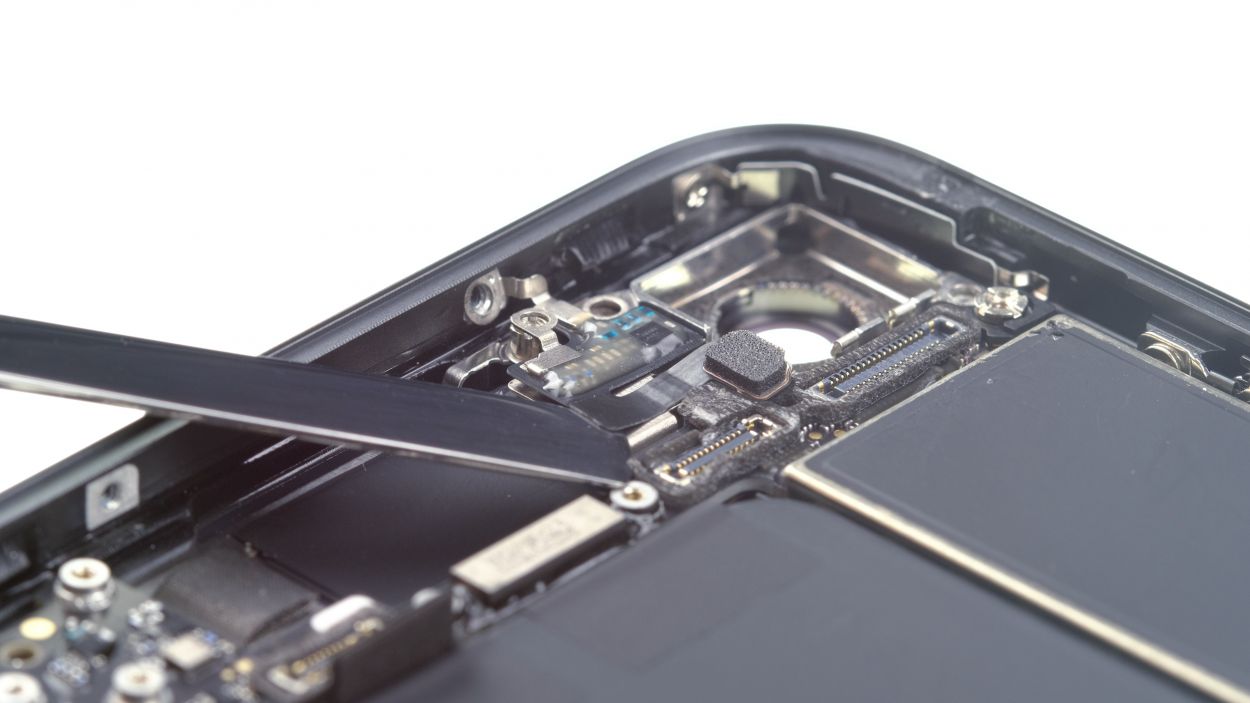
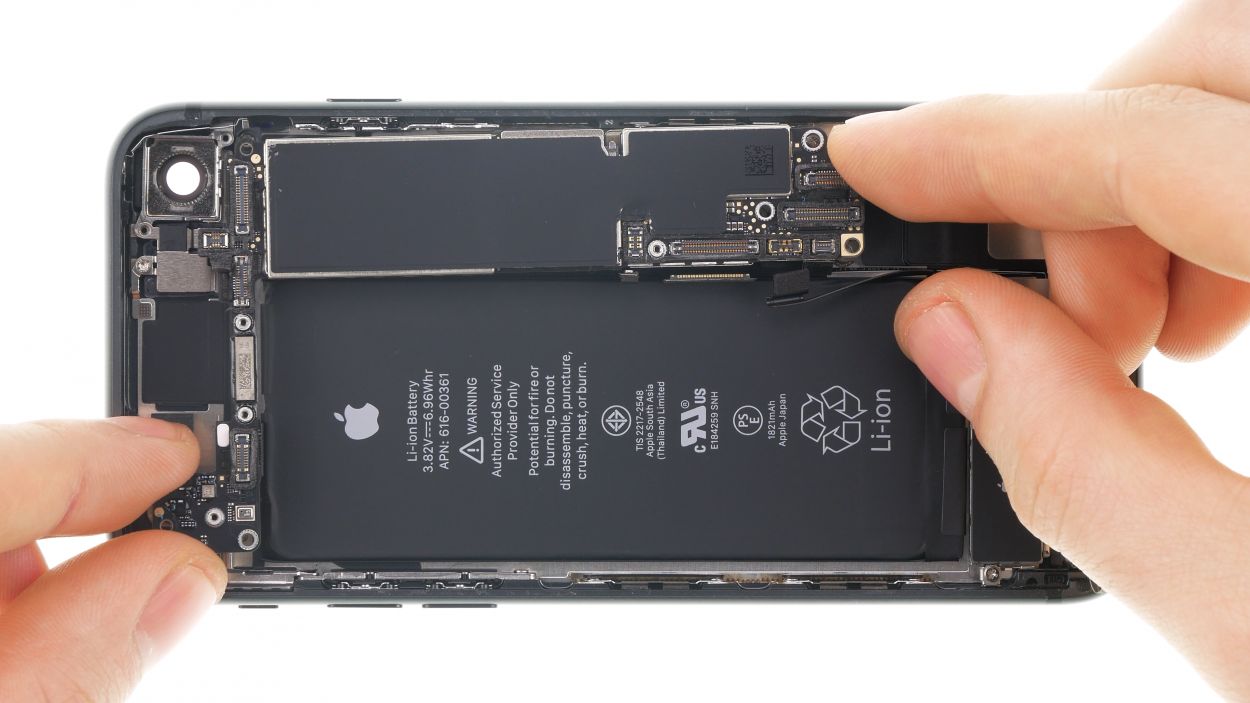
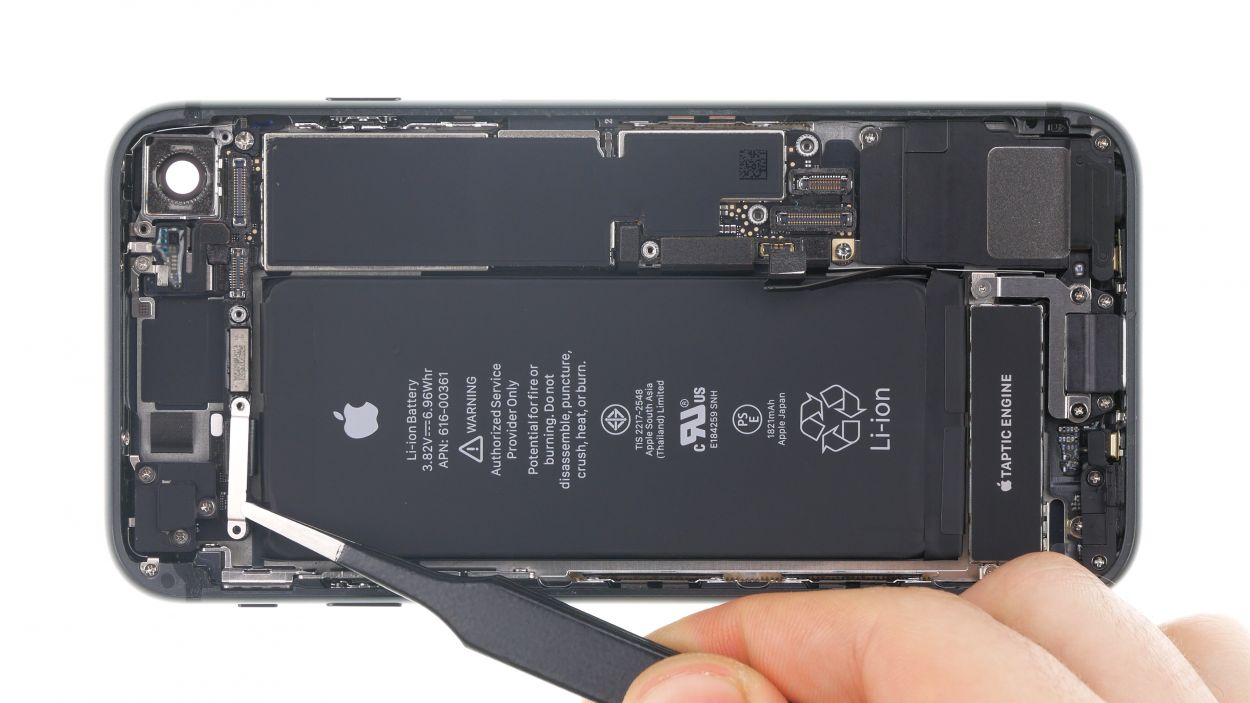
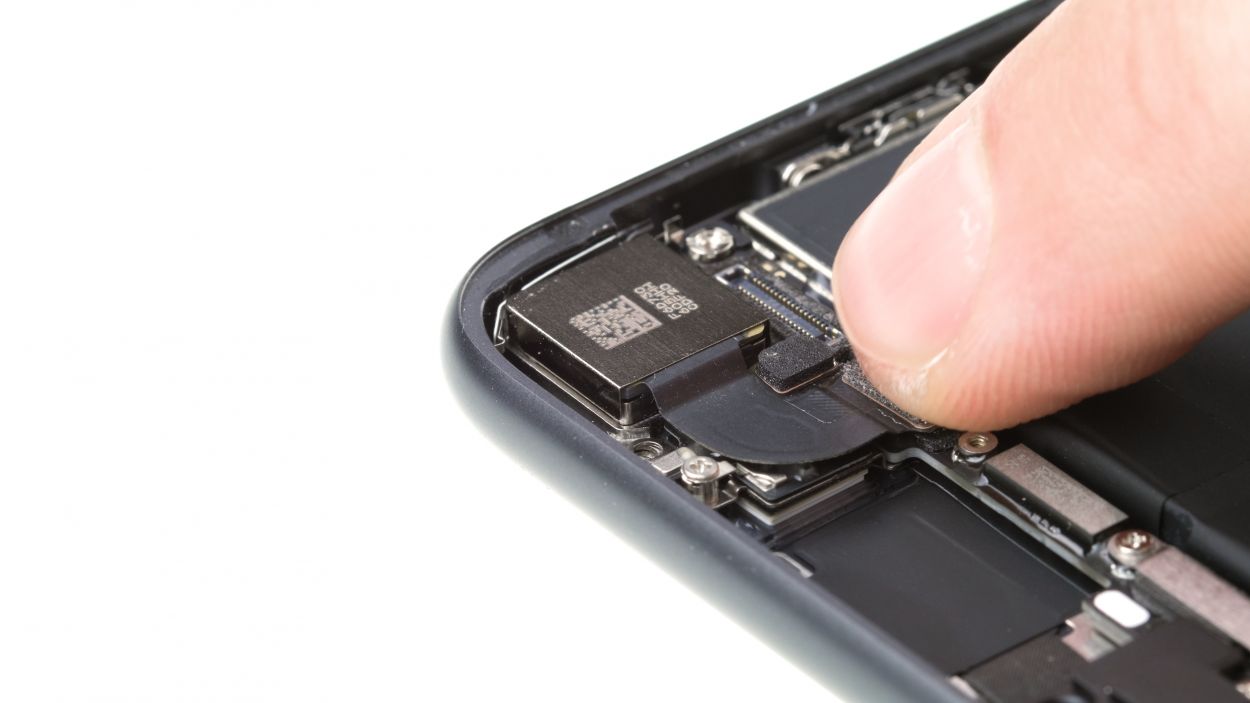
– Grab your trusty spudger and gently wiggle it to disconnect those three connectors on the battery side of the logic board. You’ve got this!
Tools Used
Step 15

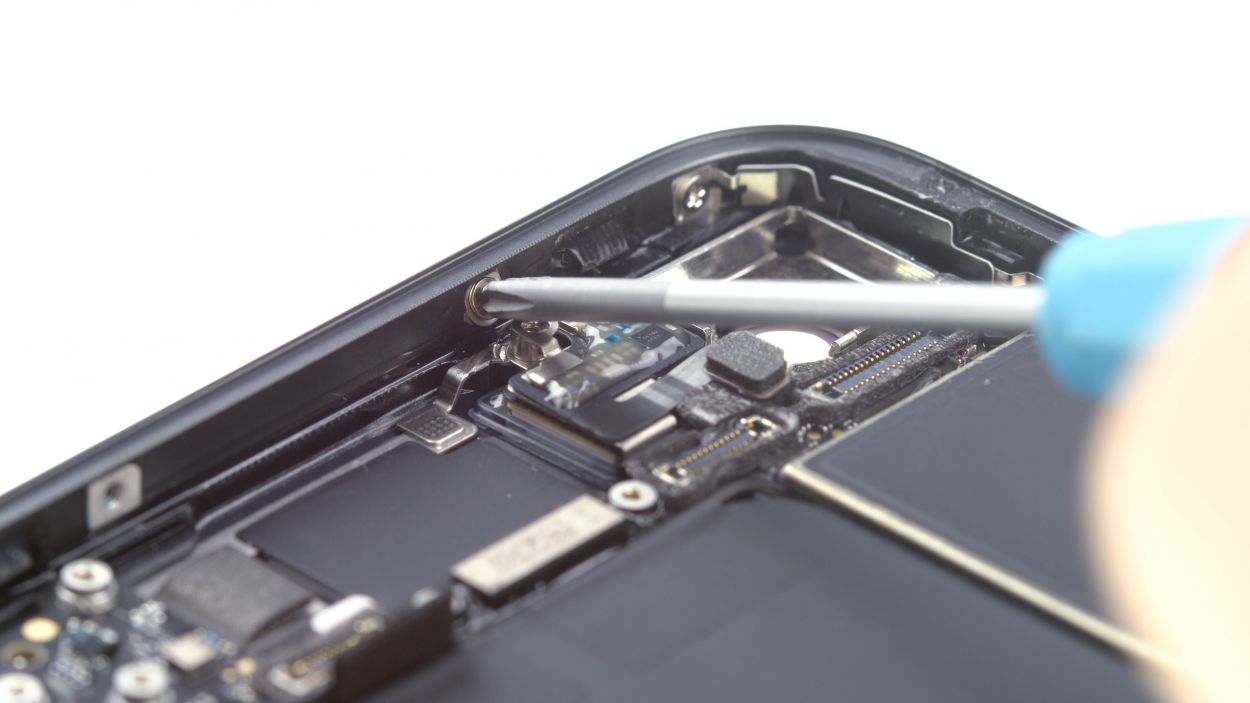
1 × 2.4 mm Standoff
1 × 2.1 mm Standoff
1 × 1.6 mm Phillips
The Phillips screw is hiding behind a sticker (check out the photo!).
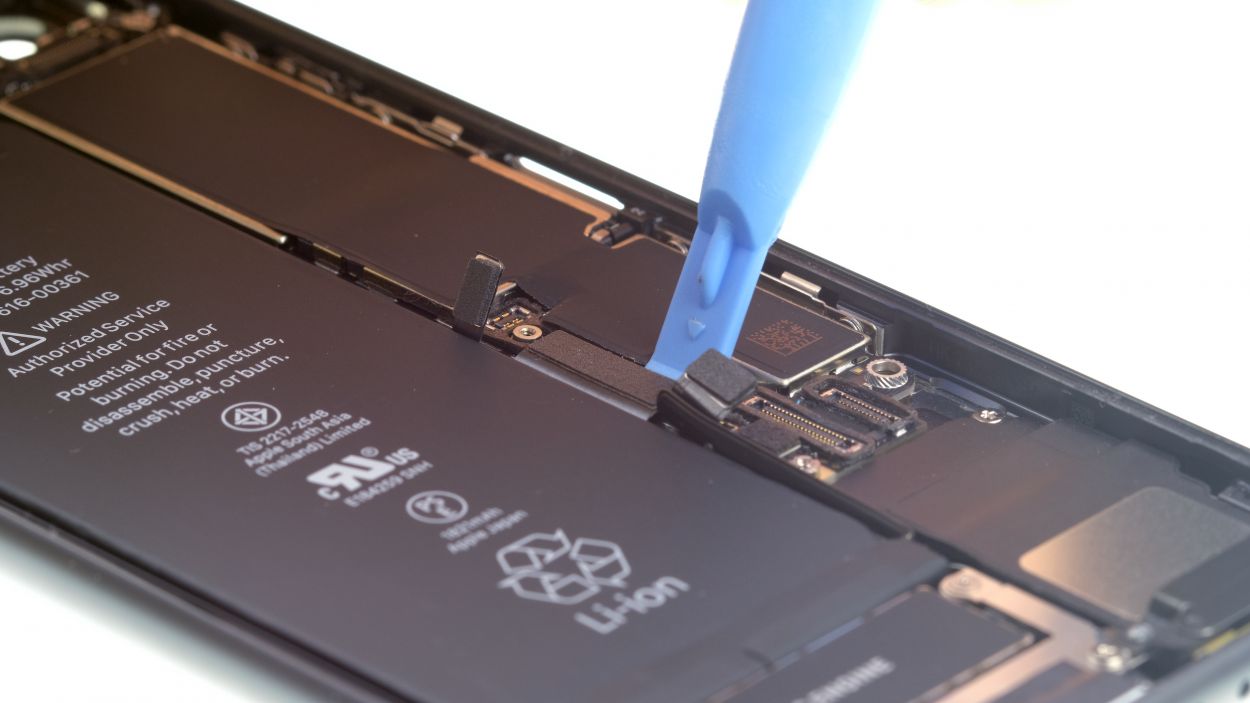
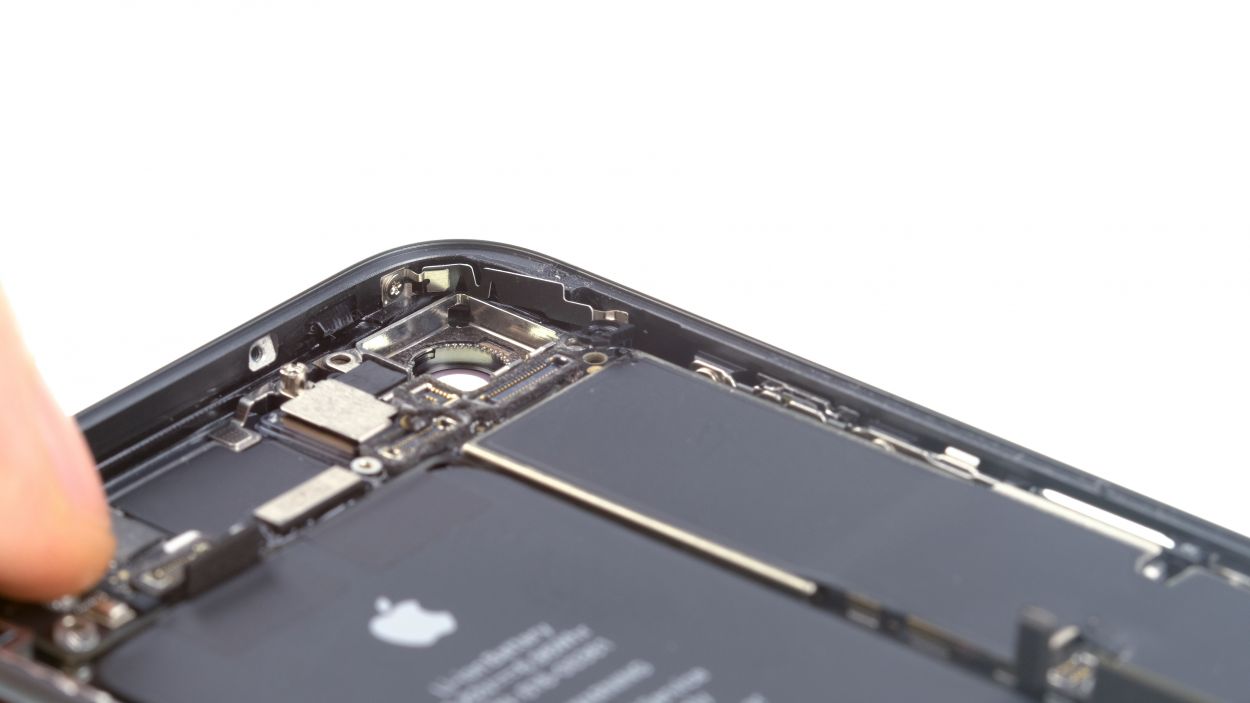
– First, let’s get those screws out that are keeping the logic board snug and secure. Grab your trusty screwdriver and unscrew them all!
– Once you’ve got those screws off, it’s time to gently lift out the logic board with your hands. Just a heads up, there’s a little plastic holder for a screw right next to the iSight camera holes, so keep an eye out for that as you go. You’ve got this!
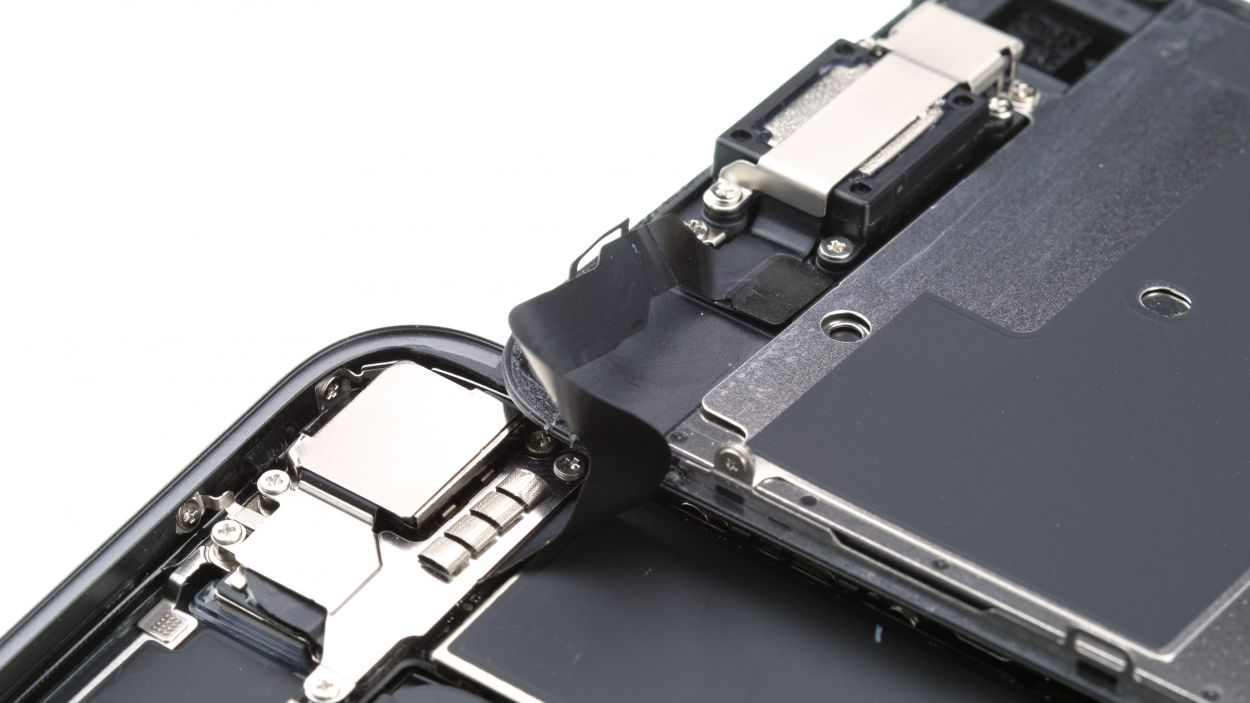
Step 16

1 × 1.2 mm Y-type
1 × 2.9 mm Phillips
1 × 2.5 mm Phillips
1 × 1.4 mm Phillips
1 × 2.1 mm Phillips
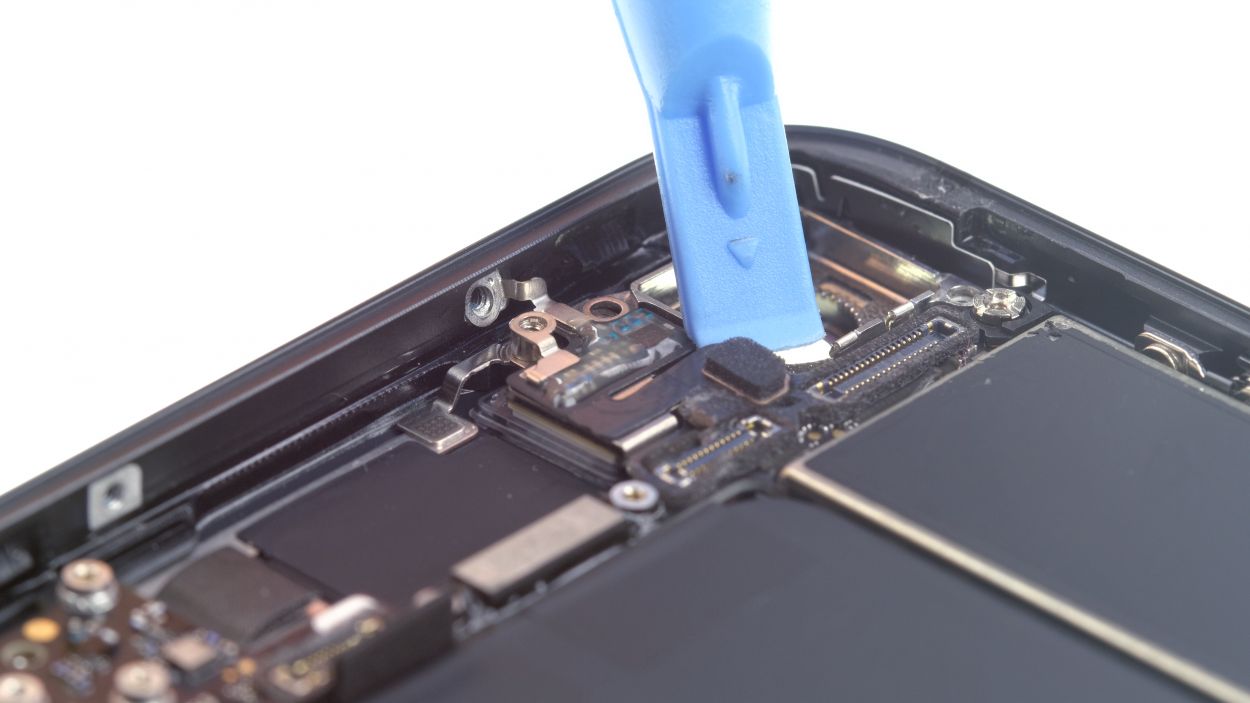
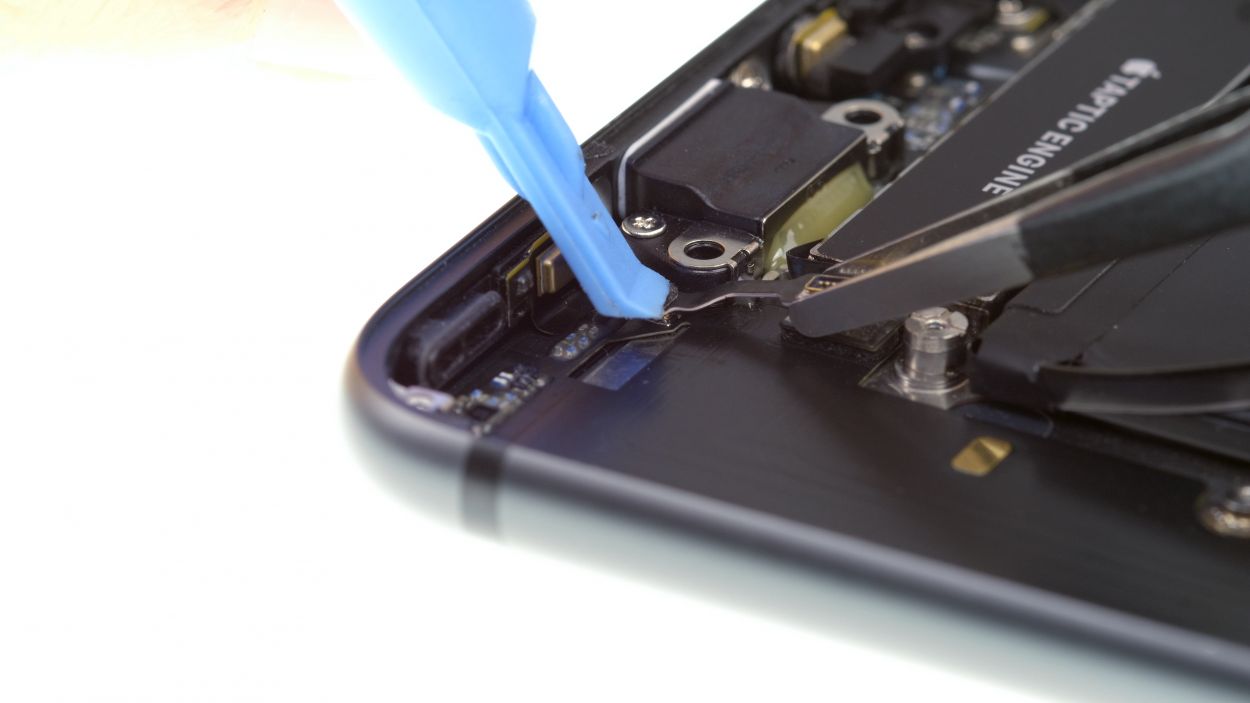
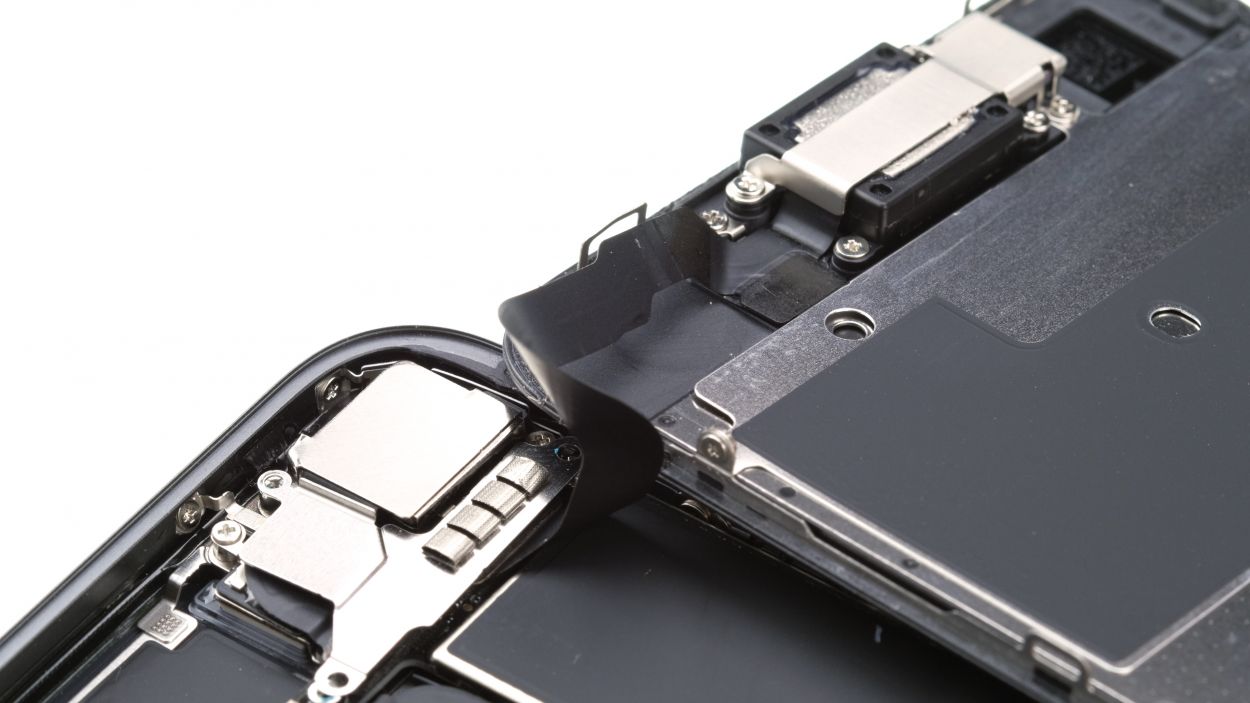
– Start by loosening the screws on the cover plate that’s hanging out over the flex cable connector, then set it aside like a pro.
– Next, go ahead and disconnect that flex cable connector and gently lift it up, giving it a little freedom.
– Now, loosen up the screws holding the speaker in place.
– With that done, you can lift out the speaker along with the flex cable, and just like that, you’re on your way!
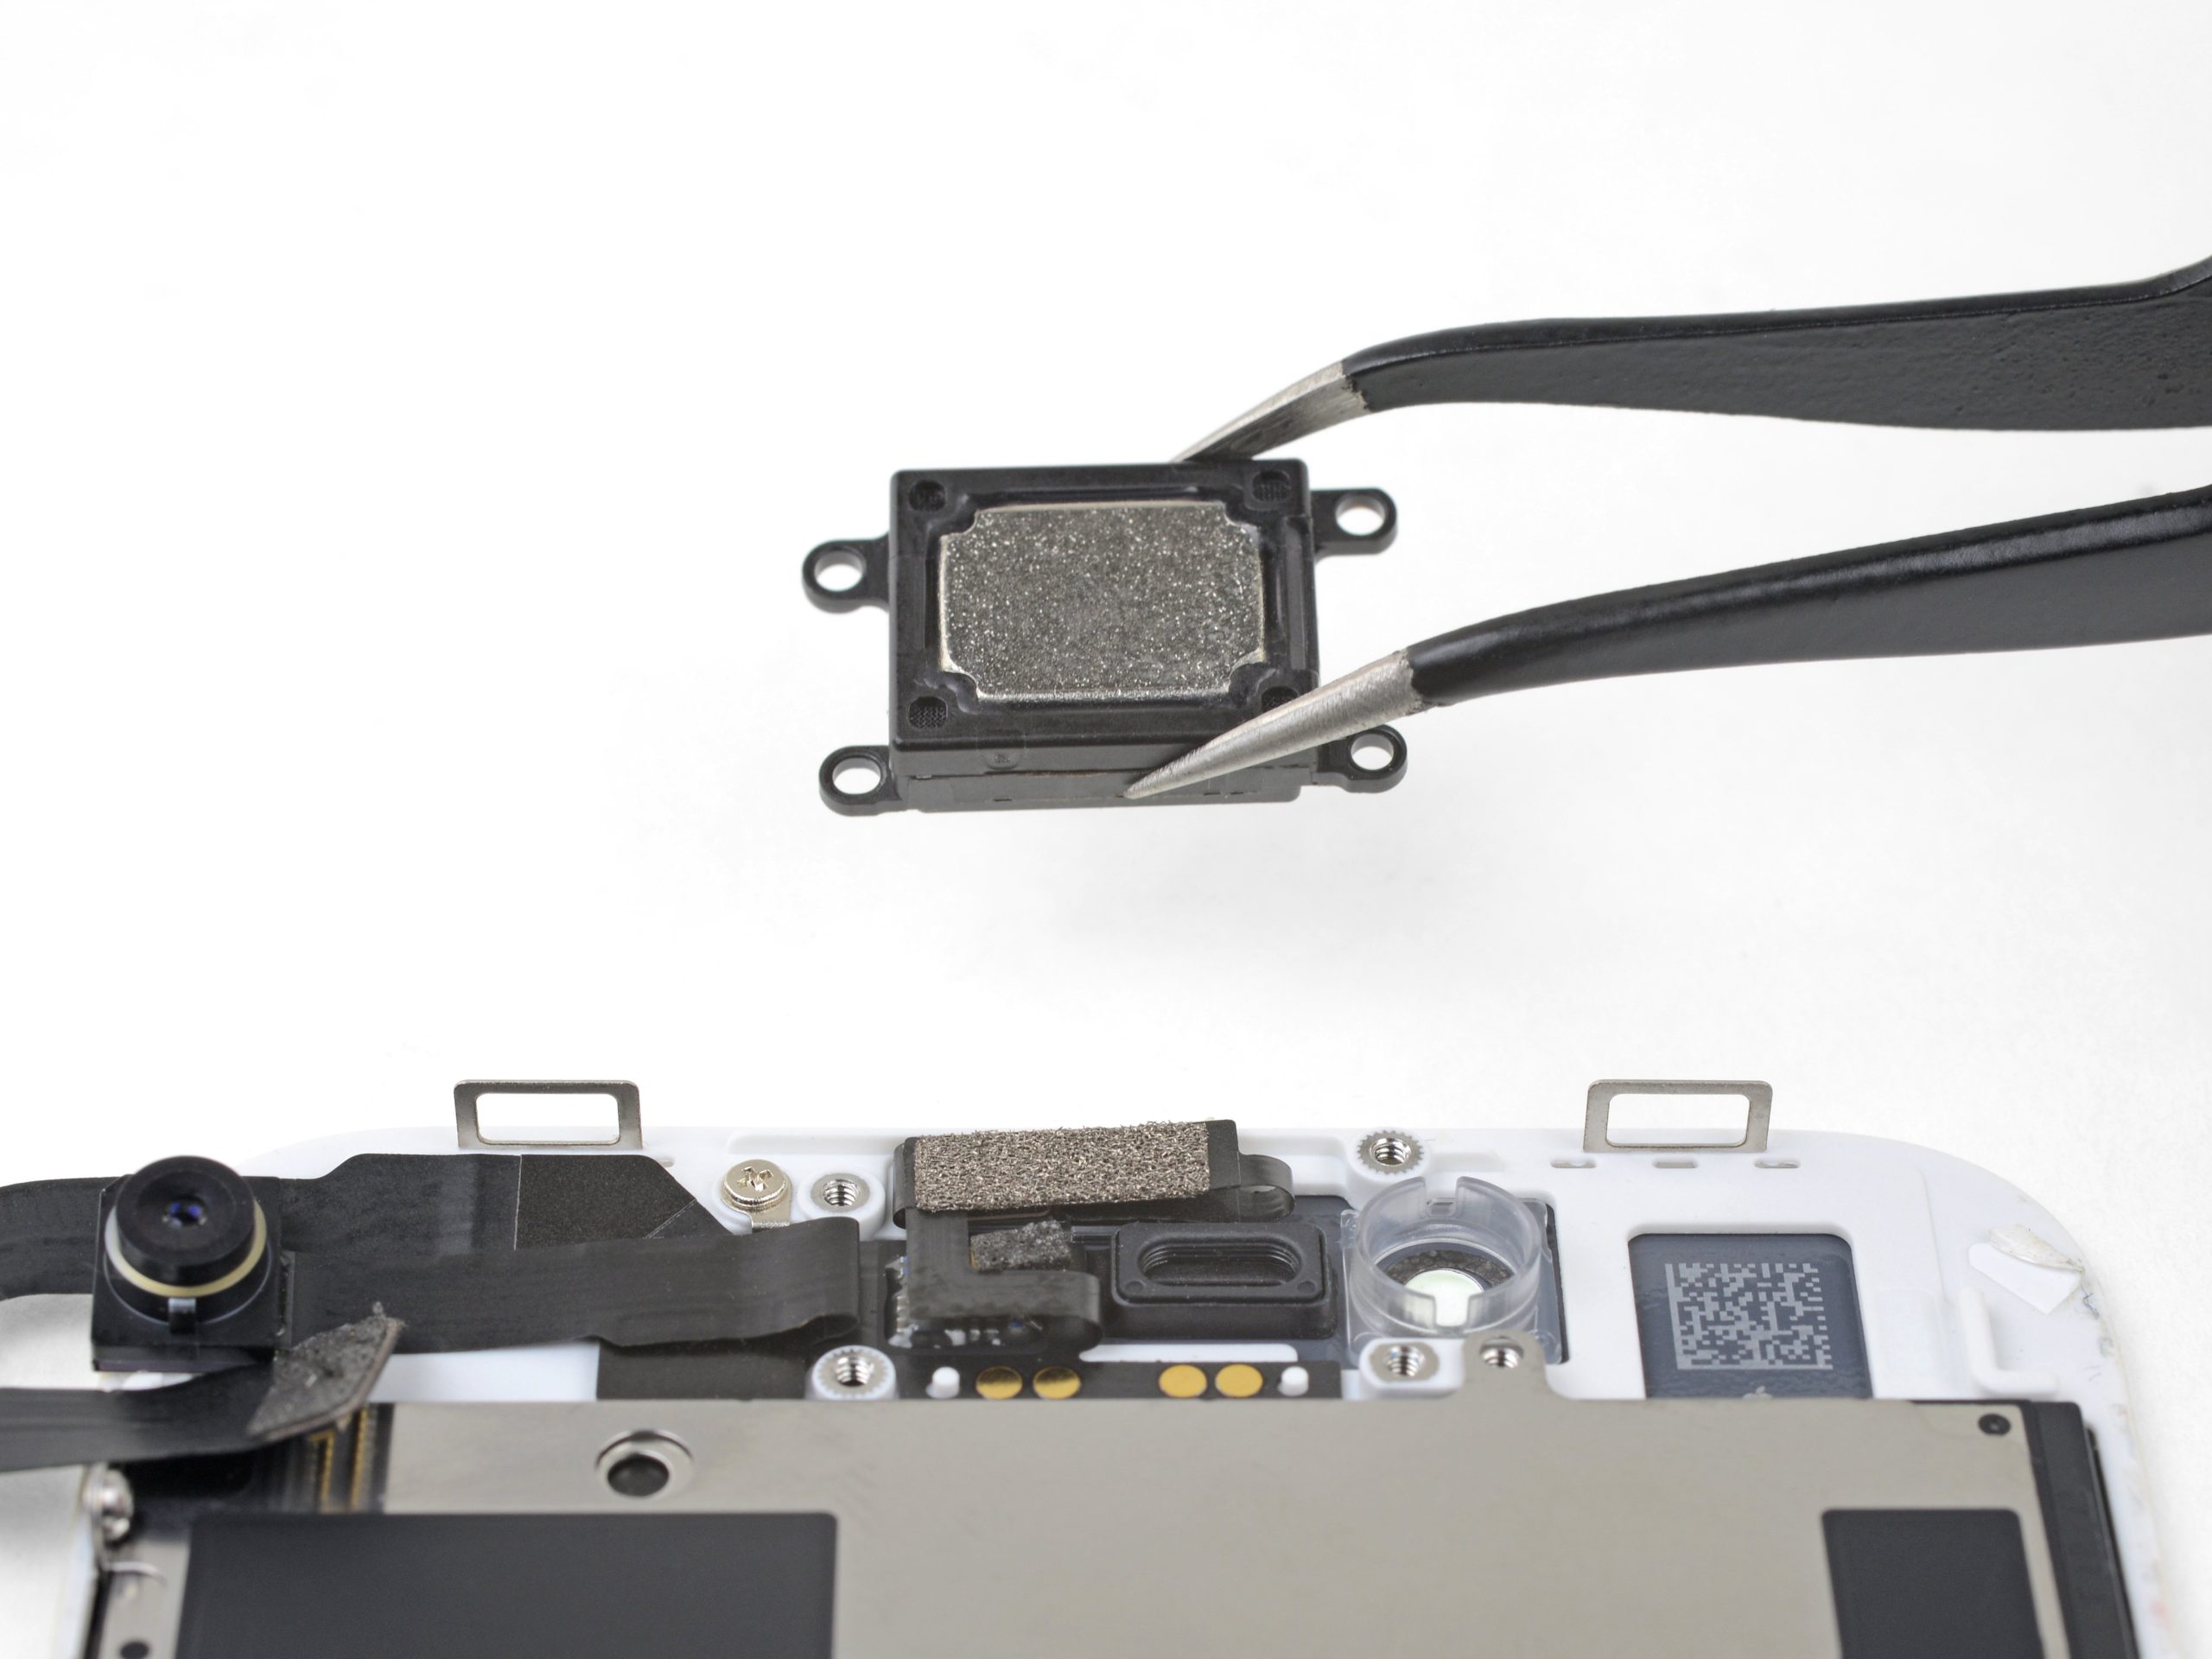
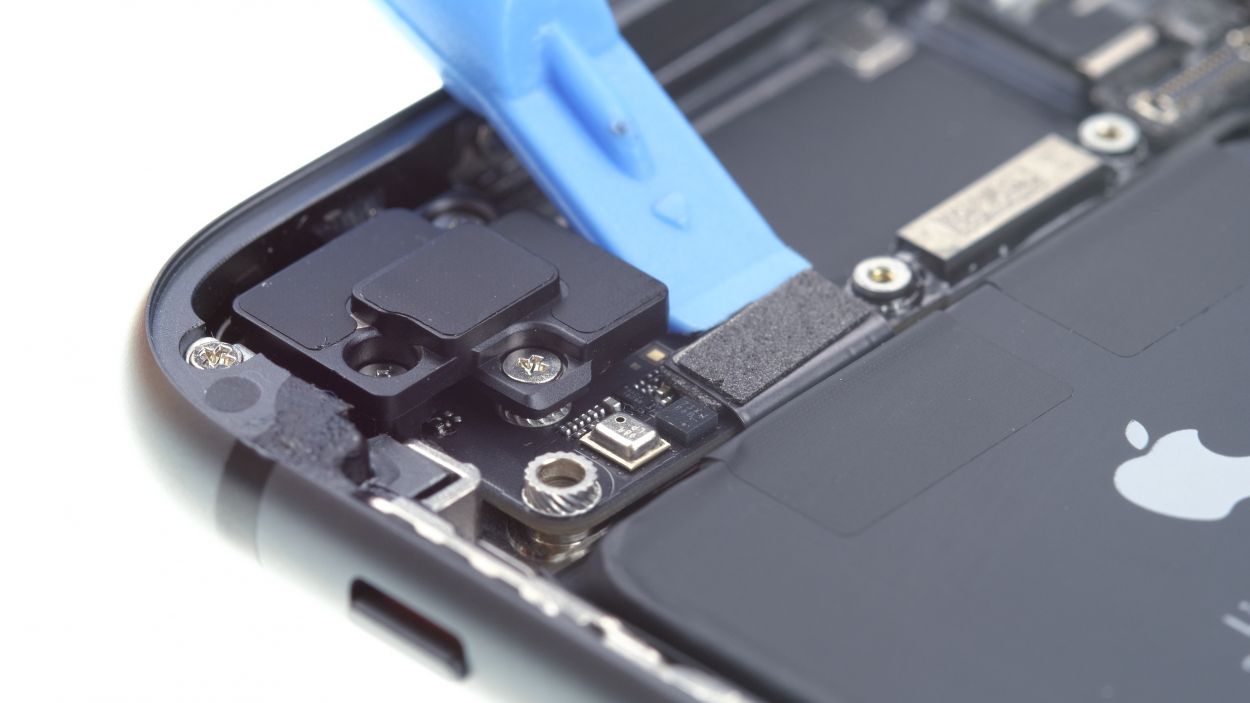
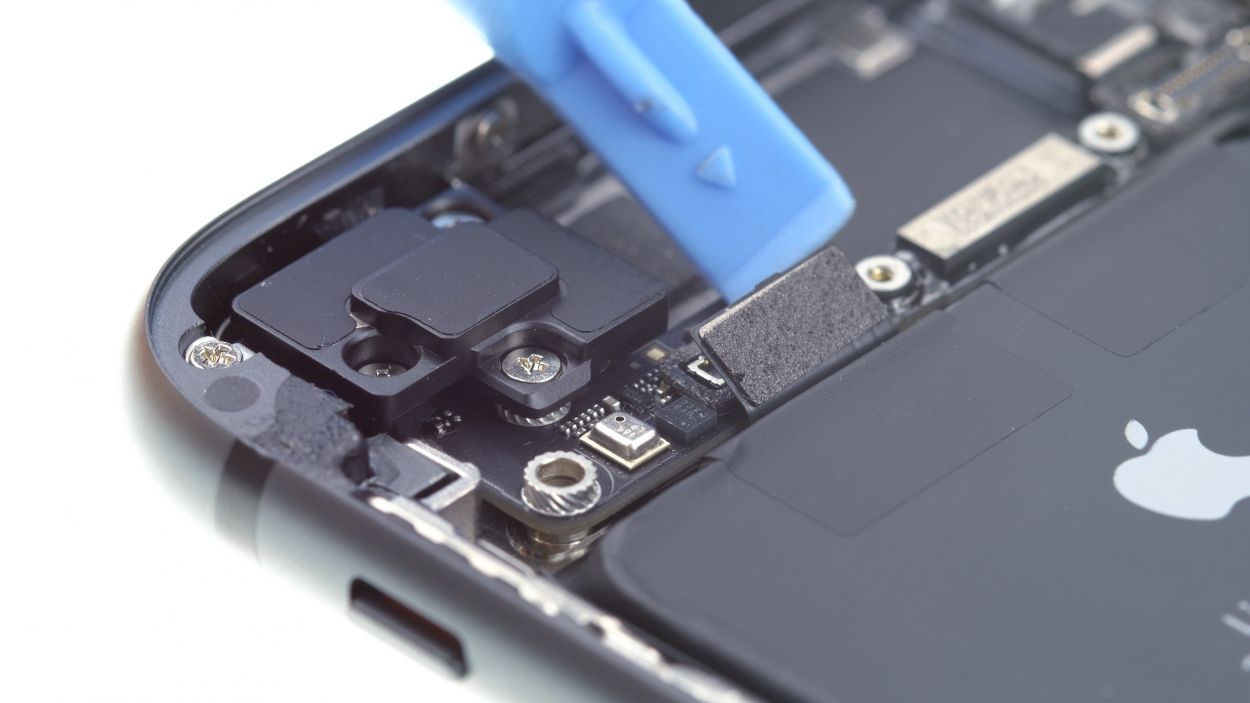
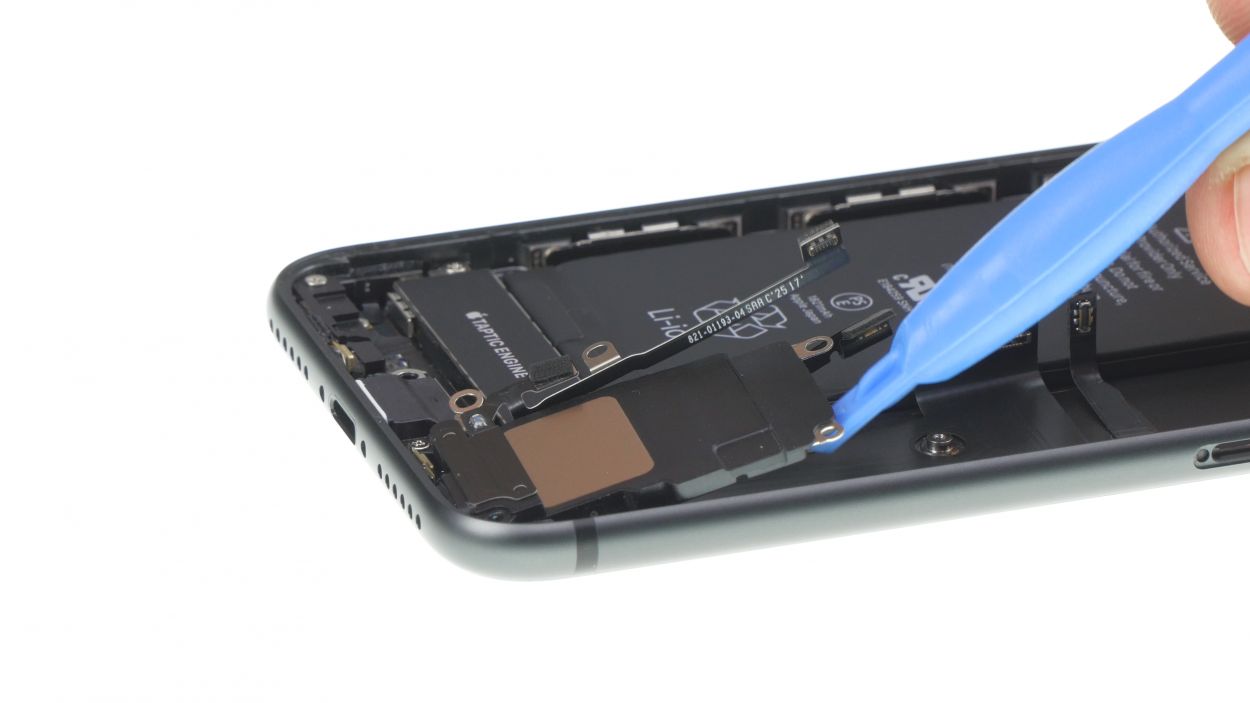
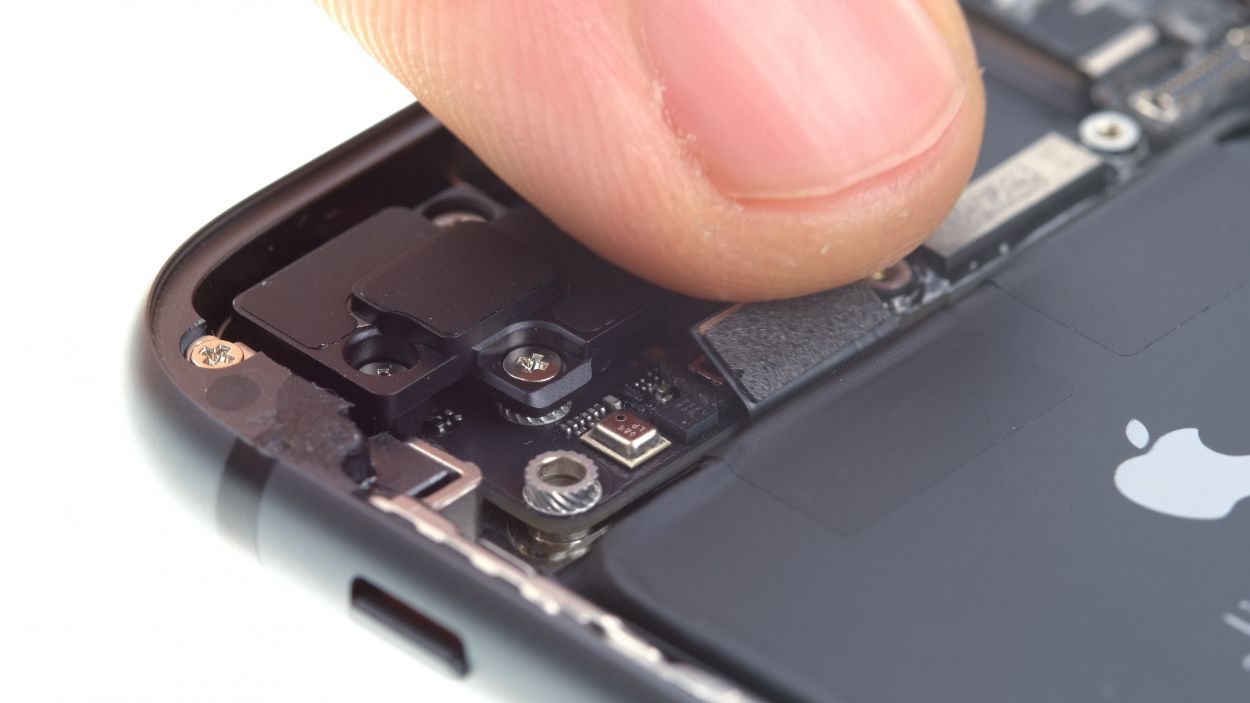
Step 17


1 × 2.0 mm Standoff
1 × 2.0 mm Phillips
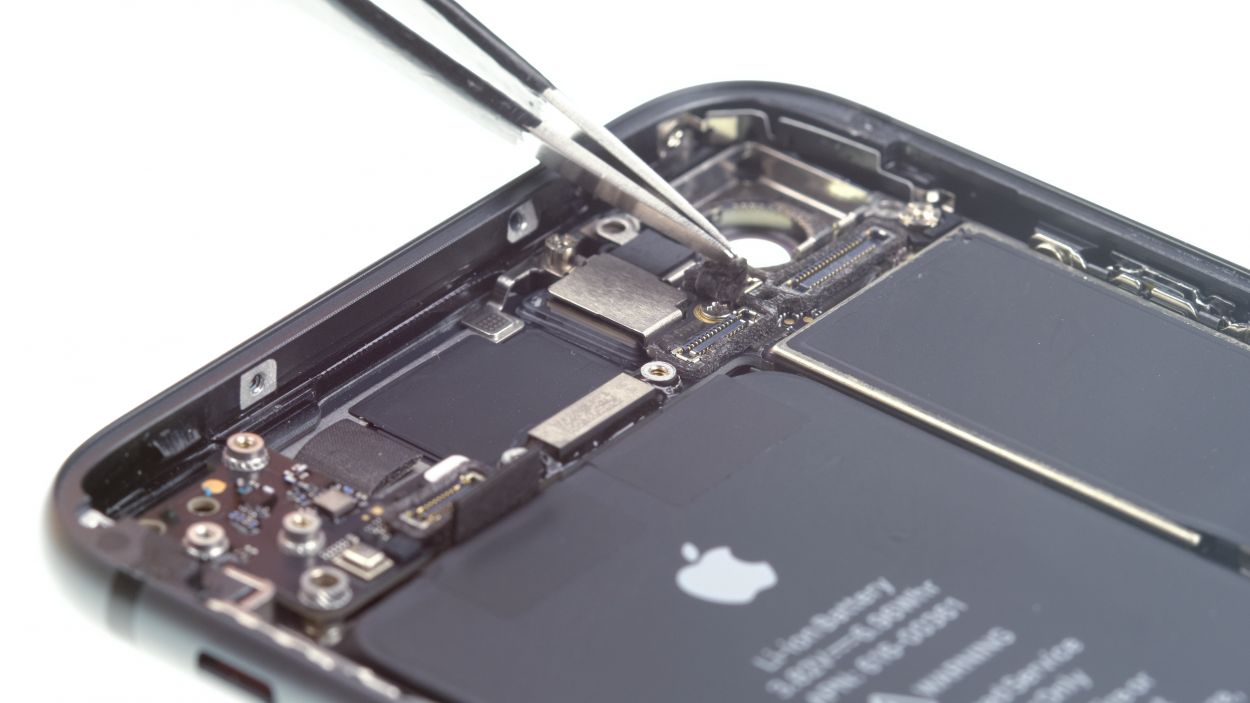
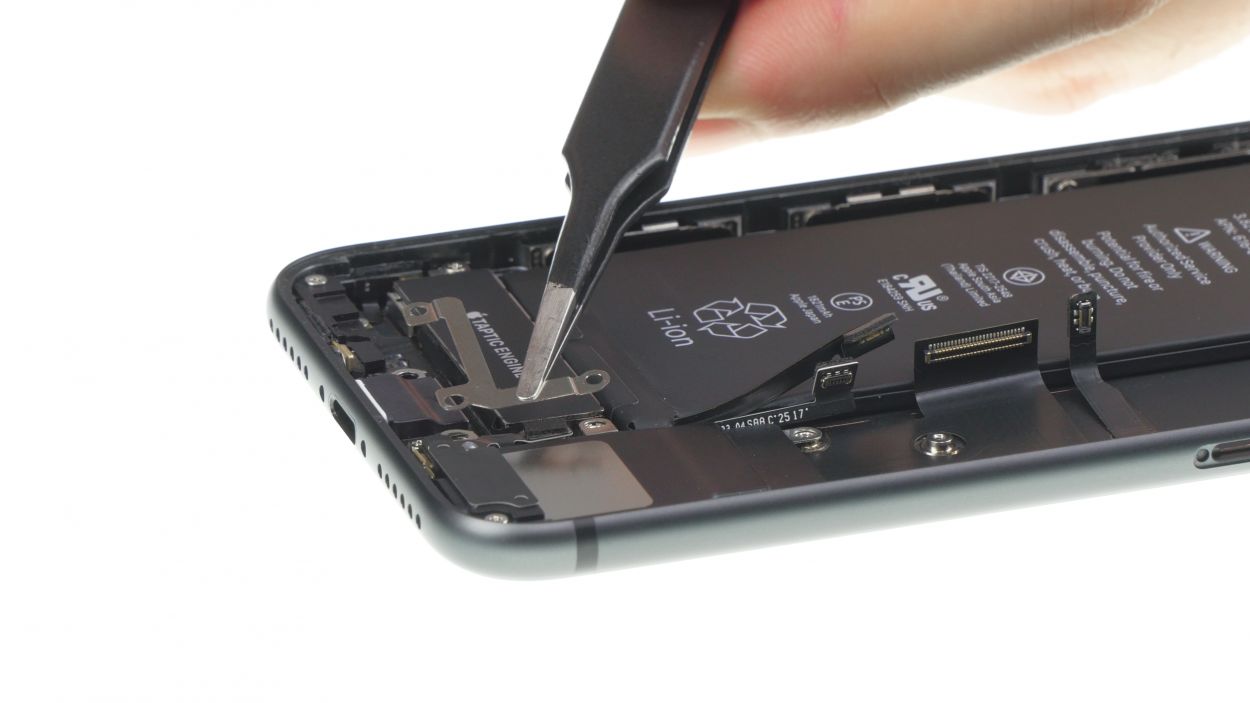
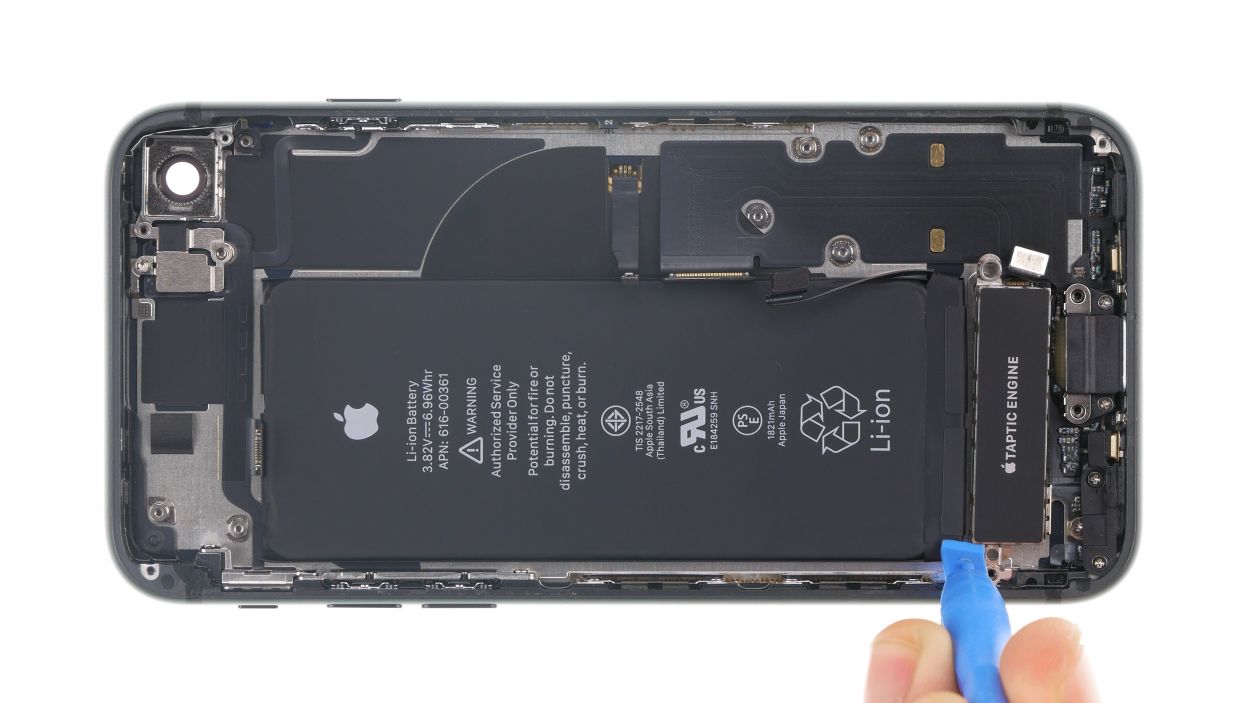
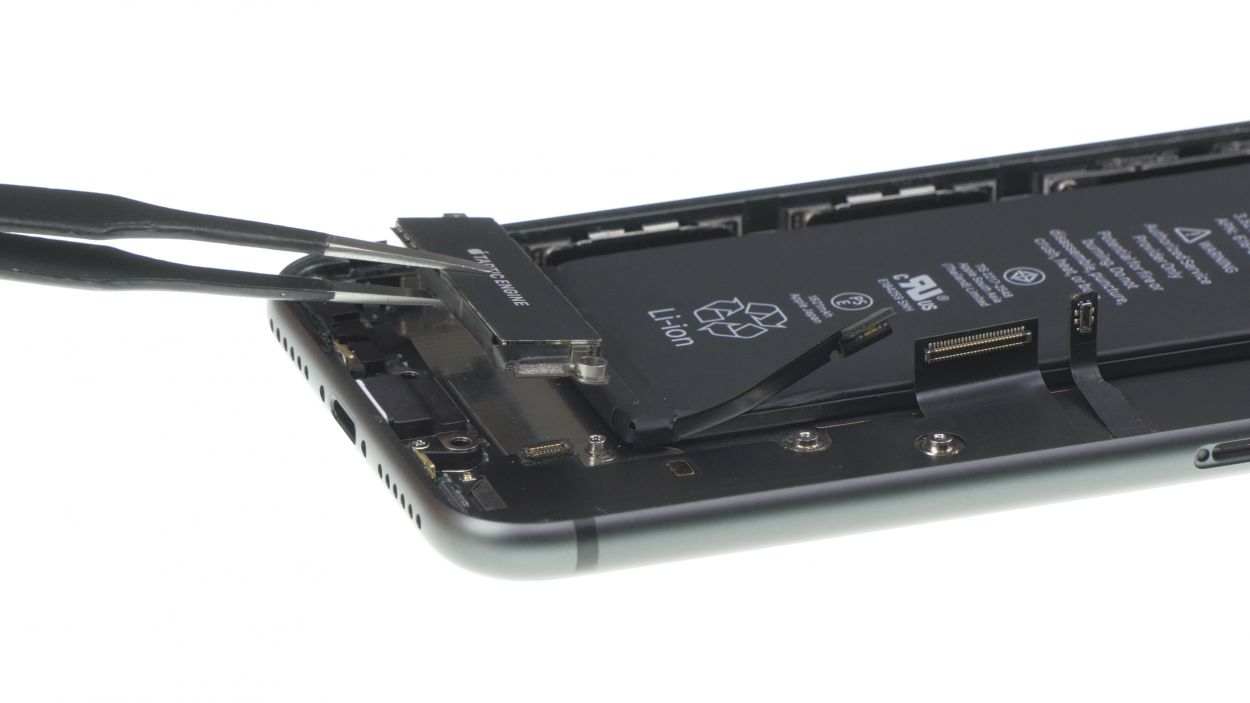
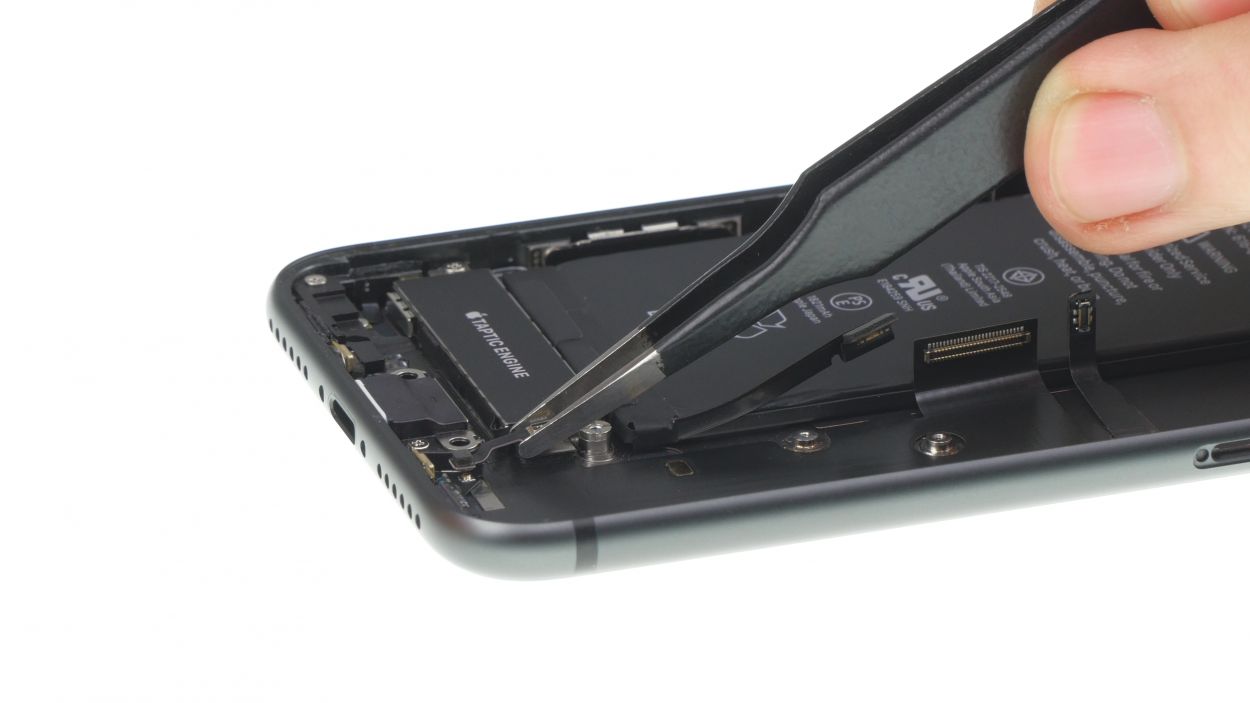
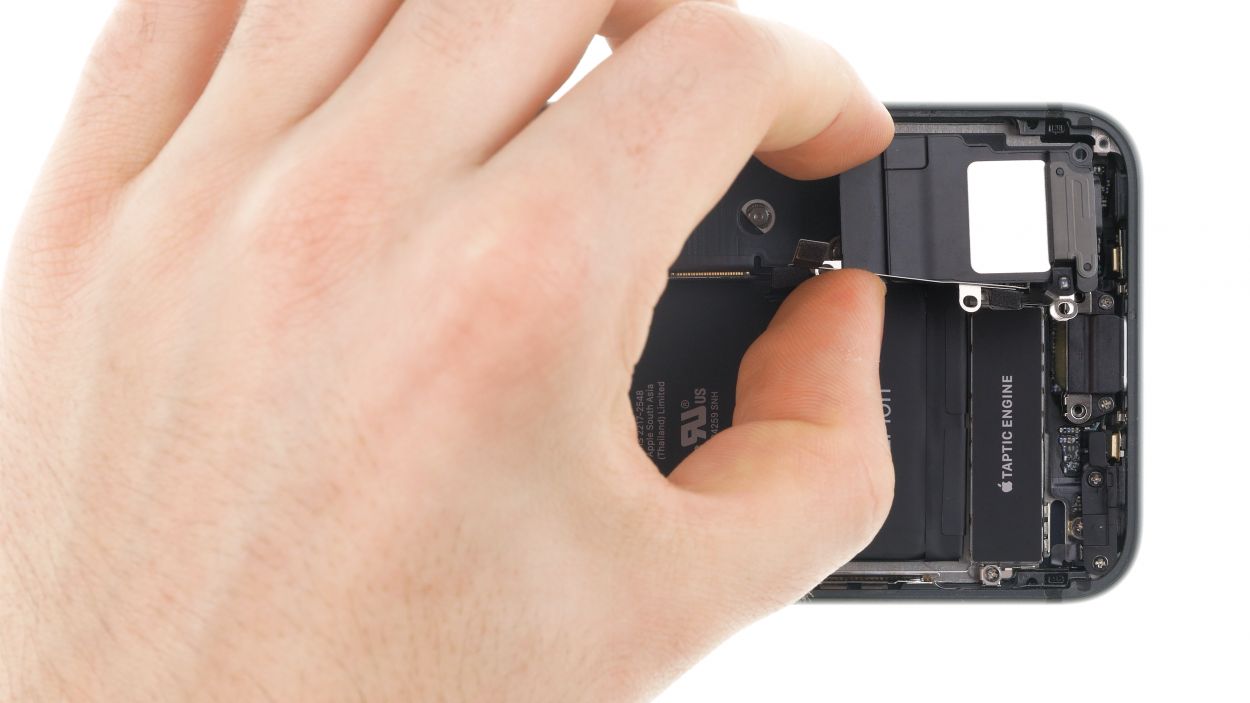
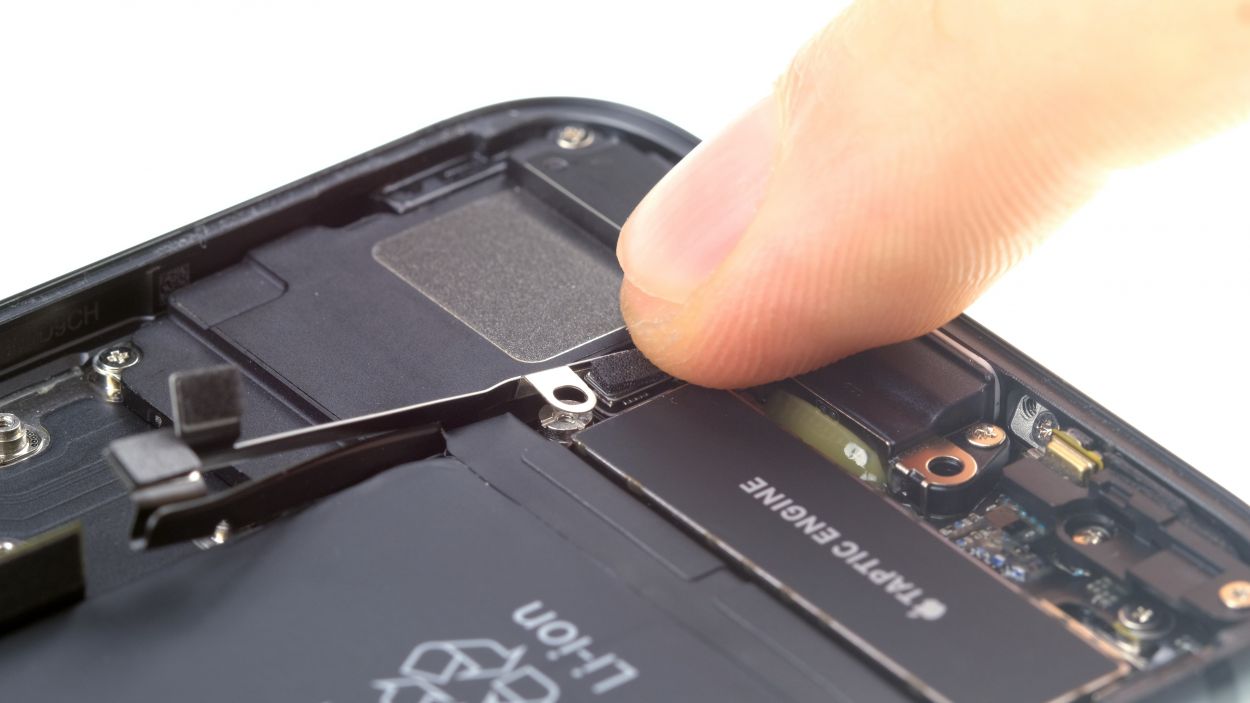
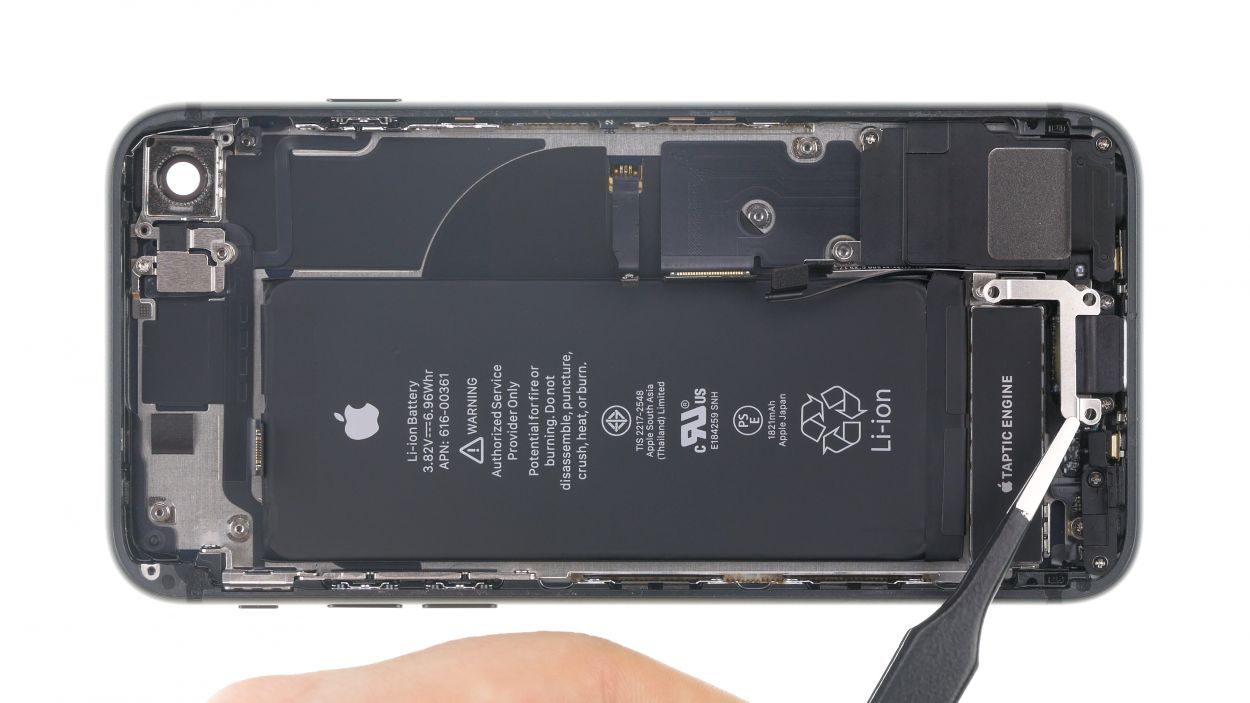
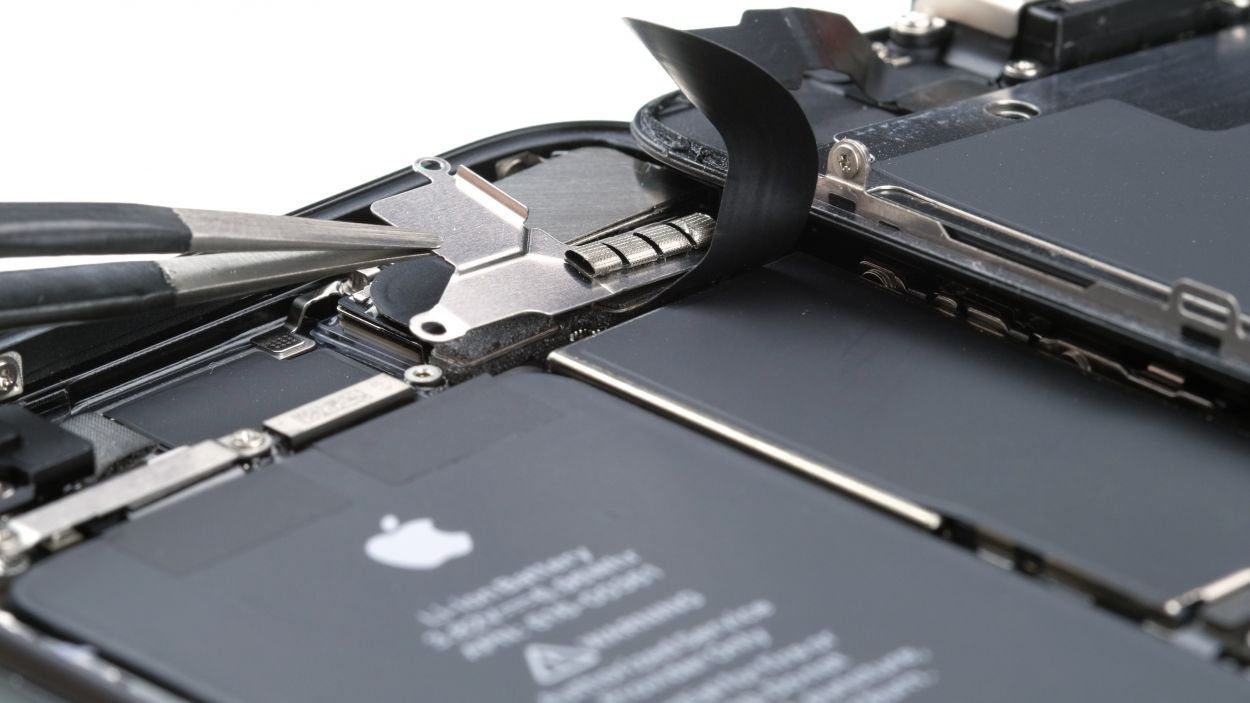
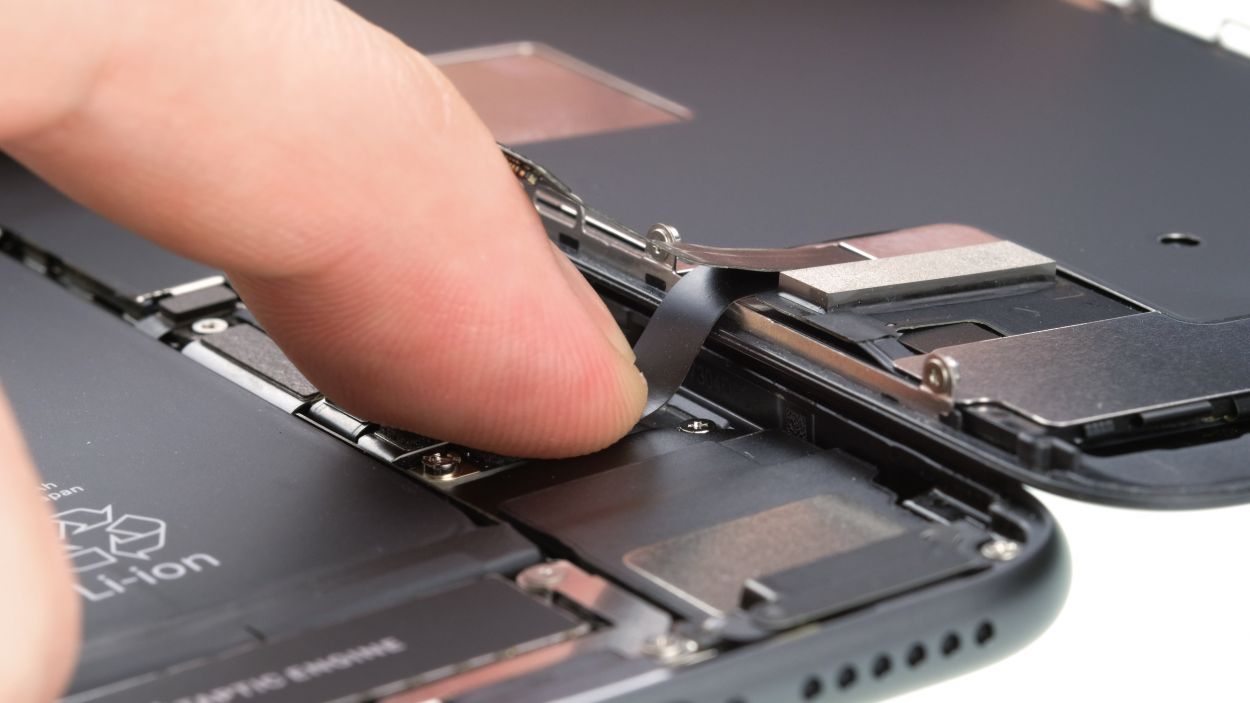
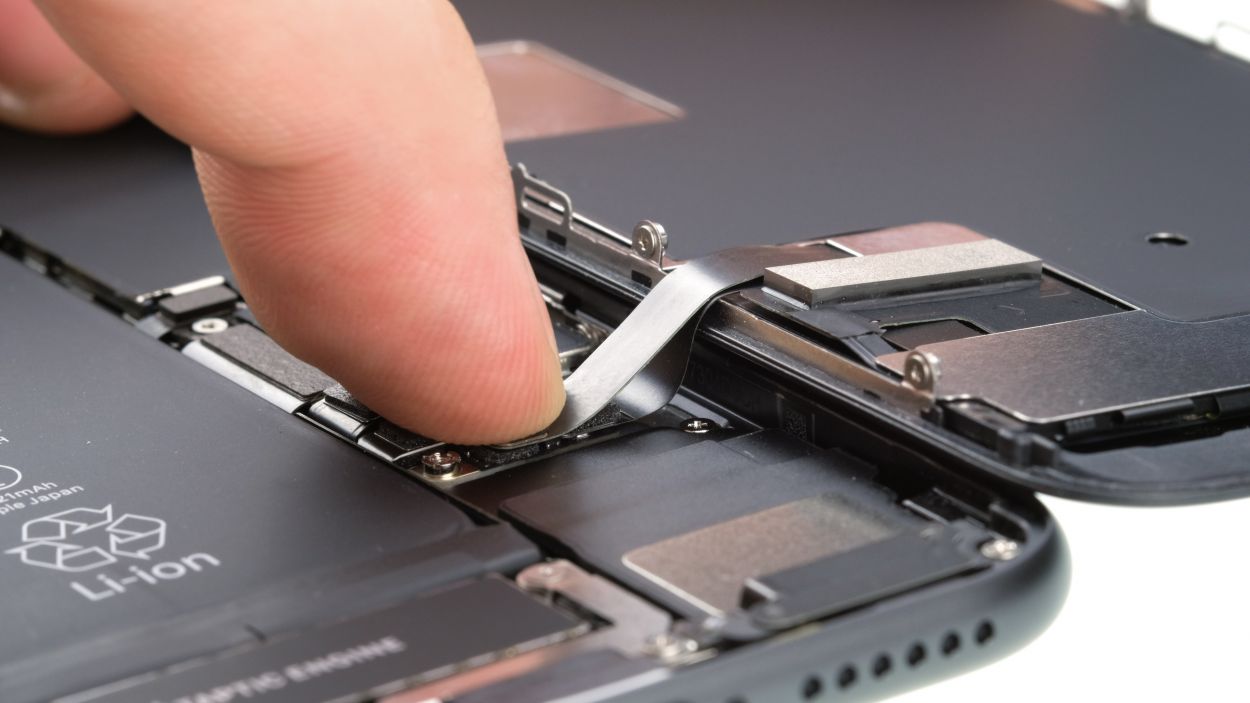
– First, grab your trusty spudger or some tweezers and gently detach the little flex cable hanging out above the Taptic Engine connector.
– Next up, loosen those screws securing the Taptic Engine in place—easy peasy!
– Now, carefully use your spudger to lever the Taptic Engine connector and lift that Taptic Engine out of your device. You’ve got this!
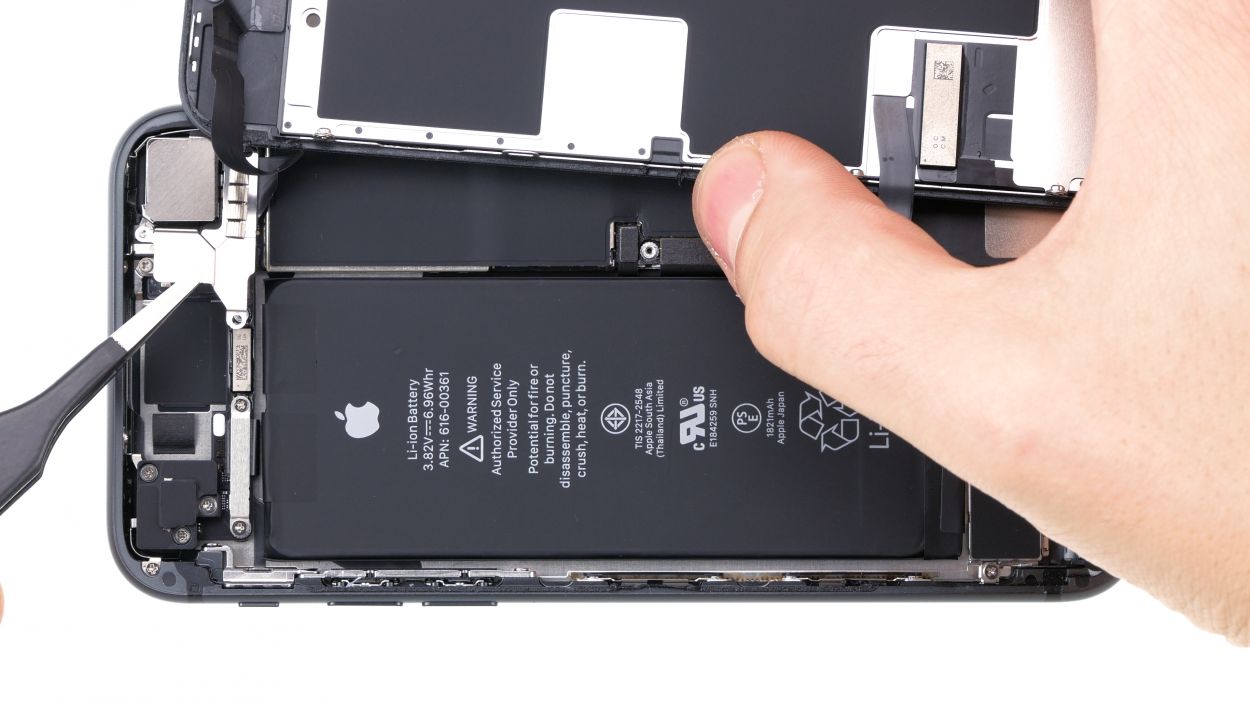
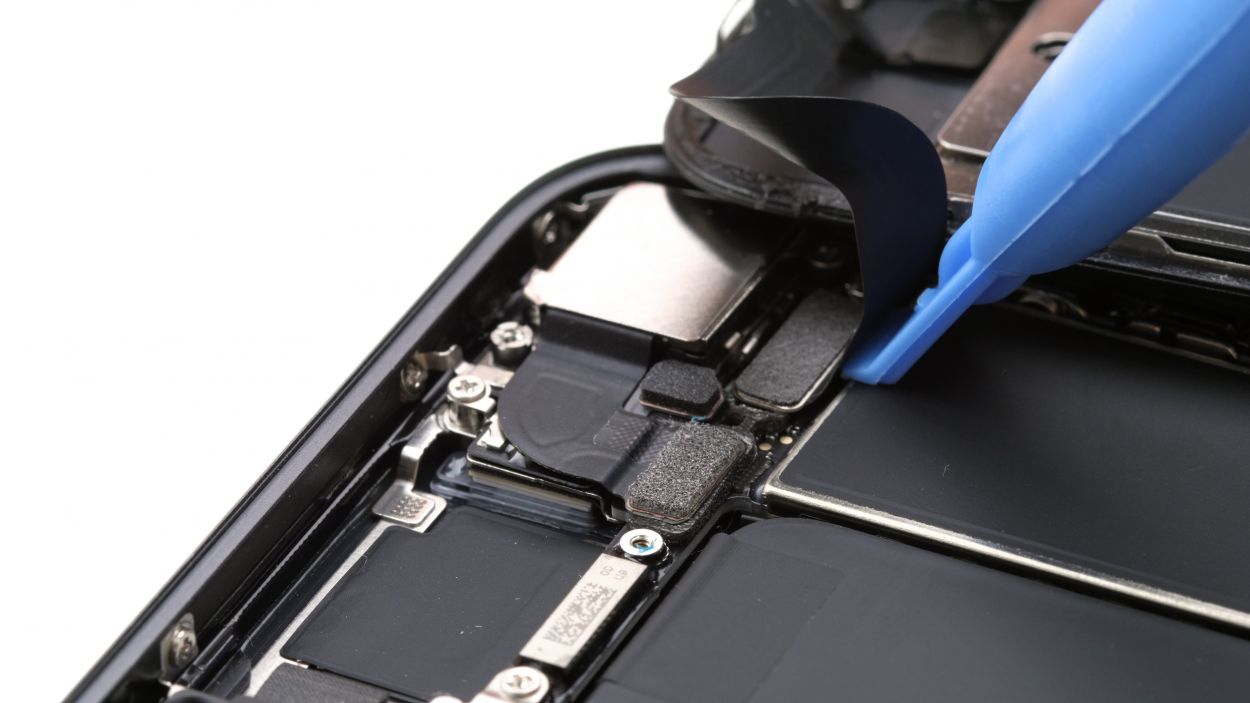
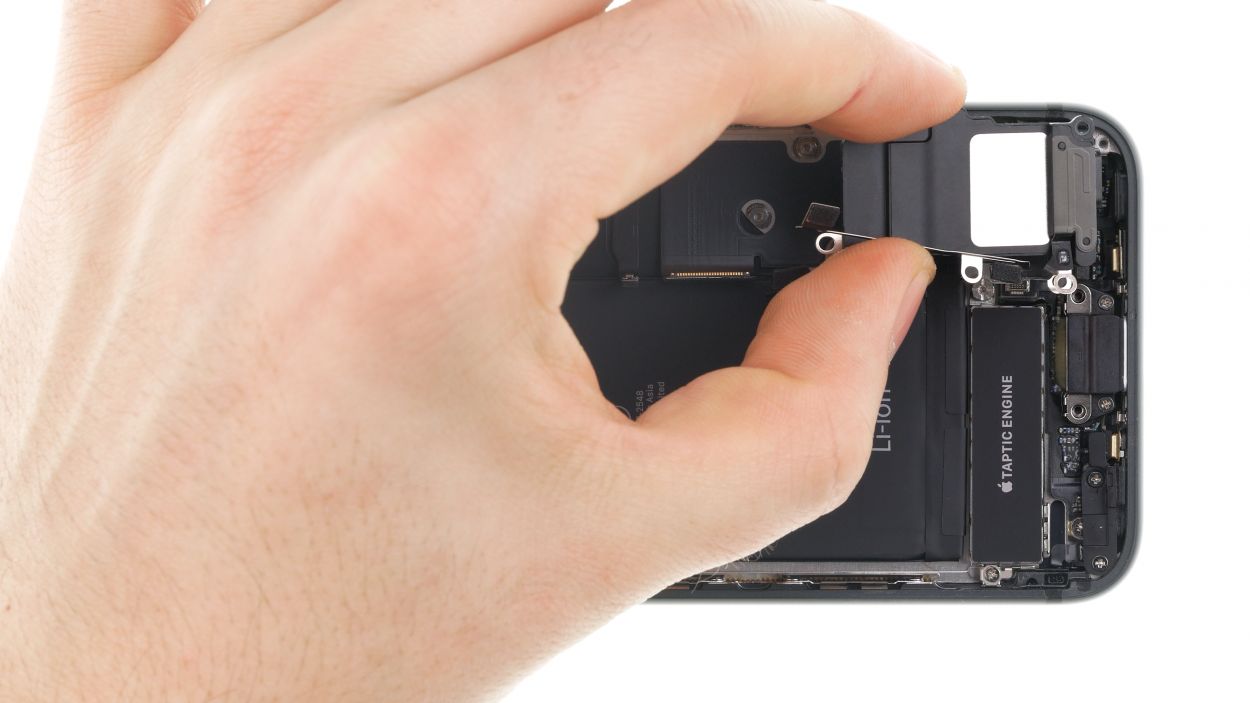
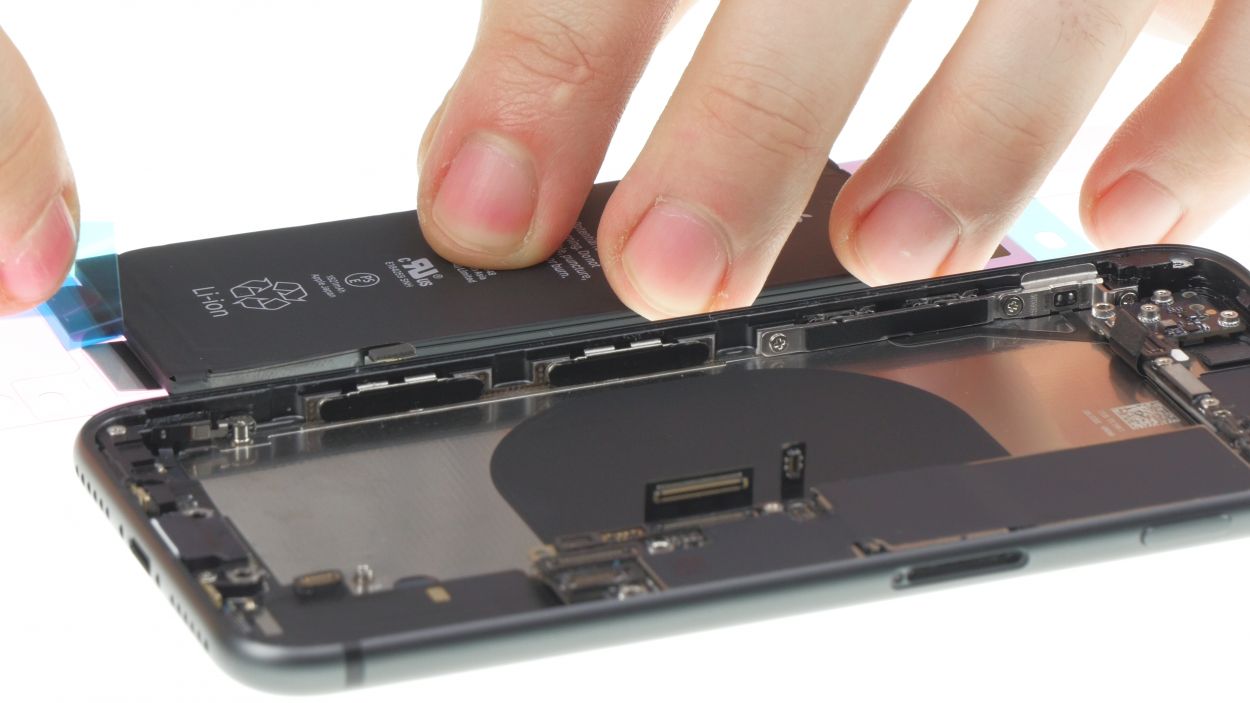
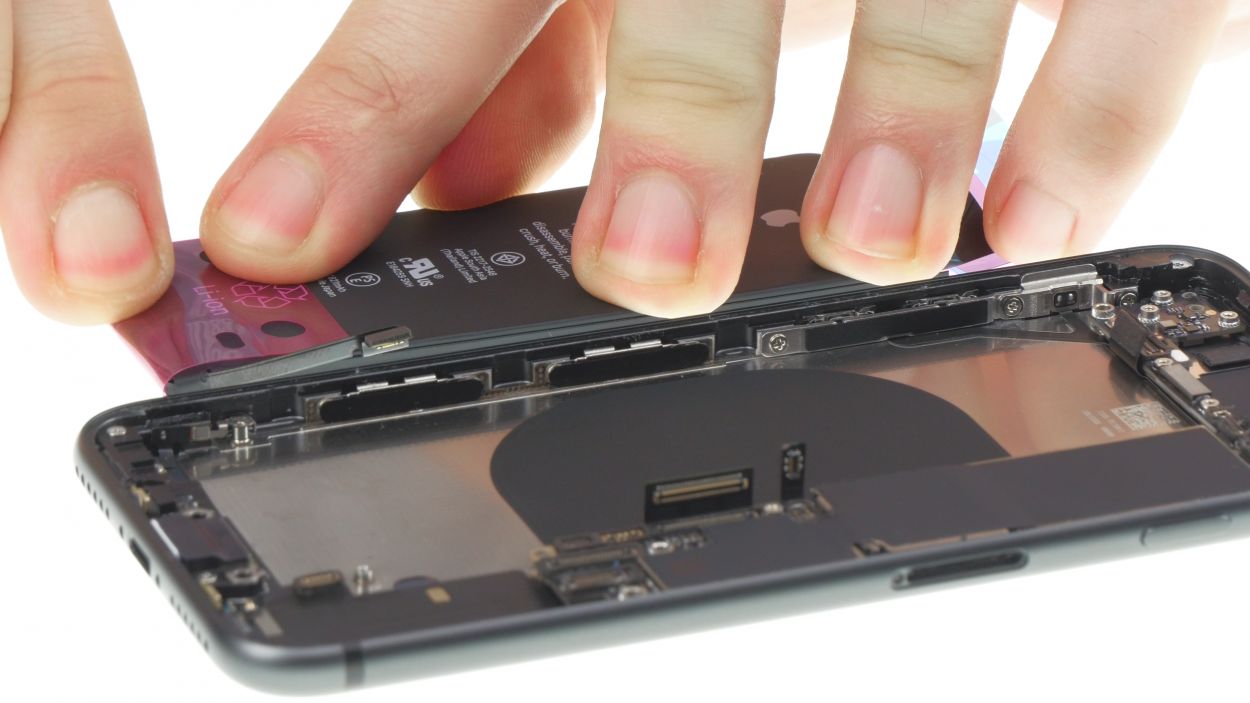
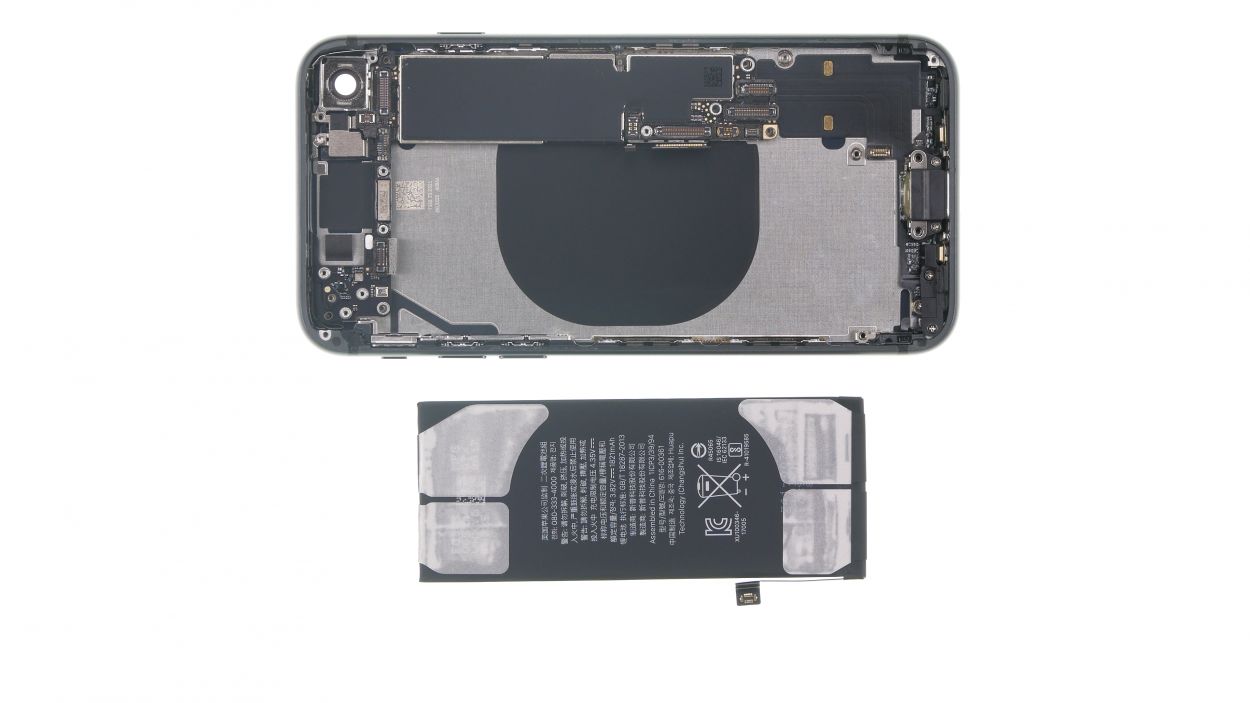
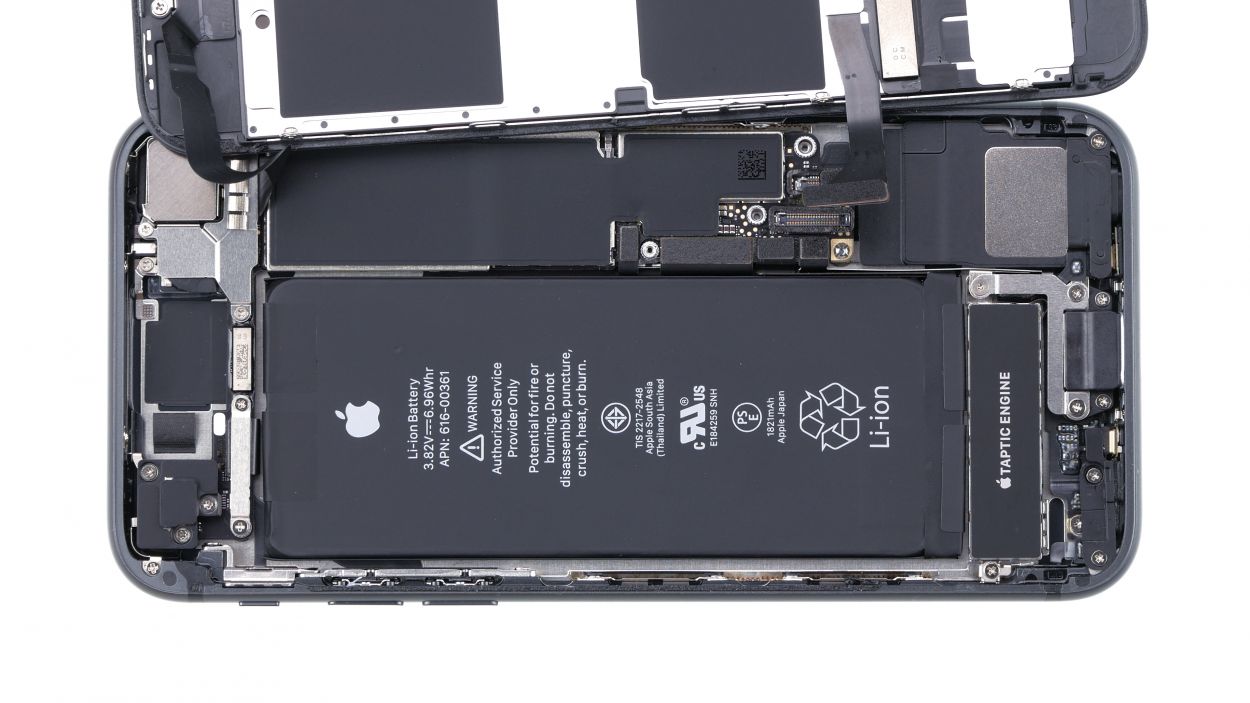
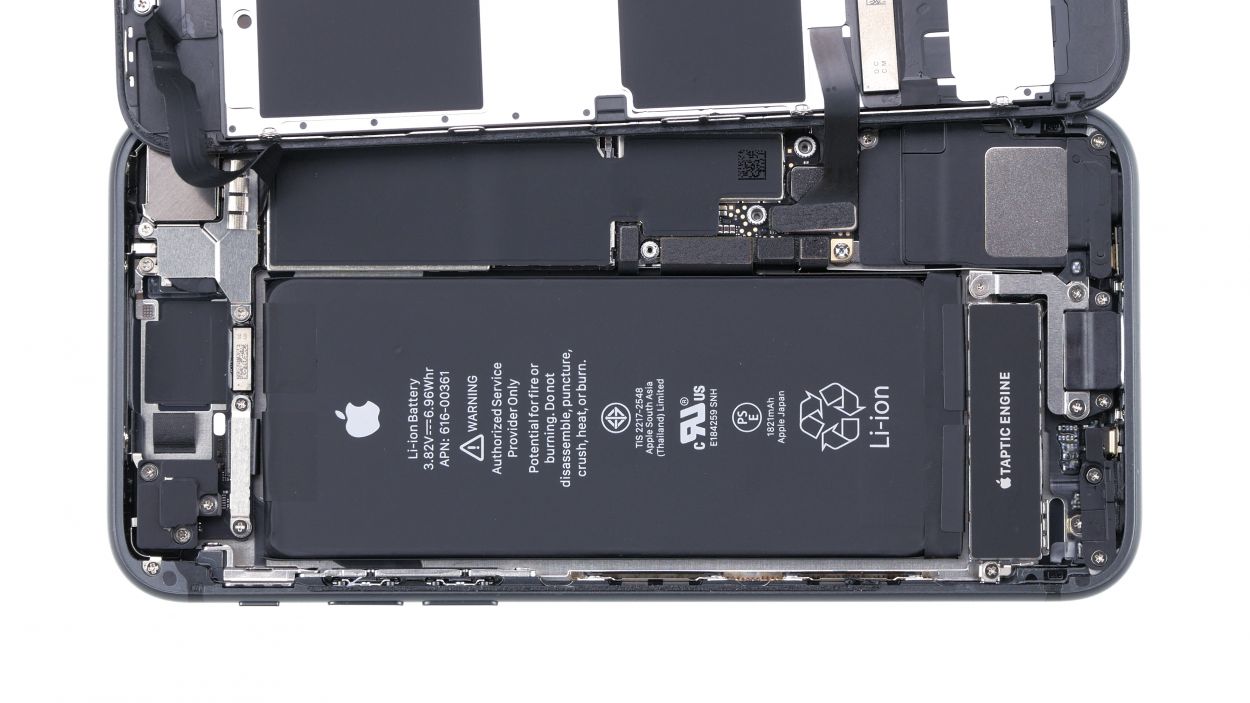
Step 18
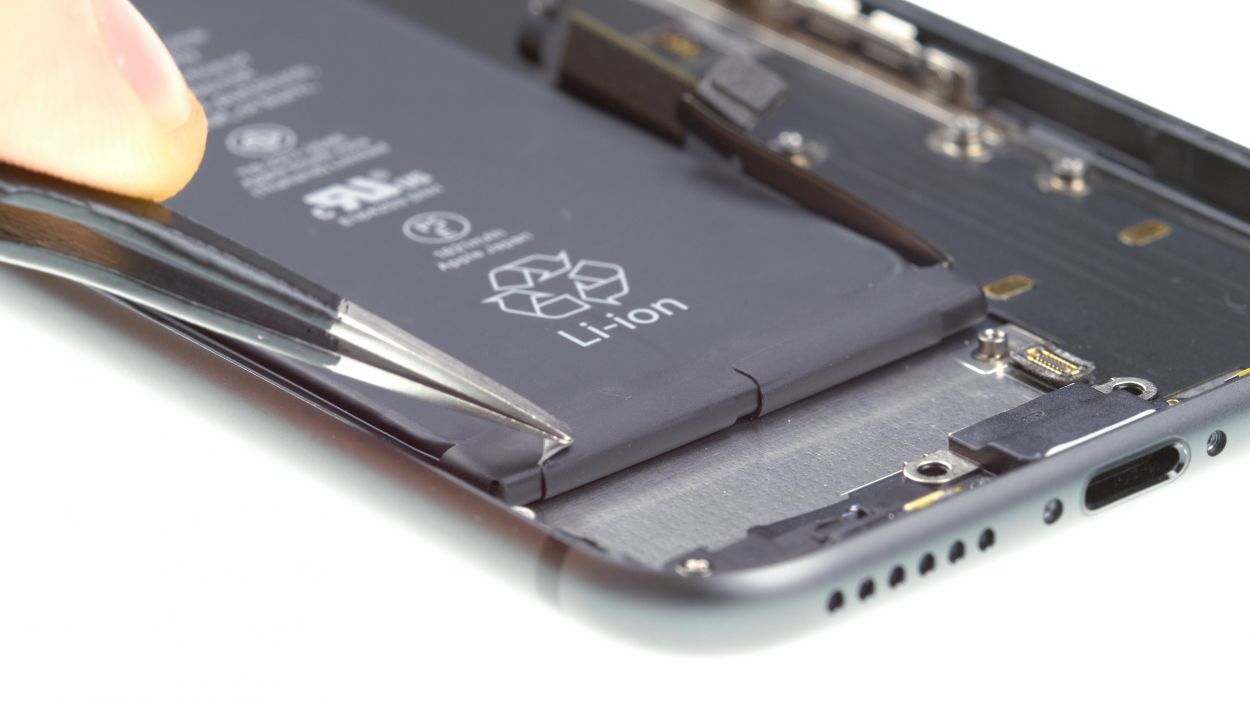

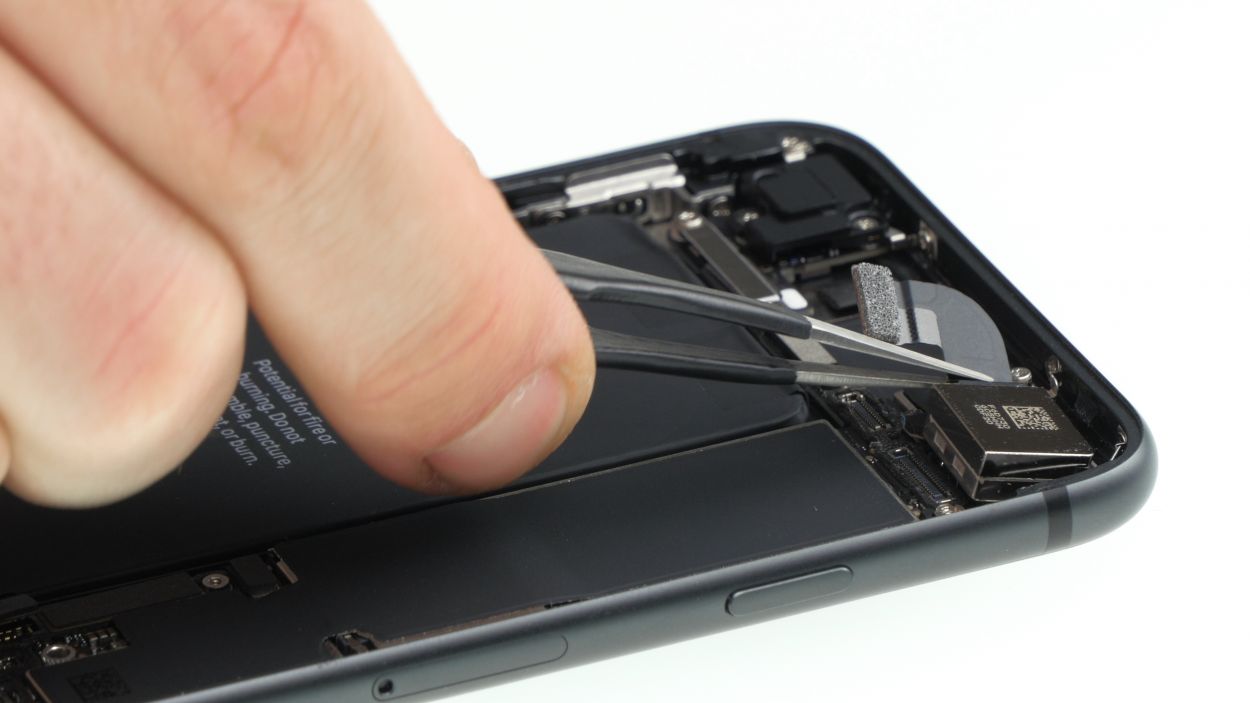
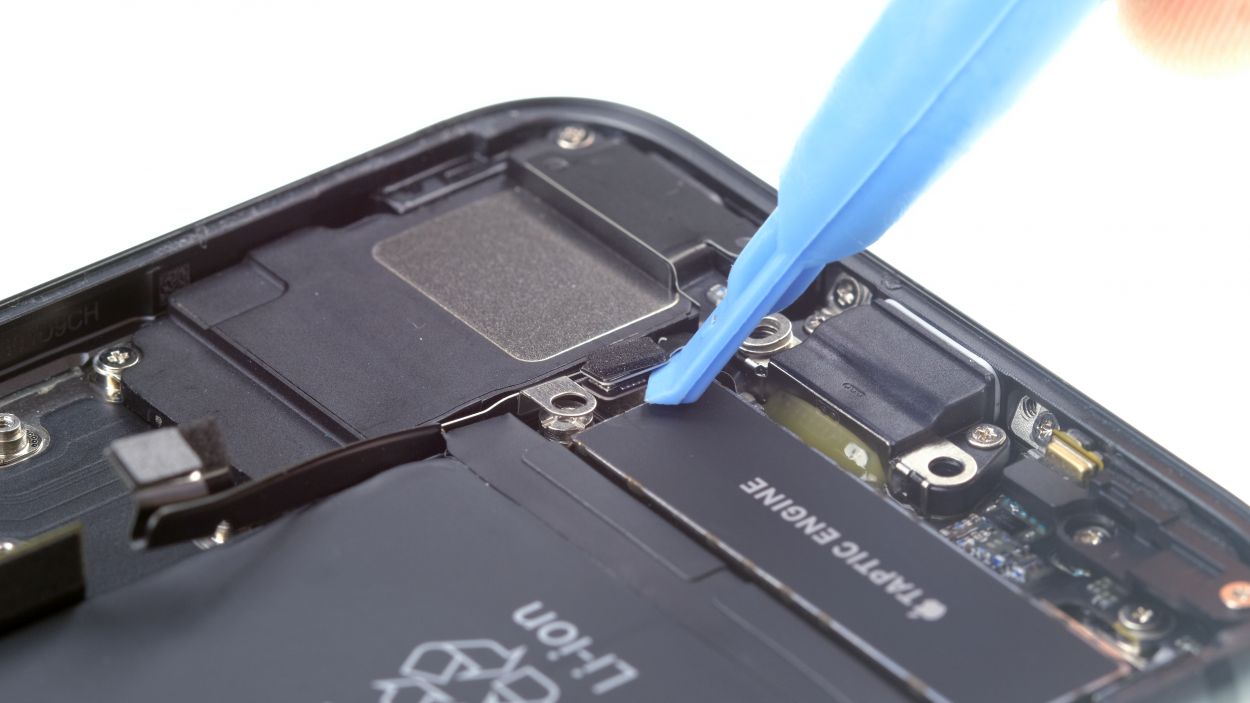
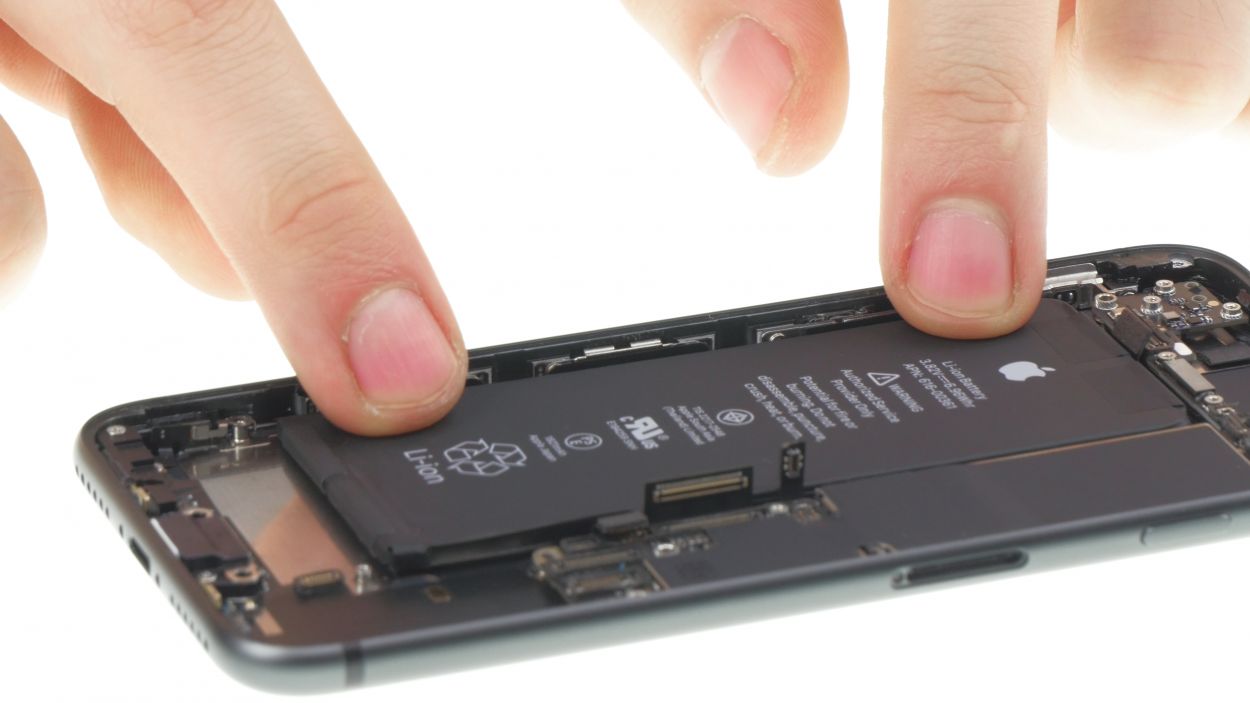
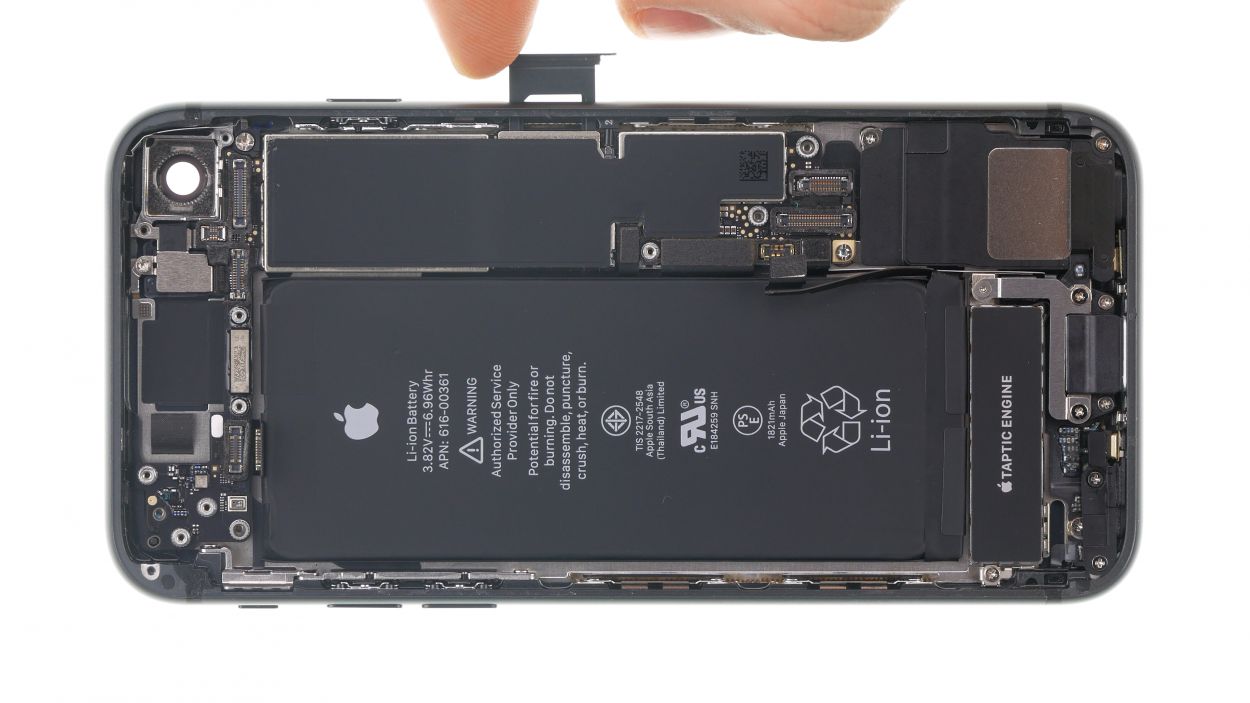
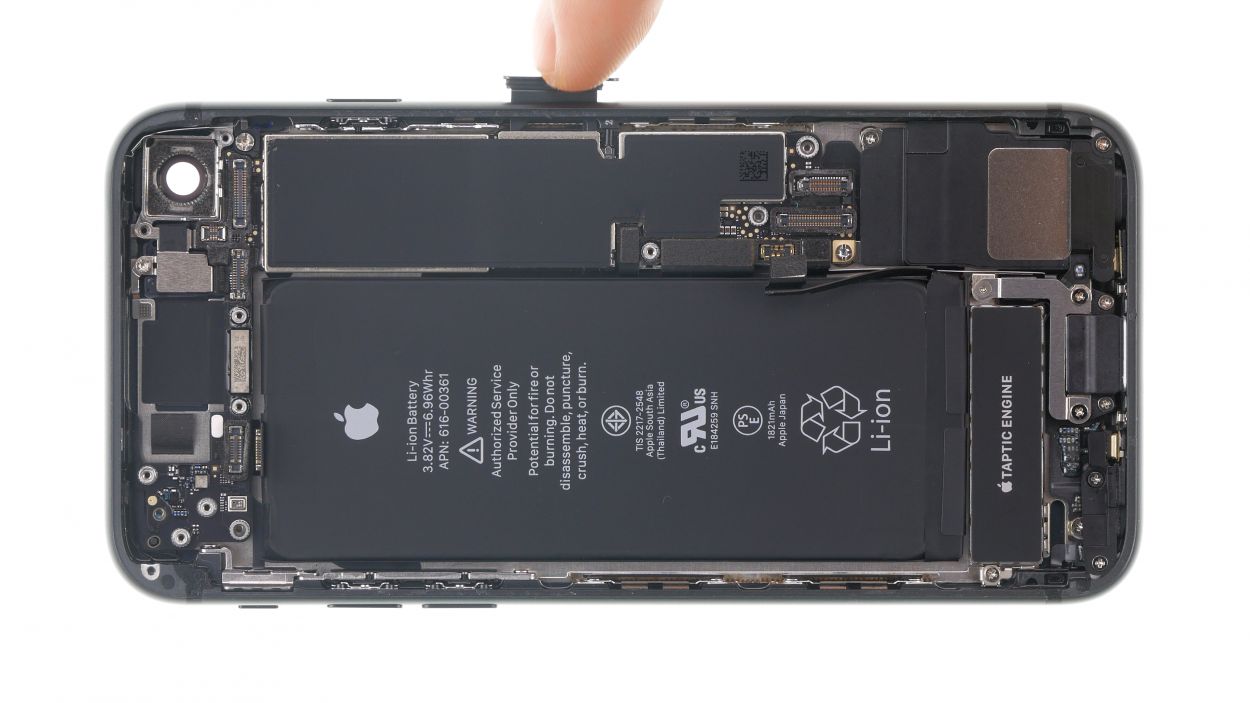
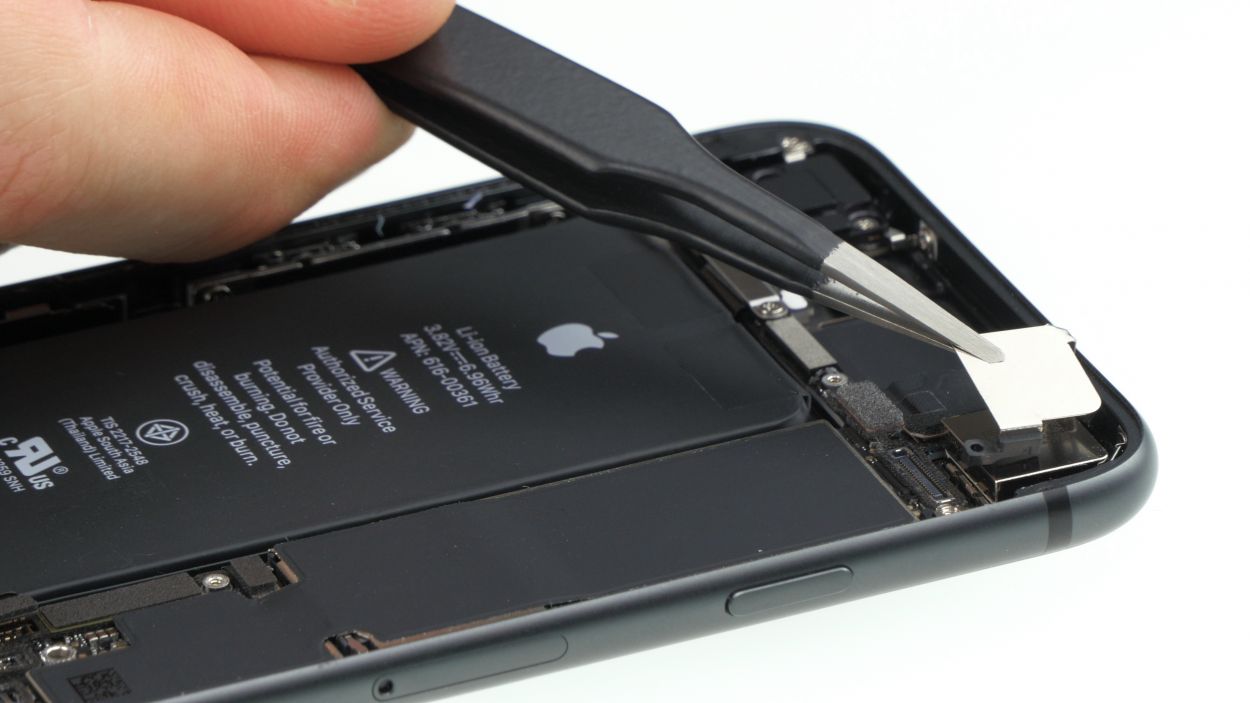
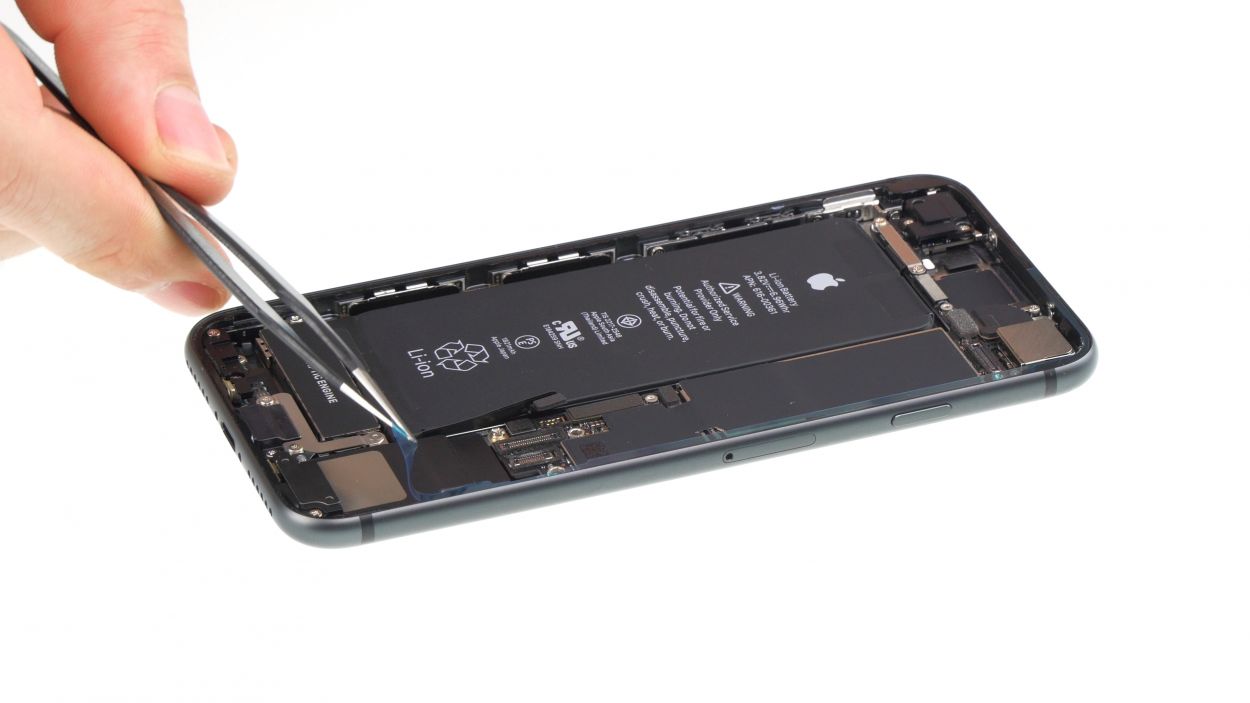
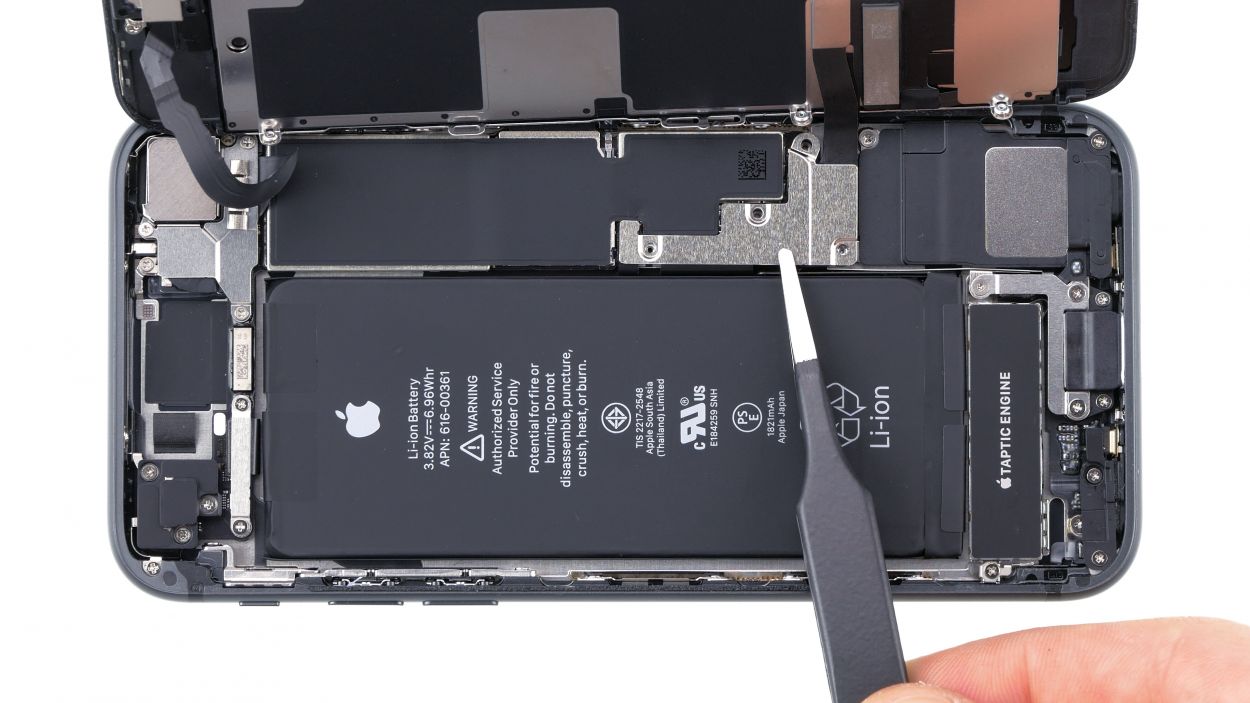
– Grab those tweezers or a spatula and gently lift away the black tabs from the battery. Beneath them, you’ll find the white adhesive strips waiting for you!
As you carefully pull out those adhesive strips, keep an eye out for the standby and volume cable contacts! We want to avoid any accidental mishaps, so take it slow and steady!
Tools Used
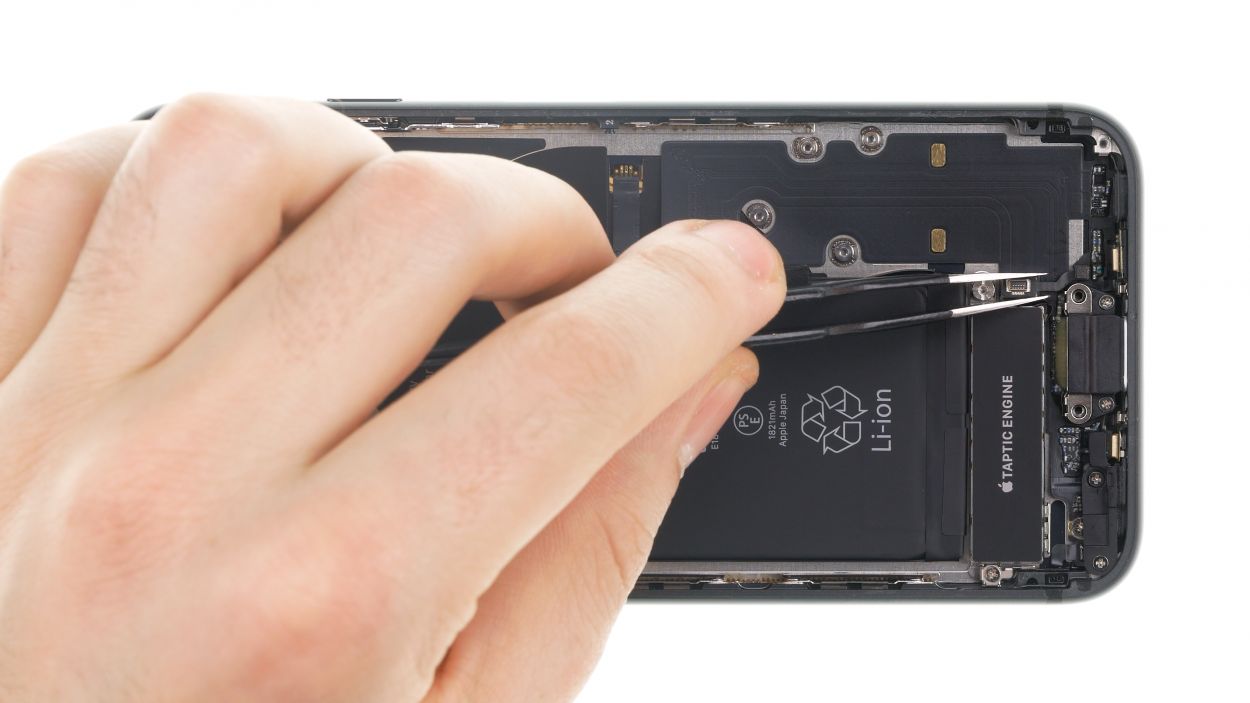
Step 19

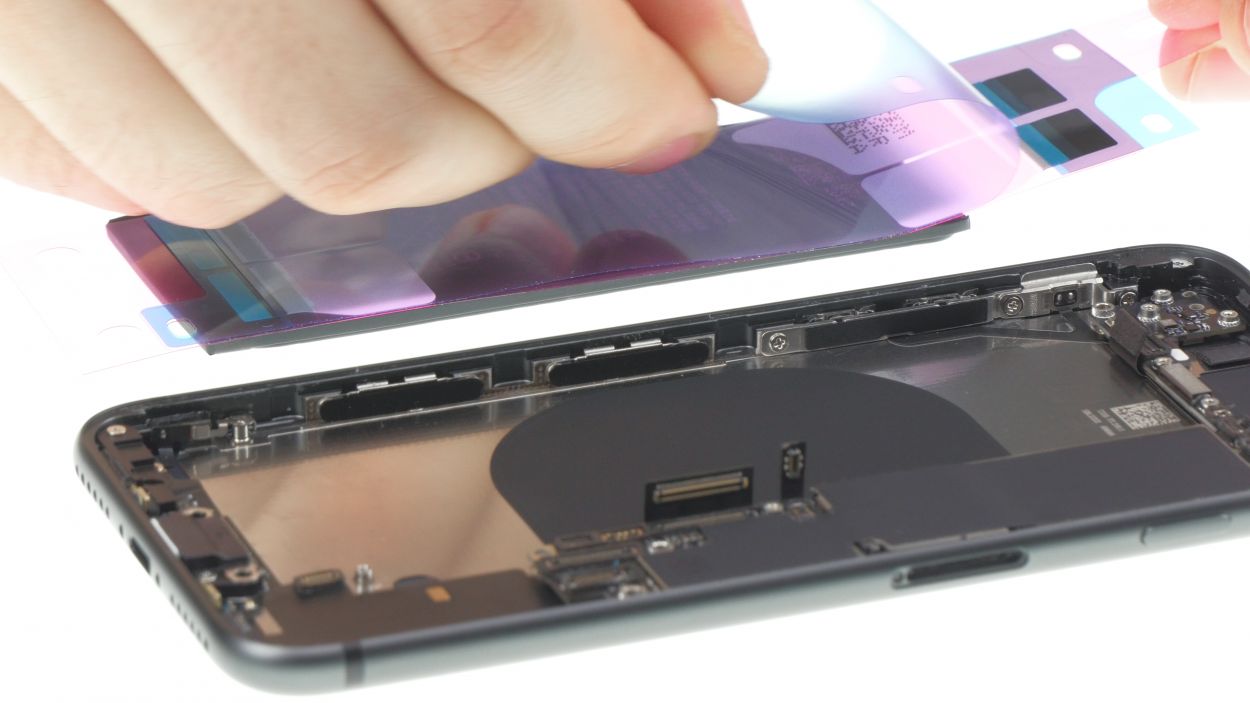


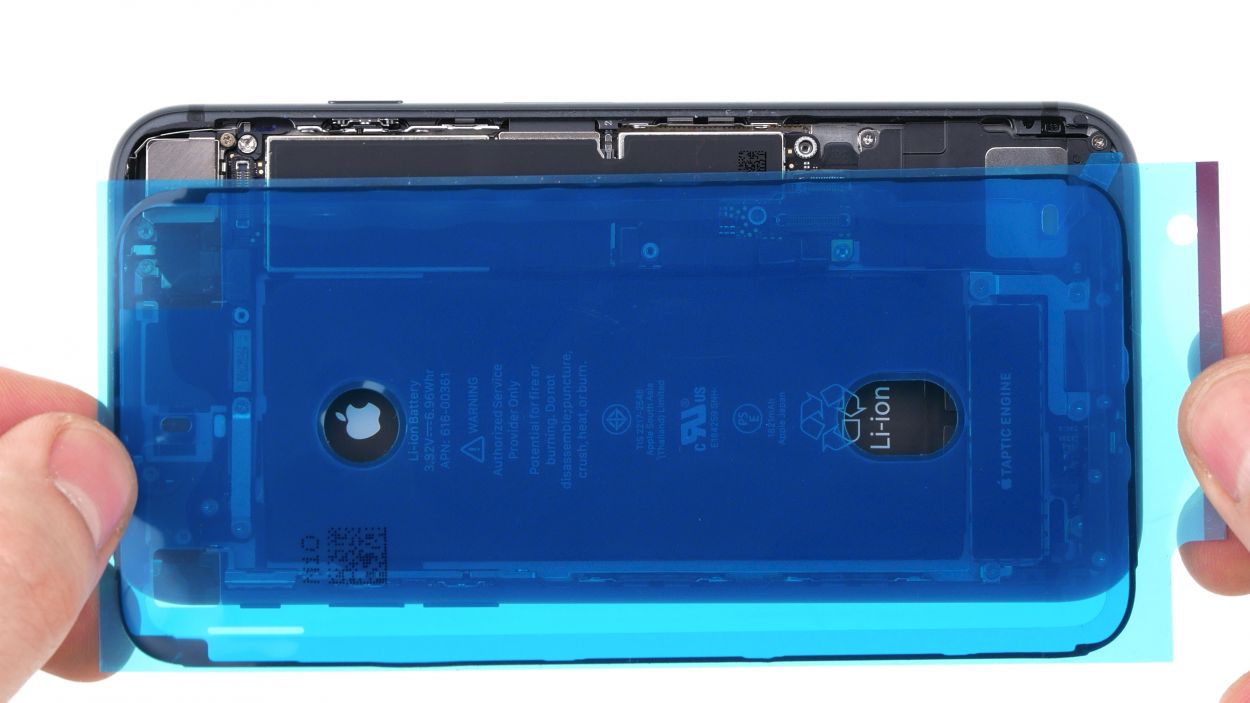
Get those adhesive strips lined up just right! Start by placing them in your device to check their alignment before you stick them down.
When you’re putting that tape on, make sure to leave some wiggle room on both sides so you can fold those tabs over without a hitch!
– First things first, peel off that blue protective film from the adhesive strips and stick them right in the center of the battery’s bottom side. You’ve got this!
– Now flip that battery over and carefully remove the small blue and pink protective films from the tabs of the adhesive strips. Almost there!
– Fold those tabs over to secure them to the top side of the battery. You’re doing great!
Tools Used
Step 20
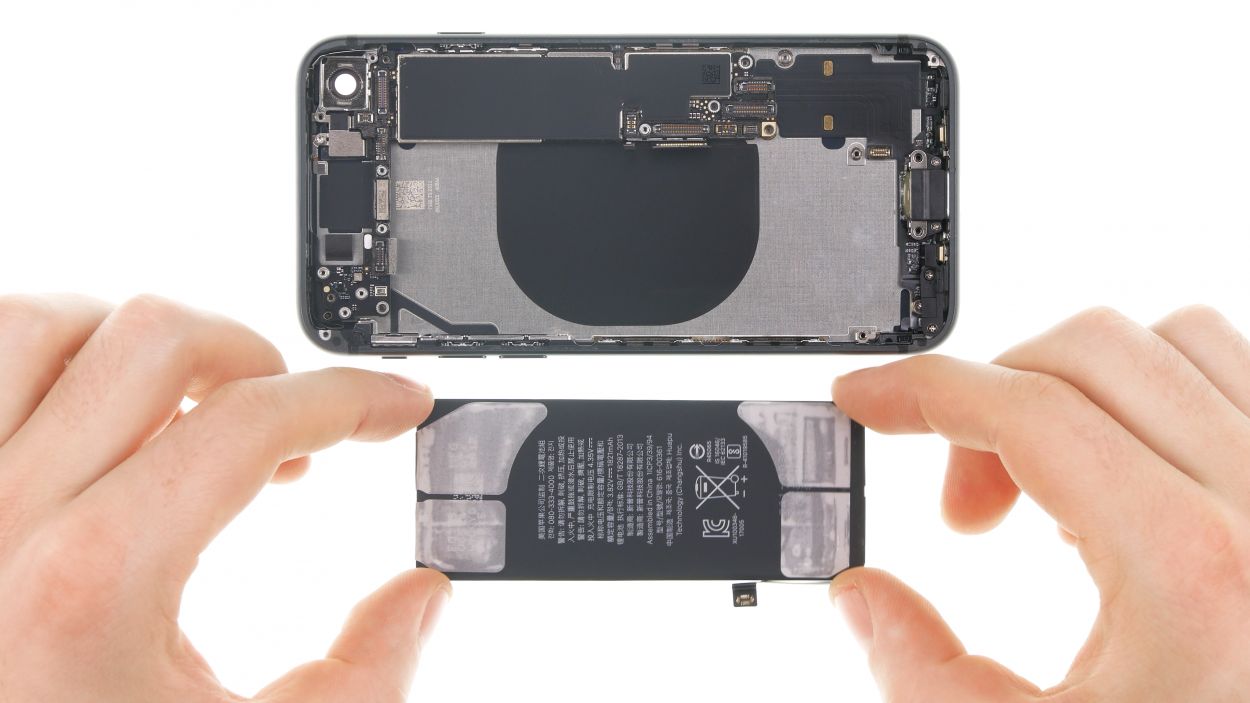
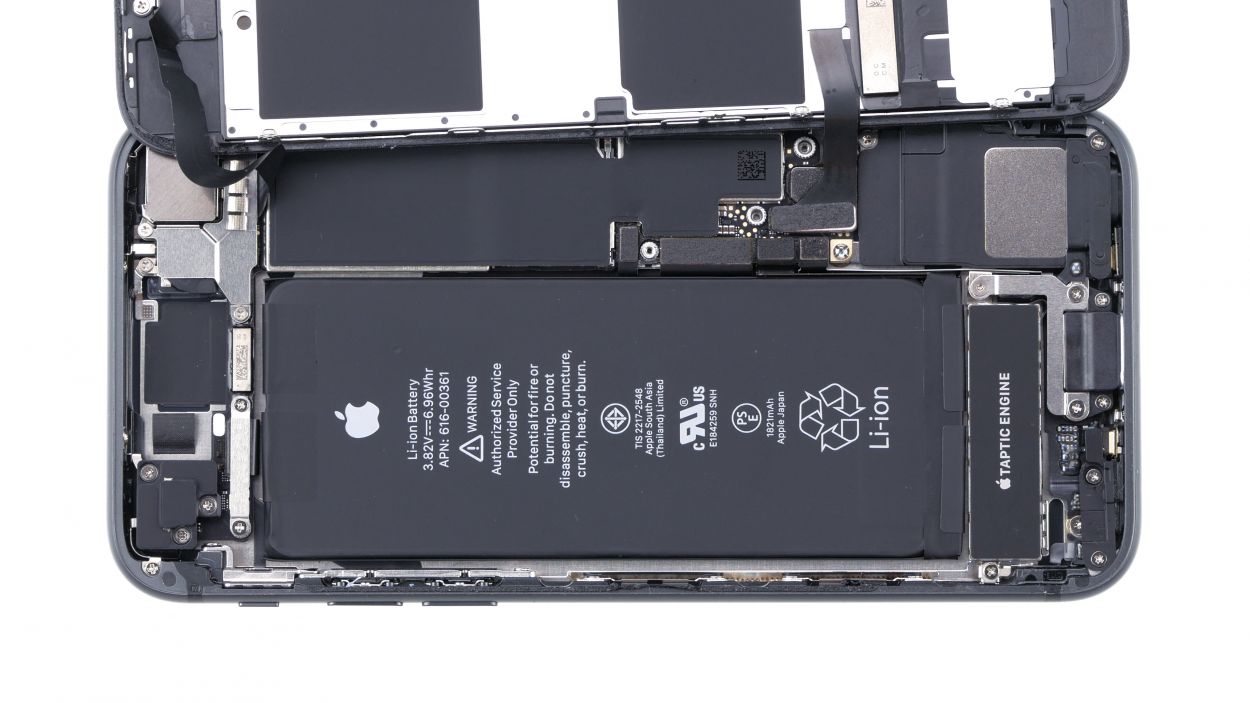
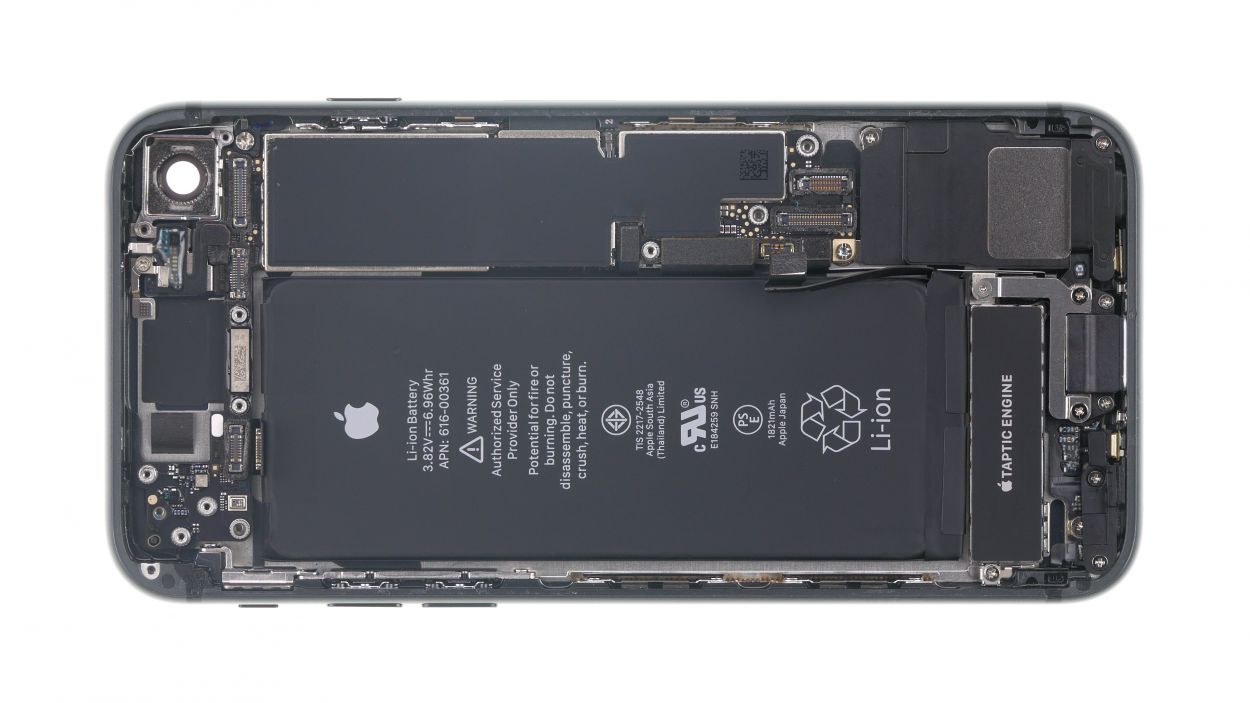
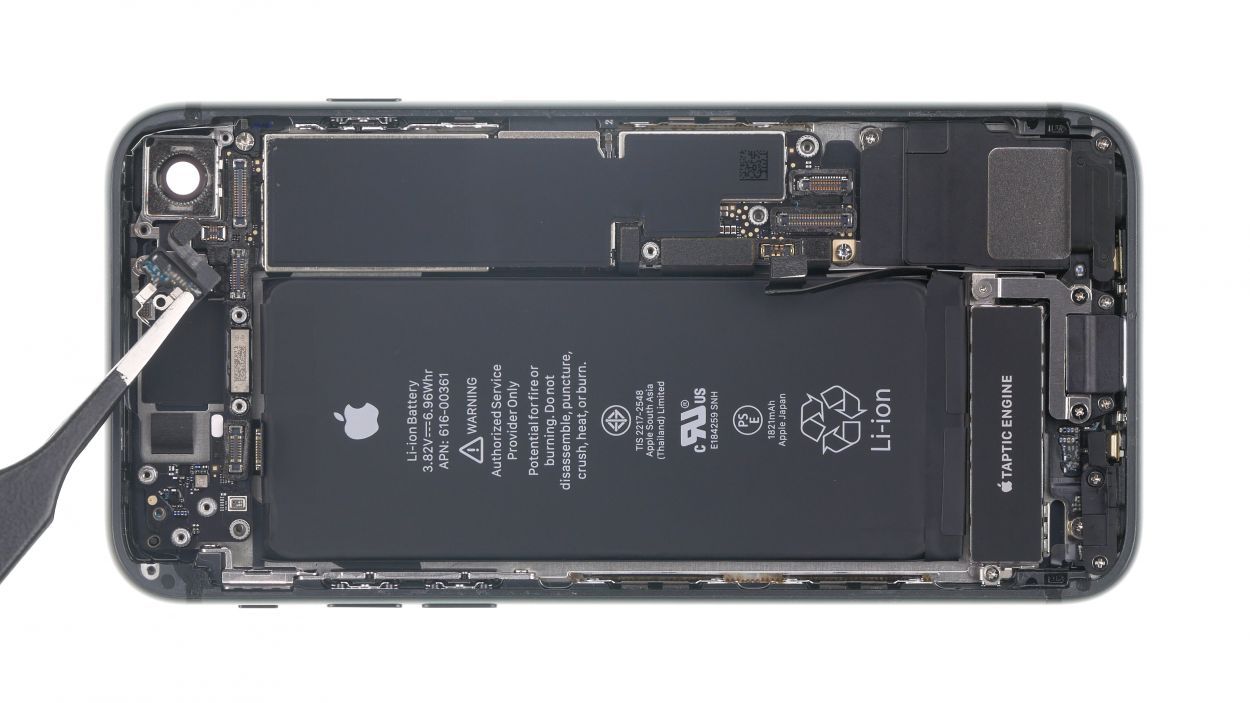
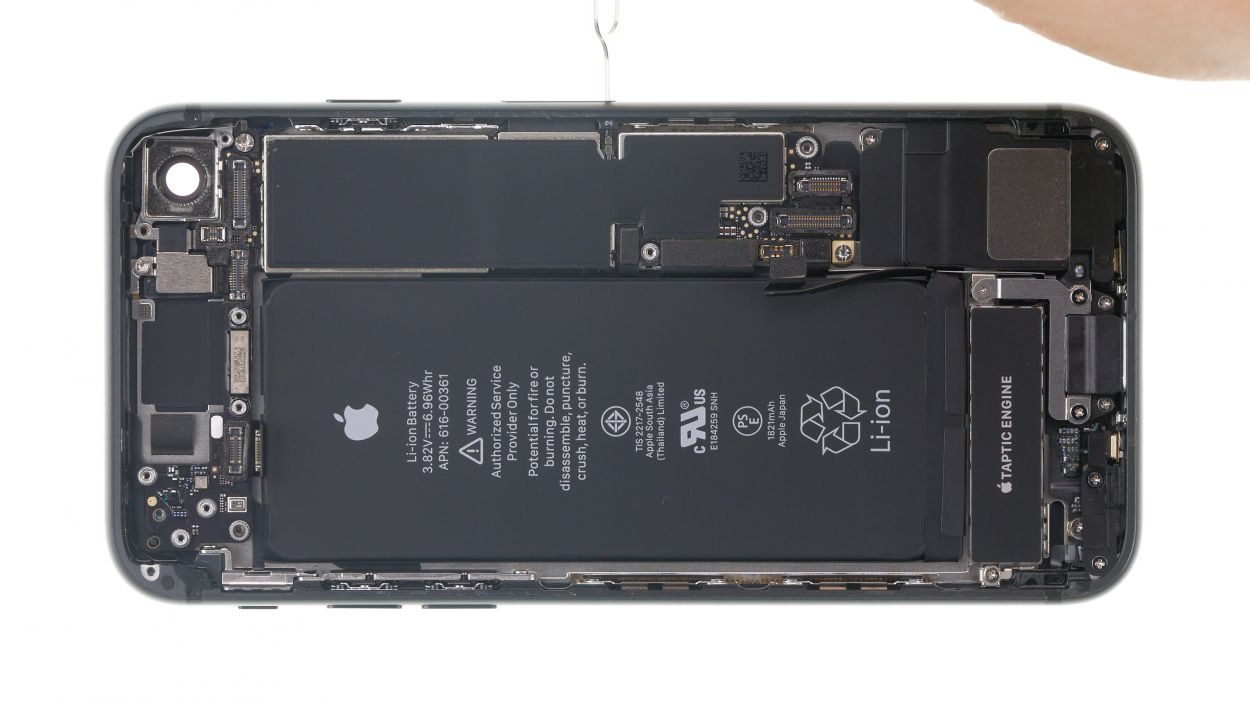
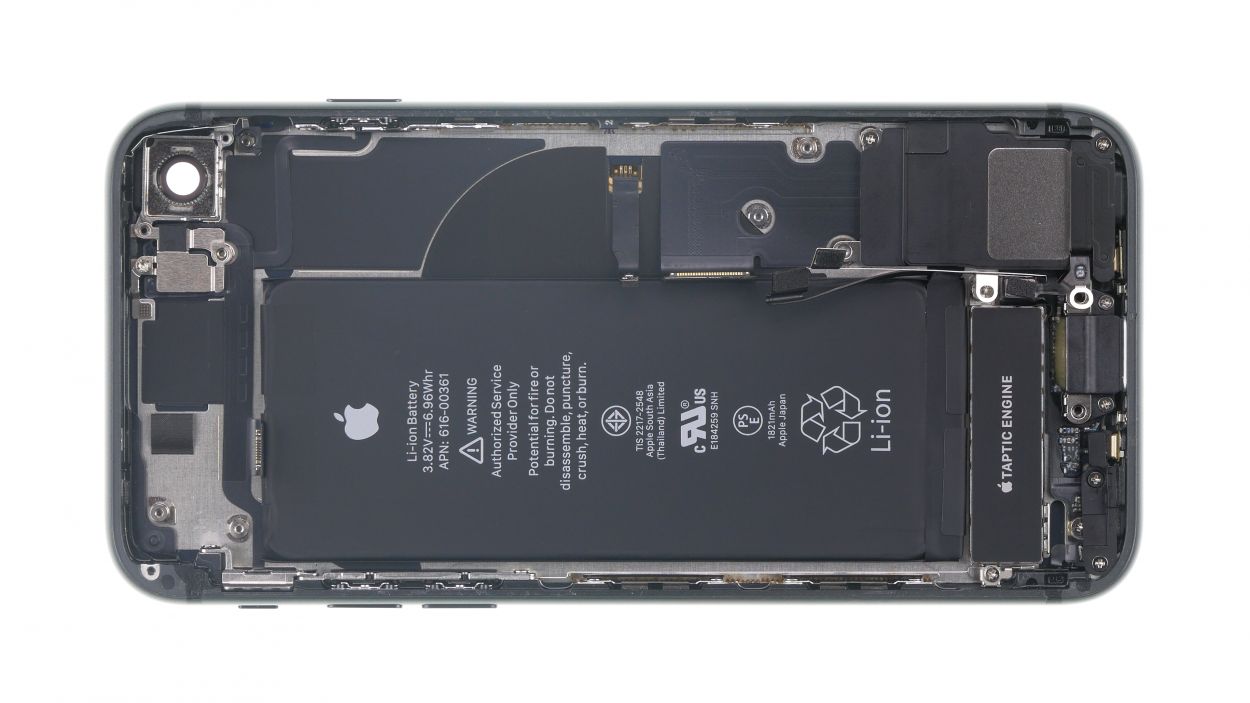
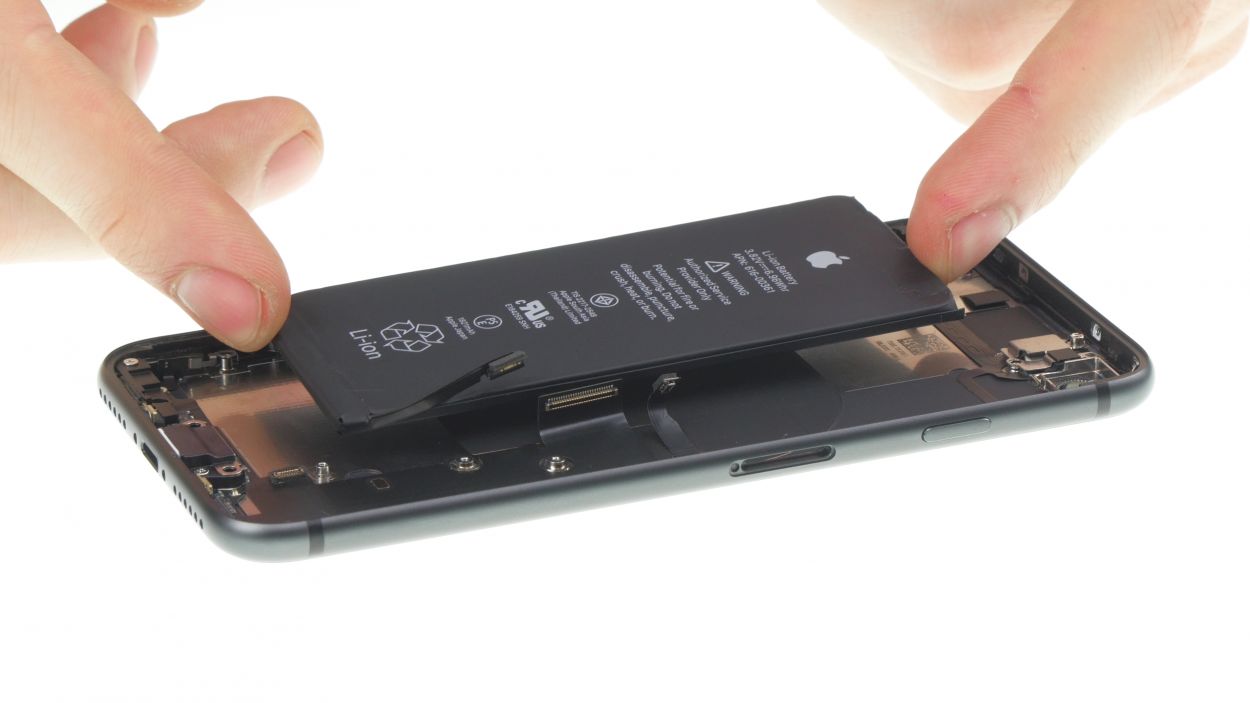
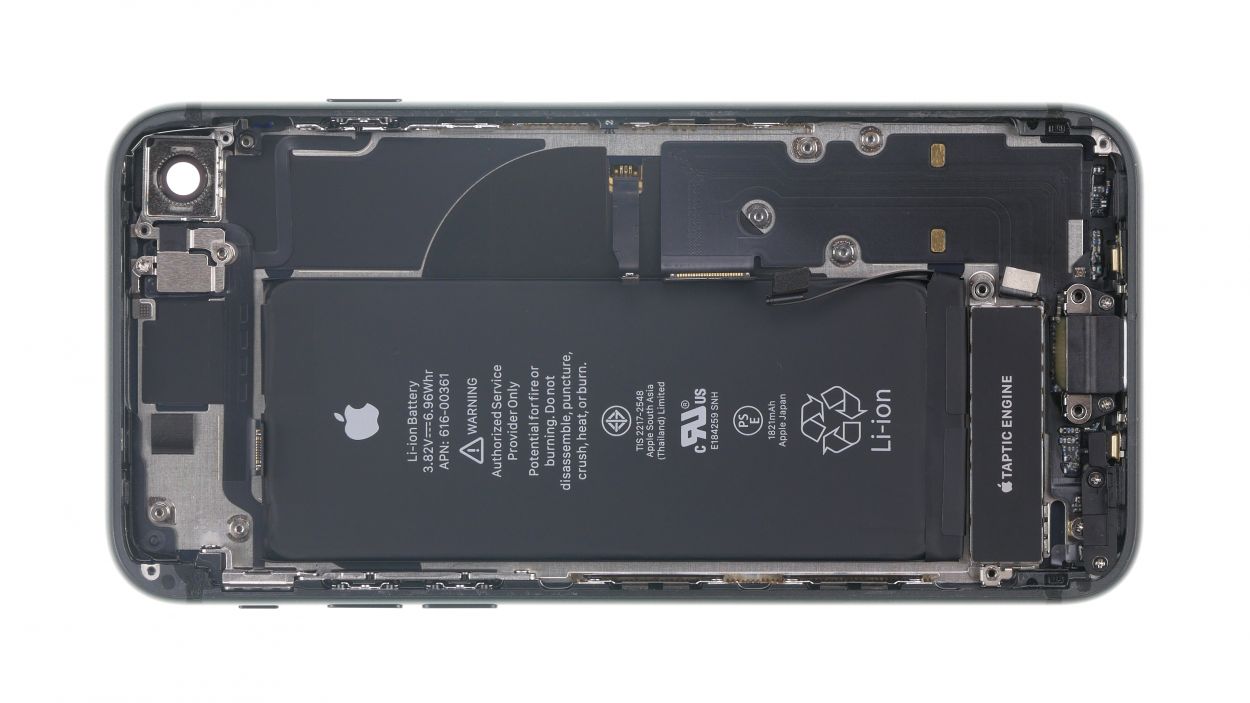
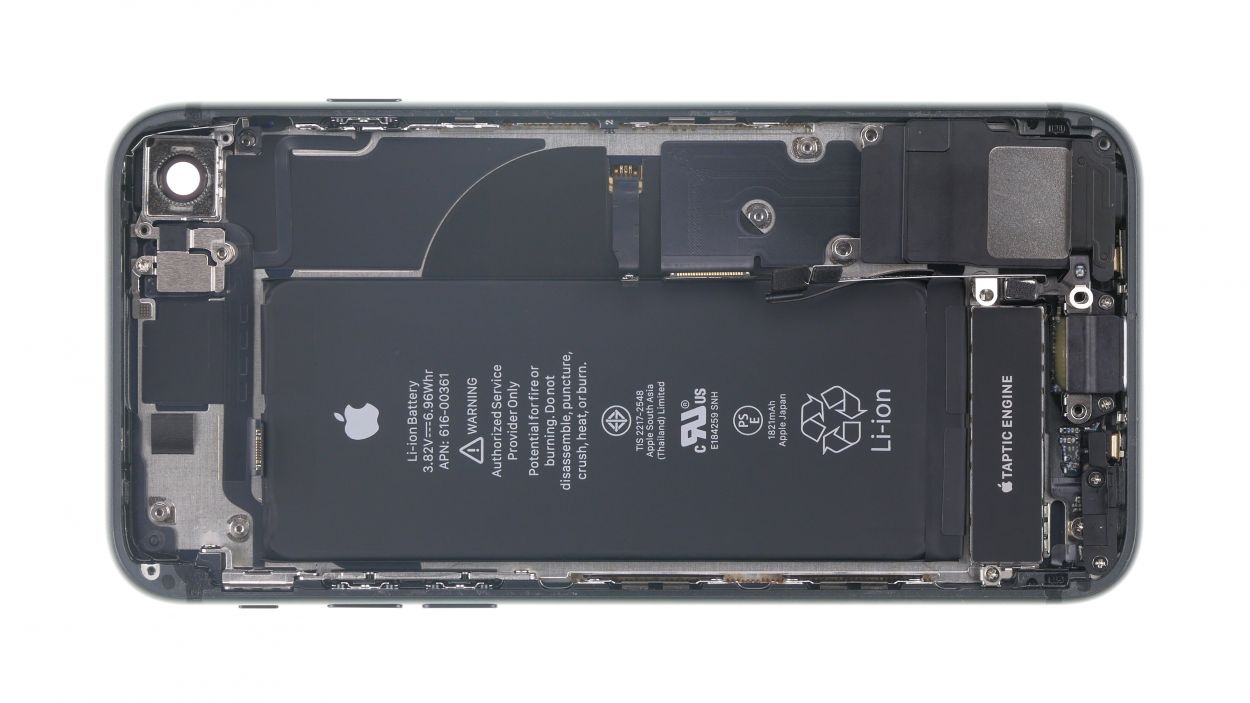
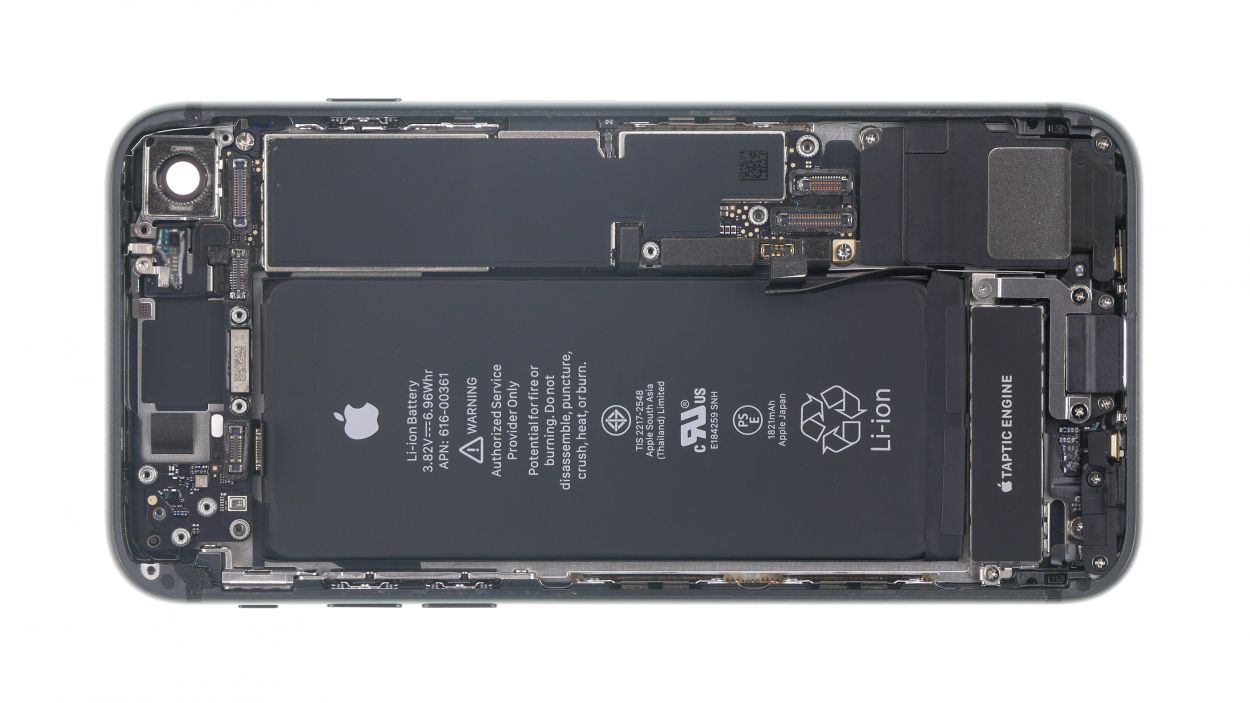
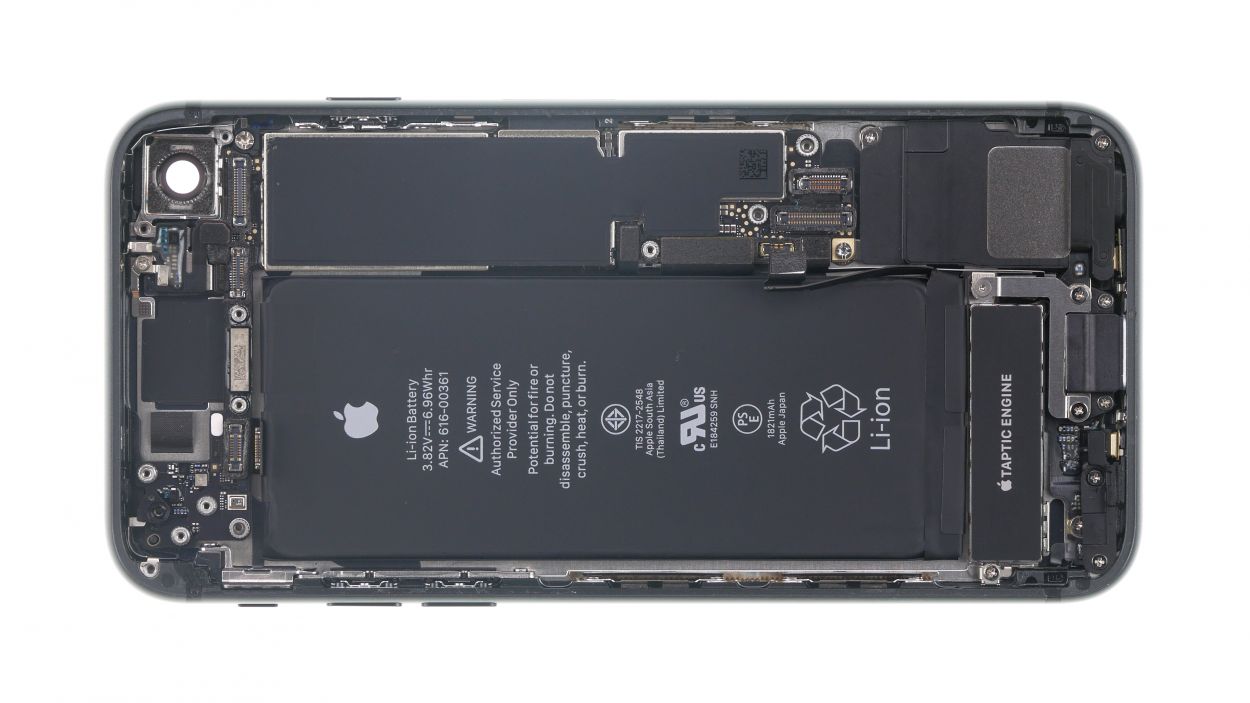
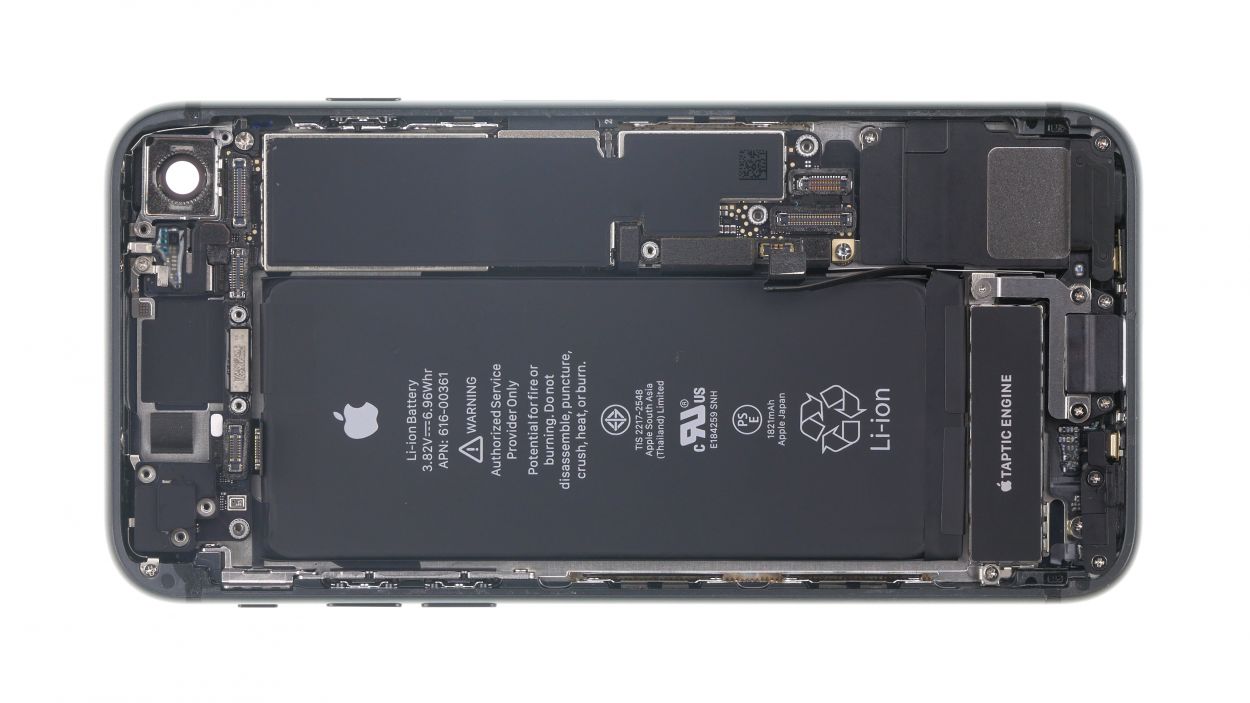
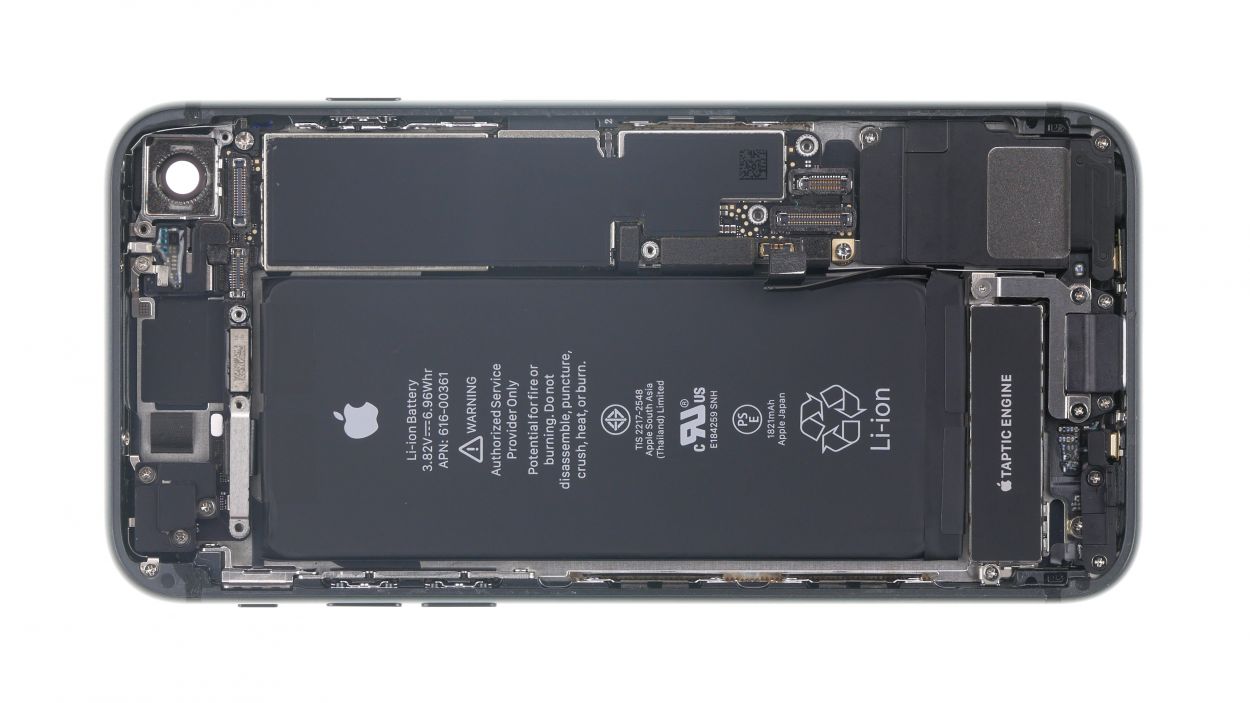
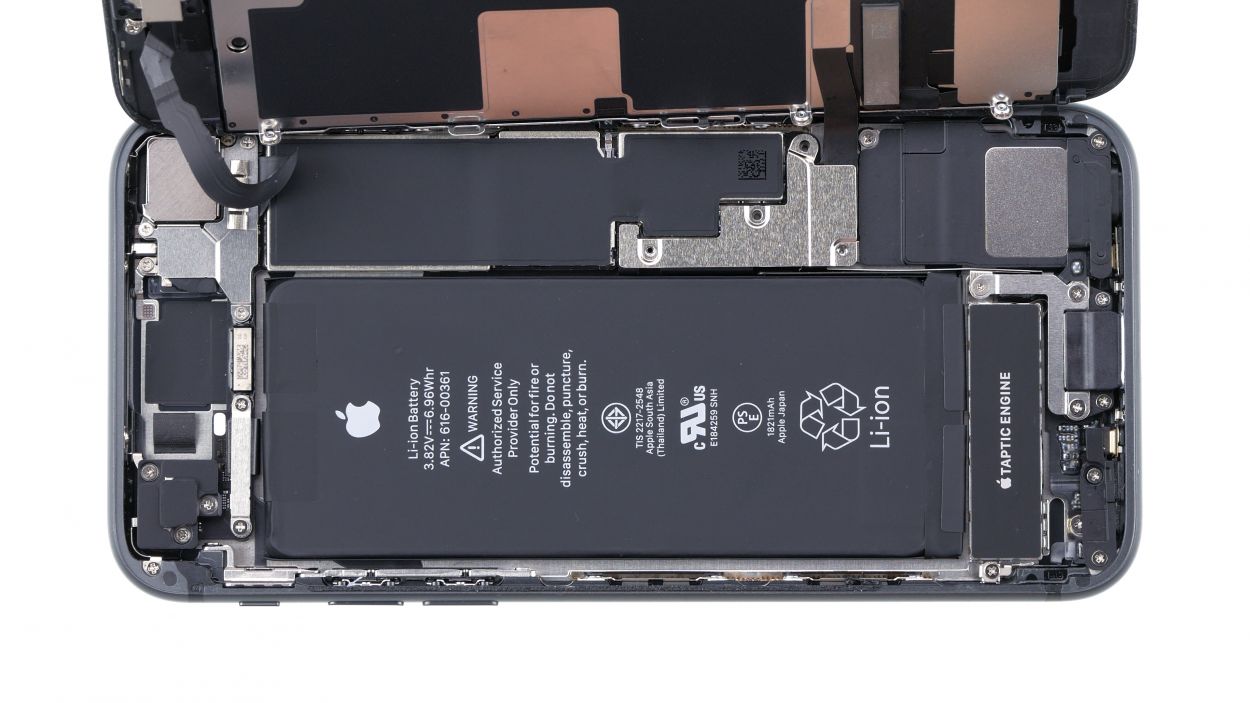
Make sure to leave a little breathing room around the battery and its fellow components. We want everyone to feel comfortable in their cozy little space!
Step 21

1 × 2.0 mm Standoff
1 × 2.0 mm Phillips
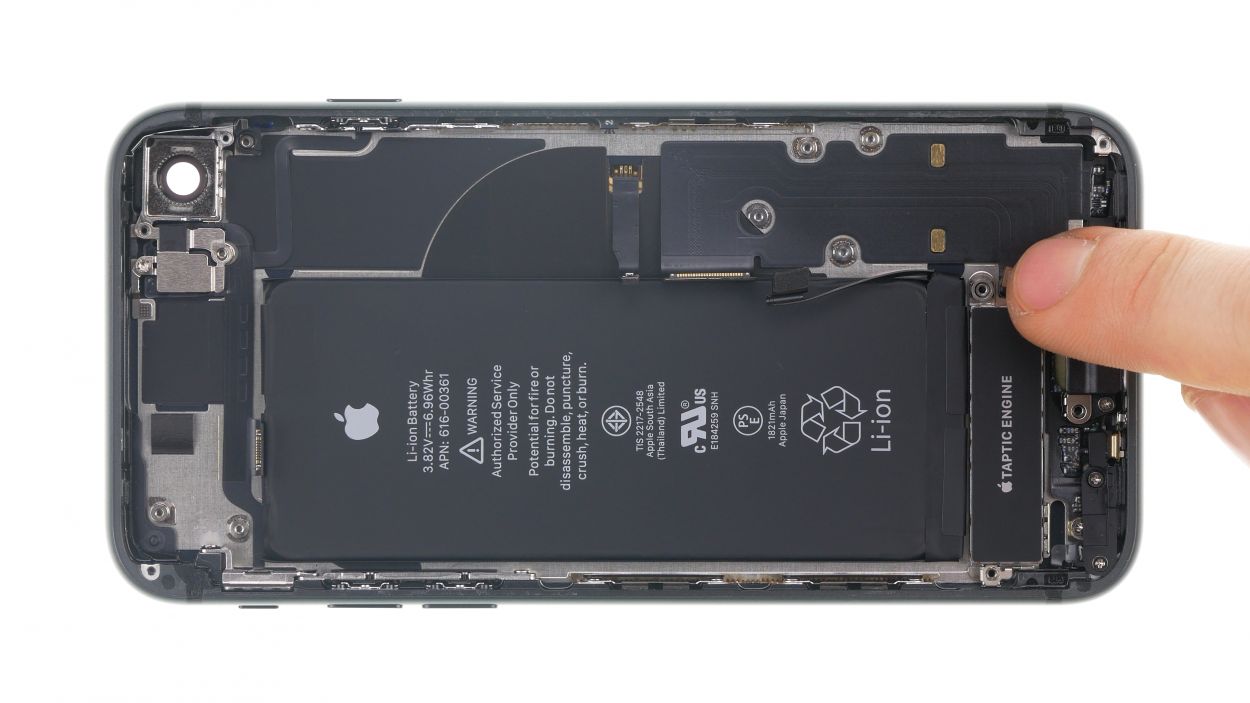
Align those Taptic Engine screw holes just right! It’s the secret to keeping your screws happy and avoiding any mishaps.
– Slide that Taptic Engine back into its cozy spot nestled between the battery and the Lightning connector. It’s like tucking in a little friend!
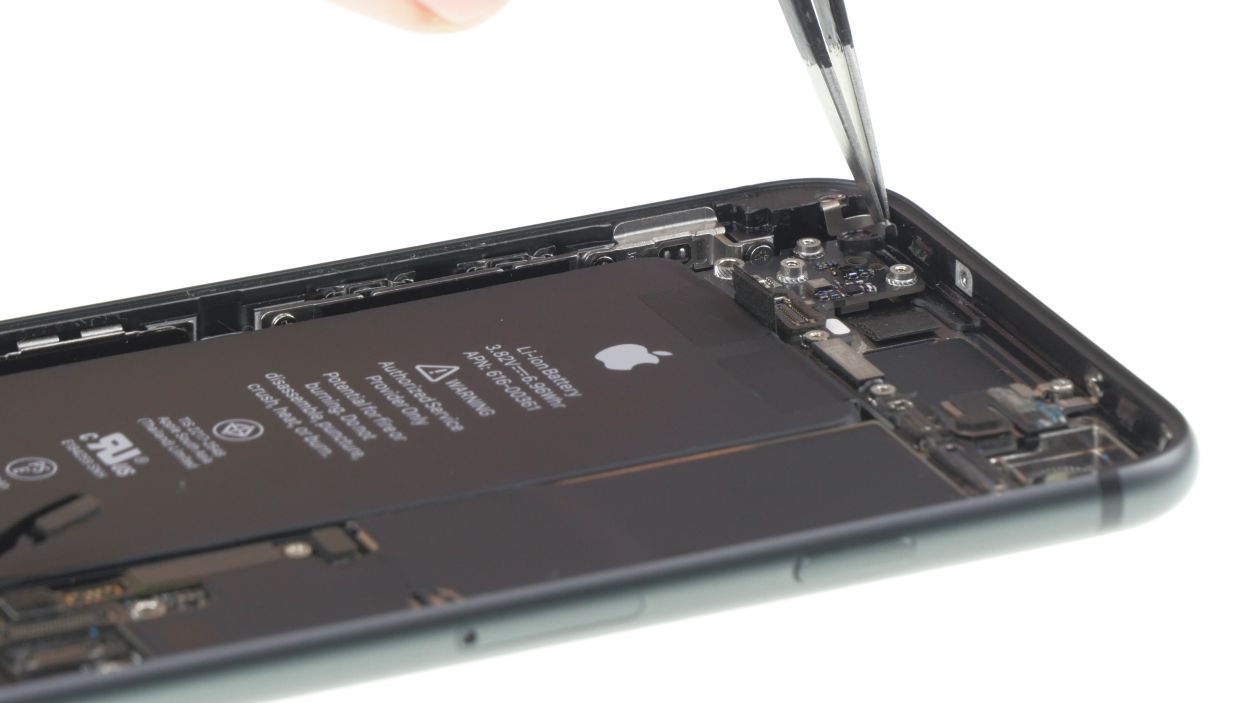
Step 22

1 × 2.1 mm Phillips
1 × 1.4 mm Phillips
1 × 1.2 mm Y-type
1 × 2.9 mm Phillips
1 × 2.5 mm Phillips
Be sure to place that flex cable just right between the battery and the speaker! It’s like finding the perfect spot for a cozy nap—everything needs to be in its place!
– Pop the speaker back into its cozy spot in the rear case and give it a gentle press.
– Now, let’s secure that speaker with the two Phillips screws—tighten them up like a pro!
– Give the speaker connector a nice press to make sure it’s snug.
– Reinsert the bracket plate over the flex cable and fasten it down with those three screws.
Step 23
1 × 2.4 mm Standoff
1 × 2.1 mm Standoff
1 × 1.6 mm Phillips
The camera holder is your logicboard’s new best friend, sitting pretty right on top (just above the screw hole in the top right corner of the image).
– Carefully slide the logic board back into its original spot, just like tucking in a cozy blanket. Make sure it fits snugly!
Step 24
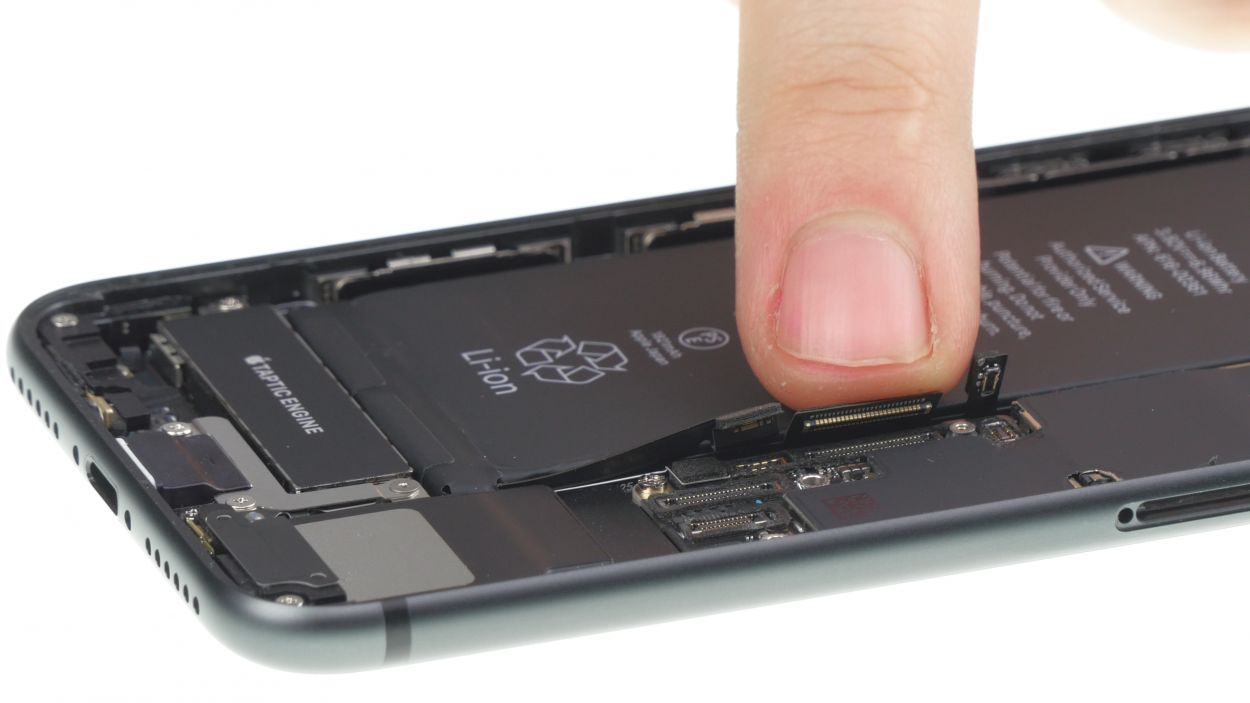
– First, get those connectors lined up over their sockets, then give them a gentle press with your finger to snap them into place!
Step 25
If you’re having a tough time getting it to slide in, take a moment to check if the logic board is in the right spot. A little adjustment might do the trick!
– Now, slide that SIM card tray back into its cozy little home. It’s like tucking in your favorite blanket!
Step 26

1 × 1.3 mm Phillips
1 × 1.2 mm Phillips
– Reposition the Wi-Fi antenna back to where it belongs and give it a gentle press to ensure it sticks like a champ.
– Next up, connect the antenna’s connector.
– Finally, secure everything in place by attaching the bracket plate with those two Phillips screws.
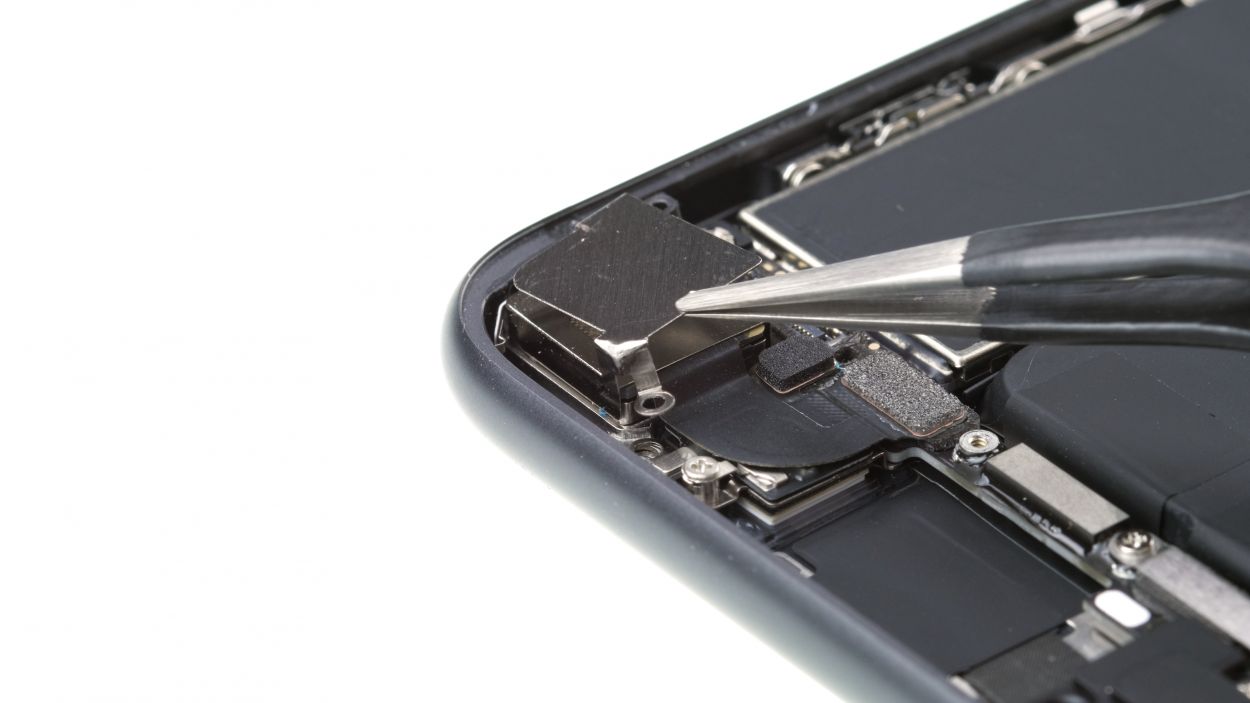
Step 27

1 × 2.5 mm Phillips
1 × 1.4 mm Phillips
2 × 1.2 mm Phillips
2 × 1.0 mm Phillips
– Carefully pop that connecting piece back into place and secure it with those trusty Phillips screws.
– Now it’s time to reattach the plastic bracket and give it a good tighten with Phillips screws too!
Step 28
1 × 1.1 mm Phillips
1 × 2.7 mm Phillips
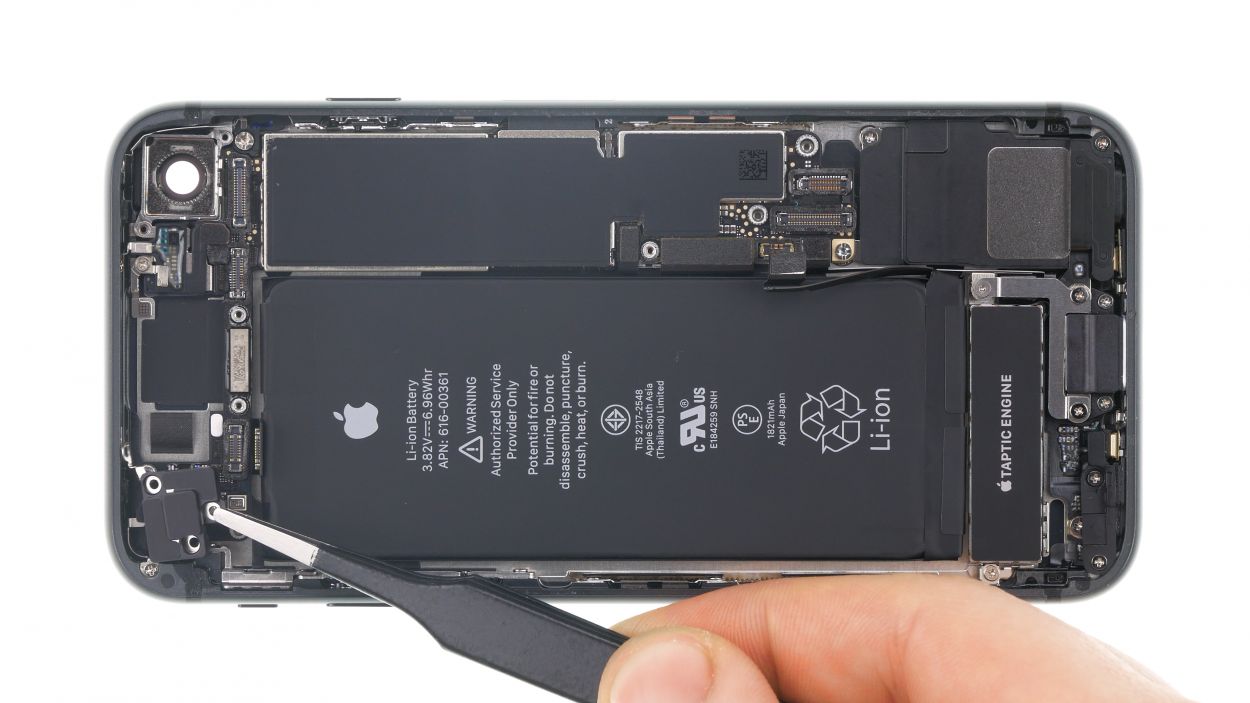
– Reconnect the volume control cable connector with care.
– Reattach the bracket plate onto the connector and secure it with the screws.
Step 29

1 × 2.9 mm Phillips
1 × 3.0 mm Standoff
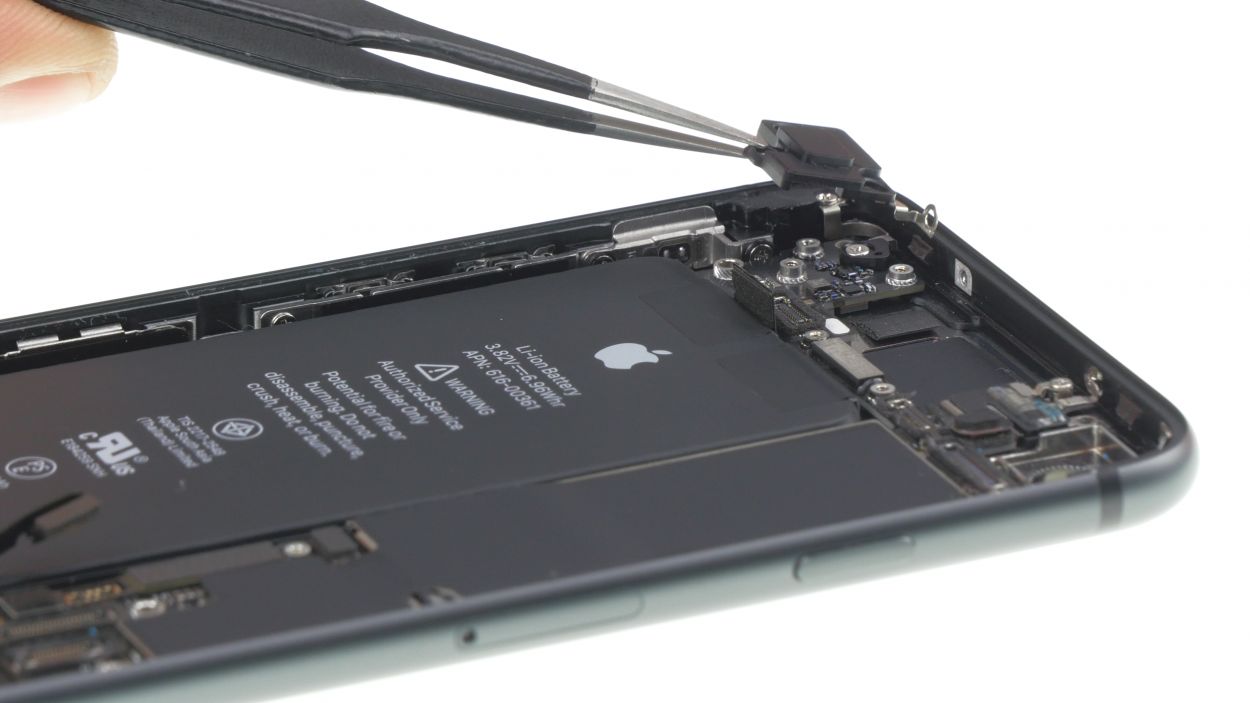
– Gently press the camera back into its snug little home.
– Connect the camera’s connector with care.
– Secure the camera’s bracket plate back on and tighten those screws like a champ.
Step 30

After you pop on that shiny new adhesive frame, your iPhone 8 will be all set to fend off dust and splashes like a champ, but remember, it’s not quite the underwater superhero it used to be!
The corners are unique and play a key role in helping you find your way around!
– First, let’s get that adhesive residue off the metal frame and display. This way, your new adhesive frame will fit like a glove!
– Next up, align that adhesive frame with the back cover of your iPhone. Positioning it just right is key to a smooth installation.
Tools Used
Step 31
3 × 1,0 mm Phillips-Schraube
– Stand the display up on the frame and connect that FaceTime connector to the logic board like a pro!
– Gently lay the display on the back cover’s side, making sure it feels right at home.
– Cover the FaceTime connector with the plate and secure it using the three Phillips screws. You’ve got this!
Step 32
– Reconnect the two display connectors (the one for the display and the one for the home button) to the logic board, just like putting the finishing touches on a masterpiece!

Step 34

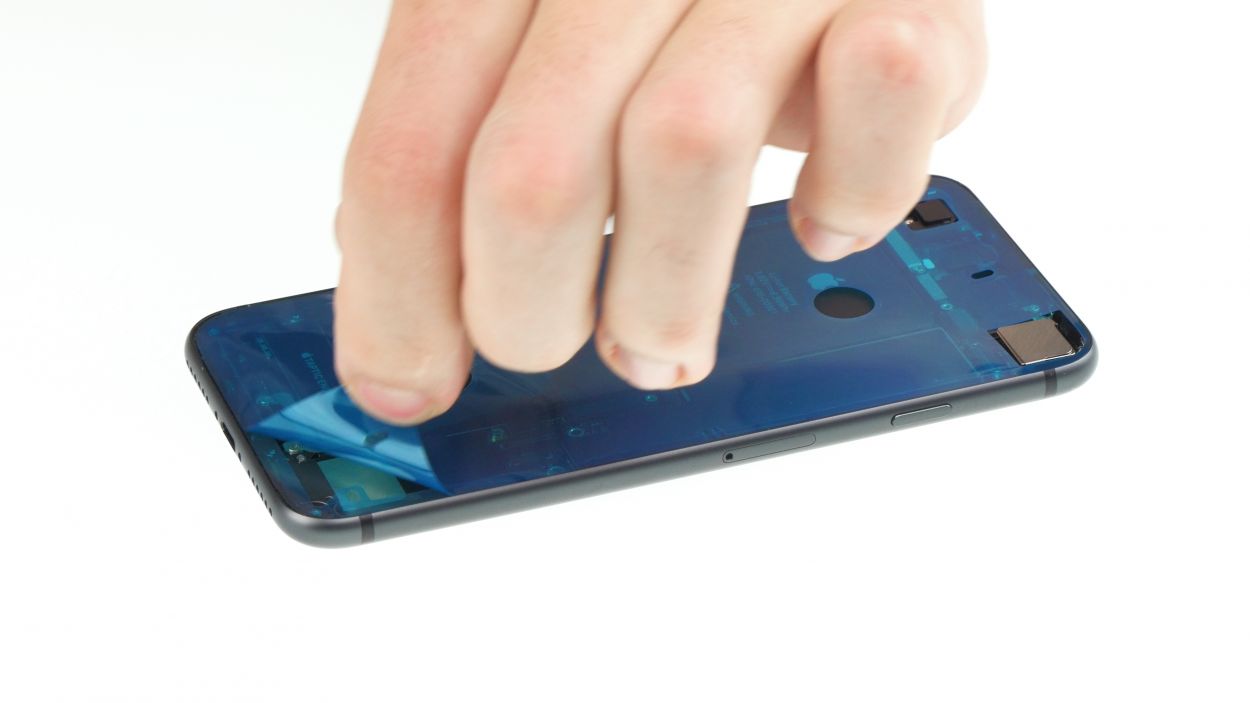
– Gently set the display alongside the back cover and give it a little fold, like tucking in a cozy blanket.
– Now, apply a firm press across the display to make sure it sticks like a champ!
Wrong position
Right position
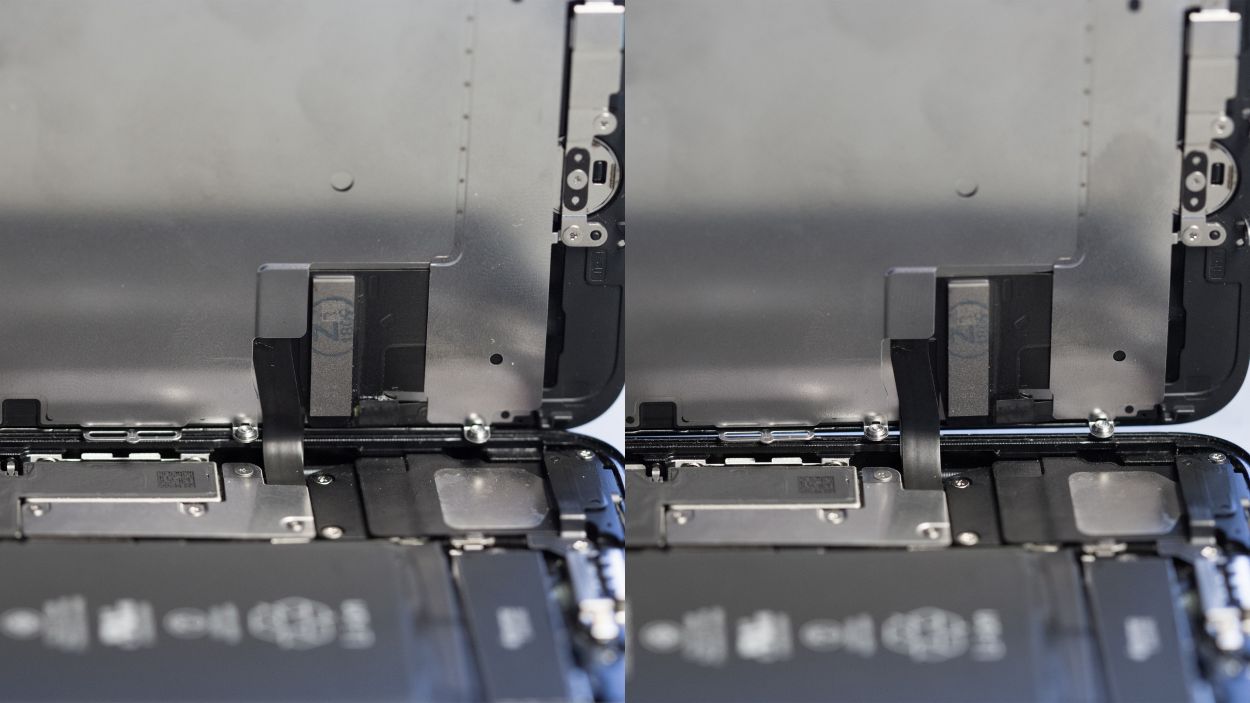
Just a friendly reminder to position that silver chip on the cable just like it was before (check out the photo for guidance!). If you don’t, you might notice some funky discolorations and spots on the screen right in that area after you’re done. If that happens, don’t sweat it! Just double-check the cable position and align the chip precisely like in our photo.
Step 35
2 × 3.4 mm Pentalobe
– Secure the two pentalobe screws on either side of the Lightning connector back into the rear case, and make sure they’re snug as a bug!