HP TouchPad Microphone Replacement
Duration: 45 minutes
Steps: 14 Steps
Ready to get your voice back? Follow these steps to swap out that busted microphone and get chatting again in no time.
Step 1

The front panel is held in place by seven clips that are pretty easy to remove, but you may end up breaking the clips or the supports that hold them to the rear case when taking the front panel assembly off – we’ll keep working to find replacement parts or a better removal method. For now, just be gentle and patient.
As you take the front panel assembly off, be careful not to mess with the ambient light sensor or the two antennas – they’re pretty delicate, so handle with care.
– In the next steps, grab a metal spudger and gently pry the front panel away from the rear case of your TouchPad. Keep it steady and work your way around to lift it out smoothly. If you need a hand, you can always schedule a repair.
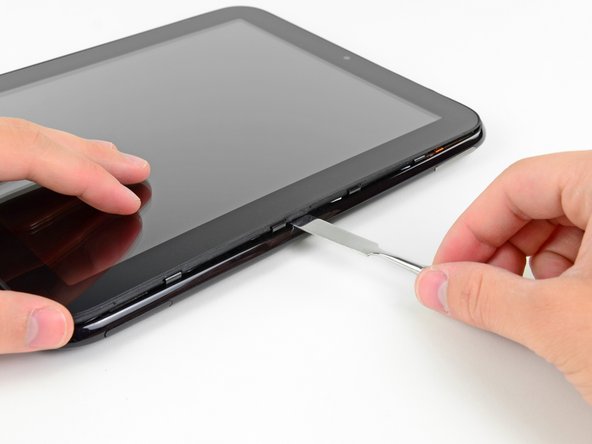
Step 2

– Slide a flat metal spudger into the gap between the rubber ring on the front of the device and the black plastic back, right near the USB port.
– Gently work the front panel loose from the back case—take your time and be careful not to put any pressure on the LCD or glass.
As you follow along, gently insert your metal spudger and carefully pry the front panel up—just don’t try to slide it along the gap you’re creating. Remove your spudger after each lift, then reposition it elsewhere and give it another gentle pry upward. Patience is key—keep it steady and you’ll have that panel off in no time. If you need help, you can always schedule a repair.
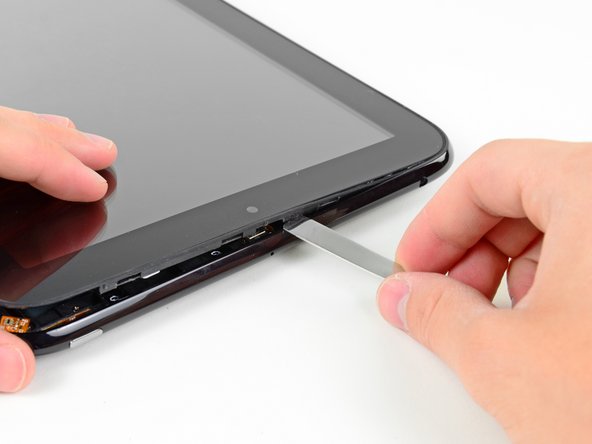
Step 3

– Just like before, grab your trusty spudger and work along the long edge near the volume buttons to gently lift the front panel away from the back of your TouchPad.
– Keep prying along the volume button side until you spot a nice gap forming between the front panel and the rear case.
Step 4

Watch out for the ambient light sensor and the upper antenna—give them a little space so they stay happy and intact!
– Gently pop up the front panel assembly by working along the top edge of the TouchPad.
Step 5

– Gently lift the front panel starting from the edge nearest to the home screen button. Take it slow, and remember—patience is key!
Step 6

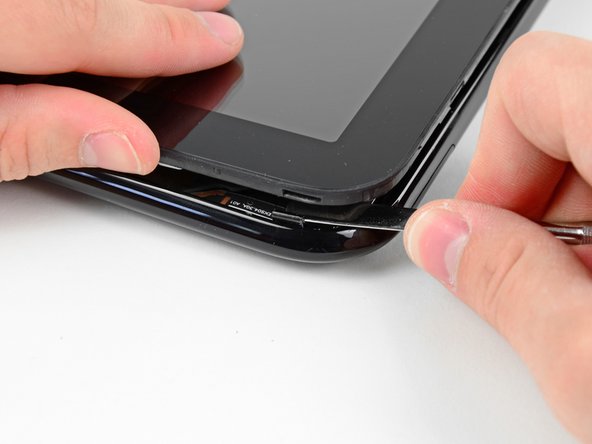
– Before lifting the free side of the front panel away from the rear case, you might need to free it from those plastic clips holding it snugly in place.
– Grab your trusty metal spudger and gently pry the stuck retaining clips away from the edge of the front panel to free it up.
Step 7

Hold up! The front panel assembly is still tethered to the motherboard, so don’t try to pull it off just yet.
– Once those retaining clips are free, gently lift the front panel assembly away from the rear case. Easy does it!
Step 8

Lift the cable straight up, avoiding any sideways tugging parallel to the motherboard’s surface. Pulling at an angle might bend or break the socket—so go gentle and keep it vertical!
Watch out for the ribbon cable stuck with adhesive underneath the cable you’re removing—it stays put, so no need to disconnect it.
– Grab that handy black tab and gently pull the display data cable straight up to pop it out of its slot on the motherboard.
Step 9


Make sure you’re lifting on the hinged retaining flaps, not the actual sockets. Keep it gentle and steady!
– Gently lift the retaining flaps on the two ZIF sockets for the digitizer ribbon cable using your fingernail.
– Once the flaps are up, carefully slide the digitizer ribbon cable out of both sockets on the motherboard.
Step 10

– Carefully detach the front panel assembly from the rear case assembly. Take your time and keep track of all screws and clips as you go. If you need a hand, you can always schedule a repair for expert help.
Step 11

Careful now—make sure you’re flipping up the little hinged flap, not yanking on the whole socket.
– Grab your plastic opening tool and gently use the edge to lift up the microphone ribbon cable’s retaining flap. It’s a small step, but it’s a crucial one!
– Now, take a pair of tweezers and carefully pull the microphone cable out of its socket. Just a little tug, and you’re on your way!
Tools Used

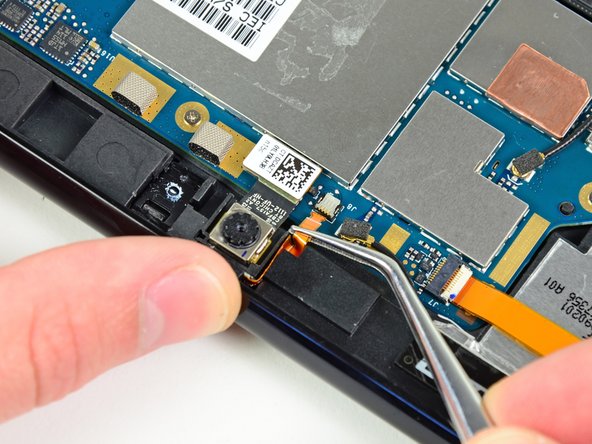
Step 12


– Grab your tweezers and gently pluck out the black rubber grommet sitting between the microphone and the rear case.
Tools Used
Step 13

– Grab a plastic opening tool and gently pry the microphone away from the rear case, right above the camera. Take your time and work carefully to avoid any damage. If you need help along the way, you can always schedule a repair.
Step 14

– Carefully disconnect and remove the microphone from its mount. Take your time to ensure it’s free of any connectors or adhesives. If you need help, you can always schedule a repair for professional assistance.