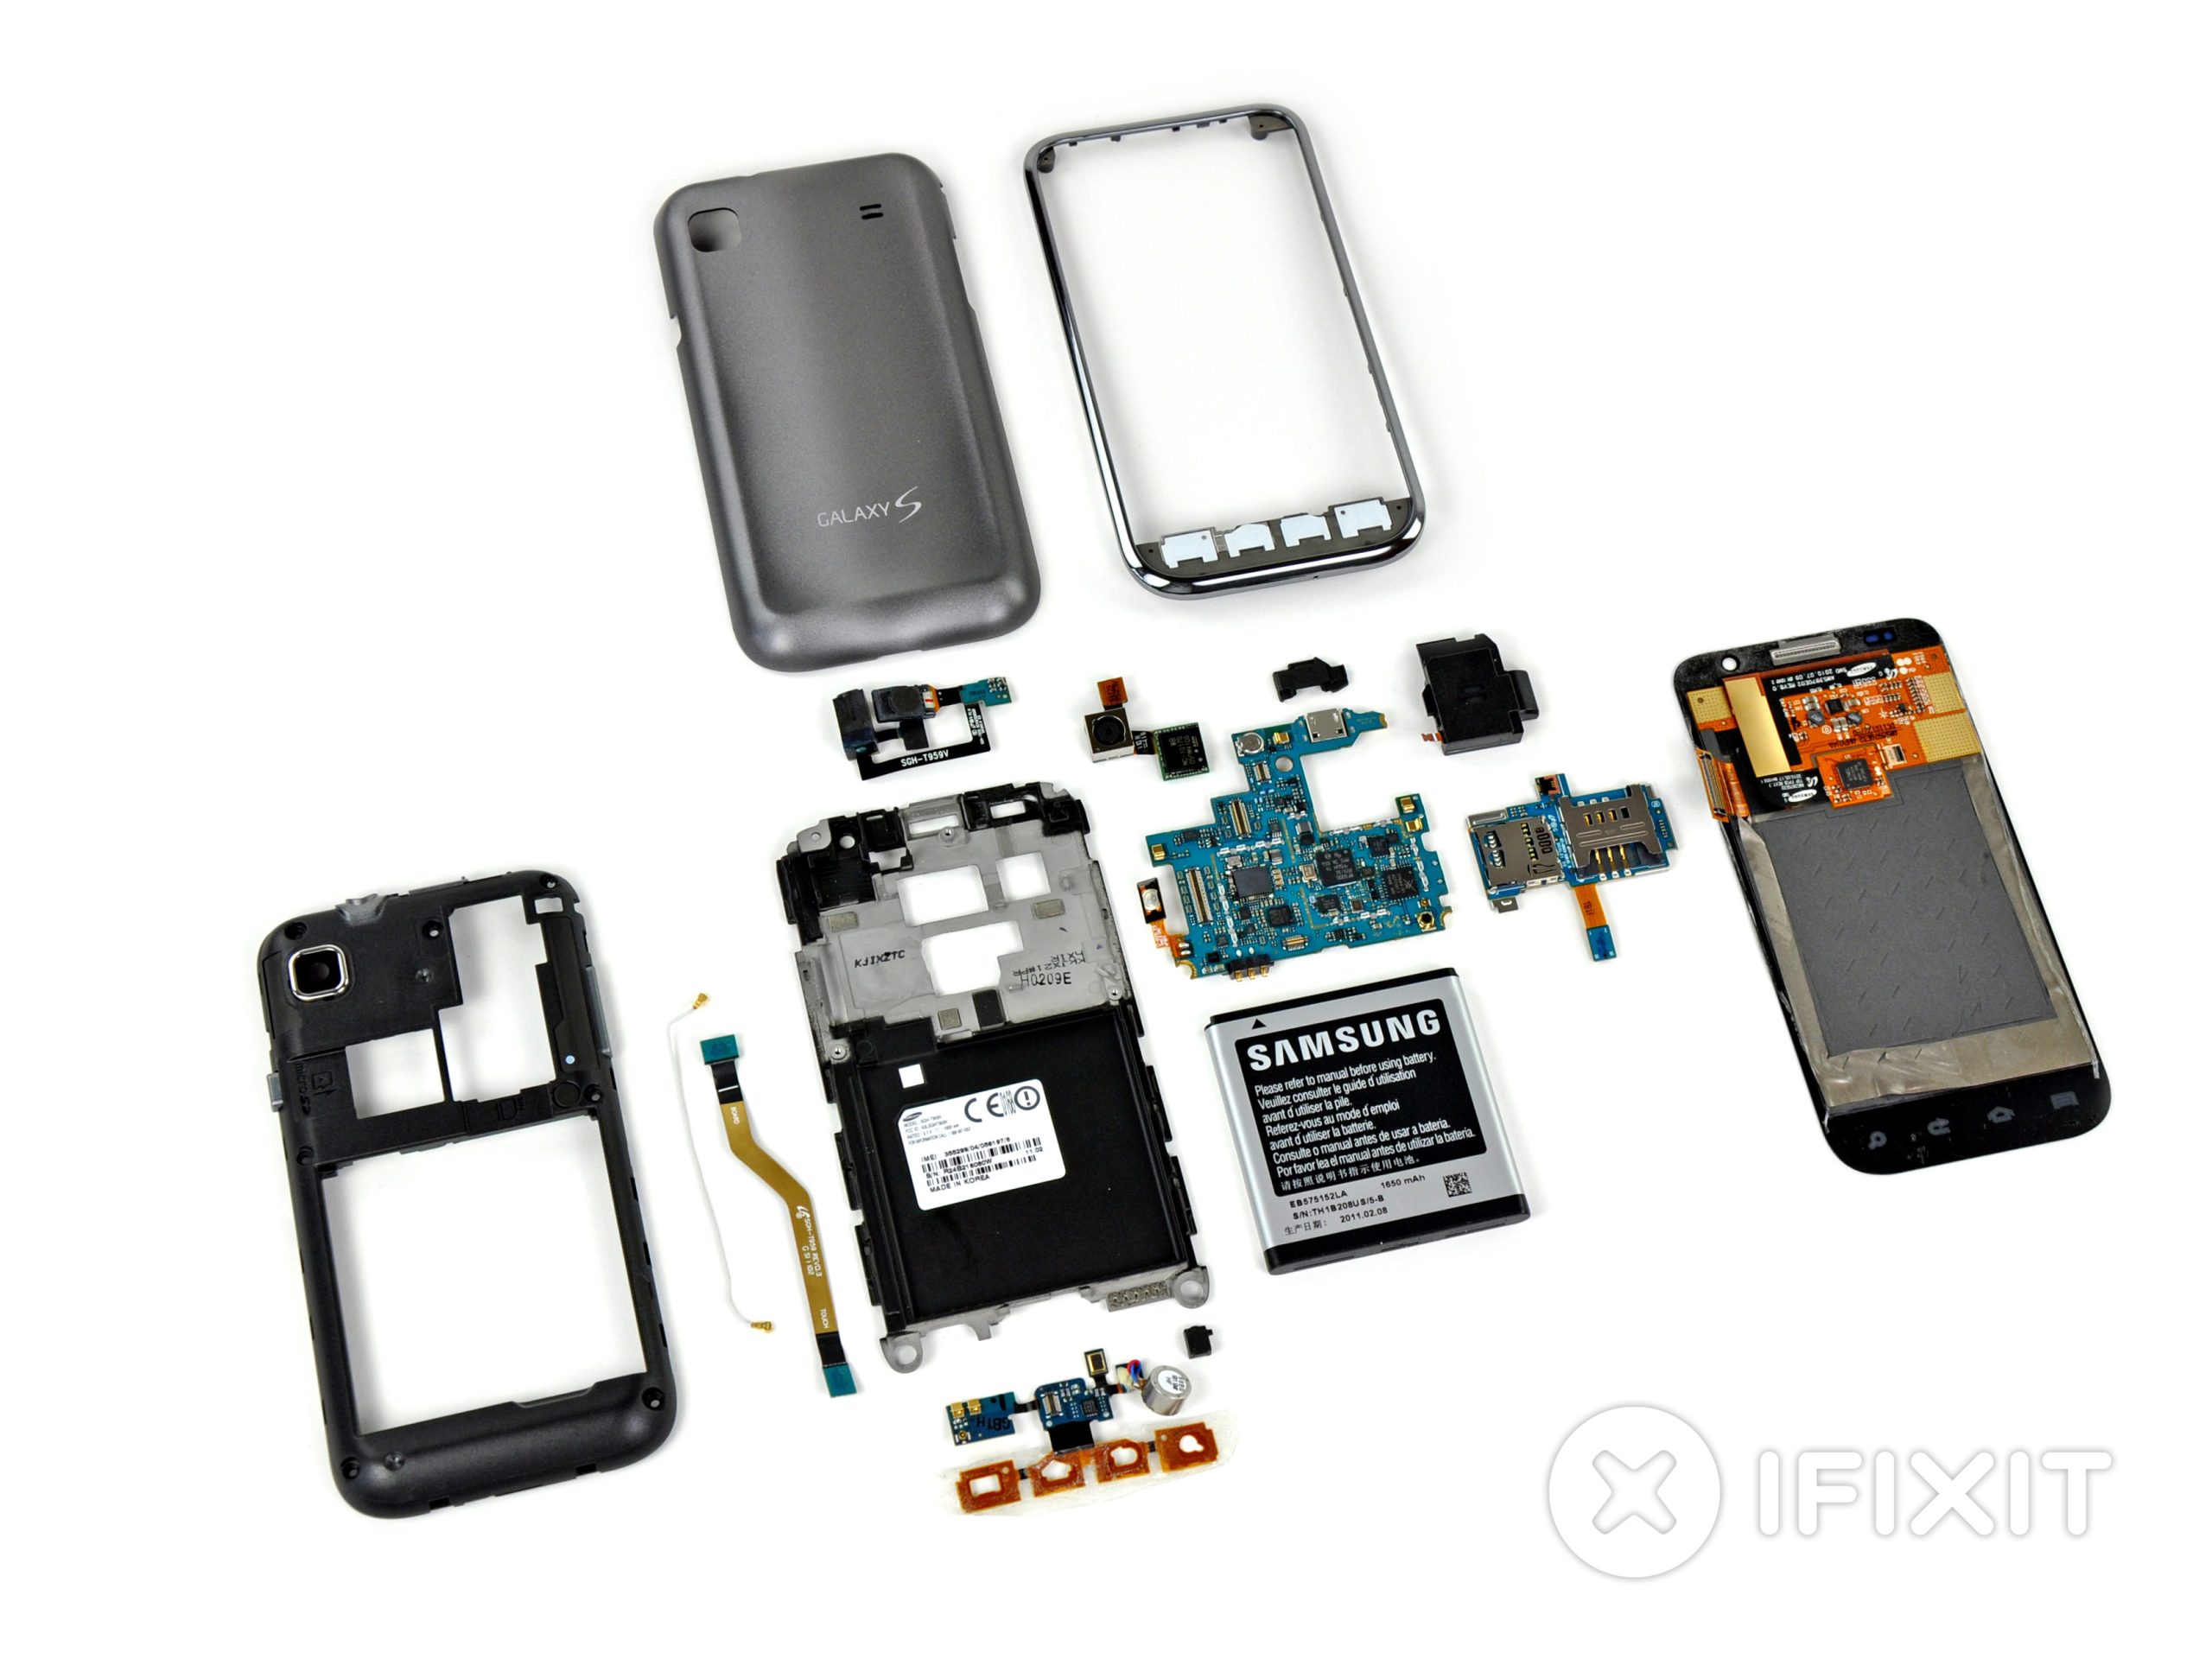
Samsung Galaxy S4 Teardown Guide: Step-by-Step Repair Tutorial
Duration: 45 minutes
Steps: 23 Steps
Ever wonder what life’s really about? Joy, cash, or maybe legendary chess champs? Samsung has a suggestion: a handy sidekick in your pocket—the Galaxy S4. Forget awkward small talk and let your new smartphone do the heavy lifting. Dive into our guide and see what makes this device tick. Need backup? Schedule a repair if things get tricky.
Step 1
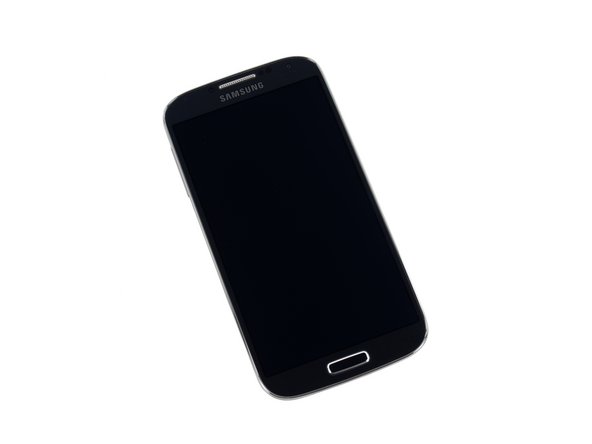


– Let’s explore the specs of the Galaxy S4 (not SIV), the latest in Samsung’s Galaxy S lineup, which now skips the Roman numerals. Remember, safety first—don’t try to fix stuff while you’re on the road. The device features a 5-inch display with a sharp 1920 x 1080 resolution at 441 pixels per inch, just below the HTC One’s 468 ppi. You can choose from 16, 32, or 64 GB of internal storage, plus expand your storage capacity with up to 64 GB via microSDXC cards. It packs 2 GB of RAM, a 13 MP rear camera, and a 2 MP front-facing camera. If you need help during your repair, you can always schedule a repair.
Step 2
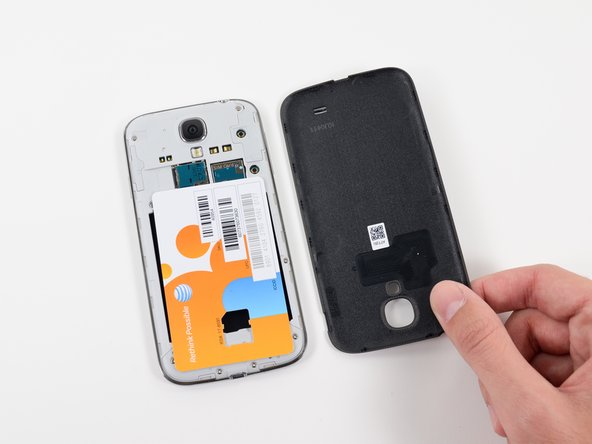

– Right out of the box, we’re already feeling a bit relieved—because this device has a removable battery! That’s a nice change of pace.
– This design choice makes us pretty happy! Kudos to Samsung for making things easier for the user and better for the environment.
– Not only is the battery removable, but it also comes out easily! The back cover sits upside-down on the device, so you won’t need to fuss with clips or tools to open it up.
– Inside, you’ll find the micro-SIM card tray: a small plastic piece that holds your micro-SIM card. It’s packed with important info for the card’s operation, all stored on a thin, easy-to-lose plastic sheet.
Step 3


– Let’s have a little fun and see how the Galaxy S4 stacks up against the iPhone 5.
– The S4 sports a vibrant 5-inch full HD Super AMOLED display, while the iPhone 5 features a 4-inch Retina IPS LCD.
– Size-wise, the Galaxy S4 is definitely the bigger phone, coming in at 5.38 x 2.71 x 0.31 inches and 4.6 ounces. The iPhone 5 is a bit more compact at 4.87 x 2.69 x 0.30 inches and 3.95 ounces.
– Both offer 16, 32, or 64 GB of internal storage, but the S4 also lets you bump up your space with a microSDXC card for up to another 64 GB.
Step 4
The S4 wasn’t too eager to spot our Iron Man poster or the office Chia Gnome as actual faces, but with a little creativity, we got it to play along.
– One of the cool new features of the S4 is Smart Pause, which automatically stops video playback when you look away from the screen. Like all great ‘Life Companions,’ the S4 wants your attention—when it’s talking to you, you better be looking! We found that, after playing around with Smart Pause, we needed to figure out a way to trick it out. If you’re interested in more tips or need help, you can always schedule a repair.
Step 5


– Once you’ve given the device a quick test run, it’s time to remove the battery and get to work. New software features are fun, but our main focus is on what actually powers the device.
– Removing the back cover is straightforward—a fingernail in the groove is all you need to pop this phone open.
Step 6


– You’re swapping the battery like a pro — pop it out, pop it back in, and give it a little shake to make sure it’s snug. The lithium-ion battery packs a punch at 3.8 V and 2600 mAh (9.88 Wh), offering up to 7 hours of talk time and nearly two weeks of standby. Need a hand? You can always schedule a repair with Salvation Repair.
Step 7

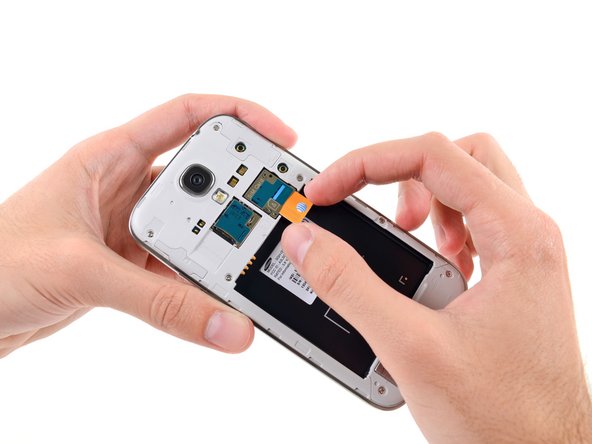
– First up, let’s quickly move the pre-installed micro-SIM card out of the way. No time to waste, right?
– As with the previous version, just a few screws are keeping the plastic midframe in place. Nothing too tricky.
– We were hoping for a magnesium midframe like the one we saw in the S4’s great-grandparent. But, nope! Looks like no playing with fire in this Galaxy just yet.
Step 8


Inside the midframe, you’ll find the springy volume and power buttons, a generously-sized speaker, and a liquid damage indicator ready to tell its tale.
– Once the screws are out, don’t forget about the sneaky clips still holding the plastic midframe of the S4 in place. They’re no match for a plastic opening tool, though! It’s the perfect little gadget to get those clips to pop free. Once you do, you’ll get your first peek at the circuit board—yep, it looks just as familiar as you thought!
Step 9


This is the sweet spot for your speaker if you like to keep your ears close by while holding your device. Perfect for those who like a little extra volume in their pocket.
– With minimal effort, we pop the speaker assembly right out of the midframe. Simple, right?
– Unlike the HTC One’s dual front-facing speakers, the S4 sticks to a solo speaker tucked at the bottom of the back of the phone.
– While it may not deliver gourmet sound, this speaker still knows how to crank out those jams loud and clear. Perfect for your playlist or whatever beats you’re feeling.
Step 10


– With the midframe removed, you’ll see that just a few connectors and a single screw are holding the motherboard in place. Grab your favorite tools, and you’ll have it out in no time. And hey, how serious does Samsung seem about their phone? If their unveiling didn’t give it away, an internal stamp confirms this device is straight-up 1337. If you need help, you can always schedule a repair.
Step 11


The pull between the motherboard and camera is about 0.0000000000098 Newtons—so, basically, separating them is a breeze.
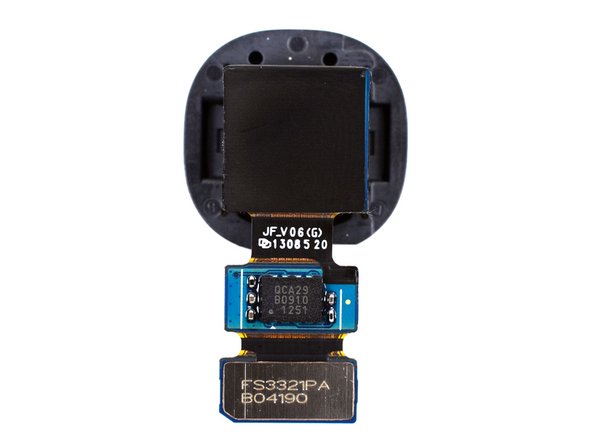
– First things first, let’s get that rear-facing camera off so we can dive into the motherboard. It’s a simple step, but crucial to getting everything else done.
– Unlike HTC’s recent approach to megapixels, Samsung’s rear-facing camera comes in at a solid 13 megapixels. It’s equipped with the usual LED flash, a back-illuminated sensor, and yes, it can record full 1080p HD video at 30 fps—perfect for those video moments.
Step 12


– Right on top of the motherboard sits the SIM/microSDXC board, just hanging out.
– The cool thing is, the modular setup means you can swap it out if one of the slots takes a hit—but you’ll need to replace both at once, since they’re a package deal.
– Heads up: it’s stuck down with adhesive, so you probably won’t want to go through the trouble unless it’s really necessary.
Step 13

– Meet the Qualcomm MDM9215M: your phone’s ticket to 4G GSM/UMTS/LTE speeds.
– Powering the show is the Qualcomm PM8917, keeping things running smooth.
– On the right, you’ll spot the ARM Holdings MBG965H chip, strutting its stuff.
– Underneath that Samsung K3QF2F200E 2 GB LPDDR3 RAM, there’s a high-octane Snapdragon 600 APQ8064T 1.9 GHz Quad-Core CPU hiding out.
– Toshiba’s THGBM5G7A4JBA4W 16 GB eMMC handles your storage needs, combining flash memory and a controller in one neat package.
– Qualcomm WCD9310 is your audio codec, making all your sound magic happen.
– The Broadcom BCM4335 chip takes care of 5G Wi-Fi MAC/Baseband/Radio duties—rumor has it, there’s a mysterious component tucked underneath.
– On the left, you’ll find the Bosch Sensortec BMP180 barometric pressure sensor, which helps your device calculate altitude in meters as a second parameter.
Step 14

– Once you’ve heated up and removed the Broadcom module from the motherboard, you’ll spot a surprise hiding underneath: a Skyworks SKY85303-11 2.4 GHz, 256 QAM WLAN/Bluetooth® Front-End Module. Who knew repairs could be so full of plot twists?
Step 15

– Let’s take a quick tour of the Galaxy components: First up, the Skyworks 77619 power amplifier module handles quad-band GSM/EDGE signals. Next, the Qualcomm WTR1605L is a seven-band 4G LTE chip—it’s the same one found in the Nexus 4, so it’s pretty reliable. Then there’s the SWA GNF09, a handy NFC chip for contactless communication. Don’t forget the Broadcom 20794S1A, a standalone NFC chip for seamless connectivity. The Maxim MAX77803 microcontroller keeps things running smoothly behind the scenes. Silicon Image’s 8240BO MHL 2.0 transmitter takes care of high-quality media streaming, and finally, the Qualcomm PM8821 power management IC ensures your device stays powered up and efficient. If you hit any snags along the way, you can always schedule a repair with Salvation Repair.
Step 16


Curious about what happened to the Qualcomm MDM9215M modem? Well, it got the chop as part of a daring experiment in the name of science.
– And boom! Hidden beneath the Samsung LPDDR3 IC sits the Snapdragon 600 APQ8064T 1.9 GHz Quad-Core CPU.
– The Qualcomm applications processor is sporting the APQ8064 label.
– Samsung got some heat for using tin solder sourced from risky mines in Indonesia—Friends of the Earth even kicked off a #makeitbetter campaign, complete with attention-grabbing signs at Samsung’s office.
– Turns out, Samsung just updated their policy last week. Way to adapt! Meanwhile, Apple is keeping quiet about where their tin comes from.
Step 17


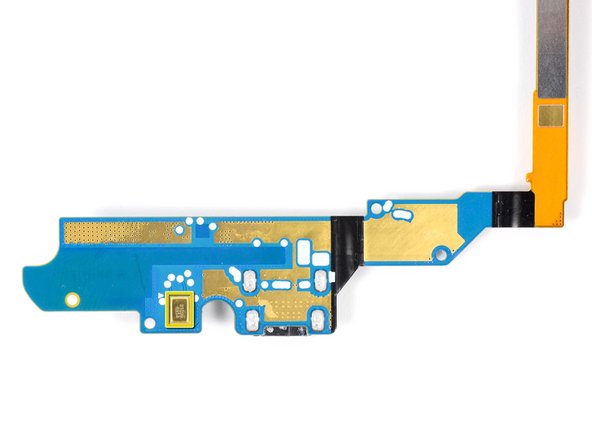
– With the motherboard out of the way, we can focus our efforts on removing components attached to the front of the device.
– The first component out is the standard 3.5 mm headphone jack. A swift flick of our trusty spudger, and poof! It’s out!
– Samsung left no useful space un-adorned with extra components—the headphone jack is home to the status LED and the first of a pair of IR sensors.
Tools Used

Step 18


– A little careful tweezing helps us gently lift out the front-facing camera from the S4.
– This 2 MP front-facing camera is a key part of the S4’s dual-camera feature, because who doesn’t love snapping pics of their friends taking pictures of their food, right?
Step 19


Samsung’s Air View and Air Gesture features work thanks to the clever positioning of two IR sensors on either side of the earpiece speaker. These sensors track the reflection of IR light from your hand, allowing the phone to detect sideways movement as you gesture over the screen without ever having to touch it.
– Alright, now that the easily removable parts are out of the way, let’s carefully peel back the remaining slightly-stuck components covering the Galaxy S4’s display assembly. The first component to go is a versatile connector that links the earpiece speaker, IR blaster, and a sensor array housing the ambient light sensor along with a second IR sensor. Take your time and proceed gently to avoid any damage. If you need assistance, you can always schedule a repair.
Step 20


– Our next target in the anti-adhesive prying adventure is the vibration motor, also known as the ‘little motor that could’.
– The S4 packs a linear oscillator vibration motor, similar to what you’d find in other Android devices like the Nexus 4 and Galaxy Nexus—so it’s a familiar vibe if you’ve tinkered before.
– This particular motor is labeled 53329 34AVCV—think of it as the motor’s own badge of honor, ready to be replaced or checked.
Step 21
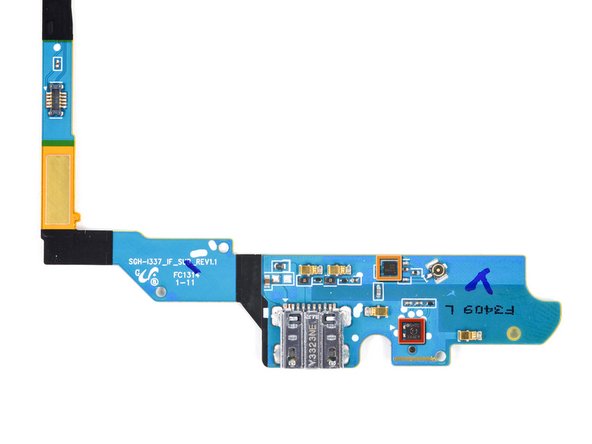

– The daughterboard isn’t just for charging—it’s got a micro USB port with all the bells and whistles. MHL and USB OTG mean you can hook up HDMI or plug in USB gadgets, not just charge or transfer files.
– Pop out the daughterboard and you’ll get a peek at some of its hidden gems.
– Here’s the Sensirion SHTC1 sensor for tracking humidity and temperature.
– You’ll spot the RFMD RF1119 running antenna duties.
– And that’s the S1029 6914—yep, that’s your voice mic!
Step 22


– The front panel assembly is the last piece of the puzzle—almost there!
– Take a peek at the second liquid damage indicator on the back of the screen. And wait, what’s that hiding down there?
– It looks like we’ve just uncovered the touchscreen controller, a Synaptics S5000B.
– This little guy is in charge of the S4’s super-sensitive touchscreen, which even works through gloves!
The display and front glass are fused together with a layer of optical adhesive, creating one solid piece. Plus, the glass is glued to the plastic display frame, turning it into a single, unified assembly. Nothing shocking here—just part of the process. If you need help, you can always schedule a repair.
Step 23


– The Galaxy S4 scores an impressive 8 out of 10 for repairability — meaning most fixes are straightforward. Replacing the battery is a breeze and can be done in seconds without tools. The device opens up easily, giving quick access to its internal parts. There are just 11 Phillips #0 screws throughout, all standard and no special security screws to worry about. Many small components are modular and can be swapped out individually, though some are glued in, making replacements a tad trickier. Keep in mind, the glass is fused to both the display and its frame, which can bump up repair costs. To replace the front panel, you’ll need to go through the entire phone since everything is built into the back. If you need help, you can always schedule a repair.