iPhone 11 Pro Battery Replacement Guide: How to Fix Your Dead Battery
Duration: 75 min.
Steps: 19 Steps
Welcome to your DIY adventure! In this guide, we’re diving into how to swap out that tired battery in your iPhone. You’ve got this! Check out our online store for the perfect iPhone toolkit and a top-notch replacement battery to get you started. If you run into any hiccups along the way, don’t hesitate to reach out—we’re here to help! Good luck with your battery swap! And hey, if you find our instructions useful, we’d love to hear your feedback. Let’s get to it!
Step 1
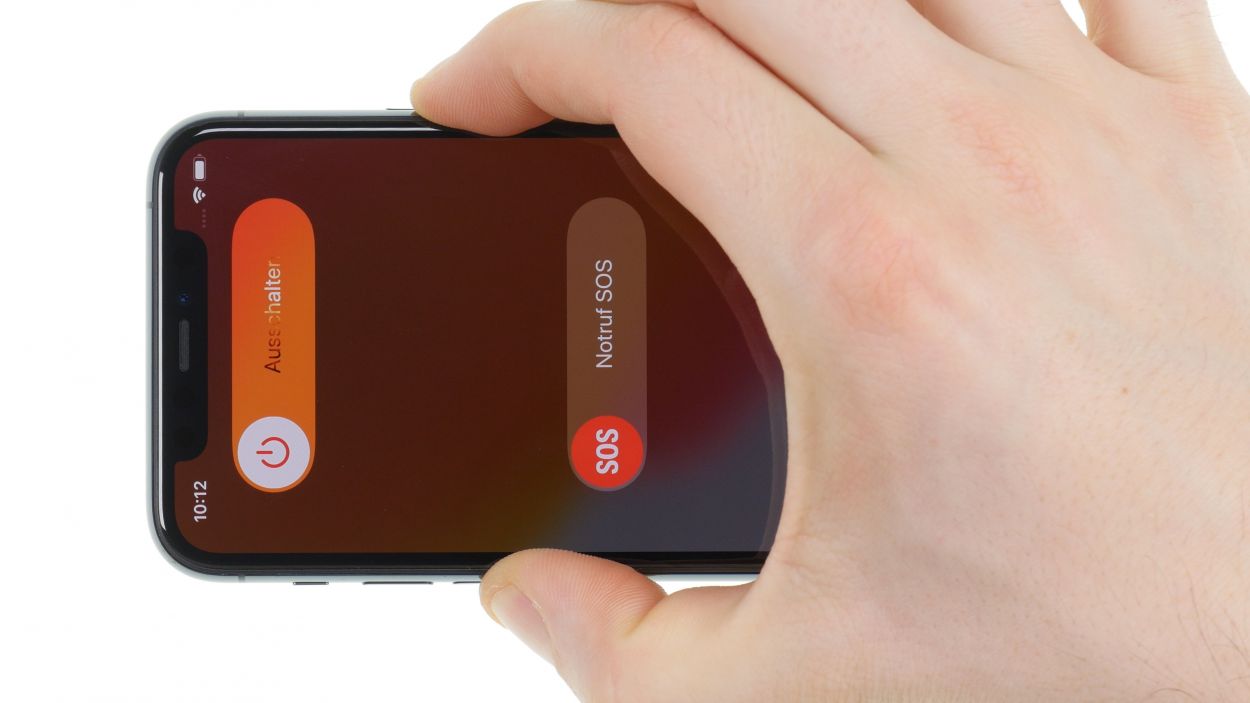
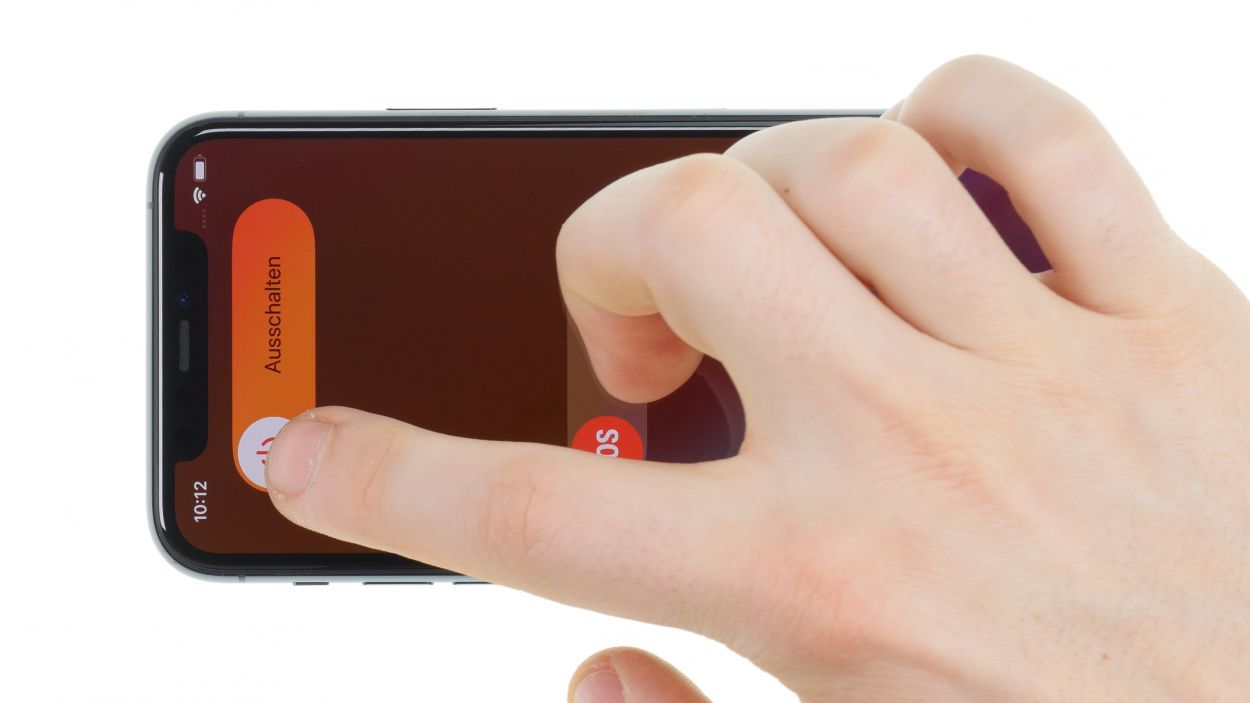
– Give those sleep/wake and volume buttons a friendly squeeze together for a few seconds to power down your device.
– Swipe that ‘Switch off’ slider from left to right like you’re closing a door on a busy day.
– In just a few moments, your smartphone will be taking a well-deserved nap!
Step 2

– Grab your trusty Pentalobe screwdriver and twist out those two Pentalobe screws like a pro!
– Once you’ve got them out, toss them into a screw storage container to keep them safe and sound.
2 × 6.7 mm Pentalobe
Hey there! To keep your screws and parts safe during this repair journey, we totally recommend using a screw storage solution. An old sewing box can do the trick! At Salvation Repair, we love our handy magnetic pad, where you can neatly arrange all your parts just like they were in the phone. This way, you won’t misplace any screws or mix them up, which could cause some hiccups in your device’s performance. Let’s keep everything organized and your device happy!
Step 3
Just a little tip: you should be able to touch the screen without feeling like you’re in a sauna. Keep it cool!
– To kick things off, gently set your iPhone on a soft, clean surface. This way, your case stays scratch-free and happy!
– Next up, grab that heat gun and give the edge of the display a nice warm-up. Run it evenly along the edge like you’re giving your device a cozy little hug.
Tools Used
- heat gun to heat parts that are glued on so they’re easier to remove.
In most cases, you can also use a hairdryer.” rel=”noopener”>Heat gun
Step 4
– Kick things off by sticking a suction cup on the bottom edge of your display. Gently pull it upwards to create a snug little gap between the display and the case.
– Next, slide in a flat, sturdy tool to widen that gap. A hard plastic plectrum and the iFlex are perfect for this job!
Opening up your iPhone 11 Pro might just put a dent in that shiny manufacturer’s warranty, plus it could also wave goodbye to your IP68 dust and water protection. So, think twice before you dive in!
Hey there! The hard plastic plectrum is designed to be a bit thinner at the corners. This little feature makes it super easy to slide in, while also keeping you from going too deep into your device. Now, the iFlex is a sleek tool made of ultra-thin, sturdy metal with sharp edges. To keep your device’s frame looking sharp, we suggest kicking off this step with the iFlex and switching to the hard plastic plectrum as soon as you can. Let’s keep that frame scratch-free and get this repair rolling!
Tools Used
- Pick Set
- screen and the frame. The practical iFlex is made of stainless steel and sits comfortably in the hand. This makes it the perfect assistant for every smartphone repair.” rel=”noopener”>iFlex Opening Tool
- VAKUPLASTIC Suction Cup
Step 5
While you’re working on that display, remember to keep it under 180°! We want to protect those delicate flex cables from any accidental tearing. You’ve got this!
Hey there! A little hot air can work wonders! Just reheat that glue with a heat gun every now and then to make it a breeze to peel things apart. You’ve got this!
Step 6
2 × 1.5 mm Y-Type
4 × 1.46 mm Y-Type
When you’re popping off those connectors, kick things off from the side without any tiny components hanging out. This little strategy will help you dodge any potential mishaps. You’re on the right track!
– First, let’s tackle that bracket plate above the battery connector. Just unscrew those Y-type screws and you’ll be all set!
Step 7
6 × 1.16 mm Y-Type
Connectors
When you’re disconnecting those connectors, kick things off from the side without any tiny components hanging around. This little strategy will help you dodge any potential mishaps. You’re on the right track!
– To kick things off, let’s unscrew that bracket plate sitting above the display connectors by loosening those Y-type screws. You’ve got this!
Step 8
2 × 1.3 mm Y-Type
Connectors
When you’re disconnecting those connectors, kick things off from the side without any tiny components hanging around. This little strategy will help you dodge any potential mishaps. You’re on the right track!
– Take off the bracket plate that’s cozying up to the Lightning connector cable set. Just loosen those two Y-Type screws and set the plate aside for now.
Step 9
1 × 4.10 mm Standoff
1 × 1.33 mm Y-Type
1 × 1.75 mm Y-Type
When you’re disconnecting those connectors, start from the side without any tiny components hanging around. This little strategy will help you dodge any potential mishaps. You’re on the right track!
– First up, gently lift the Taptic Engine connector off the USB board using a spudger—think of it as giving it a little hug.
– Now, let’s loosen those three screws that are keeping the Taptic Engine snug in place.
– Once that’s done, you can smoothly slide it out of your iPhone!
Step 10
– To kick things off, gently peel away the black tabs of the adhesive strips from the edge of the battery using your trusty tweezers. You’re doing great!
Keep a solid grip on your phone and the battery while you gently pull that last adhesive strip. We don’t want the battery doing a surprise leap out of your device!
If one of those adhesive strips decides to play hardball and tears, no worries! Just gently coax the battery out of the rear case using a flat, stable tool. We recommend a trusty battery spudger or the flexible iPlastix to get the job done without bending anything. You’ve got this!
Step 11
– First up, let’s line up those adhesive strips on the back of the battery for a quick test run.
– Now, peel away that blue protective foil and stick those adhesive strips to the battery like a pro!
Tools Used
Step 12
– First, peel off that pink protective foil from the adhesive strips like you’re unwrapping a surprise gift!
– Then, give the battery a gentle but firm press onto the bottom of the rear case, making sure it’s snug as a bug!
Step 13
1 × 4.10 mm Standoff
1 × 1.33 mm Y-Type
1 × 1.75 mm Y-Type
Hey there! When connecting those little connectors, remember to be gentle—no need to flex those muscles! A little finesse goes a long way, and being too forceful could cause some serious trouble for your device. Keep it smooth and steady!
– Pop it back into its cozy spot at the bottom of the rear case and secure it with those trusty screws!
Step 14
Connectors
2 × 1.3 mm Y-Type
– Gently press the two connectors on the logic board until you hear that satisfying click—it’s like a high five for your phone!
– Carefully place the bracket plate over the flex cable and secure it to the edge of the rear case with a few screws. It’s all about that snug fit!
Step 15
Connectors
6 × 1.16 mm Y-Type
Hey there! When you’re connecting those little connectors, remember to be gentle—no need to flex those muscles! A little finesse goes a long way, and being too forceful could cause some serious trouble for your device. Keep it smooth and steady!
– Prop that display back against something sturdy to keep those flex cables from getting too stretched out while you connect them. You’re doing great!
Step 16
4 × 1.46 mm Y-Type
2 × 1.15 mm Y-Type
– Gently press that battery connector onto the board until you hear a satisfying click—it’s like a little victory dance for your device!
– Next, position the bracket plate over the connector and secure it with a few screws. It’s all about keeping things snug and secure!
Step 17
Step 18
When you’re closing up that display, keep an eye out for those sneaky flex cables! We don’t want any pinching drama happening here.
– To wrap things up, gently fold that display back and give it a nice, even press into the rear case. You want to hear that satisfying click when it settles in just right!
Tools Used
Step 19
2 × 6.7 mm Pentalobe
– Secure those Pentalobe screws on either side of the Lightning connector like a boss!