Acer Aspire 4741G-332G32Mn Screen Replacement
Duration: 45 minutes
Steps: 4 Steps
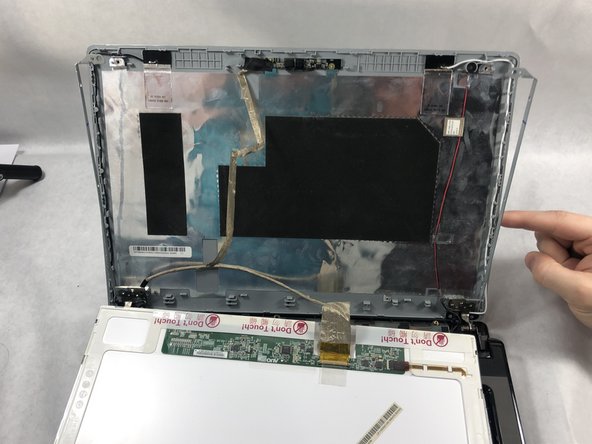
If your Acer Aspire 4741G-332G32Mn display is looking more like a pixelated art project than a crisp screen—think glitchy images, flickering, or a patchwork of dead pixels—this guide walks you through swapping out the screen. The display is made up of thousands of tiny pixels that come together to give you those sharp visuals, so when something goes wrong, the picture gets fuzzy or disappears altogether. Before diving in, double-check for any dust or grime that might be hanging out on the screen—sometimes a quick once-over with an ESD-safe brush or a slightly damp towel is all you need. Power your laptop off, then back on a couple times to be sure the screen is really the culprit. When you’re ready to start, fully shut down your laptop and unplug any power sources or connected monitors. Let’s get that display looking sharp again!
Step 1
– Gently slide the blue opening tool between the edge of the screen and the computer. Work your way around the perimeter, carefully easing the tool along the edges.
Step 2
– Pop off those little circular screw caps and unscrew the two screws with a Phillips #0 screwdriver—easy peasy!
– Gently lift away the computer’s frame to get to the goodies inside.
Tools Used
Step 3
– Grab your Phillips #0 screwdriver and carefully unscrew the six screws at each corner of the screen. You’re doing great—keep it steady and take your time.
Tools Used
Step 4
– Grab your Phillips #0 screwdriver and take out the screws along both sides of the screen—two on each side. Easy does it!
– Next up, carefully disconnect the screen adapter from the screen. Almost done!
– Gently lift the screen away from the rest of your laptop. Mission accomplished!
Tools Used
Success!


