Acer Aspire 4520-5464 RAM Replacement
Duration: 45 minutes
Steps: 5 Steps
Ready to give your computer a boost? Swapping out your old RAM is a quick and simple way to speed things up. With just a few steps, you’ll have your machine running smoother in no time—no sweat and barely any risk to your computer’s important parts.
Step 1

– Power down your computer and unplug all cables and gadgets hanging off it.
– Flip your computer over so its underside is facing up.
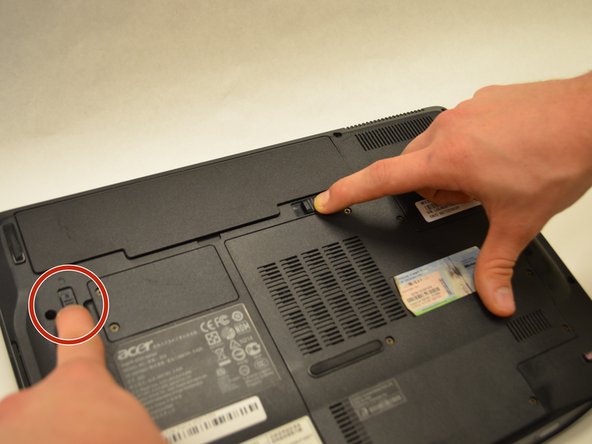
Step 2


– First, make sure the battery compartment lock tab is unlocked – it’s time to set that battery free!
– Next, gently slide the black tab away from the battery compartment. Easy does it!
– The inside edge of the battery should now be released, and it should pop out of the compartment just a bit. You’re making great progress!
Step 3

– Grab the inner edge of the battery and gently lift it out to remove it completely from your computer.
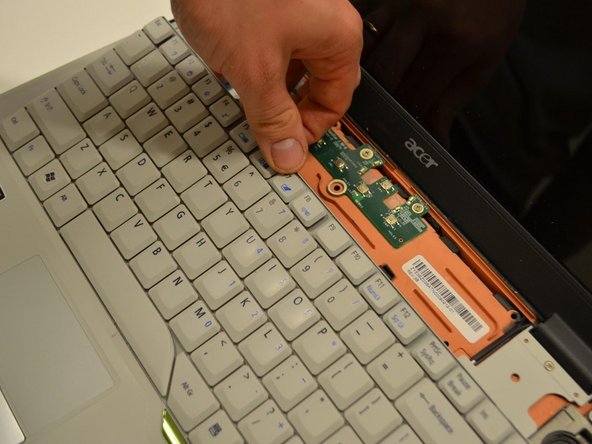
Step 4


– Start by removing the seven 2mm Phillips #1 screws from the big panel on the back of your laptop. Then, gently lift up the panel from the notch on the right side to get it out of the way. If you need a hand along the way, you can always schedule a repair.
Step 5


Now, go ahead and repeat the same process for the bottom stick of RAM. You’re doing great!
– To put everything back together, just work your way through these steps in reverse – easy peasy!
– You’ve made it to the end of this repair guide! If you need help or have any questions, you can always schedule a repair with Salvation Repair.
Success!