Acer Aspire 4520-5464 Keyboard Replacement
Duration: 45 minutes
Steps: 7 Steps
Get ready to breathe new life into your Acer Aspire 4520-5464 laptop by replacing the keyboard. This essential component lets you type and command your laptop with ease. Follow this clear and easy-to-read step-by-step repair guide to get the job done. If you need help along the way, you can always schedule a repair.
Step 1

– Power off your device and unplug any cables or external devices. Let’s give it a little rest!
– Flip the device over carefully, it’s time to get to work on the other side.
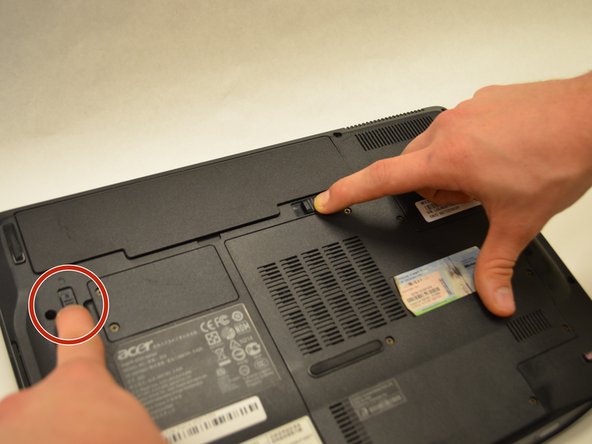
Step 2


– Make sure the battery lock tab is in the unlocked position before proceeding.
– Slide the black tab away from the battery compartment to loosen things up.
– Gently lift the inside edge of the battery—it should pop out just a little, making it easier to remove.
Step 3

– Grab the edge of the battery with your fingers and gently lift it out to disconnect it from the device. If you need help, you can always schedule a repair.
Step 4

– First up, grab your screwdriver and unscrew the five tiny 1mm Phillips #1 screws hiding inside the battery compartment. Next, locate the top edge of the case and remove the three 2mm Phillips #1 screws along the perimeter. Keep track of all screws as you go—salvationrepair.com can help if you need a hand with the tricky bits. When you’re ready, proceed to the next step to continue your repair adventure!
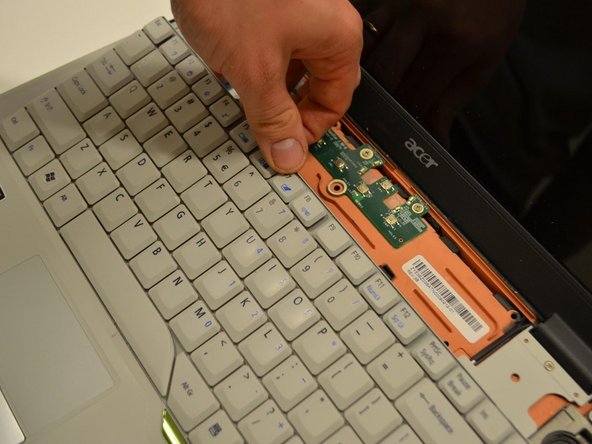
Step 5


– Time to get started! Use your trusty prying tool to carefully remove the gray plastic section above the keyboard – it’s like a little door waiting to be opened.
– Now, gently lift off the keyboard. You’re making great progress!
Step 6

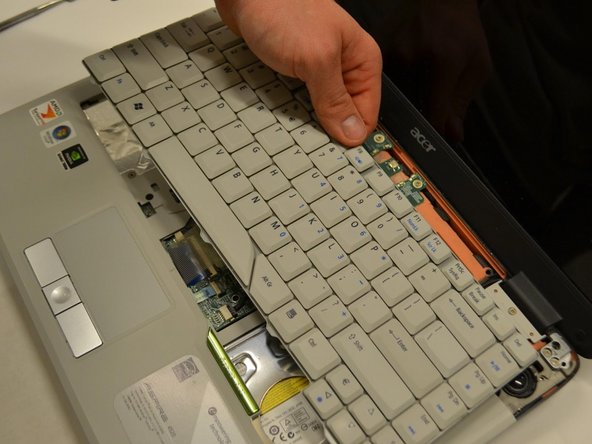
Keep the keyboard connected to the laptop—don’t pull it all the way off just yet!
– Grab the keyboard from behind the function keys and carefully lift it up – you got this!
Step 7


– Flip up the small black locking tab where the keyboard connects to the laptop—think of it as unlocking a little treasure chest.
– Gently slide the keyboard cable toward the trackpad and lift out the keyboard. Mission accomplished!