Acer Aspire 3000 Screen Replacement
Duration: 45 minutes
Steps: 27 Steps
This guide walks you through replacing the screen on an Acer Aspire 3000, including removing the battery and keyboard. It’s a straightforward process that should take about 30 minutes. If you need a hand along the way, you can always schedule a repair with professionals.
Step 1

– Flip your device so it’s chilling face down.
– Line up the laptop so the battery is farthest from you and the headphone ports are right up front.
Step 2


When the tab is pushed over to the side with the unlocked symbol, that means your battery is free and ready for liftoff.
– Give that button just below the battery a gentle slide to the left to unlock it. Easy does it!
Step 3


Hold that tab in place before pushing the battery, so you don’t risk damaging your device. Patience is key!
– Find the battery and spot the tab hanging out on its right side.
– Give that tab a gentle pull to the right while nudging the battery away from you like you’re sliding it out of a cozy spot.
Step 4

– Unscrew the two 4.6 mm Phillips #1 screws along the lower edge of the laptop case. Take it easy, they’re not too tight!
Step 5

– Gently pop out the three side tabs from the back case.
Step 6

– Carefully remove the panel that’s covering up the graphics card. This will give you the access you need to work your magic. If you need help, you can always schedule a repair.
Step 7

Lift with care, straight up and down, to avoid damaging those delicate connectors!
– Let’s get started by disconnecting the black and white cables from the graphics card. This is a straightforward step, but be gentle to avoid any damage.
Step 8

The card should start to pop out of the case on its own – you’re making great progress!
– Gently press the white tabs on both sides of the graphics card outward.
Step 9

– Gently lift the card up and away from the side with all the contacts—think of it like flipping the lid on your favorite snack box, just with a little more precision!
Step 10

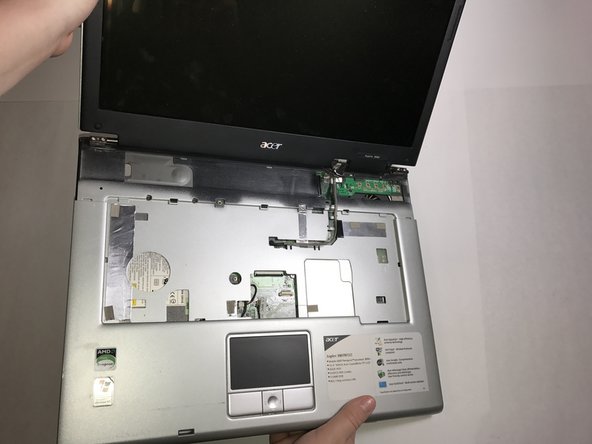
– Gently lift your laptop onto its edge, keeping the bottom of the screen facing up in the air. We’re just getting started, so take it easy and make sure everything stays steady!
Step 11

– Unscrew the three 4.6 mm Phillips #1 screws along this edge to move forward with the repair.
Step 12


Open the lid all the way to make the removal process easier.
– Slide a spudger into the latch on the right side. Gently wedge it in there.
– Now, pull the spudger handle towards you – this will release the first tab holding the piece in place.
– Work your way from right to left, lifting the panel up and rotating it to the left as you pop each tab free. Take your time and be gentle!
Step 13

– Remove the two 4.6 mm Phillips #1 screws—let’s get this show on the road!
Step 14

Hold up! Don’t fully detach the keyboard just yet – there’s still a ribbon cable keeping it connected to the device. Be gentle!
– Carefully lift the top edge of the keyboard, gently prying it out of its place. Take your time—patience makes perfect. If you hit any snags, remember you can always schedule a repair with Salvation Repair for expert help.
Step 15

– Flip up the little black tab on the ZIF connector—it’s like opening a tiny treasure chest. Gently ease the ribbon cable out, no tug-of-war needed.
– Lift out the keyboard. Nice and easy, like you’re picking up the last slice of pizza.
Step 16

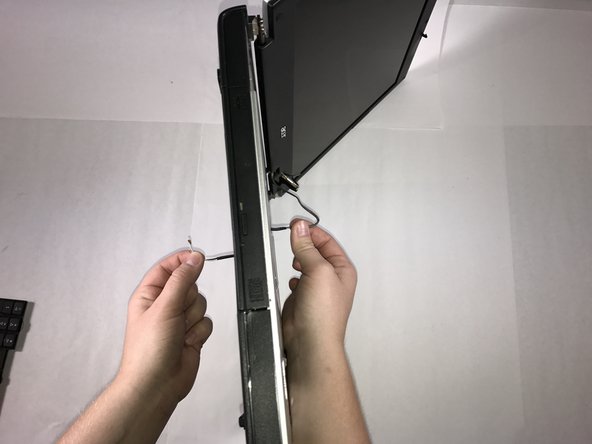
– Gently lift the connector attached to the black cable that’s leading to your laptop screen.
– Make sure to lift it straight up, and feel free to move your hand a little towards or away from you if needed to smoothly separate the connectors.
Step 17

– Grab your trusty spudger and gently wiggle it under the grey cable, carefully lifting it free from the plastic bars that are holding it down inside the laptop. It’s like releasing a little prisoner, but way less dramatic.
Step 18


– Stand the laptop up on its side so you’ve got a good view.
– Grab that black and white cable you unplugged earlier and smooth it out along the bottom of the laptop.
– Gently pull the cable through so it pops out on the keyboard side.
Step 19


Take it easy while unscrewing one screw from each side at a time. Support the screen as you remove the last screws to keep everything in place and avoid any accidental damage to the laptop’s components.
– Let’s get started by removing the four 4.6 mm screws located in this area. Take your time and make sure they’re all out before moving on to the next step.
Step 20

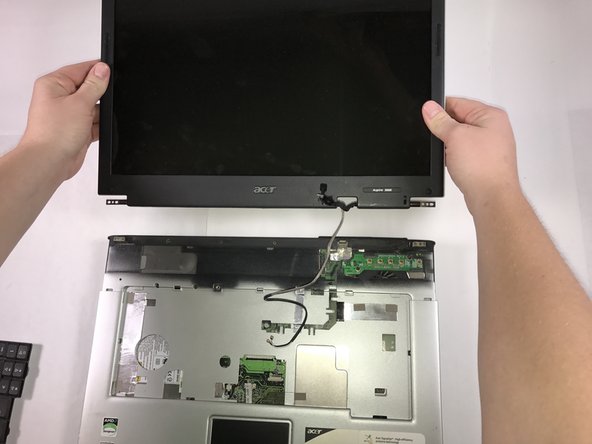
– Gently lift the screen and its casing away from the laptop, as if you’re unveiling a secret compartment. Keep it steady, and take your time.
Step 21

You might notice some leftover adhesive on top of the screws—that’s pretty common and nothing to worry about. It won’t cause any issues when you’re removing the screws. Just keep going, and if you need a hand, you can always schedule a repair.
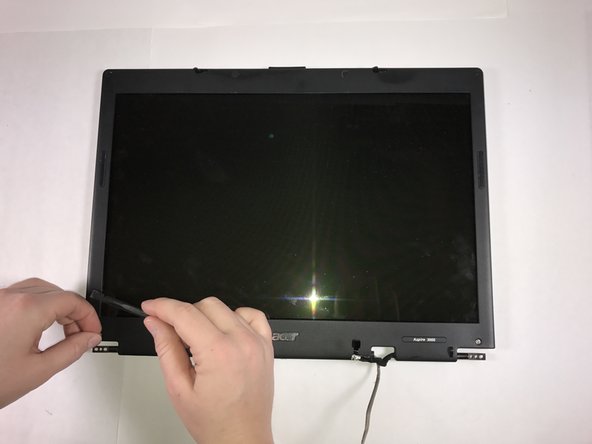
– Grab your trusty spudger and gently nudge those four rubber circles covering the screws on the upper casing. You got this!
– Now, unscrew the four 4.6 mm screws that were hiding behind those rubber circles. Easy peasy!
Step 22
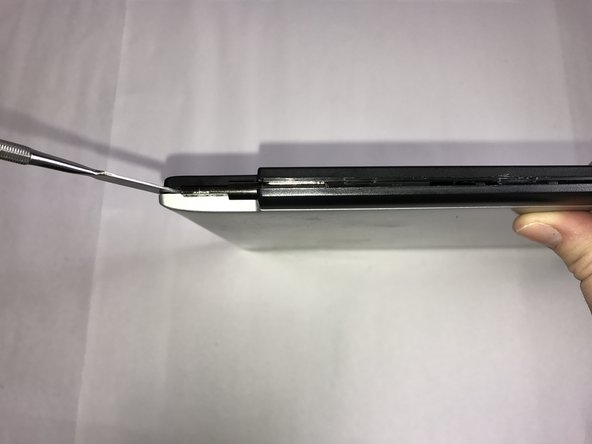

– Start by carefully prying the screen casing open, beginning at the bottom near where the cables enter the casing.
– To release the casing, take your trusty spudger and insert it into the gap, giving it a gentle twist until you hear the tabs pop loose.
– Work your way down the seam, twisting the spudger whenever you encounter a stubborn tab to set it free.
Step 23

– After the bottom has been freed and the side of the casing has started to separate, one’s hands can be used safely to pry apart the rest of the casing.
Step 24
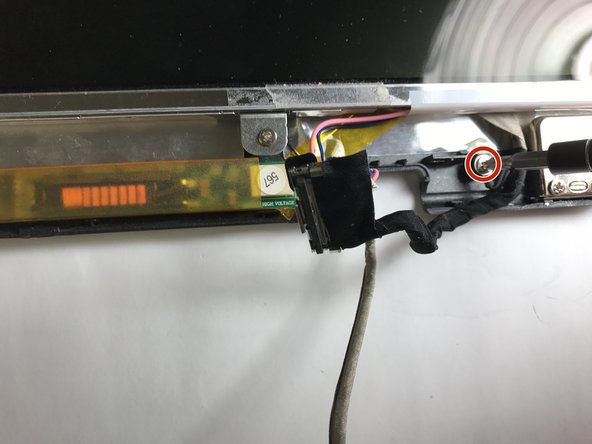

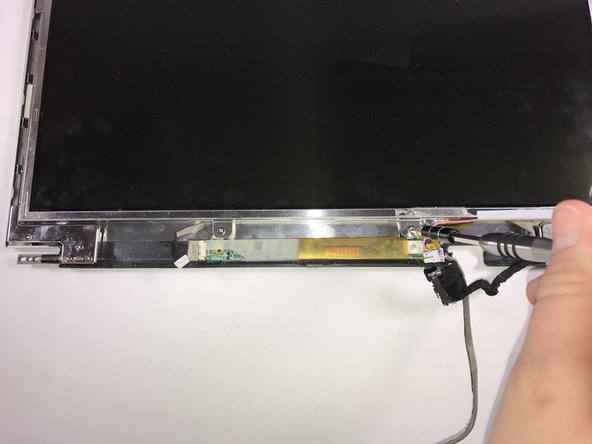
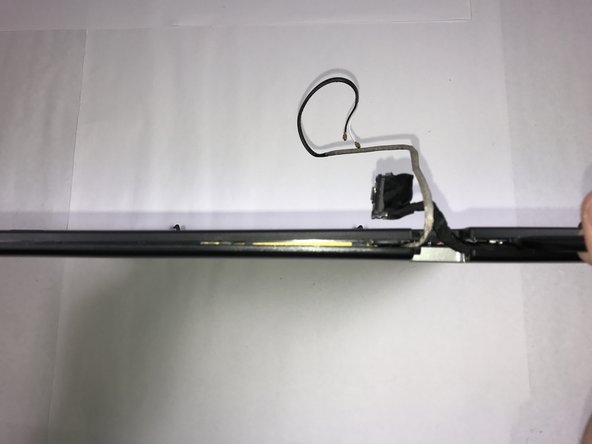
– Gently detach the two connectors that link the screen to the circuit board at the bottom of the casing. A little wiggle, and they should pop right off!
– Loosen up the grounding screw for the black cable. It’s a small but important step, so don’t rush it.
Step 25

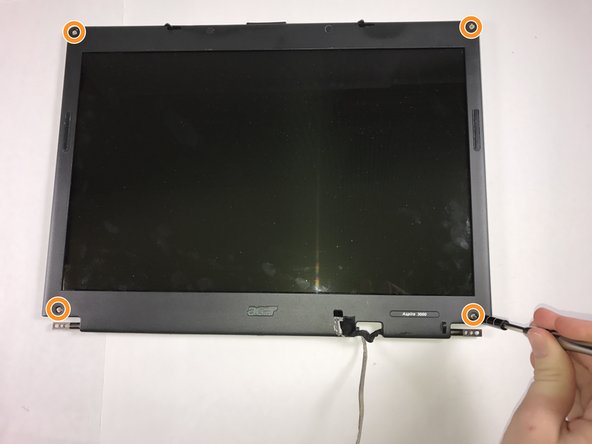
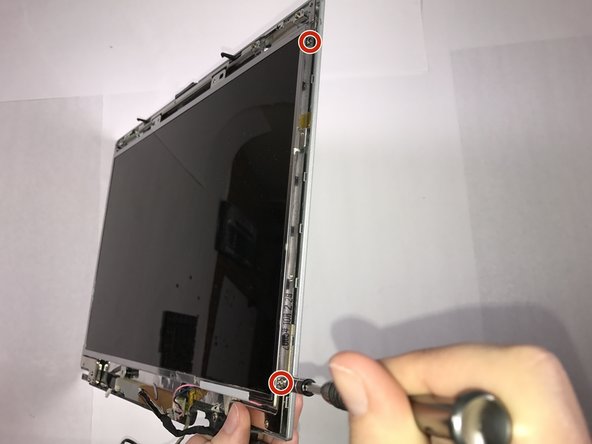
– Remove the four 4.6mm screws hanging out above and below the screen.
Step 26

Heads up: To keep those screws happy and unstripped, you might need to gently lift the screen away from the case to reach them.
– Unscrew the two 4.6 mm screws on each side of the screen. Easy peasy!
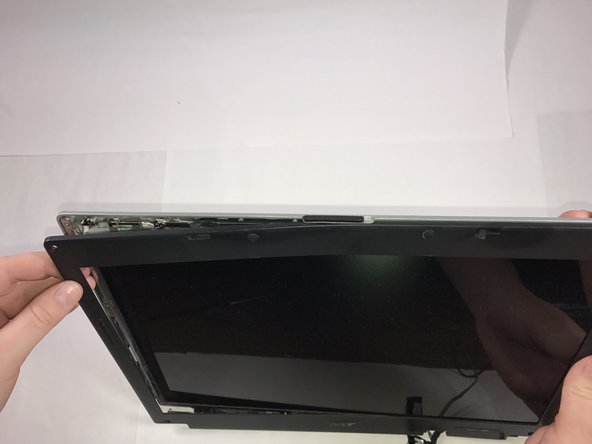
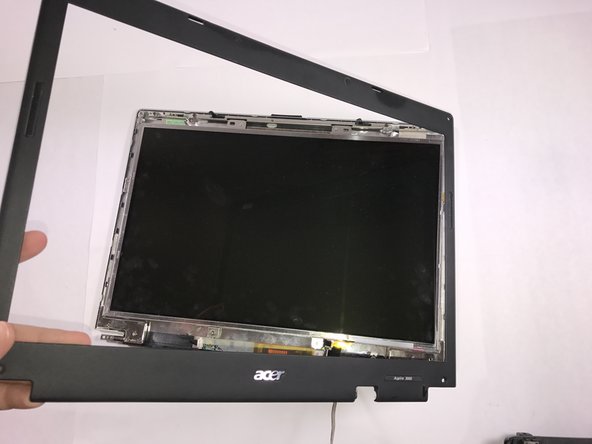
Step 27

– Gently tilt the top of the screen away from the case, then carefully separate it from the metal frame that holds it in place and lift it out. If you need a hand, you can always schedule a repair.
Success!