Acer Aspire E5-574-53QS Back Panel Removal
Duration: 45 minutes
Steps: 4 Steps
Ready to peek under the hood? Here’s your step-by-step guide to removing the back panel of the Acer Aspire E5-574-53QS laptop. Taking off the back panel is your gateway to all the good stuff inside—think upgrades, cleaning, and repairs. Let’s make sure you get there safely and confidently.
Step 1

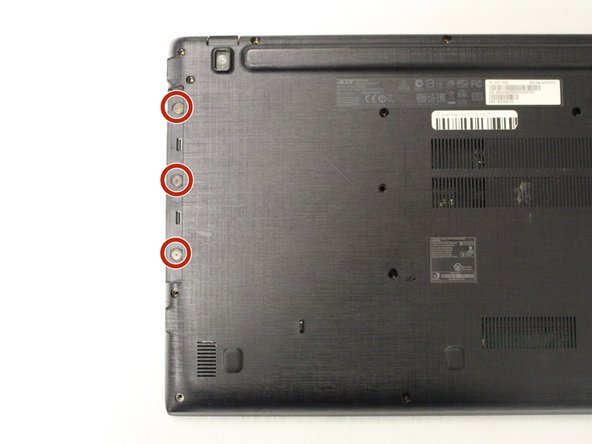
– Flip your laptop so the back is facing up—backside beauty shot!
– Grab a Phillips #0 screwdriver and unscrew the eighteen little screws holding the back cover in place.
Tools Used

Step 2


– Time to set that optical drive free! Use a plastic opening tool to carefully pry it out from the side of your laptop, then give it a gentle pull to remove it completely.
– Now, let’s get screwing – just kidding, we’re actually removing screws! Take out the three screws along the edge of the optical drive port using a trusty Phillips #0 screwdriver.
Tools Used
Step 3
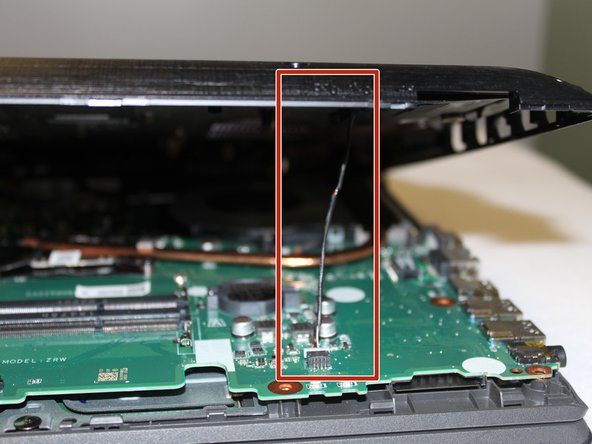

Don’t take it all the way off! Just loosen the connection between the back panel and the laptop. Watch out for that VGA port – it has a habit of getting snagged on the panel during this step. A little careful attention goes a long way!
– Gently insert an opening tool into the laptop’s seam and carefully pry the back panel away from the device, working your way around to loosen it. Take your time and give each clip a gentle pry to free the panel smoothly.
– Once the back panel is lifted, you’ll see the cable linking the back cover to the motherboard. Carefully disconnect or lift it to proceed with your repair. If you need a hand, you can always schedule a repair.
Step 4
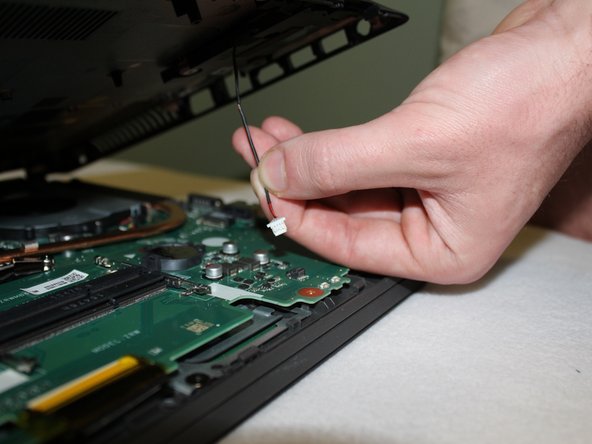


Handle the socket with care—it’s a bit delicate, so nudge the cable connector out gently.
– Gently pull out the cable from its socket – easy does it!
– Now, completely remove the back case from your device. Take your time and get it off smoothly.