Acer Aspire 5 A515-46-R3UB SSD Replacement
Duration: 45 minutes
Steps: 7 Steps
Your SSD is the digital filing cabinet of your computer, holding all your files and data. If it’s acting up in your ACER Aspire 5 A515-46-R3UB, it might be the culprit behind a bunch of weird errors. No worries—this guide will walk you through replacing or fixing your drive with straightforward steps. For extra tips, check out the ACER Aspire 5 A515-46-R3UB Troubleshooting page. Before diving in, make sure to power down your laptop and unplug it from the charger—safety first!
Step 1


– Grab your JIS #1 screwdriver and take out the eleven 6.7 mm screws holding the bottom cover in place.
Step 2


– Let’s get started! Use an opening tool and some handy picks to carefully pry the bottom cover away from the laptop.
– Now, work your way around the edges to release any sneaky clips before you can remove the bottom case.
– Great job so far! Now it’s time to remove the bottom case.
Step 3


– Let’s get started by carefully removing the two pieces of tape from the battery and its connector – you’ll want to save that tape for later when you’re putting everything back together.
– Hang onto that tape, you’ll need it for reassembly.
Step 4

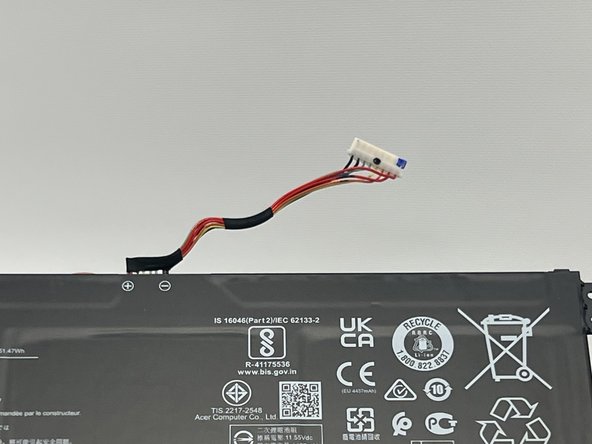
– Gently nudge both sides of the connector with your plastic opening tool until it pops out of the socket. Easy does it—no need to rush!
Step 5


– Gently lift the battery up and take it out of the laptop’s bottom case.
Step 6

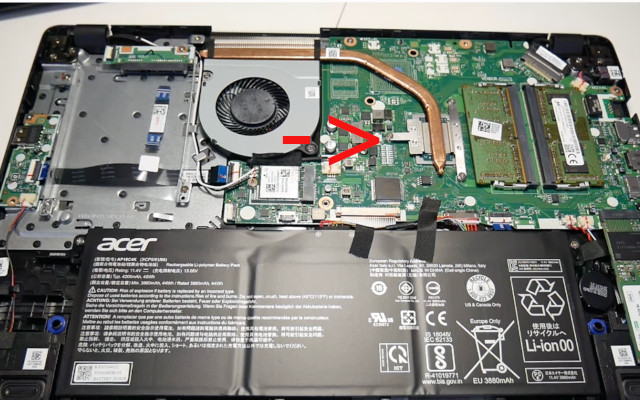
Once you take out the screw, the SSD card will pop up like it’s saying hello.
– Grab a JIS #1 screwdriver and carefully unscrew the single 3.2 mm screw holding the SSD in place. If you need a hand, you can always schedule a repair.
Step 7


– Carefully slide the SSD out of the socket.