Acer Aspire 3 A315-58-350L Fan Replacement
Duration: 45 minutes
Steps: 5 Steps
Your laptop’s fan is like its personal cooling coach – it helps keep things from getting too hot to handle. If you notice your laptop is burning up (literally!), it’s probably time to swap out the fan. Don’t worry, it’s an easy fix that’ll get your cooling system back on track. Just make sure to power down your laptop for a few minutes before you start, so it can chill out (pun intended!). This will give you a safe window to open it up and replace the fan. Remember, if you need help, you can always schedule a repair.
Step 1


– Grab your trusty Phillips screwdriver and remove the eleven 7 mm screws holding down the lower case. You got this!
Step 2


– Slide your opening tool into the gap between the lower case and the chassis.
– Work your way around the edges, gently popping the lower case free.
– Lift the lower case off and set it aside.
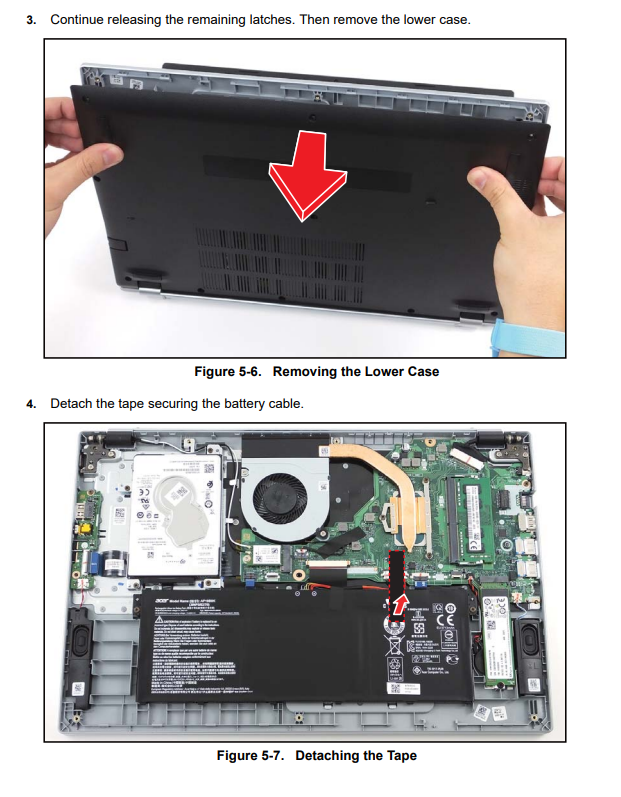
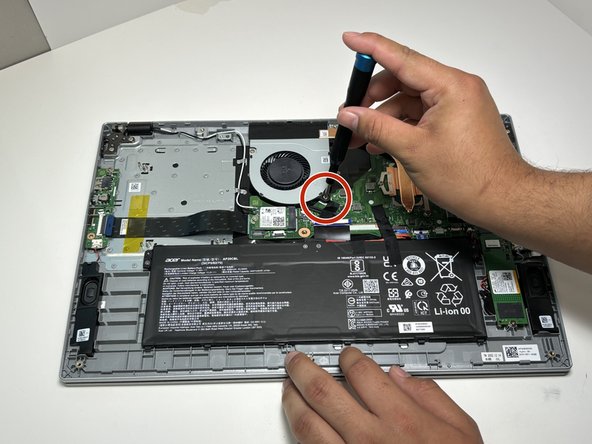
Step 3

– Time to get up close and personal with that fan cable! Use your trusty tweezers to carefully remove the black tape that’s holding it in place.
Tools Used

Step 4

– Take out both of the 4 mm Phillips screws holding the fan in place.
Step 5

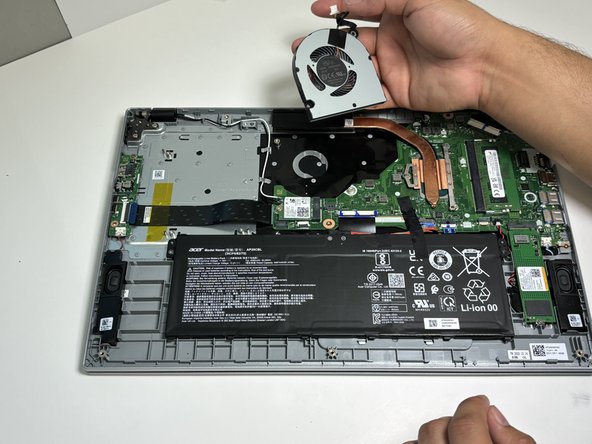
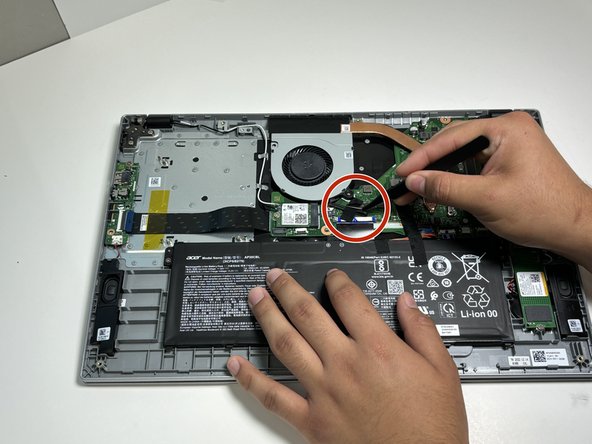
– Grab your tweezers and gently unplug the white fan connector from its spot on the motherboard.
– Next, lift the fan straight up and out of the device—easy does it!