Acer Aspire 3 A315-24P-R7VH SSD Replacement
Duration: 45 minutes
Steps: 7 Steps
In this guide, Acer Aspire 3 owners will learn how to replace their SSDs. Some common reasons would be to increase their laptop speeds, replace a faulty drive or to replace one you’ve had over five years. Some signs to look for a defective drive are files not being read or written, file system needing to be constantly repaired or frequent crashes when booting your laptop.
Step 1

– First, let’s get your machine ready for repair – switch it off and unplug it from the wall charger to ensure your safety.
Step 2


– Gently close your laptop and flip it onto its back—think of it as giving your device a nice stretch.
– Grab your Phillips screwdriver and take out all eleven 6.5 mm screws from the bottom case. Keep those screws safe—they like to wander!
Step 3

– Slip an opening pick between the lower case and the chassis. Take it easy, but aim for a good spot.
– Gently work your way around the edges, prying carefully until the lower case starts to come loose.
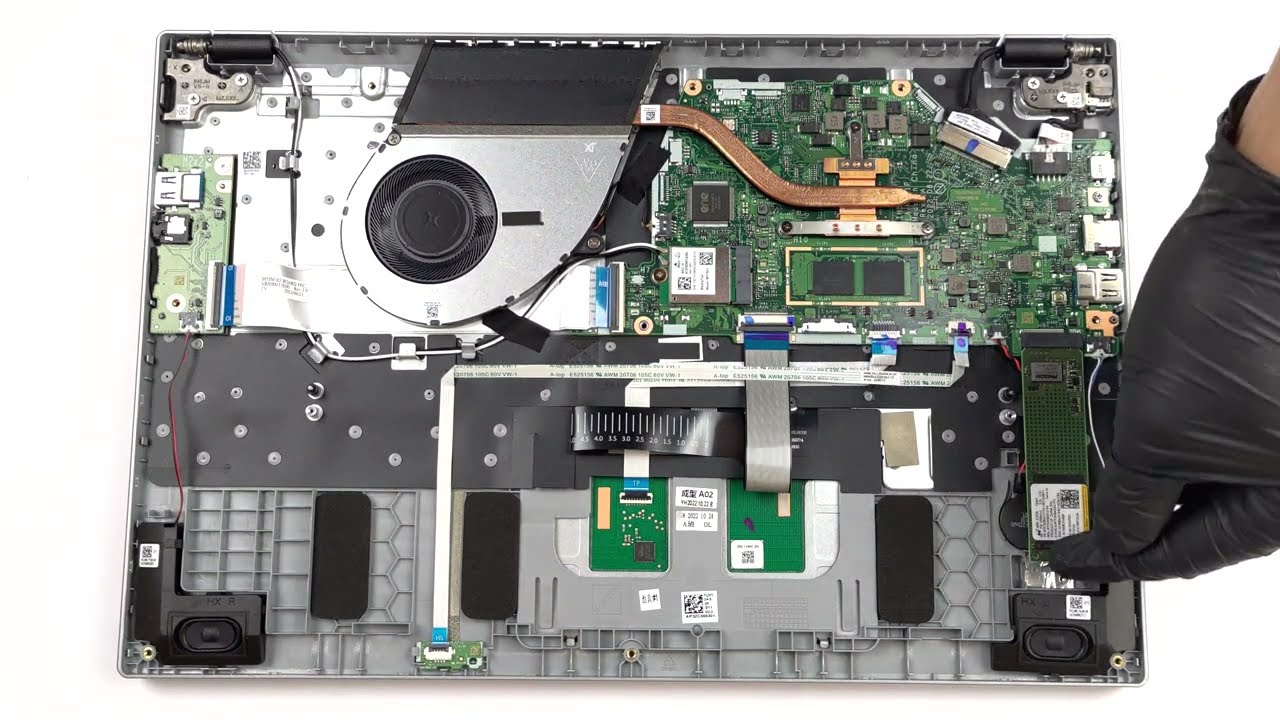
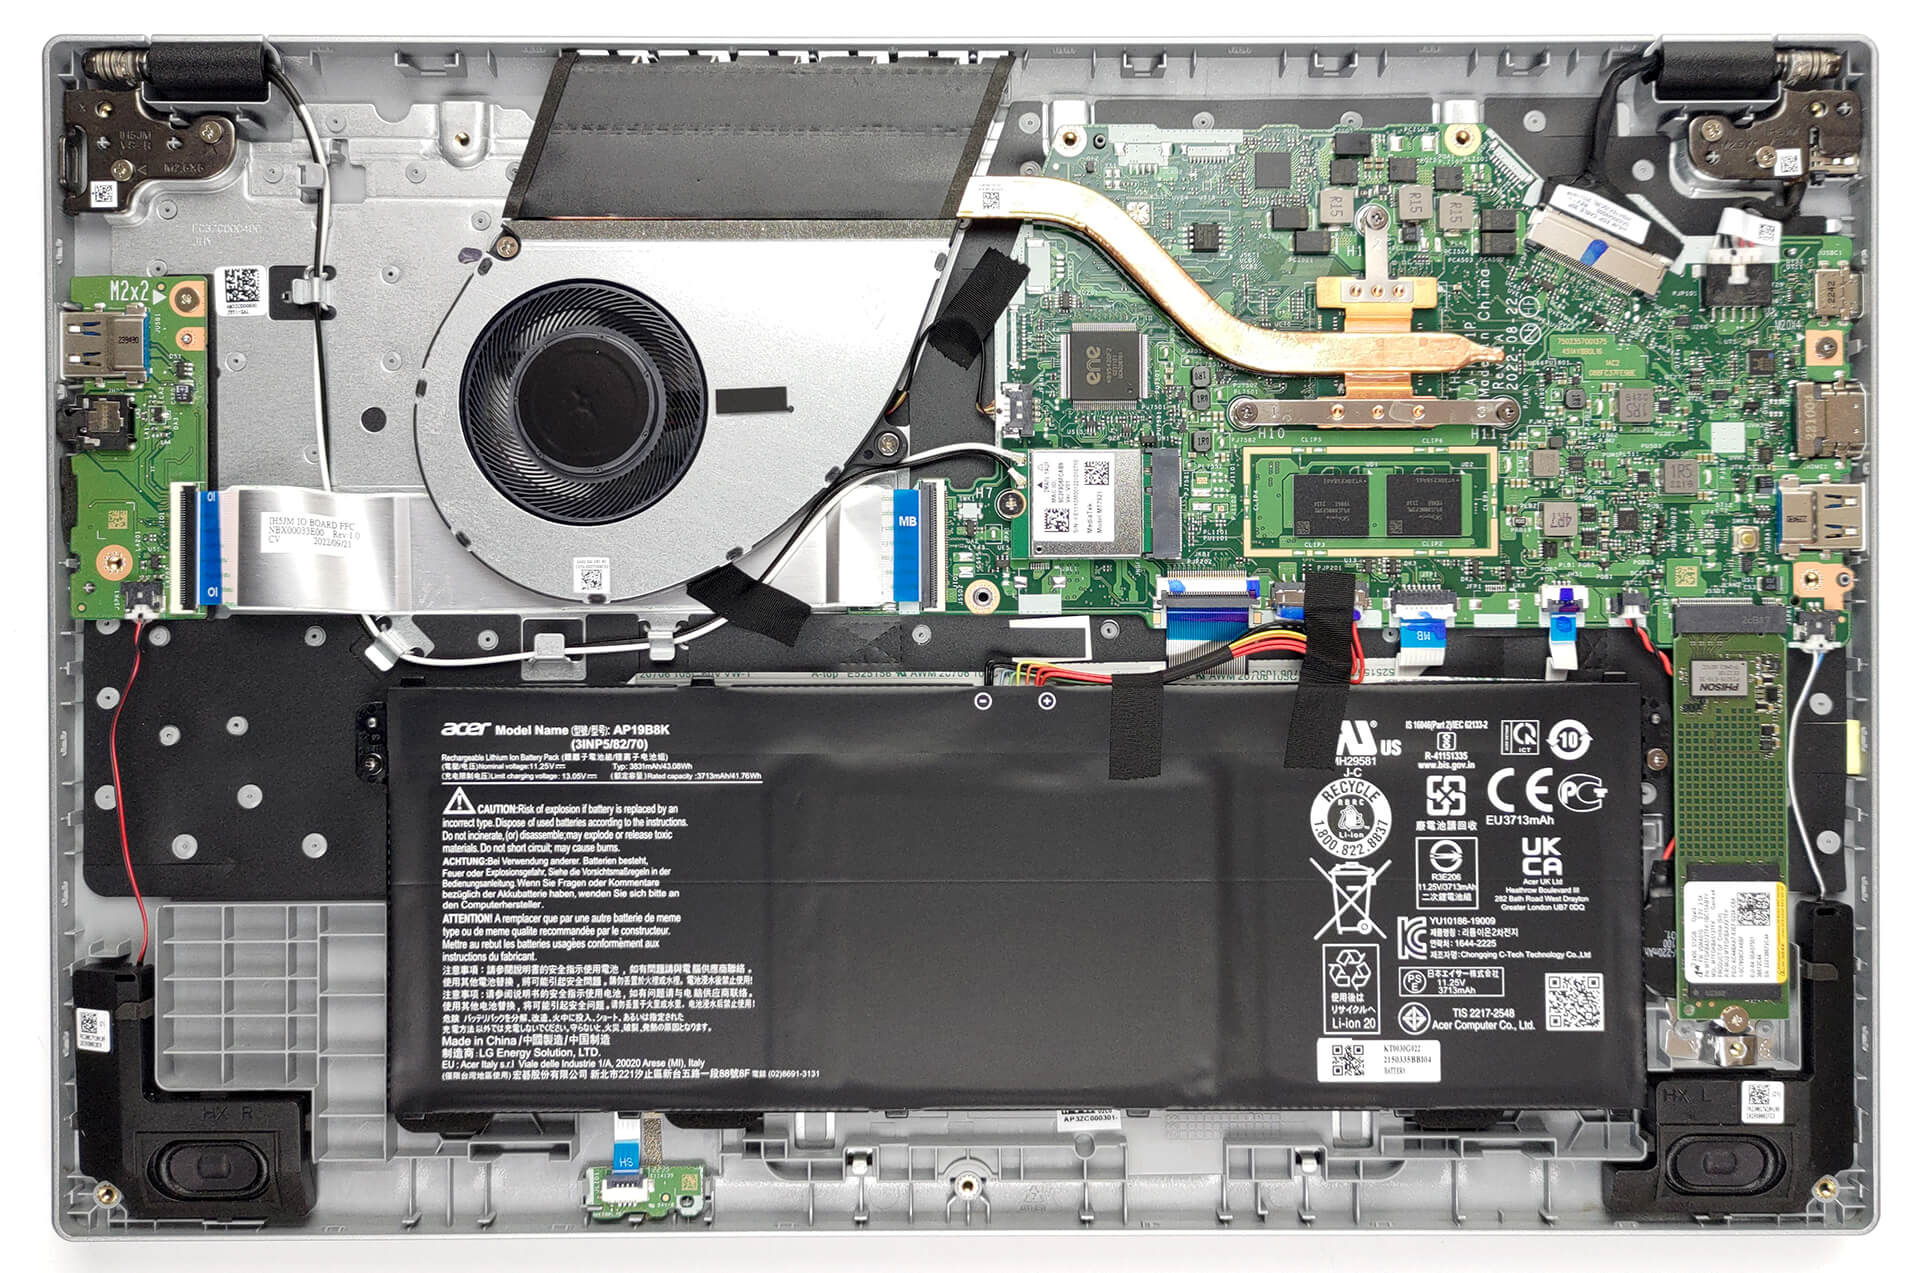
– Once you’ve got it, lift off the lower case and set it aside.
Step 4

Optional: Strap on an anti-static wristband and give a friendly handshake to any unpainted metal part on your laptop. That way, you and your device both stay shock-free!
Step 5

The SSD will gently tilt upwards at a small angle.
– Grab your Phillips screwdriver and unscrew that tiny 2.2 mm screw holding down the SSD. You got this—just a quick turn and you’re on to the next step. If you need a hand, you can always schedule a repair.
Step 6

– Carefully grasp the drive and gently pull it straight out of its socket. If you need a hand, you can always schedule a repair.
Step 7

– Double-check that your new SSD is the 2280 size—no square pegs in round holes here!