Acer Aspire 3 A315-24P-R7VH Heat Sink Replacement
Duration: 45 minutes
Steps: 11 Steps
Ready to swap out your heat sink or refresh that thermal paste on your Acer Aspire 3 A315-24P-R7VH Laptop? First things first: you’ll need to remove the battery to safely disconnect it. Take your time here—handle the battery gently and resist any moves that might bend, twist, or poke it. A damaged lithium-ion battery is no joke, especially if it’s charged. If you spot a battery that’s looking a bit on the puffy side, go slow and stay alert.
Step 1

– Time to get started! Shut down your laptop, and carefully unplug all those cables to ensure your safety while you work on it.
Step 2

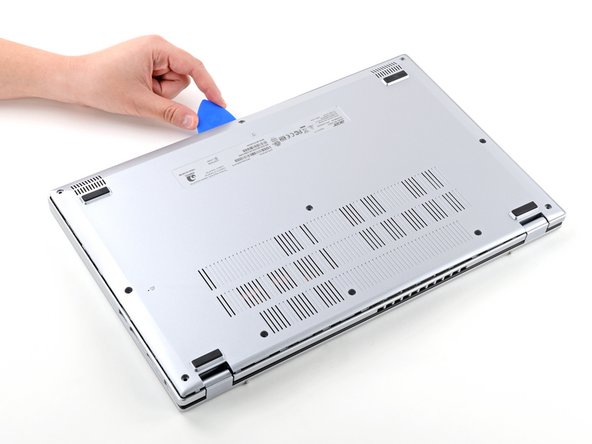
– Let’s get started! Close the laptop and flip it over on a flat, clean surface to prevent any damage or scratches.
– Now it’s time to get hands-on – use a trusty Phillips screwdriver to remove the eleven 6.6 mm-long screws from the back cover. Take your time and make sure they’re all out before moving on to the next step.
Step 3


– Let’s get started by inserting the long edge of an opening pick straight down between the chassis and the back cover at the rear of the laptop – this is where the magic begins!
– Gently pry up to release a few back cover clips, then position the opening pick flat under the back cover. You’re making great progress!
– Now, slide the pick along the rear edge of the laptop to release the clips. Almost there, keep going!
Step 4
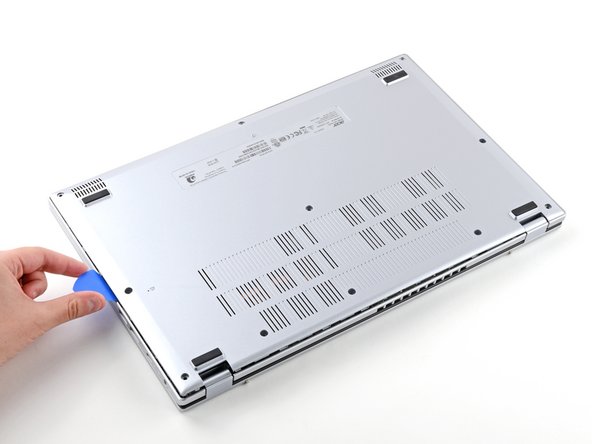

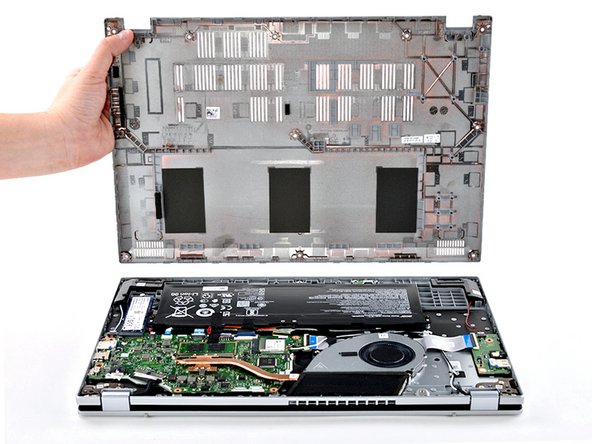
– Carefully pry around the entire perimeter of the device until the back cover comes loose and releases.
Step 5

If the back cover is stubborn, just repeat the previous step to free any remaining clips.
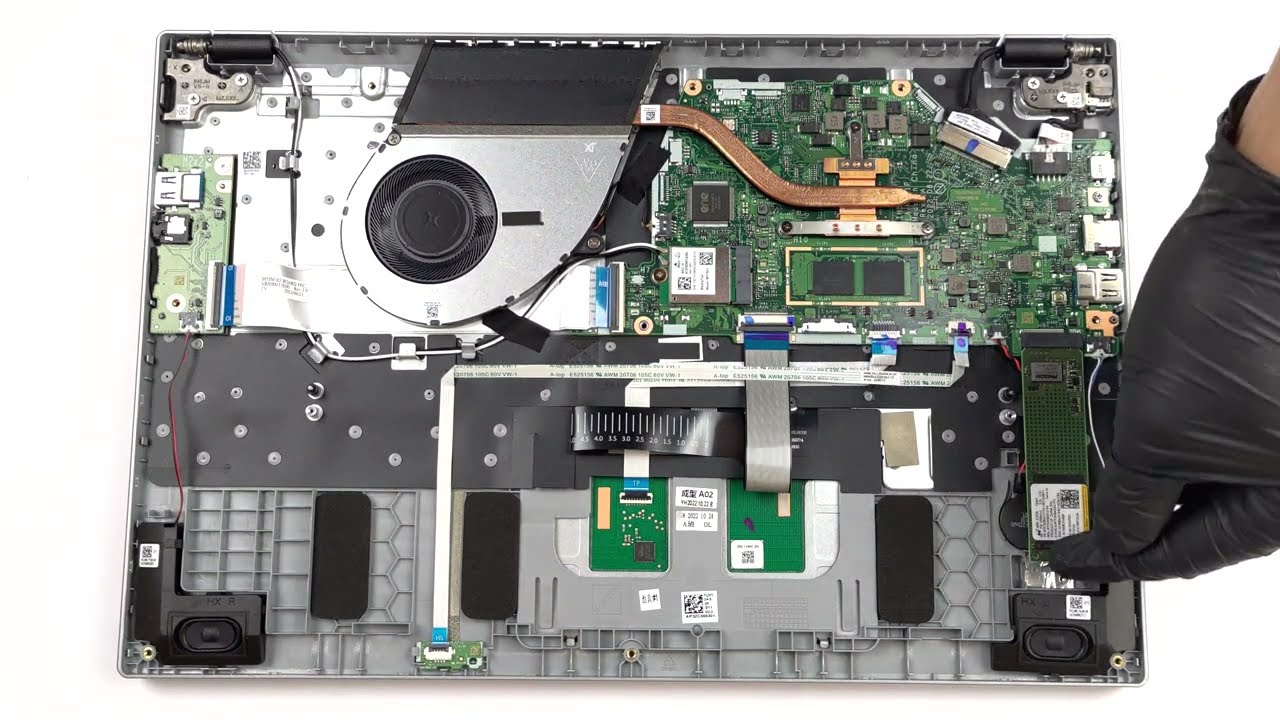
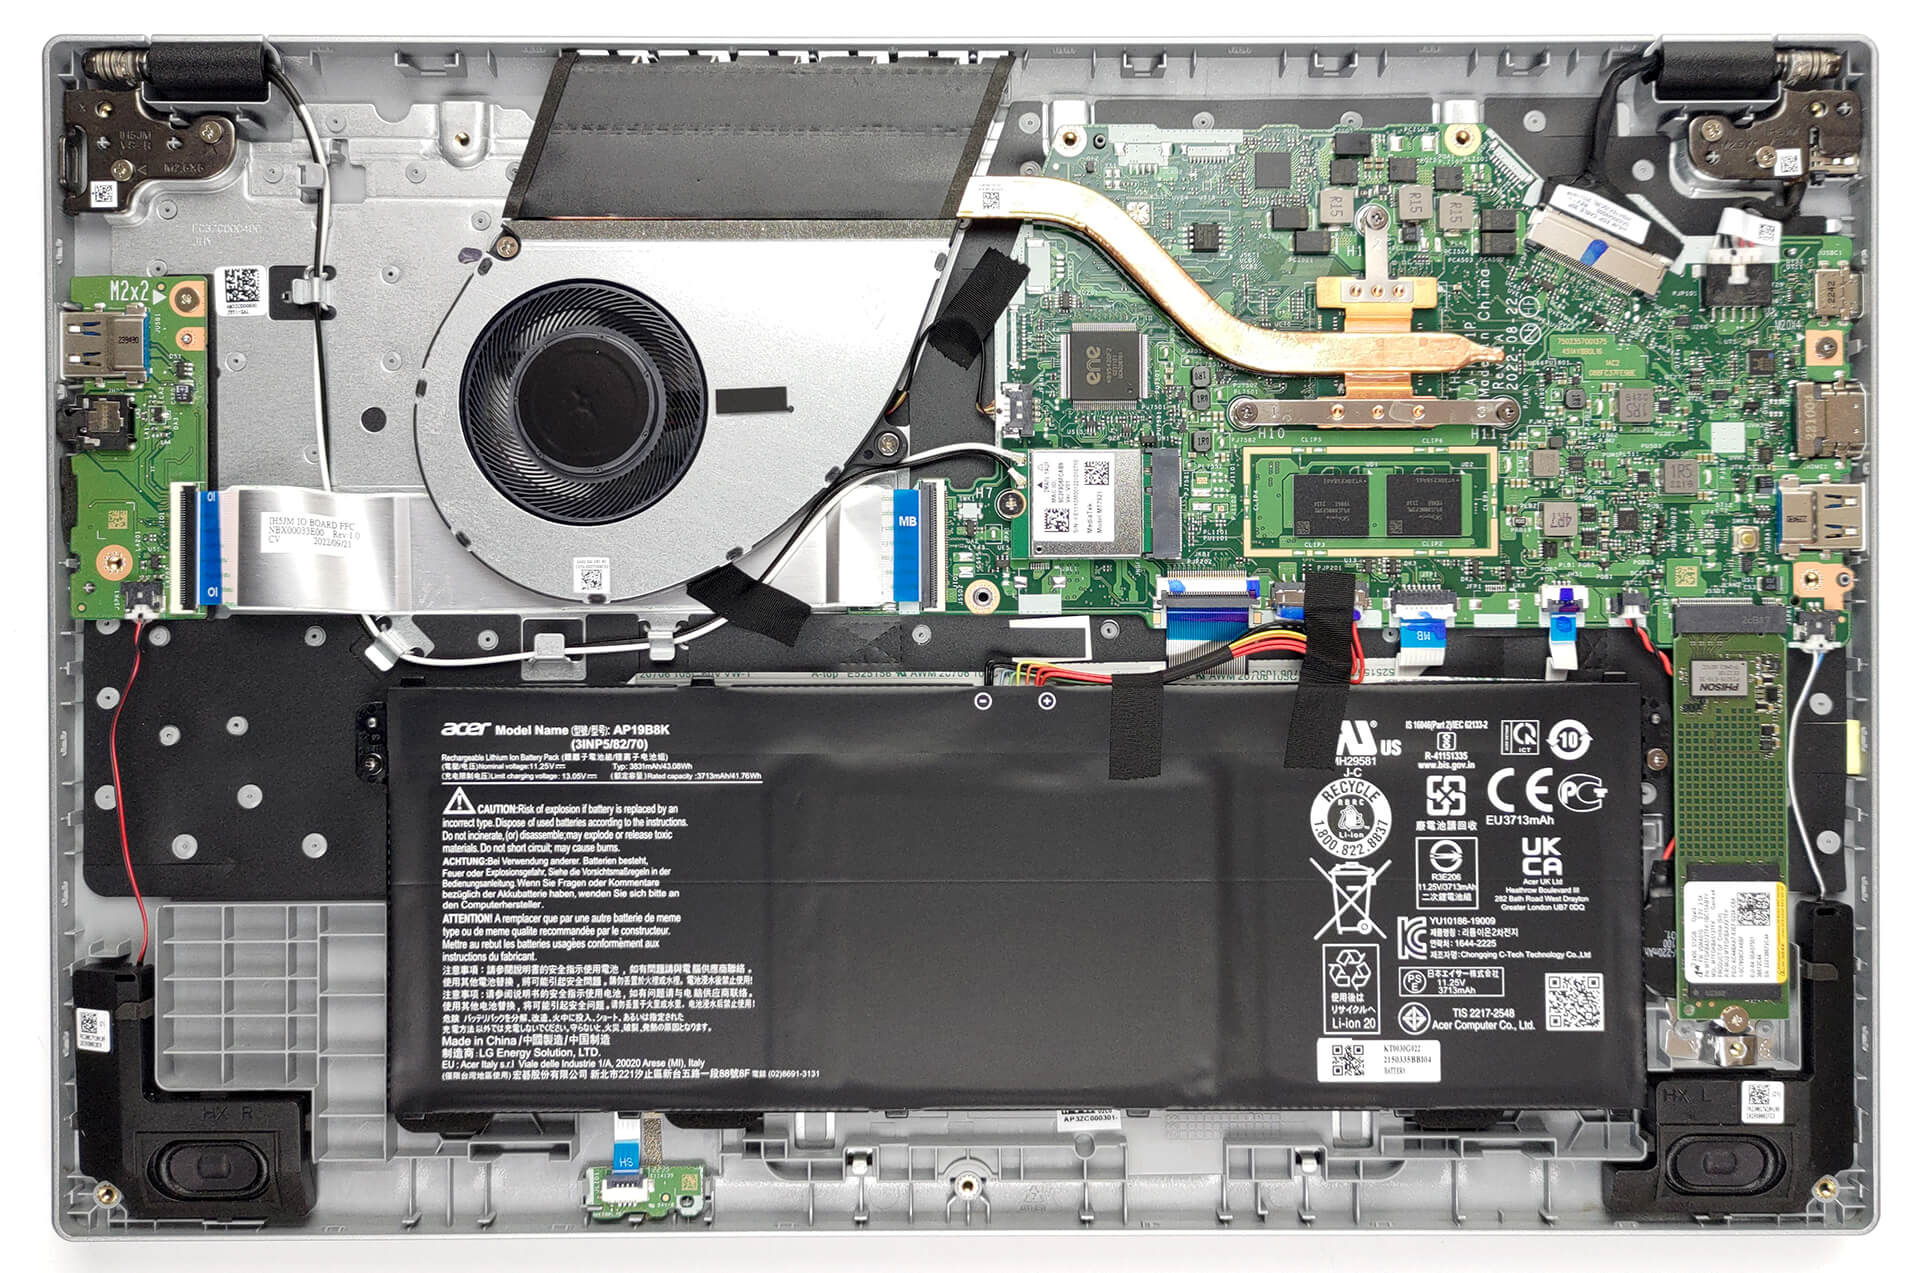
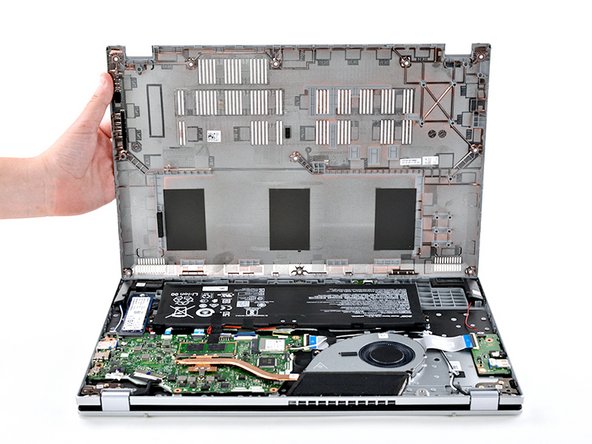
– Carefully lift off the back cover to access the internals. Keep a steady hand and remove it gently—no rush needed. If you need help at any point, you can always schedule a repair.
Step 6
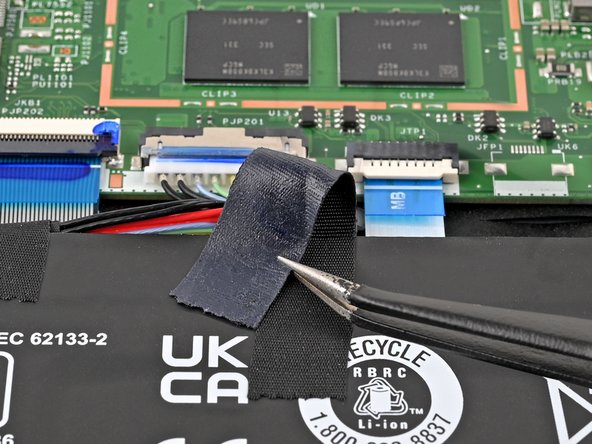

– Gently peel away the tape covering the battery connector using tweezers or your fingers—no need to wrestle it off, just a smooth lift. If you hit a stubborn spot, take your time and keep it friendly. Remember, patience is key! If you need help along the way, you can always schedule a repair.
Step 7


– Grab a spudger and gently nudge on each side of the battery cable connector until it pops free from its socket. Keep things steady and take your time—patience is key. If you need help, you can always schedule a repair.
Tools Used

Step 8


– Let’s get started! Use a Phillips screwdriver to carefully remove the two 4.7 mm-long screws that are holding the battery in place.
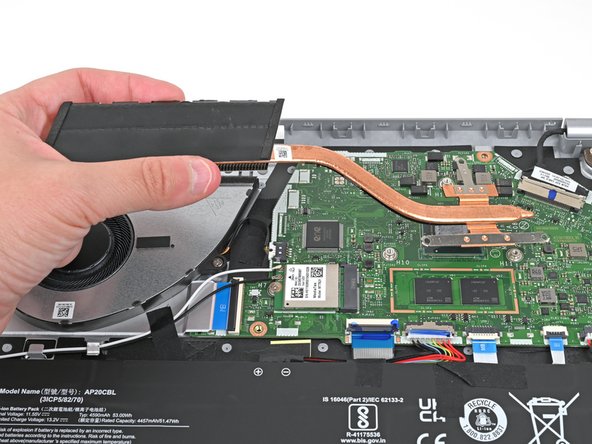
Step 9


– Gently lift the battery out of the device and set it aside. It’s like giving your device a little break!
Step 10
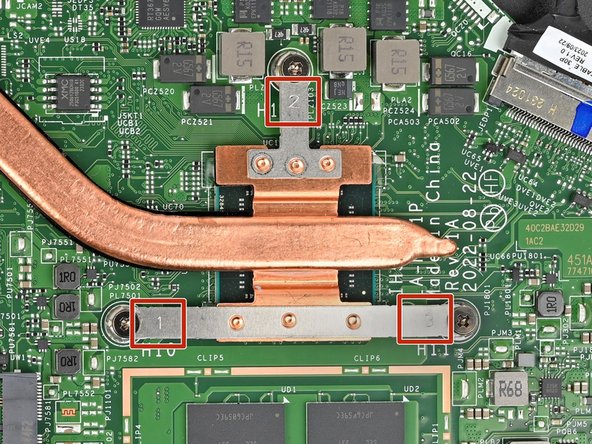

– Start by removing the screws labeled 1, following their numerical order. Grab your Phillips screwdriver and take out the three screws, each about 4.7 mm long, that hold the heat sink in place.
– When putting everything back together, be sure to tighten the screws in the same order you took them out. This helps keep everything aligned and secure.
Step 11

– Ready to put your device back together? Just work your way through the steps in reverse, and you’ll be up and running in no time.
– Old parts piling up? Drop your e-waste at an R2 or e-Stewards certified recycler. Acer works with recycling programs all over—check here to find a spot near you.
– If things didn’t quite go according to plan, try some classic troubleshooting moves, or connect with our Answers community for some extra brainpower.
– Still stuck? No worries—you can always schedule a repair with Salvation Repair.
Success!