Samsung Galaxy S21 Plus Screen Replacement
Duration: 45 minutes
Steps: 27 Steps
Make sure to run the battery down to below 25% before you get started. It’s the best way to avoid any surprises while you’re working on your device. Don't worry, your phone, tablet, or laptop can handle it—just give it a little downtime.
Got a cracked or broken screen on your Samsung Galaxy S21 Plus? No worries, we’ve got you covered. This guide will walk you through replacing your screen on the SM-G996B/DS model (the international version). Other models might have an extra antenna cable along the edge of the midframe, so keep that in mind. If your frame’s been bent out of shape, you’ll need to replace it to ensure the new screen fits snugly and avoids any pressure damage. Also, if your battery is swollen, take extra precautions. Before you dive in, make sure to discharge the battery below 25%. This simple step helps reduce the risk of any thermal events if the battery gets damaged by accident during the repair. Quick note: This guide is all about swapping out the screen, while keeping the original frame and motherboard in place. But, some replacement screens come pre-installed in a new frame (aka chassis), and that involves a whole different process. So, double-check your parts before starting! If you don’t replace the adhesive seals when putting everything back together, your device will still work, but it will lose its water resistance. To avoid any leaks, make sure you’ve got new adhesive for both the rear glass and the screen before starting the repair. If you need help, you can always schedule a repair.
Step 1

You might consider using a hair dryer, heat gun, or hot plate to warm things up, but steer clear of overheating the device. The display and internal battery are pretty sensitive to heat, so keep the heat gentle and controlled to avoid any damage.


Step 2


If your back cover is suffering from a crack, the suction handle might have a tough time sticking. No worries! You can give it a try with some strong tape or use a little superglue to hold the suction handle in place while it sets. Then, you're all set to move on!
Having a hard time getting that gap going? Just add a bit more heat to further soften the adhesive. Remember to follow the iOpener instructions to keep everything from getting too toasty.
- Stick a suction handle right near the bottom edge of the back cover—get as close as you can without starting a game of Twister.
- Gently pull up with the suction handle until you spot a little gap between the cover and the frame. No need for Hulk strength here.
- Slip an opening pick into that gap like you're sliding into DMs—smooth and easy does it.
- Glide the pick over to the bottom left corner and slice through the adhesive, ninja-style.
- Keep the pick chilling in place so the sticky stuff doesn’t try to make a comeback.
Tools Used

Step 3


- Pop in a second opening pick at the bottom edge of your device to get things moving.
- Carefully slide that pick toward the bottom right corner to cut through the adhesive.
- Keep those opening picks in place—it's like giving the adhesive a little timeout so it doesn’t stick back together.
Step 4


If the adhesive gets tough to cut through, it’s probably cooled off. Warm it back up by applying your iOpener for a couple of minutes—three at most—to soften things up again.
- Pop in a third opening pick at the bottom right corner of your phone—like you’re dealing cards at a poker table.
- Glide that pick up the right edge to break up the sticky adhesive situation.
- Leave the pick chilling in the top right corner so the adhesive doesn’t make an unexpected comeback.
Tools Used
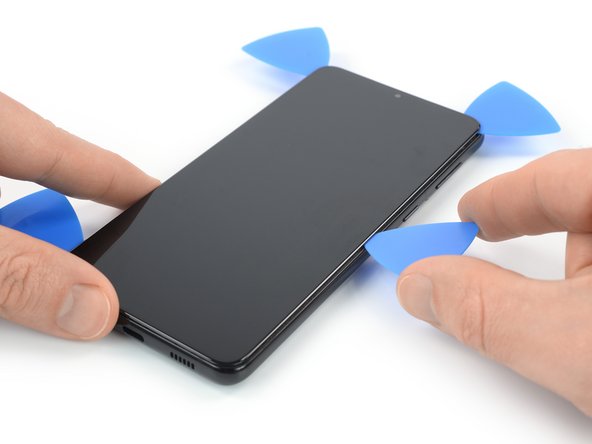
Step 5


When you're working near the camera, just dip the tip of your opening pick in—about 4-5 mm is all you need. That way, your camera stays clean and damage-free!
- Pop in a fourth opening pick right under the top right corner of your device, like you're giving it a friendly nudge.
- Glide that opening pick along the top edge to gently slice through the adhesive—think of it as dancing your way around the glue.
- Keep the opening pick in the top left corner to prevent the adhesive from sealing back up—it's like giving your repair a little insurance policy.
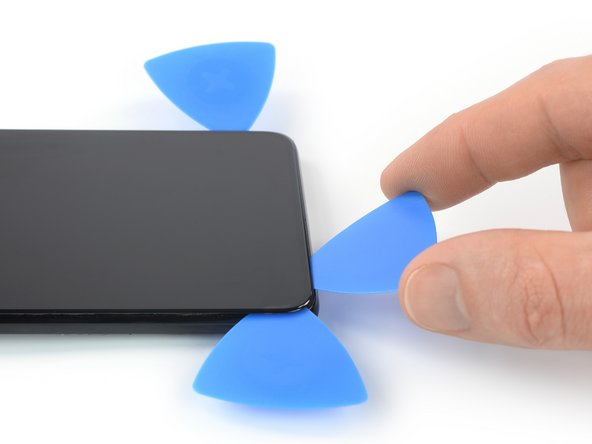
Step 6


As you glide near the power button, just dip the tip of the opening pick in—think 3-4 mm max—so you don’t accidentally mess with the power and volume button flex cable hiding underneath.
- Grab your fifth opening pick and sneak it under the bottom left edge.
- Glide the pick up the left side of the back cover to finish slicing through that stubborn adhesive.
Step 7


- Pop off the back cover.
- On your way back to reassembly:
- Now’s a great time to power up your phone and make sure it’s behaving—test all the buttons and features before you lock things down. Just remember to shut it down completely before you dive back in.
- Get rid of any leftover adhesive chunks—tweezers or your fingers work great. Give the area a swipe with some high-strength (over 90%) isopropyl alcohol to clear away any sticky residue.
- Rolling with Samsung custom-cut adhesives? Check out this guide.
- Using double-sided tape instead? This guide’s got your back.
Step 8


Keep that battery safe! Avoid poking or bending it with your tools—damaged batteries can spill nasty stuff or get seriously hot.
Watch out for the cable hiding under the charging coil. Take your time, and if your tool gets stuck, pause and make sure you're not snagging the cable.
- Slide an opening pick gently under the left bottom corner of the NFC antenna and charging coil assembly. You're doing great!
- Now, carefully glide that pick along the bottom left edge of the assembly to detach it from the battery. Keep it steady and you're on the right track!
Step 9


- Gently wedge an opening pick right underneath the bottom edge of the NFC antenna and charging coil assembly. Then, carefully guide the pick along the bottom of the assembly to loosen it from the loudspeaker. Need a hand? You can always schedule a repair.
Step 10


- Grab your spudger and gently pop the charging coil connector straight up from its socket. Easy does it—no need to wrestle with it!
Tools Used

Step 11


- Grab a spudger and gently lift the NFC antenna connector straight up from its socket. Easy does it—no force needed.
Tools Used
Step 12

- Grab a Phillips screwdriver and unscrew the five 3.9 mm screws holding down the NFC antenna and charging coil assembly. Keep those screws safe—you'll need them later. If you hit a snag or need extra hands, you can always schedule a repair with Salvation Repair.
Step 13


- Grab a trusty pair of tweezers or simply use your fingers, and gently pluck out the NFC antenna and charging coil assembly. You've got this!
Step 14

- Grab a spudger and gently pry up the battery connector from its socket. Just pop it up, no force needed!
Tools Used
Step 15

- Grab a Phillips screwdriver and unscrew those six 3.9 mm-long screws holding the loudspeaker assembly in place. Keep them safe—you'll need them later. If you run into any trouble, remember you can always schedule a repair with Salvation Repair.
Step 16


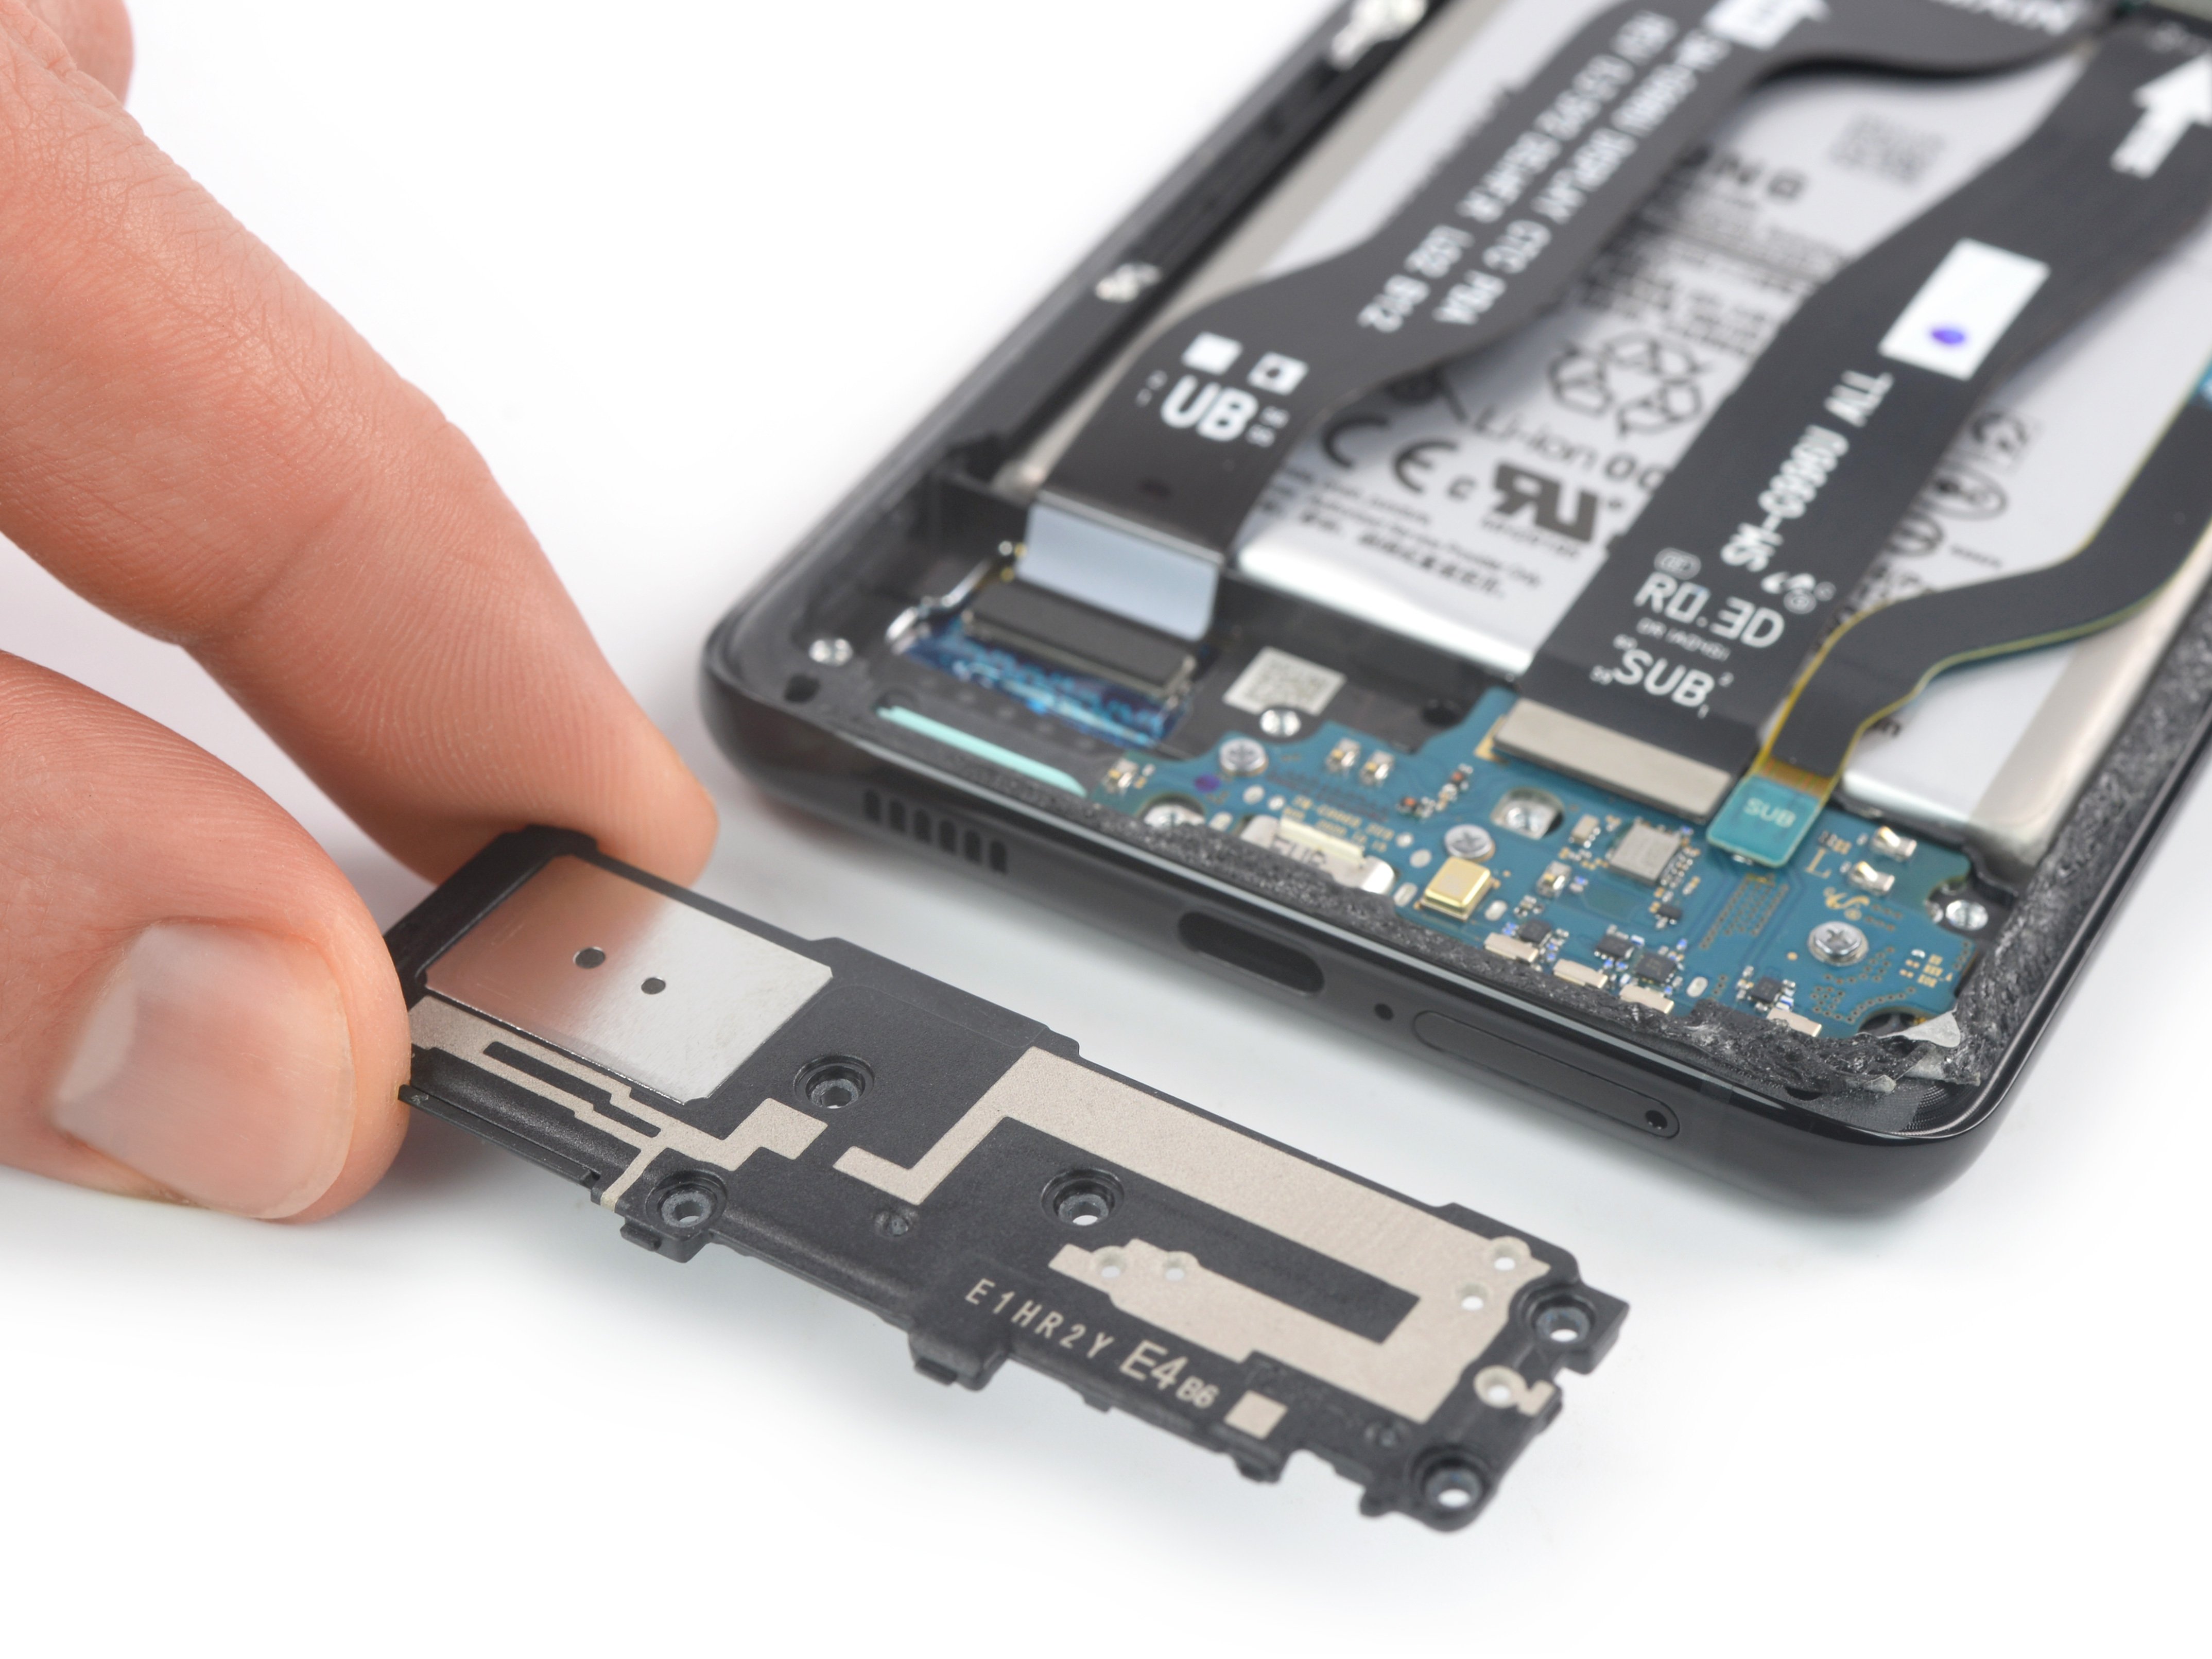
- Slide your opening pick into the gap at the top edge of the loudspeaker assembly. Then, gently pry up the assembly by tilting it downward—easy does it! If you need a hand along the way, you can always schedule a repair.
Step 17


- Remove the loudspeaker assembly. When you're ready to put everything back together, don't forget to apply fresh adhesive where needed—just give those areas a good cleaning with isopropyl alcohol (>90%) first. It’s all about keeping things snug and secure for a smooth finish.
Step 18


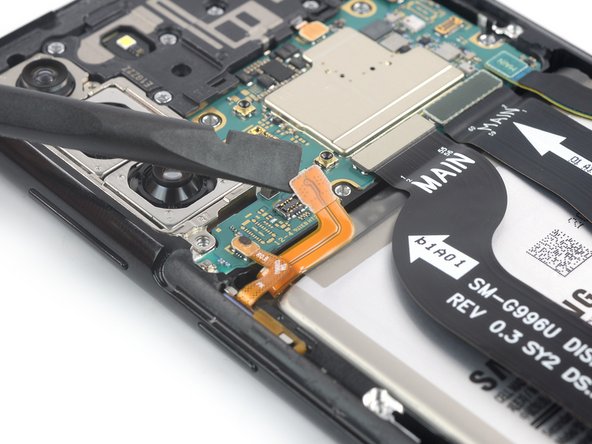
- Slide the spudger under the display flex cable’s upper connector and give it a gentle upward nudge—think of it as popping the top off your favorite fizzy drink. Connector free, display happy.
Tools Used
Step 19


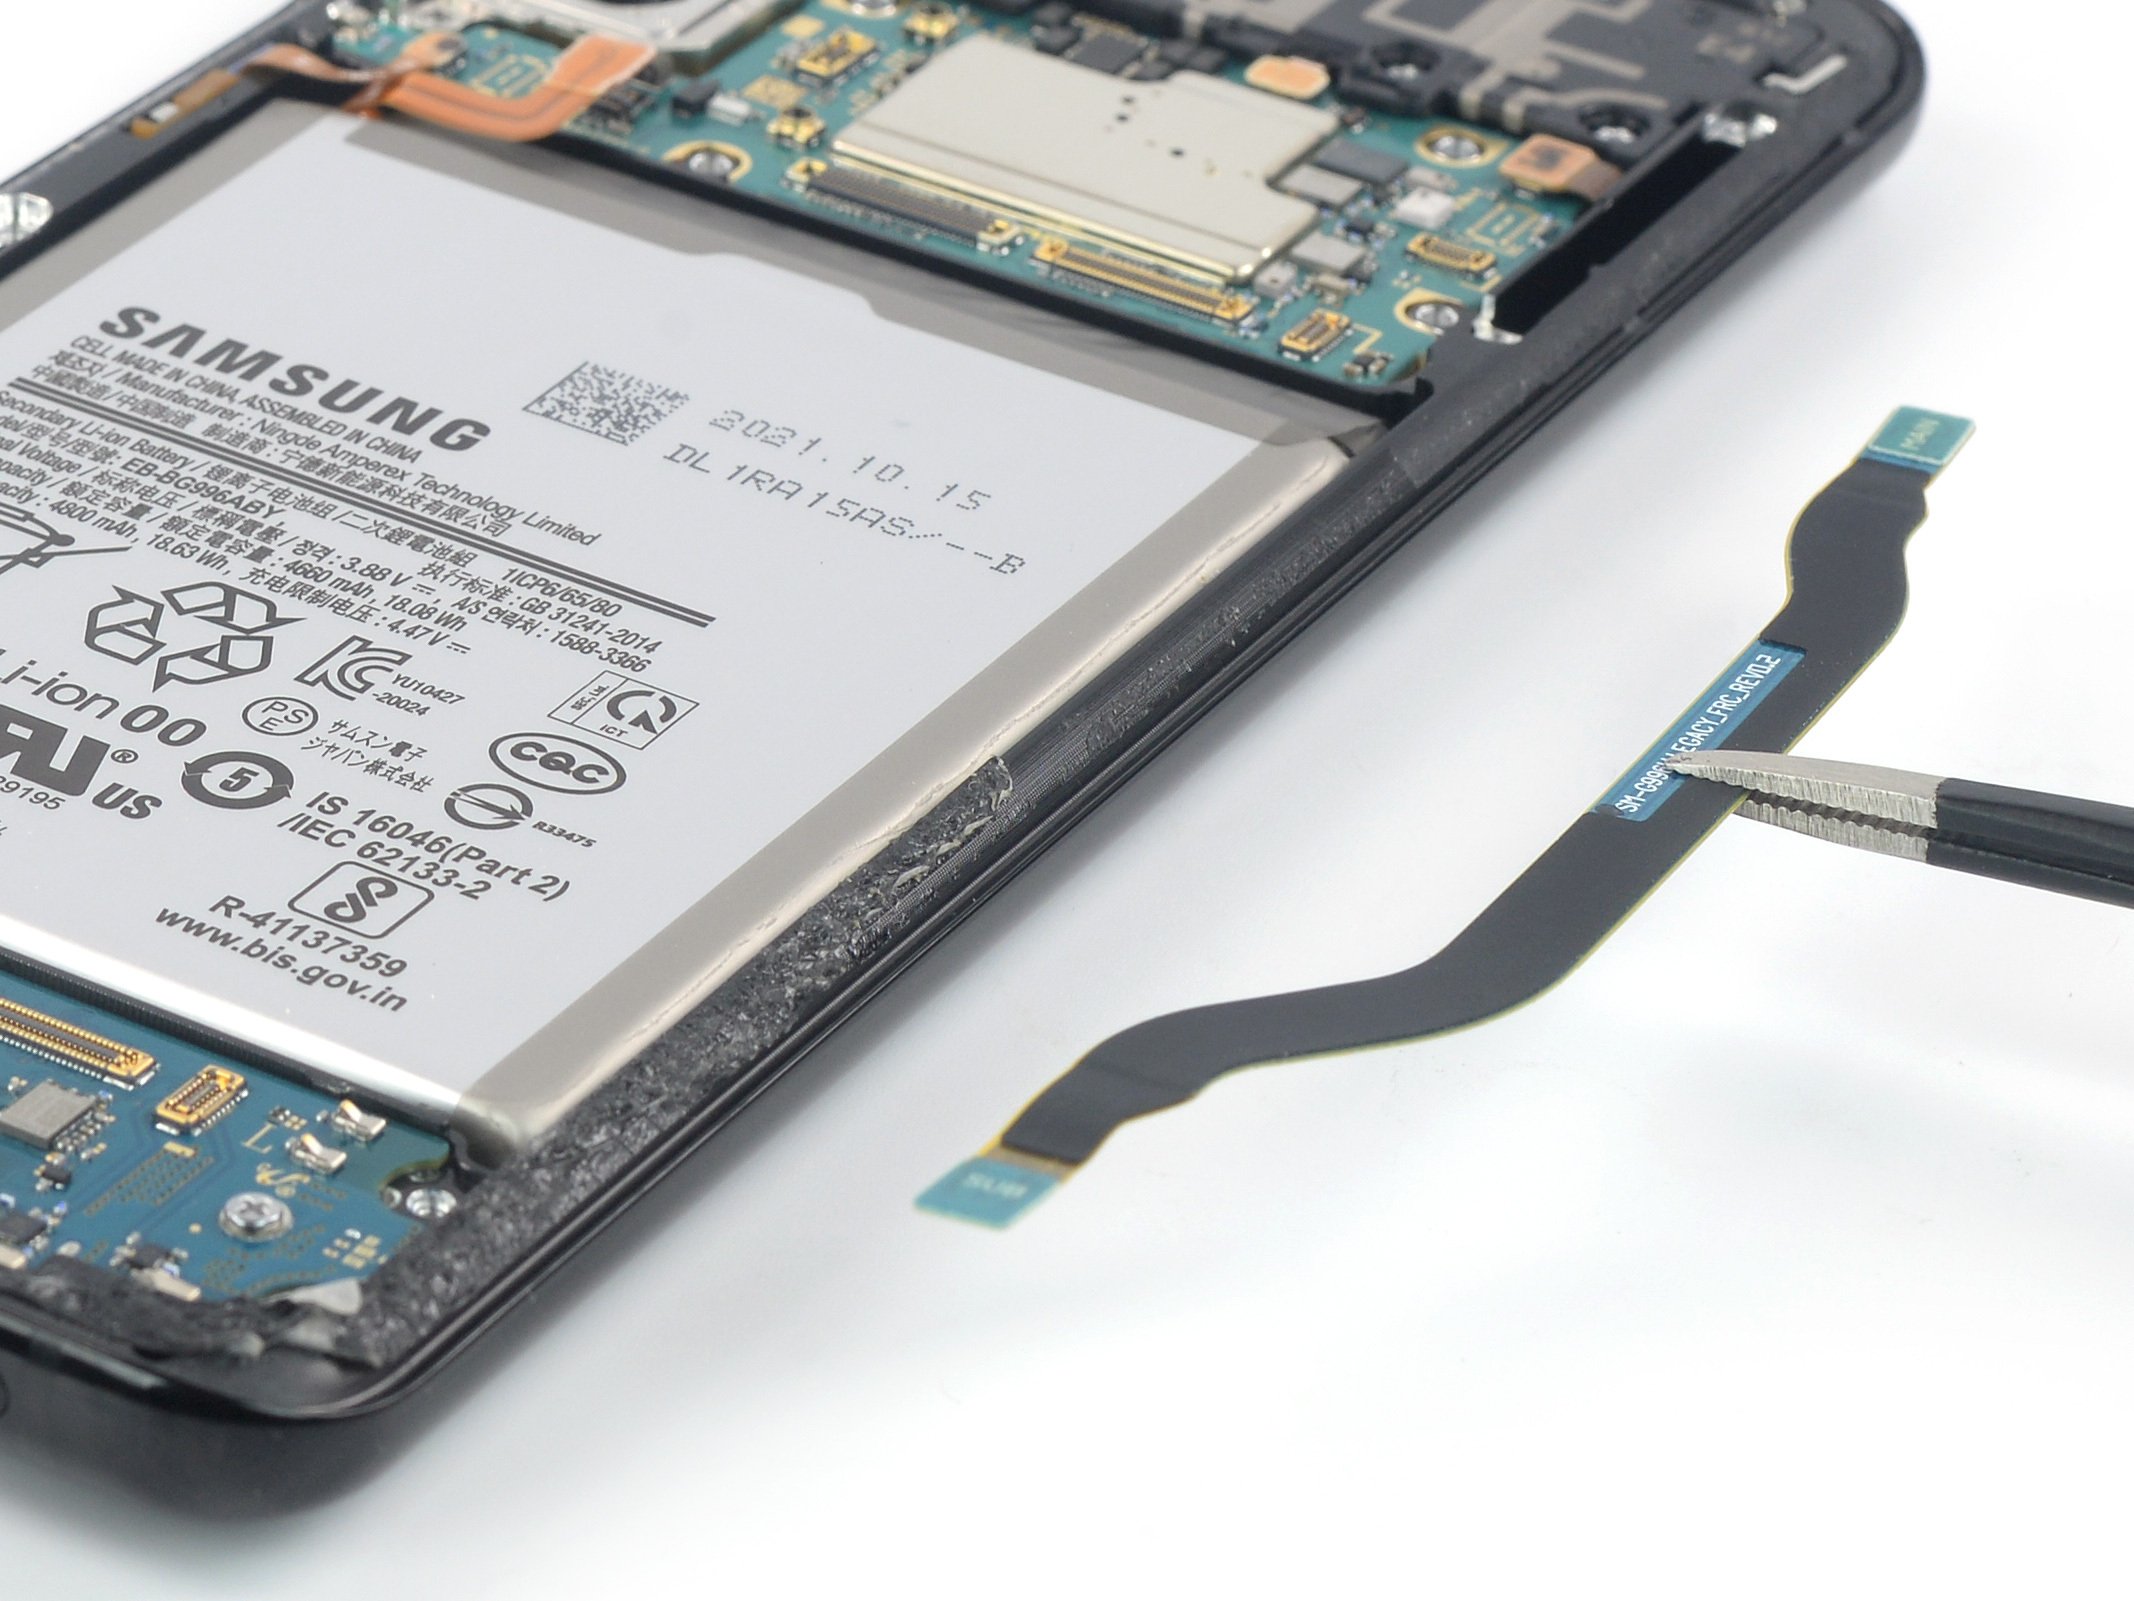
- Grab your trusty spudger and pop that display flex cable connector straight up from its socket—like opening a stubborn pickle jar, but way less messy.
- With your fingers or a pair of tweezers, gently lift out the display flex cable. Go slow, like you’re picking out the last french fry from the bag—no rush, you got this!
Tools Used
Step 20

The adhesive holding the display of the Galaxy S21 Plus is super strong, so you might find yourself reheating and reapplying the iOpener a few times before and during the display removal process. It's all part of the adventure!
Feel free to use a hair dryer, heat gun, or hot plate, but remember to keep it cool—overheating is a no-go!
- Place a heated iOpener on the screen to soften up that stubborn adhesive. Keep it in place for at least 5 minutes to let the heat do its magic. If you need help along the way, you can always schedule a repair.
Step 21

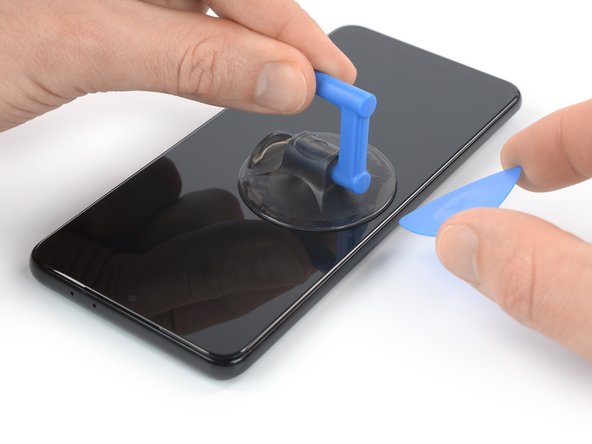
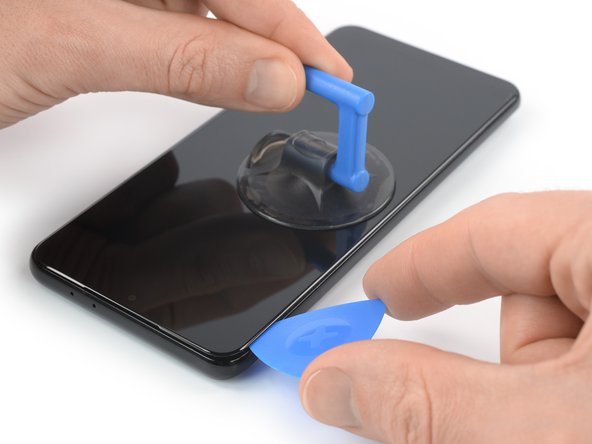
- Once the screen feels warm to the touch, grab a suction handle and place it as close to the left edge as you can. Just a little tap on the edge will do.
- Gently pull up on the suction handle to create a small gap between the screen and the frame. It's like opening a door, but much more satisfying!
- Now, slide an opening pick into the gap. Think of it as a tiny tool to break free the screen from its grip.
- Move the pick towards the top left corner of the screen and slice through the adhesive, as smooth as a hot knife through butter.
- Leave the pick in place to prevent the adhesive from sealing back up on you. Patience is key here!
Use just the tip of the opening pick (about 4-5 mm) during this step to keep things safe—no tangling with the in-display fingerprint cable or risking a tear. Keep it light, keep it gentle, and you'll be good to go. If you need help, you can always schedule a repair.
If your screen is shattered and the suction cup won't stick, try laying down a piece of clear packing tape over the crack—this might help the suction cup grab on. If that doesn’t do the trick, a sturdy piece of tape could work as a substitute for the suction handle. And hey, if all else fails, a tiny dab of superglue can secure the suction cup right onto the screen. Need more help? You can always schedule a repair to get it sorted.
Tools Used
Step 22

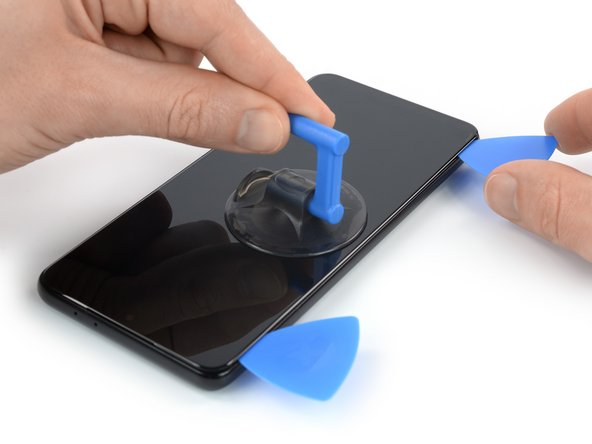

- Grab a second opening pick and slide it into the top left corner of the screen, then gently glide it down to the bottom left to cut through the adhesive. Keep that pick in place to prevent the adhesive from sealing back up. If you need a hand, you can always schedule a repair.
Step 23
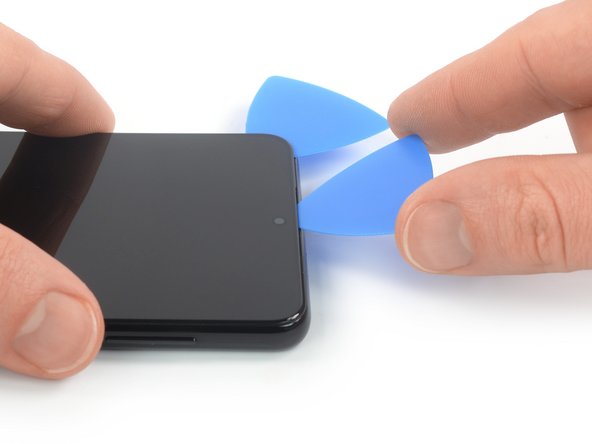

When you're getting close to the front-facing camera, just slide in the tip of that opening pick (about 2-3 mm) to keep the camera safe and sound. We want to avoid any smudges or damage, so take it easy and be gentle!
- Pop in a third opening pick up at the top left corner—like you’re playing high-stakes phone Tetris.
- Guide the pick along the top edge to slice through that stubborn adhesive. Glide like you mean it.
- Let the pick chill where it is, so the adhesive doesn’t sneak back together. You’re in charge now.
Step 24


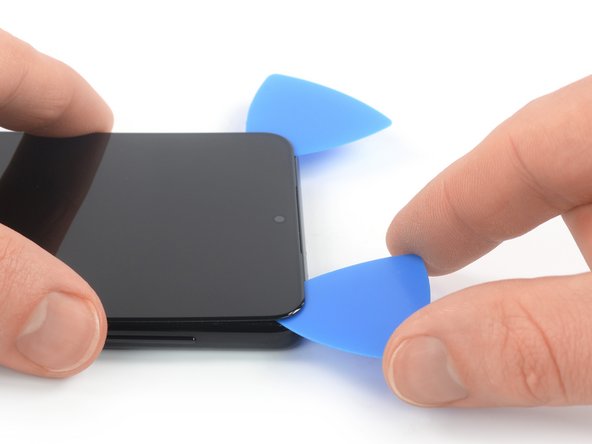
If the adhesive starts acting stubborn and tough to slice, it probably cooled off. Hit it with your iOpener or heat gun for a minute or two to warm things back up and keep the process smooth.
- Slip a fourth opening pick under the top right corner of the screen. You've got this!
- Gently glide the opening pick down the right edge of the screen to cut through that sticky adhesive. Nice and easy!
- Keep that opening pick in place to stop the adhesive from sealing up again. You're making progress!
Step 25

Hold off on peeling the display all the way off just yet — the adhesive underneath the center is still giving it a good stick. Keep patience; the display isn’t coming free until that glue is ready to give up.
- Pop in a fifth opening pick at the bottom right corner of the screen, just like adding the cherry on top of your sundae!
- Gently glide that opening pick along the bottom edge to cut through the remaining adhesive, like you're spreading butter on warm toast!
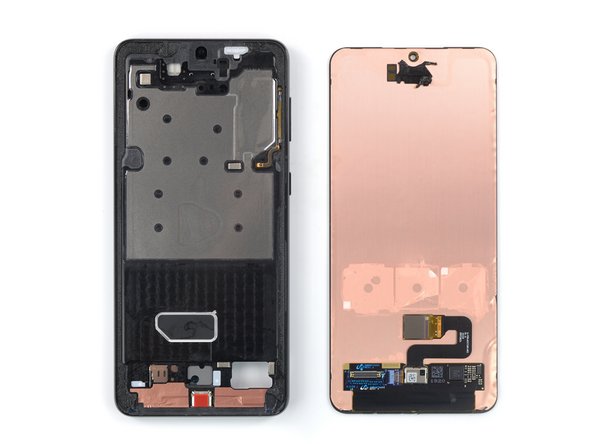
Step 26

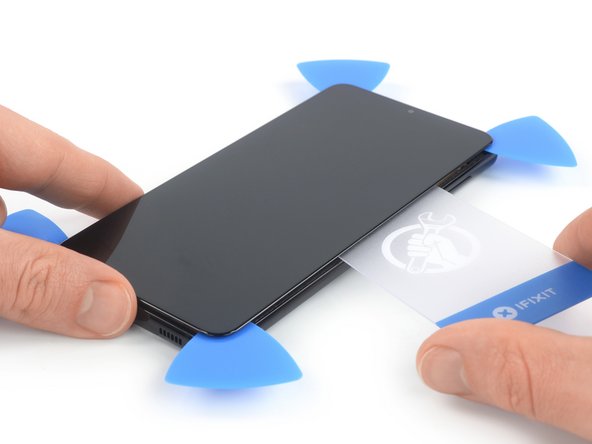
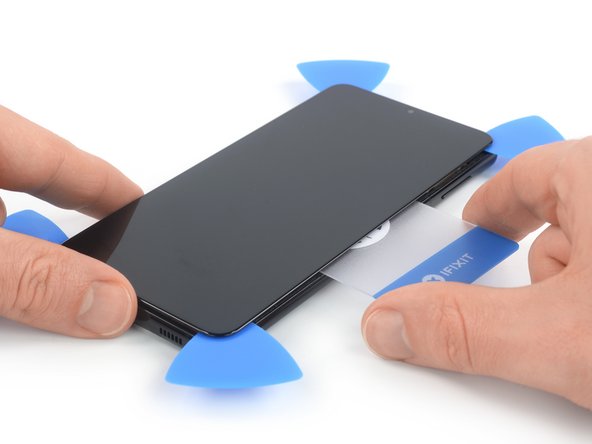
The center of your Galaxy S21 Plus screen is held down with some stubborn adhesive—give it a careful slice before you pop off the frame.
- Grab a trusty plastic card and slide it into the crack between the midframe and the screen along one of the phone’s long sides.
- Gently wiggle and slice with the card to loosen up that sticky adhesive holding the display down.
Step 27
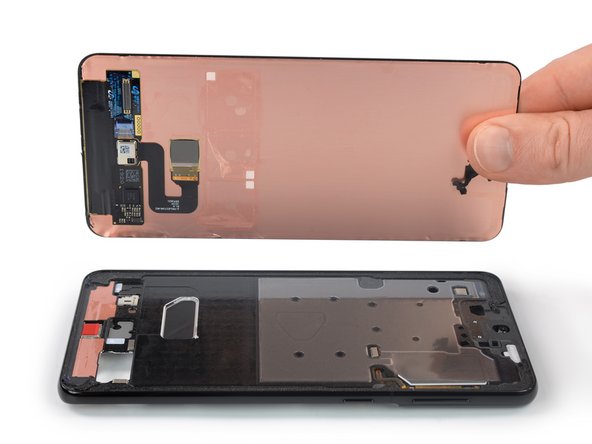

- Fire up your device and give your repair a quick test drive before locking things back in place.
- Putting it all back together? Just reverse these steps—like rewinding your favorite song.
- Once you’re done, check out our guide to make sure your fix is working as it should.
- For a solid screen install, use custom-cut double-sided tape on the back—think of it as a security blanket for your display.
- Take your old parts to an R2 or e-Stewards recycler and let them handle the electronic leftovers.
- If things went sideways, run through some basic troubleshooting or tap into our Answers community. Need backup? You can always schedule a repair.