Samsung Galaxy S21 Plus Screen and Battery Assembly Replacement
Duration: 45 minutes
Steps: 45 Steps
Heads up: this guide is all about swapping out both the screen and the battery together.
Ready to swap out the screen and battery on your Samsung Galaxy S21+? This guide walks you through replacing the whole assembly—the screen, battery, and frame—all in one piece. Double-check you’ve got the right part before diving in. If your battery’s looking a little puffy, take some extra precautions. Before you start, fully discharge the battery—this helps keep things safe if it gets pinched or damaged along the way. Keep in mind, re-sealing your device to restore water resistance depends on how well you reattach the adhesive, but your device’s IP rating will be lost after the repair.
Step 1


Oops! If you accidentally poked the microphone hole with the SIM eject tool, no worries—chances are you didn’t do any real harm to the microphone.
- Grab a SIM eject tool, a bit, or even a straightened paperclip, and gently insert it into the tiny hole on the top edge of your phone's SIM tray. Push in until the tray pops out. Carefully pull out the SIM card tray to access the SIM card. If you need a hand, you can always schedule a repair.
Step 2

Before you dive in, hit the power button and shut down your device—nobody likes surprise sparks!
A hair dryer, heat gun, or hot plate can be handy, but keep an eye on the heat — too much warmth can damage the display or internal battery. Use gentle, controlled heat to avoid any mishaps.


Step 3
If the back cover is cracked, the suction handle might not stick as well as you'd like. No worries! You can try using some strong tape to give it a lift, or if you're feeling crafty, superglue the suction handle in place and let it set so you can keep moving forward.
Having a tough time creating a gap? No problem! Just apply a bit more heat to soften that adhesive even more. Remember to follow the iOpener instructions to keep things from getting too toasty.
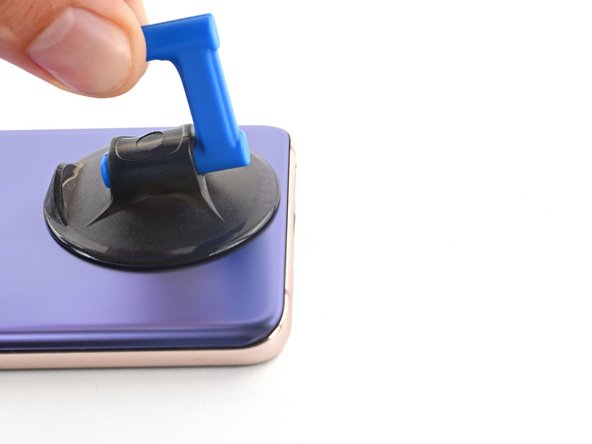
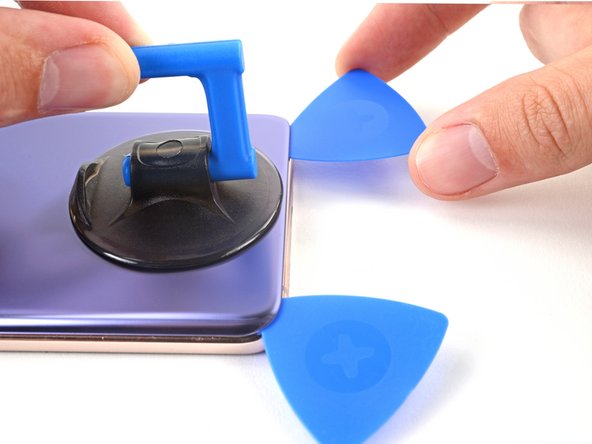
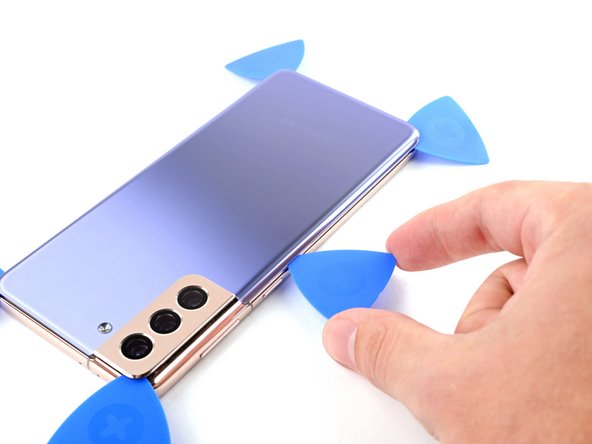
- Slap a suction handle onto the bottom edge of the back cover—get it as close to the edge as you can without starting a new trend.
- Gently lift the back cover with the suction handle until you spot a tiny gap peeking out between the cover and the frame.
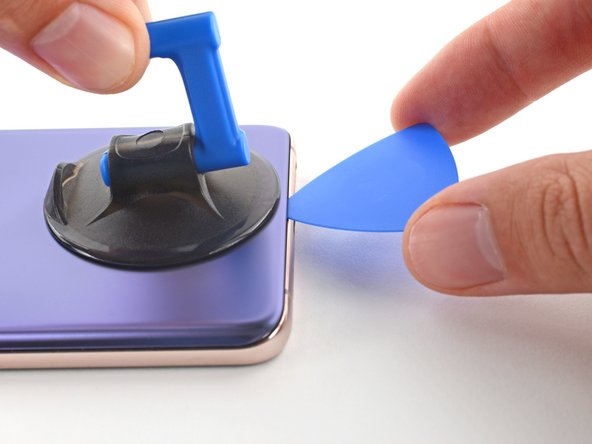
- Slide an opening pick into the gap, like you're sneaking a slice of pizza from a crowded box.
Tools Used

Step 4


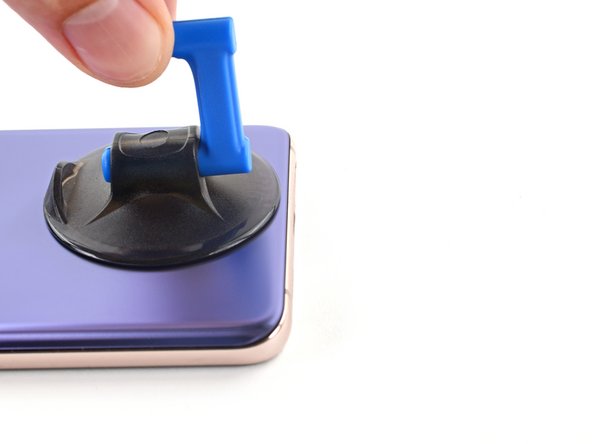
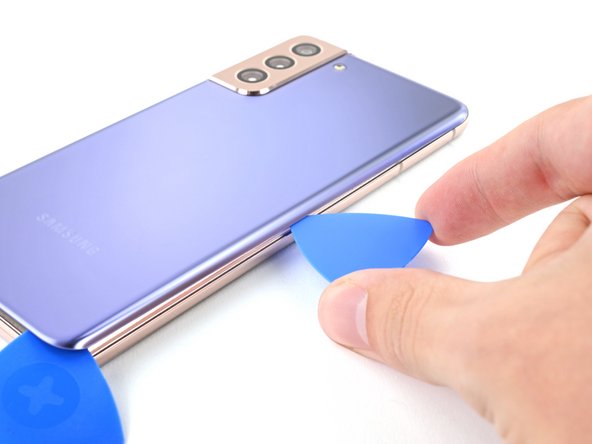
- Glide the pick down to the bottom left corner and slice through that stubborn adhesive.
- Keep the pick parked right there so the adhesive doesn’t try any sneaky moves to stick itself back together.
Step 5

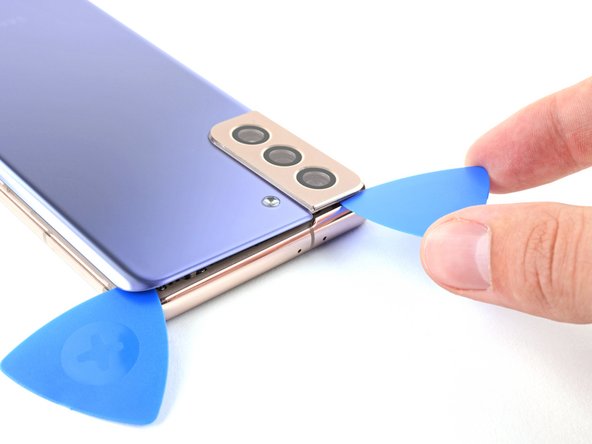
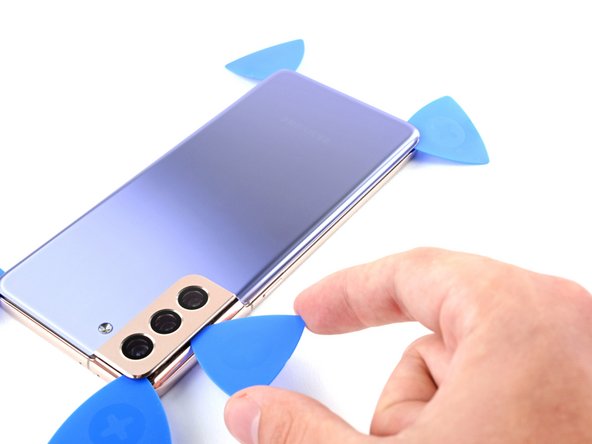
- Pop a second opening pick into the bottom edge of your phone—like giving it a little wedge.
- Slide that pick over to the bottom right corner and slice through the sticky stuff holding it together.
- Let those picks chill in place to keep the adhesive from sticking itself back together.
Step 6

- Warm up an iOpener and stick it to the right edge of the back cover for about two minutes. Give it time to work its magic and soften things up before you move on.
Tools Used
Step 7


If the adhesive is giving you a hard time and feels tough to cut, it’s probably cooled off. Give it a little love with a heated iOpener on the edge to warm it back up.
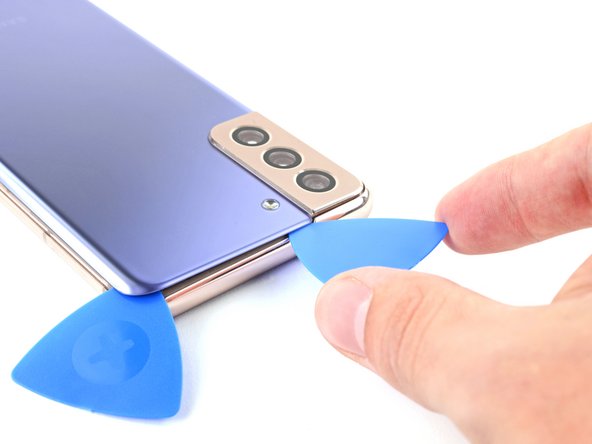
- Pop a third opening pick into the bottom right corner—like adding a slice of techy pie.
- Glide that pick up the right edge to slice through the sticky stuff holding your phone together.
- Park your pick in the top right corner so the glue doesn’t sneak back together while you work.
Tools Used
Step 8

- Warm up your trusty iOpener and let it chill on the top edge of the back cover for about two minutes—just enough time to make the adhesive wave the white flag.
Tools Used
Step 9

When working near the camera assembly, only insert the tip of your opening pick (~4-5mm) to keep the camera safe from scratches or smudges. Take it slow and steady—you're doing great! If you need a hand, you can always schedule a repair.
- Pop a fourth pick under the top right corner—like sneaking a cookie from the jar.
- Glide that pick along the top edge, cutting through the sticky stuff holding your phone together.
- Let the pick chill in the top left corner so the adhesive doesn’t get any ideas about closing up again.
Step 10

- Warm up an iOpener and gently press it against the left edge of the back cover for about two minutes to loosen things up.
Tools Used
Step 11

Keep it chill near the power button—just dip the tip of the opening pick in, about 3-4 mm. That way, you’ll steer clear of the flex cable for the power and volume buttons.
- Slip a fifth opening pick gently beneath the bottom left corner to get things started. Then, glide your pick along the left edge of the back cover, slicing through the remaining adhesive with a steady hand. Need a hand? Schedule a repair if you want some extra help.
Step 12


- Pop off the back cover—think of it as opening up your device’s secret lair.
- When you’re putting things back together:
- This is a great time to power up your phone and make sure everything’s working as it should. Just remember to shut it down again before sealing it up for good.
- Clear away any leftover adhesive with tweezers or your fingers. For stubborn residue, grab some high-proof (over 90%) isopropyl alcohol and wipe it clean.
- Using custom-cut adhesives? Follow this guide for a smooth application.
- Rolling with double-sided tape? This guide will show you the ropes.
Step 13

Watch out for the battery—don’t poke or flex it with your tool. If it gets damaged, it can leak yucky stuff or even heat up way more than you want!
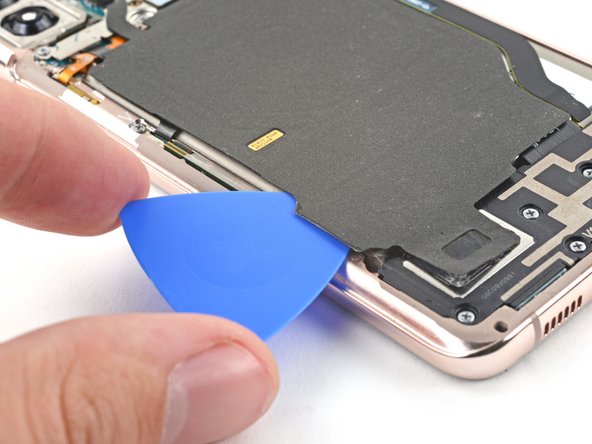
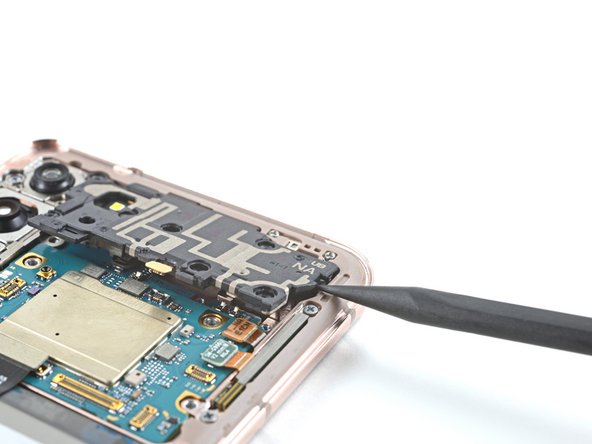
- Slide an opening pick under the left bottom corner of the NFC antenna and charging coil assembly.
- Gently glide the pick along the bottom left edge to carefully separate it from the battery.
Step 14

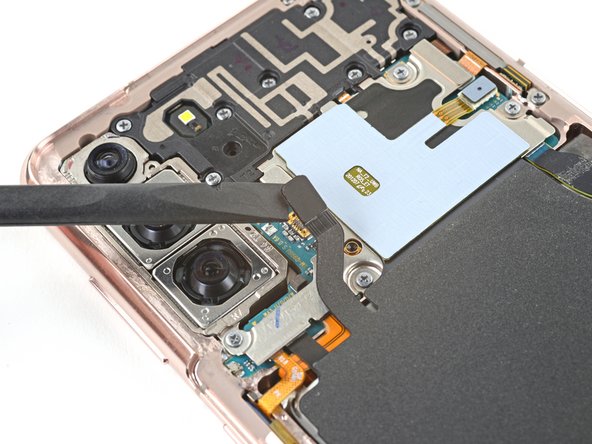
- Grab your trusty spudger and gently pop the charging coil connector straight up from its socket—no need for brute force, just a little finesse!
Tools Used

Step 15

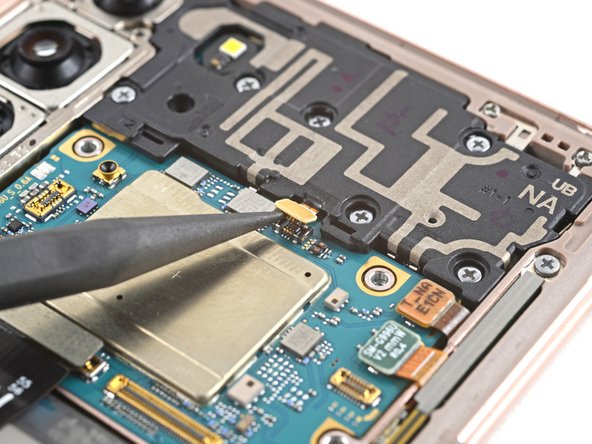
- Grab a spudger and gently pry the NFC antenna connector straight up from its socket. Easy does it—just a little lift, and you’re good to go. If you need a hand, you can always schedule a repair.
Tools Used
Step 16

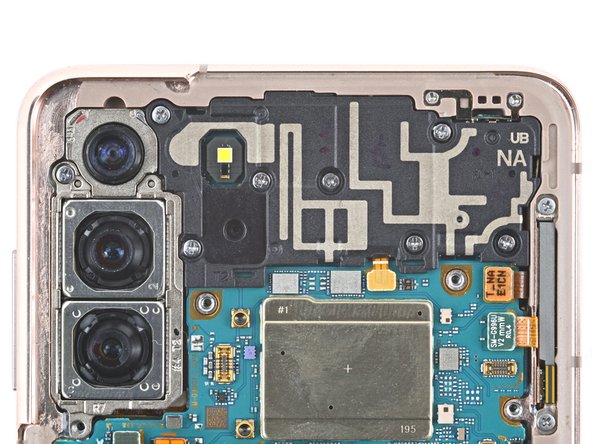
- Grab your Phillips screwdriver and take out the five screws (3.9 mm long) holding down the NFC antenna and charging coil assembly. Don’t rush—steady hands win the day!
Step 17

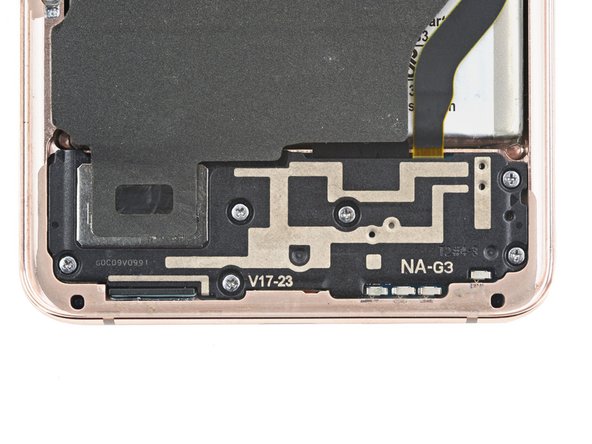
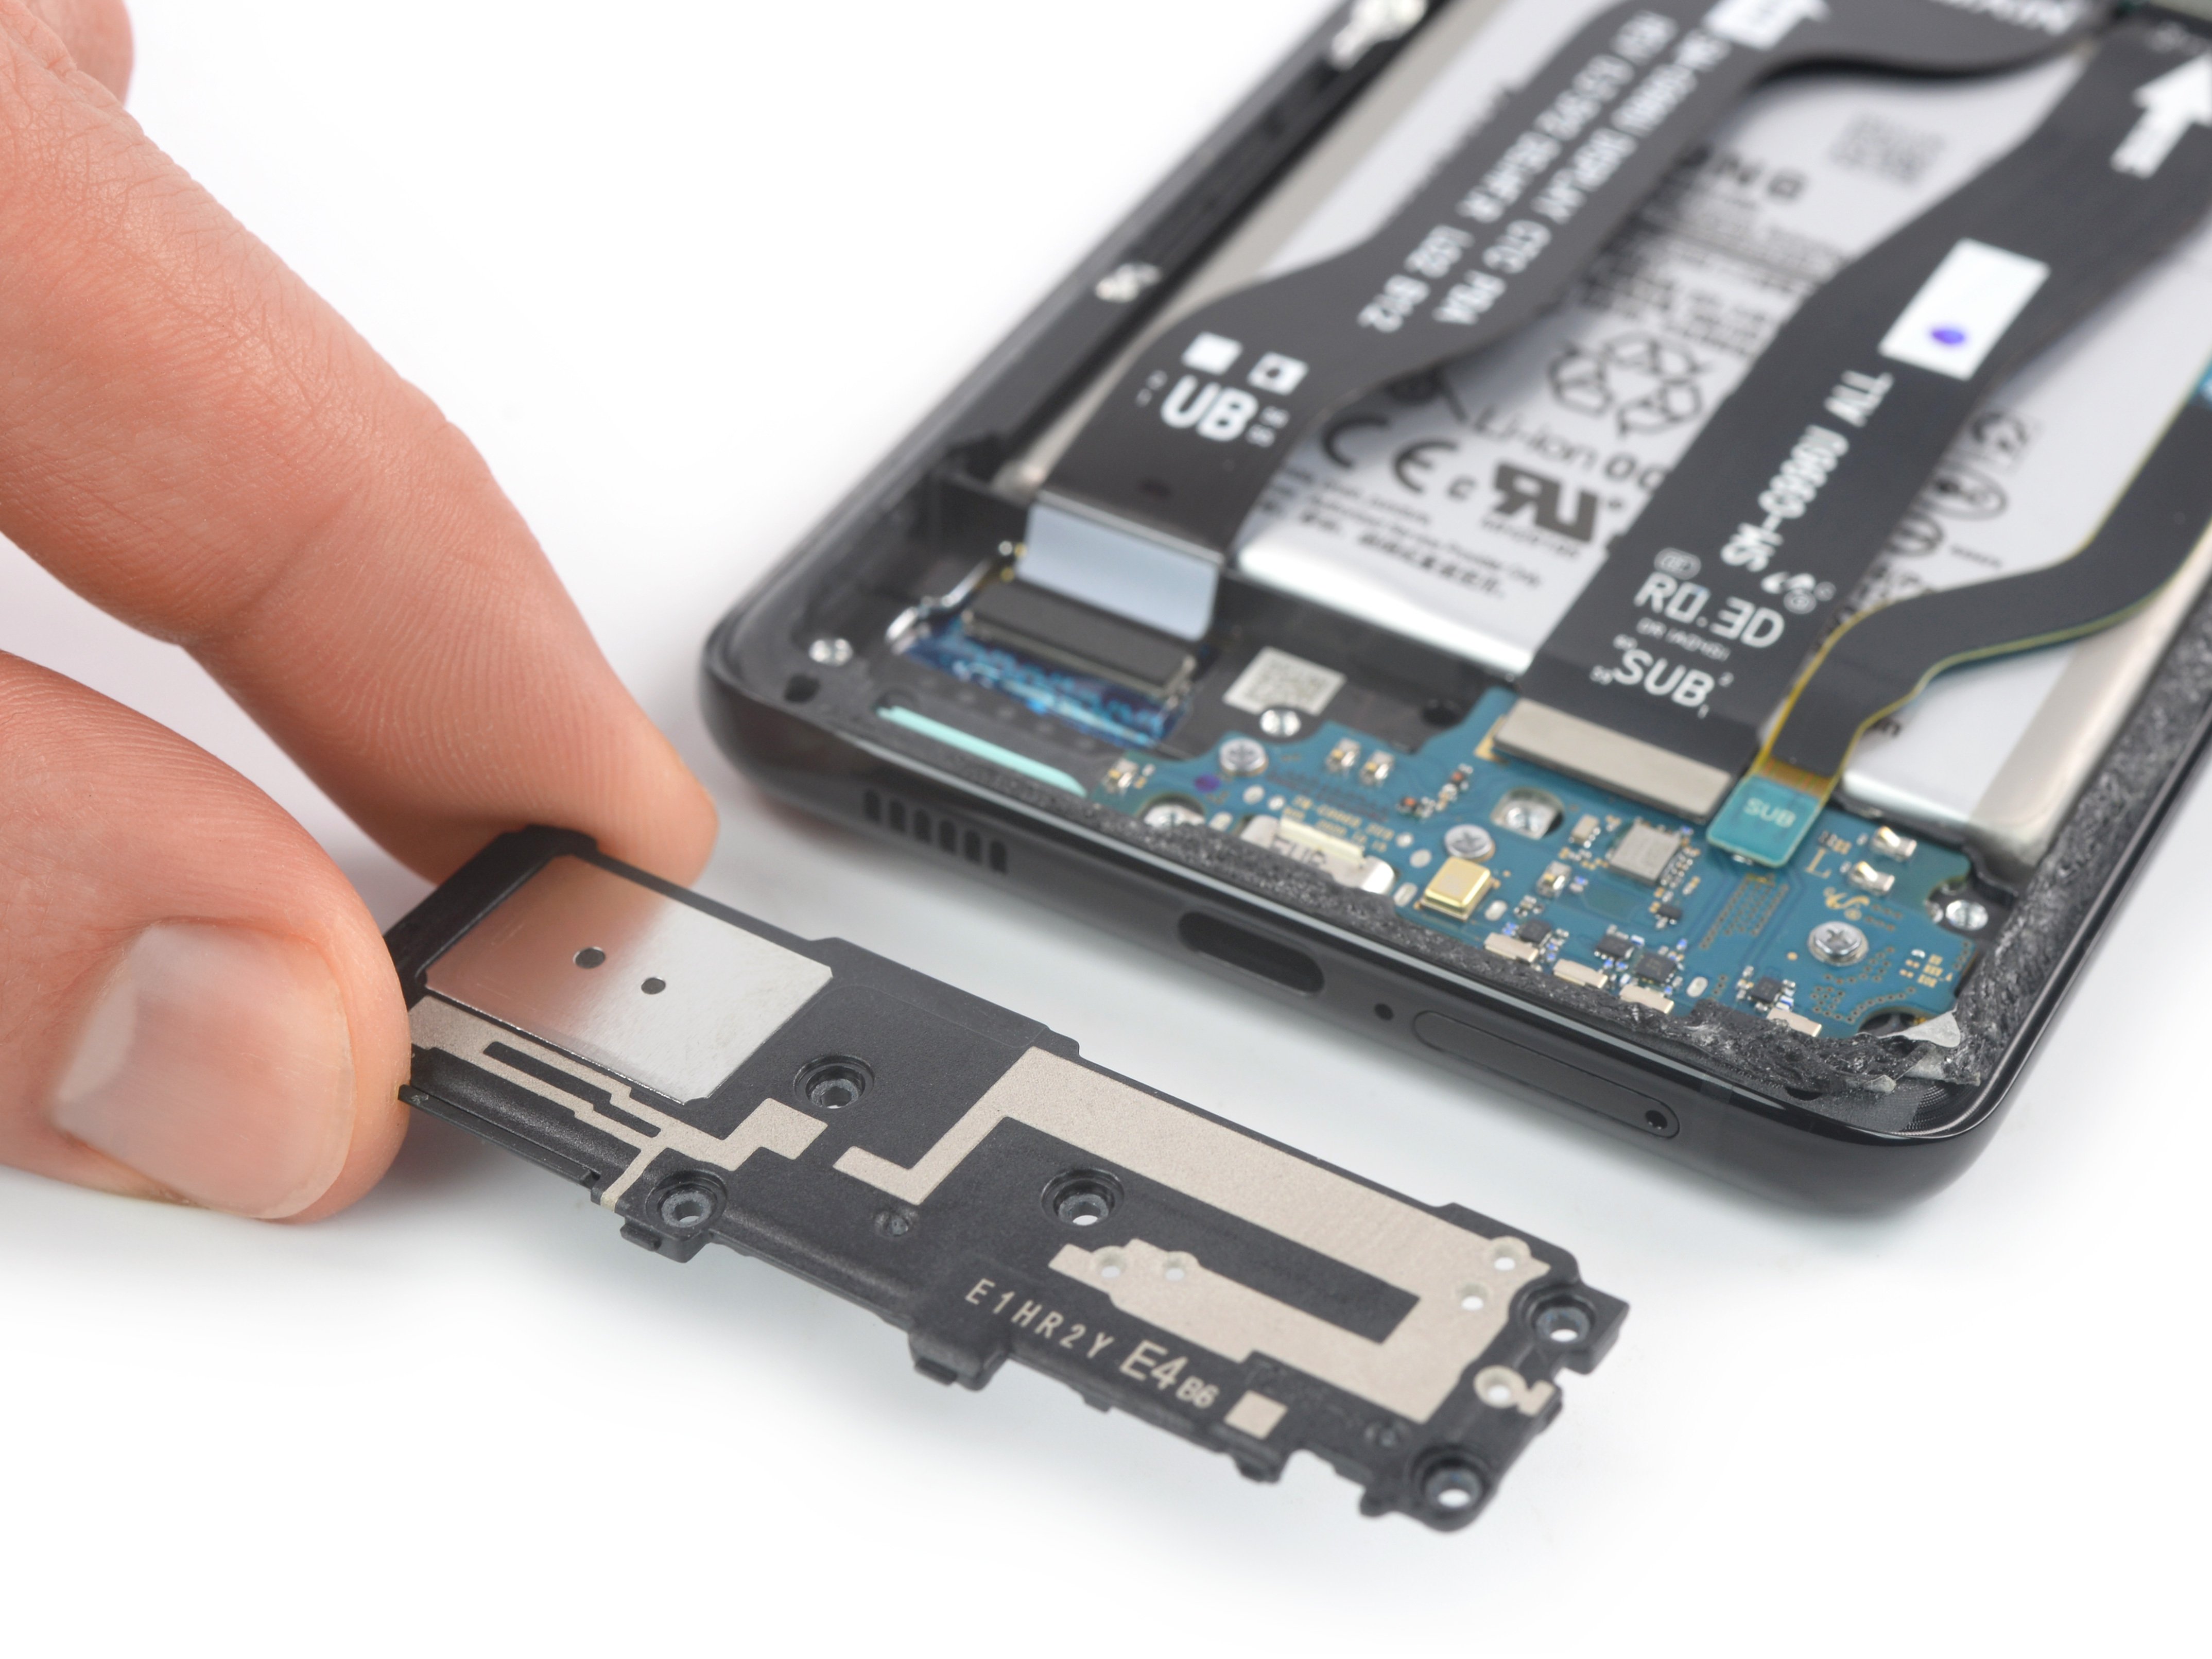
- Grab your Phillips screwdriver and unscrew the six 3.9 mm screws holding down the loudspeaker assembly. Let’s keep it smooth and steady!
Step 18

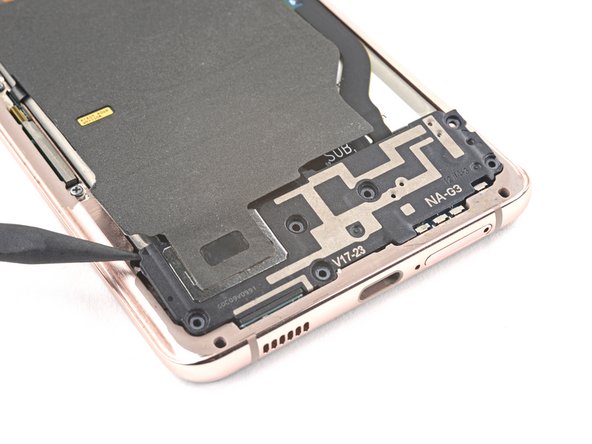
- Slide the tip of your spudger between the frame and the upper-left notch of the loudspeaker. Like sneaking into a secret club, but for tech!
- Gently pop the loudspeaker out of its plastic clips using the spudger. If it feels stubborn, give it a little pep talk and keep prying!
Tools Used
Step 19
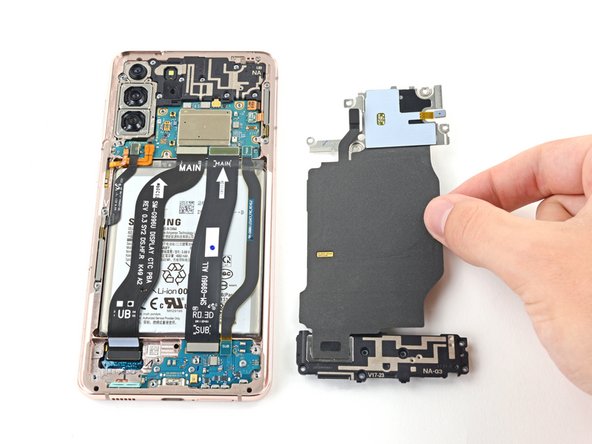

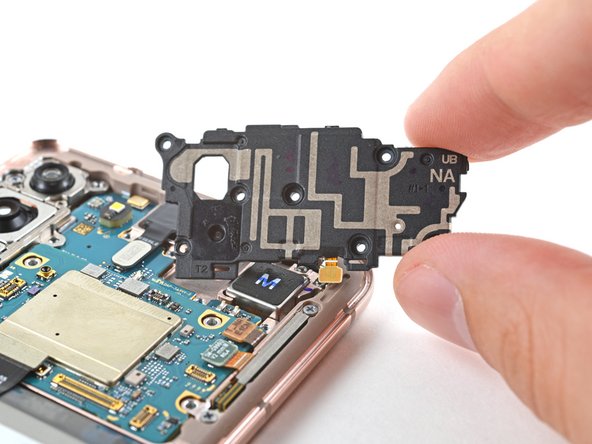
- Grab your tweezers or use your fingers and gently lift out the NFC antenna and charging coil assembly—nice and easy, like you’re picking up a delicate cookie.
Step 20

- Grab your trusty spudger and gently pop up the battery connector. Easy does it—disconnect and keep cruising!
Tools Used
Step 21

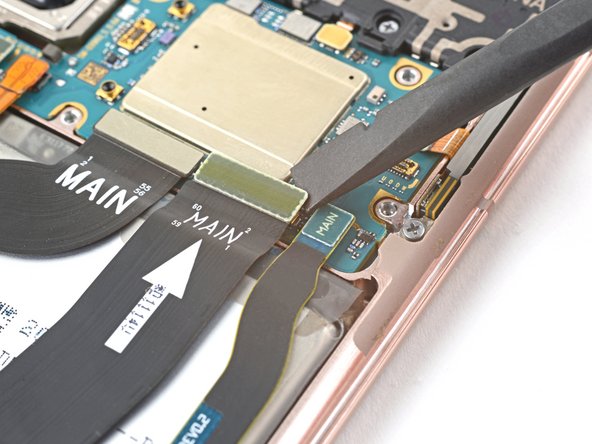
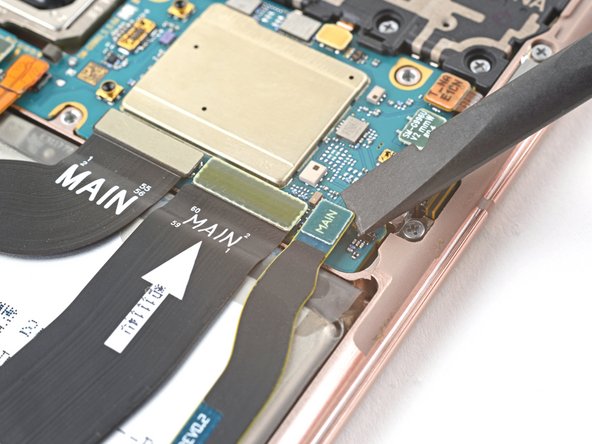
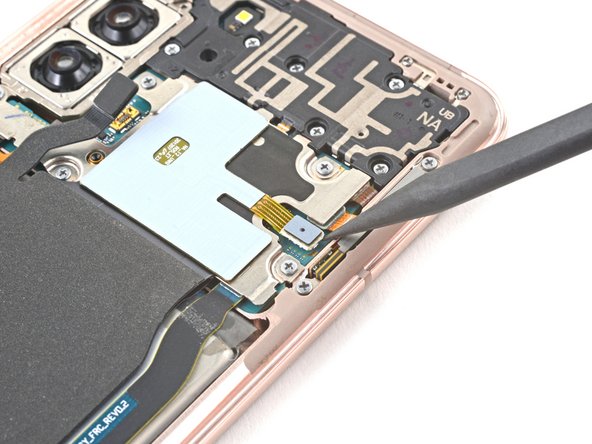
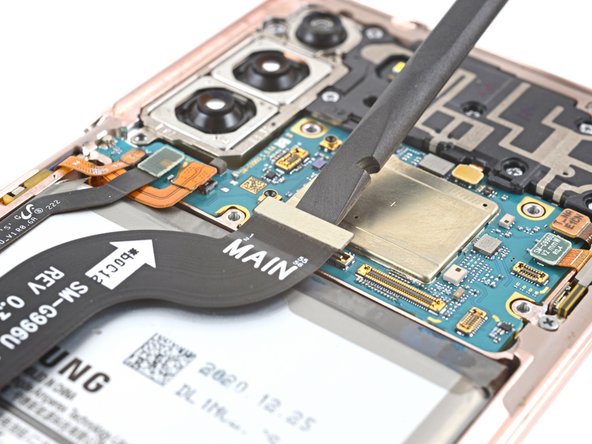
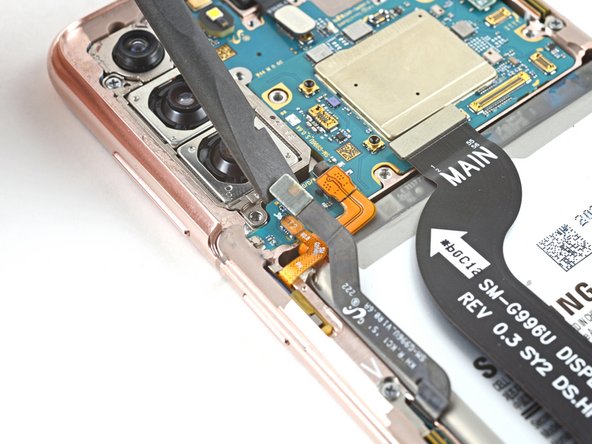
- Grab your trusty spudger and gently pop up the press connectors for both the primary and secondary interconnect cables on the motherboard—easy does it!
Tools Used
Step 22

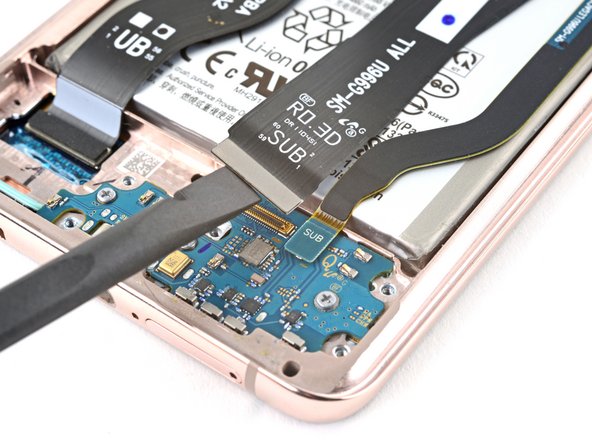
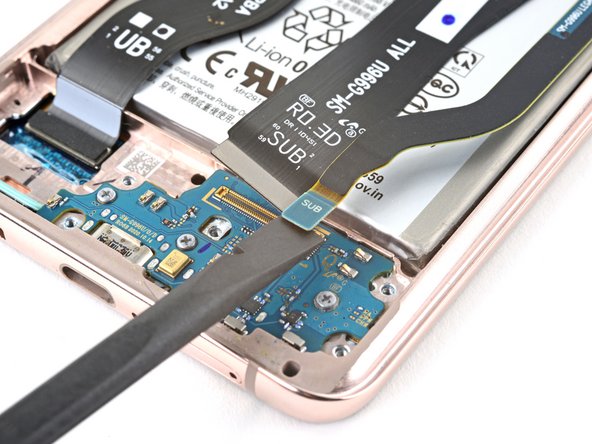
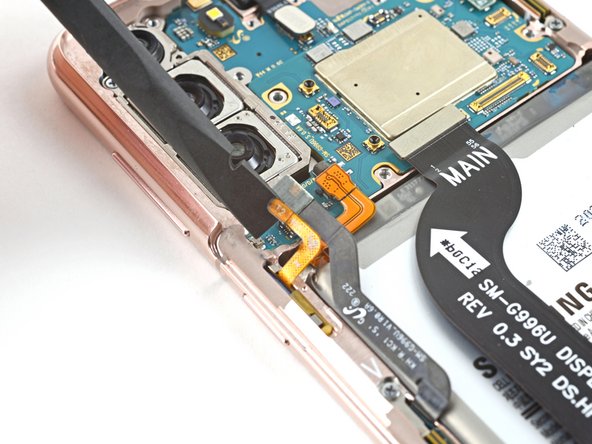
- Grab a spudger and gently pry up the connectors on the daughterboard that link the primary and secondary interconnect cables. Carefully disconnect them from their press-fit connectors to keep things smooth and damage-free. If you need a hand, remember you can always schedule a repair.
Tools Used
Step 23
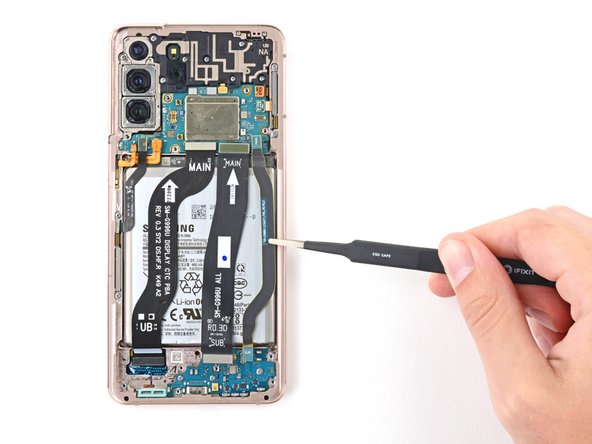

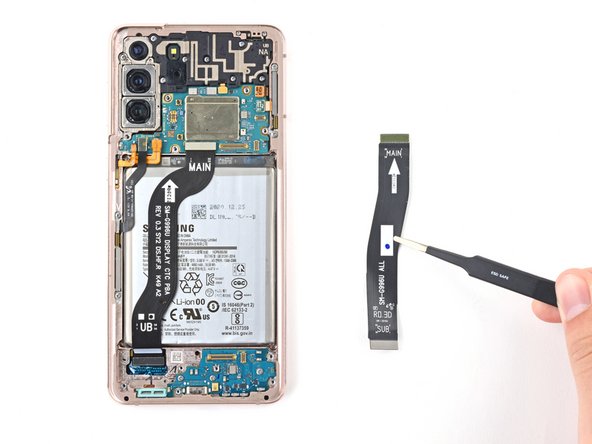
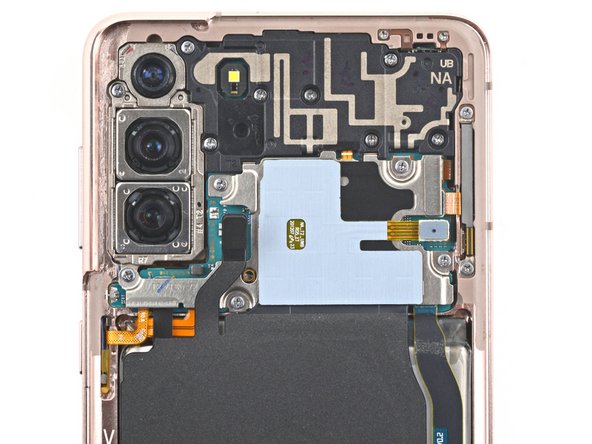
- Grab those trusty tweezers—or just use your fingers—to gently lift out the interconnect cables.
- Keep the cables somewhere safe for now. You'll need them again when it all goes back together.
Step 24
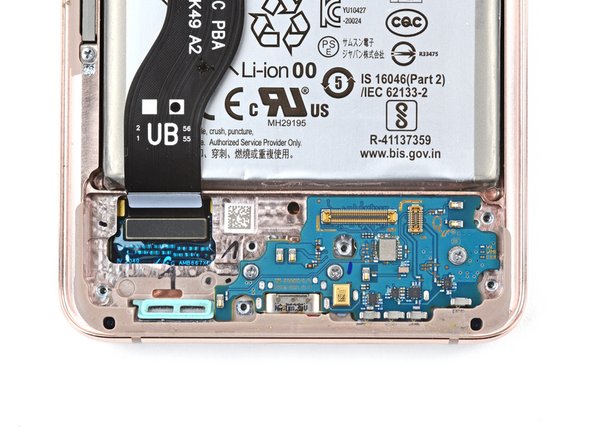

- Grab your Phillips screwdriver and spin out those three 3.4 mm screws holding down the charging board. It’s a quick twist and you’re on your way!
Step 25
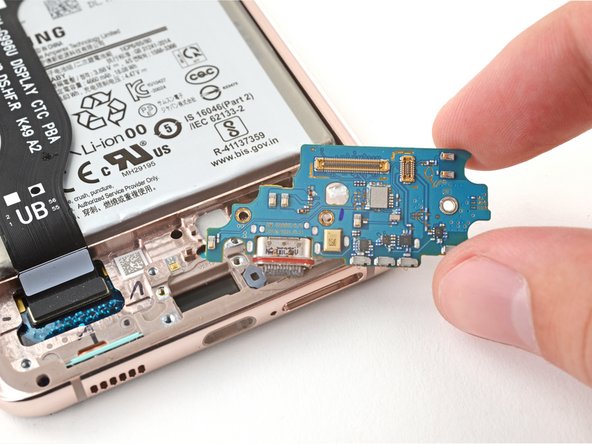
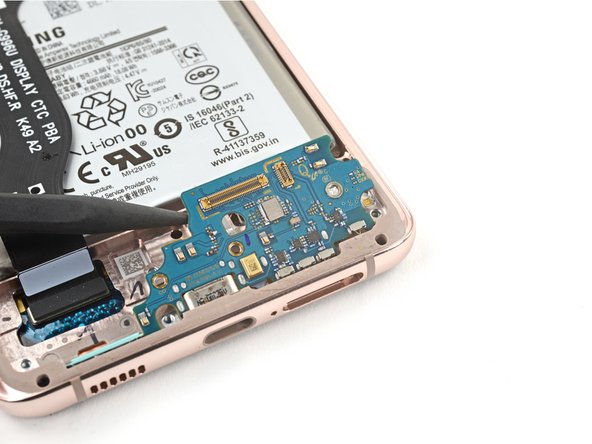

- Gently slide the sharp end of your trusty spudger under the upper left edge of the daughterboard and give it a little nudge to pop it free from its snug fit.
- Now, with a little finesse, use some tweezers or your fingers to lift the daughterboard up and away from the bottom of the device, saying goodbye as you remove it.
Tools Used
Step 26

- Grab your spudger and gently lift up the display cable's press connector to disconnect it. Easy does it!
Tools Used
Step 27

- Grab the tip of your spudger and gently work it under the earpiece speaker's press connector to lift it up and disconnect it.
Tools Used
Step 28

- Grab your trusty Phillips screwdriver and unscrew those seven 3.9 mm-long screws holding down the earpiece speaker assembly. You got this!
Step 29

- Slide a spudger into the gap between the earpiece speaker and the frame.
- Gently pry upwards with the spudger to free the earpiece speaker from its pesky plastic clips.
- Carefully take out the earpiece speaker.
- Place the speaker aside for now; it'll be making a comeback during reassembly!
Tools Used
Step 30

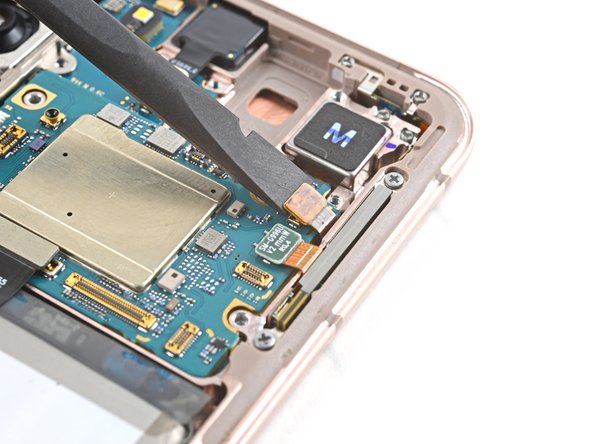
- Grab your trusty spudger and gently pop up the 5G mmWave antenna’s press connector. It’s like unplugging a secret handshake.
- Move over to the power button cable’s press connector right next to it, and repeat the move. You’ve got this!
Tools Used
Step 31
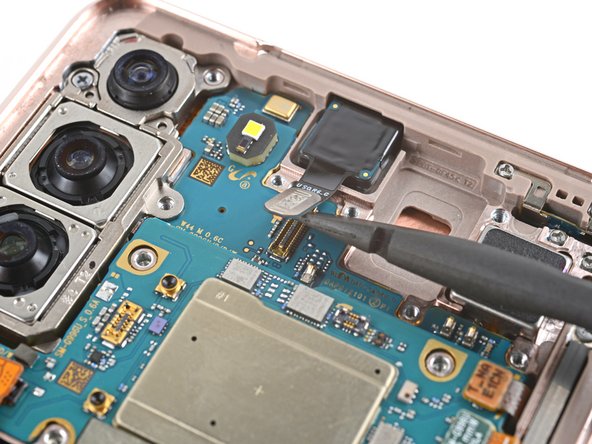

- Grab your trusty spudger and gently wiggle it to lift up and disconnect the front camera's press connector. You've got this!
Tools Used
Step 32

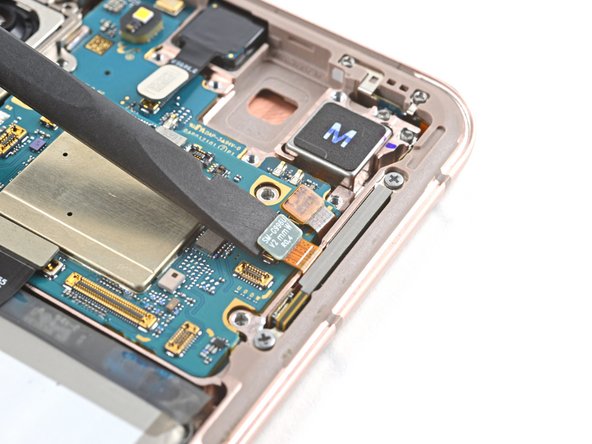
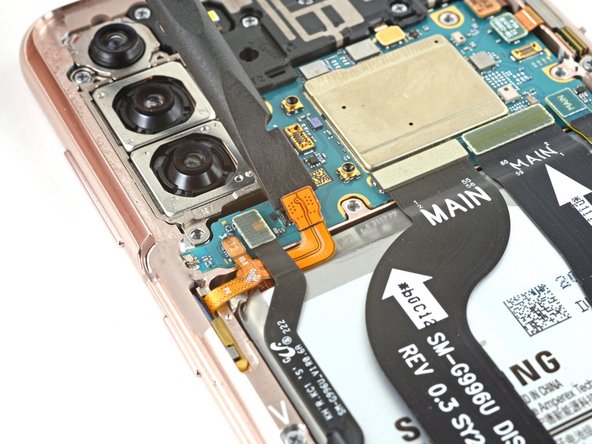
- Grab a spudger and carefully work it under the orange press connector to release it. Nice and steady!
- Now, do the same thing for the right 5G mmWave antenna's press connector right next door. You've got this!
Tools Used
Step 33

- Grab your Phillips screwdriver and carefully unscrew the 3.9mm screw that's keeping the motherboard in place. No need to rush—just take your time and make sure it’s nice and secure when you take it out!
Step 34

- Grab your tweezers or use your fingers and give the left 5G mmWave antenna cable a gentle nudge, moving it away from the frame.
- Do the same thing for the power button cable—just a careful wiggle to set it aside.
Step 35
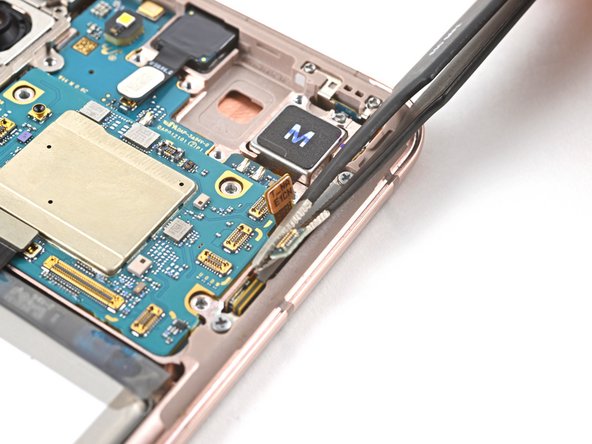
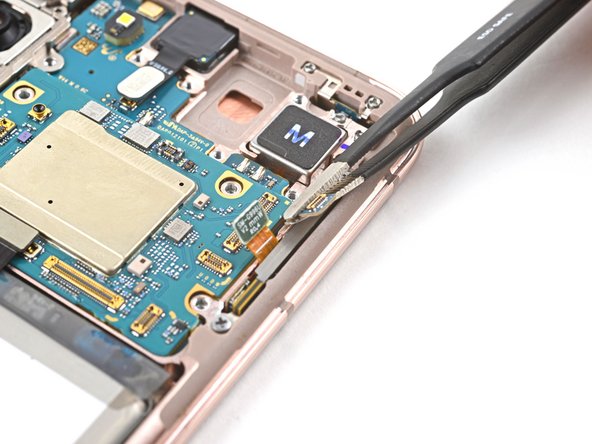

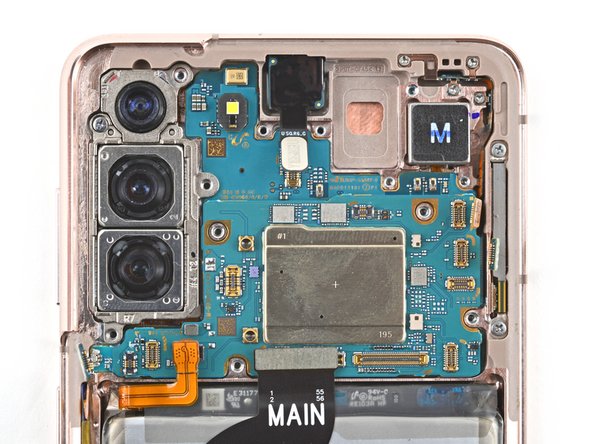
- Grab your tweezers (or just use your fingers—no judgment) and gently nudge the two connectors away from the right edge of the motherboard.
Step 36
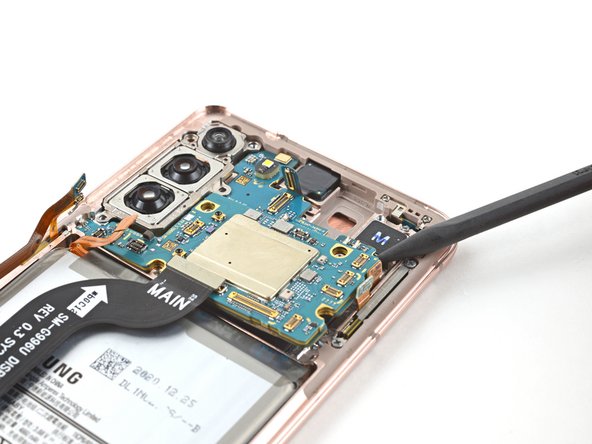

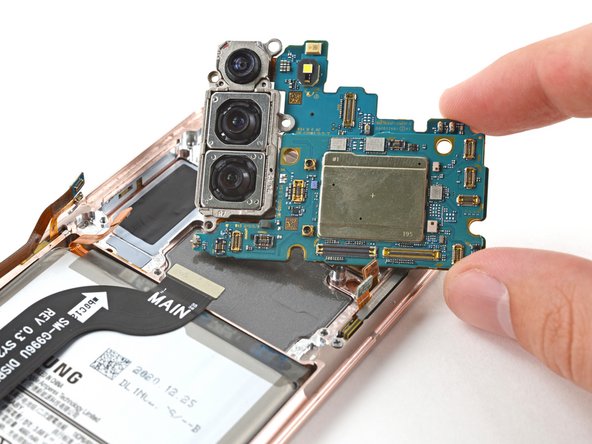
- Slip the tip of your spudger between the motherboard and the frame—like you're picking the perfect slice of pizza.
- Gently pry up with the spudger to pop the motherboard out of its cozy spot in the frame.
- Lift the motherboard out—nice and easy, like you’re handling a sleeping kitten.
- Set the motherboard aside for now. You’ll be bringing it back for the grand finale during reassembly.
Tools Used
Step 37

- Warm up your iOpener and give the front camera a nice 90-second spa session.
Tools Used
Step 38
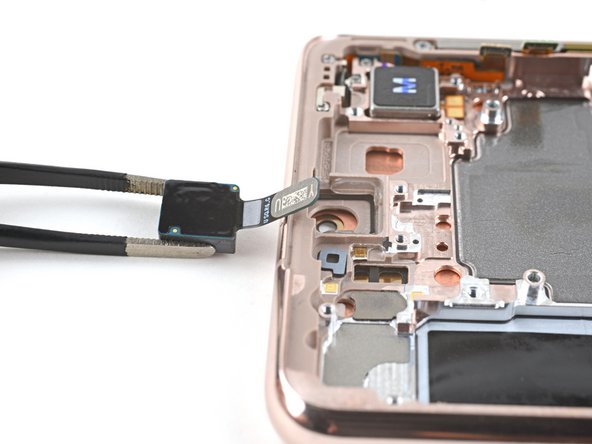

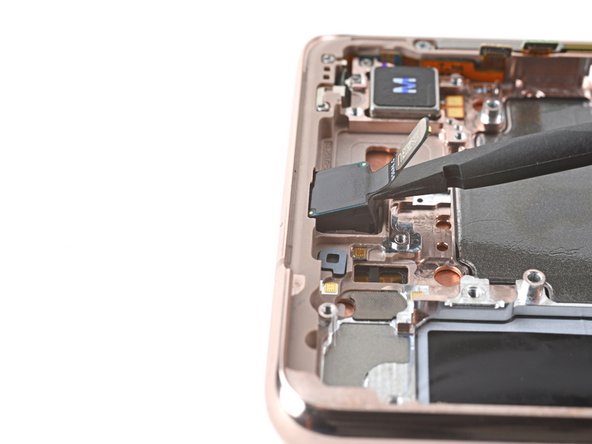
Front camera stuck? Give it a bit more heat and it'll loosen right up.
- Slip a spudger into the gap between the frame and the front camera. Gently pry to lift the camera away from the frame. Use tweezers or your fingers to carefully lift out the front camera. Set the camera aside—you'll be reinstalling it later. If you need a hand, you can always schedule a repair.
Tools Used
Step 39
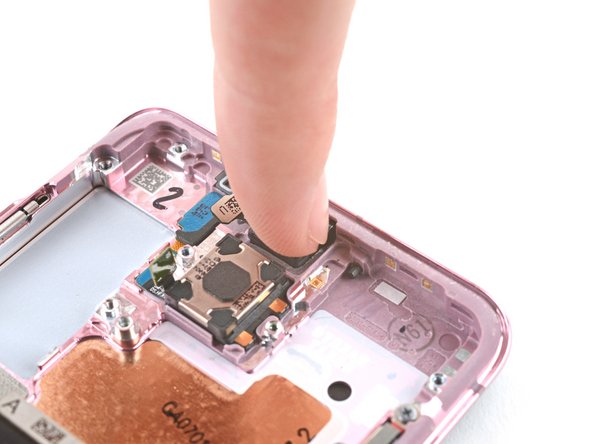

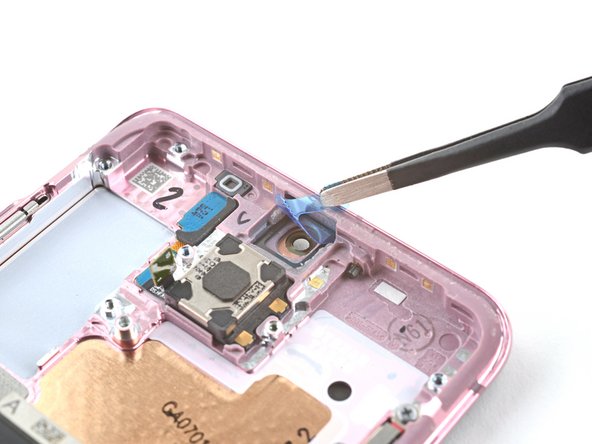
- As you reassemble, here’s how to reattach your front camera: peel the adhesive backing off the sticker and stick the sticky end onto the frame. Use your fingers or some tweezers to pull on the tab gently, revealing the top layer of the adhesive. Finally, slide the front camera into place and press down firmly to secure it. If you need a hand, you can always schedule a repair.
Step 40

- Grab your Phillips screwdriver and take out the four 3.4 mm screws holding down the 5G mmWave antennas. Easy does it!
Step 41

- Grab your spudger and gently lift up the bottom screw tab of the right 5G mmWave antenna bracket—think of it as peeling back a tiny sticker.
- Using tweezers or your fingers, carefully detach the right 5G mmWave antenna from its spot—like gently lifting a delicate flower.
- Set that antenna aside; you'll be reattaching it during the reassembly, so keep it handy. If you need help, you can always schedule a repair.
Tools Used
Step 42

- Grab your trusty spudger and lift up the bottom screw tab on the left 5G mmWave antenna bracket. It’s a bit of a wiggle, but you’ve got this.
- With tweezers or your fingers, pluck out the left 5G mmWave antenna. No need for superhuman strength here.
- Put that antenna somewhere safe—you’ll be putting it back together soon. It’s all coming together!
Tools Used
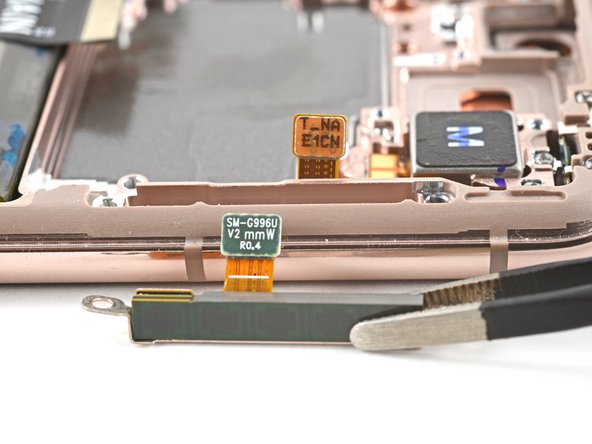
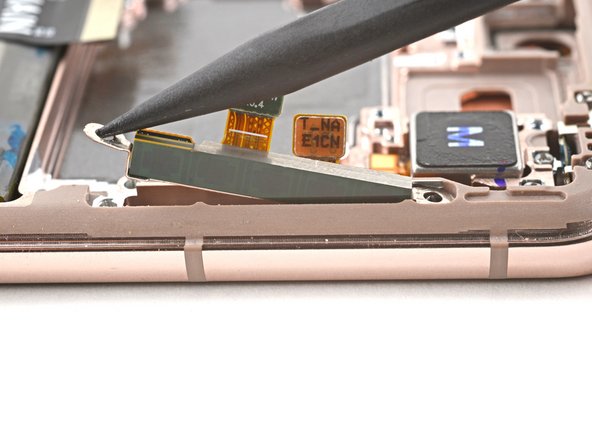
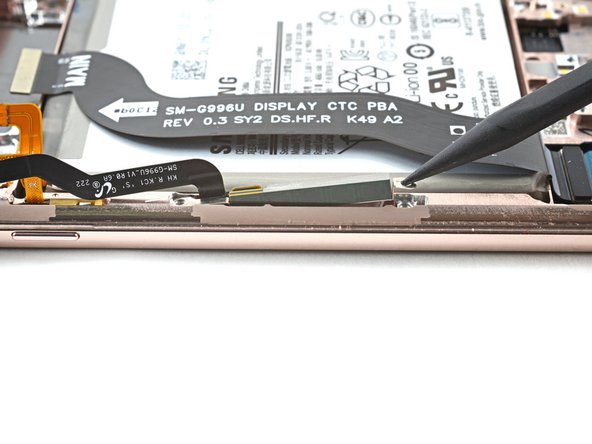
Step 43
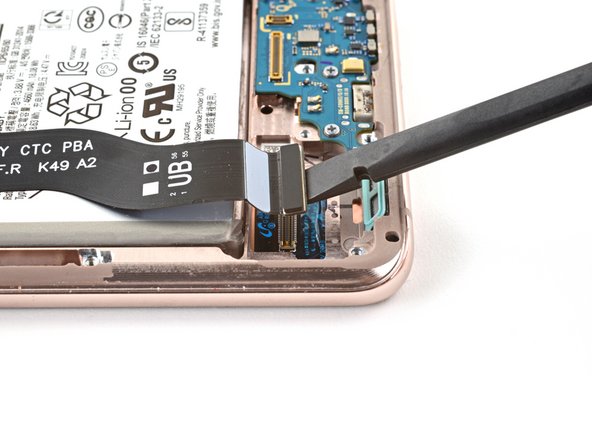

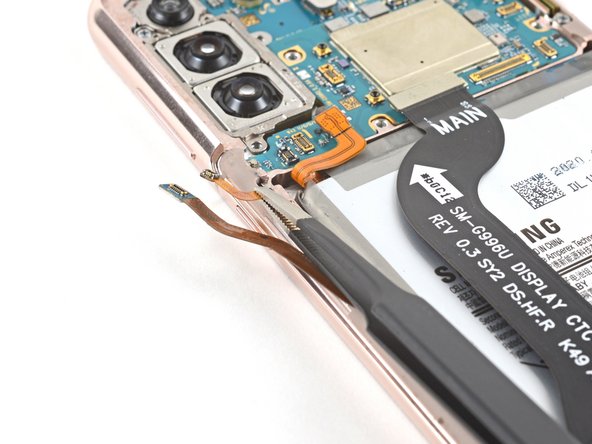
- Grab your trusty spudger and gently pop up the display cable's connector near the bottom of your device—no need to wrestle with it, just a smooth lift and you're good!
Tools Used
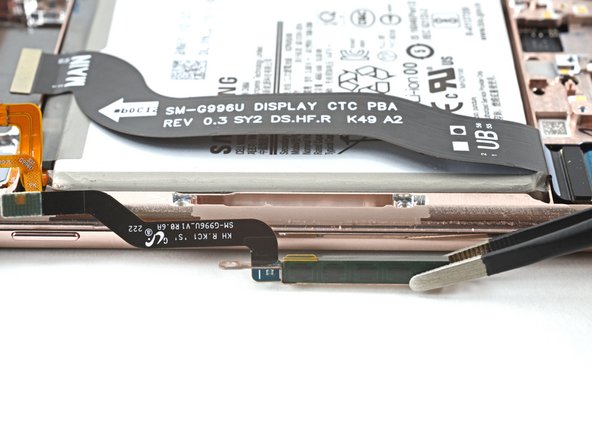
Step 44
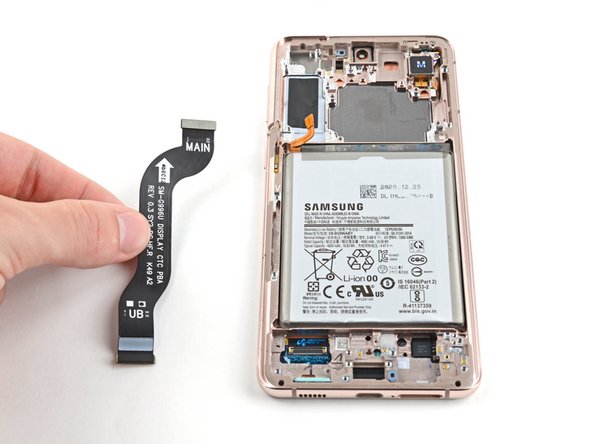

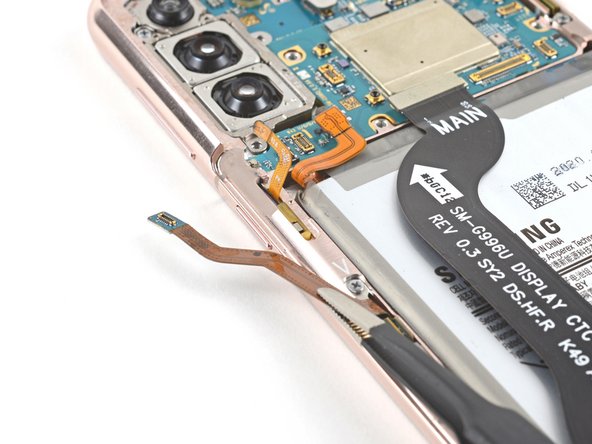
- Grab some tweezers or use your fingers to gently peel away the display cable. Once it's free, set it aside carefully—you'll be reconnecting it later during reassembly.
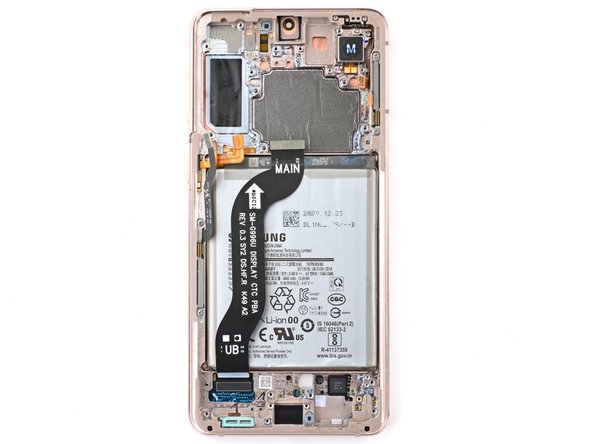
Step 45

- You've now got the screen and battery hanging out together—just the two of them left!