
Samsung Galaxy S21 Plus Vibration Motor Replacement
Duration: 45 minutes
Steps: 28 Steps
Ready to give your Samsung Galaxy S21 Plus a little TLC? Follow this guide to swap out that vibration motor! We worked our magic on the SM-G996B/DS (international) model, but heads up—other models might have an extra antenna cable hanging out in the midframe. If you skip the adhesive seals during reassembly, your phone will still work like a champ, but it might lose a bit of that water resistance charm. Make sure to grab some replacement adhesive to keep everything snug when you're putting it all back together!
Step 1

A hair dryer, heat gun, or hot plate can do the trick, but be cautious—avoid overheating the phone since both the display and the internal battery are sensitive to heat. Keep it gentle to prevent any mishaps. If you need help, you can always schedule a repair.


Step 2


If the back cover is cracked, the suction handle might not stick as well as you'd like. No worries! You can try using some strong tape to give it a lift, or if you're feeling crafty, superglue that suction handle in place and let it cure before moving on.
Having a tough time creating a gap? No problem! Just apply a bit more heat to soften that adhesive even further. Remember to follow the iOpener instructions to keep things from getting too toasty!
- Grab a suction handle and stick it to the bottom edge of the back cover, getting as close to the edge as you can.
- Gently pull up on the suction handle to create a little gap between the back cover and the frame.
- Slide an opening pick into that gap you just made.
- Move the opening pick down to the bottom left corner to cut through the adhesive.
- Keep the opening pick in place to stop the adhesive from sealing back up.
Tools Used

Step 3


- Pop a second opening pick into the bottom edge of your phone. Give it a little wiggle—you're almost there!
- Slide the pick toward the bottom right corner to slice through that stubborn adhesive. Take it slow and steady.
- Let those picks chill in place to keep the adhesive from closing up again. This keeps your hard work from sticking itself back together!
Step 4


If the adhesive starts acting stubborn and won’t budge, it’s probably cooled off. Grab your iOpener and give it another two to three minutes of heat to loosen things up.
- Start by slipping a third opening pick into the bottom right corner of your device.
- Gently slide the pick along the right edge to cut through the adhesive holding the screen in place.
- Keep the pick in the top right corner to stop the adhesive from sealing back up as you work.
Tools Used
Step 5


When you’re working near the camera assembly, just dip the tip of the opening pick—about 4-5 mm in—so you don’t mess with or smudge the camera. Keep it light and precise!
- Pop in a fourth opening pick under the top right corner of your device to get started.
- Glide that pick along the top edge to cut through the adhesive like a pro.
- Keep the opening pick in the top left corner to stop the adhesive from sticking back together.
Step 6


When you're working near the power button, just gently slide the opening pick (~3-4 mm tip) in—think of it as giving the flex cable a tiny hello—so you don't accidentally poke or damage the power and volume button flex cable.
- Slip a fifth pick under the bottom left corner like a pro.
- Glide that pick up the left side to slice away the last bit of stubborn adhesive.
Step 7


- Start by gently removing the back cover.
- As you put everything back together, don't forget: this is the perfect moment to power up your device and test all functions before sealing it up. Just be sure to fully power it down again before you dive back into your work.
- Use a pair of tweezers or your fingers to carefully remove any leftover adhesive chunks. Then, grab some high-concentration (over 90%) isopropyl alcohol to wipe away any sticky residue.
- If you're working with Samsung custom-cut adhesives, make sure to follow this guide.
- If you're using double-sided tape, here's the guide for that too.
Tools Used

Step 8


Handle the battery like the drama queen it is—no poking or bending, or it might throw a chemical tantrum or heat-wave hissy fit.
Slide that pick like you're on a chill treasure hunt; if it snags on the cable beneath the charging coil, just pause and give it a gentle wiggle.
- Slide an opening pick under the bottom left corner of the NFC antenna and charging coil—like you're sneaking in to grab the last slice of pizza.
- Wiggle that pick along the bottom left edge, gently separating the assembly from the battery. Slow and steady wins this race!
Step 9


- Slide an opening pick under the bottom edge of the NFC antenna and charging coil—just shimmy it in like you're slicing into a pie.
- Glide the pick along the bottom of the assembly to gently separate it from the loudspeaker. Take it slow, and keep things smooth.
Step 10


- Grab your trusty spudger and gently pop the charging coil connector straight up from its socket, like you're unplugging the world's tiniest lamp.
Tools Used

Step 11


- Grab your spudger and gently pop the NFC antenna connector straight up from its socket—nice and easy, like opening a stubborn pickle jar.
Tools Used
Step 12

- Grab your trusty Phillips screwdriver and get ready to tackle those five 3.9 mm-long screws holding the NFC antenna and charging coil assembly in place. You've got this!
Step 13


- Grab your tweezers or just use your fingers, and gently lift out the NFC antenna and charging coil assembly. Easy does it—no rush!
Tools Used
Step 14

- Grab your trusty spudger and gently pry the battery cable connector straight up from its socket. It's like giving it a little lift-off!
Tools Used
Step 15


- Grab your trusty spudger and gently lift the top connector of the display flex cable straight up from its socket. Easy does it—just a little wiggle and pop!
Tools Used
Step 16

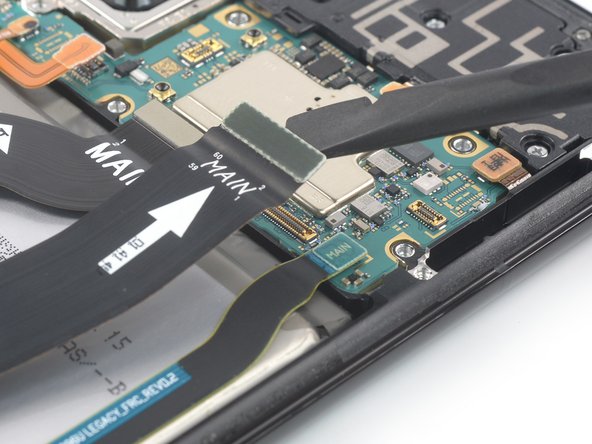
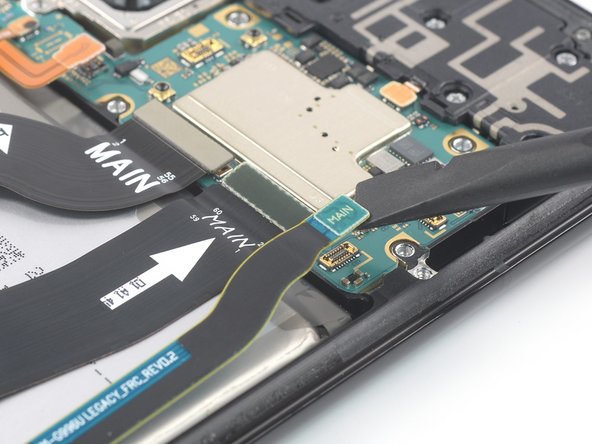
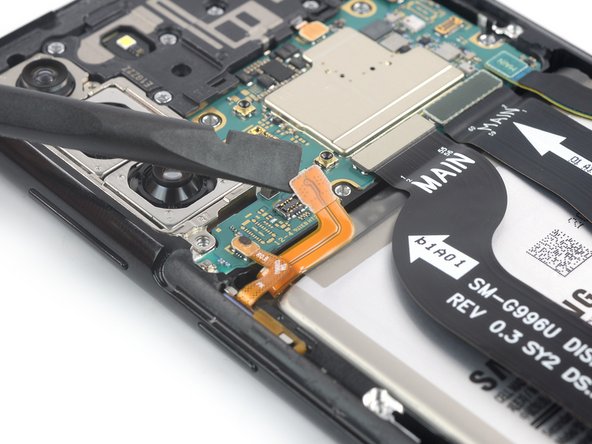
- Grab your trusty spudger and gently pop the main and interconnect flex cables off the motherboard by lifting their top connectors straight up from their sockets. Easy does it—no need for brute force here!
Tools Used
Step 17

- Grab a Phillips screwdriver and carefully remove the seven 3.9 mm screws holding in the earpiece speaker assembly. Keep those screws safe—you’ll need them later. If you run into any trouble, you can always schedule a repair for extra help.
Step 18

- Grab a spudger and gently pry the earpiece speaker cable connector straight up from its socket. Keep it steady and take your time—patience is key to a smooth disconnect.
Tools Used
Step 19


- Slide a spudger under the bottom left edge of the earpiece speaker assembly—like you’re flipping the edge of a pancake.
- Gently lift the assembly with your spudger. Go slow and steady—no need to rush the magic!
Tools Used
Step 20


- Grab your trusty tweezers (or just use your fingers) and gently lift out the earpiece speaker assembly. No need to rush—slow and steady wins the race!
- When putting everything back together, slap on some fresh adhesive after giving the area a good clean with isopropyl alcohol (90% or higher). Your device will thank you for keeping things tidy!
Tools Used
Step 21
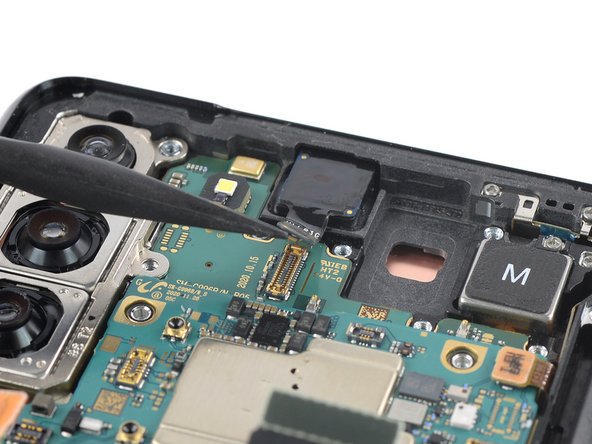

- Grab a spudger and gently lift the front-facing camera cable connector straight up from its socket. Easy does it—think of it as giving the camera a friendly nudge to come loose. If you need a hand, you can always schedule a repair.
Tools Used
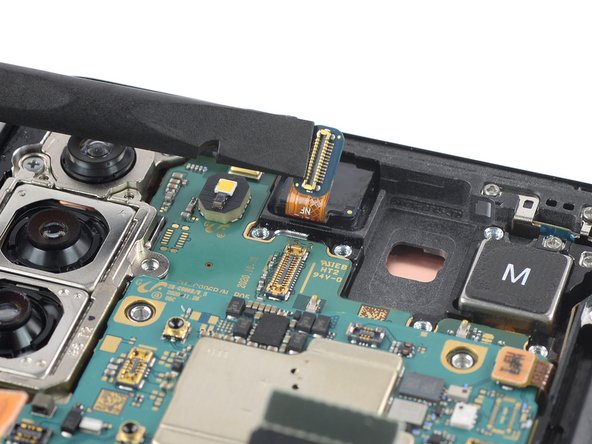
Step 22


As you tackle this step, remember to keep that cable bending gentle and easygoing—no sharp folds, please! Let's keep it safe and sound.
- Grab your trusty spudger and pop the power button flex cable connector straight up from its socket—gentle prying is the name of the game.
- Now, use the spudger to nudge the flex cable off to the side. This keeps it safe and out of the way while you work on removing the motherboard.
Tools Used
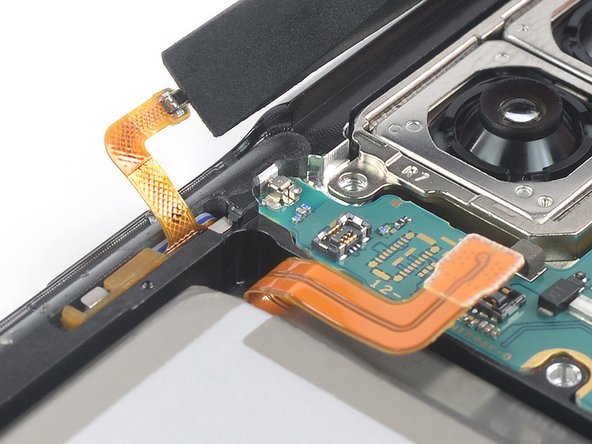
Step 23

Go easy with the cable—no sharp folds or wild bends. Treat it gently to keep it happy and healthy!
- Grab a spudger and gently lift the power antenna flex cable connector straight off its socket—think of it as carefully unplugging for a smooth disconnect.
- Use your spudger to gently bend the flex cable aside, giving it a little nudge to clear the way during motherboard removal—gentle and friendly, like guiding a friend out the door.
Tools Used
Step 24

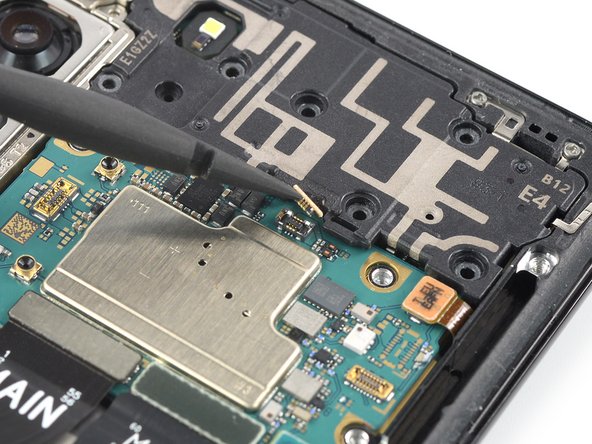
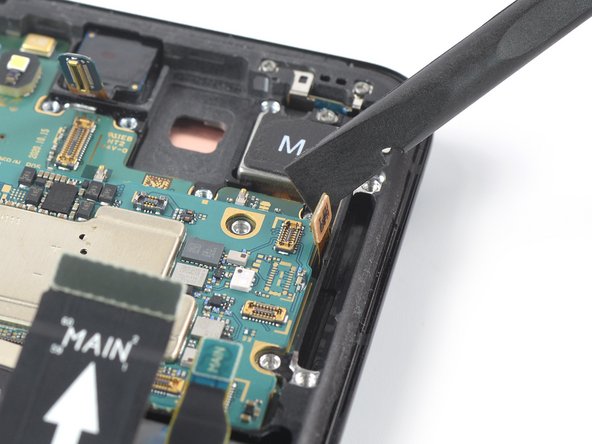
Keep cables untangled from the motherboard assembly as you work—it's the best way to prevent any cable mishaps during removal. Stay cool and steady, and if you need a hand, you can always schedule a repair.
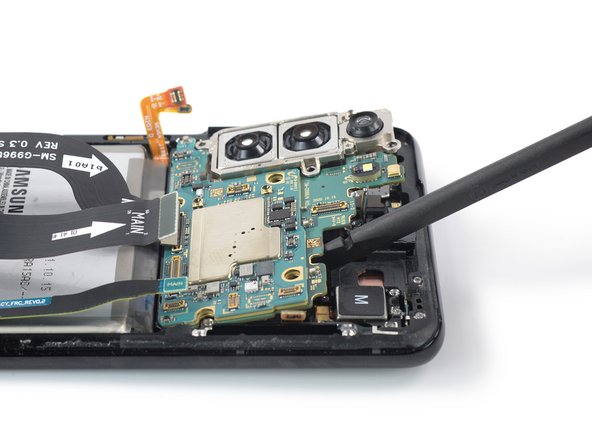
- Grab your trusty spudger and gently slide it under the top edge of the motherboard assembly, right next to the vibration motor.
- Now, give that spudger a little nudge and carefully lift the motherboard assembly. Easy does it!
Tools Used
Step 25

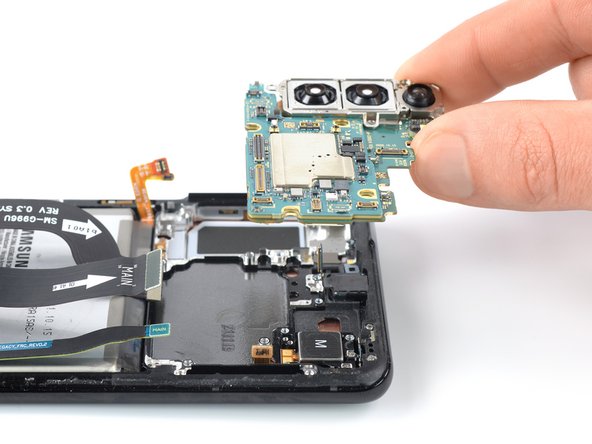
- Gently lift out the motherboard assembly, making sure to scoop up those rear cameras along for the ride.
Step 26

A hair dryer, heat gun, or hot plate can come in handy, but keep an eye on the temperature—your phone’s display and internal battery are pretty sensitive to heat. Use gentle warmth to avoid any accidental overheating mishaps.
Step 27

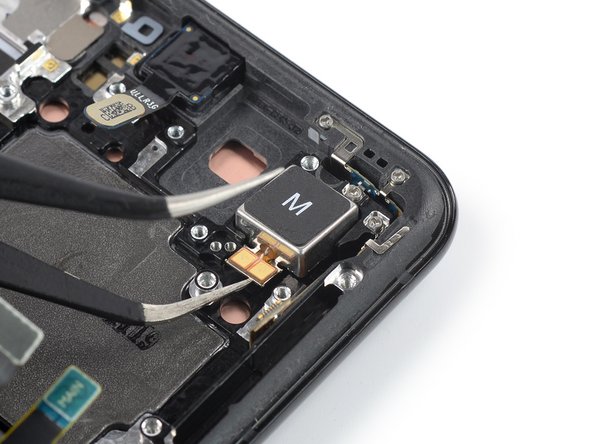
- Slide one arm of your tweezers gently under the vibration motor connector—like you're sneaking past a sleeping cat.
- Lift the vibration motor with your tweezers, giving it a little nudge upward. Easy does it!
Tools Used
Step 28


- Grab your trusty tweezers and lift the vibration motor out of its spot. Set it aside like a prized trophy.
- When you're putting things back together, fresh adhesive is your friend. Clean up the surfaces with some high-test isopropyl alcohol before sticking things down.


