Motorola Droid RAZR M Headphone Jack Replacement
Duration: 45 minutes
Steps: 15 Steps
Get ready to dive into your Motorola Droid RAZR M and rescue that headphone jack from the rear assembly. Keep track of those tiny screws, as they’ll be piling up quickly. To reach the headphone jack, you’ll need to remove the motherboard first – don’t worry, it’s easier than it sounds. Just take out the screws, undo a few snap connections, and gently pull it out. Then, it’s time to put in some effort to carefully pry out the headphone jack. Take your time, and you’ll be listening to your favorite tunes in no time.
Step 1


– Start by gently lifting the small latch on the left side of your device with your finger. This will reveal the SIM card and microSD card slots. Pretty easy, right?
– If you’ve got either of these cards, carefully remove them. You don’t want to risk damaging them while you’re getting the phone apart. If your device doesn’t have any cards, no worries – skip this step!
– Once the cards are out, simply close the latch to keep everything nice and secure. You’re doing great!
Step 2


– Grab your screwdriver and unscrew those six 4mm T3 Torx screws—three on each side of the device. Keep them safe so you can put everything back together later. If you need help, you can always schedule a repair.
Step 3


Be gentle when removing the small plastic hooks – they can be a bit fragile. Don’t worry if it takes a little elbow grease to get them undone, just be careful not to damage them in the process.
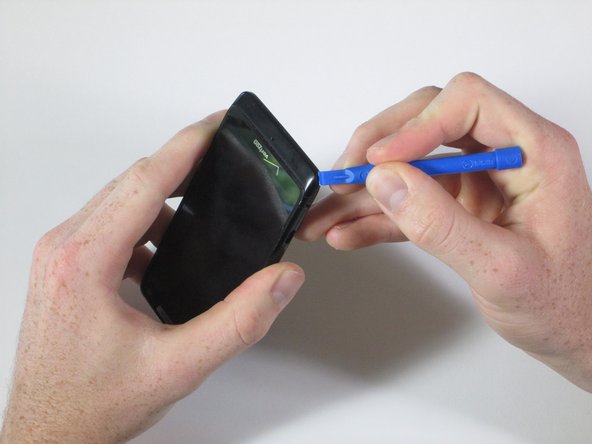
– Slide the plastic opening tool gently under the bottom edge of your phone to loosen the small plastic cover beneath the Verizon logo.
– Once it’s free, carefully pull the cover off using your fingers.
– It might take a bit of muscle, but don’t worry! Work your way around the bottom corners to release the two hooks holding the cover in place.
Step 4


– Start by removing the three T4 Torx screws at the bottom of the device. Once they’re out, you’re on your way to opening things up. If you need help along the way, you can always schedule a repair.
Step 5


– Grab your plastic opening tool and gently work it under the silver Motorola plate at the top of your phone. It’s glued down pretty well, so you might need to give it a little wiggle from a few different angles.
– Once you’ve got enough space, slide your finger under and peel the silver plate off. It should come away with a little coaxing!
Step 6


– Time to grab your T4 Torx screwdriver and take out the two 7mm screws hanging out at the top of your device.
Step 7


When you detach the front from the back, be careful not to pull the two pieces completely apart. There’s a flat orange wire connecting them that we’ll disconnect in the next step, so let’s take it one step at a time.
– Let’s get started by snapping apart the two internal clips at the top corners of your device, and the two clips at the bottom corners. Easy peasy!
– Now, take your plastic opening tool and run it around the edge of the entire device. This will help you pry apart the front of the phone from the back. Just be gentle and patient, and you’ll be done in no time!
– As you’re working on the front assembly, you might notice a small black plastic piece at the bottom. Don’t worry if it falls off – it’s an easy fix! Just snap it back on and keep going. You’re doing great! If you need help, you can always schedule a repair
Step 8


– Like opening a clamshell, gently lift the device from the top. Keep opening it slowly, but be careful of that flat orange wire connecting the motherboard to the front assembly. It’s a bit delicate.
– Now, take your plastic opening tool and gently slide it under the end of the orange wire in the lower left corner to undo the snap connection. A little lift, and you’re good to go.
– Once the snap connection is freed, slowly pull the front assembly away from the rest of the device. Take your time!
Step 9


– Grab your precision screwdriver and carefully remove the six 4mm T5 Torx screws along the edge of the motherboard. Keep them safe—you’ll need them to put things back together. If you need help, you can always schedule a repair.
Step 10


– Gently pry up the lower left corner’s snap connector using a plastic opening tool. Take your time and keep it friendly—you’re making progress!
Step 11


– Let’s get started by carefully prying underneath the snap connection in the upper left corner using your trusty plastic opening tool. Gently work it loose to release the connection.
– As you release the snap connection, go ahead and completely remove the rear facing camera from its slot in the motherboard. It should slide out smoothly, and you’ll be one step closer to a successful repair!
Step 12


– Let’s get started by carefully disconnecting the snap connection in the upper right corner. Use your trusty plastic opening tool to gently pry underneath, and you’ll be on your way to a successful repair!
Step 13


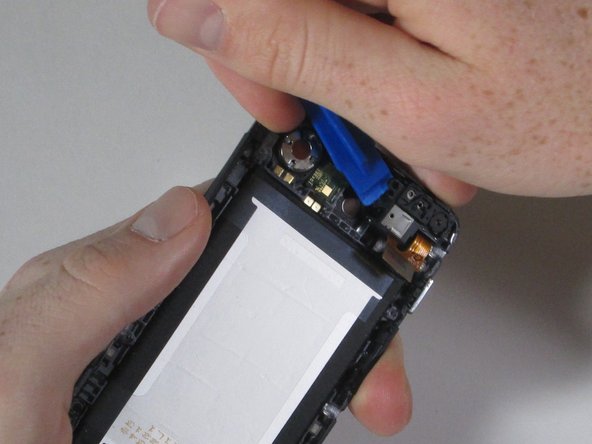
– Let’s get started by carefully inserting the plastic opening tool between the motherboard and rear casing. Gently lift the bottom of the motherboard away from the rear casing – you’re making great progress!
– Next, use your fingers to gently pull the motherboard down and out of the rear casing. Take your time and be patient, it’s almost out!
Step 14

– Gently wedge a plastic opening tool between the front-facing camera’s casing and the rear assembly. Carefully pry until the camera snaps free. If you need help, you can always schedule a repair.
Step 15

– You’re almost done! To put everything back together, just follow these steps in reverse.
– If you need help or have any questions, you can always schedule a repair with Salvation Repair.
Success!