Samsung Galaxy S20 Ultra Front-Facing Camera Module Replacement
Duration: 45 minutes
Steps: 26 Steps
Ready to swap out the front-facing camera module on your Galaxy S20 Ultra? You’re in the right place! Heads up: removing the camera module is a bit tricky and can easily damage it, so if you want to reuse it, go slow and pay close attention to the warnings. Don’t forget, you’ll need some fresh adhesive to seal things up once you’re done.
Step 1

- Fire up your iOpener and let it work its magic on the bottom edge of the back cover for a couple of minutes. Heat makes everything easier!
Before starting, make sure to unplug and turn off your device. You might also use a hair dryer, heat gun, or hot plate to help loosen things up—just keep the heat gentle so you don’t risk damaging the display or internal battery. If you need a hand with any step, feel free to schedule a repair to get professional help.
Tools Used

Step 2


Go easy with the pick—put too much muscle into it and that back cover glass might snap!
Got a back cover that looks like it went a few rounds with a hammer? Slap on some clear packing tape to help your suction cup stick, or just use strong tape instead. If things get wild, a little superglue on the suction cup can save the day.
Patience is key here—those tight tolerances mean you might need a few rounds of reheating with the iOpener and some tug-of-war with the suction cup to make it happen.
If you're struggling to get a gap going, crank up the heat a bit more on that stubborn edge and give it another shot.
- Stick a suction cup on the back of the phone, aiming for the very bottom center for best grip.
- Pull steadily on the suction cup—no need to go Hulk on it—just firm and consistent to create a little space between the back cover and the frame.
- Gently slip the tip of an opening pick into that gap and you're all set to get things started.
Tools Used
Step 3


Be careful around the curved corners of the phone—trying to cut the adhesive there might cause the glass to crack. Stay safe and gentle as you work!
- Gently wiggle your opening pick along the bottom edge to slice through the adhesive—think of it as giving the glue a gentle tease.
- Keep that pick in the seam once you've got it open to prevent the adhesive from sneaking back and sticking everything shut again.
Step 4

- Warm up the left edge of the back cover with a heated iOpener for about two minutes. This helps loosen things up for the next steps.
Tools Used
Step 5


Go easy with the pick—too much muscle and you might give your back cover glass a surprise crack.
Getting this right can take a few tries, so don’t sweat it!
The curve of the glass means this pick won't slide in too far, but as long as the tip is tucked just beneath the edge, you're good to go!
If you're struggling to make that gap, just heat up the edge a little more and give it another shot!
- Stick a suction cup onto the back of your device, aiming for the area near the left edge but as close to the middle as possible. Give it a firm, steady pull to gently pry open a gap between the back cover and the frame. Carefully slide an opening pick into that gap to start loosening things up. If the adhesive seems stubborn, a few drops of high-concentration (over 90%) isopropyl alcohol applied into the seam might help loosen it up. If you need a hand with the process, you can always schedule a repair.
Tools Used

Step 6


- Once the pick slips under the edge of the glass, tilt it downward and wiggle it in further to loosen the back cover's adhesive. Keep at it until it's fully separated.
Step 7


- Glide the pick down towards the bottom edge of your phone—you're loosening up that sticky adhesive holding the back cover.
- Let your pick chill under the left edge of the glass, near the bottom. This keeps the glue from sneakily sticking itself back together while you work.
Step 8


Be gentle when sliding around the ridge near the volume and power buttons—the glass cutout can be a bit more fragile and prone to cracking. Take your time, and if you need a hand, you can always schedule a repair.
- Slide another pick under the center of the left edge of the back cover—like you’re playing a game of phone Tetris.
- Gently work the pick up toward the top, loosening that stubborn back cover adhesive as you go.
- Let your pick chill under the left edge near the top. That way, the sticky stuff doesn’t sneak back together while you’re working.
Step 9

You can use a hair dryer, heat gun, or hot plate to help with the process, but remember to keep it cool! Overheating your phone can lead to some serious heat damage to the display and internal battery. So, let’s keep it chill while we work our magic!
- Warm up your iOpener and let it chill on the right edge of the back cover for about two minutes.
Tools Used
Step 10


Just like with the last edge, angle the opening pick downward so it slides smoothly underneath the back cover. You're almost there!
- Stick a suction cup onto the back of the phone, aiming as close to the middle of the right edge as you can. Think of it as a tiny grappling hook!
- Give that suction cup a firm, steady tug to pop open a small gap between the back cover and the frame. No need to yank—just a confident pull!
- Slide the pointy end of an opening pick into that gap to start prying it open. Keep it gentle but persistent—you're just getting the party started!
Step 11


- Gently slide your pick towards the bottom edge of the phone to loosen the back cover's adhesive. Keep the pick in place, and leave it tucked under the right edge of the glass near the bottom of the device—this way, the adhesive won't seal back up. If you need a hand, you can always schedule a repair.
Step 12


While you're working on this, you might notice the bottom edge of the back cover letting go of the three picks hanging out there. If they pop out, just set them aside—the bottom edge won't snap shut again from here on out.
- Slide a plastic pick just beneath the center of the right edge of the back cover. Then, gently work the pick upward and outward, gradually separating the back cover from the device by easing the adhesive apart.
Step 13

- Warm up the top edge of the back cover with a heated iOpener for about two minutes. Give it some time to loosen things up.
Tools Used
Step 14


Hey there! Just a quick heads up: the glass around the corners of the back cover is a bit wobbly and prone to cracking. So, take it easy during this step to keep your back cover safe and sound!
If you find yourself struggling with the slicing at any moment, take a breather and warm things up again before you dive back in.
- Gently slide your opening tool from the right edge of the device, working your way around the top right corner. Keep at it until you've loosened the back cover's adhesive along the top edge — it’s like peeling a sticker, but for tech! If you need help, you can always schedule a repair.
Step 15


- Gently lift the back cover, taking your time. Slice through any leftover adhesive with some opening picks.
- Take off the back cover and set it aside.
- On your way back to reassembly:
- This is a great moment to power up your phone and make sure everything’s working before locking things down.
- Clear out any adhesive debris using tweezers or your fingers. If the adhesive is stubborn, hit it with some heat.
- Using Samsung custom-cut adhesives? Check out Salvation Repair’s guide.
- If you’re going with double-sided tape, Salvation Repair’s guide has you covered.
Tools Used

Step 16


As you unplug connectors like these, watch out for the tiny parts hanging around the socket—they’re easy to bump loose if you’re not paying attention!
- Grab a spudger and gently pry up the wireless charging coil connector to disconnect it. Take your time—patience pays off! If you need a hand, you can always schedule a repair.
Tools Used

Step 17


- Grab your trusty tweezers and carefully lift the wireless charging coil away—think of it as removing a sticker, but way cooler.
- Take out the wireless charging coil and set it aside like the VIP it is.
- When you're putting things back together, reconnect the wireless charging coil connector first. This lines everything up nicely. Then press the coil down so it sticks like it means it.
Tools Used
Step 18

Keep a close eye on every screw—each one has its own spot to return to, like tiny puzzle pieces that want to go home.
- Grab your trusty Phillips #00 screwdriver and take out the five screws (3.9 mm long) that are holding down the motherboard bracket.
Tools Used

Step 19

- Grab a trusty pair of tweezers and gently unclip the motherboard bracket, then lift it away like a pro!
Tools Used
Step 20


- Grab your trusty spudger and gently pop up the battery connector to disconnect it.
Tools Used
Step 21

- Grab a Phillips #00 screwdriver and unscrew those four tiny 3.9 mm screws holding down the upper midframe. Keep them safe—you'll need them later. If you need a hand with this step, you can always schedule a repair.
Tools Used
Step 22
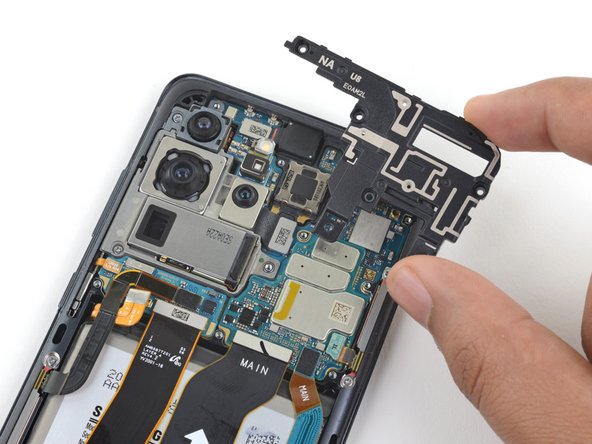

- Gently slide the pointed end of your trusty spudger into the notch on the upper right side of the midframe and give it a little pry – this will pop those pesky clips loose and set you on your way!
- Carefully lift off the upper midframe and set it aside, you're doing awesome!
Tools Used
Step 23

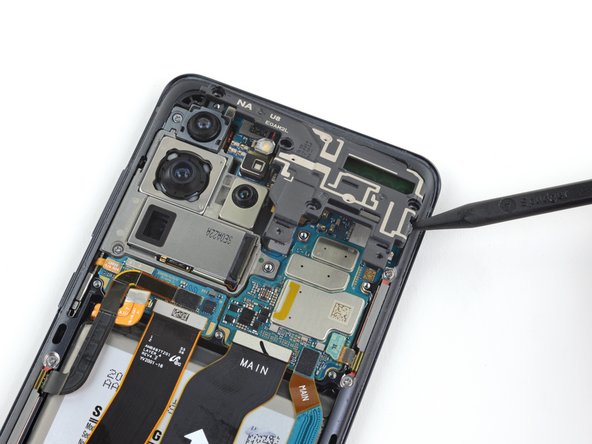
- Gently lift and pop the front-facing camera cable off the motherboard—like you're flipping the perfect pancake, but with way less syrup.
- When you're putting the connector back, line it up with care and press down one side until it clicks, then do the other. Avoid pressing the middle like it's hot lava! Misaligned pins can bend, and that's a party foul you definitely want to skip.
Step 24

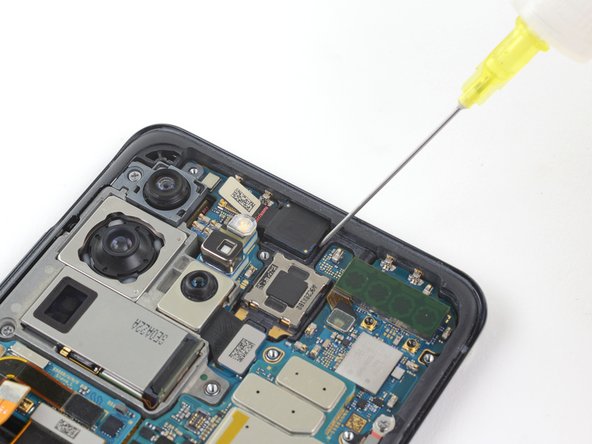
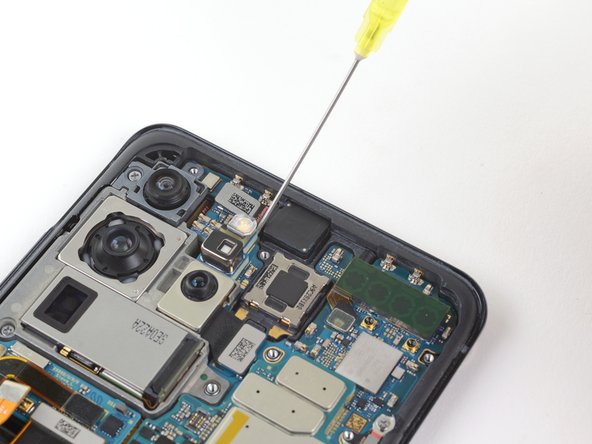
- Splash some high-octane isopropyl alcohol (over 90%, if you're feeling adventurous!) around the edges of the front-facing camera module to give that sticky adhesive a little nudge. It's like a spa day for your device!
- Let that alcohol work its magic for about 1-2 minutes so it can dive in and soften the adhesive. Patience is key—good things come to those who wait!
Tools Used
Step 25


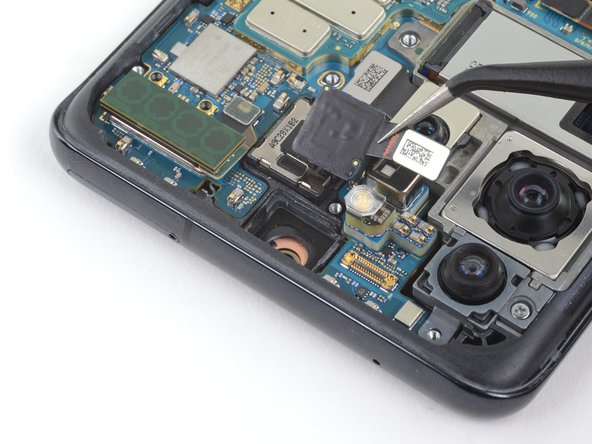
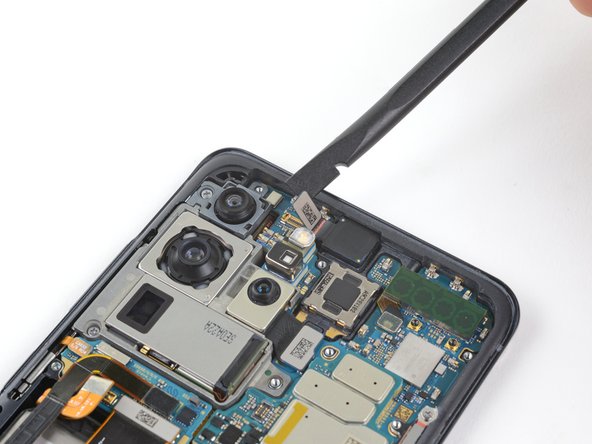
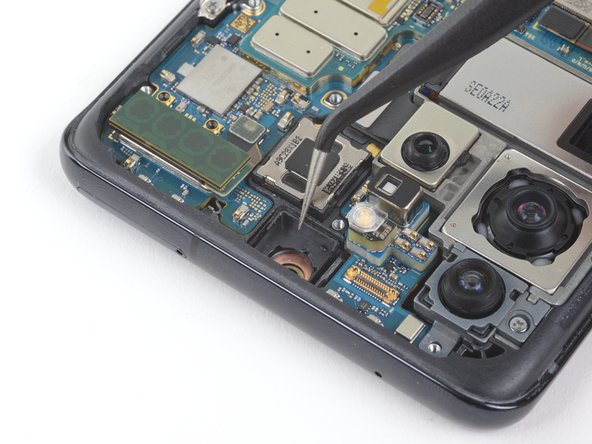
- Gently pop up the bottom edge of the front-facing camera module using the flat end of a spudger—like you’re opening a stubborn bag of chips.
- Lift out the front-facing camera module and set it aside. You’ve got this!
- The original camera adhesive might still do the trick when you put everything back together. If it’s seen better days, swap it out with a pre-cut adhesive sheet.
Careful now! You can gently lift the internal sensor and components from the module without its plastic shell, but watch out – doing so could put the module at risk of damage. If you're in the process of swapping out the module, no worries! The steps below will guide you on how to tackle that plastic casing separately.
The camera module can be a little stubborn because it's glued in pretty tight. If it refuses to move even after applying some alcohol, your best bet is to carefully cut through the adhesive with a craft or utility knife to free it up—just be gentle to avoid any damage. If you want to keep the camera working as is, try reseating the sensor back into its plastic housing before cutting or prying, then reassemble and reseat the sensor after removing the casing. Need professional help? You can always schedule a repair.
Tools Used
Step 26


Give the alcohol a moment, about 1-2 minutes, to work its magic on the adhesive.
- Double-check your new part against the old one—sometimes there's hidden tape, stickers, or bits that need to switch over before installation.
- To put everything back together, just follow these steps in reverse. It’s like rewinding your favorite song.
- Once you're done, run through the test guide to make sure everything’s working as it should.
- Got leftover electronics? Drop them off with an R2 or e-Stewards certified recycler so your old gear gets a second life.
- If things didn’t go quite according to plan, our Answers community is a solid spot to troubleshoot weird glitches.
- If you want a pro to handle it or you just need a break, you can always schedule a repair.