
Samsung Galaxy S20 Ultra Screen Replacement
Duration: 45 minutes
Steps: 38 Steps
Heads up: the display panel is pretty delicate here, so go slow and steady to avoid any cracks or heartbreak.
Ready to give your Samsung Galaxy S20 Ultra a fresh new face? This guide walks you through swapping out the entire screen assembly—including the display glass, OLED panel, and digitizer. Heads up: Some replacement screens come with a snazzy new frame (chassis), so you’ll need to move all your phone’s guts over and pop in a new battery. Double-check you’ve got the right part before diving in. The display panel is a bit of a diva—unreinforced and pretty delicate—so if you’re planning to reuse it, bring the heat and take your time with prying. Don’t forget, you’ll need fresh adhesive to seal the deal. If things get tricky, you can always schedule a repair.
Step 1

Power down and unplug your phone before you get started. No one wants an accidental light show.
A hair dryer, heat gun, or hot plate can get things loosened up, but don’t go wild with the heat—your screen and battery are not fans of spicy temperatures.
- Warm up your iOpener and set it on the bottom edge of the back cover for about two minutes. Let that heat work its magic!
Tools Used

Step 2


Easy does it with the pick—too much muscle and that back cover glass might just call it quits.
If your back cover looks like it took a walk through a glass factory, slap on some clear packing tape to help the suction cup stick. No tape? Super strong tape works too. Still slipping? Go wild and superglue that suction cup to the cover—just be ready for the commitment.
Getting started can be a little tricky thanks to those tight tolerances. You might need to reheat with the iOpener and give the suction cup a few tries before it all clicks.
If you’re struggling to make a gap, hit the edge with some extra heat and try again. Sometimes, persistence is the real MVP.
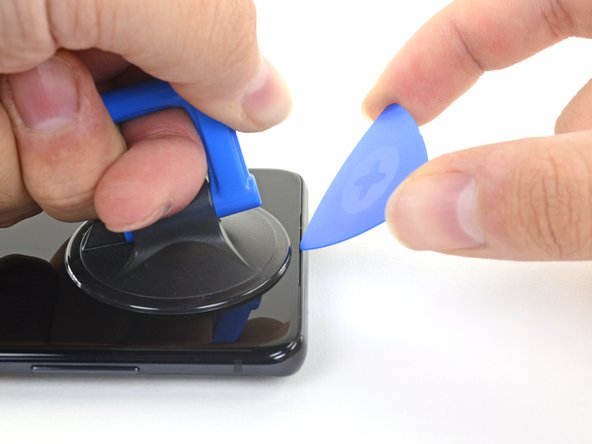
- Start by placing a suction cup on the back of your phone, right near the center of the bottom edge for the best grip.
- Give that suction cup a strong tug – we want to open a little gap between the back cover and the frame, so pull with steady confidence!
- Now, take an opening pick and gently slide it into the gap you just created.
Tools Used
Step 3


Be careful near the edges of the phone—trying to cut the adhesive there might crack the glass, especially where it’s curved. Take it slow and steady to keep everything intact.
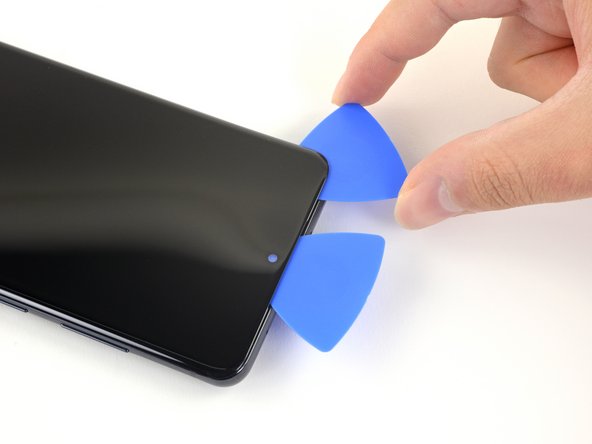
- Gently glide the pick back and forth along the bottom edge to cut through that sticky adhesive like a pro.
- Keep your opening pick snugly in the seam to stop the adhesive from sealing up again.
Step 4

- Take your trusty iOpener and warm it up. Now, place it gently on the left edge of the back cover for about two minutes. Let the heat work its magic, softening things up so you can get to the good stuff. Patience is key, but you've got this!
Tools Used
Step 5


- Grab a suction cup and stick it to the back of your phone, aiming for the center of the left edge.
- Give that suction cup a good, steady pull to create a little gap between the back cover and the frame.
- Slide the tip of an opening pick into that gap you just made.
- For an extra boost, you might want to drop a few drops of high concentration (over 90%) isopropyl alcohol into the seam to help loosen up that stubborn adhesive.
Handle the pick with care—too much pressure and you might just shatter that back cover glass!
Since tolerances are pretty tight, don’t be discouraged if it takes a few tries to get it right. The curved edge means you won’t get your pick very deep in, but as long as the tip is tucked just beneath the glass edge, you’re good to go. Having trouble creating a gap? A little extra heat along the edge can loosen things up—give that a shot and try again.
Tools Used

Step 6


- Slide the pick under the edge of the glass, angle it down, and work it in a little more to loosen up all that sticky back cover glue.
Step 7


- Gently slide that trusty pick toward the bottom edge of the phone to help separate the back cover from its sticky situation.
- Keep your pick snugly tucked under the left edge of the glass near the bottom of the device to stop the adhesive from getting all clingy again.
Step 8


Watch out when gliding your tool near the frame by the volume and power buttons—thanks to the cutout in the glass, it’s got a higher chance of cracking. Take it slow and keep those breakages at bay!
- Slide a pick under the center of the left edge of the back cover like you’re sneaking into a secret club.
- Work the pick up toward the top, gently working the adhesive loose as you go.
- Keep the pick chilling under the left edge near the top—this stops the sticky stuff from grabbing hold again.
Step 9

You can use a hair dryer, heat gun, or hot plate for this step—just don’t get too wild with the heat! Too much warmth can mess with the display or the battery, and nobody wants a toasted phone.
- Warm up the right edge of the back cover by applying a heated iOpener for about two minutes. Keep it cozy and gentle—think of it as giving your device a little spa treatment. If you need a hand, you can always schedule a repair.
Tools Used
Step 10


Just like with the previous edge, you'll want to tilt that opening pick downward so it slides easily underneath the back cover. Keep at it gently—patience is key here—and you'll have that cover lifted in no time. If you need a hand, remember you can always schedule a repair.
- Stick a suction cup onto the back of the phone, aiming as close to the center of the right edge as you can. Keep it steady and confident.
- Pull on the suction cup with a firm, steady tug to create a little gap between the back cover and the frame. No need to go all Hulk—just enough to get some room.
- Slide a plastic opening pick into that gap. You're on your way to freeing up the back cover—keep it smooth and steady.
Step 11


- Scoot your pick down to the bottom edge of the phone—let’s show that adhesive who’s boss.
- Park the pick near the lower right edge of the glass to keep that sticky stuff from making a comeback.
Step 12


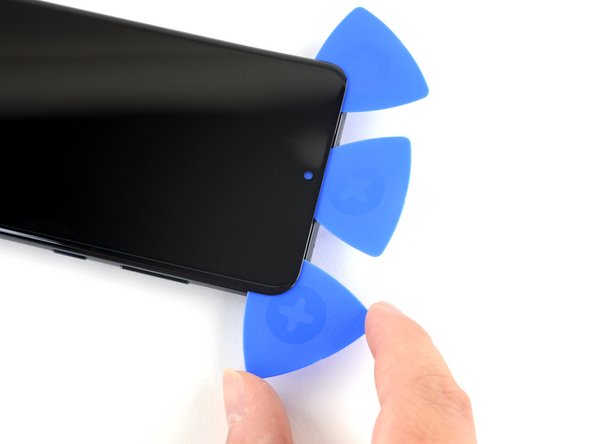
- Slide another pick under the middle of the back cover’s right edge—think of it as giving your device a gentle nudge.
- Work the pick up toward the top, gliding along to loosen that sticky adhesive. Keep it smooth and steady!
As you gently lift the back cover, you might notice the three picks near the bottom edge popping loose. If that happens, just set those picks aside — the bottom edge shouldn't stick back together from this point on. Keep going, and remember, if you need a hand, you can always schedule a repair.
Step 13

- Warm up the top edge of your back cover for about two minutes using a heated iOpener. Let it work its magic—your phone's about to loosen up!
Tools Used
Step 14


The glass near the corners of the back cover is a bit delicate and can crack easily. Handle this step with care to keep your back cover in one piece. If you need help, you can always schedule a repair.
If slicing starts feeling like a workout, hit pause and give it another round of heat before you get back to it.
- Gently slide your pick from the right edge of the device, maneuvering around the top right corner.
- Keep slicing along the top edge to carefully detach the back cover’s adhesive, making sure not to rush.
Step 15


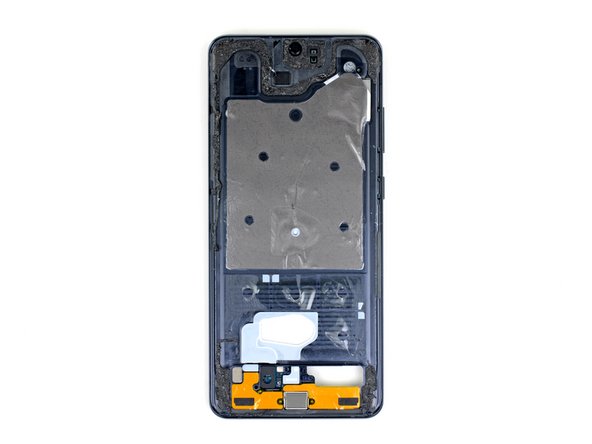
- Gently lift off the back cover, using opening picks to carefully cut through any leftover adhesive. Next, remove the back cover completely. During reassembly, this is a good moment to power on your device and give all functions a quick test before sealing everything up. Use tweezers or your fingers to pick away any stubborn adhesive bits—apply a little heat if they're really sticking. If you're working with Samsung's custom-cut adhesives, follow this guide. For double-sided tape, refer to this guide. If you're feeling stuck or need a hand, you can always schedule a repair.
Tools Used

Step 16


Watch out for those tiny parts near the connector! They’re easy to knock loose, so take it slow and steady.
- Grab your trusty spudger and gently lift up the connector for the wireless charging coil—think of it as giving your phone a little nudge to wake it up.
Tools Used

Step 17


- Grab a pair of tweezers and gently lift the wireless charging coil away from the device—think of it as peeling away a sticker, but more delicate.
- Carefully remove the wireless charging coil from its spot, making sure not to bend or damage it.
- When putting everything back together, connect the wireless charging coil connector first—this helps align everything just right. Then, press down firmly on the coil to stick it in place and secure the connection. If you need a hand, you can always schedule a repair.
Tools Used
Step 18

Keep an eye on each screw and make sure it finds its way back to its original spot—no mix-ups allowed!
- Grab your Phillips #00 screwdriver and take out the five screws (they’re each 3.9 mm long) holding down the motherboard bracket.
Tools Used

Step 19

- Grab your tweezers and gently pop off the motherboard bracket—like you’re removing a stubborn popcorn kernel. Easy does it!
Tools Used
Step 20


- Grab your trusty spudger and gently lift the battery connector up and away—like you're unplugging a tiny robot's nap cord.
Tools Used
Step 21

- Grab your trusty Phillips #00 screwdriver and get ready to work your magic! Carefully remove the five screws, each measuring 3.9 mm, that are holding the loudspeaker and lower midframe in place. You're doing great, keep it up!
Tools Used
Step 22


Step 23


- Grab your trusty spudger and gently wiggle it to lift up and disconnect that display cable. You've got this!
Tools Used
Step 24

In the next few steps, you'll gently heat and carefully peel away the black adhesive around the edges of the device. Think of it as softening up the glue so it’s easier to lift without any drama.
- The adhesive along the long sides of the device is pretty thin, so a gentle 5 mm pick insertion is enough to start separating it. Keep in mind, though, that along the top edge, the adhesive extends quite a bit further from the device's edge. You'll want to insert your pick a little deeper here to get it fully separated. Take your time, and if you need a hand, you can always schedule a repair.
Step 25

You can use a hair dryer, heat gun, or hot plate to loosen things up, but don’t get carried away—too much heat can mess with your screen and battery.
- Warm up your iOpener and set it on the top edge of the screen for about two minutes to loosen things up.
Tools Used
Step 26


Make sure your pick glides smoothly over the front camera—don’t jab it or the camera might not be happy!
Got a seriously shattered screen? Slap on some clear packing tape to help the suction cup stick, or go rogue and use strong tape instead. If the suction cup keeps sliding off, a little dab of superglue can help it hang on to the glass.
The glue holding things together is no joke, so don’t be surprised if you have to reheat and retry with the iOpener and suction cup a few times before you get that perfect lift.
Still struggling to make a gap? Hit that edge with a bit more heat and give it another shot.
- Grab a suction cup and slap it onto the display glass, aiming for the center near the top edge – you got this!
- With a firm and steady pull on that suction cup, create a little gap between the display glass and the frame – feel the excitement!
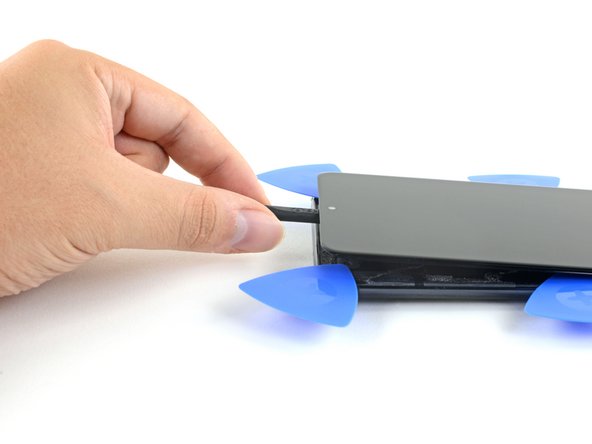
- Now, take the sharp end of an opening pick and carefully slip it into the gap, starting at the earpiece speaker notch and gently slide it down beneath the display.
- Keep that pick in place to make sure the adhesive doesn’t decide to play hide and seek again!
Tools Used
Step 27

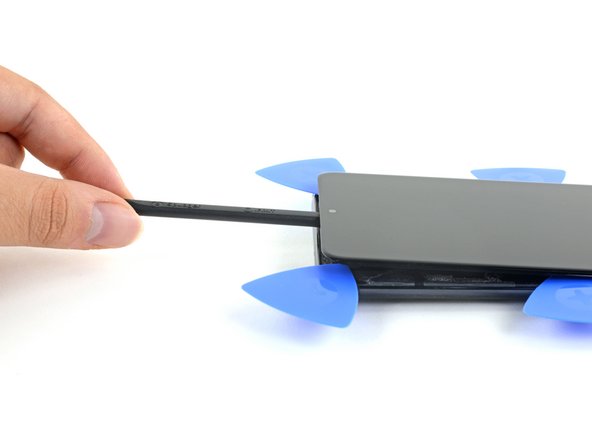
- Pop in a second pick into that same gap and glide it up to the top left corner of the display to cut through the adhesive like a pro.
- Keep your opening pick snug in the seam to stop that adhesive from sealing back up. You're doing great!
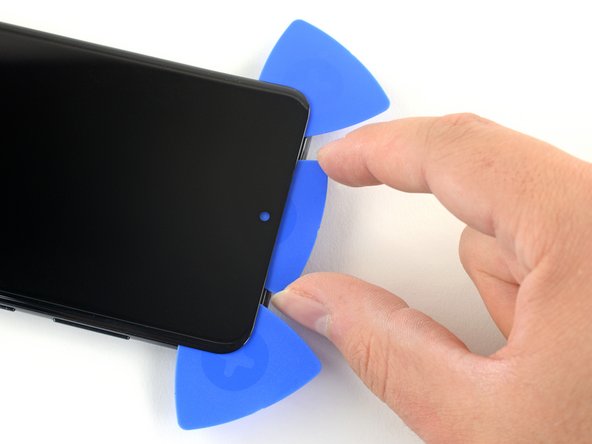
Step 28

- Grab your third pick and wiggle it into the center gap. Slide it over to the top right corner, slicing through that stubborn adhesive like a pro.
- Leave your pick chilling in the seam—this keeps the adhesive from sticking itself back together.
Step 29

If the adhesive gets a little stubborn, don't worry! Just apply some more heat and try again - it'll loosen up in no time.
Be careful not to insert the pick too far, or it might slip under the screen assembly and you'll have to fish it out.
- Glide the center pick along the top edge to loosen up the sticky stuff around the earpiece and front camera. Let the pick do the work!
- Once you’ve sliced through, lift out the center pick with a little victory dance.
Step 30

- Warm up a trusty iOpener and give the right edge of the display a cozy two-minute hug.
Tools Used
Step 31
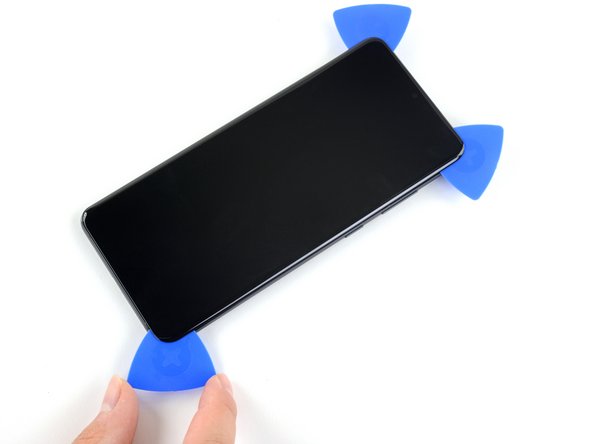


- Grab an opening pick and slip it into the top right corner of the screen—look for that little gap.
- Glide the pick smoothly down to the bottom right corner, slicing through the sticky adhesive like a pro.
- Now, tuck a pick under the middle of the screen’s right side to keep that adhesive from sticking itself back together.
Step 32

No need to go too deep here – just slide your pick in about 5mm into the gap. Keep it light and easy, no force needed!
- As you glide your tool around the edge of the device to carefully slice through the adhesive, keep an extra eye on the delicate spots near the USB-C port—let's avoid any surprises!
Step 33

- Warm up the left edge of the display with a heated iOpener for about two minutes—think of it as giving your device a gentle spa treatment before you start.
Tools Used
Step 34

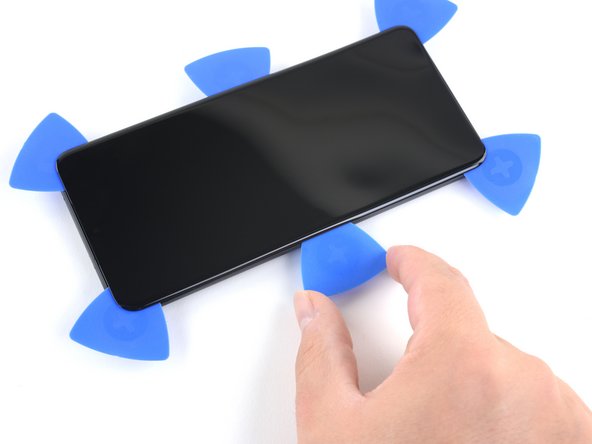
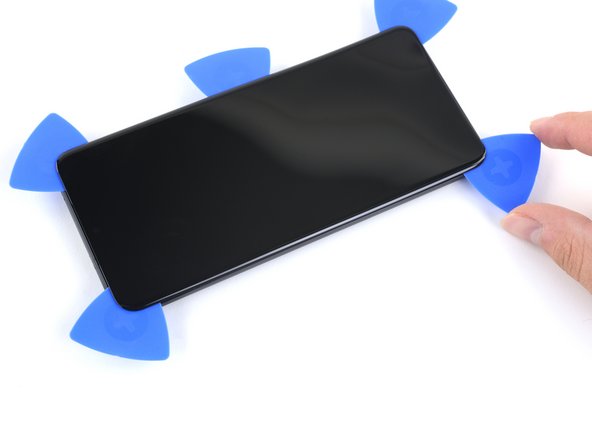
- Gently insert a pick into the gap at the top-left corner of the display.
- Carefully slide the pick down along the edge to the bottom-left corner to loosen the adhesive.
- Slide a pick underneath the center of the screen's left edge to keep the adhesive from sealing back up.
Step 35


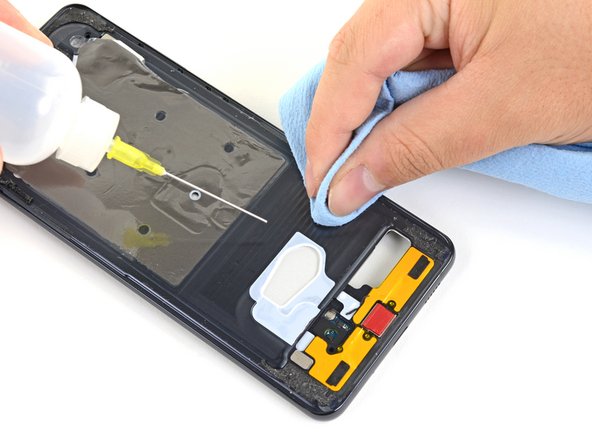
Next up, gently apply some isopropyl alcohol behind the screen to loosen up that stubborn clear adhesive near the bottom center of the device. It’s a smooth move that helps the parts come apart more easily. If you need help along the way, you can always schedule a repair.
- Start by squirting a generous amount of over 90% isopropyl alcohol behind the display, aiming as close to the clear adhesive (marked in red) as you can. Tilt the device slightly as you do this—it's like giving the adhesive a little nudge to let the alcohol sneak in underneath. Once you've applied the alcohol, keep tilting the bottom of the phone downward for a couple of minutes—think of it as giving the alcohol time to do its magic and loosen things up. If you need help, you can always schedule a repair.
Tools Used
Step 36

Slide the spudger in until you've successfully separated that stubborn clear adhesive completely.
- Gently slide your spudger under the top edge of the screen and work it along to loosen up that sticky clear adhesive. Take it slow—no need to rush!
Tools Used
Step 37


There might be a tiny bit of sticky stuff hanging onto the bottom edge, but it’s nothing that’ll put up a real fight.
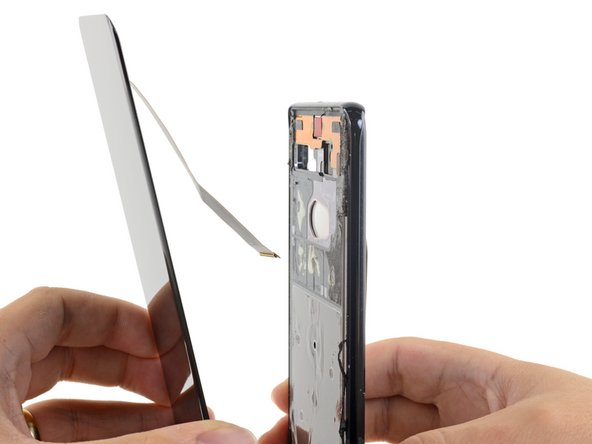
Make sure you guide the display cable gently through the frame—no wrestling required.
- Carefully detach the display from the frame, keeping it gentle so nothing cracks. When it’s time to put the new display back in, thread the display cable through the frame’s cutout before pressing the screen into the adhesive. Remember, don’t insert the cable before the adhesive is ready—wait until you’re all set for a smooth fit. If you need a hand, you can always schedule a repair.
Step 38
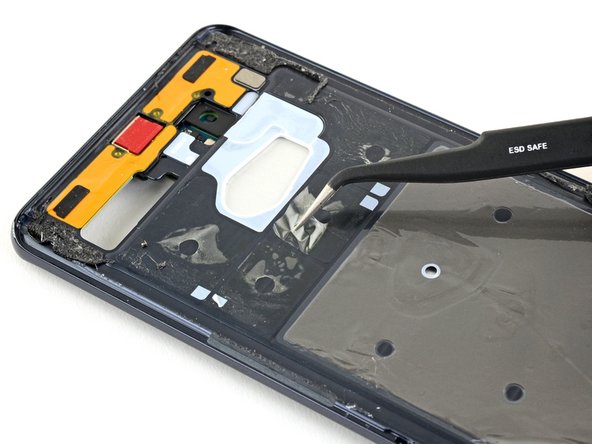

- Grab some tweezers to gently lift away any leftover adhesive from the frame—no need to scrape or force it. Next, grab some isopropyl alcohol and a lint-free cloth to give the frame's surface a good clean, wiping in one steady direction to keep things neat and smear-free. When it's time to reassemble, follow this guide to install custom-cut adhesives designed for your device. If you need a hand along the way, you can always schedule a repair.


