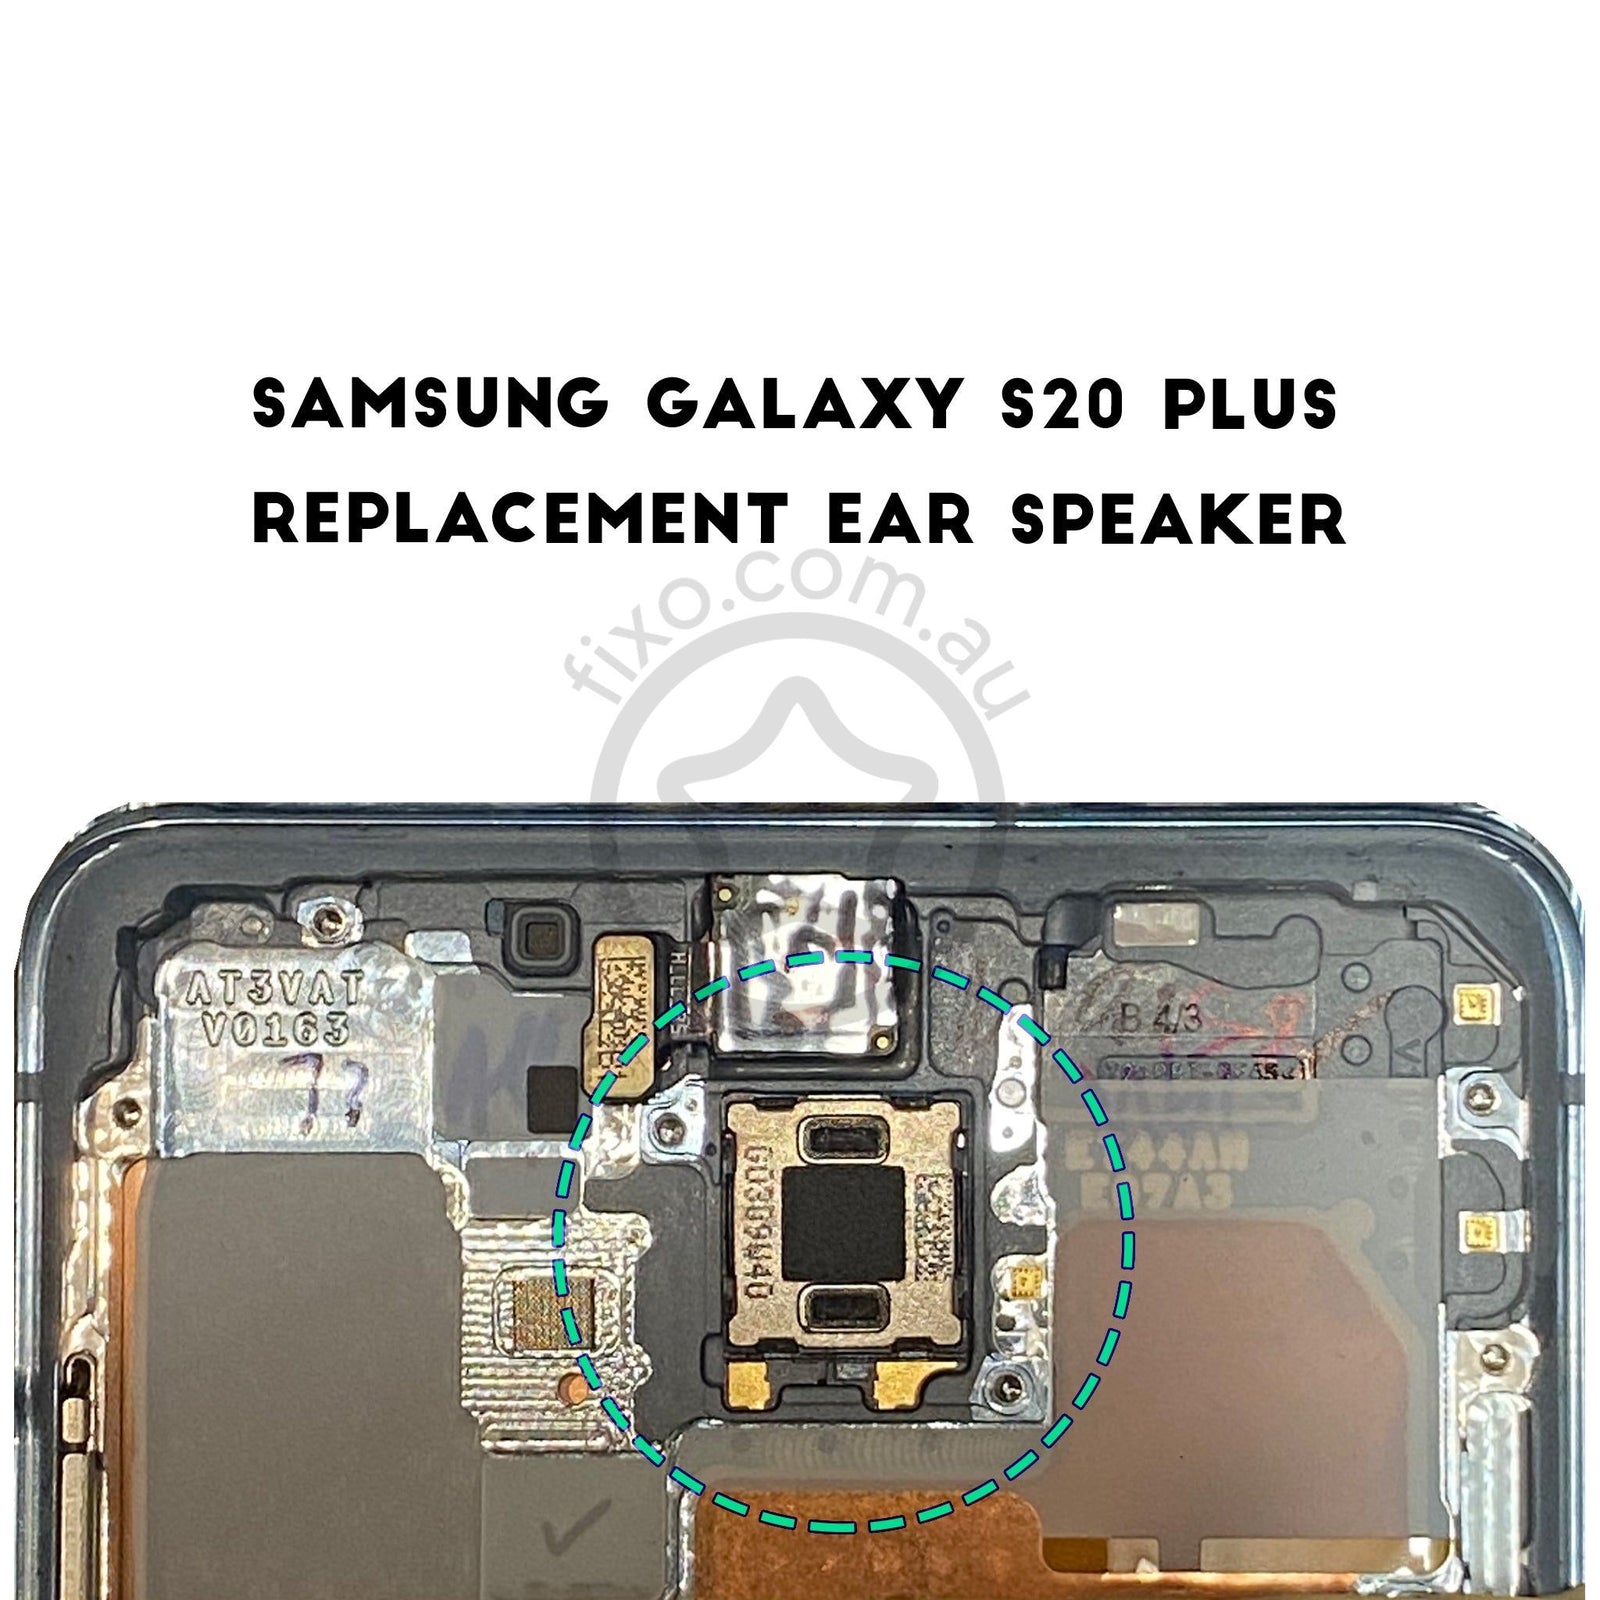
Samsung Galaxy S20 Plus Loudspeaker Replacement
Duration: 45 minutes
Steps: 21 Steps
Ready to give your Galaxy S20 Plus a fresh-sounding boost? This guide will walk you through removing the loudspeaker, which is attached to the lower midframe—so they’ll both be swapped out together. Grab some fresh adhesive to seal the deal when you’re done.
Step 1

Make sure to unplug and power off your phone before diving in. It's the first step to a safe and happy repair journey!
You can use a hair dryer, heat gun, or hot plate to warm things up—but go easy on the heat! Too much and your phone’s display (and battery) might not be thrilled about it.
- Warm up your iOpener and give it a cozy two-minute rest on the bottom edge of the back cover. This will help soften things up for the next step!
Tools Used

Step 2


Easy does it with the pick! Applying too much force could crack the back cover glass. Take it slow and steady.
Got a gnarly crack? Slap some clear packing tape over it to help your suction cup stick. If that’s still not working, try some extra-grippy tape instead. Worst case scenario—just glue that suction cup right onto the glass and don’t look back.
These screens are stubborn! You might need a few rounds of reheating with the iOpener and going at it with the suction cup before that gap appears. Stay patient and keep at it.
If the gap refuses to show up, hit the edge with more heat and give it another shot.
- Stick a suction cup onto the back of your phone, aiming for the center of the bottom edge.
- Give the suction cup a firm, steady pull to open up a gap between the back cover and the phone frame.
- Slide the tip of an opening pick into that gap to get things started.
Tools Used
Step 3


Careful around those curvy corners—trying to slice the adhesive there can crack the glass. No one wants extra shatter, right?
- Glide the pick back and forth along the bottom edge to slice through that sticky stuff.
- Keep your pick chilling in the seam so the adhesive doesn’t sneak back together.
Step 4

- Warm up the left edge of the back cover by applying a heated iOpener for about two minutes. This helps loosen the adhesive and makes the cover easier to lift. If you need a hand, you can always schedule a repair.
Tools Used
Step 5


Go easy with the pick—too much muscle and the back cover glass might crack.
This might take a few tries because everything is super snug.
Since the glass on this edge is curved, you won't be able to slide the pick in too deep. Just make sure the very tip of the pick is under the edge of the glass, and you'll be good to go!
If you're struggling to create a gap, feel free to apply a bit more heat to the edge and give it another shot.
- Stick a suction cup on the back of the phone, aiming for the center of the left edge—precision points if you’re feeling fancy.
- Give the suction cup a firm, steady pull to coax a gap between the back cover and the frame. No need for superhero strength, just some solid determination.
- Slip the tip of an opening pick into the gap you just made. You're basically a phone ninja at this point.
- For stubborn adhesive, a few drops of high concentration (over 90%) isopropyl alcohol along the seam can help loosen things up. Science saves the day!
Step 6


- Slide the pick under the edge of the glass, then angle it down and push it in a bit more to break up the adhesive holding the back cover. Keep it smooth and steady—you're almost there!
Step 7


Go easy when sliding over the ridge near the volume and power buttons—the glass has a cutout here, which makes it more likely to crack if you get too wild.
- Glide the pick along the left edge to loosen up that sticky adhesive holding the back cover.
- Leave the pick chilling under the left edge so things don’t stick themselves back together.
Step 8

A hair dryer, heat gun, or hot plate can do the trick, but be cautious—avoid overheating your device. The display and internal battery are sensitive to heat, so keep the temperature in check to prevent any damage.
- Place a heated iOpener on the right edge of the back cover and let it sit for about two minutes. This will help loosen things up so you can get inside more easily.
Tools Used
Step 9


Just like with the previous edge, give that opening pick a little tilt downwards to slide it right under the back cover. You've got this!
- Stick a suction cup on the back of your phone, aiming for the center along the right edge. Time to give it a good grip!
- Pull on the suction cup with steady strength—like you mean it—until you see a little gap pop up between the back cover and the frame.
- Slide the pointy end of an opening pick into that gap. You’ve got this!
Step 10


While you're at it, the back cover might just decide to let go of one or both of those picks and let them tumble free. If that happens, no worries! Just set the pick(s) aside because from here on out, the bottom edge is not going to reseal.
- Gently slide your pick along the right edge of the phone to loosen the adhesive holding the back cover.
- Keep your pick tucked under the top part of the glass near the right edge to stop the adhesive from sticking back together.
Step 11

- Warm up the top edge of the back cover with a heated iOpener for about two minutes. This gentle heat will loosen things up, making it easier to get inside. If you need a hand, you can always schedule a repair.
Tools Used
Step 12


The glass around the corners of the back cover is a bit curved and can be more prone to cracking. Handle with care during this step to keep your back cover intact.
If you hit a tough spot while slicing, don't stress! Just pause for a moment, give it some extra heat, and keep going. You’ve got this!
- Gently work your way from the right edge of the device, slipping the pick around the top right corner. Keep the momentum going along the top edge, slicing all the way to the left to loosen the back cover's adhesive. If you need help, you can always schedule a repair.
Step 13


- Gently lift the back cover, taking your time. Use opening picks to carefully slice through any stubborn adhesive. Once you've got it loose, remove the back cover entirely. During reassembly, it's a smart move to power on your device and test all functions before sealing everything up tight. Make sure to shut it down completely before you put the back on again. For leftover adhesive bits, grab a pair of tweezers or your fingers—apply a bit of heat if they’re being stubborn. If you’re using custom-cut adhesives, follow this guide. For double-sided tape, refer to this step-by-step.
Tools Used

Step 14

Screws are like puzzle pieces—each has its place. Keep an eye on them, and make sure they go back exactly where you found them.
- Grab your Phillips #00 screwdriver and unscrew the six 4 mm screws holding down the motherboard bracket. Keep those screws safe—you're going to need them to put things back together later.
Tools Used

Step 15


Hold your horses! Don't take that bracket off just yet—it's still cozy with the wireless charging coil.
- Grab your tweezers and smoothly lift the motherboard bracket out of its cozy spot on the plastic midframe—just pop it up and unclip it like you own the place.
Tools Used
Step 16


- Carefully lift the motherboard bracket to reveal the orange battery connector, making it easy to access.
Step 17


When disconnecting connectors like these, keep an eye out for the tiny surface-mounted components hanging around the socket — they’re delicate and don’t want to be knocked loose. Take it slow, and if you need a hand, you can always schedule a repair.
- Grab your trusty spudger and gently pop up the battery connector to disconnect it. Easy does it—no need to wrestle!
Tools Used

Step 18


- Grab your trusty spudger and gently pop up the wireless charging coil connector to set it free.
Tools Used
Step 19


- Grab your trusty tweezers and carefully lift the wireless charging coil away from the device. Easy does it!
- Next up, gently take out the wireless charging coil. You're doing great!
- As you put everything back together, start by reconnecting the charging coil and battery connectors. Then, secure those motherboard bracket screws to keep everything snug in its place. Finally, give that coil pad a firm press to ensure it sticks nicely. You're almost there!
Tools Used
Step 20

- Grab a Phillips #00 screwdriver and gently unscrew the five 4 mm screws holding in the loudspeaker and lower midframe. Keep them safe—these little guys are easy to lose! If you need help along the way, you can always schedule a repair.
Tools Used
Step 21


- Take a moment to compare your new replacement part to the original one. If necessary, transfer any remaining parts or peel off any adhesive backings before you start the installation.
- Now, just work your way back through the steps to reassemble your device—easy peasy!
- Once you’ve wrapped up the repair, follow this guide to test if everything’s working like it should.
- Don't forget to recycle your e-waste properly! Find a certified recycler, like an R2 or e-Stewards certified one, to dispose of it responsibly.
- Things didn’t go quite as planned? No worries—check out our Answers community for some troubleshooting help, or if you feel like you need a hand, you can always schedule a repair.