Samsung Galaxy S8 Active NFC Antenna and Charging Coil Assembly Replacement
Duration: 45 minutes
Steps: 8 Steps
Ready to swap out the NFC Antenna and Charging Coil Assembly on your Samsung Galaxy S8 Active? You’ll start by popping off the back cover, so grab some fresh adhesive to seal it back up when you’re done. Make sure your battery is under 25% charged before you dive in, since a lower charge means less drama if the battery gets damaged. Take your time, follow each step, and you’ll have your phone back together in no time!
Step 1


- Grab your trusty SIM card ejector tool (or just an unfolded paperclip if you're feeling crafty) and gently slide it into that tiny hole on the left side at the top of your phone.
- Give it a gentle press, and voilà—the SIM tray will pop out like magic!
- Carefully pull the SIM card tray out from your device.
- When you're ready to pop the SIM card tray back in, make sure the gold contacts are facing up and the little notch is down to the right. Just press the card gently into the slot, and you're all set!
Step 2


- Grab your TR6 Torx Security Screwdriver and unscrew the four black 3mm screws hanging out on the outer edges—these are the ones keeping the rubber bumpers locked down.
- Lift off those rubber bumpers from the top and bottom edges, giving your device a little breather.
Taking off the back cover of the S8 Active will break its waterproof seals. Before you start, make sure to have some replacement adhesive ready — this way, you'll be good to go after reassembly. If you’d rather avoid water mishaps, just remember to replace the adhesive or keep your device away from liquids. Need a hand? You can always schedule a repair with us.
Tools Used

Step 3

Heads up: using a heat gun, hair dryer, or hot plate means the metal frame is about to get seriously warm—so don’t get your fingers toasted.
Keep the temp chill! Overheating can mess up the OLED display, battery, and other delicate bits inside. Usually, one minute of heat is enough to loosen things up.
You can use an iOpener, a hair dryer, or a hot plate to gently warm up the edges.
- Gently warm up the edges of the back with a heat gun to soften that stubborn adhesive holding the back cover in place. Keep it light and even—you want just enough heat to loosen things up without turning it into a mini sauna.
Tools Used

Step 4


Because of the textured back cover, a suction cup alone won't get a grip to lift it. No worries—just use a plastic opening tool or a guitar pick to gently pry around the edges. Take your time and work your way around to avoid any cracks. If you need a hand, you can always schedule a repair.
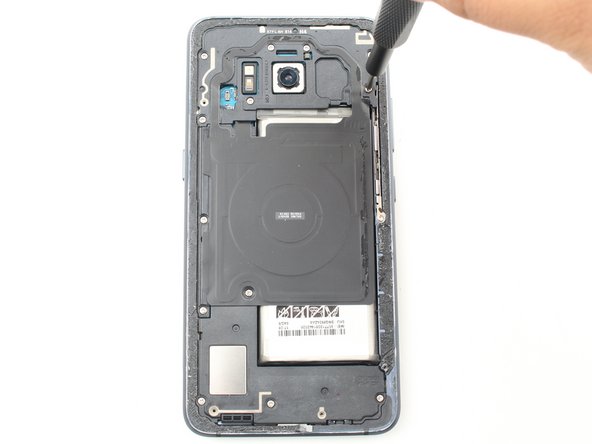
- Slide the Jimmy tool under the edge of the back cover like you're sneaking into a secret club.
- Once you've got the Jimmy tool in position, pop an opening pick into the seam to keep things open—just in case your Jimmy tool wants to bail early.
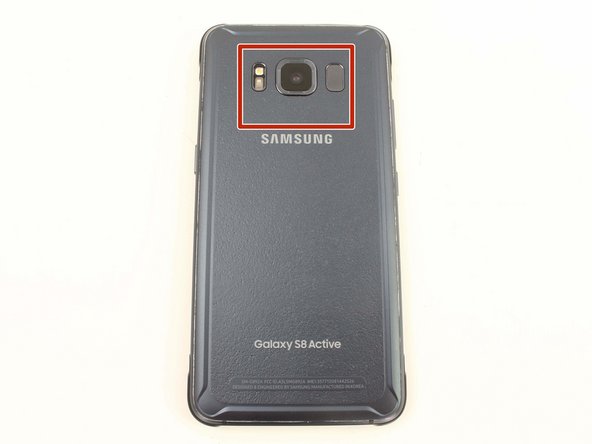
- Take your time working around the top edge and watch out for the fingerprint sensor and camera cables. No need for heroics here; don't pry too deep up top.
- Glide the Jimmy tool down both sides, cutting through the adhesive like you're opening a stubborn bag of chips.
Tools Used

Step 5

Heads up: the fingerprint sensor cable hangs out near the top of your phone, close to the front-facing camera. When you're removing the back cover, take it easy and pull gently so you don't accidentally give that cable a bad day.
If you’ve got fresh adhesive strips on hand, use the Jimmy tool to gently scrape off any leftover sticky residue from the device frame. Keep it smooth and clean so your new adhesive sticks perfectly. If you need a hand with anything, you can always schedule a repair.
- Grab the opening pick and gently slice through any stubborn adhesive holding things together.
- Carefully open the back cover just enough to peek at the fingerprint sensor flex cable connector.
Tools Used
Step 6


- Gently flip the cover over and lay it down on the rest of the device, like you're tucking it in for a nap.
- Pop off the fingerprint flex cable using the flat end of your spudger—think of it as a little high five for your tech.
- Lift off the back cover and set it aside. You’re officially inside the device club.
- To reconnect the fingerprint sensor cable when putting things back together, tilt the back cover until the flex cable is chilling right over its socket. Then, use the flat end of your spudger to press the cable straight down—no wrestling moves needed, just a gentle snap.
Tools Used

Step 7


- Start by removing eleven 3.5 mm screws with a Phillips #00 screwdriver—these hold things together snugly. Then, find the two 2mm screws and take those out next, also with your Phillips #00. Keep going steady—you're making progress! If you hit a snag, remember you can always schedule a repair with Salvation Repair for a hand.
Tools Used

Step 8


- Once you’re done, just walk back through the steps in reverse and your device will be back in action. Need a hand? You can always schedule a repair.