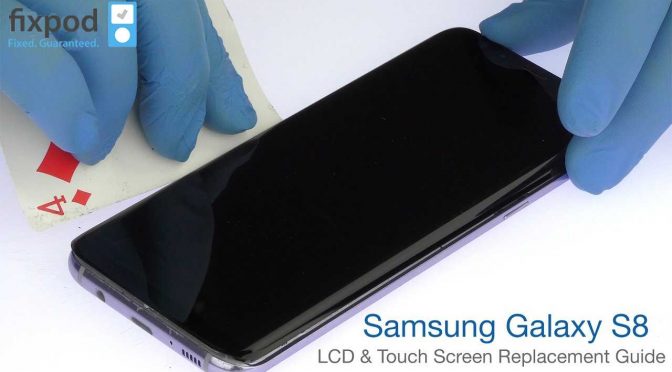
Samsung Galaxy S8 Motherboard Replacement
Duration: 45 minutes
Steps: 25 Steps
Hey there! Before you dive into the guts of your phone, make sure to drain that battery to below 25%. It's a little safety tip—if the battery gets punctured, it could go off like a firecracker, but discharging it first makes that way less likely. Stay safe and get ready to fix!
Ready to swap out your motherboard? This guide takes you through the process, including popping off that rear glass cover—just remember you’ll need fresh adhesive to seal things back up. The motherboard and daughterboard aren’t the same for every version, so check if you’ve got the North American Snapdragon (G950U) or the international Exynos (G950F) model. We’re working with the North American one here, and the boards don’t mix and match between these types. Before you dive in, make sure to drain your battery below 25%—a lower charge means less drama if it gets poked. Let’s get your device back in action!
Step 1


If you’ve got a carousel microwave, double-check that the plate can spin easily. If the iOpener gets stuck, it might get way too hot and end up crispy. Nobody wants that!
Give your microwave a quick clean before you get started—leftover mystery goo on the bottom could stick to your iOpener and nobody wants that.
- Pop your iOpener right in the middle of the microwave, like it's the VIP at a dance party.
Tools Used

Step 2

- Give the iOpener a quick 30-second heat-up. It's like giving it a mini spa treatment.
- While you're working, keep an eye on it. When it cools down, just pop it back in the microwave for another 30 seconds. Easy does it!
Keep your cool with the iOpener—don’t let it get too hot, or it might pop! Stay below 100˚C (212˚F) and you’re golden.
If the iOpener looks puffed up, hands off! It’s not a stress ball.
If the middle is still sizzling, let it chill out before you heat it again. A nicely warmed iOpener should stay toasty for about 10 minutes.
Microwave wattage varies, so your heating time might need a tweak—more power, less time; less power, a little longer. The iOpener is ready when it's just warm enough that you can't comfortably touch it. Keep an eye on the temperature to avoid surprises, and if you need a hand, schedule a repair.
Tools Used
Step 3

Caution: The iOpener gets super hot, so watch your fingers! If it feels too toasty, grab an oven mitt to help you out.
- Take the iOpener out of the microwave, but be smart—grab it by one of the flat ends, not the hot center. Trust us, your fingers will thank you later.
Tools Used
Step 4


Heads up! The iOpener gets pretty toasty, so stick to grabbing those end tabs and keep your fingers happy.
No microwave? No worries! Just pop your iOpener in boiling water to get it nice and warm. Easy peasy. If you need a hand, you can always schedule a repair.
- Fill a pot or pan with enough water to fully submerge your iOpener. Bring the water to a rolling boil, then turn off the heat. Carefully place the iOpener into the hot water and let it sit for 2-3 minutes—make sure it's completely underwater. Use tongs to gently remove the heated iOpener from the water and give it a thorough dry with a towel. Once dry, your iOpener is ready to go. If it needs a reheat later, just repeat the process: boil some water, turn off the heat, and dip the iOpener back in for a couple of minutes. Need a hand? You can always schedule a repair.
Tools Used
Step 5

- Get your iOpener nice and toasty, then lay it along one long edge of your S8 for 2 minutes. This helps loosen things up for the next step.
You can use a hair dryer, heat gun, or hot plate, but keep it chill! Overheating can be a real party pooper for your phone—the OLED display and internal battery don’t like the heat. So, let’s keep it cool while we work our magic!
Opening your phone will break the waterproof seals, so have some replacement adhesive ready beforehand, or be extra careful to avoid liquid exposure if you're reassembling without it. While waiting for the adhesive to soften up, go ahead and read the next step to get a sense of where to pry. You might need to reheat and reapply the iOpener a few times to keep things warm enough—just follow the instructions to avoid overheating. If you need a hand, you can always schedule a repair.
Tools Used
Step 6


- Next up: we're slicing through the sticky stuff around the edge of the rear glass panel.
- Check out the first image to see exactly where that glue likes to hang out.
- Here’s the prying roadmap from the outside view:
- Thick glue zones—take it slow here.
- Thin glue spots—these are your easy lanes.
- Hands off this area! That’s fingerprint sensor territory.
Step 7


Curved glass and suction cups aren’t best friends—the seal just won’t happen on those edges.
Got a cracked back cover? The suction cup’s not going to stick around. Try lifting with strong tape, or if you’re feeling crafty, glue the suction cup on and give it time to set.
Since the glass is curved, you’ll be pushing upwards rather than sliding anything alongside the phone.
- When the back panel feels nice and toasty, stick a suction cup close to the warmed edge (just steer clear of the curvy part).
- Give the suction cup a gentle lift, then slide an opening pick under the rear glass like you're sneaking into a secret club.
Step 8

- Once the tool is snug against the glass, give the iOpener a little heat and pop it back on to help loosen that stubborn adhesive. Keep at it until things start to soften up. If you need a hand, you can always schedule a repair.
Tools Used
Step 9


Take it slow so your tool doesn't make a surprise exit from the seam. If things get tough, warm up the iOpener again and give it another go.
- Glide the opening pick along the edge of your phone—think of it as slicing through invisible glue, making way for your next move.
Tools Used
Step 10


- Repeat the heating and peeling process on the other three sides of the phone. Leave a small gap or opening pick on each side as you move along—this keeps the adhesive from sealing itself back up prematurely.
Step 11


- Grab your opening picks and slice through any leftover sticky stuff to ease the phone open a bit more.
- When you’re putting things back together, reconnecting that fingerprint sensor cable is all about finesse. Tilt the back cover so the cable connector lines up just right over its socket. Then, take the flat end of your spudger and give it a gentle press straight down to snap it in.
- Lift the glass off the phone—nice and easy.
As you lift the glass, take a quick peek to make sure the orange cable with the blue connector is free and disconnected. If the fingerprint sensor cable looks snagged or stays tight, don’t push your luck—stop here. Use a spudger to gently disconnect the connector before moving on. Need a hand? You can always schedule a repair for expert help.
The fingerprint sensor cable runs from the phone to the rear glass near the main camera. Since the cable is quite short, it’ll disconnect easily once you start removing the rear glass.
Tools Used

Step 12

Feeling adventurous? You can pop the back cover right on without swapping out the adhesive. Just clear away any chunky bits that might keep things from sitting flush. Once it's in place, give it a gentle heat blast and press down—goodbye, wobbles! The seal won't survive a swim, but the glue is usually strong enough to keep everything together.
Before you commit to new adhesive and sealing things up, power on your phone and give your repair a test run. No surprises, just smooth sailing!
- To replace the back cover: follow this guide to put the old cover back in place or to install a new one without pre-applied adhesive. You might also need to transfer the camera bezel to your new part—if so, check out our camera bezel replacement guide. Use tweezers to carefully remove any leftover adhesive from the phone's frame. Then, clean the contact areas with high-concentration isopropyl alcohol (90% or higher) and a lint-free cloth to prep for fresh adhesive. Peel off the backing from the new rear glass, carefully align one edge with the phone chassis, and press the glass firmly onto the device.
Step 13

- Time to show those screws who's boss! Grab your Phillips #000 screwdriver and take out all eleven 3.7 mm screws.
Tools Used

Step 14


- Take out the NFC antenna and the charging coil assembly. You've got this!
Step 15

- Start by unscrewing those three 3.7 mm Phillips #000 screws. Keep them safe—you’ll need them later. If you hit any snags, remember, you can always schedule a repair with Salvation Repair to get professional help.
Step 16

- Take out the loudspeaker assembly—easy does it!
Step 17


- Grab a SIM card ejector tool or a paperclip and find that tiny hole on the left side at the top edge of your phone.
- Give it a gentle press to pop out the tray—don't worry, it’s easier than it looks.
- Pull out that SIM card tray and set it aside.
- When putting the SIM card back in, make sure it’s oriented correctly—match the shape and contacts to the tray so everything lines up perfectly.
Step 18


The battery won't be making any guest appearances in the next steps, but no worries—you don’t need to yank it out. Just unplug it, and you’re all set for what’s next!
- Grab your trusty spudger and gently pry away the battery connector using the flat end. You've got this!
Tools Used
Step 19


- Grab the flat end of your spudger and pop that sensor array connector loose. Easy does it!
Tools Used
Step 20


- Grab the flat end of a spudger and gently disconnect the front-facing camera connector. Keep it steady and avoid any yanks—patience pays off. If you need a hand, you can always schedule a repair.
Tools Used
Step 21


- Grab the flat end of a spudger and gently disconnect the display and digitizer connector. Easy does it—just a little prying and you're good to go. If you need a hand, you can always schedule a repair.
Tools Used
Step 22


- Grab your spudger and gently pry apart the two antenna cables connecting the motherboard to the daughterboard. Carefully lift each cable free to keep things tidy and avoid damage. Need a hand? You can always schedule a repair if it gets tricky.
Tools Used
Step 23


- Grab your spudger and gently pop off that antenna ribbon cable connecting the motherboard to the daughterboard. Easy does it—no need for Hulk strength here!
Tools Used
Step 24


- Lift up the motherboard with the flat end of your spudger and pop it free from the daughterboard. Easy does it!
Tools Used
Step 25


Watch out for that battery connector—it likes to grab onto things if you left the battery in place.
- Now that you've re-applied that adhesive magic, it's time to put your device back together! Just retrace your steps in reverse and watch it come back to life.
- Once you've wrapped up the repair, give it a test run using the guide. If anything feels off or you're scratching your head, don't hesitate to schedule a repair for some expert help!