Samsung Galaxy Tab 4 10.1 IR Sensor Replacement
Duration: 45 minutes
Steps: 8 Steps
Ready to give your Samsung Galaxy Tab 4 10.1 a brand new IR sensor? This step-by-step guide from Salvation Repair will walk you through the process. The good news is that you only need to disconnect the battery, so you can skip steps 2, 3, 5, and 6 – easy peasy! If you need help along the way, don’t worry, you can always schedule a repair.
Step 1


– Slide the nylon spudger wedge gently between the front and back panels, then wiggle it along until the back panel pops right off.
Tools Used

Step 2

– Let’s get started by gently peeling away that green tape hiding the connectors for those three black strips. You’ve got this!
– Now, take the tip of your spudger or even your trusty fingernail and give those tiny retaining flaps a little flip-up. Easy peasy!
Tools Used
Step 3

– Grab your trusty Phillips #00 screwdriver and let’s tackle those four 3.2mm screws!
Step 4
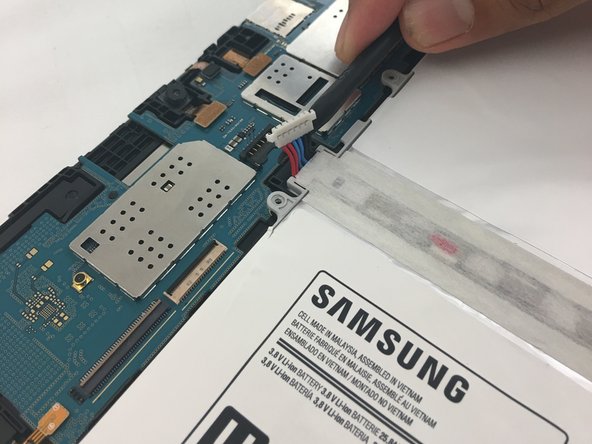
Be gentle with that connector on the circuit board! If you tug too hard, you might just break it. Grab your trusty spudger or tweezers, and while giving the battery connector a little love tap, push down on the black connector on the board. Remember, this connector is a bit fragile, so take it easy!
– Gently lift the red, blue, and black cables by prying up on the white connector from the motherboard. You’ve got this!
– If you’re using your fingers to do the magic, make sure to pull evenly across the entire width of the cable to keep those wires happy and stress-free.
Tools Used
Step 5

– Grab your trusty nylon spudger and carefully work around the edges of the battery to pop it out. No rush—just a little gentle pry and you’ll have it free in no time!
Tools Used
Step 6
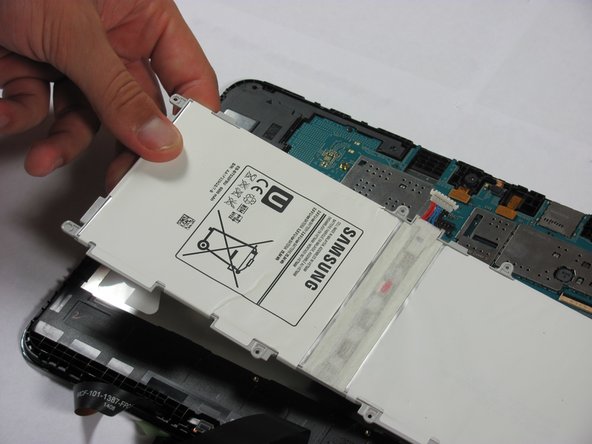
– Once the battery is loose, gently lift it out of the device. Keep it steady and avoid pulling too hard, it should come out with a little nudge.
Step 7


– Gently use the flat end of a spudger to disconnect the IR sensor’s press-fit connector from the motherboard. No need to rush – just a little wiggle and it should pop right off!
Tools Used
Step 8

– Time to say goodbye to the IR sensor! Go ahead and remove it with care.