Samsung Galaxy Tab 4 8.0 Wi-Fi Front Facing Camera Replacement
Duration: 45 minutes
Steps: 5 Steps
Ready to tackle the front-facing camera? After popping off the back case, this guide walks you through taking the camera apart from your tablet step by step—no sweat, just straightforward instructions.
Step 1

Take it easy with the force – those plastic clips are a little fragile and can break pretty easily. Handle with care!
First, make sure your tablet is totally powered down before you start the replacement process.
When it comes to prying, right-handed folks might find it easier to go clockwise, while left-handed users might prefer counter-clockwise – just do what feels natural to you!
As you remove the rear case, you’ll hear some clicking noises – don’t worry, that’s just the case disconnecting. You’re doing great!
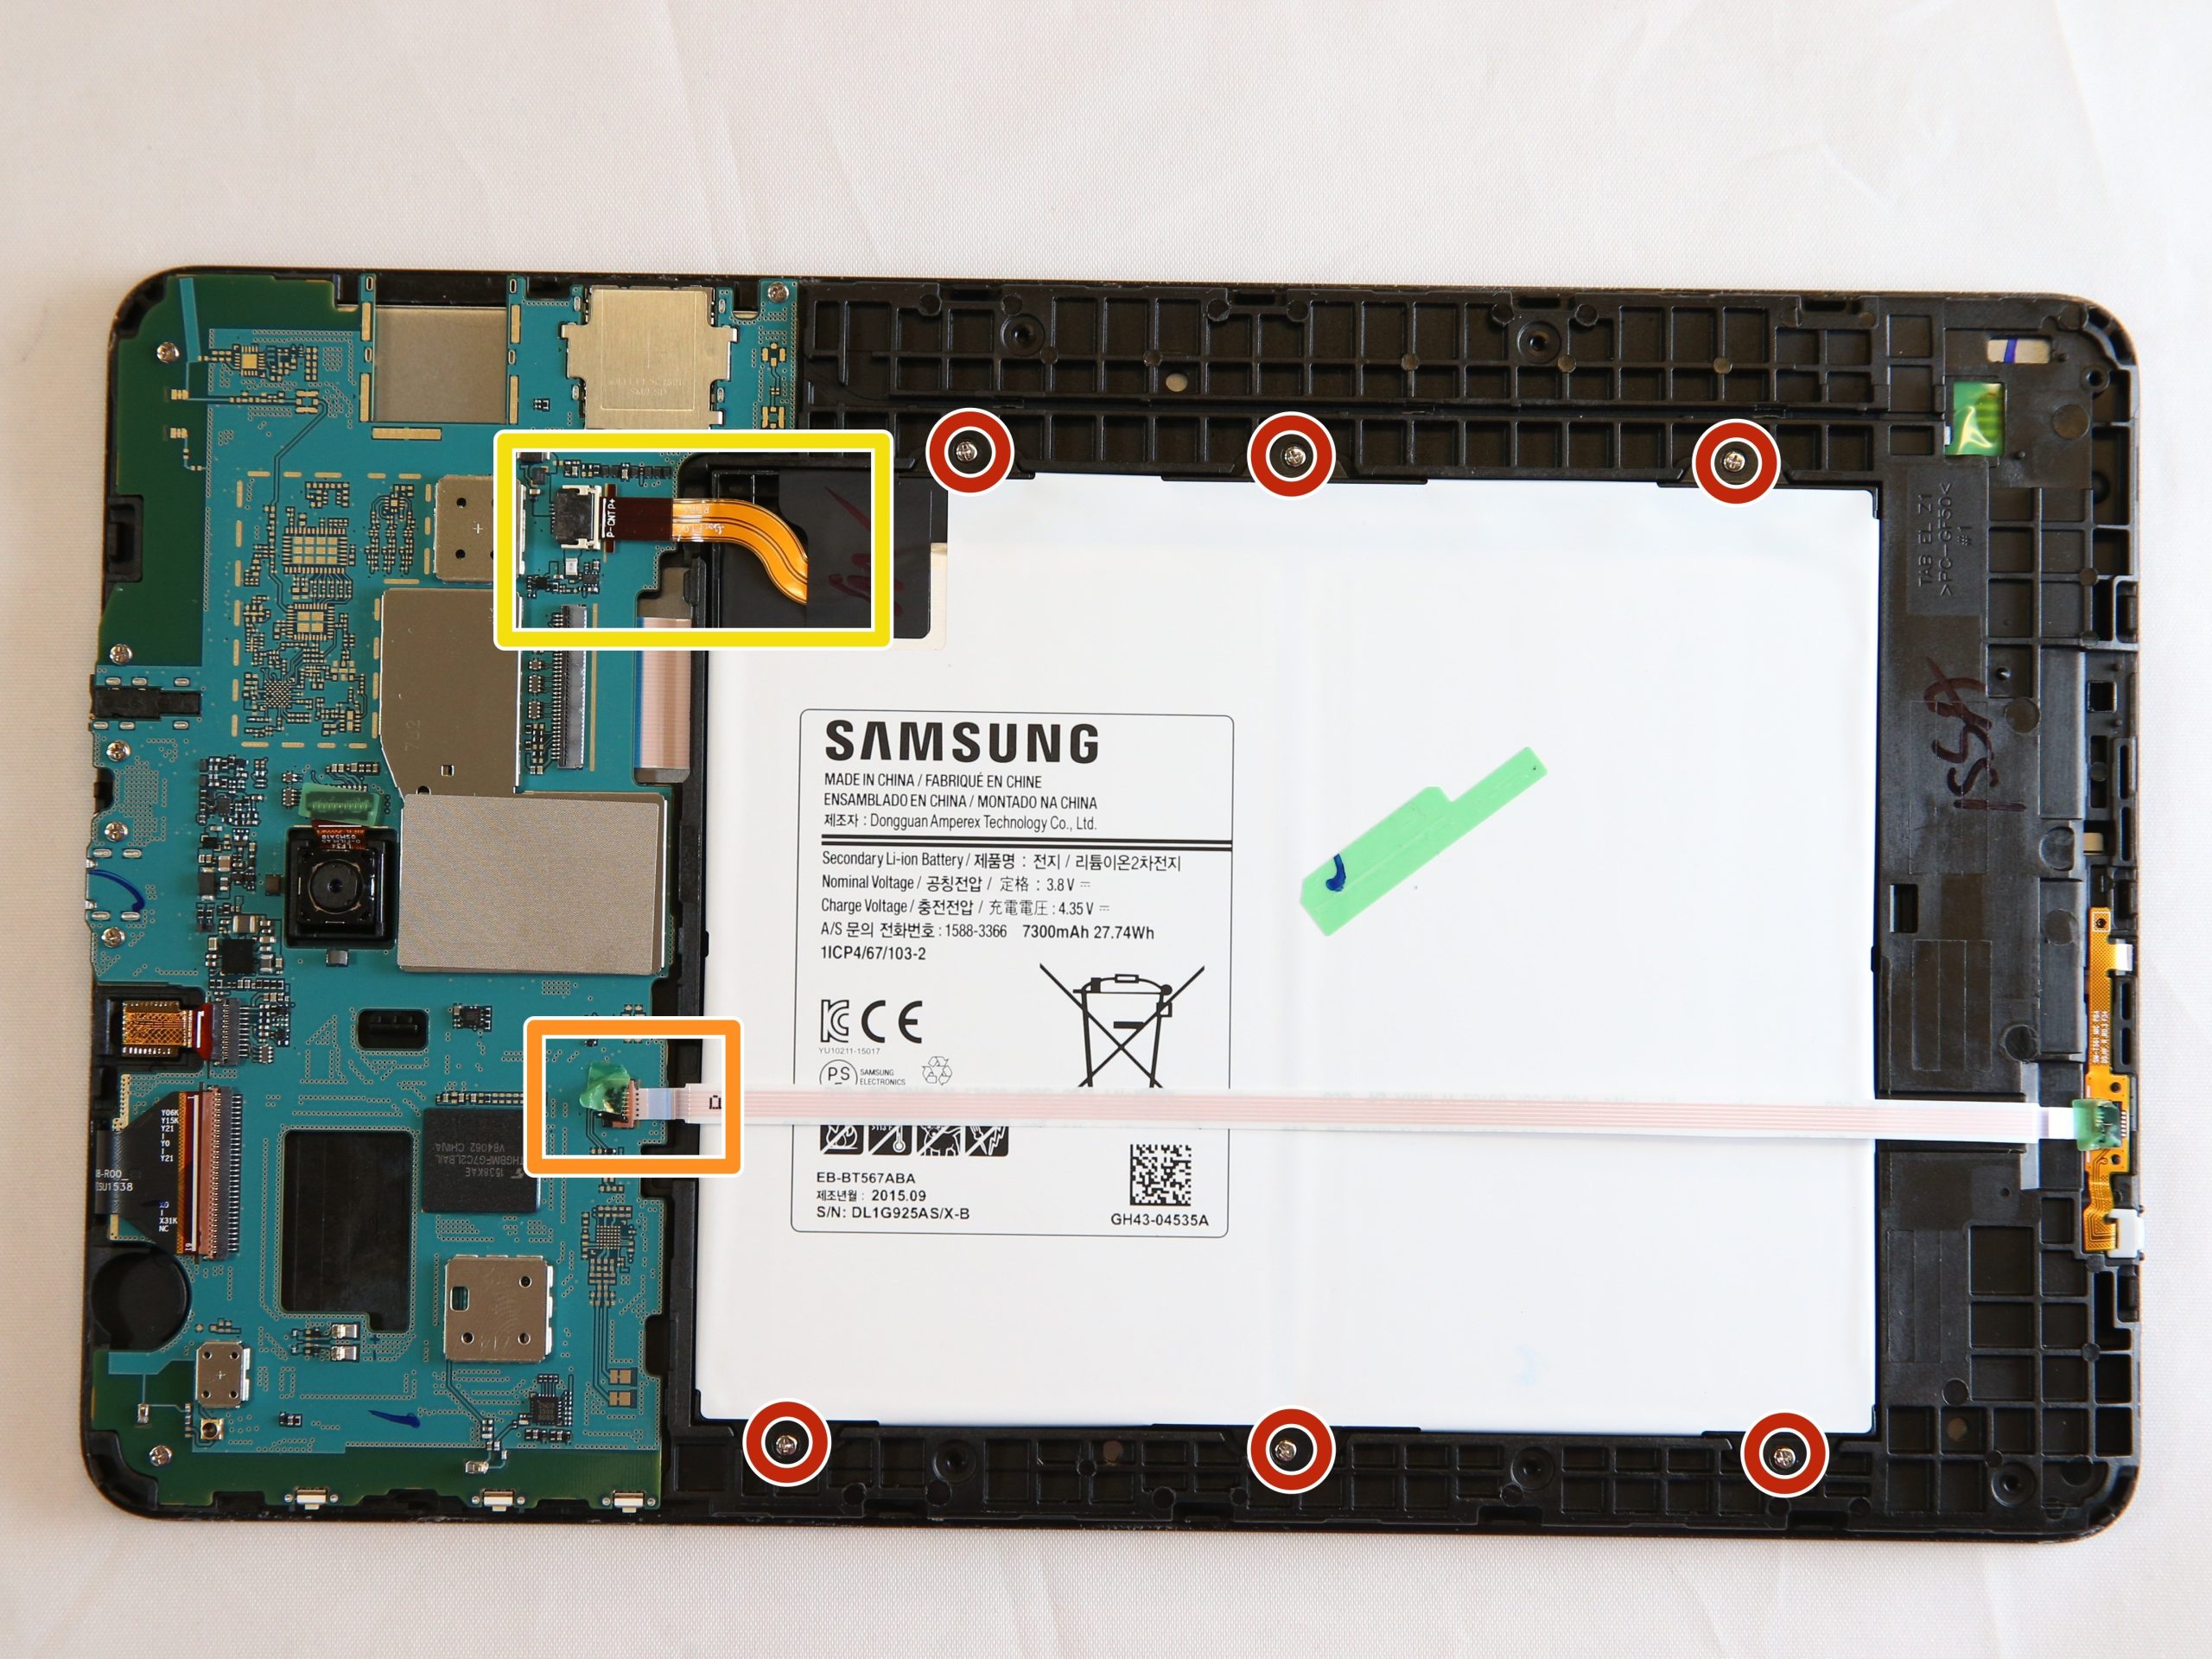
– Carefully slide the plastic opening tool between the metal edge and the back plastic casing at the bottom of your tablet. Gently pry the back casing away from the device. Keep going until the back panel is completely separated from the front assembly. If you need help, you can always schedule a repair.
Step 2

– Set your tablet screen side down on a pristine surface, ready for action!
– Hold onto the back panel and gently lift it away from the device like you’re unveiling a surprise.
Step 3

– The ribbon cable for the front-facing camera is tucked away at the top edge of the motherboard, just a little to the left of center.
– Take your trusty blue plastic opening tool and gently slide the flat end underneath the connector at the end of the ribbon cable.
Step 4

– Gently press down and slide that nifty blue plastic opening tool downward to release the front camera’s shiny gold rectangular connector from its cozy spot on the motherboard. Keep it cool and steady!
Step 5

– Gently pinch that shiny gold rectangle with your tweezers and lift it out of its cozy little spot. You’ve got this!
Tools Used

Success!