Samsung Galaxy Tab 4 8.0 Wi-Fi Battery Replacement
Duration: 45 minutes
Steps: 6 Steps
Ready to swap out your old battery for a fresh one in your Samsung Galaxy Tab 4 8.0 Wi-Fi? This guide will walk you through the steps to safely remove the old battery and get your tablet powered up with a brand-new one. With this replacement, your tablet will be back to running strong for even longer!
Step 1

Take it easy with the force here—those plastic clips can snap if you’re too rough. A gentle touch goes a long way!
Before you dive into the replacement process, make sure your tablet is fully powered off. You don’t want any surprises during the fix!
If you’re right-handed, you’ll probably find it easier to pry in a clockwise direction. Lefties, don’t worry—you’ll feel more at home going counterclockwise.
As you remove the rear case, you might hear some clicking noises. No need to panic! Those are just the clips letting go, nothing to stress about.
– Carefully slide the plastic opening tool between the shiny metal edge and the back plastic cover at the bottom of the tablet, then gently pry the back casing away from the device. Keep going until the back panel is fully separated from the front assembly. If you need help, you can always schedule a repair.
Step 2

– Lay the tablet screen-side down on a nice, clean surface—let’s keep it tidy.
– Grab the back panel and gently lift it off the device. You’ve got this!
Step 3


– Carefully remove the sticker that says ‘PULL (HANDS ONLY)’ from the battery, starting at the corner where it’s easy to detach.
Step 4

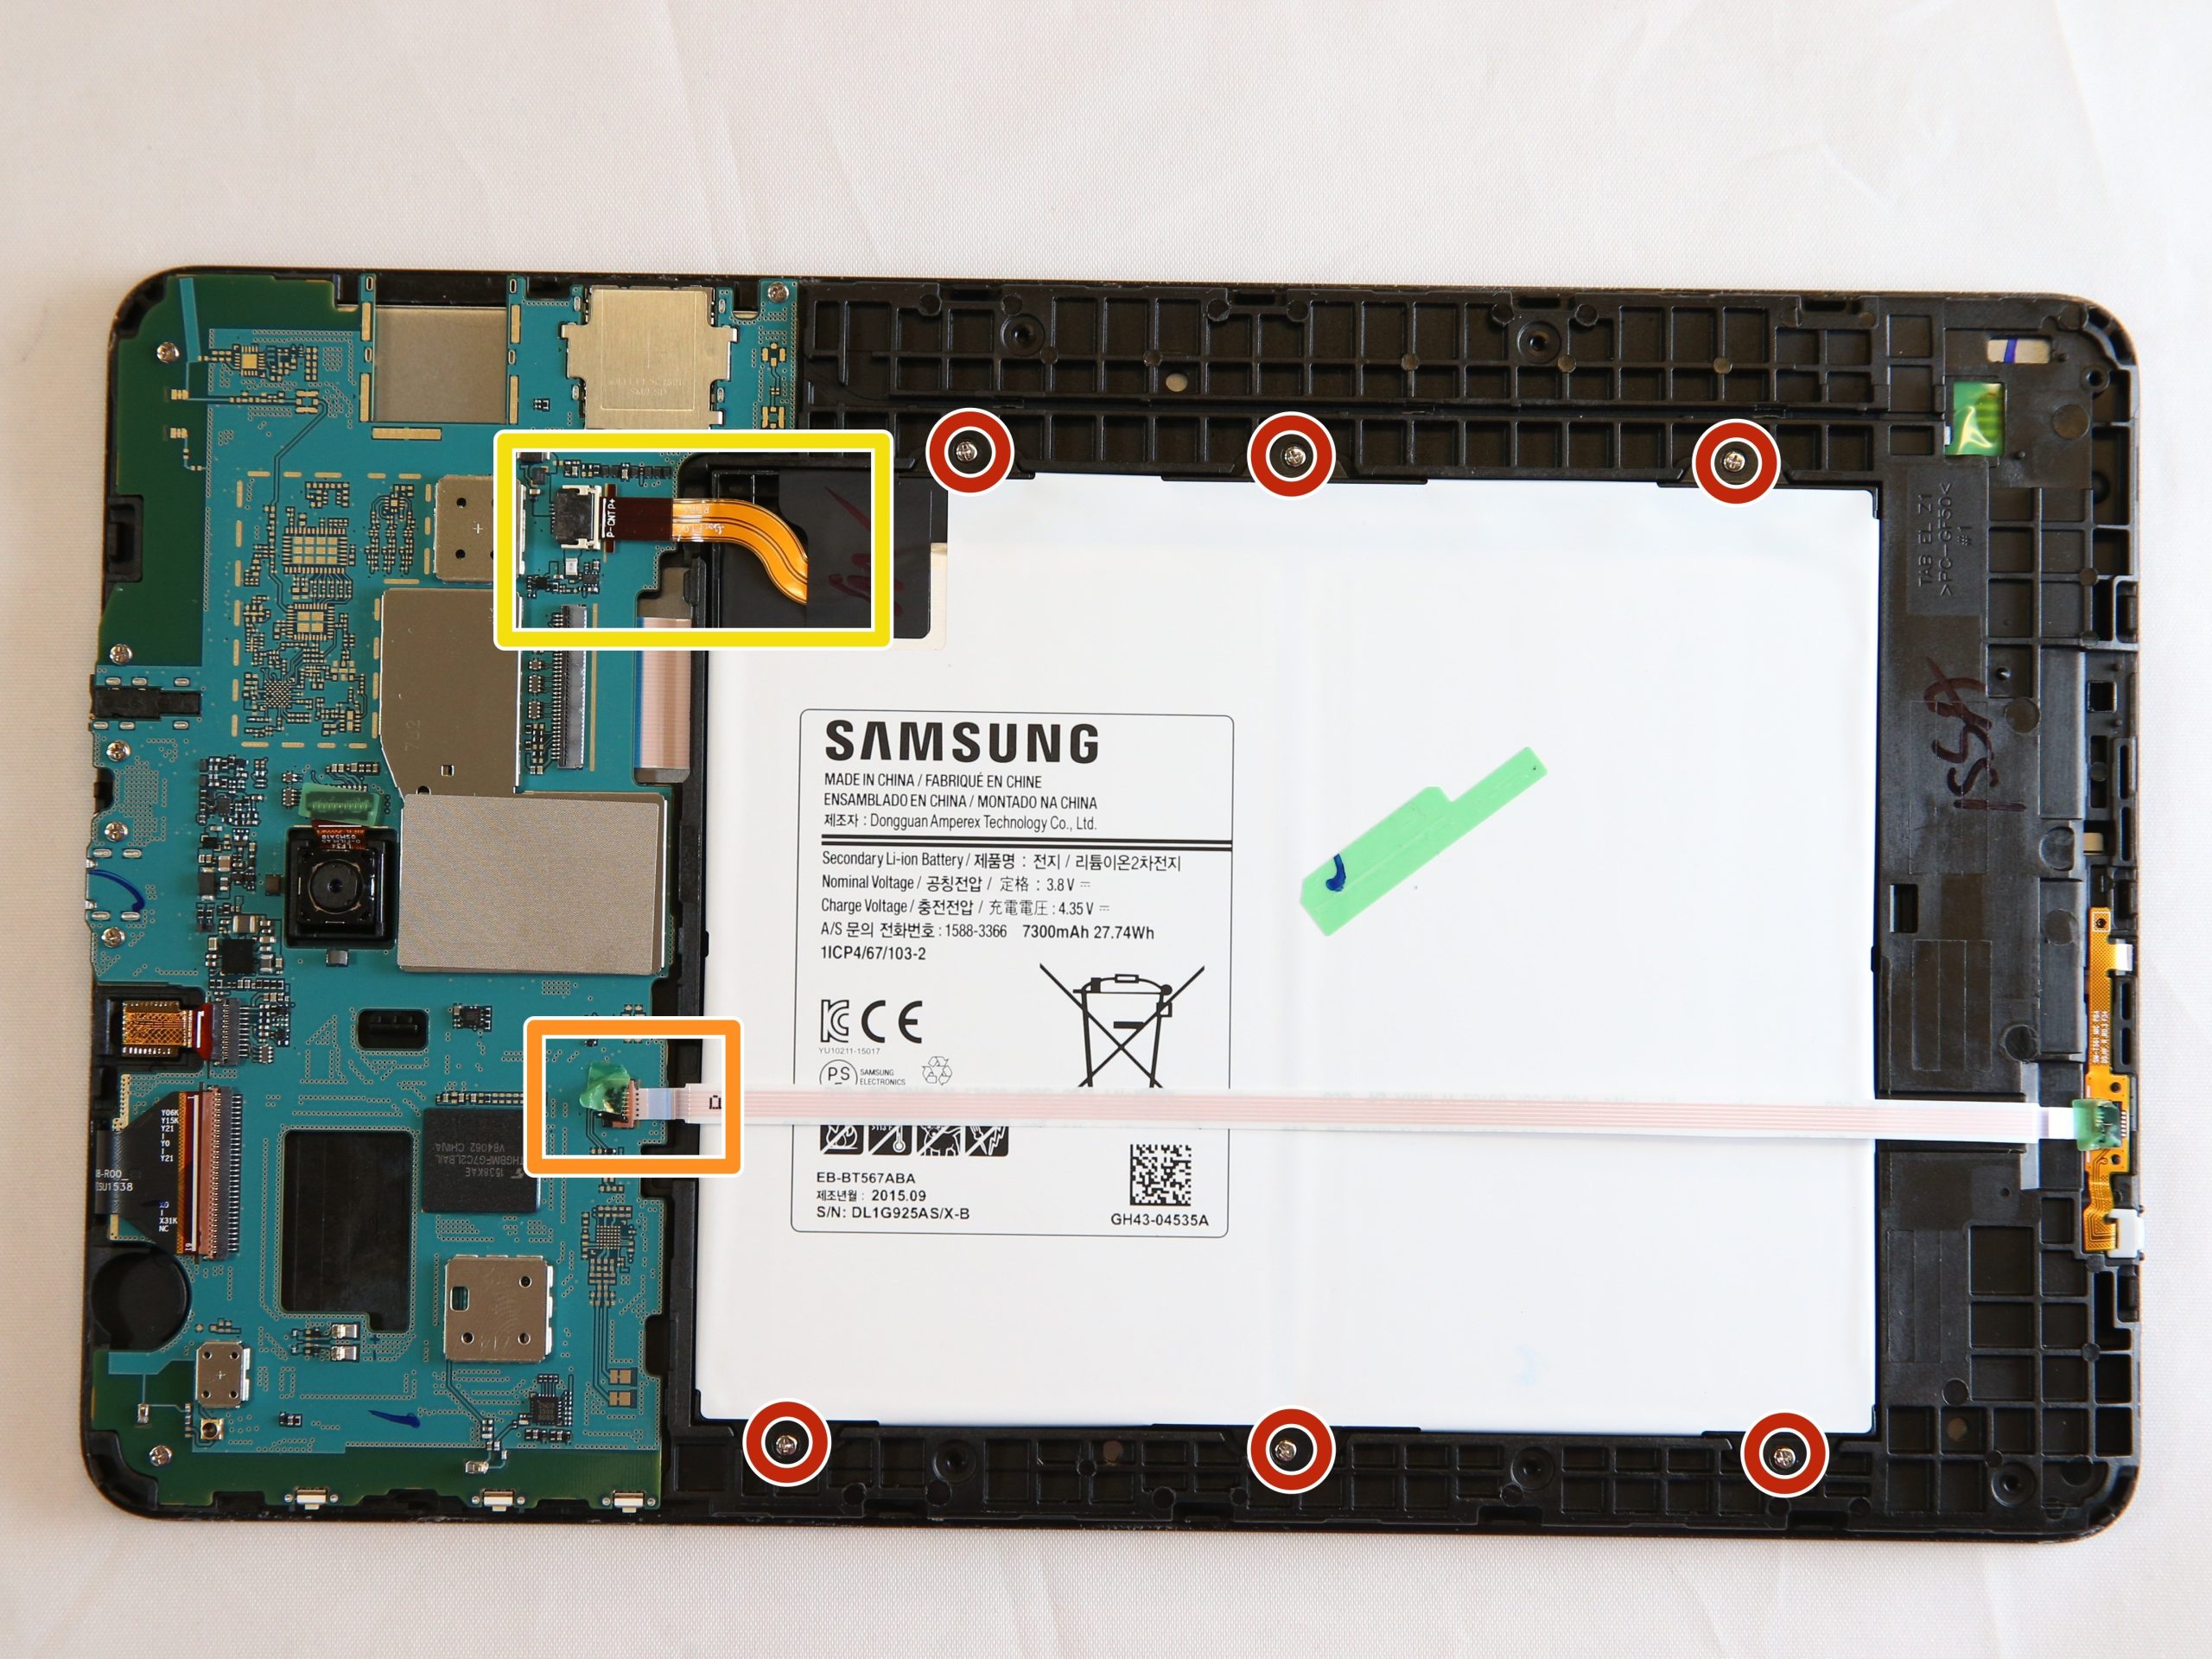
– Gently grab the top right corner of the battery and give it a little pull to free it from the device.
Be careful not to fully detach the battery – it could lead to some serious damage to your motherboard and those delicate cables connected to it. Keep things gentle and you’ll be good to go!
If the battery is stuck with some adhesive, grab the flat end of the spudger and carefully slide it between the battery and the front panel. Take your time – no rush!
Tools Used

Step 5

– Start peeling off that green tape from the bottom left corner—easy does it!
Step 6

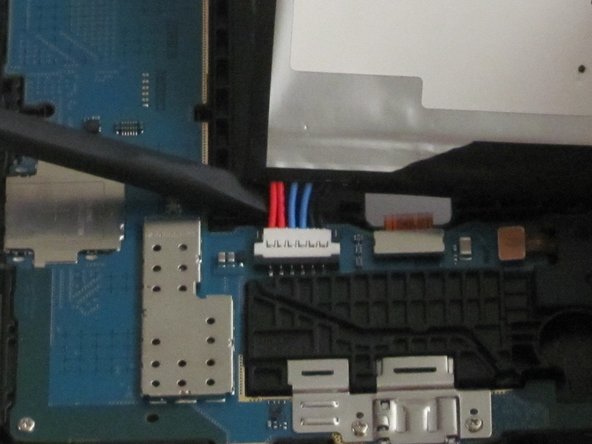
– Gently slide the spudger underneath the battery and wiggle it to unplug the battery connector.
– Carefully lift the battery out from its spot like you’re freeing a tiny trapped treasure.