Samsung Galaxy S7 Edge NFC Antenna and Charging Coil Assembly Replacement
Duration: 45 minutes
Steps: 10 Steps
Get ready to tackle the adventure of replacing the NFC antenna and charging coil in your Samsung Galaxy S7 Edge! Just a heads-up: those sleek, curved edges and the super strong adhesive can make the first opening a bit of a puzzle. But don’t sweat it! Take your time, warm things up a bit, and give those adhesive bonds a gentle tug. With a little patience and some good ol' heat and pull cycles, you'll be in business before you know it!
Step 1
A hair dryer, heat gun, or hot plate can help, but keep an eye on the heat! You don’t want to overdo it—both the OLED display and internal battery are heat-sensitive, so be gentle with the heat. Stay cool, and if it feels tricky, you can always schedule a repair.
Opening your phone means you're going to lose those trusty waterproof seals. Be sure to have some replacement adhesive on hand before diving in. And hey, if you're not replacing the adhesive, just be extra cautious around liquids when reassembling your device.
You might need to give the iOpener a few reheats and applications to get your phone nice and toasty. Just be sure to follow the iOpener instructions carefully, so you don't accidentally overdo it.
- Warm up your iOpener and press it to a long edge of the phone for about two minutes. Let that heat work its magic!
Tools Used
Step 2
Heads up: the suction cup might have a tough time sticking to the curved glass edges.
If the phone’s back cover is cracked, the suction cup could lose its grip. Try lifting it with some strong tape, or carefully superglue the suction cup on and let it set before you continue.
Because of the curve, you’ll be pushing up instead of sliding the tool in parallel with the phone’s surface.
If it’s being stubborn, heat it up a bit more to soften the adhesive, then give it another go. Adhesive cools down fast, so you might need to warm it multiple times.
- Once the back feels nice and warm to the touch, grab a suction cup and place it as close to the heated edge of the phone as possible—just watch out for that curved part.
- Gently lift on the suction cup and slide an opening pick underneath the rear glass to start the separation.
Step 3
- With the pick snugly in place under the glass, give the iOpener another round in the microwave and lay it back on to loosen up that stubborn adhesive.
Tools Used
Step 4
Take it slow and steady to keep the tip from slipping out of the seam. If it starts getting stubborn, just warm it up again and give the iOpener another go.
- Gently work your way around the phone with the opening pick, carefully prying the adhesive loose as you go.
- Keep that pick in place for now and grab a second one - it's about to get real. Leaving it in helps keep the adhesive from making a comeback.
Tools Used
Step 5
- Now, let's keep the momentum going! Just like before, heat things up and gently slice around the remaining three sides of your phone.
- Remember to stick an opening pick on each side before moving on to the next. This way, the adhesive won't try to sneakily reseal itself while you work!
Step 6
- Gently lift the glass and pop it off your phone like a pro!
Step 7
You can pop the back cover on without bothering with new adhesive if you want. Just clear out any chunky bits of old glue so the cover sits flush. After it's in place, a little heat and some gentle pressure will do the trick. It won’t be waterproof, but the original glue is usually strong enough to keep everything together.
Power up your phone and make sure your repair is good before sticking on fresh adhesive and sealing it up.
- Getting that new back cover on? Here's how:
- If you're putting the old back cover back on, or rocking a cover without sticky stuff already on it, follow along here.
- Grab some tweezers and carefully peel off any leftover adhesive from the phone's frame. Next, wipe down the sticky spots with some high-strength isopropyl alcohol (90% or more) and a lint-free cloth to make sure everything’s nice and clean for the new adhesive.
- Peel the backing off the new rear glass adhesive, line up one edge of the glass with the phone’s chassis like a pro, then press it down firmly and evenly to stick it in place.
Tools Used
Step 8
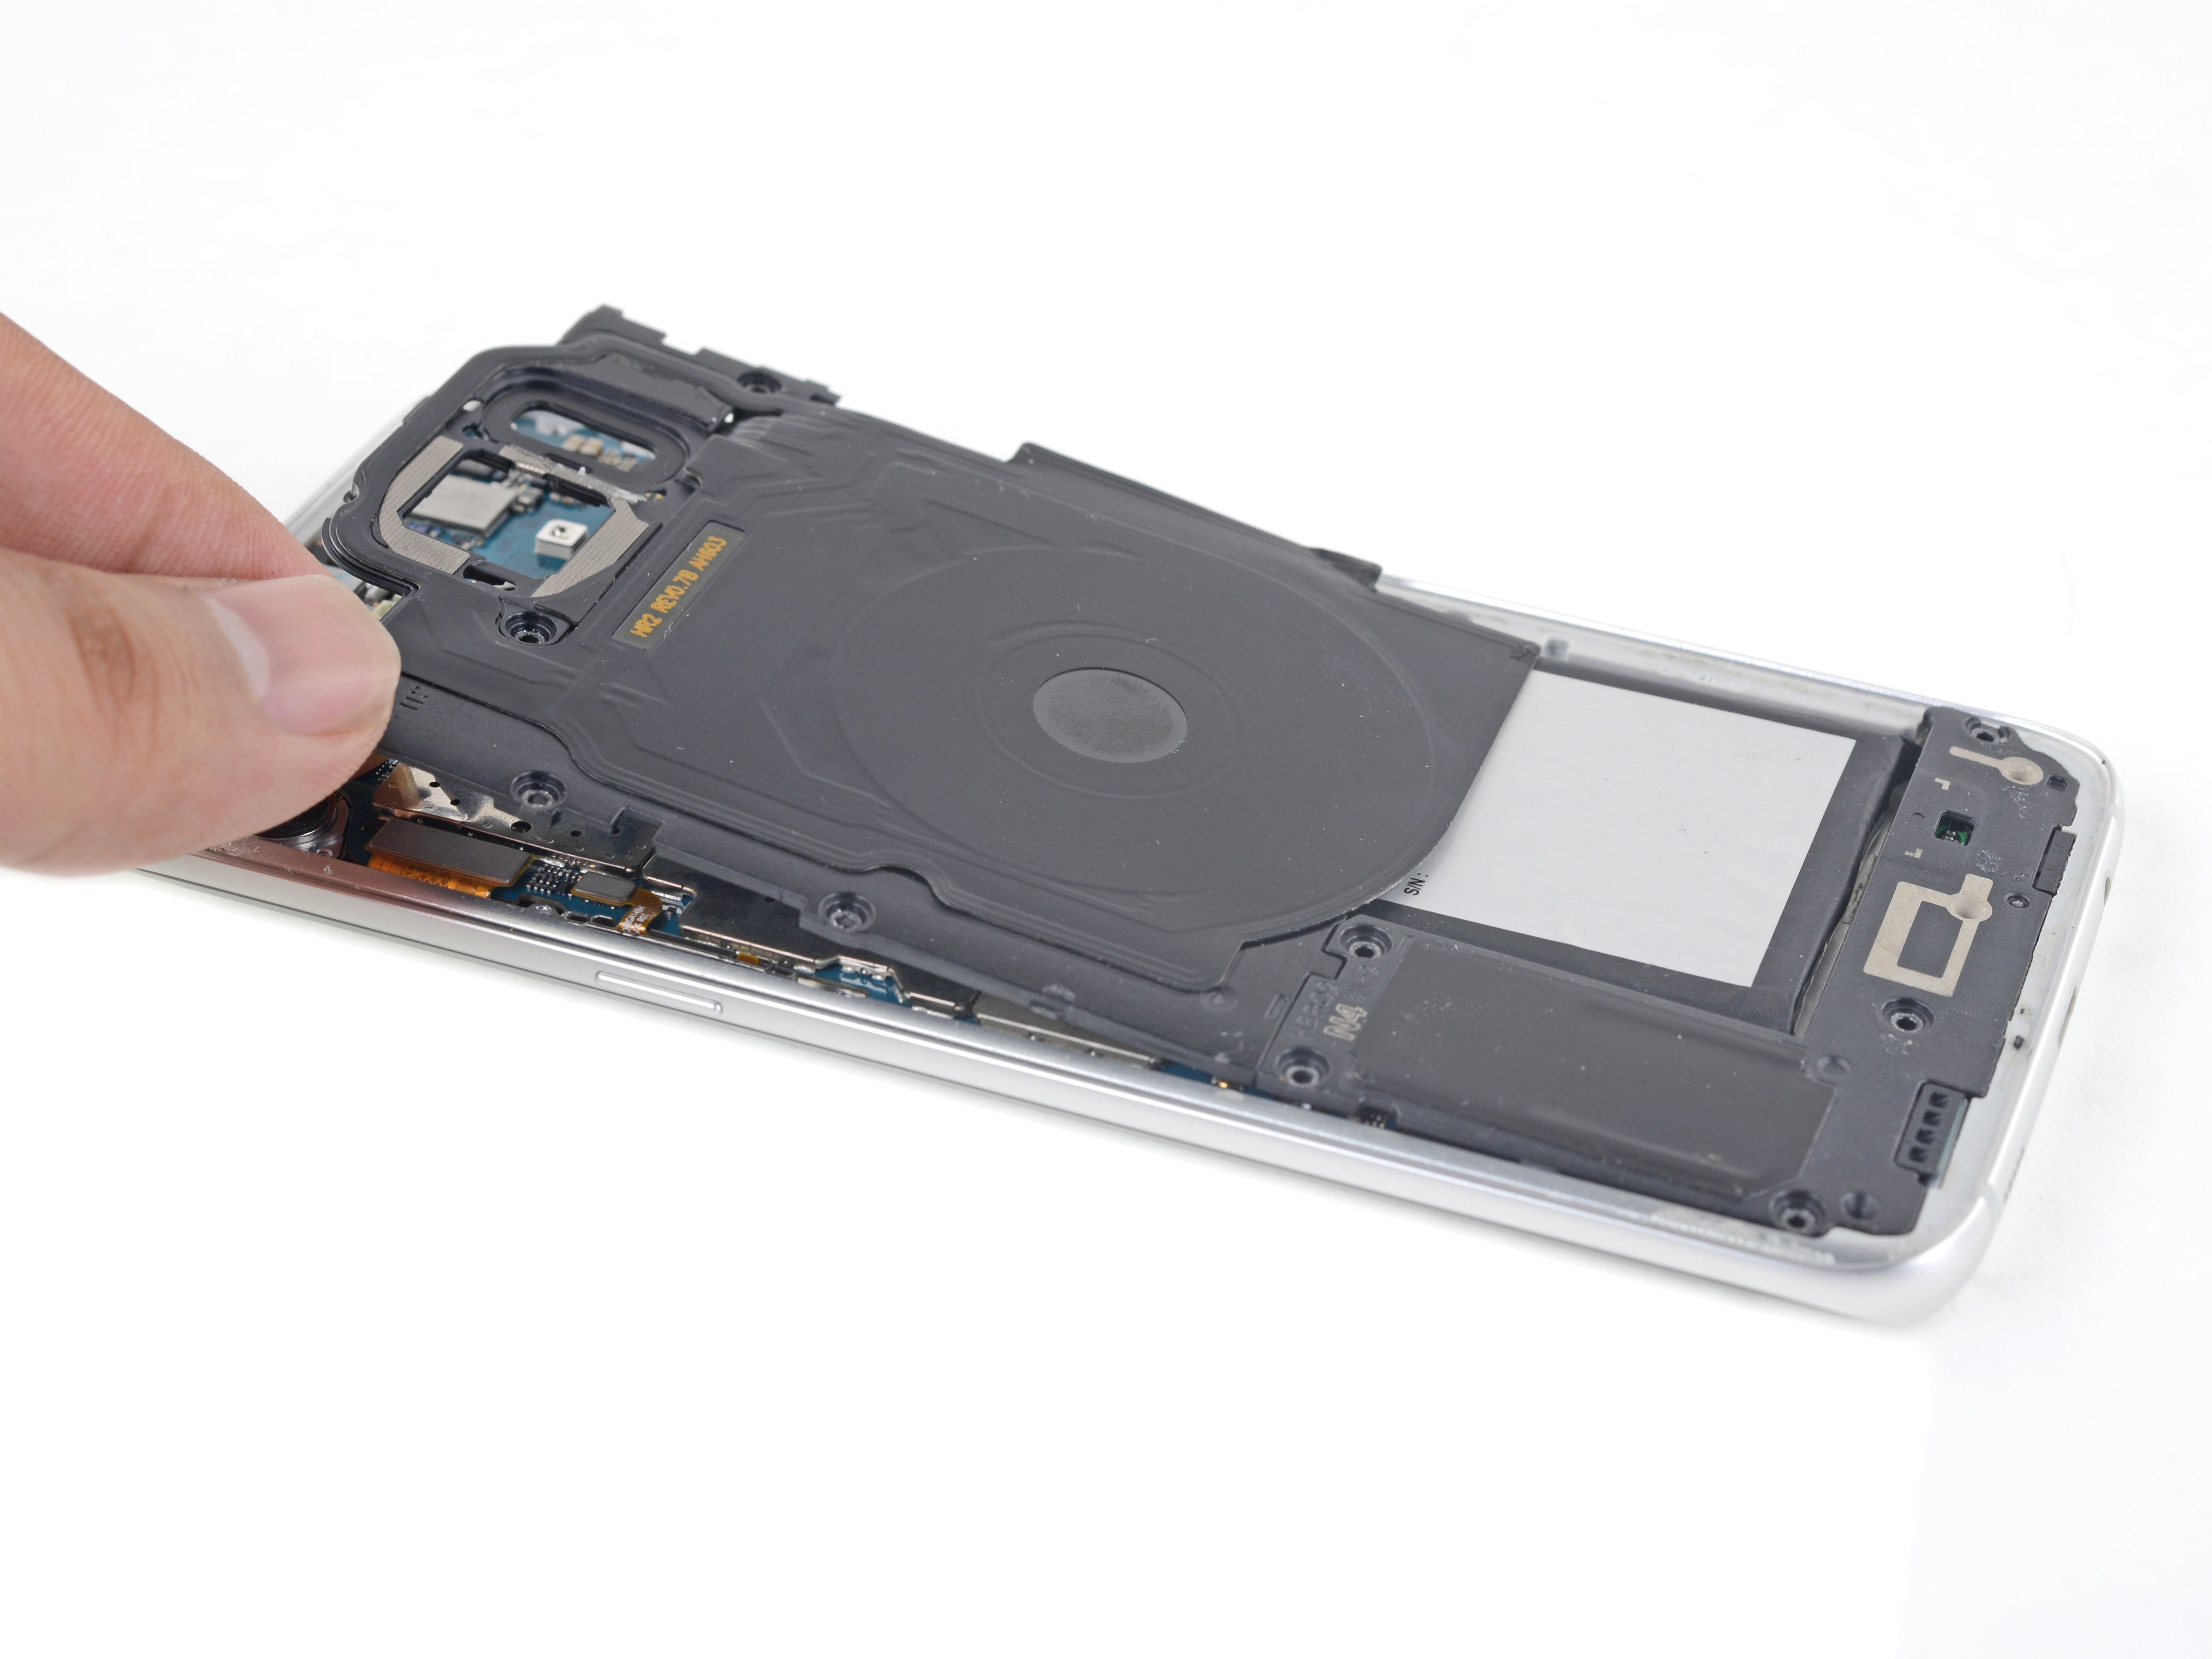
- Unscrew the seven 3.5 mm Phillips screws holding down the NFC antenna and charging coil assembly. Keep them safe—they're tiny but mighty!
Step 9
- Grab that nifty little notch on the lower left of the upper antenna and give it a gentle pry to pop it out of the phone.
- Now, go ahead and remove the upper antenna like a pro!
Step 10
- Now, just put everything back together by following these steps in reverse—easy peasy!


