How to Remove a SIM from Samsung Galaxy S7, if inserted without tray
Duration: 45 minutes
Steps: 5 Steps
Think of this as the professional way to handle a stubborn SIM card. Instead of jamming something in and prying aggressively—which can lead to damage—this method is longer, but way safer and more reliable. Coming from a tech who’s been in the game at Samsung, especially here in Canada, I can tell you this approach is the gold standard for proper SIM extraction. It might take a little more time, but it’s the kind of careful, confident move that gets the job done without risking harm to the device. If you’re feeling unsure or need a hand, you can always schedule a repair for some extra peace of mind.
Step 1
- Crank your hot air gun up to about 250°C—think of it as melting the adhesive, not a summer BBQ. (I stick with 250 for a good balance.)
- Gently heat all four edges of the back glass until they’re nice and warm—this softens things up for the next step.
- Use a trusty suction cup to lift upward pressure on the glass—when it’s warm enough, it’ll start to loosen and lift more easily.
- Apply some Ethyl Alcohol (99%) along the seam—this helps break down that stubborn adhesive and makes everything slide apart smoothly.
Step 2
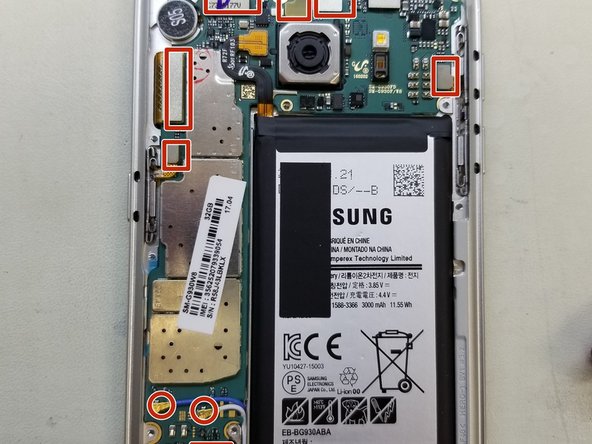
- First things first, let's get that back glass out of the way! Once it's off, start tackling the screws on those three housing panels.
- After you've conquered the screws, you'll find those panels are snug in the frame. A gentle nudge with a spudger or pick will help pop them out smoothly.
- With the three panels removed, you'll have full reign over the motherboard! Time to dive in and see what magic you can work.
Tools Used
Step 3
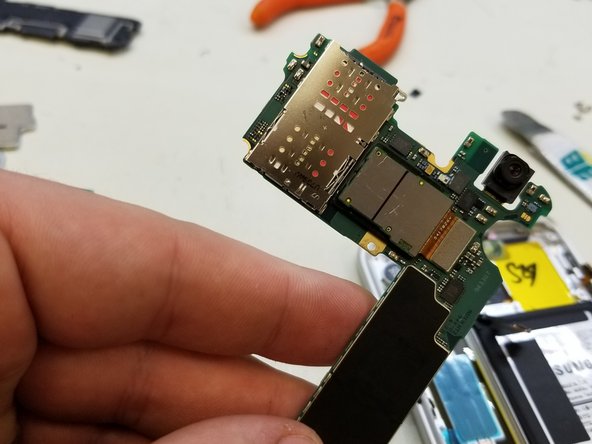
- The SIM tray is on the opposite side of the motherboard. A little twist and turn to get there!
- To access it, gently disconnect all the cables attached to the board (this includes Camera, Screen, Power Button, Network Coaxials, Fingerprint Sensor, Earspeaker, Proximity/Light Sensors, and Volume Buttons). Take it slow, you got this!
- When lifting the board, be mindful to lift from the top. The charge port’s down at the bottom, so don’t forget to disconnect the charge flex as you lift the board out. Easy does it!
Step 4
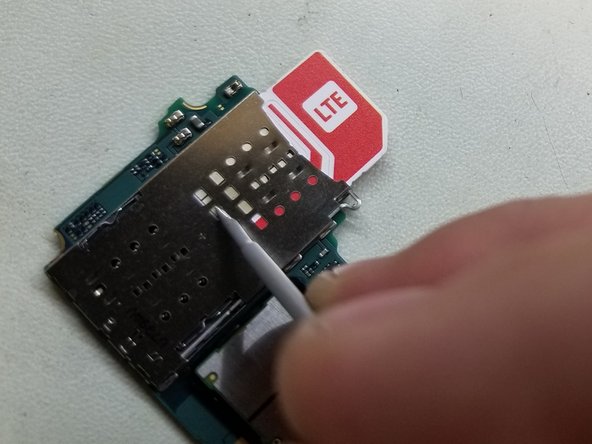
- Grab a small slot screwdriver and gently poke around the SIM reader openings—think of it as a treasure hunt, but for your SIM card. Glide the SIM out slowly, no wild moves.
- Once the SIM is peeking out enough to get a good grip, go ahead and pluck it out like a pro.
- Anytime you’re working with metal tools near the board, make sure the power’s off, zap any static off your tools, and handle everything with a gentle touch. Boards like a little TLC!
Step 5
- Now it's time to put everything back together! Just retrace your steps from earlier, and you'll have your device back in action in no time. If you hit a snag or need a hand, feel free to schedule a repair.


