Samsung Galaxy S6 Active Digitizer/LCD Screen Assembly Replacement
Duration: 45 minutes
Steps: 6 Steps
Step 1
- Grab all the tools you’ll need to get started.
- Here’s a great chance to put our iOpener Kit and 64-Bit Driver Kit to good use.
Tools Used
Step 2
- Place the iOpener pad on top of your phone. Let's kick things off at the top since the bottom is a bit more on the cracked side.
- After warming up the screen, grab a suction cup and gently lift the screen up. You've got this!
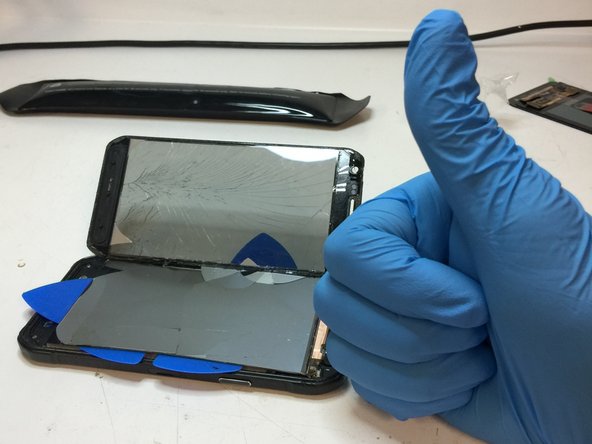
- Carefully slide an opening pick into the tiny gap between the screen and the phone.
- Continue working your way around the edges by adding more opening picks and applying a little extra heat if necessary.
Step 3
- Once you’ve created enough space between the screen and the phone, you’ll notice the LCD is glued in place with some seriously strong adhesive—Samsung sure loves their sticky stuff.
- Despite our best efforts, the cracked screen might get a little worse during removal. You can separate the screen assembly from the phone, but it takes some heat and patience to gently coax it free. Heads up: these screens are super thin and fragile!
- Wearing gloves is a smart move since these delicate LCDs can get messy if they start to shatter.
- Don’t worry if the digitizer detaches from the LCD while you’re pulling it out—that’s totally normal.
Step 4
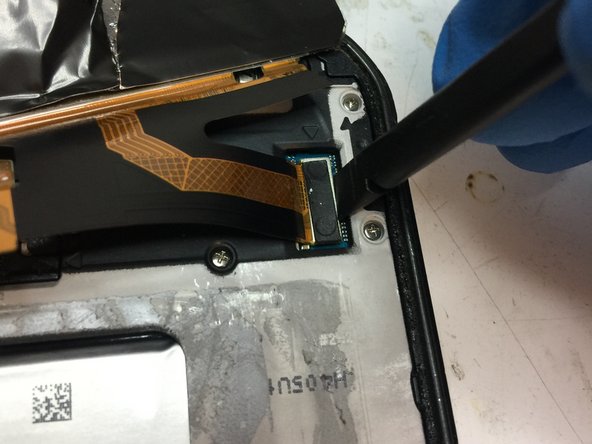
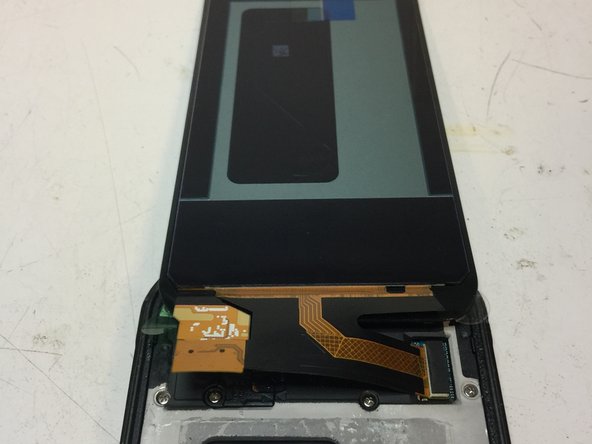
- After you’ve peeled the screen away from the phone, give it a little flip—vertically—to reach the screen connector hiding underneath.
- That sneaky connector is tucked beneath a plastic cover, which you can gently pop off using a plastic pry tool.
- With the cover out of the way, carefully unplug the screen connector from the phone’s board and you’re one step closer!
Step 5
- First, you'll want to gently remove the cracked screen assembly. Once that's done, it's time to heat up the buttons so you can transfer them onto the new screen. A little warmth goes a long way!
- Next, peel off the adhesive from the new assembly, then carefully align the buttons. Once they're stuck, they're staying put, so make sure they're in the right spot before you press down.
- Now, connect the new screen assembly to the board and pop on the plastic cover. All snug and secure!
- Before you go full steam ahead, we recommend giving the phone a quick test to make sure everything’s working as expected. Once you're happy, go ahead and adhere the new screen into place.
Step 6
- Time to put everything back together! Just reverse the steps you followed, and your device should be good to go. If things get tricky, you can always schedule a repair.


