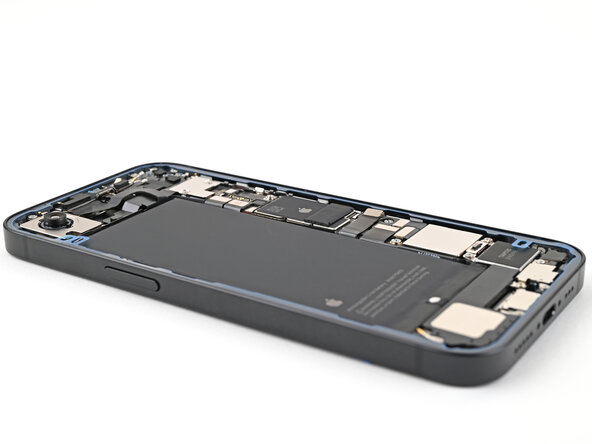
iPhone 16e Taptic Engine Replacement
Duration: 45 minutes
Steps: 54 Steps
Ready to give your iPhone 16e some fresh vibrations? This guide walks you through swapping out the Taptic Engine if your phone’s buzz feels more like a maraca or keeps disappearing. Grab some replacement back glass adhesive before you start—trust me, you’ll want it. Some pictures might show a slightly different model, but don’t sweat it; the steps are the same. Let’s get your phone shaking the right way again!
Step 1

Let your phone's battery dip below 25%—a fully charged lithium-ion battery can be a little mischievous and isn’t the safest buddy to have around. Keep it safe and sound, and if you need help, you can always schedule a repair.
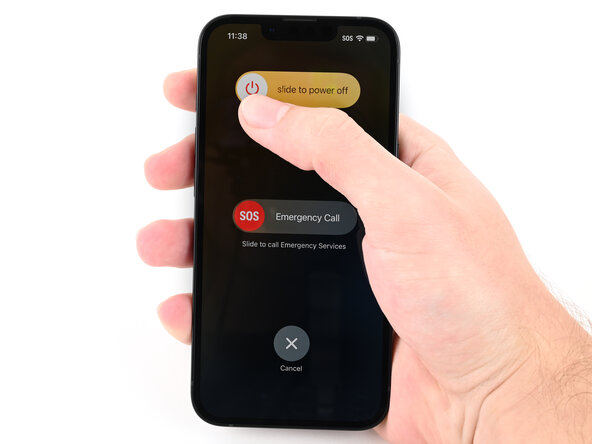
- Disconnect any cables connected to your phone—no more strings attached!
- Press and hold the power button along with either volume button, then slide to turn off your device. Easy does it!
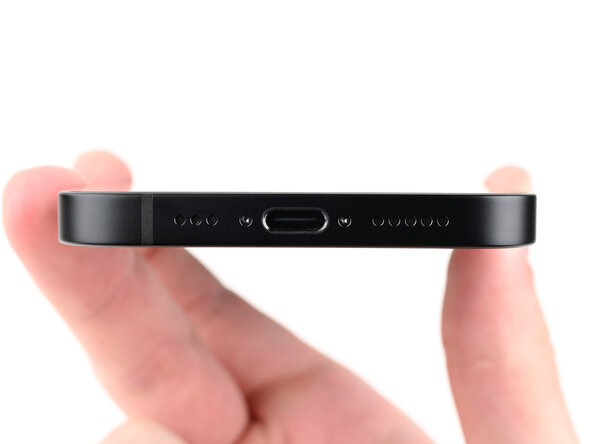
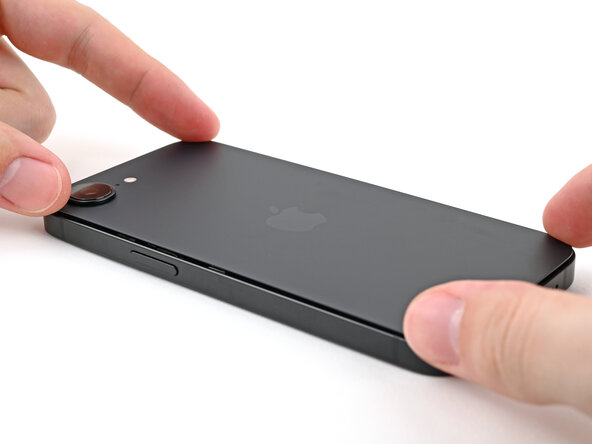
Step 2
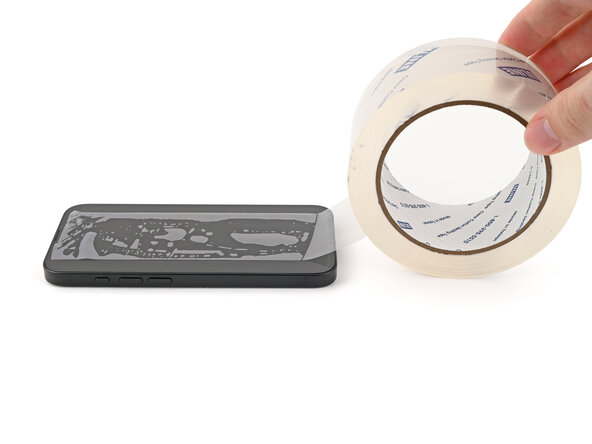
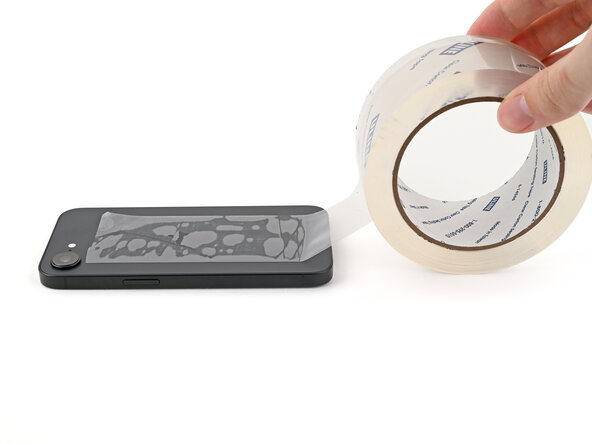
Check for a nice, flat spot at the bottom edge—big enough for your suction cup to get a good grip.
- If your screen or back glass looks like it lost a fight with gravity, cover it with strips of packing tape. This will keep your fingers safe and make the next steps way less messy.
Tools Used

Step 3
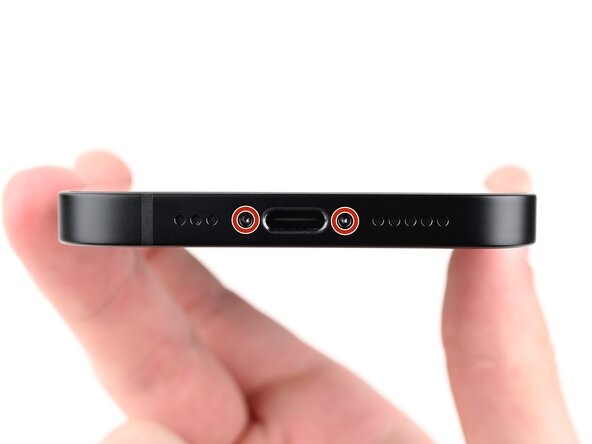
- Grab your trusty P2 pentalobe screwdriver and unscrew the two 7.8 mm-long screws hanging out on either side of the charging port. Let's get this party started!
Step 4


Pushing your opening pick in too deep can cause damage to your device—let’s avoid that! Mark your pick at the right spot to keep things safe.
Feel free to mark different corners of your pick with various measurements to keep track.
Or, get creative and tape a coin about 3 mm from the tip of your pick as a handy depth guide.
- Mark your opening pick by measuring 3 mm from the tip and using a permanent marker. You've got this!
Step 5
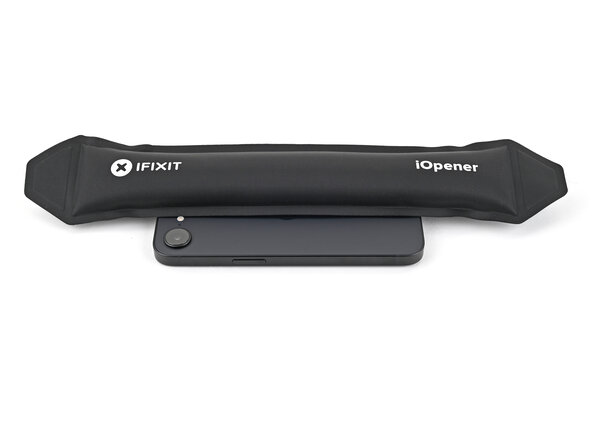
Watch out for the heat! Don’t let your phone get too toasty—the battery doesn’t like it and could get grumpy. Keep it cool, and all will be well!
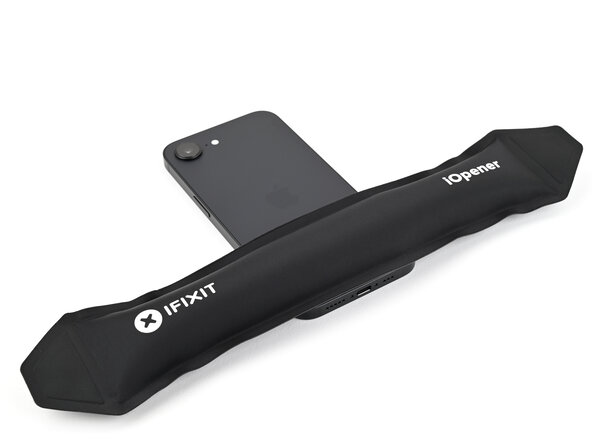
Alternatively, warm up the bottom edge of the back glass with a hair dryer or heat gun until it feels warm to the touch. This gentle heat can help loosen the adhesive. If you need a hand, you can always schedule a repair.
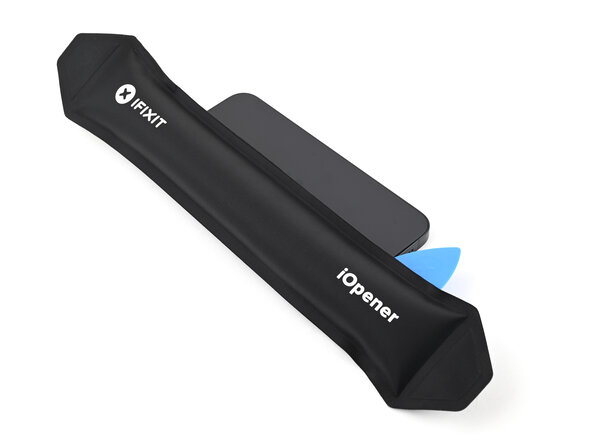
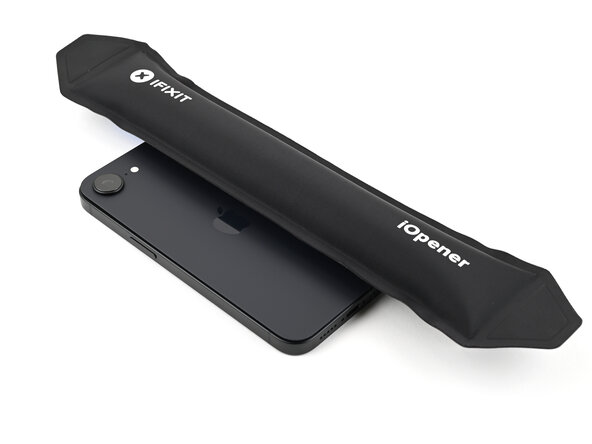
- Warm up the bottom edge of the back glass with a heated iOpener for about 90 seconds—think of it like giving your phone a cozy little spa moment before you get started.
Tools Used


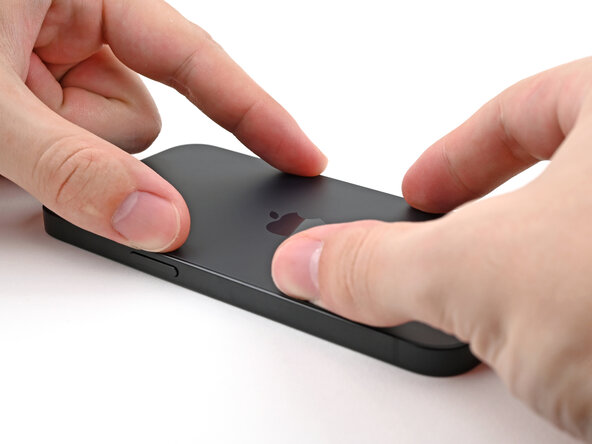
Step 6
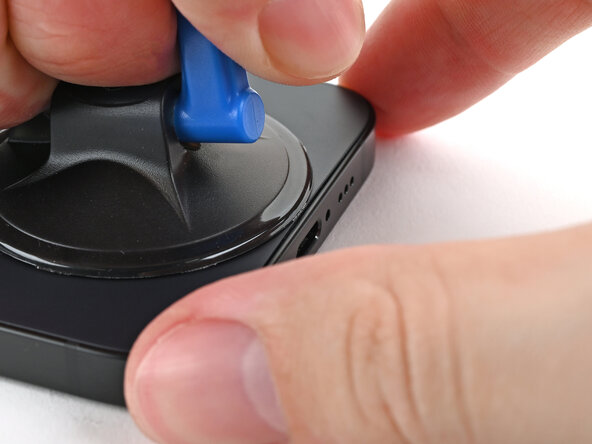
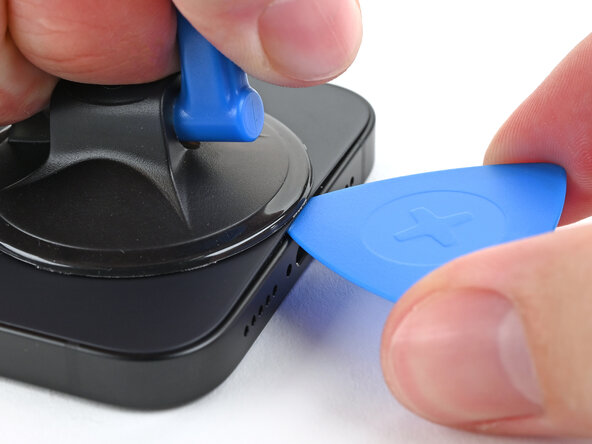
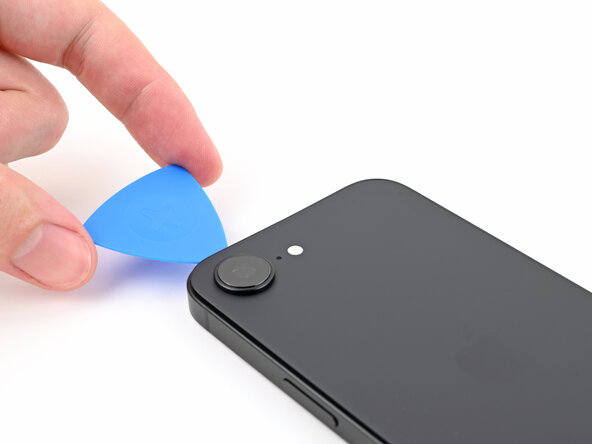
- Grab a suction handle and stick it to the bottom edge of the back glass. You've got this!
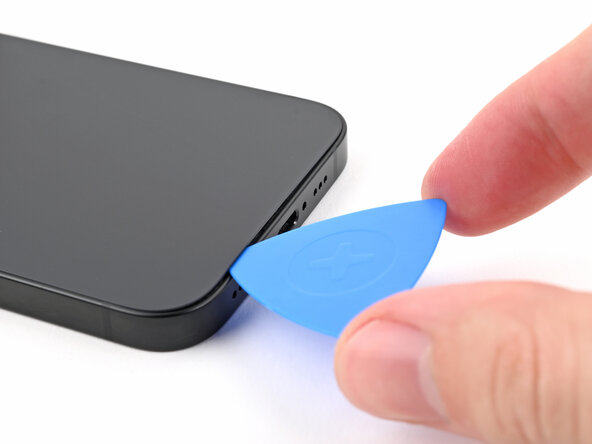
- Now, give that handle a solid pull—steady and strong—to pry a little gap between the back glass and the frame.
- Next up, slip the tip of an opening pick into that gap. You're on the right track!
Tools Used

Step 7
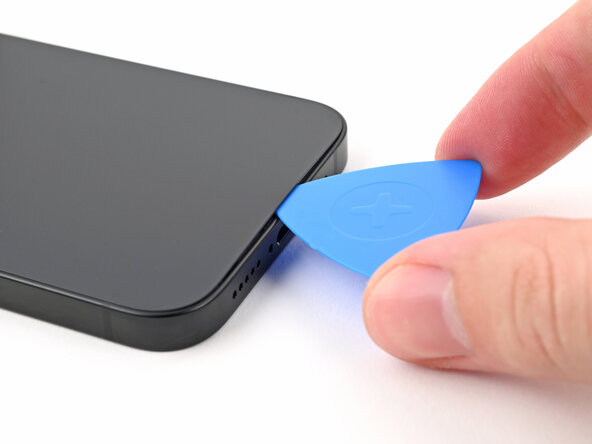
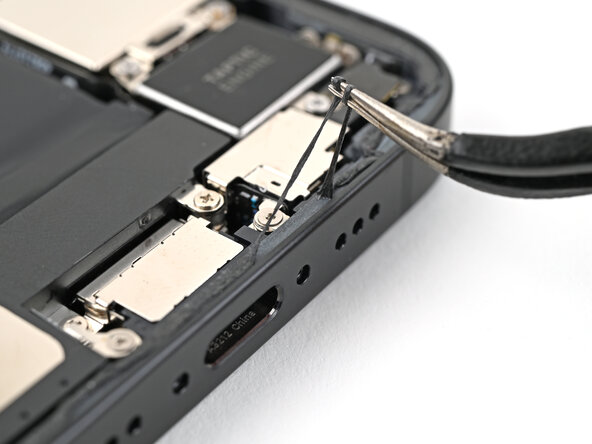
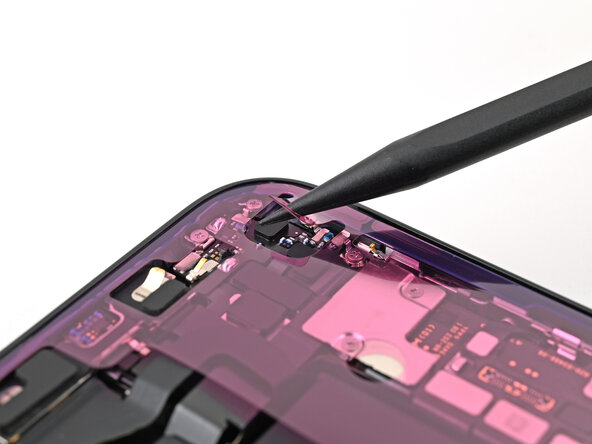
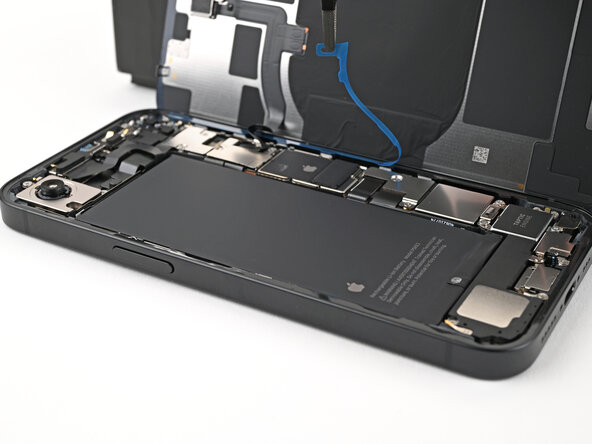
As you work your way around slicing the adhesive under the back glass, keep your pick shallow—don’t go deeper than 3 mm, or you might poke into some sensitive spots.
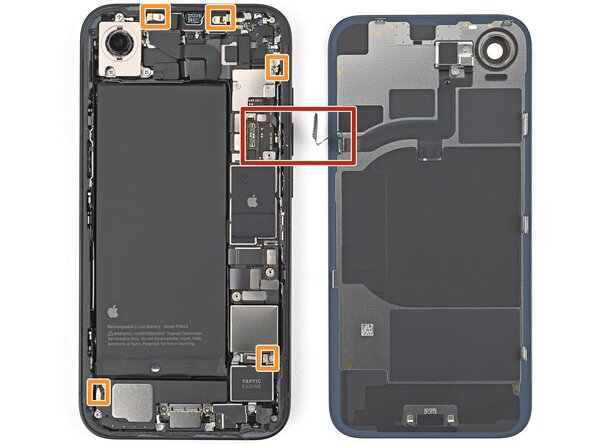
- Watch out for the tiny, delicate cable that connects the back glass to the phone—it's tucked in right next to the volume up button. Be gentle with it!
- Keep an eye on those spring contacts around the edges of your phone. They’re a little tricky, but nothing you can’t handle!
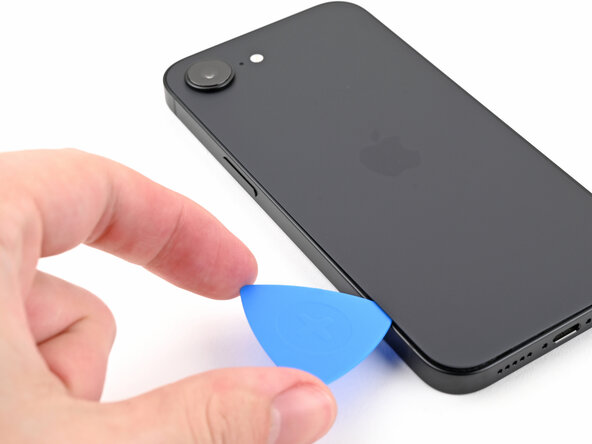
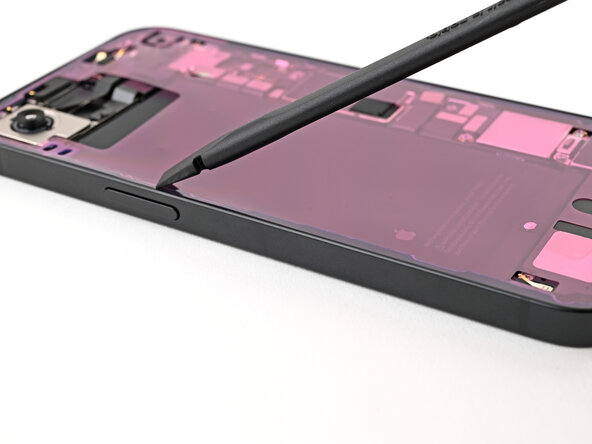
Step 8
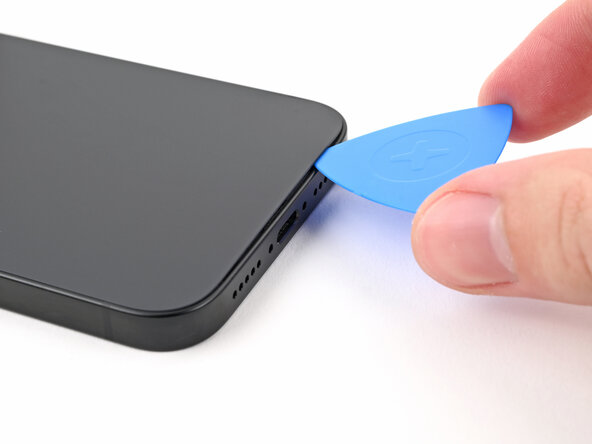
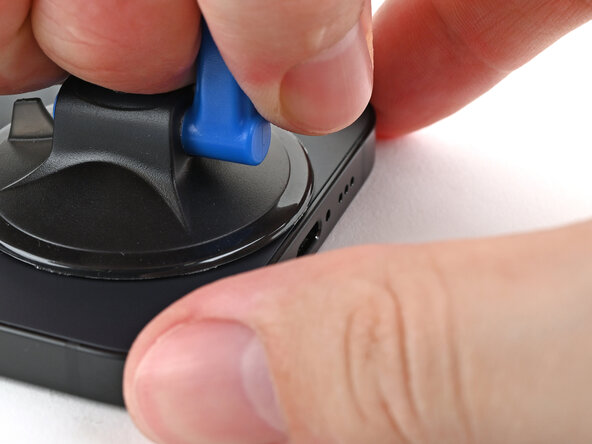
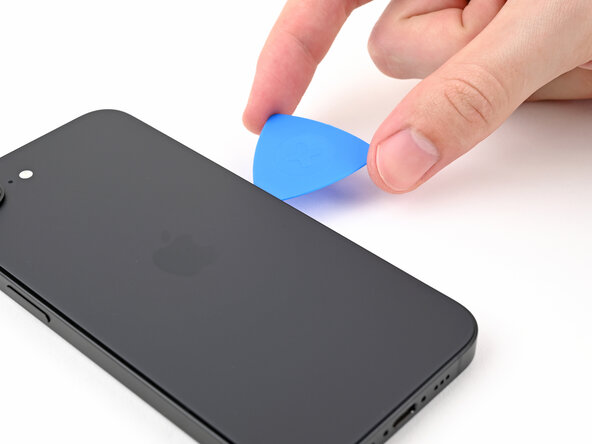
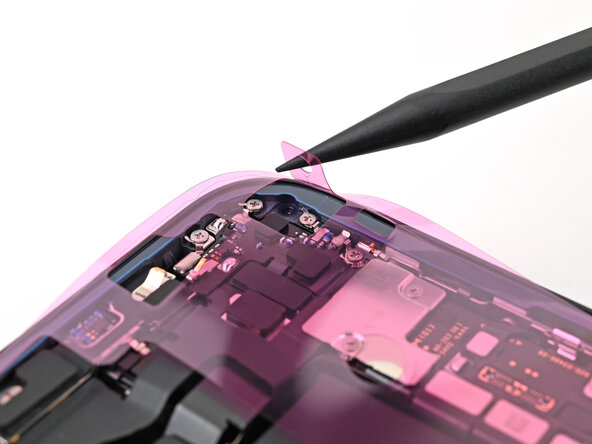
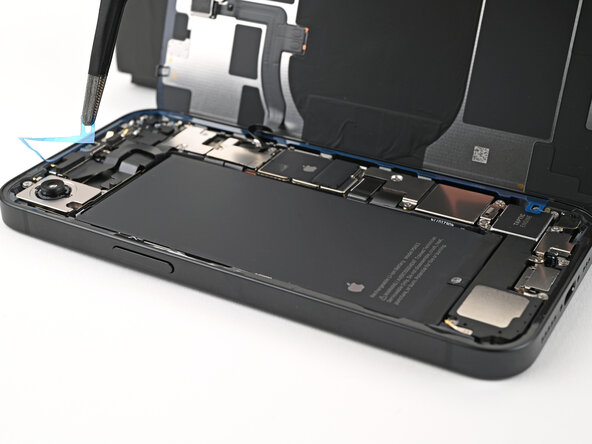
- Gently slide the opening pick along the bottom edge of the back glass to loosen the adhesive.
- Keep the opening pick resting near the bottom left corner for the next move.
Step 9
When heating the back glass with a hair dryer or heat gun, make sure it gets hot to the touch
- Place a heated iOpener on the left side of the back glass for 90 seconds. This will help loosen it up, making the next steps easier. No rush—just let the heat do its magic!
Tools Used
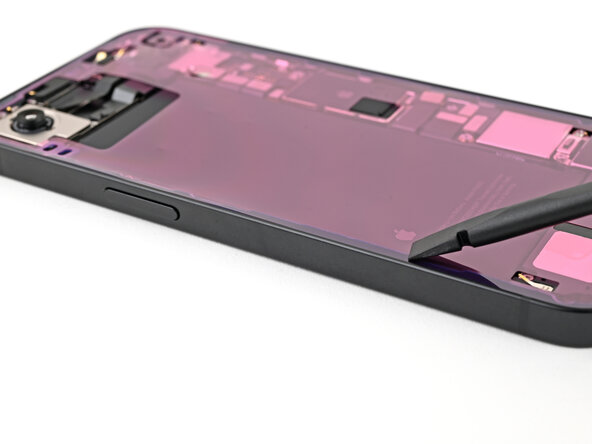
Step 10
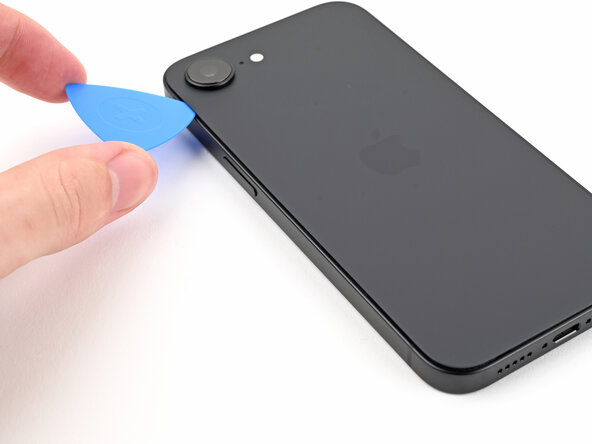
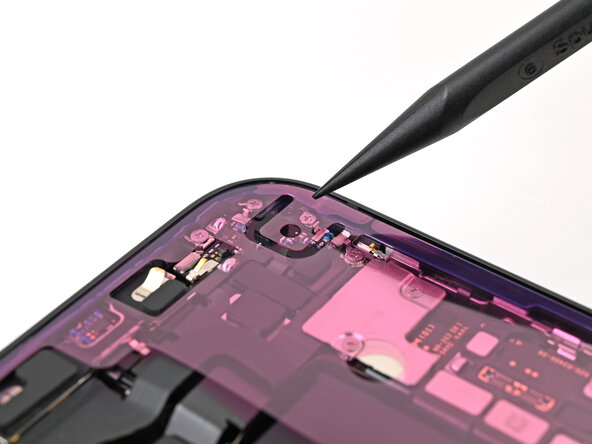
As you gently pass the metal clips, you'll hear and feel them click free—like a satisfying handshake between parts. Keep it smooth and steady, and those clips will come loose without a hitch. If you need a hand along the way, you can always schedule a repair.
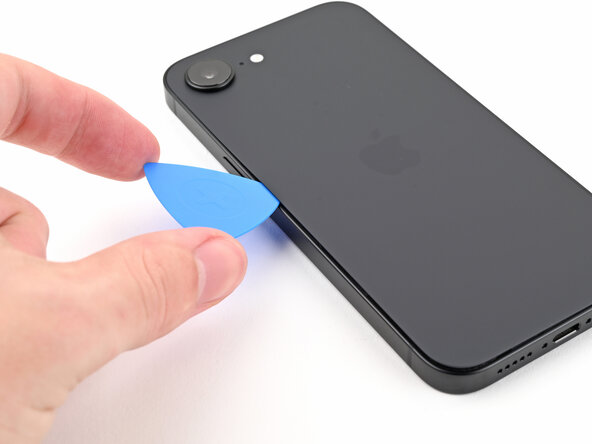
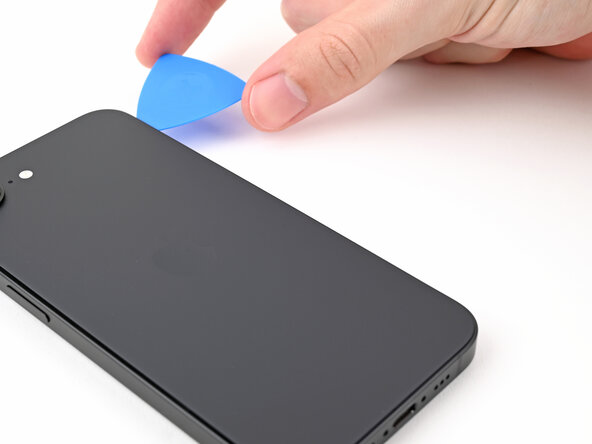
- Gently twist the opening pick around the bottom left corner and slide it up the left edge to break through the adhesive and pop those metal clips free.
- Keep the opening pick hanging out near the top left corner for the next move.
Step 11
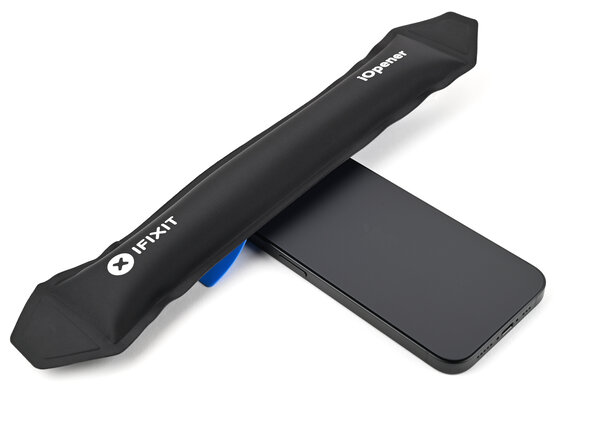
Grab your hair dryer or heat gun and warm up the back glass until it’s nice and toasty to the touch.
- Place a warm iOpener on the top edge of the back glass and let it do its magic for 90 seconds.
Tools Used
Step 12
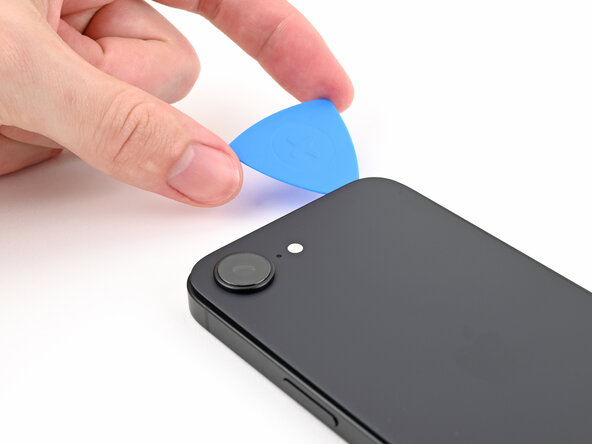
You'll get a satisfying snap and feel those metal clips pop free as you slide past them.
- Spin that opening pick around the top left corner like you’re DJing, then slide it along the top edge to slice through the adhesive and pop those metal clips free.
- Let the opening pick chill in the top right corner for now.
Step 13
Grab your trusty hair dryer or heat gun and warm up that back glass until it’s nice and toasty!
- Gently press a heated iOpener against the right edge of the back glass and hold it there for about 90 seconds. Keep it warm and cozy to loosen things up.
Tools Used
Step 14

Be careful not to push your pick in deeper than 3 mm—there’s a sneaky cable hiding in there, and we don’t want to hurt it!
As you gently pass the metal clip, you'll notice a satisfying click and a little give—that's the release happening. Keep it slow and steady for the smoothest detachment.
- Swing that opening pick around the top right corner, then glide it down the right edge to loosen up the rest of the sticky stuff and pop off that metal clip.
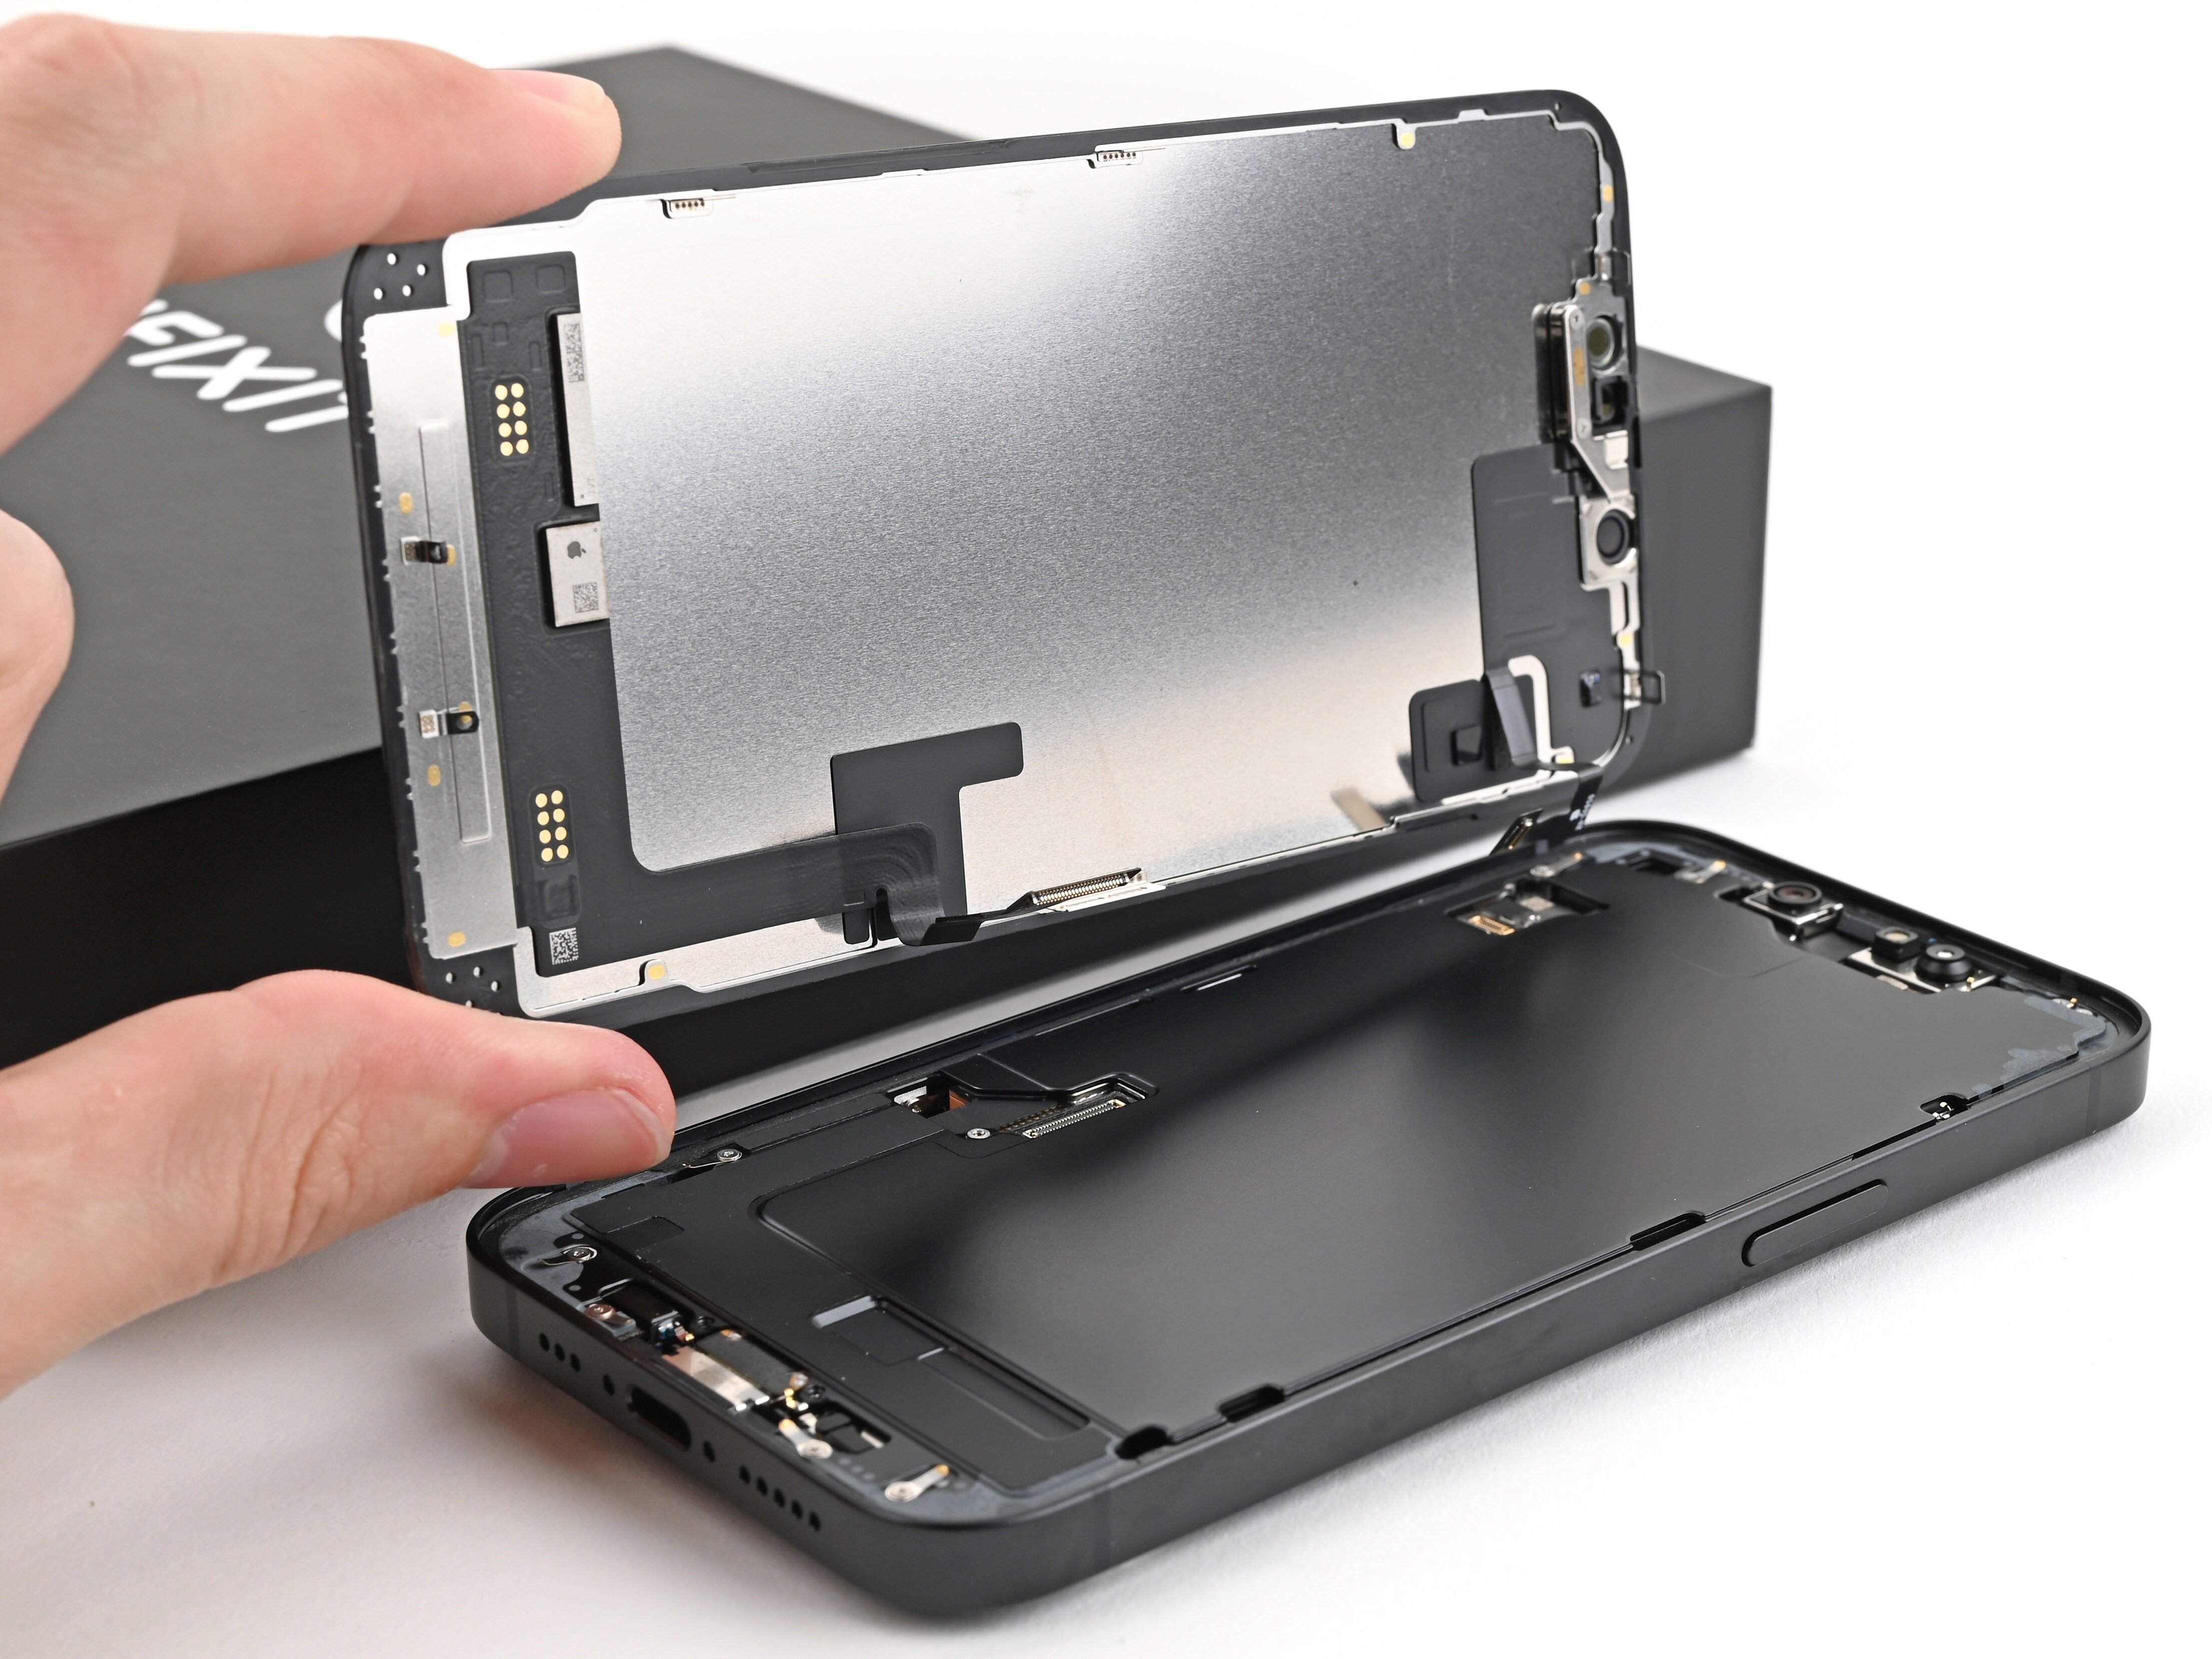
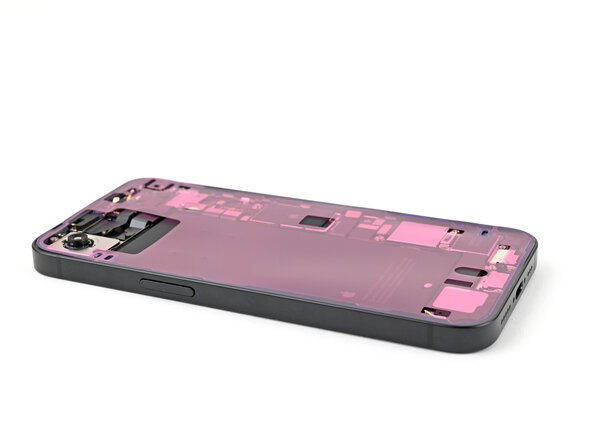
Step 15
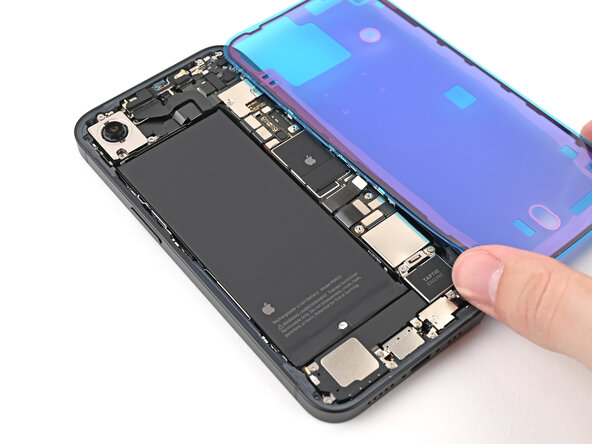
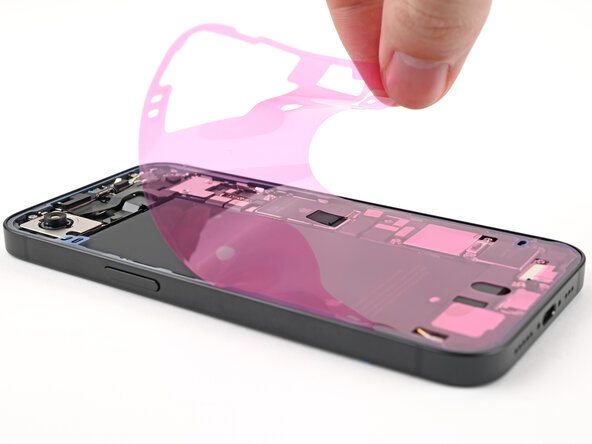
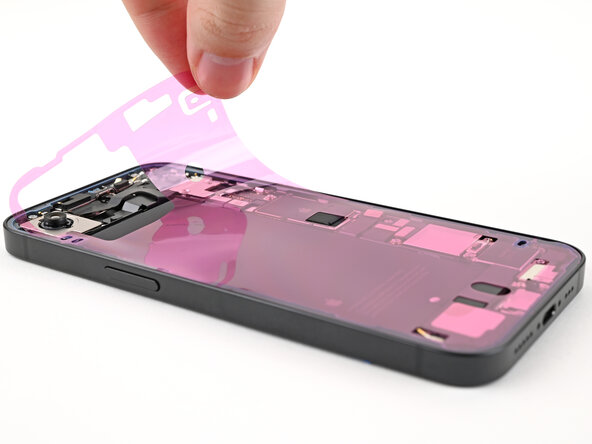
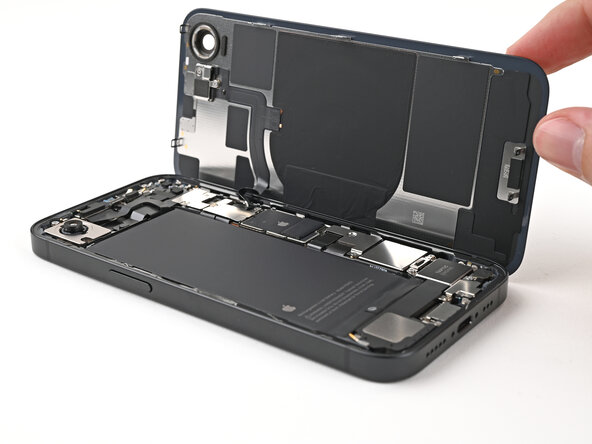
Your back glass should be all free now! If not, just give your opening pick another go around the edge to loosen up any stubborn adhesive still hanging on.
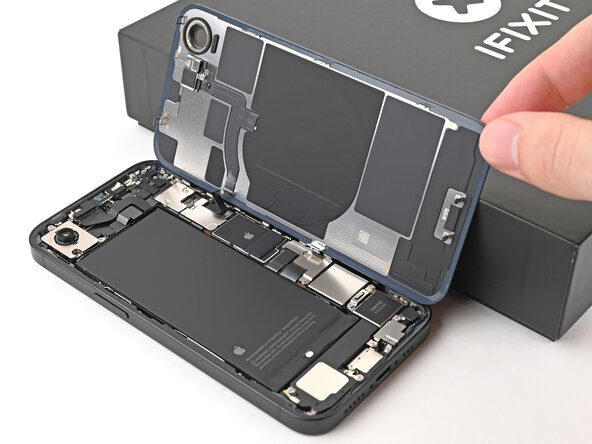
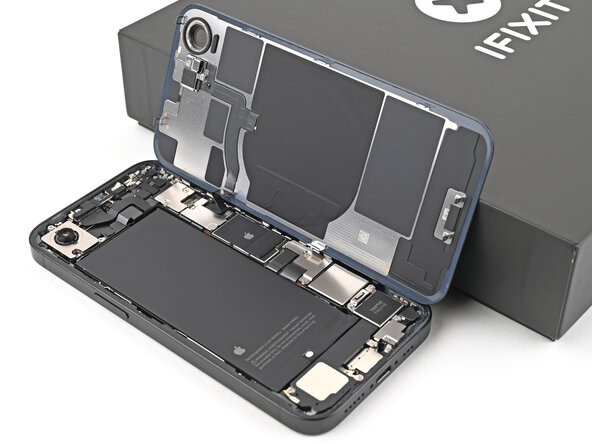
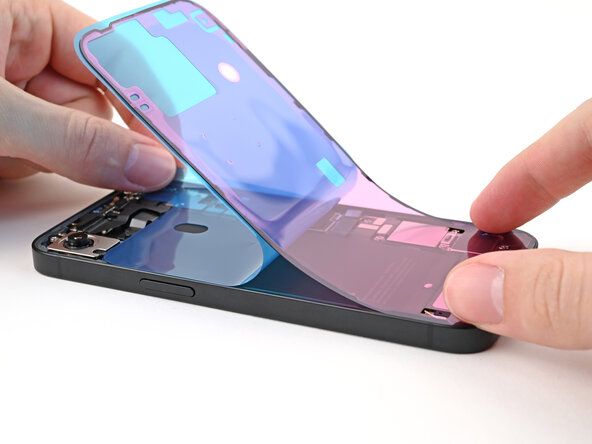
- Gently swing the back glass open to the right side of your phone, then prop it up against a clean, sturdy surface to keep it steady.
Step 16
- Grab a tri-point Y000 screwdriver and gently remove the two 1.3 mm screws holding down the lower connector cover. Easy does it—you're making progress!
Tools Used

Step 17
- Grab your trusty tweezers or just use your fingers to lift up the lower connector cover. Slide it toward the top of the phone to pop it free from its metal clip—like a tiny escape artist.
- Take off the lower connector cover and set it aside. Onward!
Tools Used

Step 18
- Grab your spudger and gently wedge the tip underneath the battery press connector. Pry it up carefully to disconnect it.
Tools Used

Step 19
- Grab your tri-point Y000 screwdriver and take out the 1.0 mm screw holding down the middle connector cover.
Tools Used
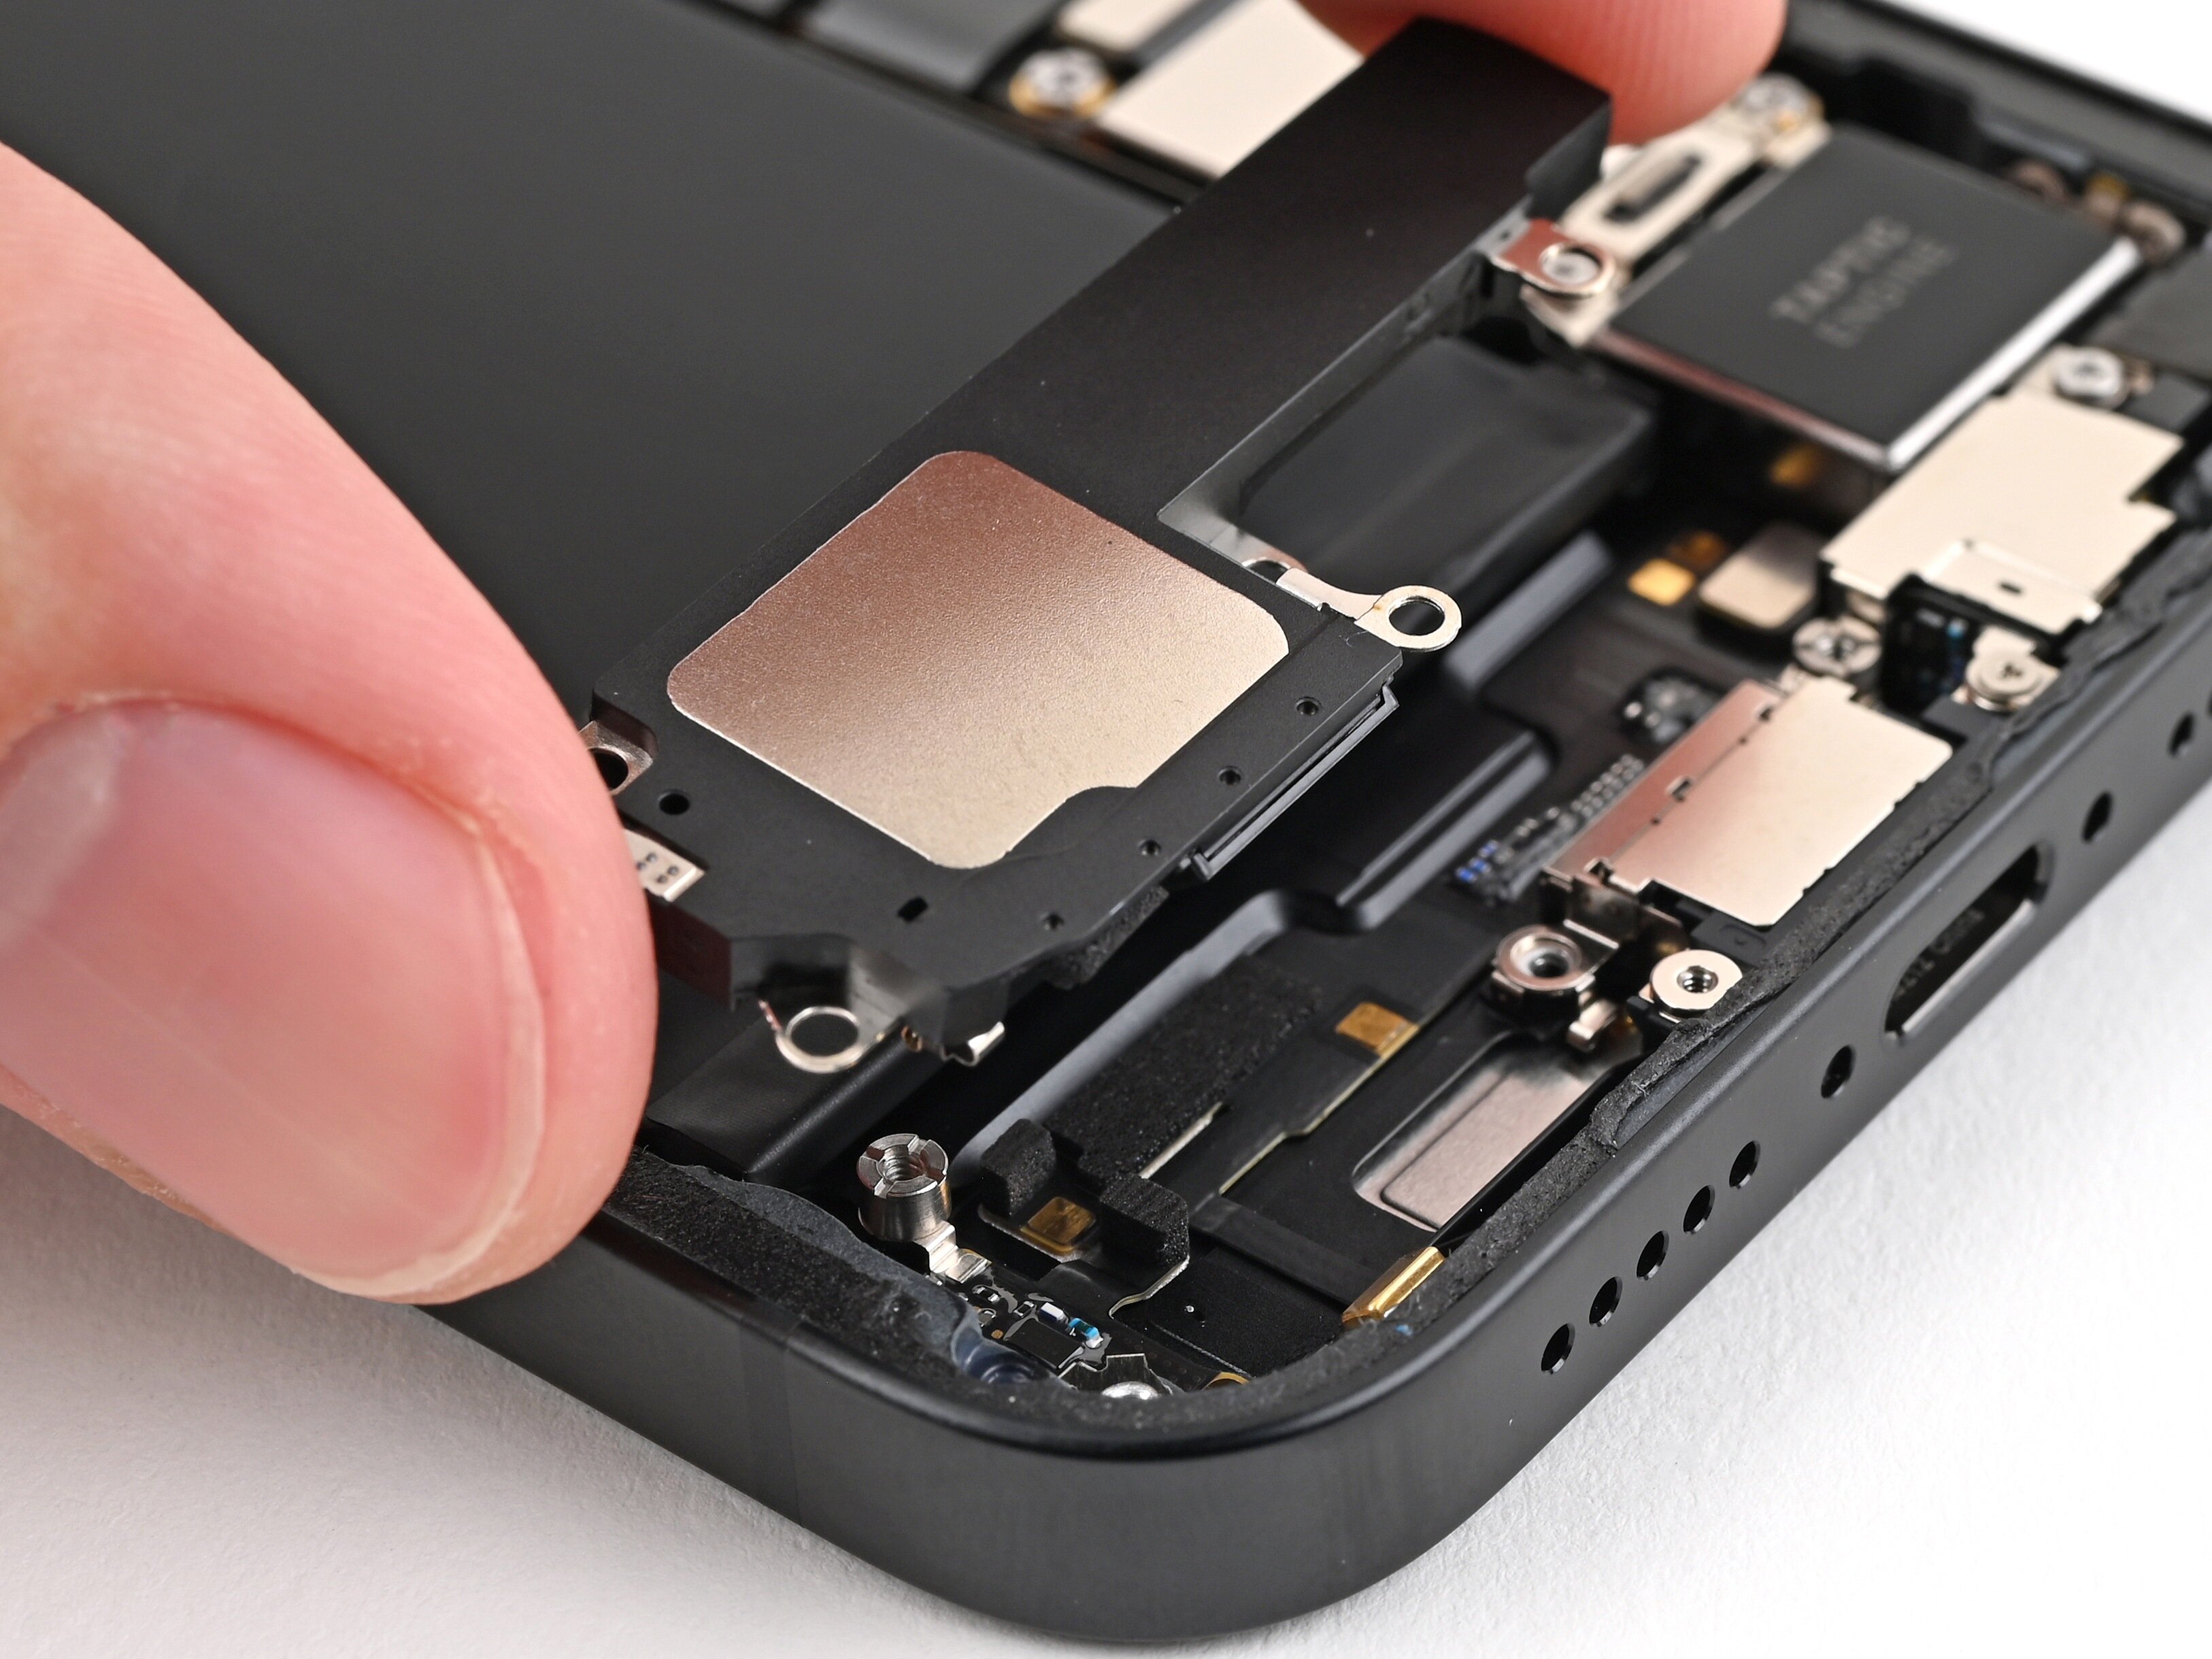
Step 20
The middle connector cover is nestled snugly between two metal clips—one at the top and one at the bottom. Keep an eye on those clips; they’re playing a vital role in keeping everything together!
Step 21
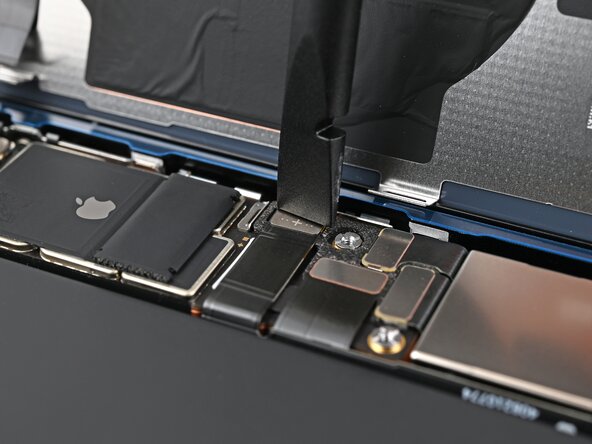
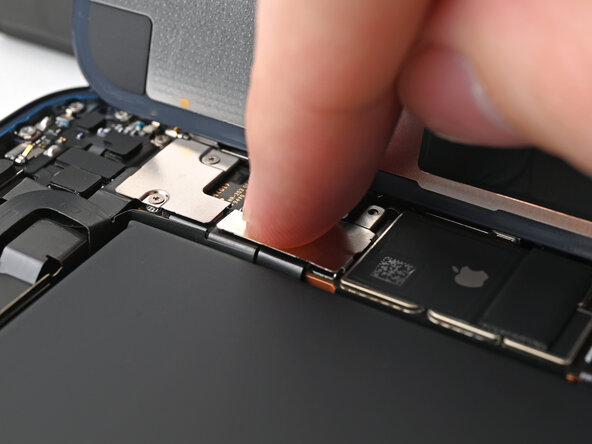
- Grab a spudger’s tip and gently wedge it under the wireless charging coil press connector to pry it up and disconnect. Stay steady and careful—no rush needed. If you hit a snag, you can always schedule a repair for expert help.
Tools Used
Step 22
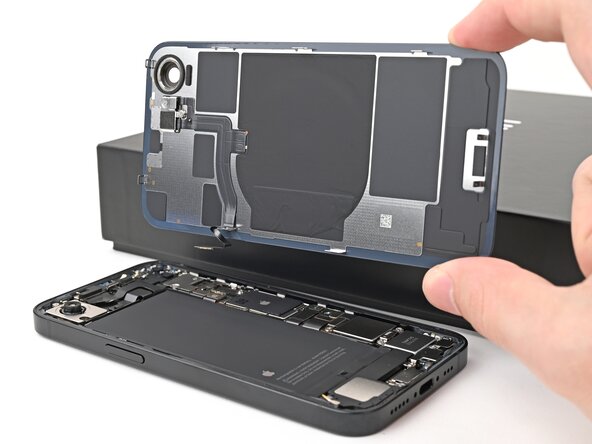
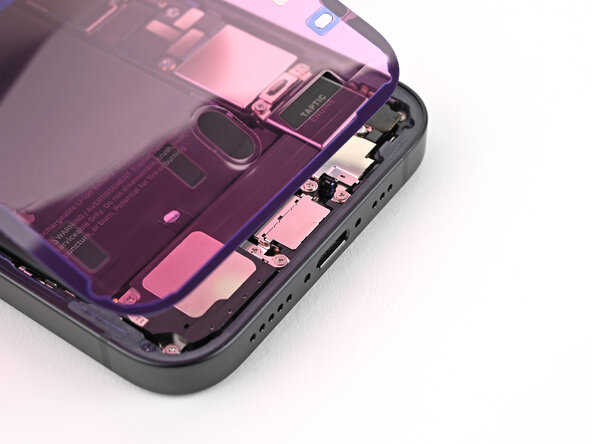
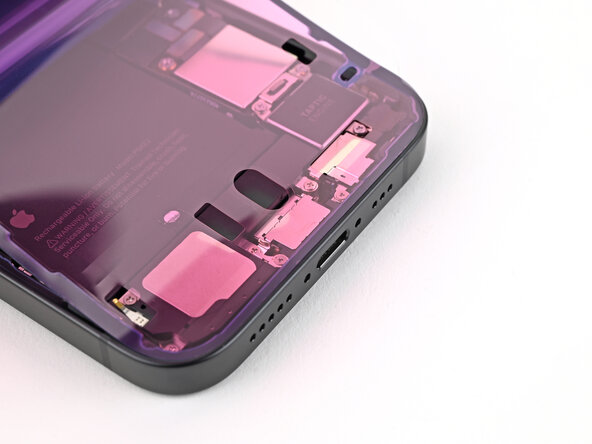
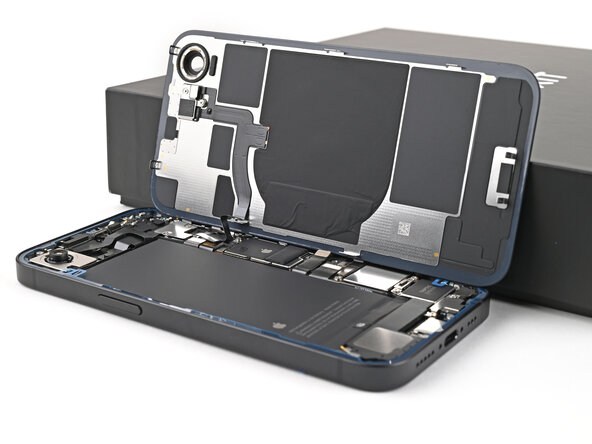
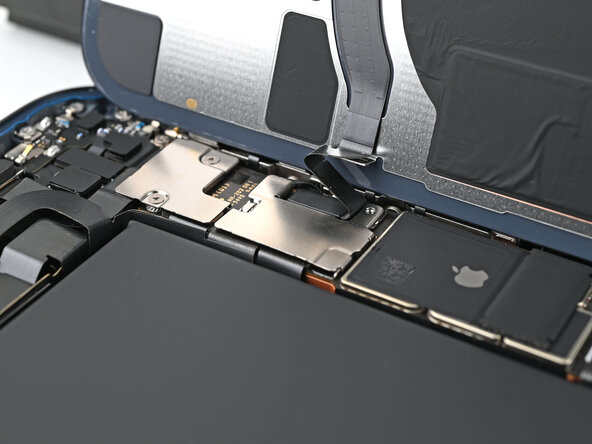
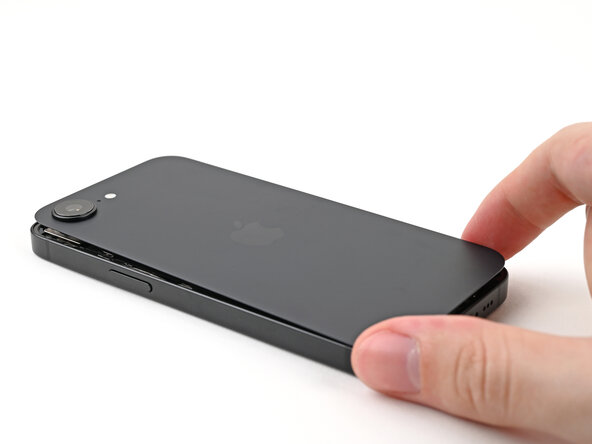
- Gently lift off the back glass from the frame and set it aside. Keep your pace steady and make sure not to force anything—patience is key. If you need help along the way, you can always schedule a repair.
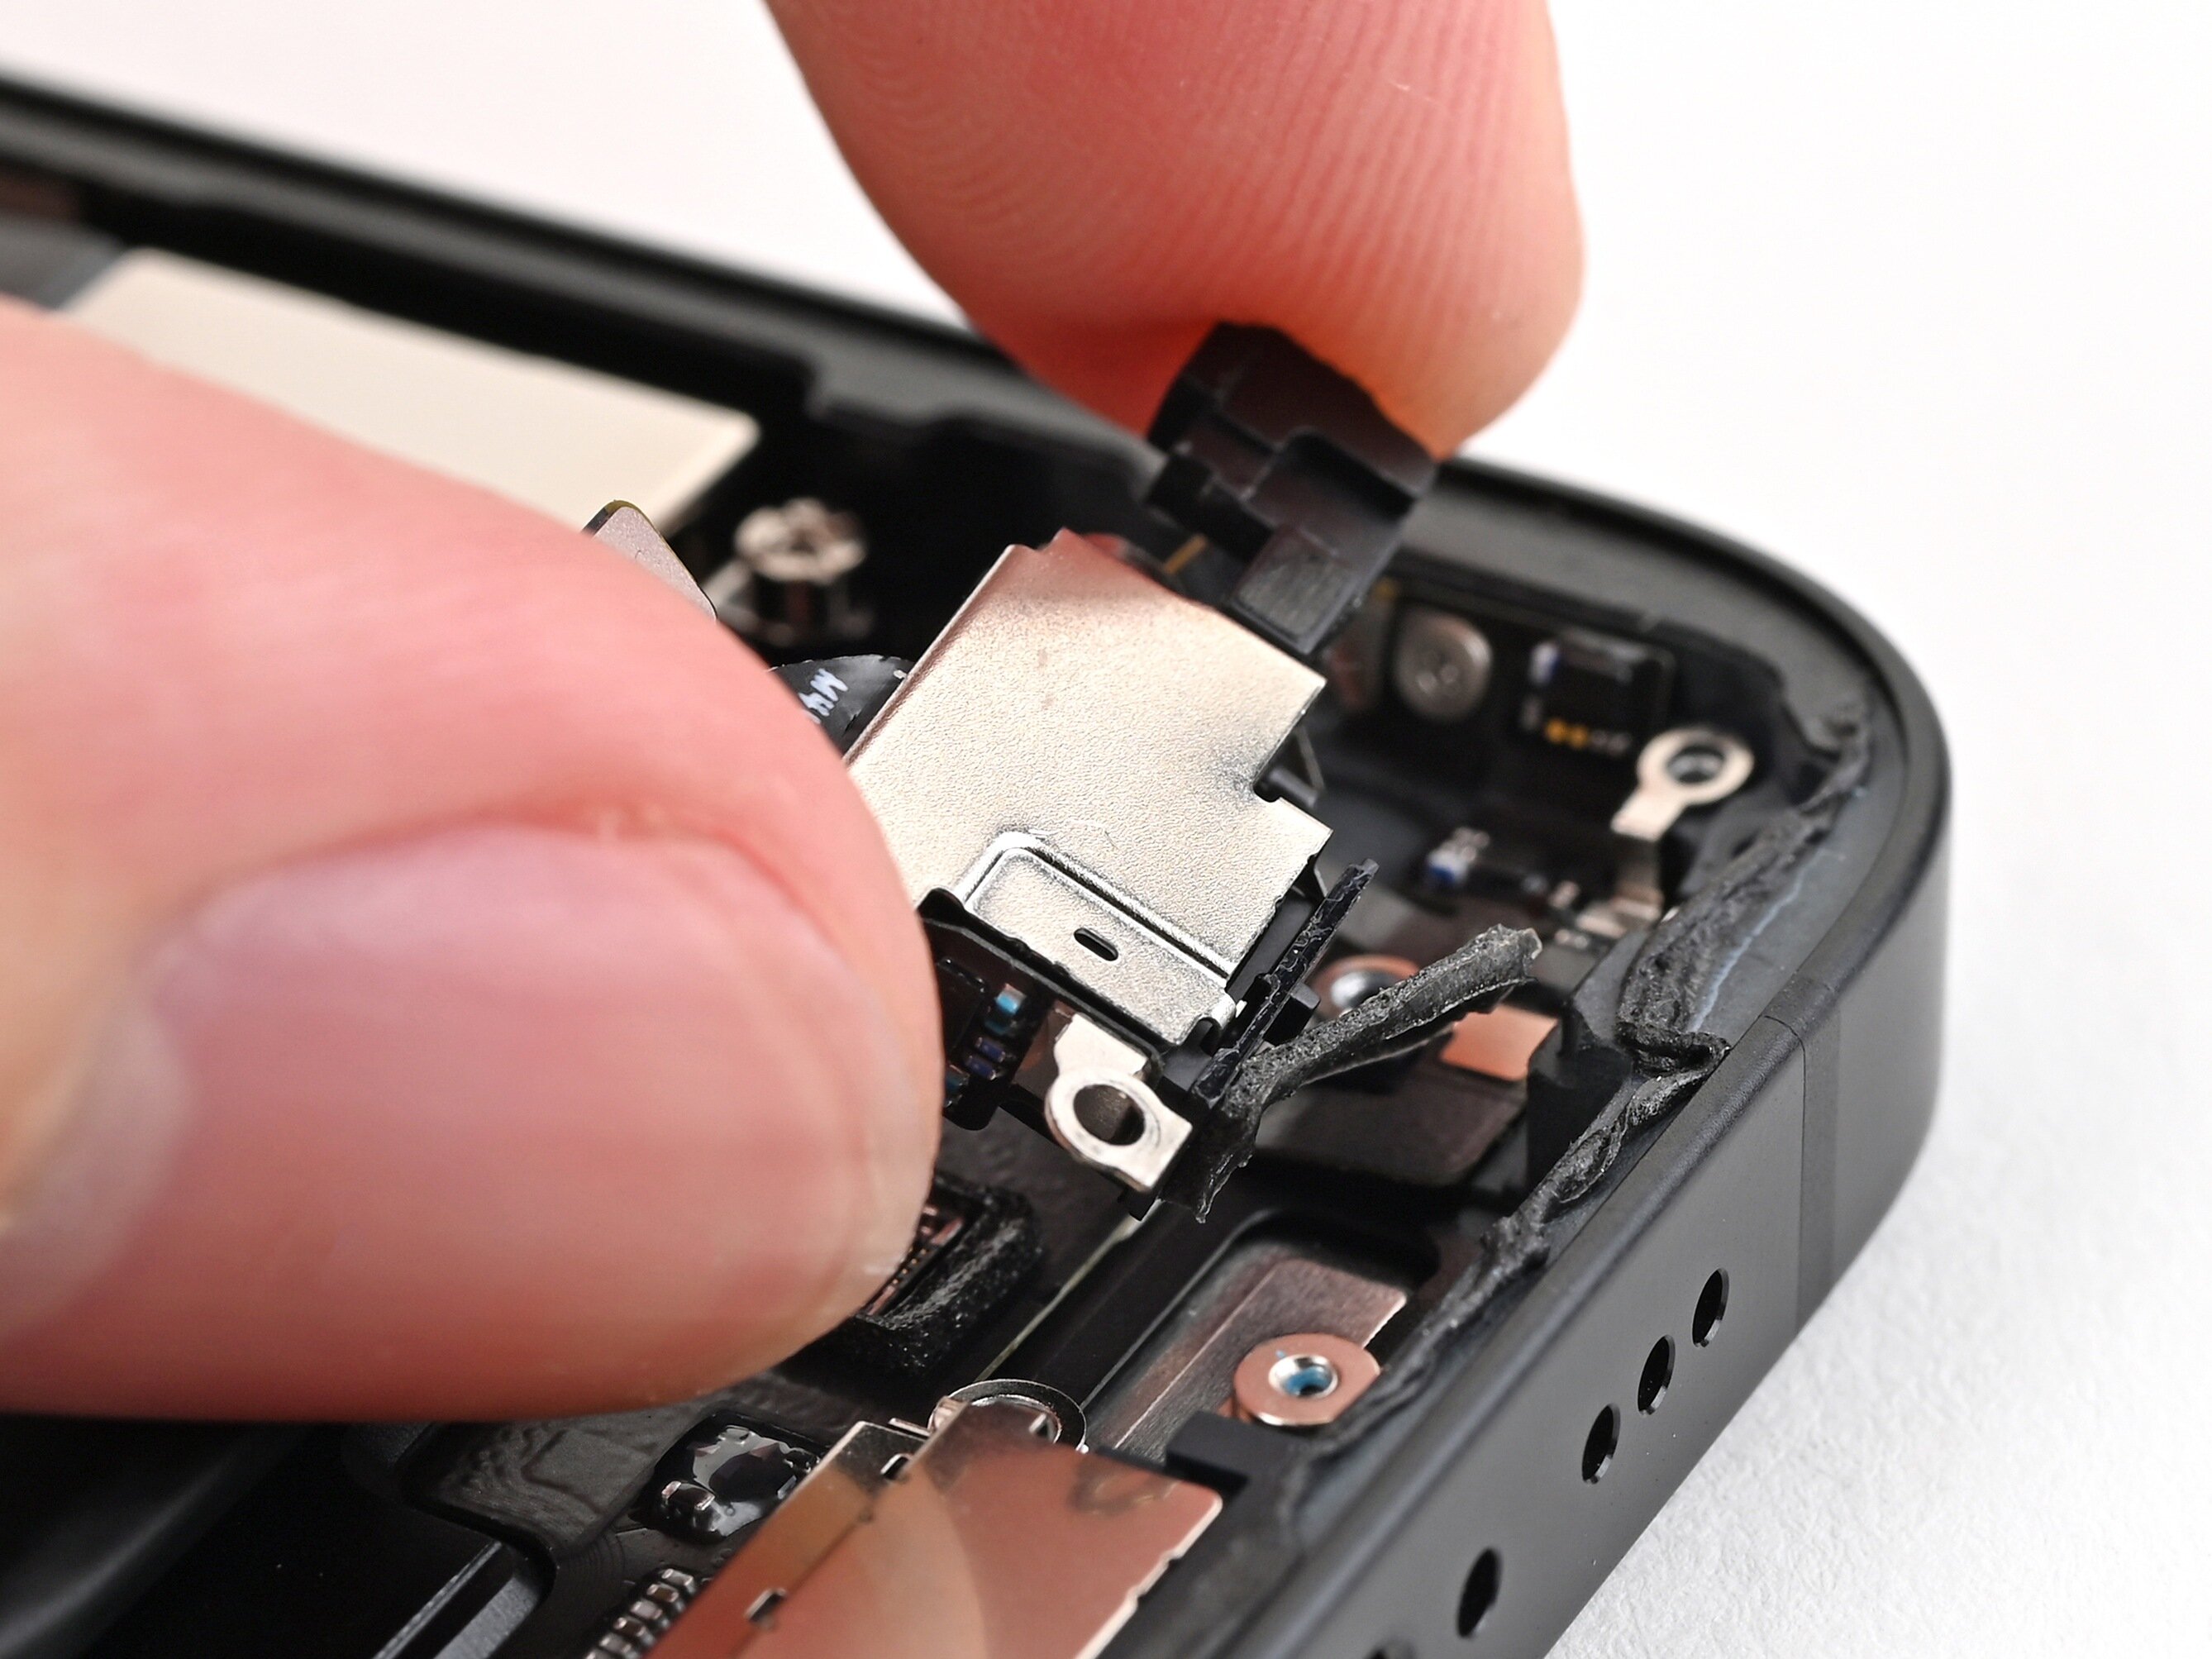
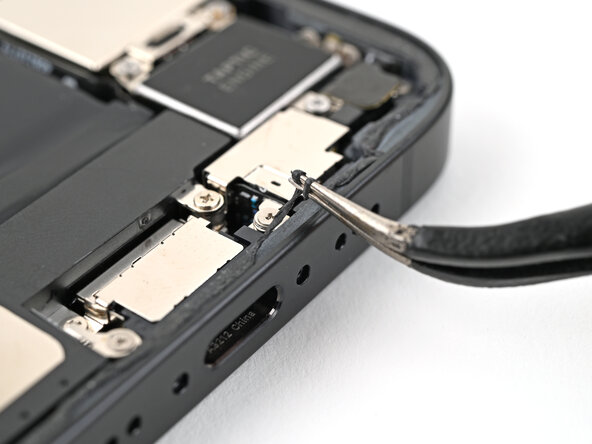
Step 23
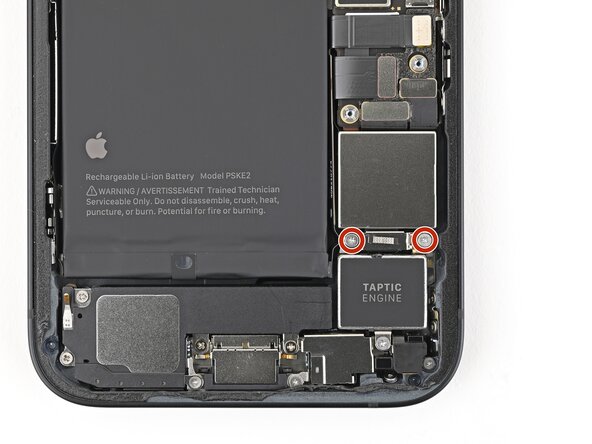
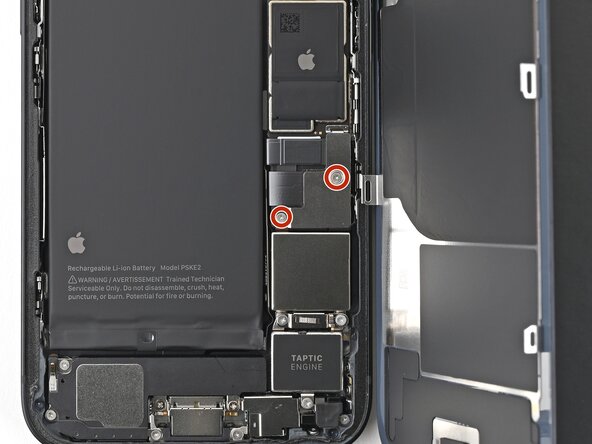
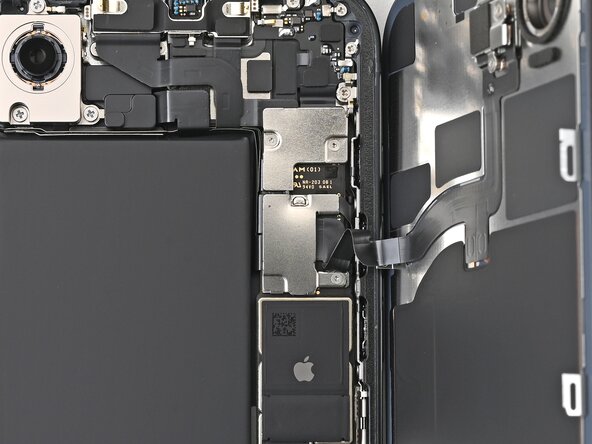
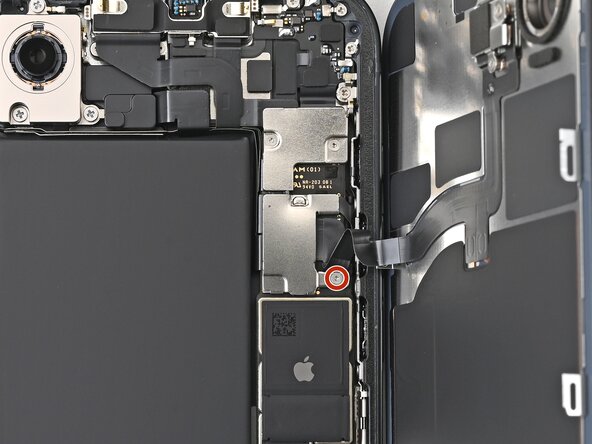
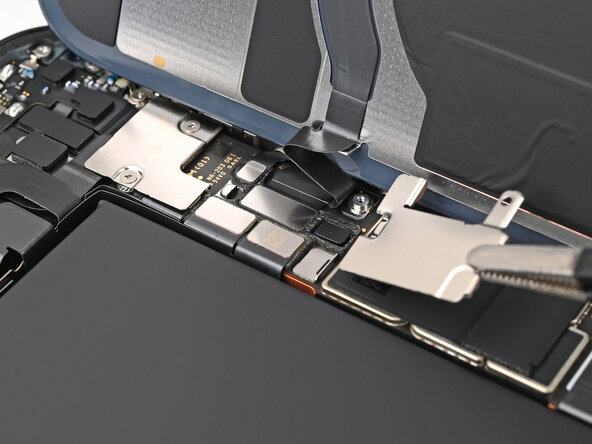
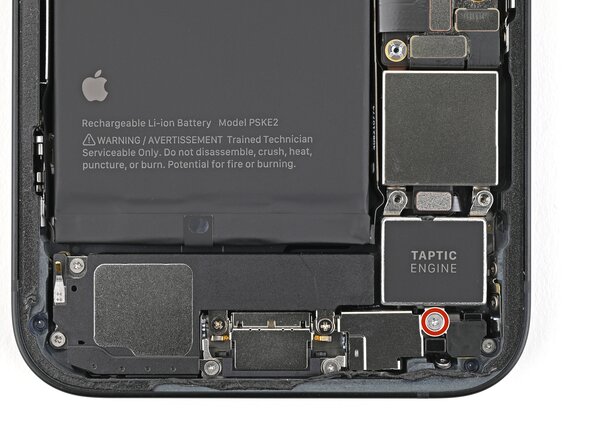
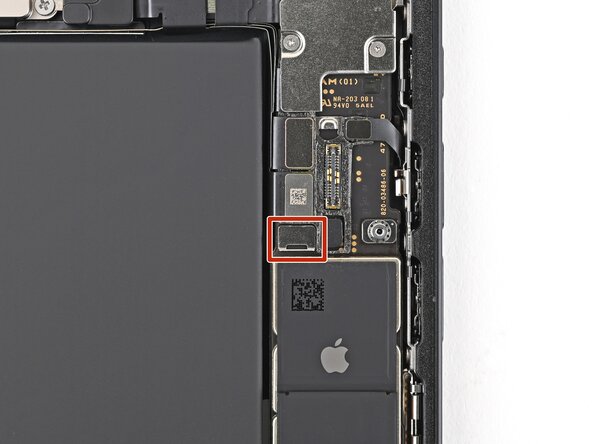
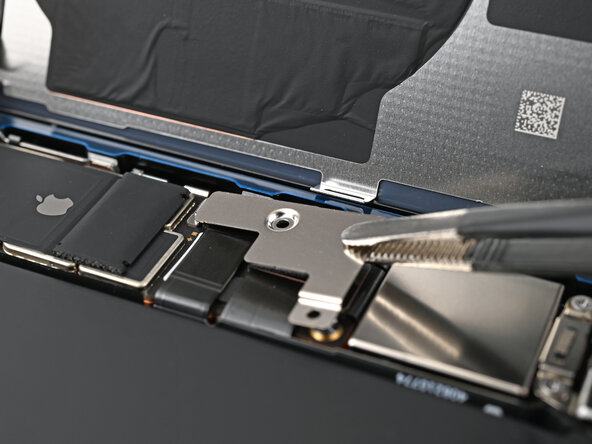
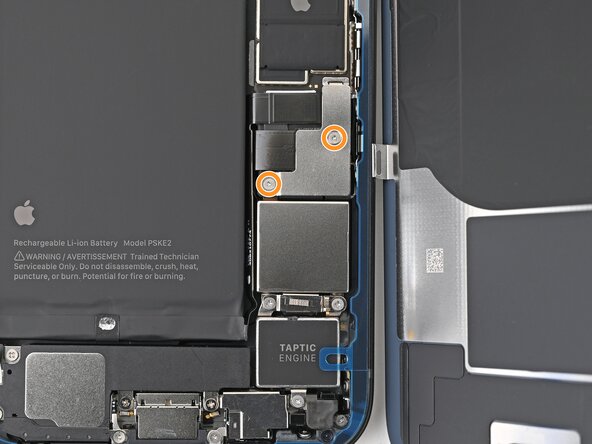
- Grab a Phillips screwdriver and carefully unscrew the two 2.2 mm-long screws holding down the Taptic Engine connector cover.
Step 24
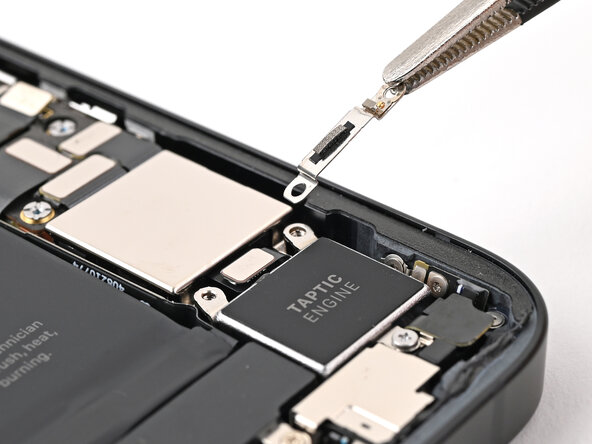
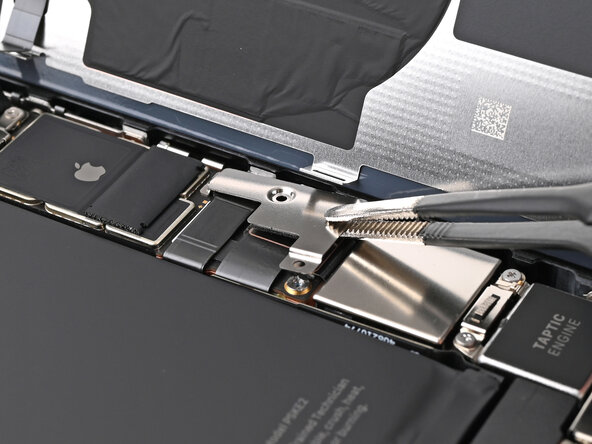
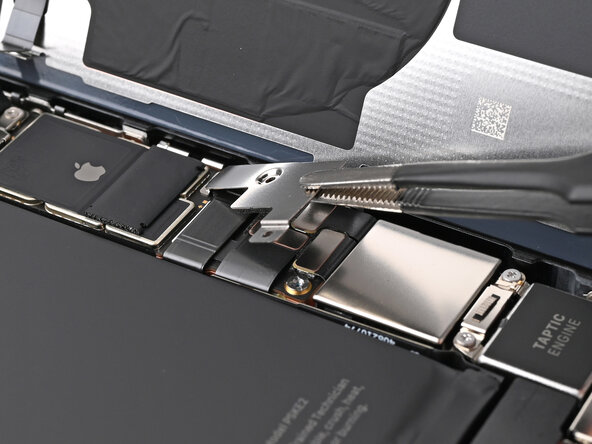
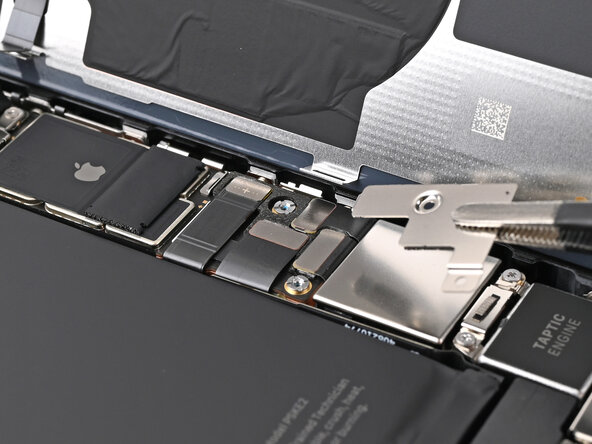
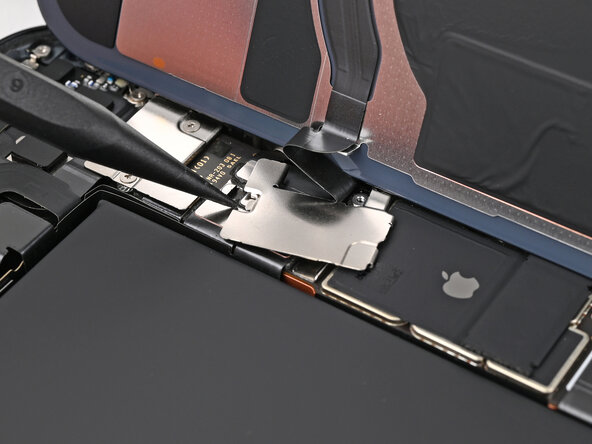
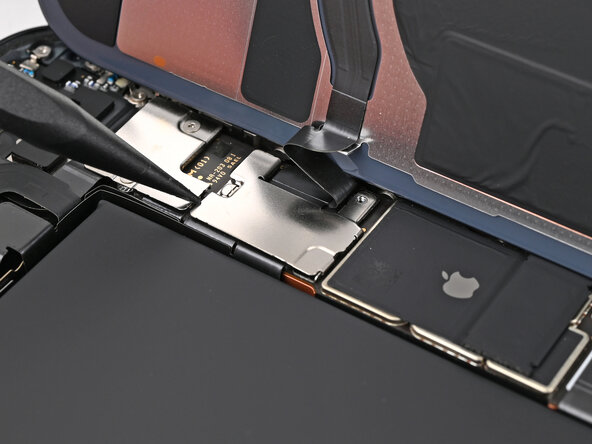
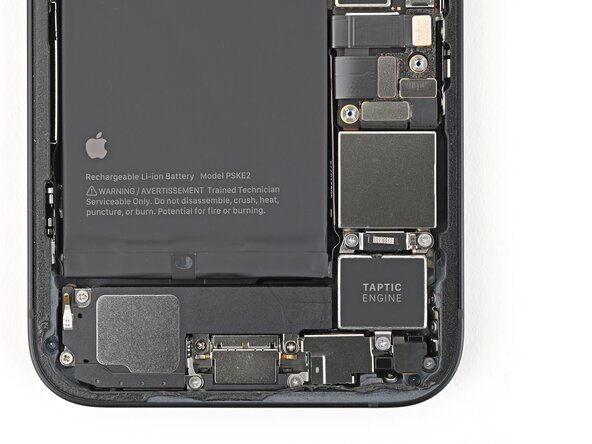
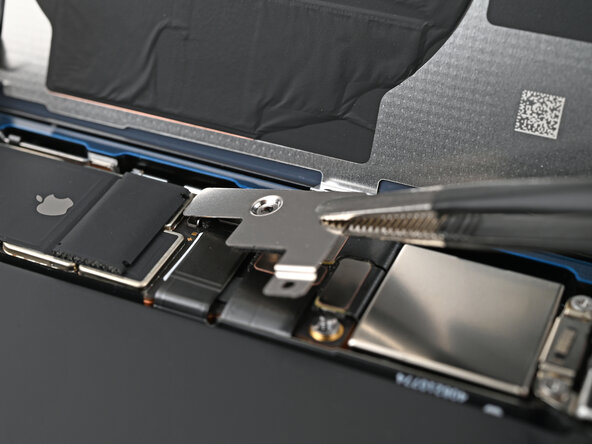
- Grab some tweezers or just use your fingers to gently lift the Taptic Engine connector cover. Easy does it—you're on your way to the next step. If you need help, you can always schedule a repair.
Tools Used
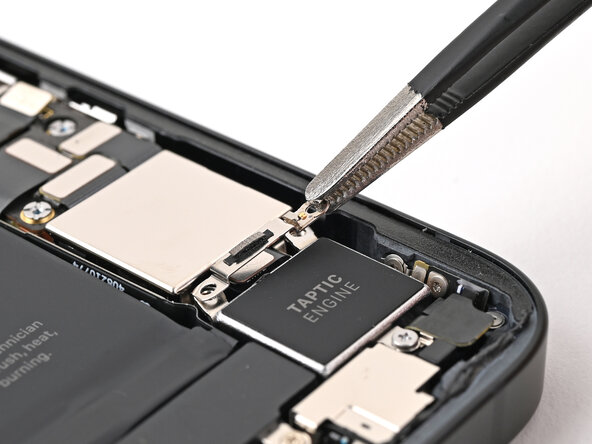
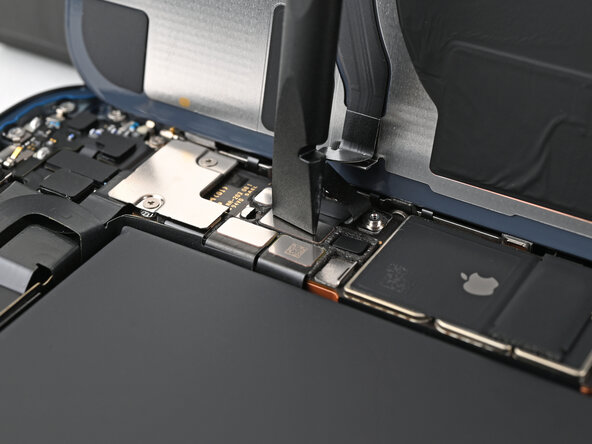
Step 25
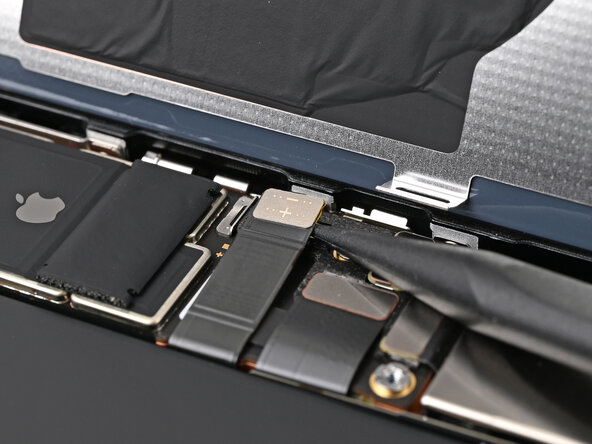
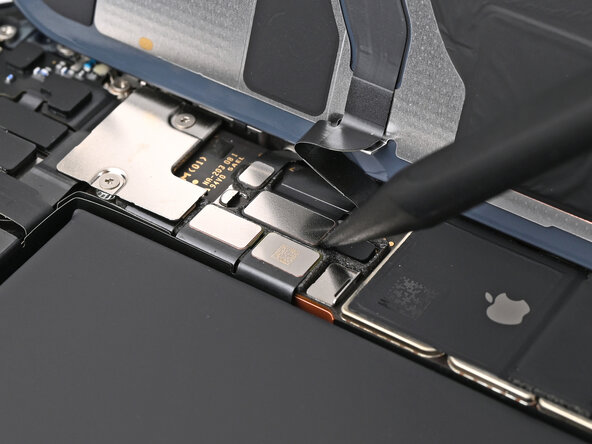
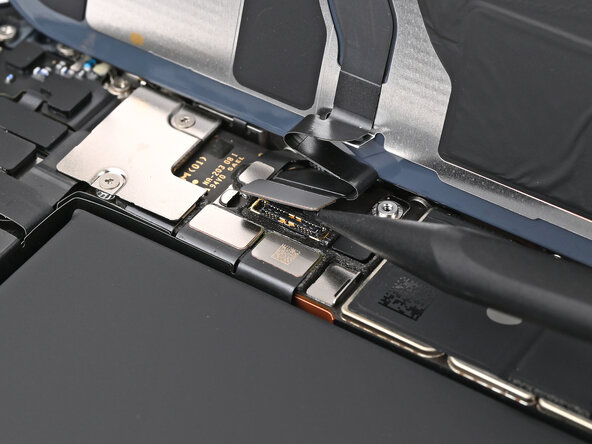
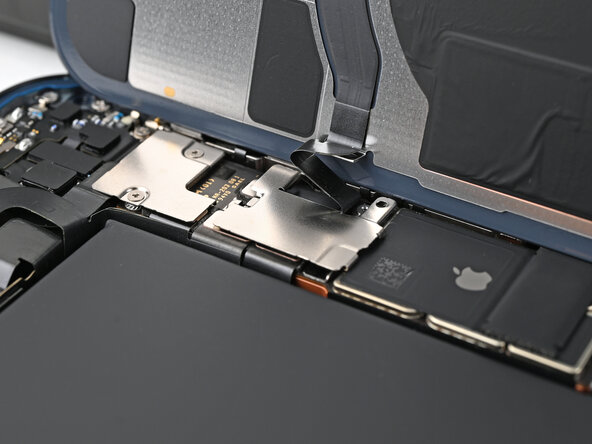
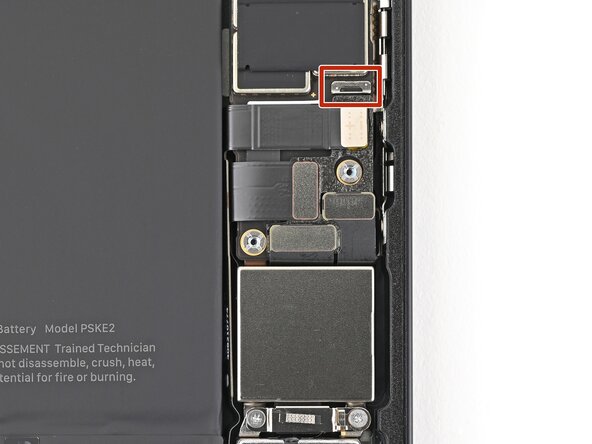
- Grab a spudger and gently pry up the Taptic Engine press connector to disconnect it. Take your time—patience is key! If you need help along the way, you can always schedule a repair.
Tools Used
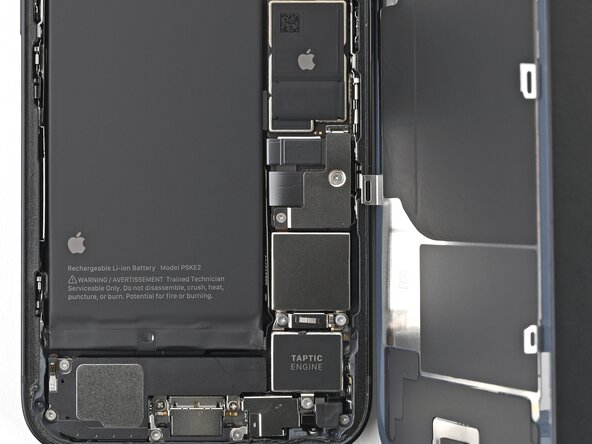
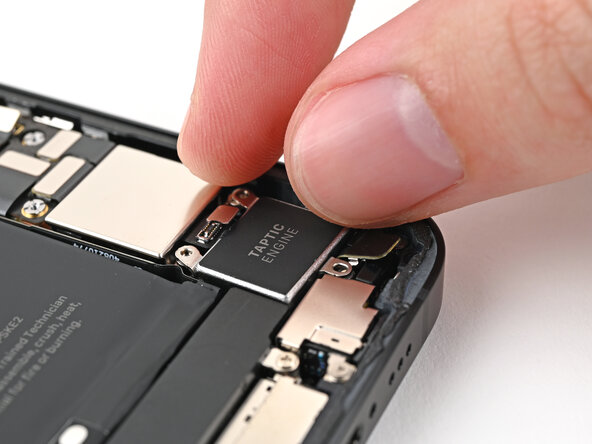
Step 26
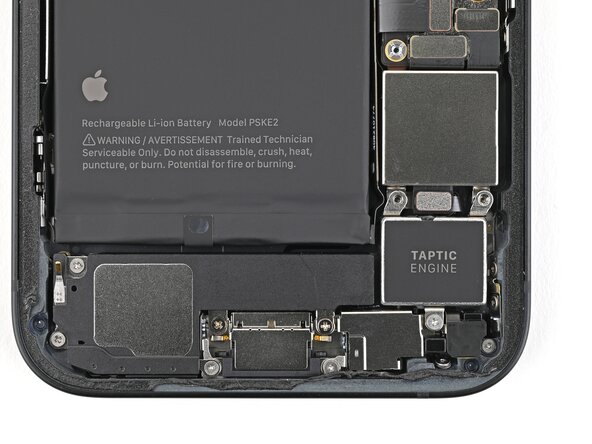
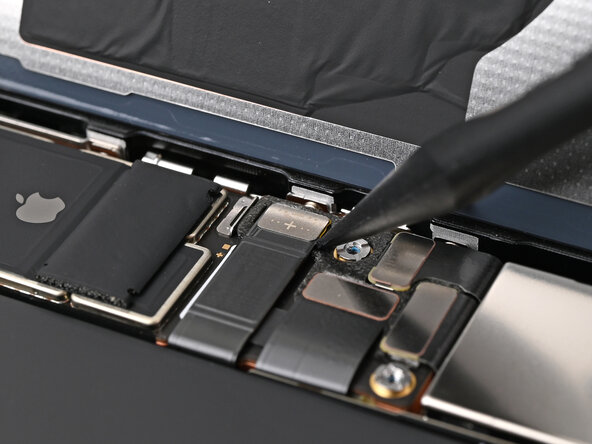
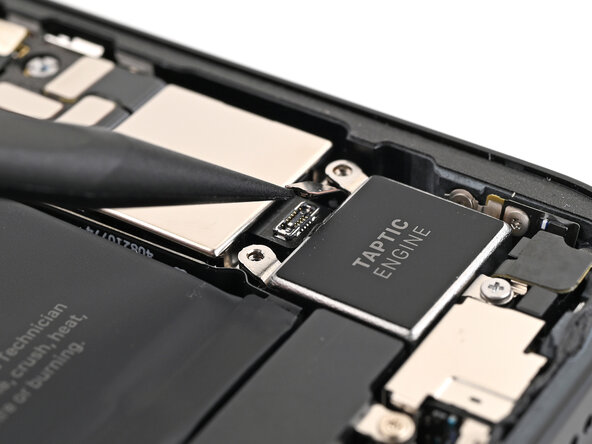
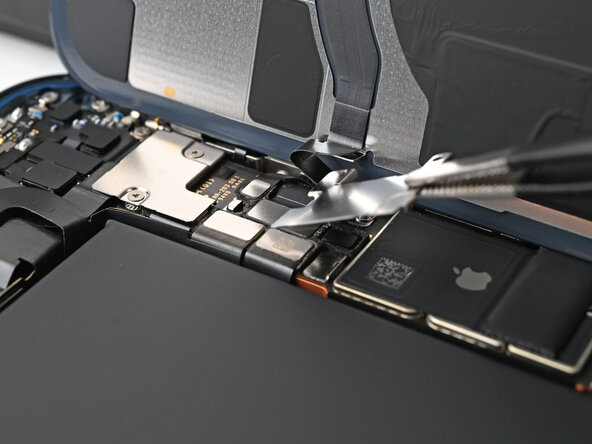
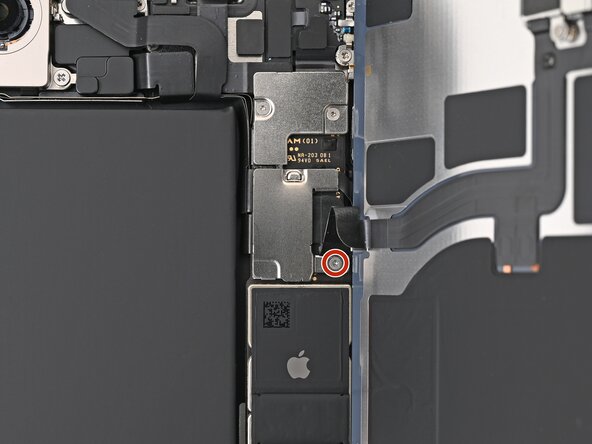
- Grab your trusty Phillips screwdriver and unscrew the 2.1mm-long screw that's holding the Taptic Engine in place. Easy peasy!
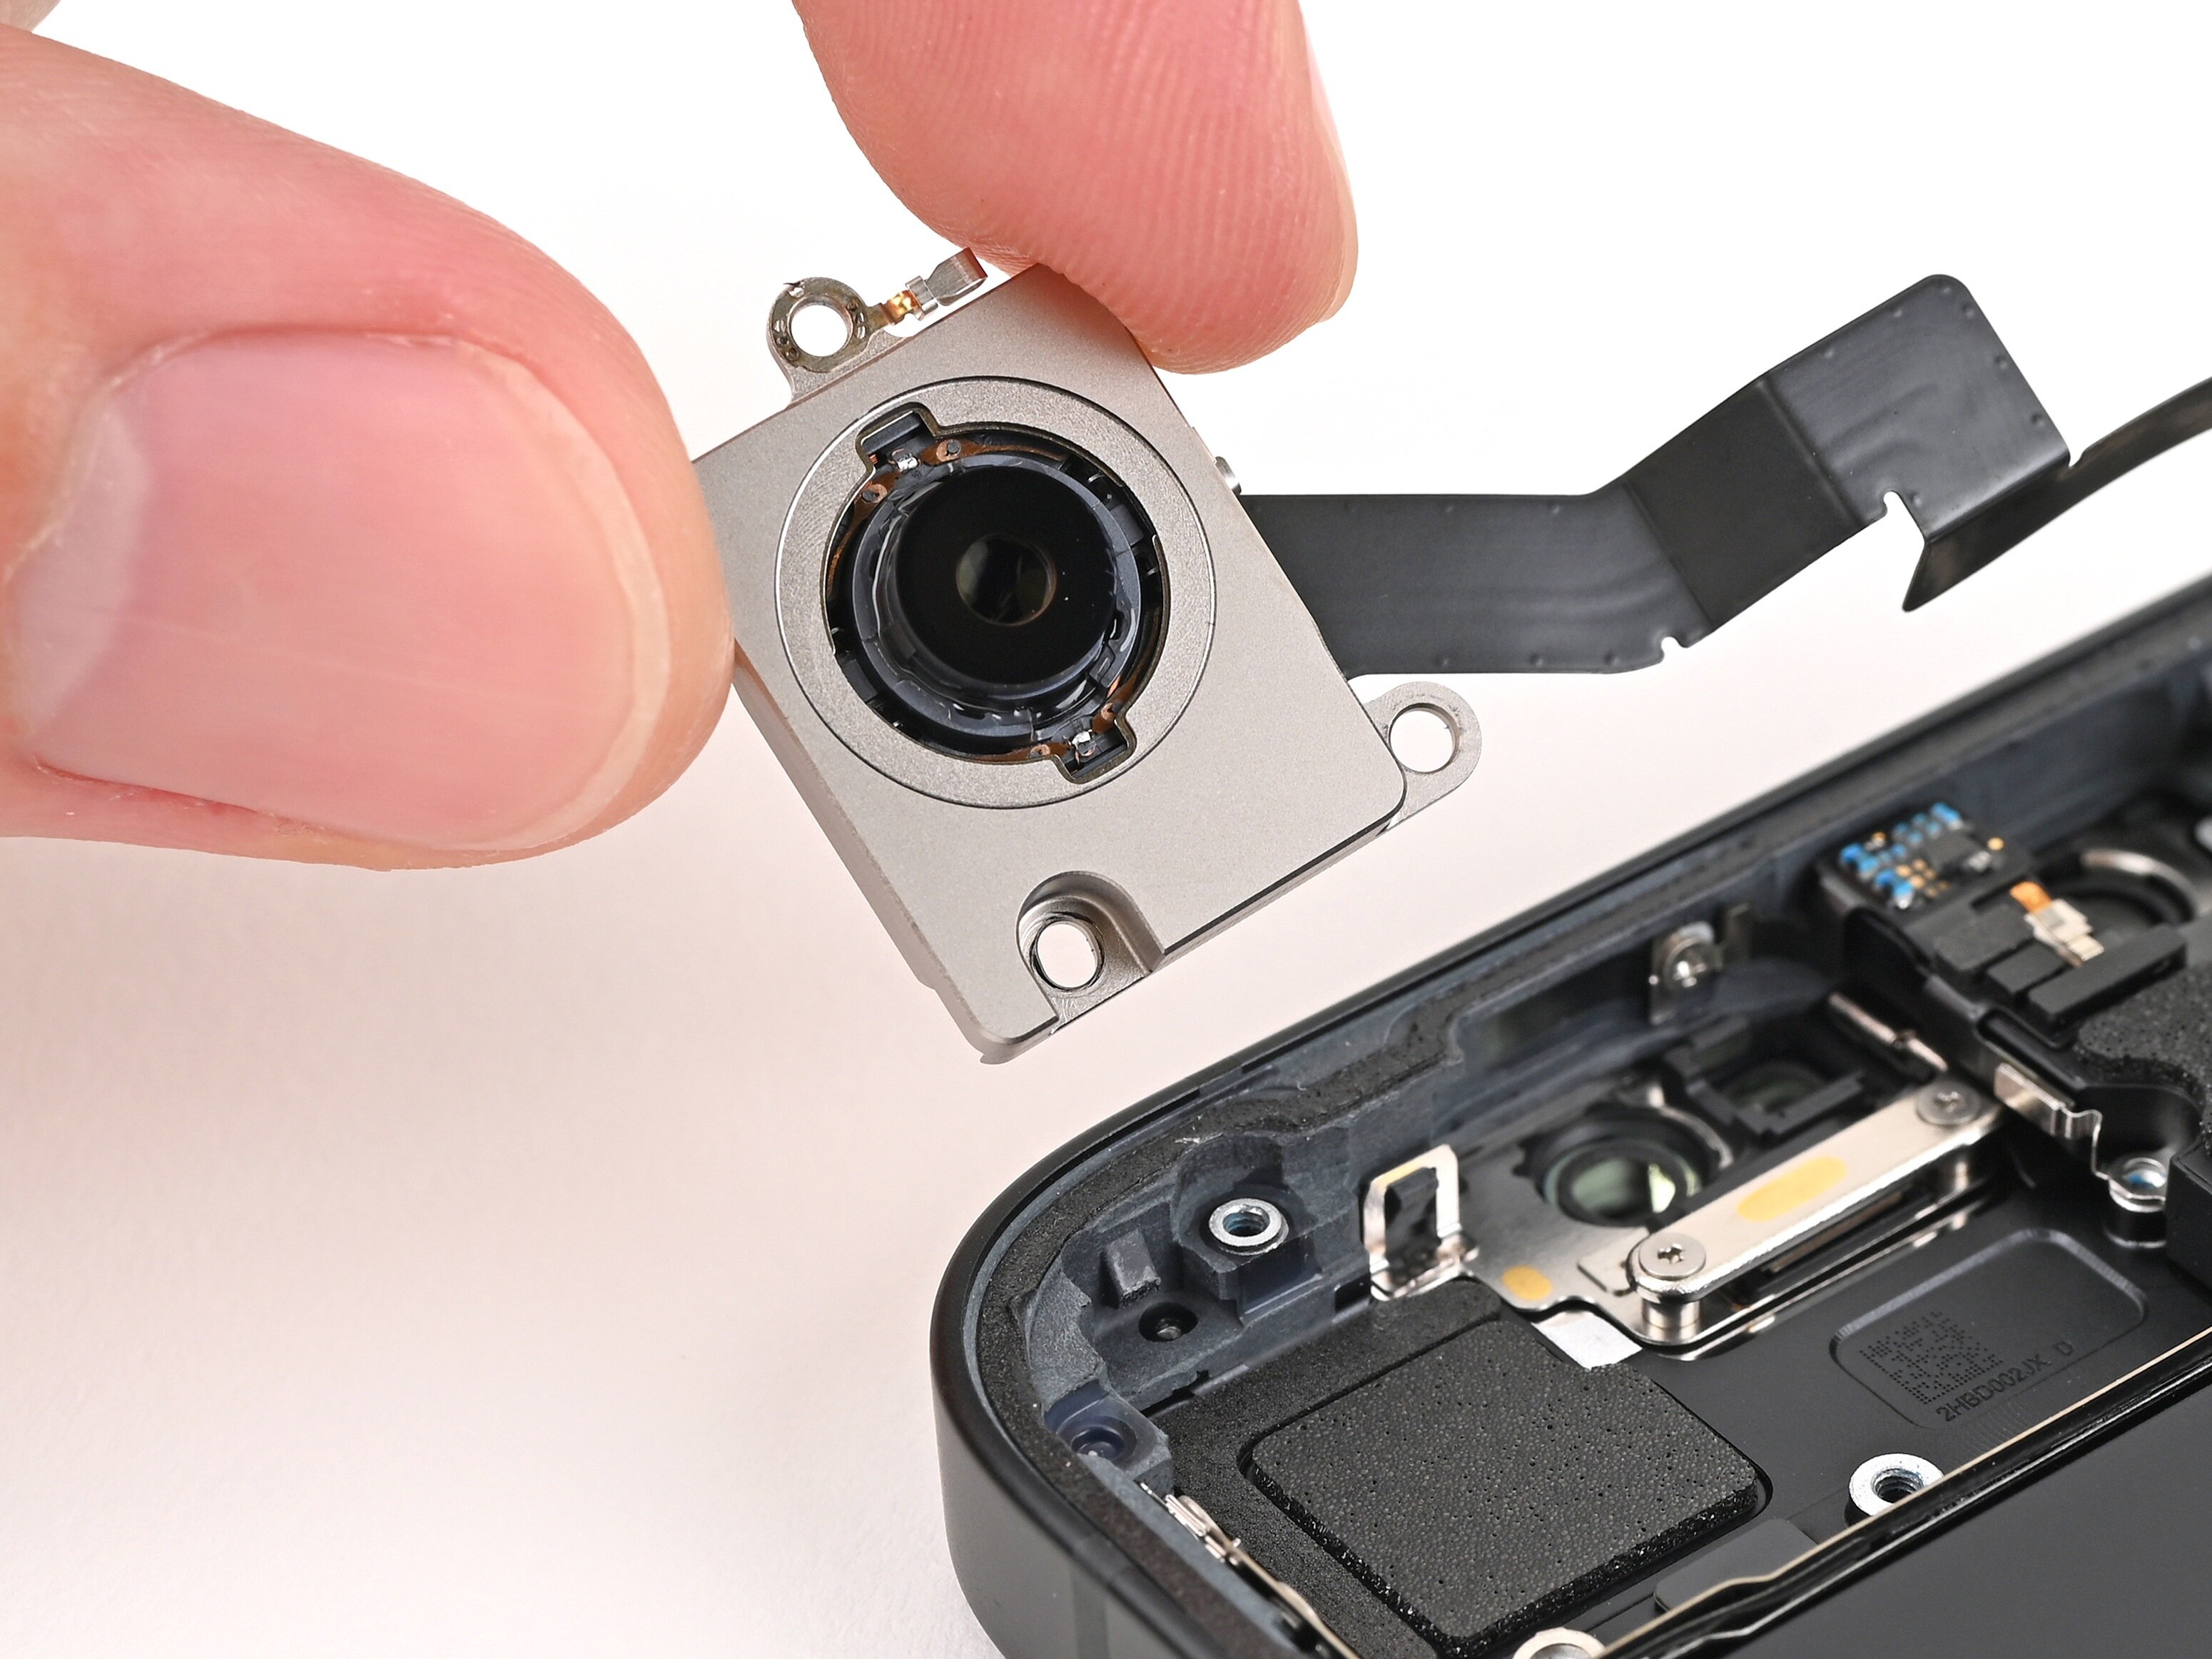
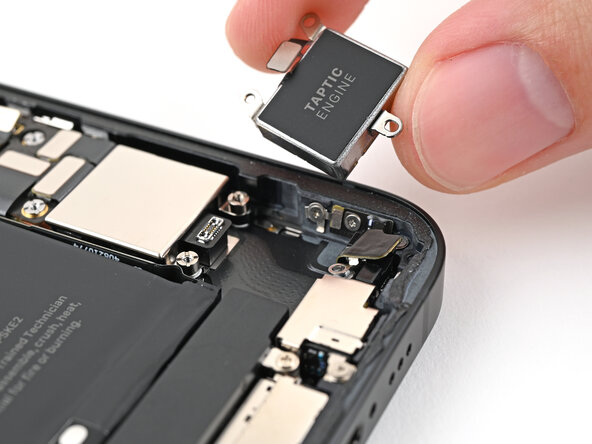
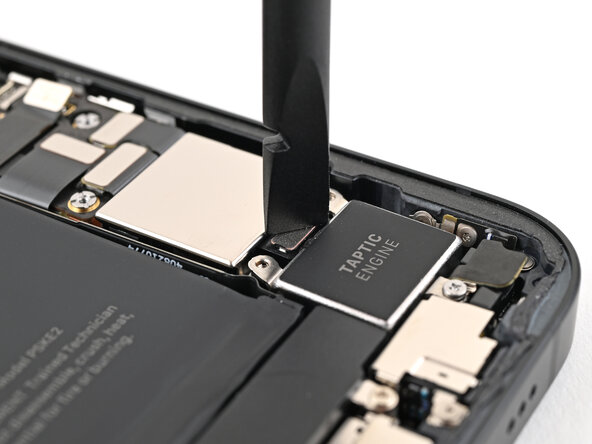
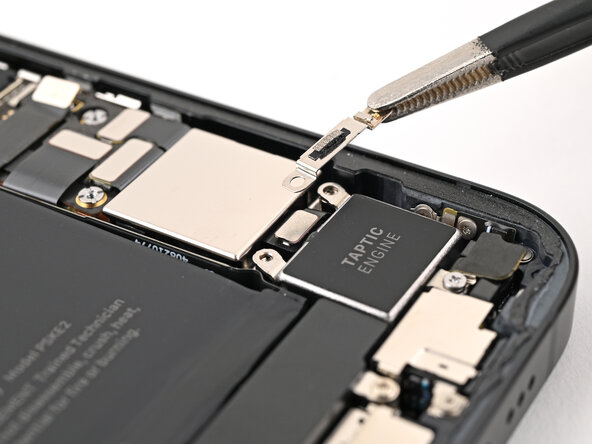
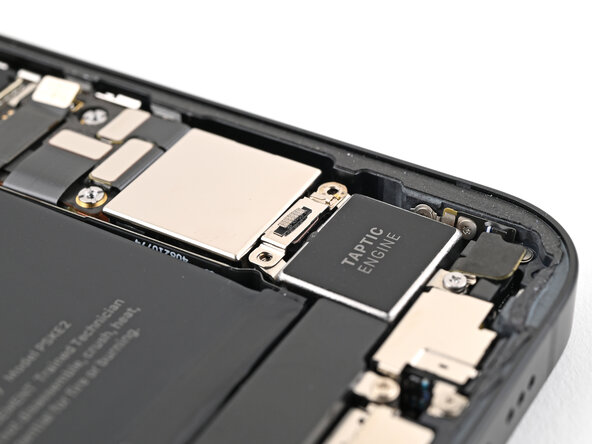
Step 27

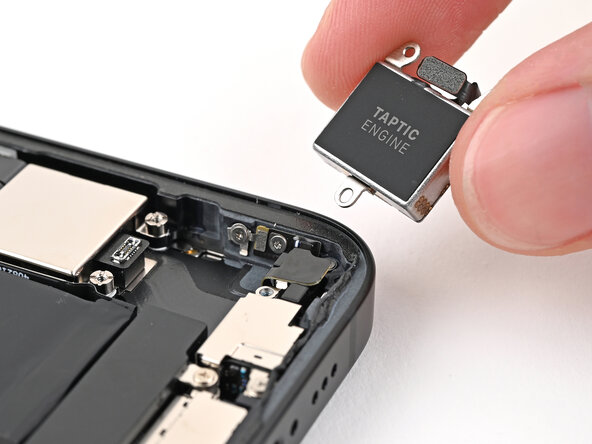
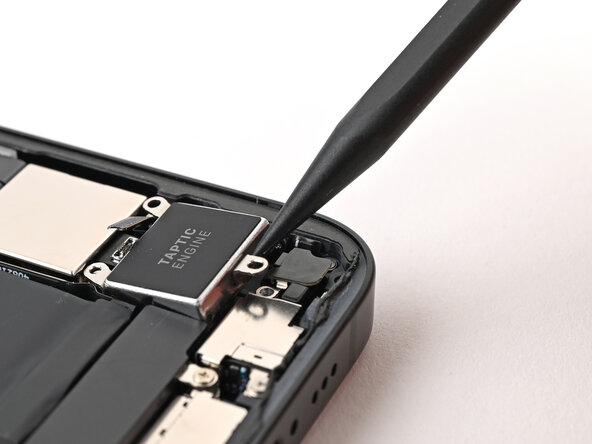
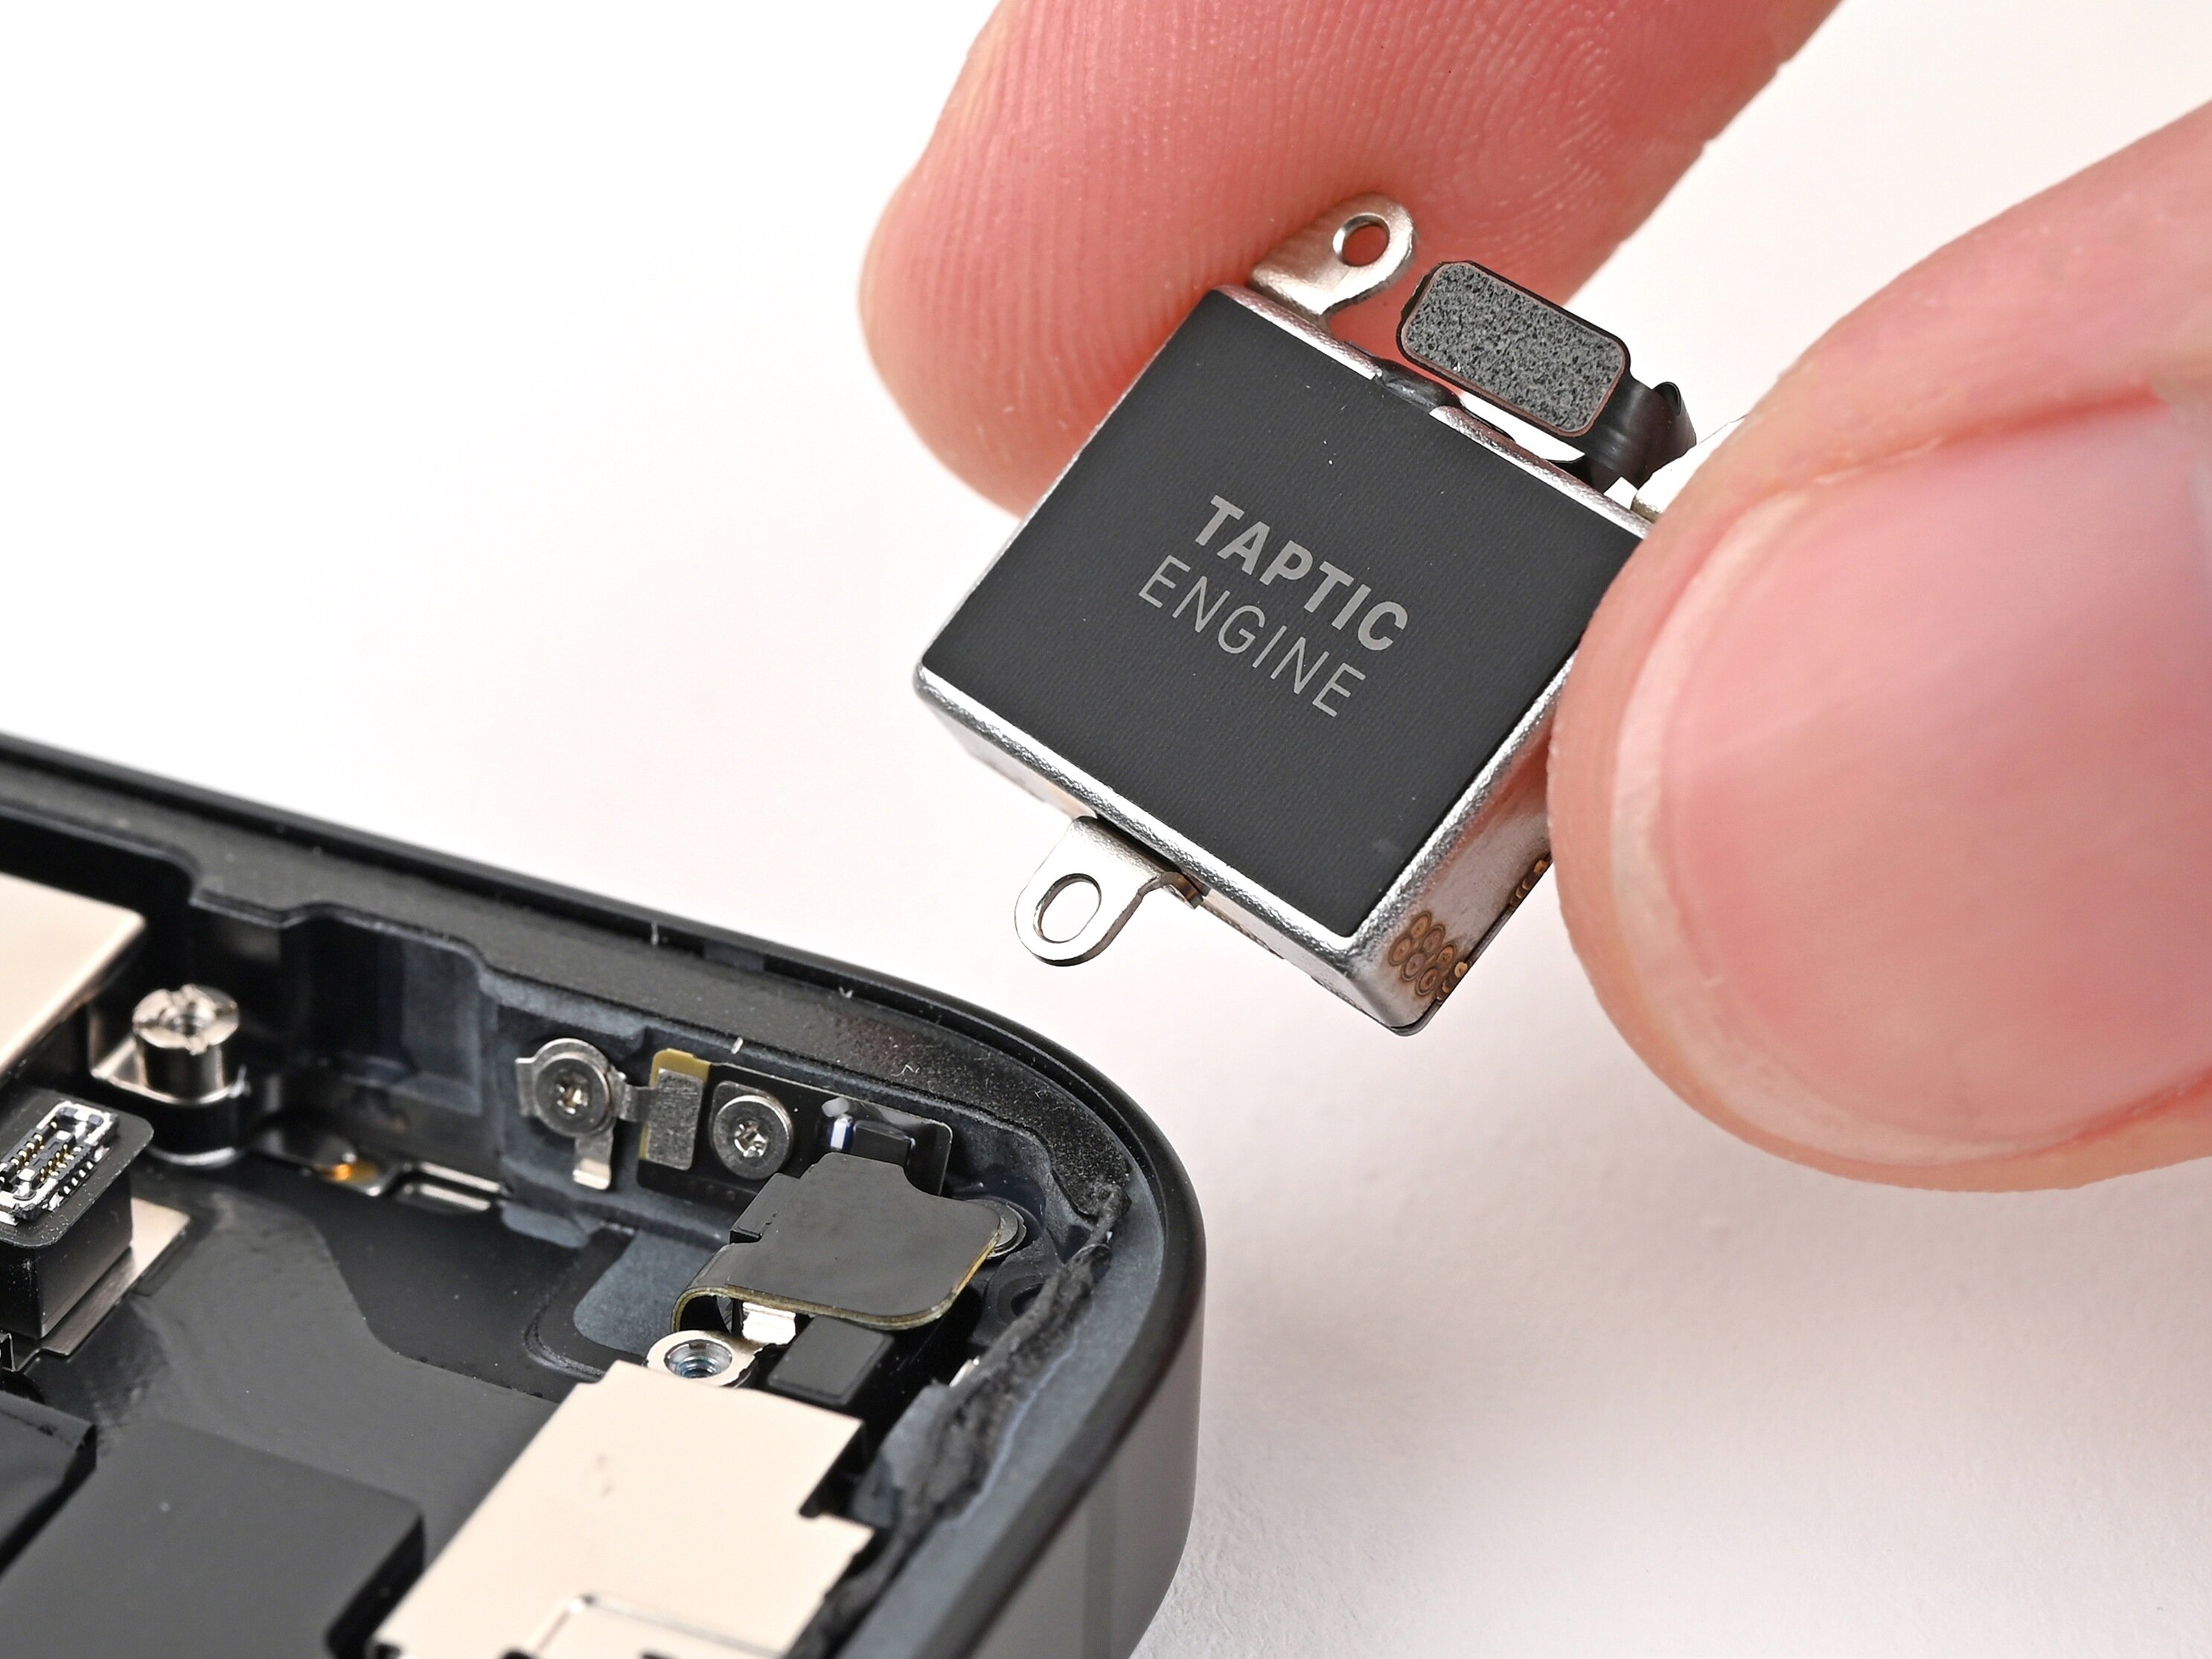
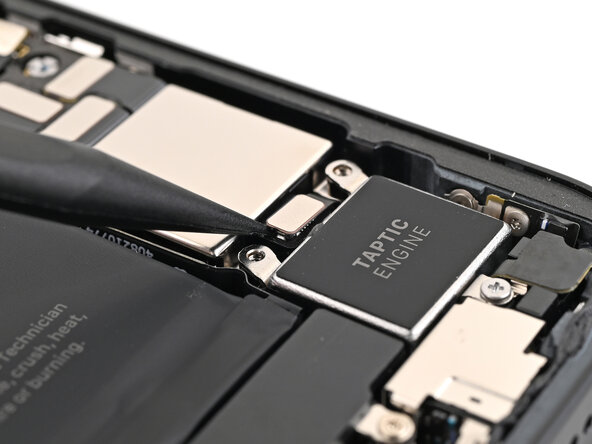
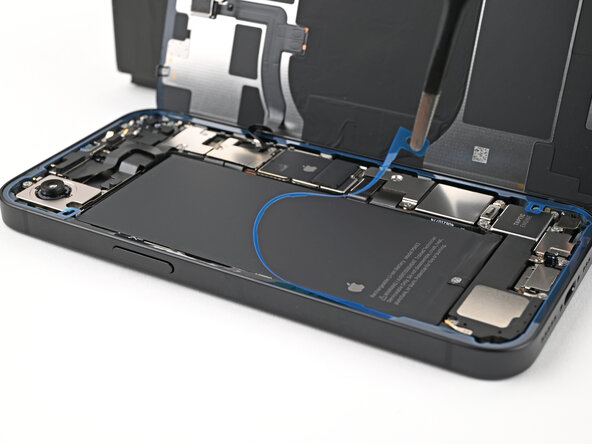
- Gently pry up the Taptic Engine using the tip of a spudger until you can grab it with your fingers, then lift it out of the frame.
- Remove the Taptic Engine completely.
Tools Used
Step 28
- Nice work getting through the disassembly! Now let's walk through the steps to get everything back together and make your device as good as new.
Step 29
- Pop the Taptic Engine right into its cozy spot in the frame. You've got this!
Step 30


- Grab your trusty Phillips screwdriver and get ready to secure that Taptic Engine with a 2.1 mm-long screw. You've got this!
Step 31
- Gently use the flat end of your spudger to snap the Taptic Engine press connector into place.
Tools Used
Step 32
- Put that cover right on over the Taptic Engine connector - nice and snug.
Step 33


- Grab your Phillips screwdriver and tighten down the two 2.2 mm screws that hold the Taptic Engine connector cover in place. Easy peasy—just a couple of turns and you're set. If you need a hand, you can always schedule a repair.
Step 34
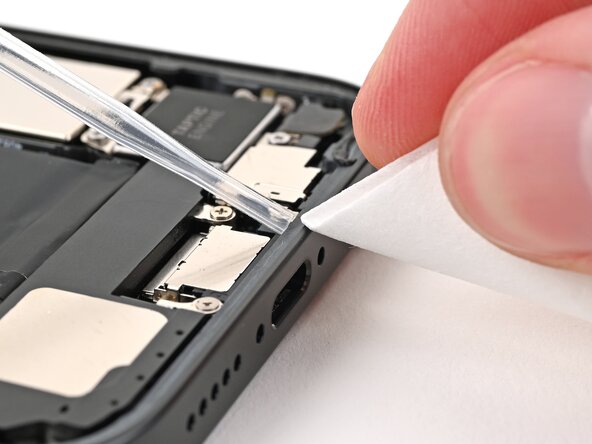
Get ready to gather that sticky adhesive with the tip of a spudger before you give it a gentle tug with your tweezers. You've got this!
- Grab those tweezers and gently peel away the sticky adhesive lining the frame. Precision is key—pretend you’re a sticker ninja.
- Wipe down any leftover gunk using a coffee filter or lint‑free cloth paired with high‑octane isopropyl alcohol (over 90%). Give it a good polish, like you’re shining up a trophy!
Step 35
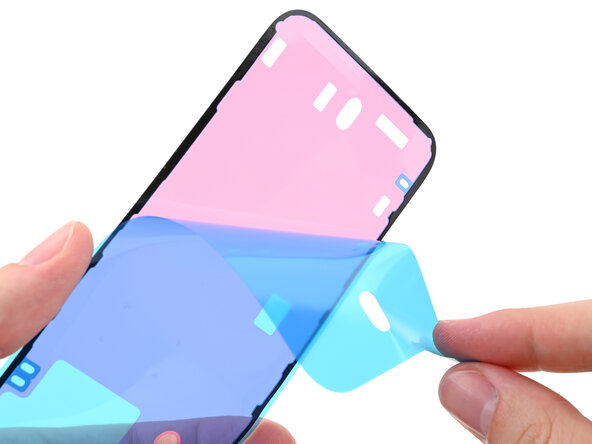
Your adhesive might have a different color liner and the pull tabs could be hanging out in other spots—don’t worry, that’s totally normal!
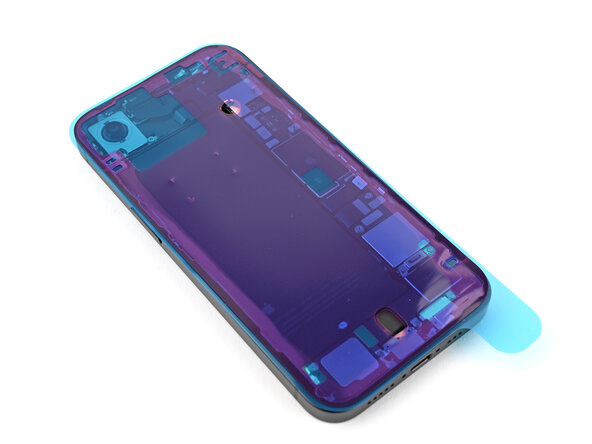
- Line up your replacement adhesive over the frame, making sure that the bigger blue liner is facing down and its pull tab is chilling in the bottom-right corner.
- Spot the camera cutout and the little notches along the edges—they’re your guides for how the adhesive fits into place.
Step 36
Once you press the adhesive down, it’s a one-way street—no sliding it around. If you’re not happy with the placement, you’ll need to peel it off and start fresh with new adhesive.
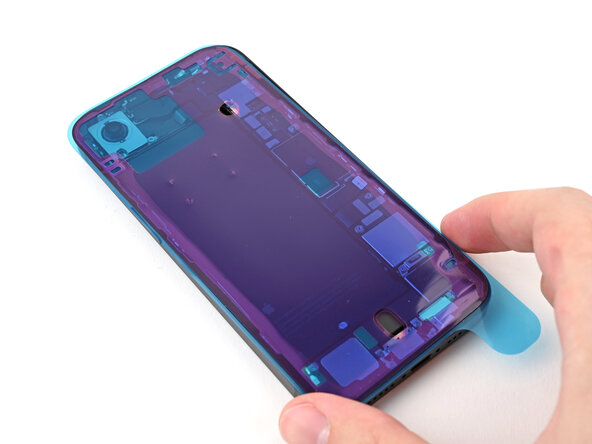
- Grab that pull tab and start peeling the back liner off the adhesive from the bottom, but keep it chill—don’t go all the way just yet.
- Swing the blue liner out of your workspace and line up the adhesive with the bottom edge of your iPhone.
- Set the bottom edge of the adhesive into its spot in the frame, making sure those spring contacts on the iPhone are perfectly matched up with their cutouts in the liner.
Step 37
When you line up the adhesive’s bottom edge just right, the sides and top will snap into place like a charm. If it’s off even a bit, peel it off and try again with fresh adhesive.
No spare adhesive on hand? No worries! You can put your iPhone back together and use it as is for now, but keep in mind the water resistance won’t be holding up until you replace that adhesive.
- Continue peeling the back liner off the adhesive while pressing the adhesive into place along the edges of the iPhone's frame.
Step 38
- Grab your trusty spudger and use the flat end to gently press that adhesive into place around the edges of the frame. You've got this!
Tools Used
Step 39
- Gently use the tip of a spudger to pry up the pull tab on the top right corner of the pink adhesive liner until you can grab it with your fingers.
Tools Used
Step 40
- Grab the pull tab and peel off the pink liner to reveal those sneaky secondary blue liners underneath.
Step 41
- Position the back glass of your iPhone upright along the right edge, using a box or something sturdy to keep it supported. You're doing great!
- Grab the flat end of a spudger or your finger to connect the charging coil press connector first, and then go for the battery press connector. Keep it up!
Tools Used
Step 42
- Gently position the middle connector cover over the wireless charging coil press connector, letting it hang just a bit over the slot on the logic board for that bottom clip. You're doing great!
Step 43

- Press down on the cover with your finger, giving it a little love tap.
- While keeping that pressure, slide the cover upwards so the metal clips can happily snap into their designated spots on the logic board.
Step 44
- Grab those tweezers and gently position the top of the lower connector cover into its cozy spot on the logic board.
- Now, just lay that lower connector cover right over the press connector like a comfy blanket.
Tools Used
Step 45
- Grab your tri-point Y000 screwdriver and pop in the 1.0 mm-long screw to lock down the middle connector cover.
- Next, use that trusty tri-point Y000 screwdriver to secure the lower connector cover with the two 1.3 mm-long screws.
Tools Used
Step 46
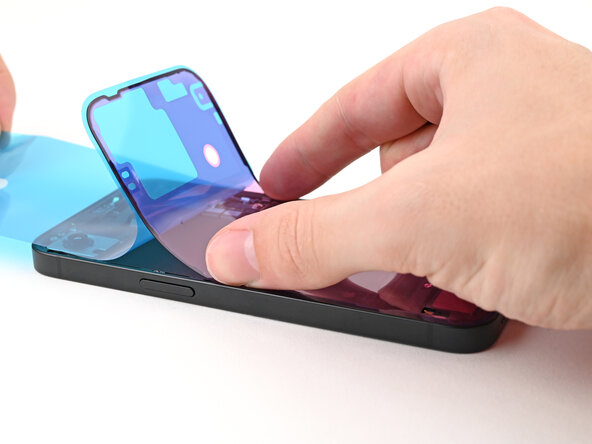
Gently hold the back glass above the frame, making sure it doesn’t touch the adhesive, and carefully peel away the liner along the right edge. Take your time—patience makes perfect when it comes to delicate parts.
- Grab your trusty tweezers and give those pull tabs on the three blue liners a gentle tug. Peel them away to reveal the sticky goodness underneath!
Tools Used
Step 47
- Hover the back glass over the phone and line it up with the frame like you're fitting a puzzle piece.
Step 48
- Gently place the back glass down onto the frame, making sure it sits just right, then press until you hear those clips snap into place.
- Give the edges a little press all around to make sure every clip is locked in tight.
Step 49

- Kick things off by warming up the edges of the back glass with a bit of heat—use an iOpener, hair dryer, or heat gun until it's comfortably hot to touch. Then, press firmly around the entire perimeter of the back glass. If you've got screen vise clamps, use those to reinforce the bond of your new adhesive. No clamps? No worries—keep reading for other handy ways to secure your back glass and make sure it stays put.
Tools Used
Step 50
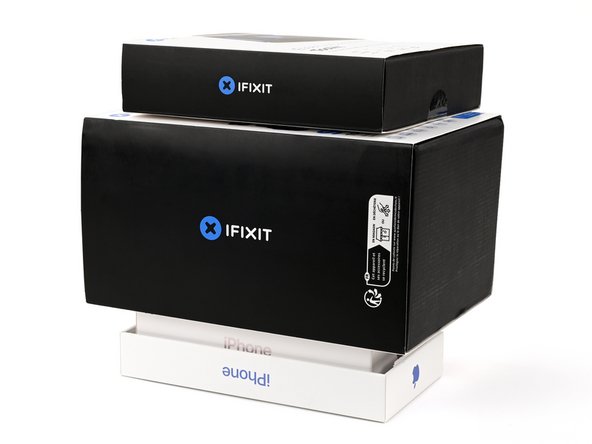
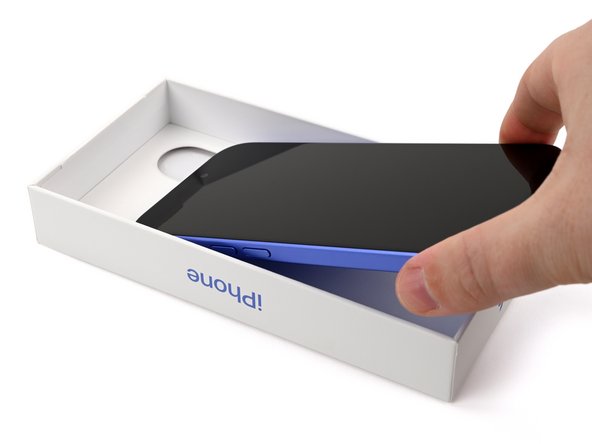
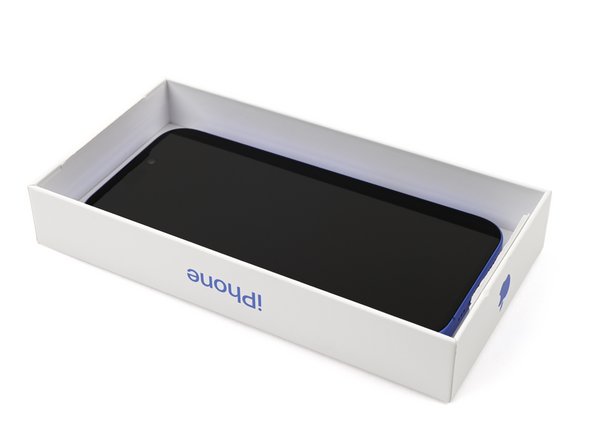
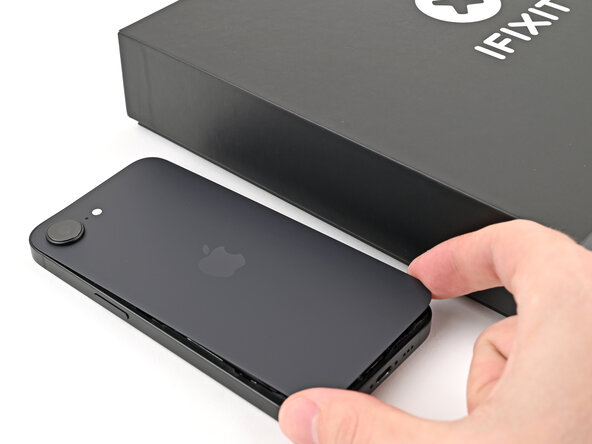
- If your iPhone came in a box, set the lid on a flat surface. Place your iPhone screen-up inside the lid, making sure the camera bump fits snugly in its recess. Find an object taller than the sides of the box but close in size to your phone—stack it on top of the iPhone, then add a few heavy items on top. Let this setup sit for at least thirty minutes—the lighter the objects, the longer they should stay. For best results, leave it overnight. If you need help, you can always schedule a repair.
To get a nice, even press on your iPhone and give that back glass a solid bond to the frame, you'll want to think about the camera bump. It’s a little bump in the road, but with the right approach, you can make sure everything sits flush. If you’ve misplaced your original box, no worries—just skip this step and try an alternative method instead. Need a hand? You can always schedule a repair for expert help.
Step 51
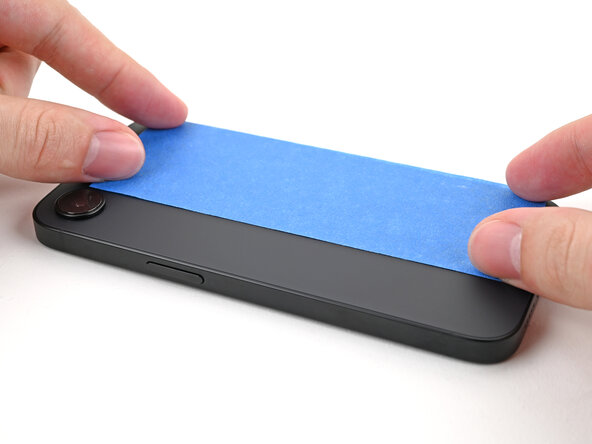
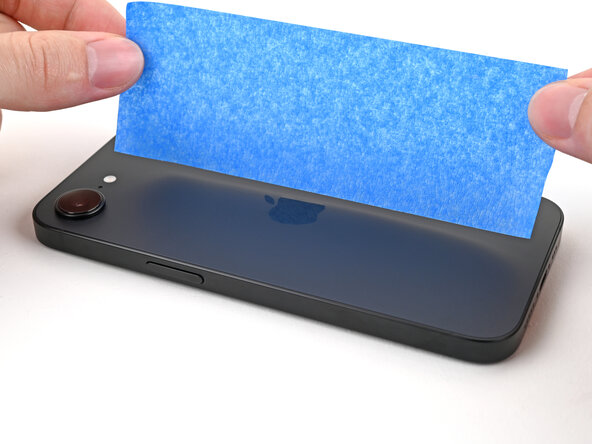
No original box for your iPhone? No worries! Just follow these next three steps to give that back glass a nice, even compression without any fuss.
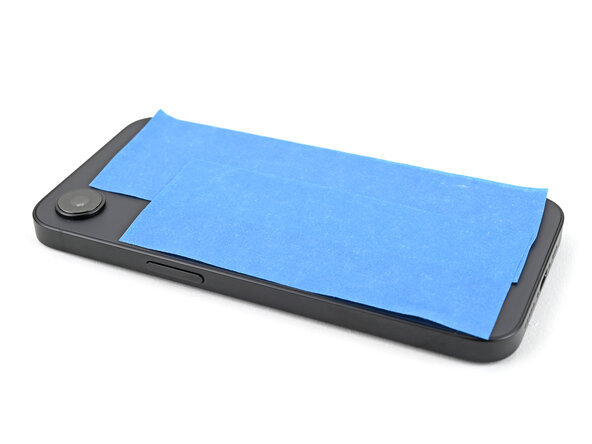
- Gently place the iPhone screen-side-down on a soft, flat surface—think of it as giving your device a little rest. Then, stick some tape onto the back glass to keep it protected and looking sharp during the repair. If you need a hand with anything, remember you can always schedule a repair.
Step 52
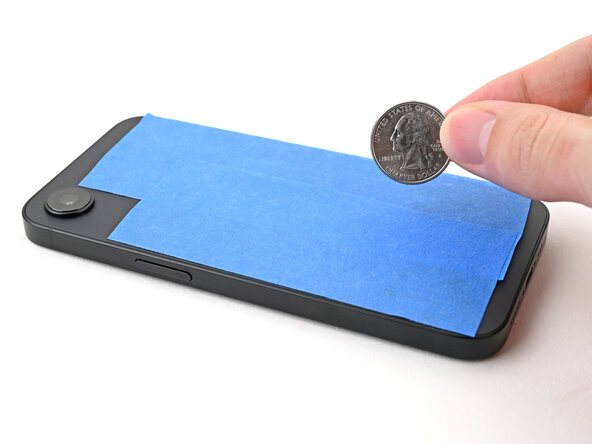
Depending on how chunky your coins are, you might want to stack a few to get the perfect fit.
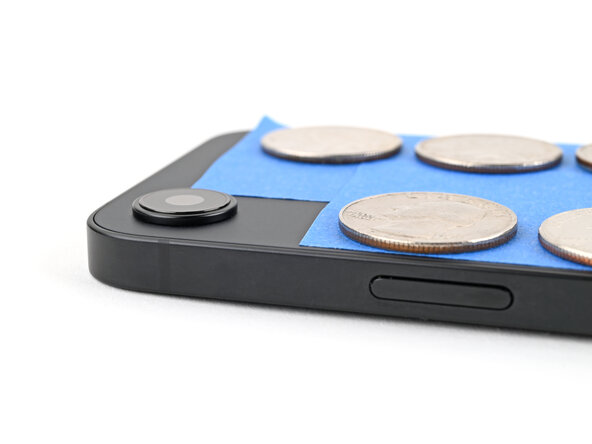
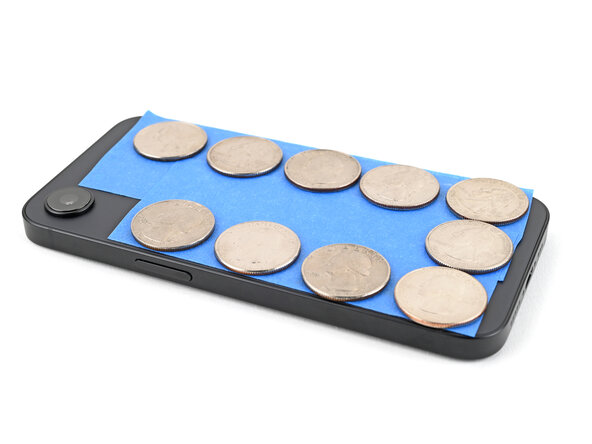
- Lay down a row of coins or anything about the same thickness along the tape lining the back glass edges.
- Spread the coins out so they're evenly spaced and at least as chunky as the camera bump.
Step 53

Be cautious! The coins might leave a mark on the item below, so it’s best to keep your treasures out of the way.
- Pile a stack of books (the heavier, the better) right on top of your iPhone.
- Let your literary mountain chill there for at least thirty minutes. Lighter books? More time. If you’ve got the patience, just leave them overnight for maximum effect.
Step 54


- Grab your trusty P2 pentalobe screwdriver and let's get those two 7.8 mm-long screws snugly in place on either side of the charging port. You've got this!