iPhone 16e Chip ID
Duration: 45 minutes
Steps: 9 Steps
These images of the board are captured with a US iPhone 16e.
These shots are from a US iPhone 16e teardown—check out the full guide for all the details. Big thanks to our community member Chunglin Chin for the contribution! If you need help with your own repair, remember you can always schedule a repair.
Step 1

- Meet the Cirrus Logic 338S00537 audio amplifier, the little chip that packs a punch in your device's sound system.
- If you're having audio issues, this component might be the sneaky culprit.
- Carefully locate the amplifier on your device's circuit board — it’s usually a small black chip labeled with the model number.
- Use the right tools to gently remove the faulty amplifier without disturbing nearby components.
- Once out, replace it with a new Cirrus Logic 338S00537 audio amplifier, making sure it’s seated perfectly.
- Reassemble your device and test the audio to confirm that the sound is back to crisp and clear.
- If you hit a tricky spot or want to leave it to the pros, you can always schedule a repair with Salvation Repair.
Step 2

- Say hello to your wireless crew: the USI 339S01444 module is your go-to for WiFi and Bluetooth magic.
- The Apple APL1114/337S07030 C1 5G modem is the speed demon that keeps your streaming and downloads cruising.
- Next up, Broadcom AFEM-8254, AFEM-8255, and AFEM-8264—these front-end modules are the unsung heroes managing your device’s signals like pros.
- Skyworks SKY53921-16 front-end module steps in to keep your connections crisp and clear.
- Murata’s front-end module rounds out the squad, making sure everything works together smoothly.
Step 3

- Time to get hands-on with your device! First up, grab your Apple APL1088/338S01150 RF transceiver and get ready to work some magic. This little guy is crucial for your device's signal action, so treat it with care!
- Before you start, make sure you've got a clean workspace and the right tools. You don't want anything getting lost in the shuffle!
- With your tools in hand, carefully locate the RF transceiver in your device. It's usually tucked away, but don't worry—you've got this. Gently pry it free without damaging any surrounding components.
- Once the transceiver is free, take a moment to check for any potential damage. If everything looks good, go ahead and replace it with the new one.
- Make sure everything is seated correctly and snug. You don’t want any loose connections messing with your device's performance.
- Reassemble your device carefully, making sure all screws and parts go back exactly where they came from.
- Power on your device and test it out. If you’re still not getting the signal you need, or if things aren't working quite right, don’t hesitate to schedule a repair. We’re here to help you get back on track!
Step 4

- Let's get familiar with some key power management components: the Apple APL1034/338S01180, Qorvo QM81026, and the SiTime programmable MEMS oscillator. These little guys are essential for keeping your device running smoothly. When troubleshooting, recognize these parts as the backbone of power regulation and timing. If you run into trouble or need a hand, you can always schedule a repair to get professional support.
Step 5


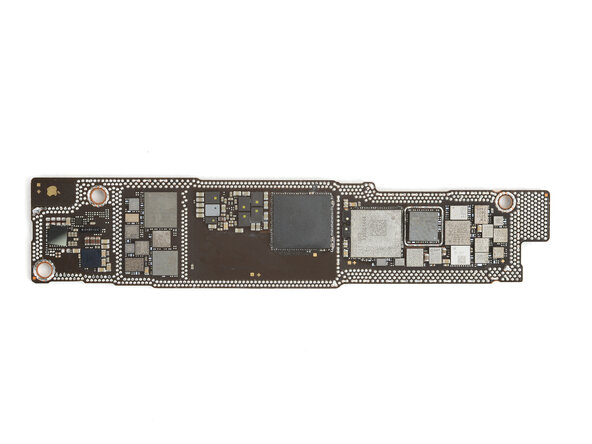
- Time to meet some vital players in your device's braintrust! First up, we've got the Apple APL1V08/339S01608 A18 applications processor, teaming up with a GPU — all snug under a SK hynix H58G66CK8HX139 8 GB LPDDR5X SDRAM memory. Next, a trusty Renesas PMIC keeps the power flowing smoothly. Then there's the Cirrus Logic 338S00537 audio amplifier, making sure your sound is on point. The STMicroelectronics STWPCHA1 wireless charging controller keeps things wire-free and charging happy. The Samsung S2DOS24 OLED display power supply fuels your screen with bright, vibrant visuals. And finally, the Texas Instruments LM3567A1 flash LED driver powers those brilliant flashlights. If you need a hand with any of these components, you can always schedule a repair to get things back in top shape.
Step 6

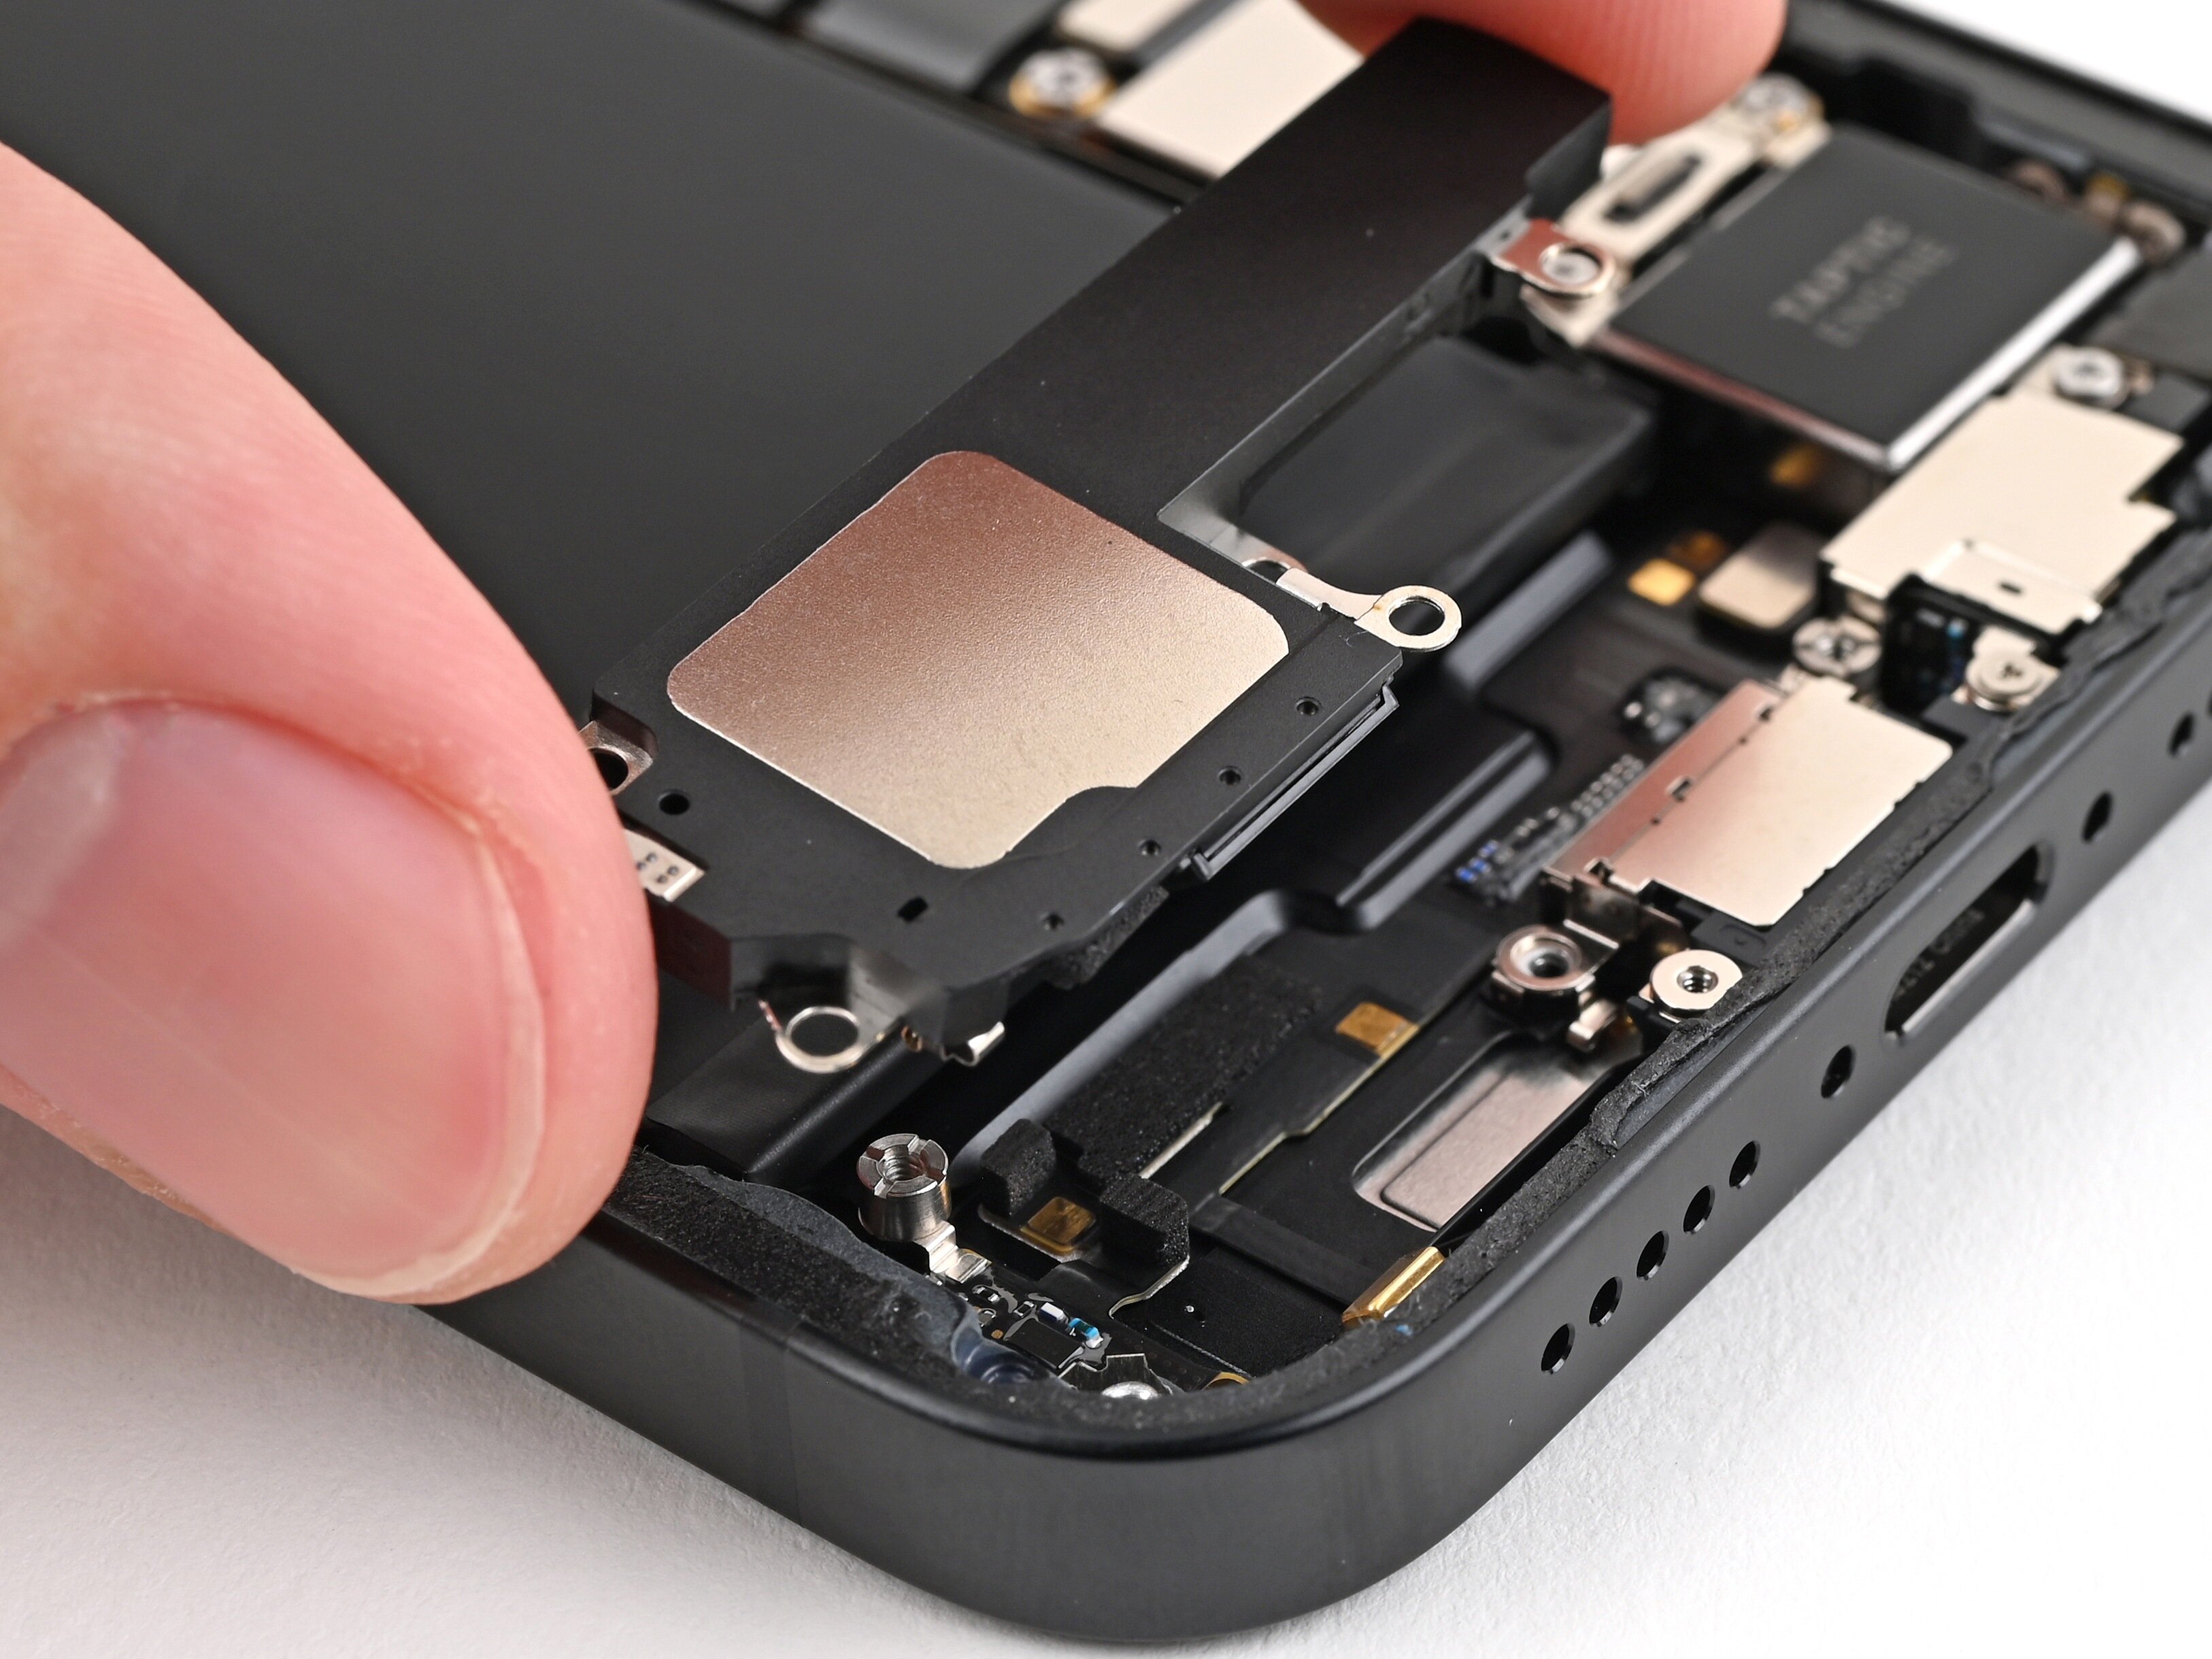
- Start by carefully removing the top RF board—no rush, just gentle patience. Next, peel away the bottom RF board with a steady hand. Moving on, lift off the top of the main board, keeping an eye out for any connected components. Then, gently detach the bottom of the main board, clearing the way for further steps. Throughout, if things get tricky or you’re unsure, you can always schedule a repair to keep things running smoothly.
Step 7

- Let's get these components swapped out and keep things running smoothly. First, identify the NXP SN300 NFC controller with its eSIM and secure element—think of it as the phone's digital passport. Carefully disconnect and remove it, making sure not to damage the delicate traces. Next, locate the Skyworks SKY58454-11 front-end module—this is the cool guy handling your radio signals. Gently detach it from its socket, keeping an eye out for any stubborn connectors. Then, move on to the Murata front-end module, another critical player in your device's communication game—careful removal here is key. Lastly, find that backlight driver from Renesas—think of it as the lighting director for your screen; gently pry it loose. If at any point you feel overwhelmed, remember, you can always schedule a repair with Salvation Repair to get professional help. Keep your workspace organized, use the right tools, and take your time—you're doing great.
Step 8


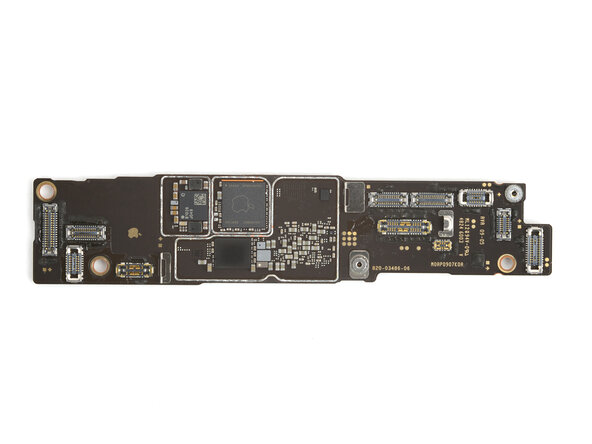
- Kioxia K5A3AL0872 128 GB NAND flash memory: Get ready to add some snazzy storage to your device. This chip packs a punch and keeps your data flowing smoothly!
- Apple APL109A/338S01165 power management: Let's tackle the power situation. This little gem ensures your device runs efficiently, so your battery stays happy and healthy!
- Renesas PMIC: Meet the maestro of power management! This is the key player that helps balance everything running in your device, ensuring seamless performance.
- Likely Texas Instruments SN2012027 USB type-C controller: Say hello to the USB type-C wizard! This controller is here to make sure your connections are solid and speedy.
- Cirrus Logic 338S00739 audio codec: Time to amp up your sound! This codec delivers crisp and clear audio, making your multimedia experience a delight.
- GigaDevice GD25Q80E 1 MB serial NOR flash memory: This little storage hero is ready to store your important data securely. Let’s keep everything organized and accessible!
Step 9

- First up, identify the Bosch Sensortec accelerometer & gyroscope and the SiTime programmable MEMS oscillator. These tiny tech stars are key to your device's movement and timing magic. Carefully disconnect and remove them, making sure not to disturb the surrounding parts. Handle with patience and precision—these components are delicate but vital. Once replaced or repaired, double-check your connections, reassemble everything smoothly, and give your device a test run. If you need a hand along the way, just schedule a repair and let the pros handle the heavy lifting.