Vizio VTAB1008 Battery Replacement
Duration: 45 minutes
Steps: 5 Steps
Get ready to breathe new life into your Vizio VTAB1008! This step-by-step guide will walk you through the process of replacing the battery. If you’re feeling handy and want to tackle this repair on your own, we’ve got you covered. But if you need help, you can always schedule a repair.
Step 1


Easy does it! Keep that opening tool shallow—going too deep might poke at fragile connectors near the edges.
Use the angled tip of the opening tool like a pro—press against the back with your thumb to wedge it in place, then smoothly slide along to pop those tabs free!
– Gently slide your trusty heavy-duty opening tool into the gap on the side of the device that’s free of buttons.
– If you hit one of those pesky corner tabs, it might need a bit more muscle. Carefully wiggle a metal prying tool into the corners to pop those tabs loose.
Step 2

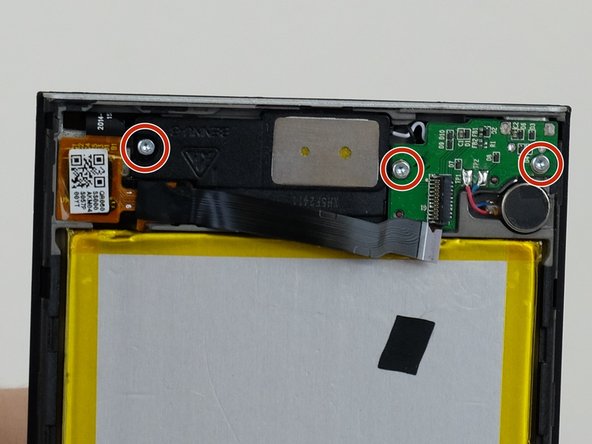
We’ve got three connectors just hanging out: one for the screen, another for the digitizer, and the last one for the motherboard. They’re snugly held in place thanks to the pressure from the backing and screen assemblies. So, no worries, they won’t just up and leave!
– Take a peek inside the tablet to check for any loose connectors hanging out.
– Gently flip over the backing from the side without buttons, making sure not to accidentally detach the ribbon connector from the display screen.
Step 3
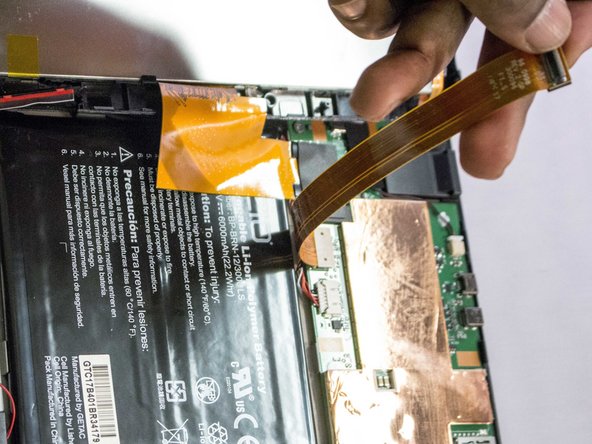

A blue opening tool can come in handy to get things started.
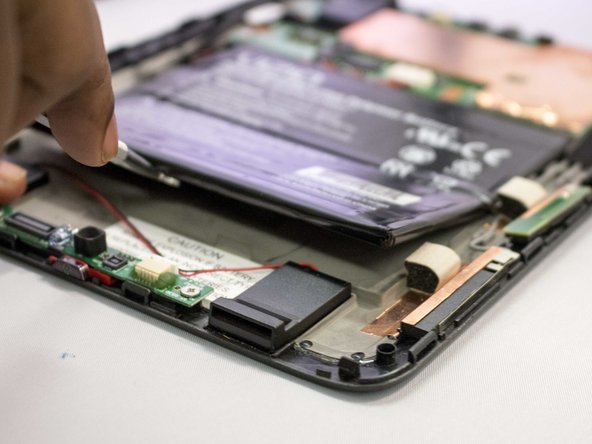
– Gently detach the ribbon strip running across the battery from both ends—it’s like unwrapping a gift, but with a dash of precision.
Step 4


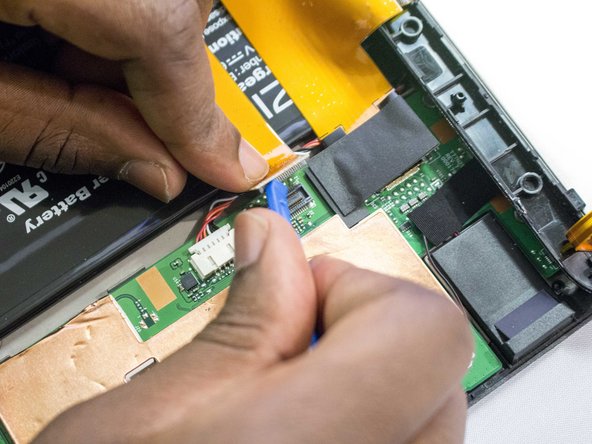
Here’s the connector that connects to the battery—those wires are important! If you need a little extra finesse, grab some tweezers to help out.
– Gently detach the connector located at the top of the motherboard by pulling it out and away. You’ve got this!
Tools Used

Step 5
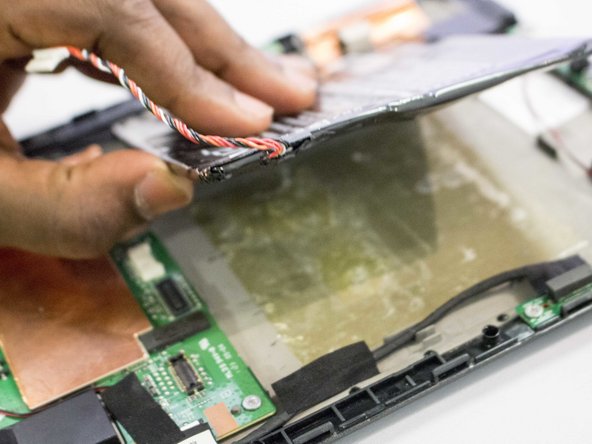

The battery is firmly attached to the back panel, so be extra careful when handling it. You don’t want to accidentally damage or puncture the battery. Slow and steady wins the race!
A metal spudger might come in handy to gently lift the battery away from the backing. A little patience goes a long way here!
– Now that you’ve got everything back together, just retrace your steps to make sure all the parts are snug and secure.
– If anything feels off or you hit a tricky spot, don’t hesitate to schedule a repair for a bit of extra help.