Toshiba Excite 10 AT300 Headphone Jack Replacement
Duration: 45 minutes
Steps: 9 Steps
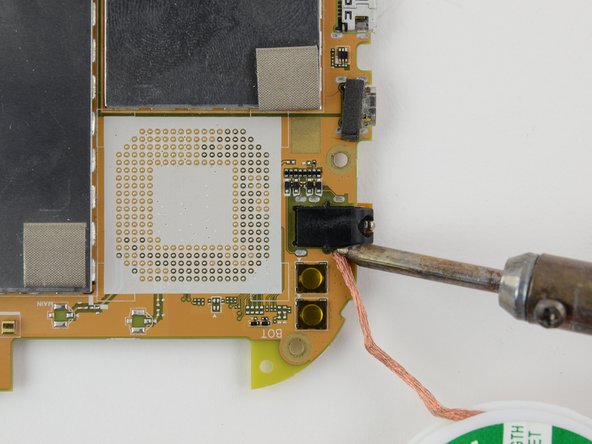
This guide will walk you through the process of getting to your tablet’s headphone jack so you can replace it. Keep in mind, you’ll need to remove quite a few parts along the way, and some of them are a bit delicate. Take your time and be gentle with those smaller pieces. Some steps, like soldering, may require a bit of experience, so be sure to take extra care. If you run into any trouble, you can always schedule a repair.
Step 1

– Pop that SD card right out of its cozy little slot!
Step 2


Don’t forget to unclip all the clips on the back panel first! Otherwise, you might find it a bit tricky to pull it off, and we wouldn’t want to risk damaging your tablet.
– Grab your trusty opening tool and gently slide it underneath the edge of the screen. With a little finesse, make your way around the device to separate the front and rear panels. You’ve got this!
Step 3


Watch out for those wires! Keep them snug in the white connector piece and avoid any accidental tugging.
– Gently detach the speaker cable from its socket. Grab both sides of the white connector with your trusty tweezers and give a smooth pull straight out. Easy peasy!
Tools Used

Step 4

– Grab your trusty #00 Phillips screwdriver and let’s take out those pesky screws:
– Five 3mm Phillips #00 screws
Step 5


– Time to set that battery free! Gently pry it up, working it away from the tab that’s holding it in place at the bottom.
– Now, hold the battery up and out of the way, and use a pair of tweezers to carefully release the battery cable from its connector.
Tools Used
Step 6

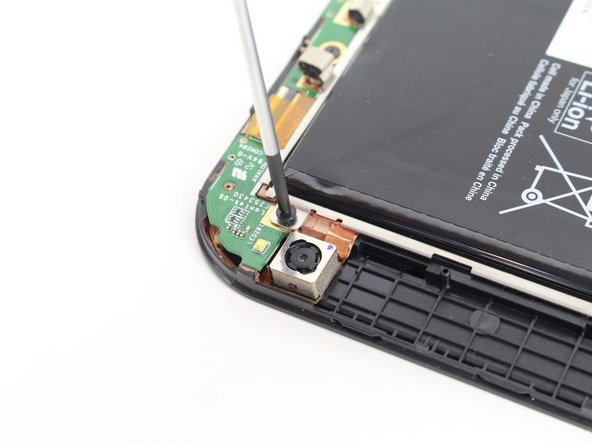
– Grab your trusty #00 Phillips screwdriver and let’s get to work! First up, it’s time to unscrew these little guys:
– Five 3mm #00 Phillips screws, just waiting for some attention!
Step 7

Take extra care not to bend those ribbon cables! A little twist or turn could lead to your device not working properly. Keep them safe, and everything should run smoothly.
To detach the top left ribbon cable shown in the first photo, gently lift the black part of the housing instead of the white part. You’ve got this!
– Peel off the 4 pieces of orange tape—use your fingers or some tweezers, whichever feels right for you.
– Take your spudger and gently lift up the white section of the ribbon cable’s housing.
– Now, carefully separate the four ribbon cables from the black housing, either with your hands or tweezers. Go slow and steady!
Tools Used
Step 8
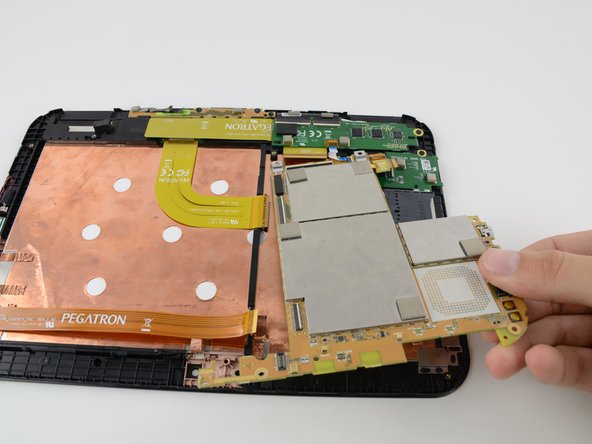

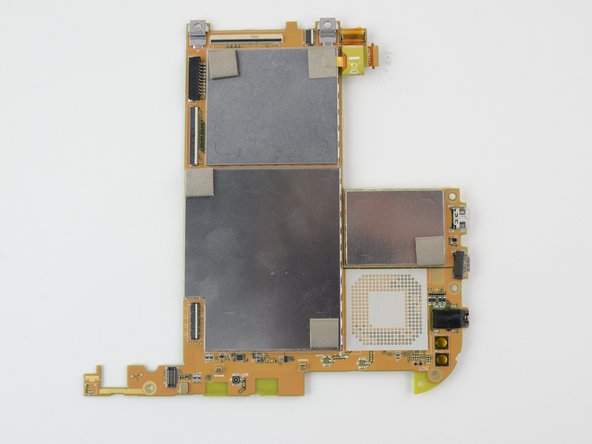
Handle that circuit board like it’s a delicate piece of art! It’s packed with sensitive components, and if you accidentally give them a rough time, your device might just throw a little tantrum and stop working. So, stay gentle and keep it happy!
– With a gentle touch, lift the circuit board out of the device housing using your hands.
Step 9

– Now it’s time to put everything back together! Just retrace your steps in reverse and you’ll be all set. If you run into any tricky bits, don’t hesitate to schedule a repair for some expert help!
–
Tools Used

Success!