Tabby Kidz Screen Replacement
Duration: 45 minutes
Steps: 5 Steps
Ready to give that cracked screen a makeover? Let’s start by gently taking apart your tablet. Take your time here—don’t rush! Applying too much force might tear the internal wires or snap those delicate plastic tabs that hold everything together. And remember, a broken screen won’t respond to your touch, so this repair is pretty important. But no worries, you’ve got this! And if you need a hand along the way, you can always schedule a repair.
Step 1


Take it easy here! No need to channel your inner Hulk—those sneaky wires connecting the speaker in the back and the front of the tablet are fragile.
– Carefully slide a metal wedge into the groove along the side of the tablet.
– Use a plastic prying tool to gently pop open the tablet’s side.
– After opening the tablet, use the plastic prying tool to lift out the speaker from the back. This will help you separate both halves of the tablet smoothly.
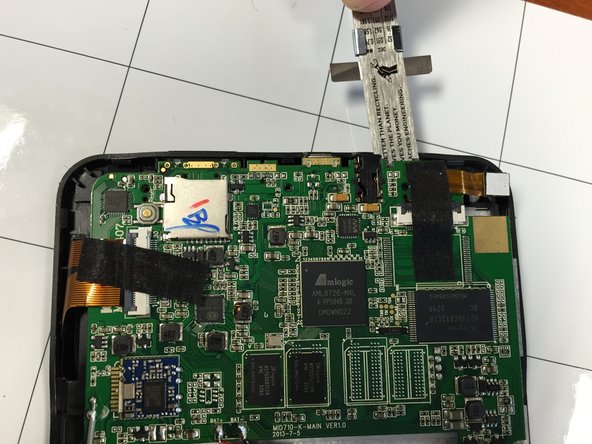
Step 2

These ribbon wires are super delicate. Handle with care or they might tear, and we wouldn’t want that! Take your time and be gentle.
– On the sides of the tablet, you’ll spot some ribbon wires. These are essential for connecting the screen to the motherboard, so make sure to carefully unhook them to avoid any accidental tears. Taking your time here will save you a headache later!
Step 3

– There are 3 screws (4 mm long, Ph 00) that are holding the motherboard in place. You’ll find them marked in the image. Once you’ve spotted them, grab your screwdriver and get to work unscrewing them.
Step 4

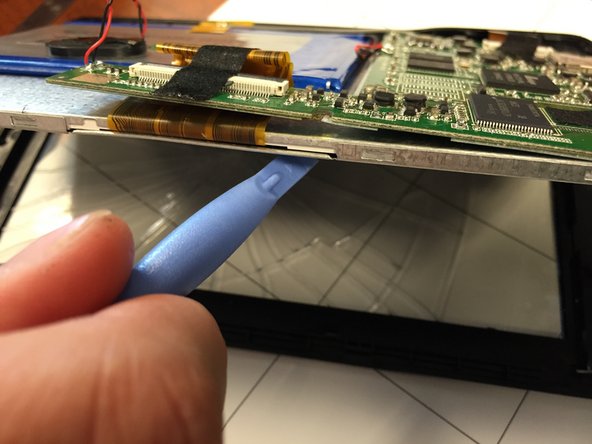
Hold up! Keep that inner screen right where it is—don’t even think about prying it away from the motherboard at this stage. Trust me, it’ll save you from a world of frustration later!
– First up, grab your PH 00 screwdriver and carefully unscrew the screws holding the inner screen to the tablet. They’re 3mm screws, so keep track of them!
– Next, take your prying tool and gently lift that inner screen away from the tablet. Easy does it!
Step 5

– Put your device back together by retracing these steps in reverse, nice and easy.
– If you hit a snag or feel stuck, you can always schedule a repair.
Success!
