
iPhone 15 Pro Max Battery Replacement
Duration: 45 minutes
Steps: 36 Steps
Ready to swap out the battery in your iPhone 15 Pro Max? iPhone batteries usually keep about 80% of their charge capacity for up to 500 cycles, which is roughly 18–24 months. If you find yourself charging more often or your phone feels sluggish, it might be time for a new battery. You'll need replacement screen adhesive to seal things back up properly. If your new battery doesn’t come with adhesive already attached, make sure to have some replacement adhesive on hand. And if your battery looks swollen, be extra careful and follow all safety steps. Just a heads-up: because of Apple’s parts pairing rules, on iOS 17.6 and earlier, you might see warnings about your new battery and lose access to battery health info, but it will still work fine. On iOS 18 and later, you'll want to calibrate genuine Apple batteries using Repair Assistant.
Step 1


Let your phone’s battery drop below 25% before starting—charged lithium-ion batteries can be a bit moody and tricky to handle safely.
- First things first, let's disconnect any cables hanging out of your phone. Time to give it some space!
- Now, grab that power button and one of the volume buttons, give them a friendly press, and slide to power off your phone. You're almost there!
Step 2


Ensure there's a nice, flat spot near the bottom edge that's spacious enough for your suction cup to latch on.
- Got a screen or back glass that looks like it survived a rock concert? Slap on some overlapping strips of packing tape to keep those glass shards in check and make your teardown a breeze.
Step 3


Watch out—if you slide the pick in too deep, your device might not be thrilled. Mark your pick at the right depth to keep things safe and happy.
Try marking the other corners of the pick with different measurements for extra control.
Or, tape a coin onto your pick, about 3 mm from the tip—instant depth gauge!
- Take a moment to measure 3 mm from the tip and give that opening pick a little mark with a permanent marker. You're on your way to a successful repair!
Step 4

- Grab your trusty P2 pentalobe driver and carefully unscrew the two 7.2 mm-long screws located on either side of the charging port. You're doing great!
Step 5

Heads up! Don’t crank up the heat too much—the battery really doesn’t like getting too toasty and could get damaged.
- Grab a hair dryer or heat gun and warm up the bottom edge of the screen until it feels nice and toasty to the touch.
Tools Used


Step 6


- Grab a suction handle and stick it onto the bottom edge of the screen.
- Give that handle a solid pull with even pressure to make a little gap between the screen and the frame.
- Slide the tip of an opening pick into that gap and you're on your way!
Tools Used

Step 7

Heads up! When you’re slicing through the adhesive holding the screen, watch out for these spots to keep everything safe and sound:
- Two super-sensitive cables are keeping the screen attached: one hangs out just above the action button, and the other chills near the middle of the left edge.
- Spring contacts are lurking all around the phone’s edge—don’t go poking your pick too deep in these spots, or they’ll get bent out of shape.
Step 8


Keep your opening pick no deeper than 3 mm along the bottom edge—no need to go on a digging adventure!
- Wiggle your pick along the bottom edge to break up the sticky adhesive.
- Park your pick in the bottom right corner so the glue doesn't sneak back together.
Step 9

- Gently warm up the right edge of the screen until it feels comfortably hot to the touch.
Step 10


Keep your pick shallow—no deeper than 5 mm along the right edge, unless you want to go treasure hunting for trouble!
- Gently slide your pick around the bottom right corner of the screen, heading toward the power button, until you hit a firm stop at a clip holding the screen in place.
- Flip your pick so that the flat edge slips right under the screen.
Step 11


- Give that pick a little twist to open up a gap between the screen and the frame, and watch as that stubborn clip finally lets go!
- Slide in a second opening pick right next to the first one, because two is always better than one!
Step 12


- Slide the first pick gently into the bottom right corner of the screen.
- Now, move the second pick up to the top right corner, just enough to break the adhesive seal.
- Leave those picks in place so the adhesive doesn't decide to be stubborn and reseal itself.
Step 13

- Warm up the top edge of the screen until it feels nice and toasty to the touch.
Step 14


Be careful not to push your pick more than 3 mm along the top edge.
- Gently slide your pick around the top right corner and along the top edge to pop loose the two clips and adhesive holding it in place.
Step 15

- Gently warm up the left edge of the screen until it feels nice and toasty to the touch.
Step 16


Be careful not to push your pick deeper than 2mm along the left edge. You don't want to accidentally mess with the cables that keep the screen connected to the phone. It's a close call, so go slow and steady!
- Gently glide your pick around the top left corner of the screen, just like you’re dancing with it.
- Now, slide that pick down to the bottom left corner to break free the adhesive holding it tight. You’ve got this!
Step 17


If the screen feels stubborn, take another lap around the edges to spot any sneaky adhesive or clips still holding on tight.
- Carefully open the screen to the left, making sure it swings smoothly.
- Once it's open, gently rest the screen against a box or something similar so the cables stay comfy and don’t get stretched.
Step 18


Keep track of every screw as you go—each one has its own special spot and likes to be reunited with its home at the end.
- Grab your trusty tri-point Y000 driver and unscrew the six screws holding down the logic board cover:
- One is a 2.1 mm-long screw—this one likes to stand out.
- The other five are 1.5 mm-long screws—short and sweet.
Step 19


- Grab those tweezers or your trusty fingers and gently slide that logic board cover down toward the bottom of the phone to free up the sensor cable. You've got this!
- Now, go ahead and remove the cover. Nice job!
Tools Used

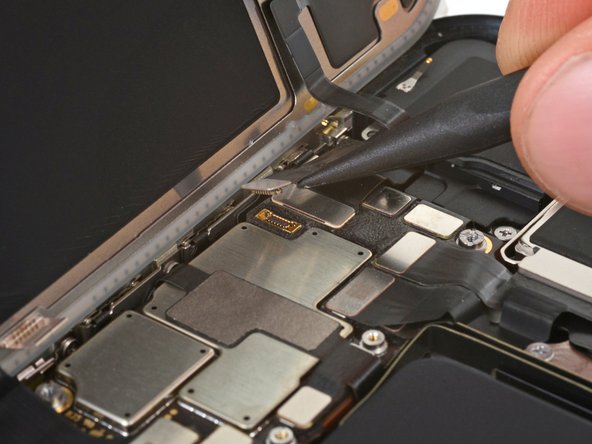
Step 20


Getting a press connector back in place is a breeze—just line it up with the socket, then press down gently on one side until you hear that satisfying click. Finish by pressing the other side and make sure the whole thing sits flush. Sometimes the rubber insulation likes to get in the way, so double-check that everything is snug and connected.
- Gently slide the tip of an opening pick under the battery press connector and carefully pop it loose.
Step 21

- Gently use the pointy end of a spudger to lift and unplug the ambient light sensor press connector located at the top left of the logic board.
Tools Used

Step 22


- Gently unplug the screen press connector—like disconnecting a tiny high-five!
Step 23


Take it easy when cleaning the frame – those little spring contacts are sensitive, so don't get too carried away!
- Carefully take off the screen. Don't rush, take your time!
- When putting everything back together, pause here. Grab this guide to apply the new screen adhesive before you go any further.
Step 24

- Grab your Phillips #000 driver and loosen the four screws holding down the loudspeaker:
- Three screws measuring 2.1 mm
- One screw measuring 2.9 mm
Step 25


A strip of tape holds together the top edges of the Taptic Engine and the loudspeaker. Simple, but crucial!
- Slide your opening pick gently into the small gap between the Taptic Engine and the loudspeaker, right under the tape.
- Now, slowly slide the pick towards the left edge of the phone to peel the tape off the Taptic Engine.
Step 26


- Slide the flat end of your spudger between the loudspeaker's right edge and the frame. It's like sneaking a little gap, so take it slow.
- Gently pry it up until you can grab the loudspeaker with your fingers. It should come right up!
- Once you've got a good grip, carefully remove the loudspeaker. You're almost there!
Tools Used
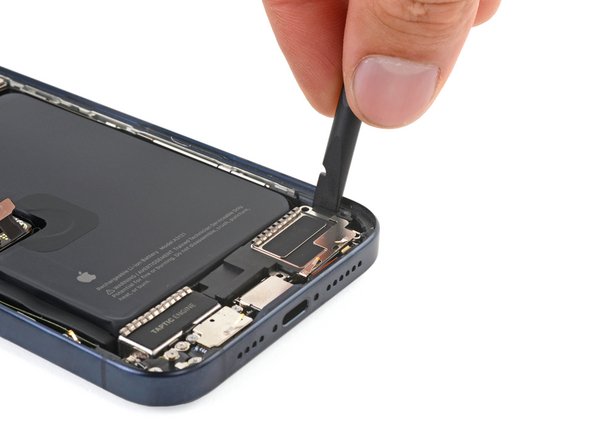
Step 27

- Gently work your spudger under the Taptic Engine press connector, then pop it off with a little bit of finesse. You’ve got this!
Tools Used
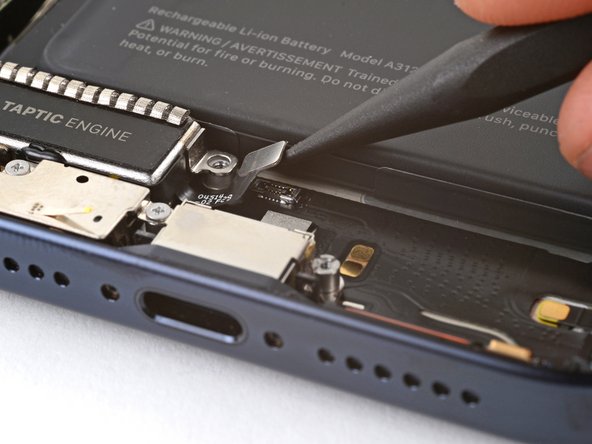
Step 28
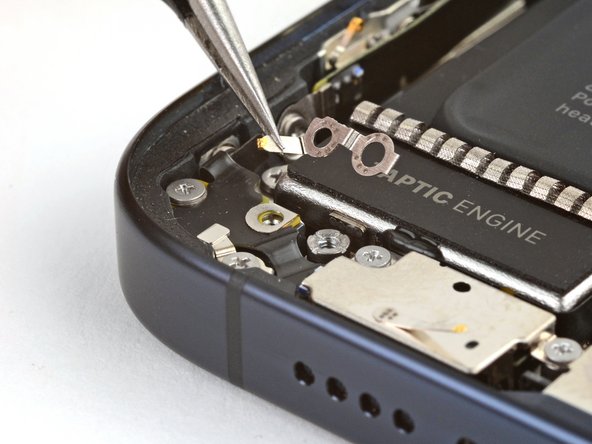

- Unscrew the two screws holding down that grounding clip:
- Grab your tweezers and gently lift the grounding clip away.
- One 1.2 mm Phillips #000 screw
- One 1.9 mm tri-point Y000 screw
Tools Used
Step 29

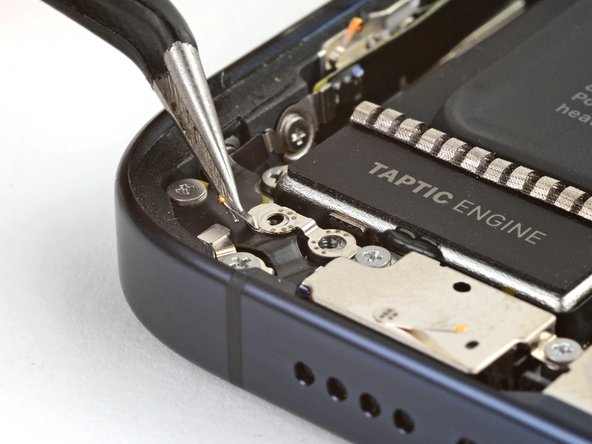
If you don't have a standoff driver, no worries! A thin flathead driver will do the trick. Just make sure to be extra careful not to strip the shallow notches on those screws. Patience is key here!
- Time to unscrew the two screws holding the Taptic Engine in place:
- One 2.9mm Phillips #000 screw
- One 3.8mm standoff screw
Step 30
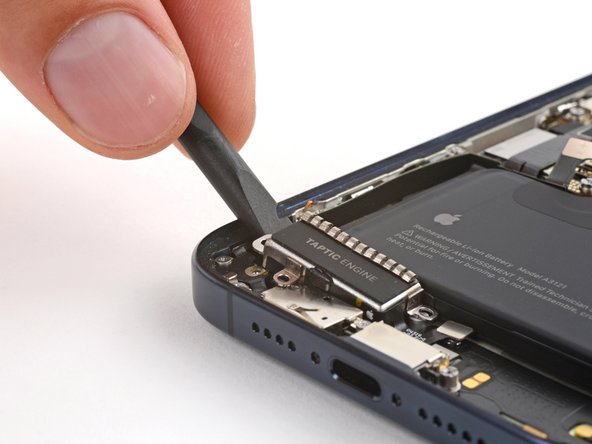


- Slide the flat end of your spudger between the left side of the Taptic Engine and the frame—think of it as sneaking in for a friendly chat.
- Gently pry upward until the Taptic Engine is loose enough to grab. Pinch it confidently, like you’re picking up a prize.
- Lift out the Taptic Engine and set it aside. Easy win!
Tools Used
Step 31

There are three sections of stretch release adhesive holding the battery snugly to the frame—two at the bottom and one at the top.
In the upcoming steps, you'll be pulling each handy tab out from beneath the battery.
These adhesive strips are designed to loosen when stretched, but sometimes they might just decide to take a break before you finish removing them, especially that top edge strip. If any of them snap, no need to stress! Keep going, there's an alternate route to get that battery out.
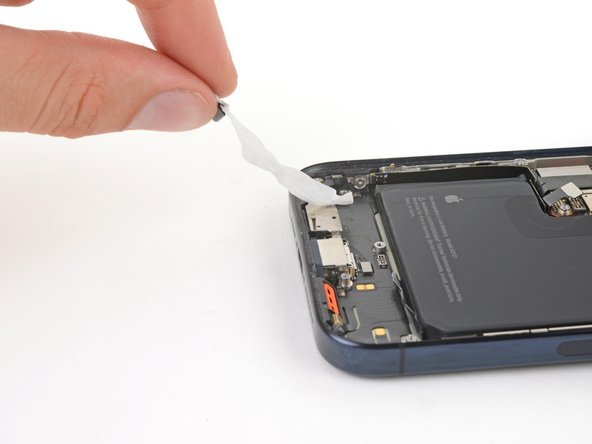
- At the end of each strip, there's a handy black pull tab that's gently stuck to the edge of the battery. Give it a light pull and watch the magic happen.
Step 32

Be careful not to poke or dent that battery with your tool! It might spring a leak of harmful chemicals or even catch fire if it gets hurt. Stay safe and keep it cool!
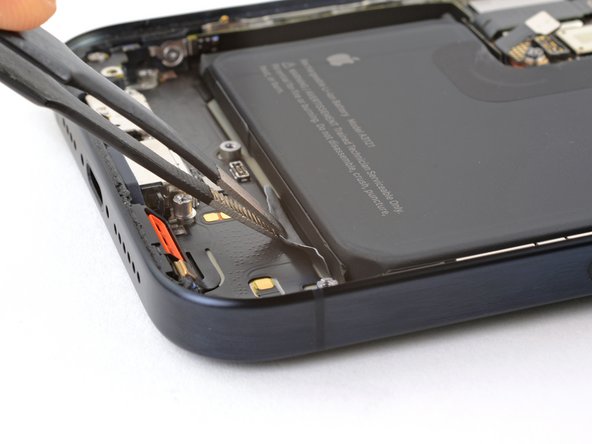
- Carefully slide the tip of an opening pick under the edge of a battery adhesive pull tab to loosen it without damage.
- Grab the loosened pull tab edge with blunt nose tweezers and pull it fully away from the battery.
- Do the same for the other two pull tabs to get them all free.
Tools Used
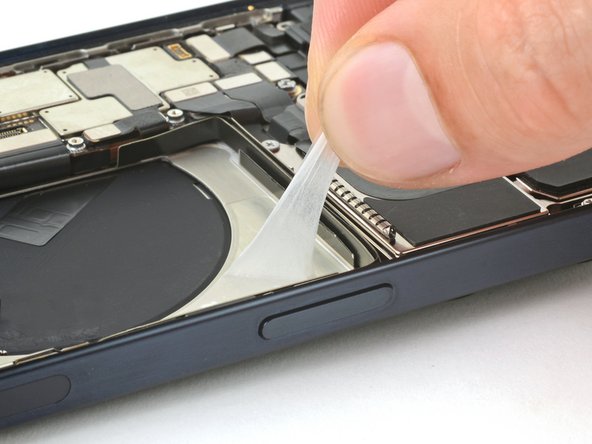
Step 33
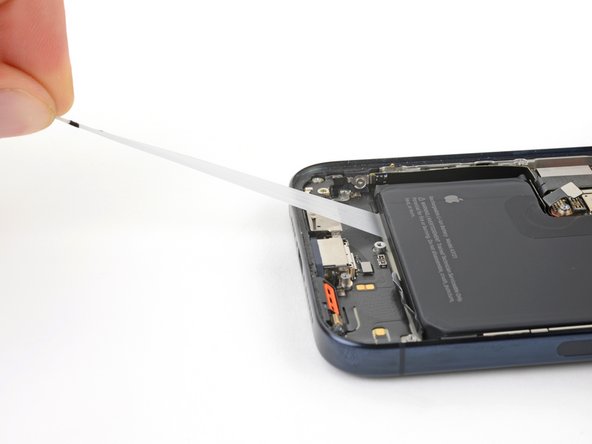

If the strip happens to break off, try to fish it out. If it's being stubborn and hiding under the battery, don't sweat it—just move on to the next step.
- Gently tug on one of the pull tabs beneath the battery until you can get a good grip on it, or wrap it around your tool if that’s easier.
- Keep the phone steady by holding onto the edges of the frame—just don’t press down on the battery!
- Slowly and evenly pull the strip at a low angle, avoiding dragging it across any other components.
- Keep pulling, adjusting your grip or wrapping it around your tool as needed, until the strip is fully free from the battery.
- Repeat these steps for the other two strips. You’ve got this!
Step 34

If you've successfully peeled off all three stretch release adhesive strips, give yourself a pat on the back—you’re ready to pop that battery out! If you haven't, no worries! Just follow the next couple of steps to loosen up that adhesive using some isopropyl alcohol and a trusty plastic card.
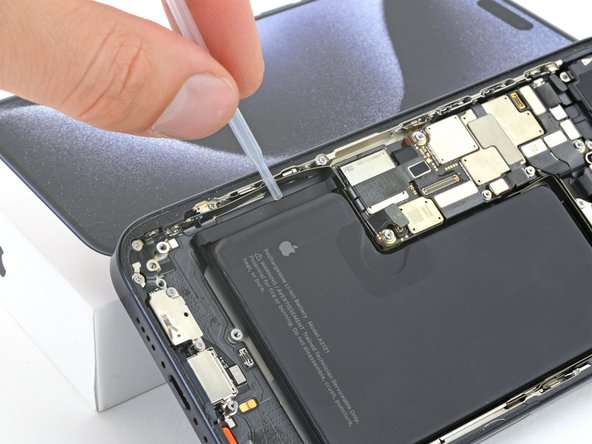
- If the top strip is still hanging on, just prop up the top edge of the phone.
- If you've got any leftover bottom strips, give the left edge (the one with the volume buttons) a little lift.
- Grab a pipette or syringe and gently drop some high-concentration isopropyl alcohol (90% or more) along the raised edge of the battery.
- Now, take a breather and let that alcohol work its magic for a minute – it'll slide under the battery and soften that sticky adhesive.
Tools Used

Step 35

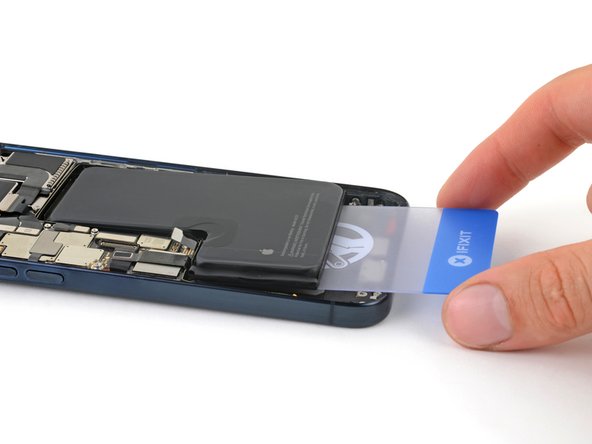
Avoid bending or folding your battery—it’s not a yoga mat! If the adhesive is being stubborn, drop a little more isopropyl alcohol and give it another go.
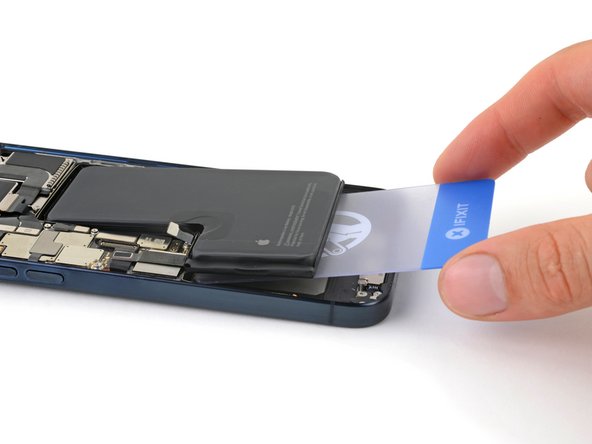
Watch out for the frame under the battery; the wireless charging coil hangs out near the center and doesn’t appreciate any scraping.
Depending on the strength of your adhesive, this might take a little while. Give it up to a minute of steady pressure to help that adhesive loosen up.
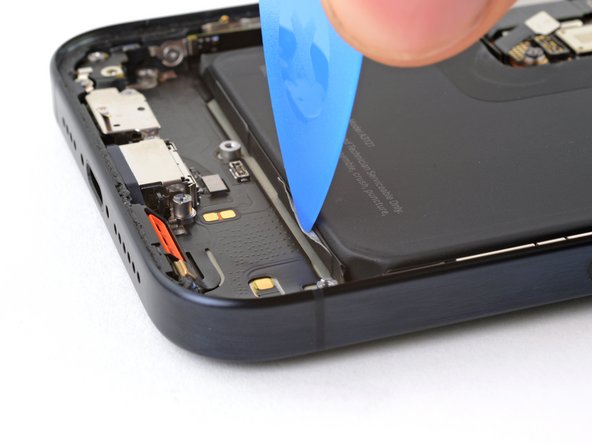
- Slide the short side of a plastic card between the battery's bottom edge and the frame.
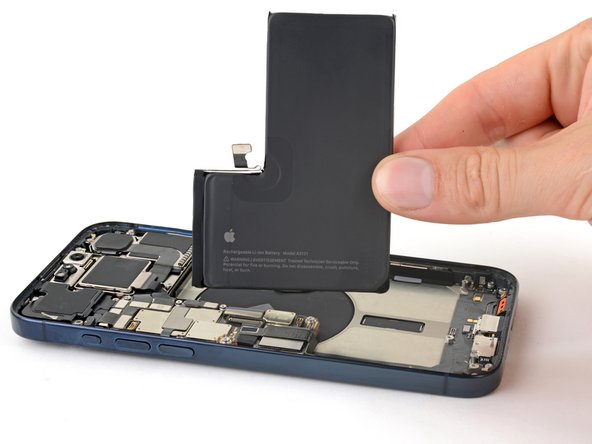
- Carefully lift the battery until the adhesive lets go completely.
Tools Used
Step 36

- Ready to put everything back together? Just reverse the steps you followed earlier.
- If you swapped a part, you might be able to calibrate it—check out Apple's Repair Assistant (iOS 18 and up). Update your device, go to Settings → General → About → Parts & Service History, tap Restart & Finish Repair, and follow the instructions onscreen.
- For a happy battery and smooth performance, give your new battery a quick calibration after wrapping up.
- Old parts lying around? Drop them off with an R2 or e-Stewards certified recycler and keep things planet-friendly.
- If things didn’t go as planned, check out some basic troubleshooting, or jump into our Answers community for help. And if you’re stuck, you can always schedule a repair.


